How To Appliqué – an Introduction to Fabric Appliqué
Welcome to my most popular tutorial on Molly and Mama. I’m so glad you found your way here. If you’d like to know more about raw-edge fabric appliqué then this is the place to be!
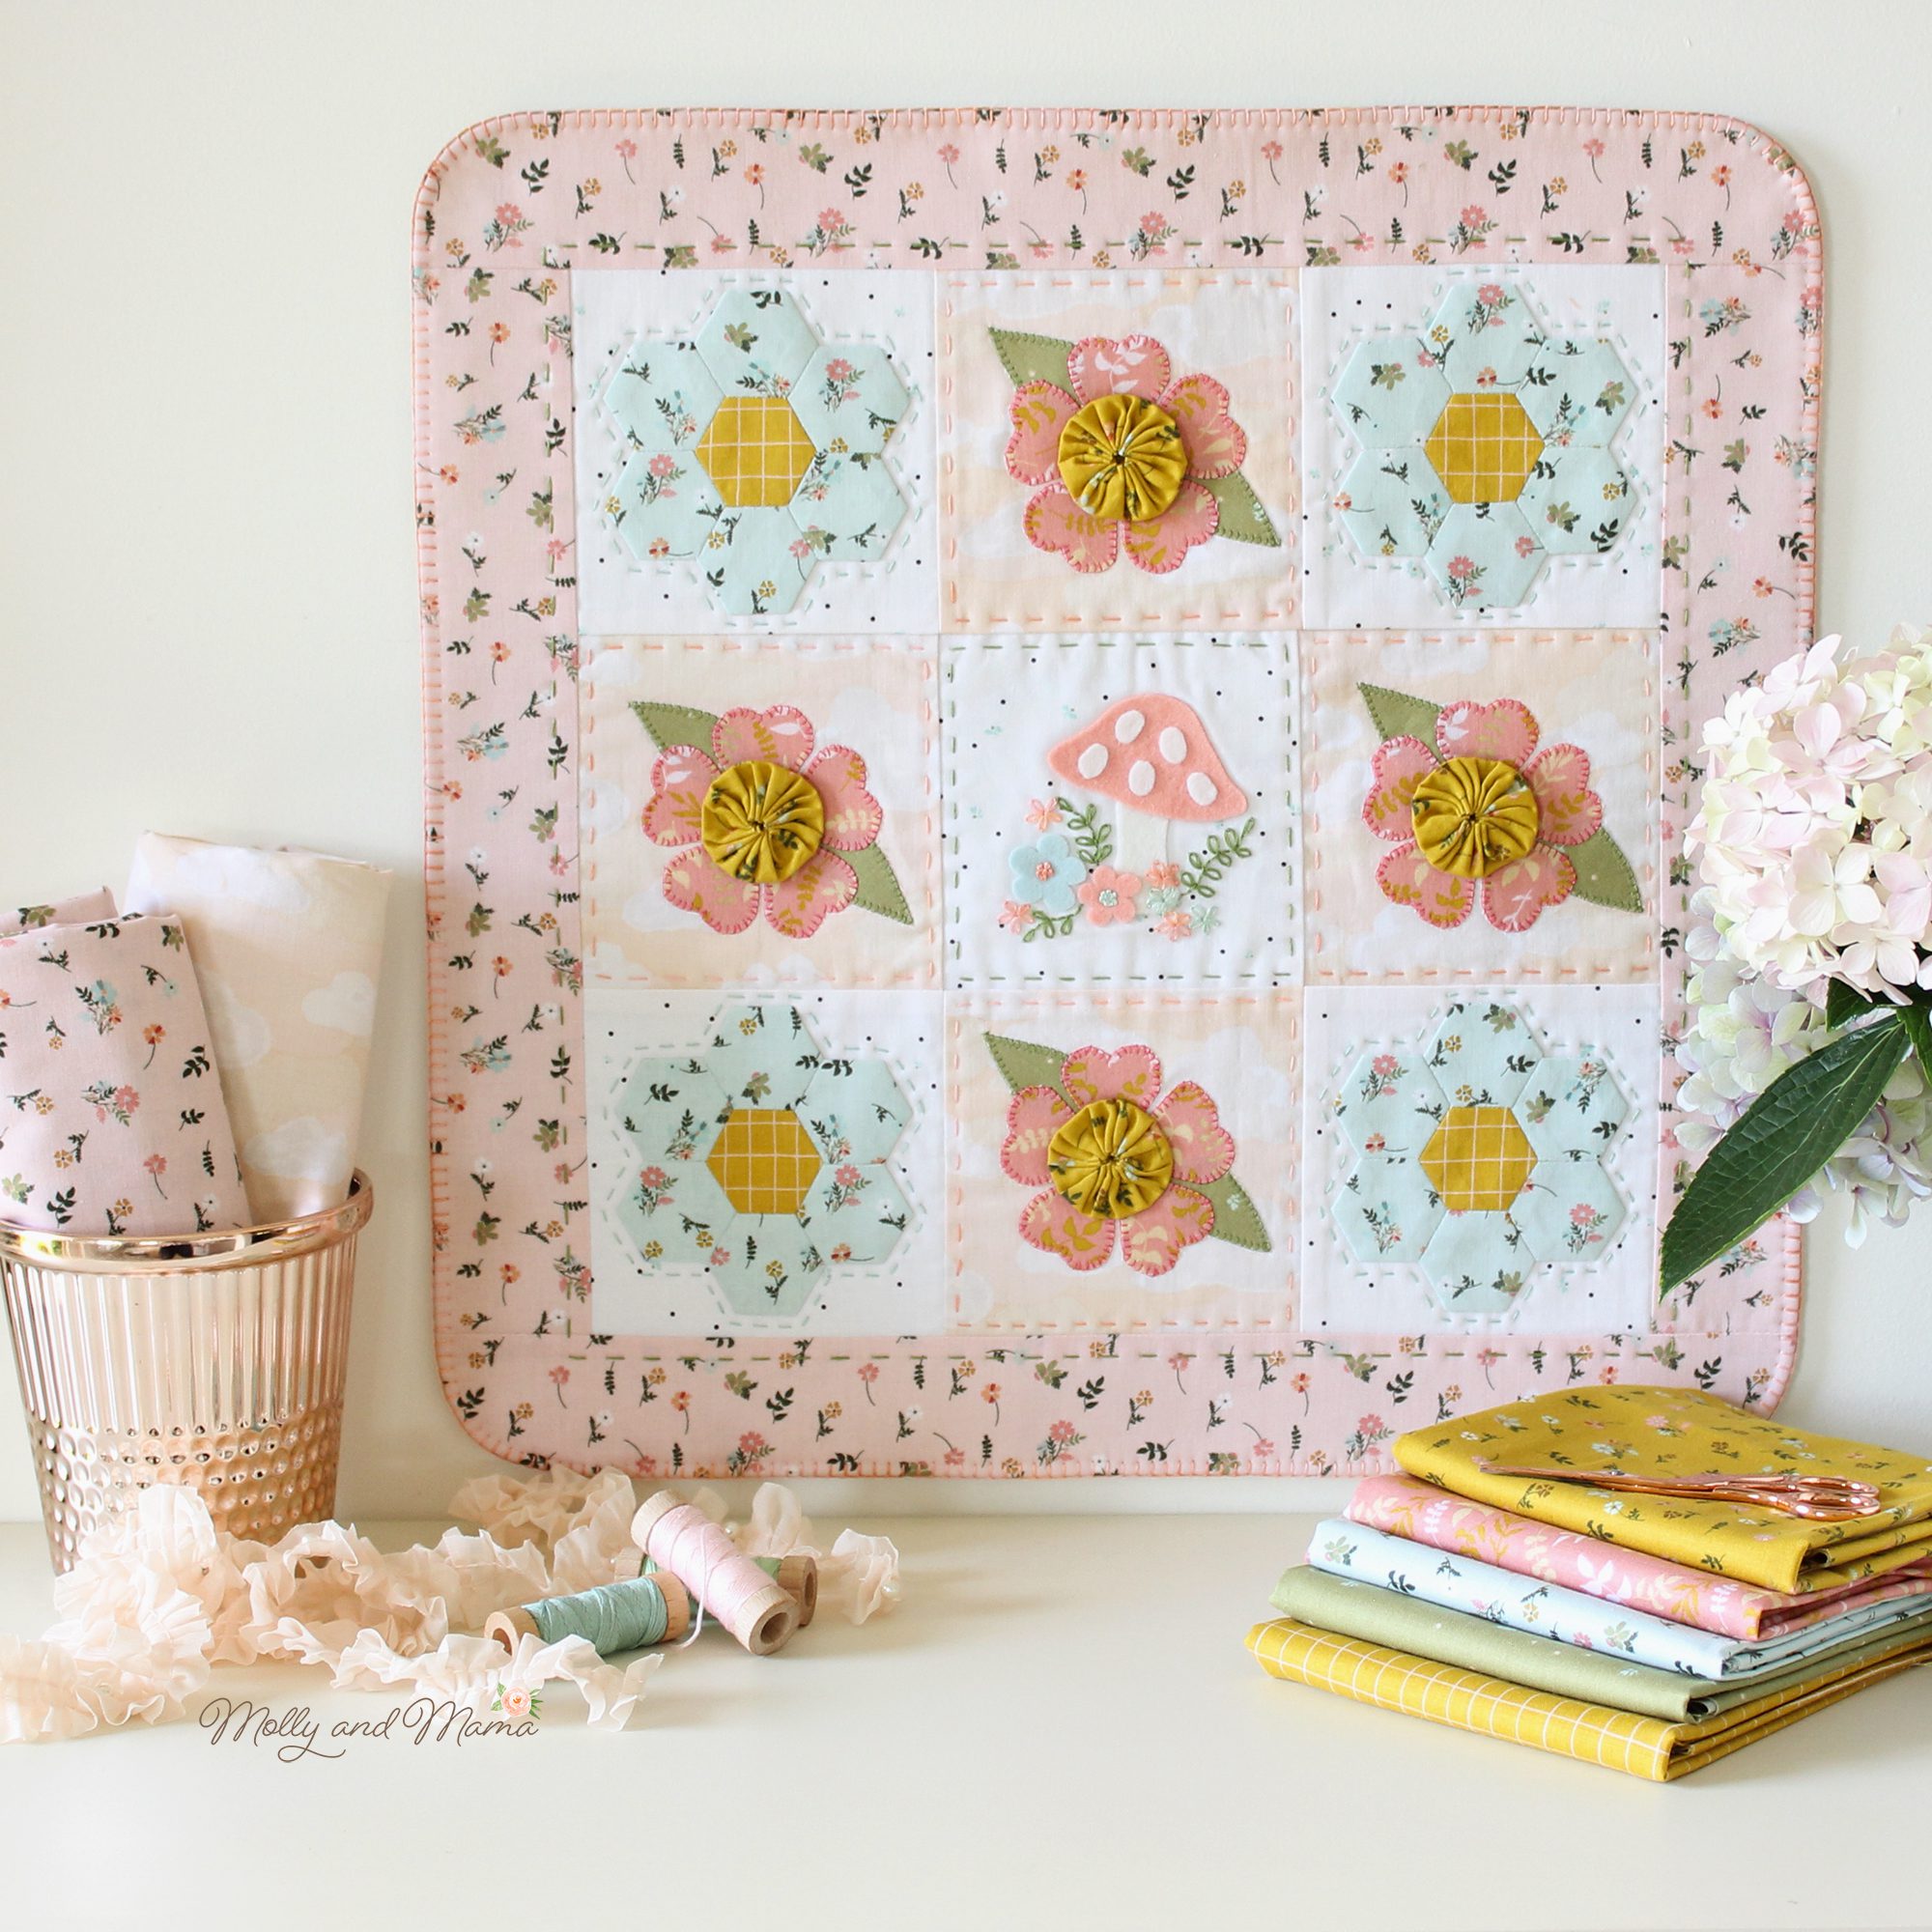
Appliqué has always been one of my favourite sewing techniques. When I first wrote this tutorial, I was creating designs for children’s clothing and decor. These days you’ll be more likely to find me sewing ‘quilty’ projects. But you’ll still find appliqué featuring in lots of my work, like this Sweet Stitches Sampler. It’s just one of the many techniques covered in this beginner friendly pattern.
I’m so glad that you found your way here. Read on to learn how easy it is to add this style of appliqué to your work. Then when you’ve finished here, be sure to take a look around to see my other tutorials or sign up for the newsletter to get tips, tricks, ideas and inspiration straight to your inbox.
All About Appliqué
Appliqué is a really lovely way of adding shapes and patterns to your patchwork and quilting projects. Some people prefer needle-turn appliqué where the raw edges of the fabric shape are turned under, before the fabric is hand stitched onto the backing fabric.
The technique I describe here is often referred to as ‘raw edge’ appliqué because the cut edges of the fabric are left raw, but secured in place with stitching.
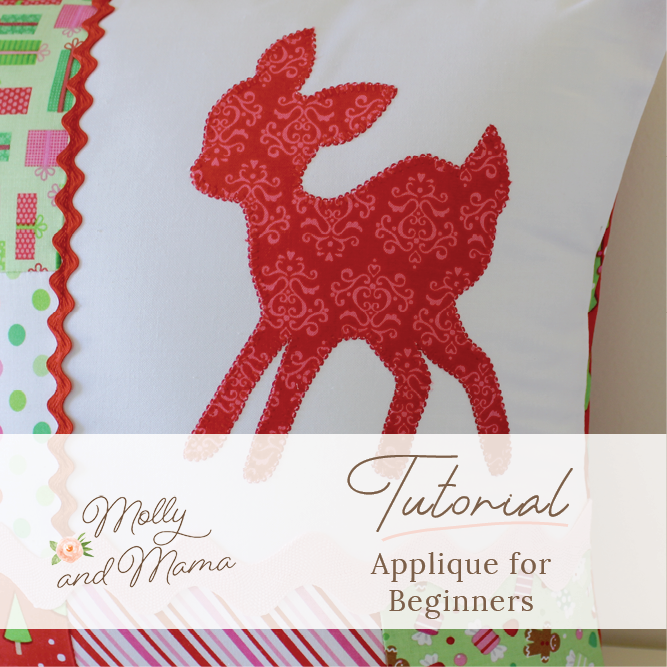
So welcome to my step-by-step guide for raw edge fabric appliqué, featuring this cute and free ‘little deer’ template. I used the template to create this sweet and simple Christmas cushion cover. But you can use these instructions to help you complete any fabric appliqué project, whether it’s one of your own designs or one you’ve purchased.

You Will Need
- Cotton fabric scraps in coordinating colours for your appliqué shapes. 100% cotton is recommended. But I also love to appliqué felt!
- A garment or base fabric to appliqué on to.
- A template, pattern, or line drawing to use as your design pattern. This tutorial uses my ‘little deer’ template. You can access it HERE, save it to your computer and print it whenever you need it.
- Paper-backed fusible heat bonding web like Vliesofix or Heat’n’Bond.
- Pen.
- Scissors.
- Iron and ironing board.
- Embroidery needle and thread or sewing machine with complimentary thread colours to your fabrics.
Before You Begin
Be sure to read the tutorial from beginning to end, before commencing your project. If you haven’t tried appliqué before, make sure you practice using some fabric scraps. Take your time. And enjoy it!
Which Stitch?
Appliqué shapes often need their raw edges protected to prevent fraying. I love to use ‘blanket stitch’. It gives a great finish, and adds to the longevity of the design. Many sewing machines will have a blanket stitch or buttonhole stitch setting (which is what I use). Alternatively, you can hand stitch your appliqué. If you are new to hand stitching, a quick Internet search brings up lots of videos, images and tutorials for different stitch types. And this diagram can also help! There’s also more detail about blanket stitch and the other basic stitch types at my Embroidery Stitch Basics Tutorial.
Apart from blanket stitch, you can also use a straight stitch, or tight zig zag (satin) stitch on your sewing machine. When satin stitching, it can be useful to use a stabiliser behind the fabric you are appliquéing on. ‘Tear away’ or even ‘freezer paper’ can be used to help stabilise the fabric and avoid stitch puckering. But for blanket stitch, I feel like a stabiliser can be more of a hindrance than a help. I like the freedom of stitching without it. You can manoeuvre your fabric more easily and get a neat finish.
Let’s Get Sewing
1. Trace Your Image, Pattern or Template
Choose a design to appliqué. There are lots of patterns you can purchase or you can use free designs like the deer I have included here.

Save the file and print it to a size that suits your project. Remember that any design you use will produce an appliqué that is a ‘mirror image’ of the template you started with. If you’d like your appliqué to appear the same as the template, be sure to print it in reverse.
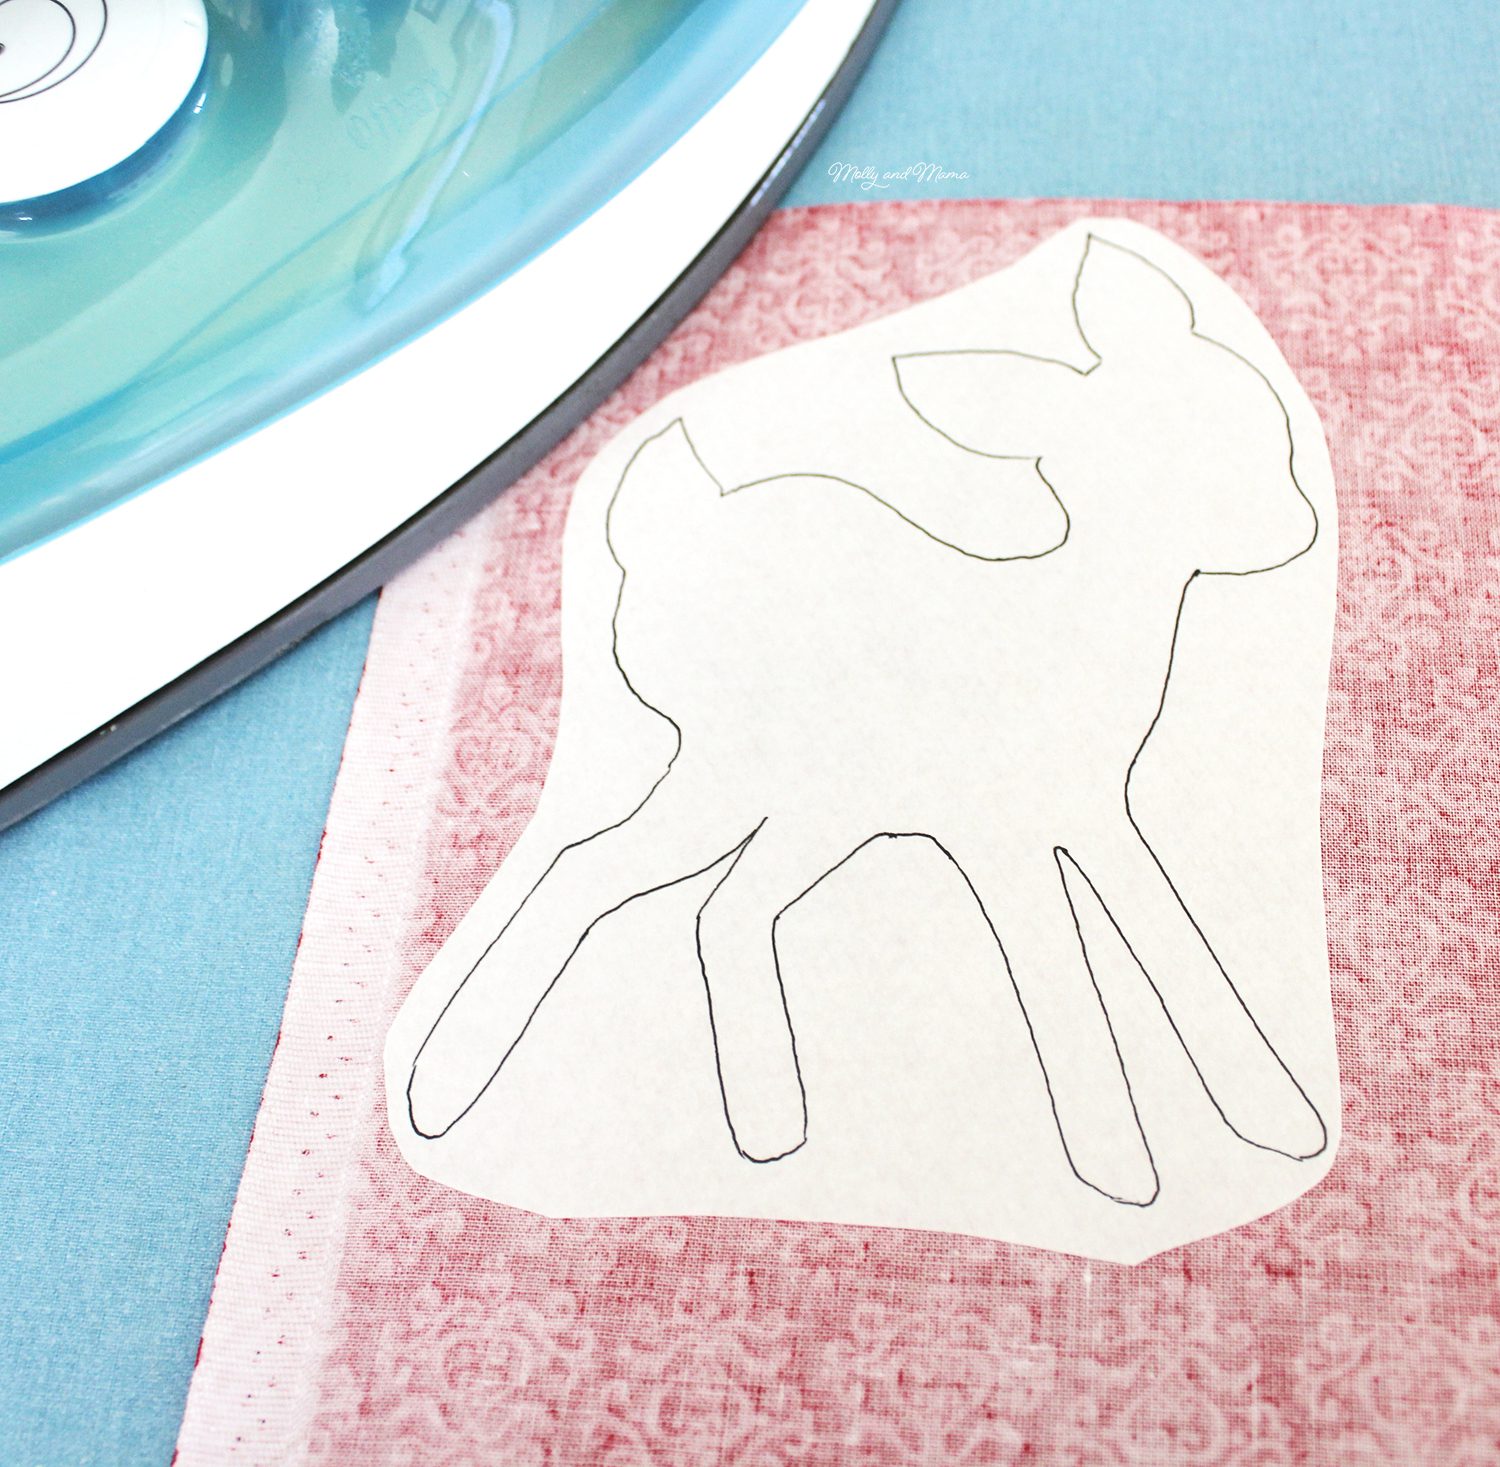
Using a pen, trace the template onto the paper side of your fusible web. If using a design with several pieces, be sure to leave sufficient cutting space between each piece (around 1/4″ or 5mm).
2. Cut Out
Roughly cut around your traced piece of fusible web ensuring you leave a small border. Do not cut on the drawn outline.

3. Secure The Fusible Web To Your Fabric
Take some time to decide on the fabric you will use, and where you will position your fusible web. Take note of fabric that has a directional print or pattern. You don’t want the pattern to be upside down on your project.
Also, try and always work with the fabric grain so that the threads in the fabric (the warp and weft) run vertical and horizontal across the template (and not diagonally).
If you’re using a design with many fabrics, take note of how they’ll overlap. You don’t want darker fabrics on the bottom that are layered with light coloured fabrics, as the dark under-fabric will show through.
Once you are happy with your fabric selection and placement, heat your iron to a hot non-steam setting. Place the fusible web piece onto the wrong side (the back) of your chosen fabric so that your template (on the paper side) is facing you and webbing is between the paper and the fabric. Fuse the paper to the fabric by running the hot iron over it for a few seconds.
NOTE: This method works best with 100% cotton fabric. If you are using fabric blends or materials like felt, be sure to protect it by using a press cloth or scrap of cotton fabric over the design.
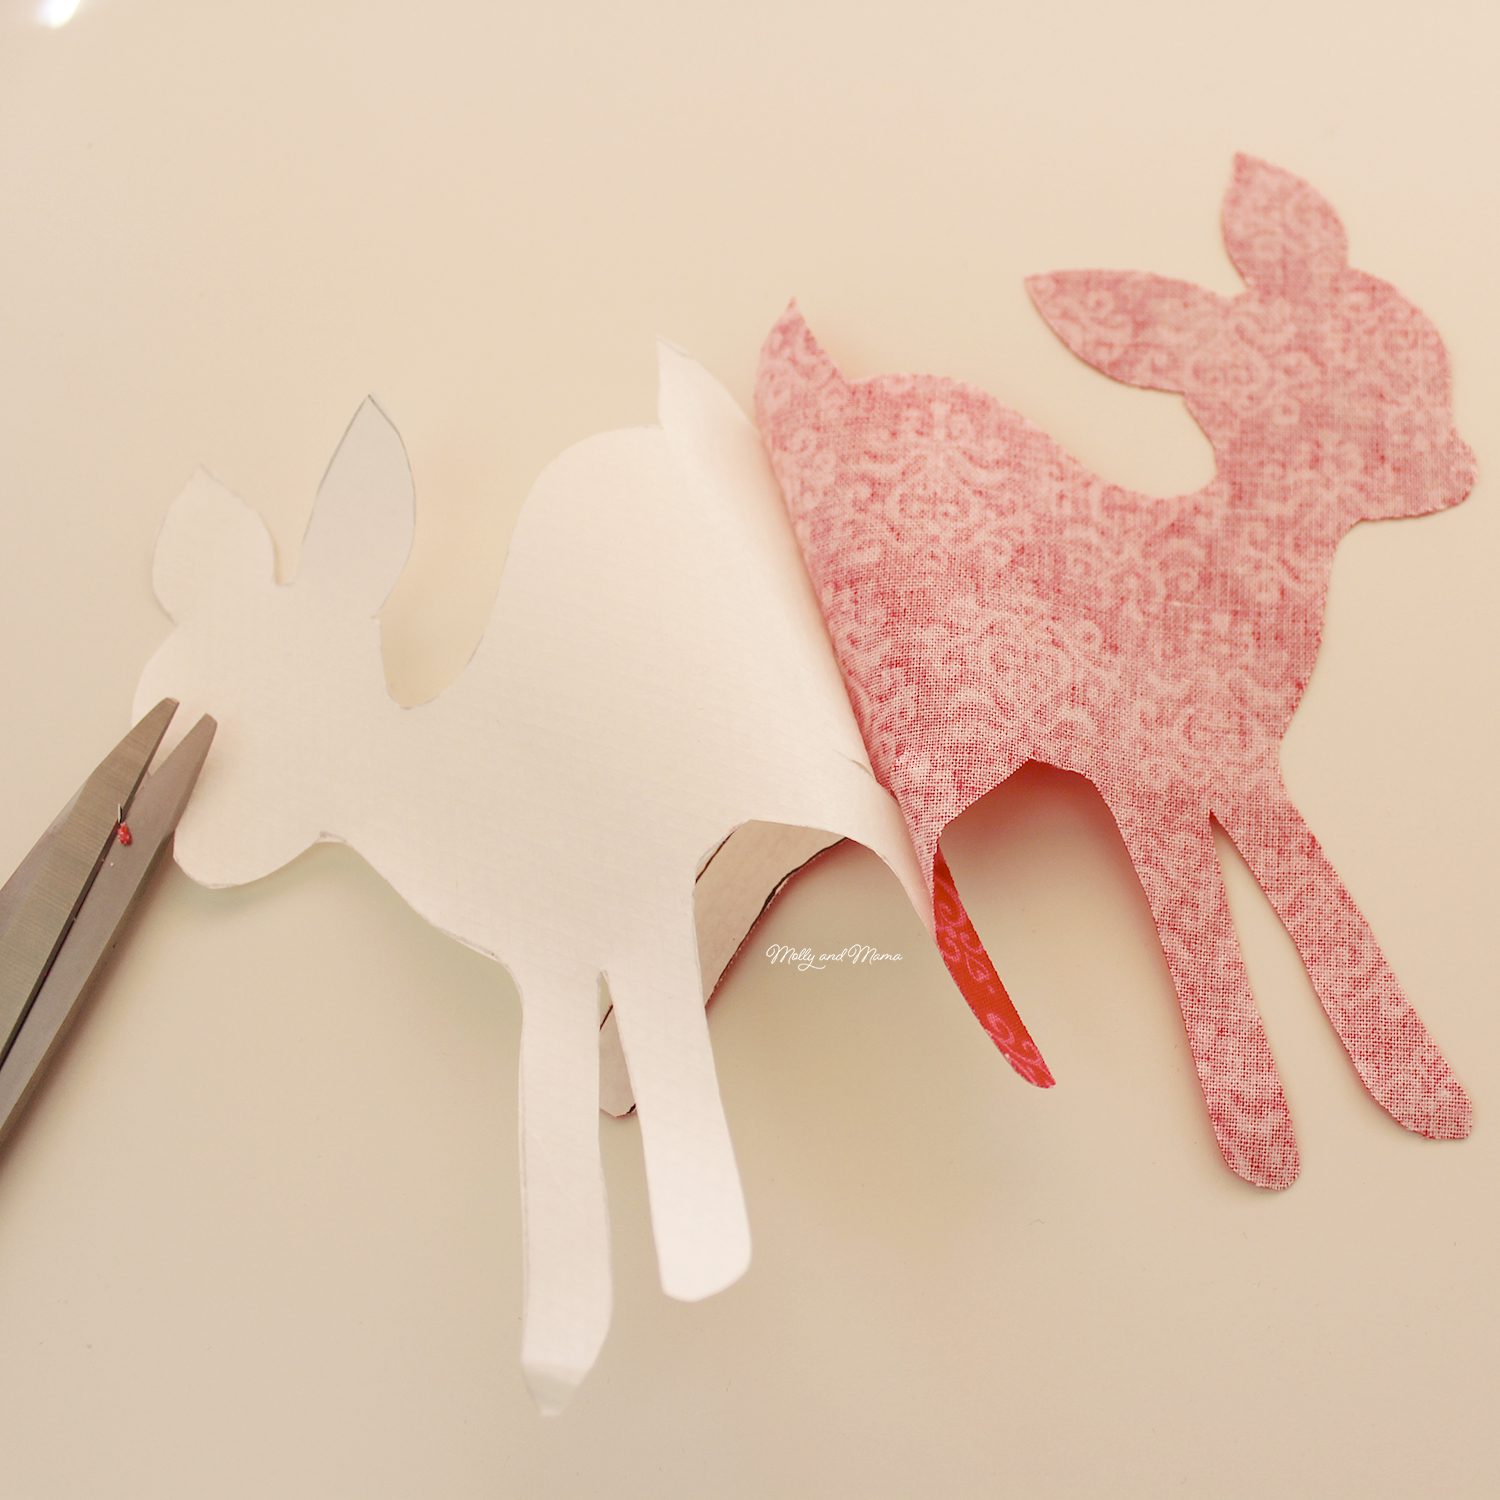
4. Cut Out Your Template
Follow your traced lines to neatly cut out your appliqué piece. Don’t use your best scissors for this task!
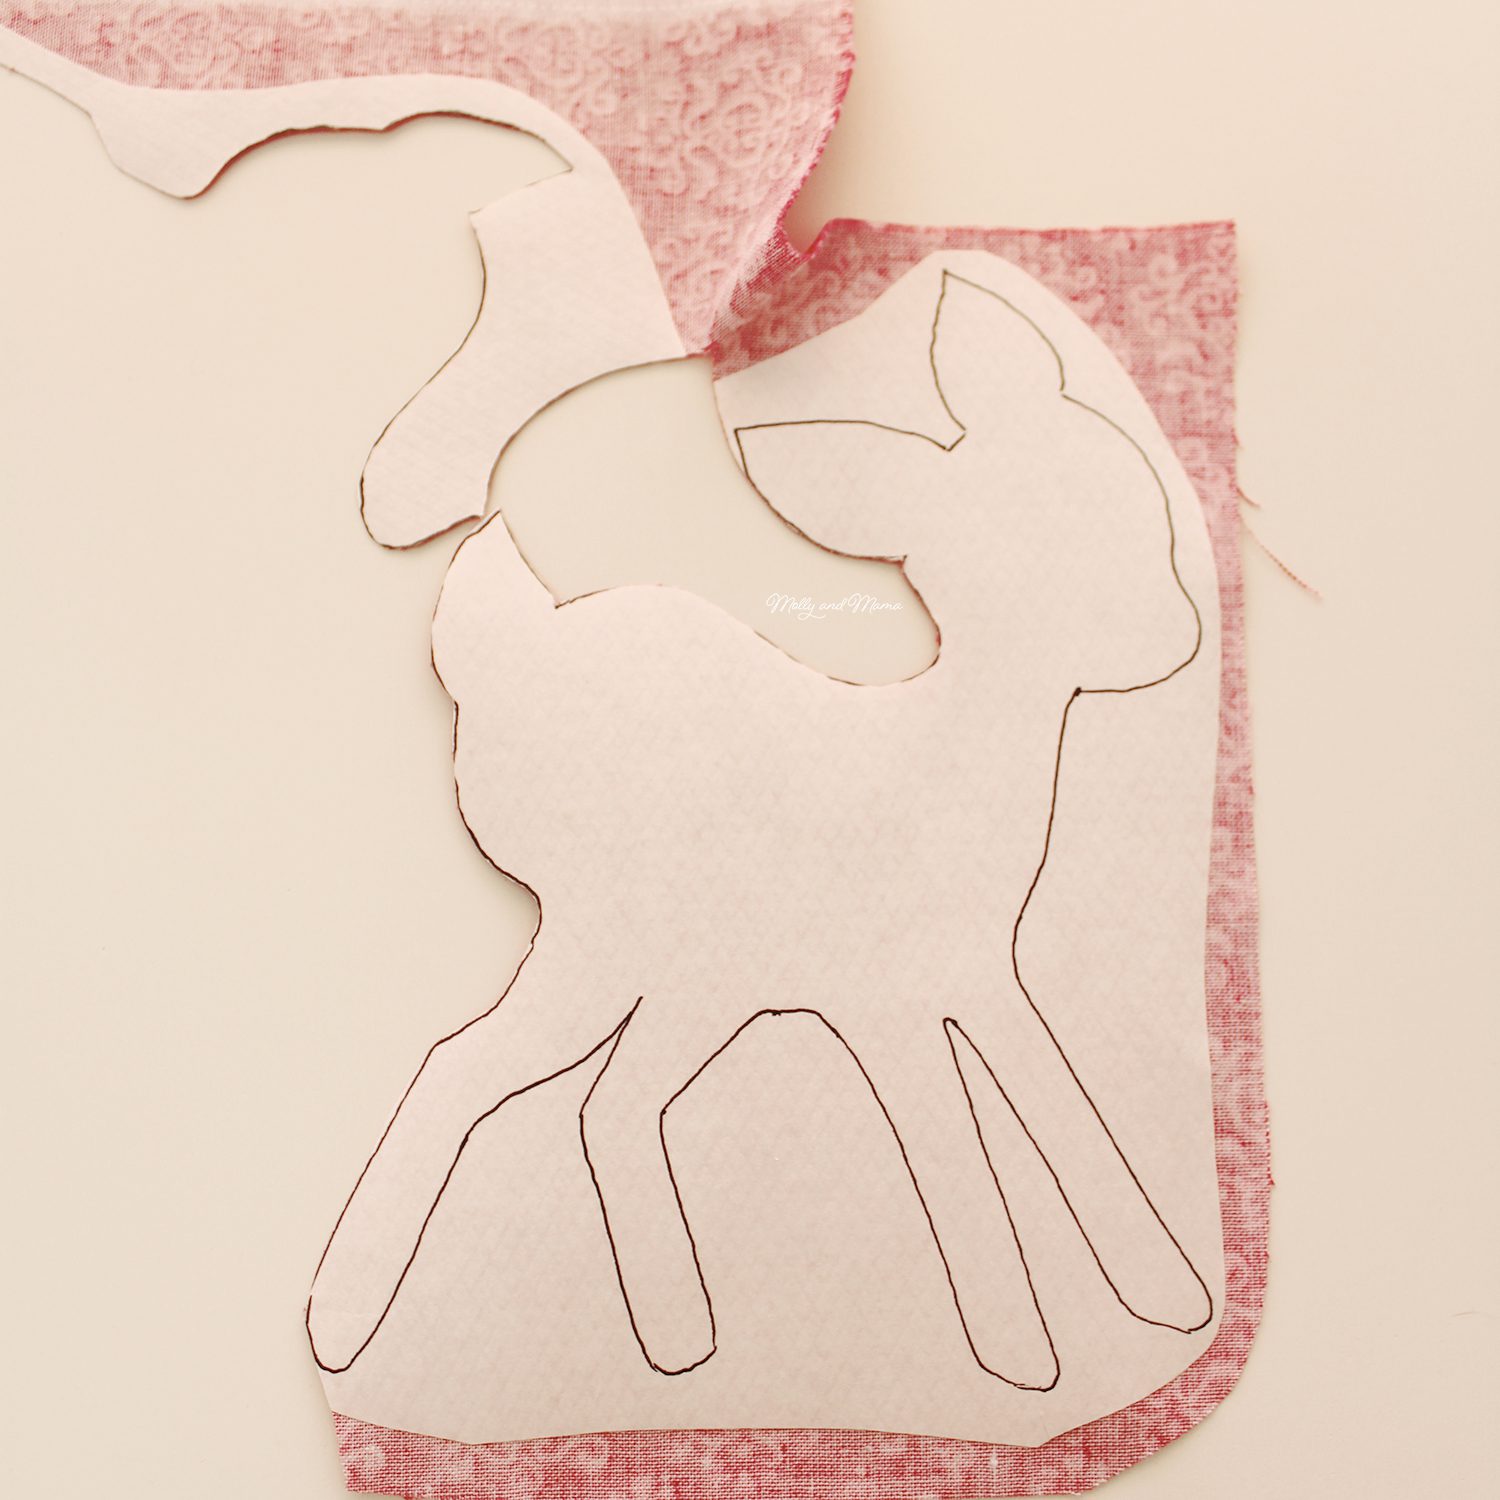

Peel the backing paper off. If using a template with more than one piece, position the pieces neatly on your garment (or project fabric) so it all fits together nicely.
5. Secure Your Appliqué
When you are happy with your positioning, secure the appliqué fabric by going over it with a hot iron. The heat will ‘melt’ the bonding agent to secure your fabric to the garment or backing fabric. Press down gently with the iron instead of rubbing from side to side. You don’t want your fabric shapes to move around!
6. Time to Stitch
It’s time to blanket stitch around the raw edges of your appliqué design. You can also use a satin stitch (which is a tight zig-zag stitch), or a straight stitch on the sewing machine. Choose a stitch you are comfortable with. However, I find that a blanket stitch protects the raw edges of the fabric and gives the neatest finish.
In a design with a single piece of fabric, start stitching in an inconspicuous place (in a bend, corner, or a place that may be covered with a button or bow embellishment later). For best results, take your time and stitch slowly and carefully. Here’s a short video of the stitching process in action.
You will need to pivot the fabric as you navigate bends and turns. But be sure the needle is down when you do! This video shows that pivoting process in action, on a machine that doesn’t have an auto foot lift.
For multi-piece appliqués, you would start stitching on the bottom layer of the appliquéd fabric. The top overlapped pieces are stitched last. Use different coloured sewing cotton or embroidery thread to match or compliment your chosen fabric if you wish. If you are stitching by hand, use two strands of embroidery thread.
Remember to secure your stitching well at the beginning and end (by back-stitching on the machine).
Here’s what your completed appliqué will look like from the back;

And from the front;

7. Add Any Embellishments
This template doesn’t require embellishing, but you can add a button for the deer’s nose or a bow around its neck. Be sure to attach all embellishments securely.
To add a bow, tie a small bow with some ribbon and trim the ends. Heat seal the ends with a heat sealing tool, or by quickly running a lighter flame along the cut edge of the ribbon to melt the fibres together. This ensures the bow doesn’t fray.
Position the bow and secure it to the appliqué by hand-stitching it firmly in place. Use sewing thread in a similar colour to the bow. I prefer to disguise my stitches under the bow ends and loops so they can’t be seen.
Tips For Appliqué
- Be sure to check your printer settings. Remember that your finished appliqué will be a mirror image of your template.
- Reduce or enlarge your template on your printer to create a suitably sized appliqué for your project.
- 100% cotton fabrics work best.
- Use a bobbin thread that matches the colour of your garment or base fabric.
- Use top threads in colours that coordinate with your appliqué pieces.
- Use the best quality sewing cotton you can. Gutermann and Aurifil are my brands of choice. I feel they give a better finish, a neater stitch and the cotton is less likely to break during stitching.
- Use an appliqué foot on your sewing machine if you can. It has a clear plastic base (often with a wide split at the front), so it’s much easier to see what you are doing (see above images).
- When sewing on t-shirts and knit fabric, use a ball point needle in your machine. This type of needle won’t break or damage knitted fibres, like a normal needle can.
- Some people like to use a stabiliser under the base fabric. ‘Tear-away’ or even freezer paper has been known to help keep stitching from puckering and moving during the appliqué stitch process. This is great when you choose a ‘satin stitch’ setting on your machine. I prefer not to use any form of stabiliser when using blanket stitch. This allows my sewing to have movement and flexibility while stitching, which gives a neater finish and allows my stitching to be more accurate.
- There are a number of online tutorials for tips and tricks when stitching appliqué with your machine. Get to know what your machine is capable of.
- Take your time when you are stitching. Practise makes perfect!
- Hand embroider and stitch using the best quality embroidery thread you can. I love DMC threads for their quality and range of colours too.
Other Projects
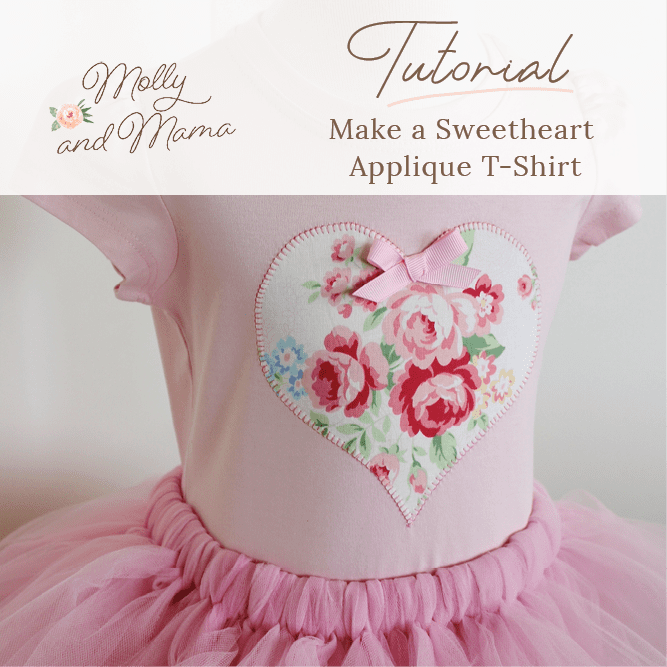
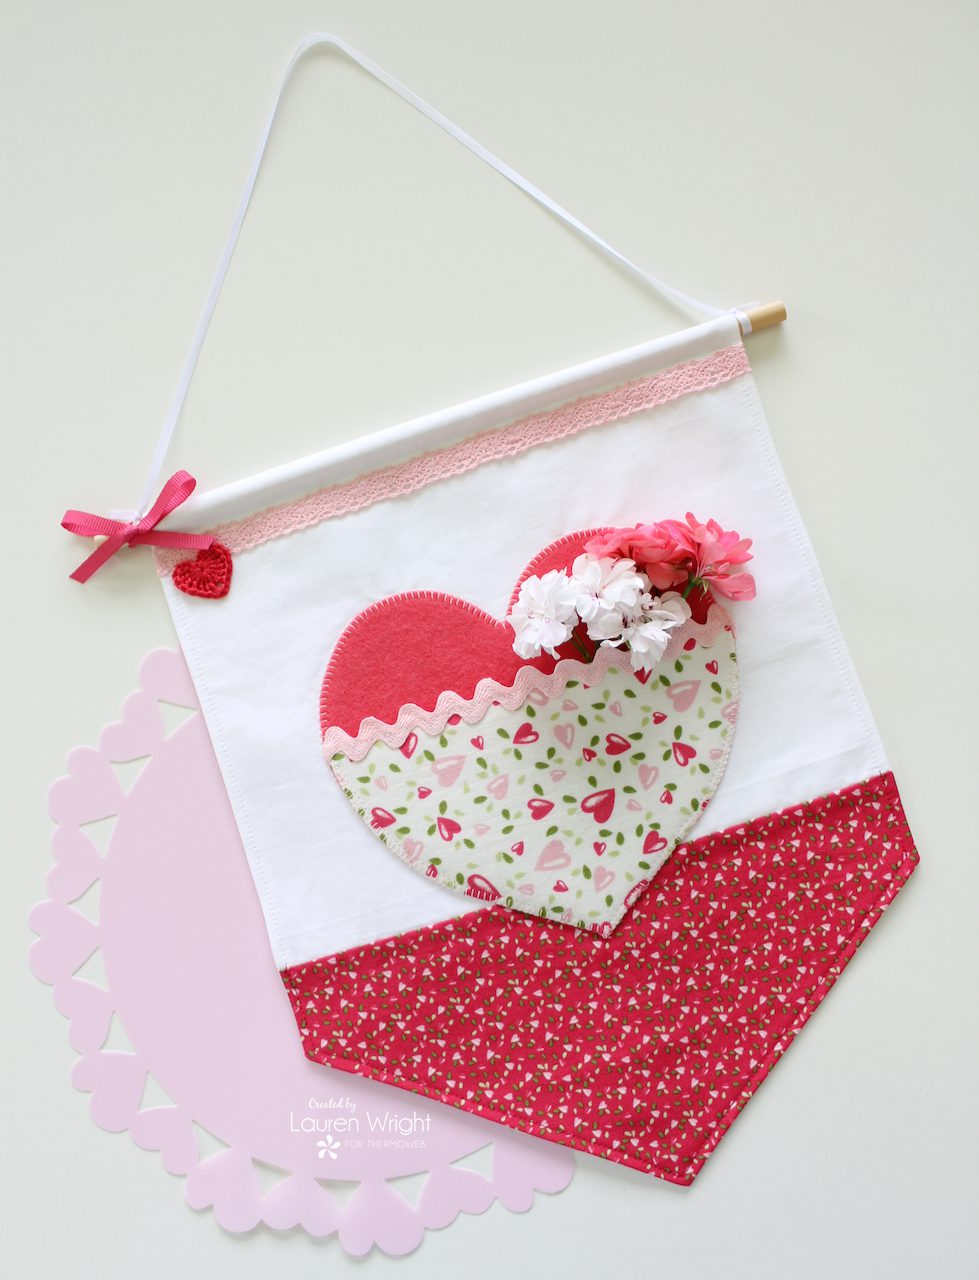
Once you’re feeling confident you can try more projects. This Sweet Heart appliqué tutorial is very easy to follow and the heart template is also free!
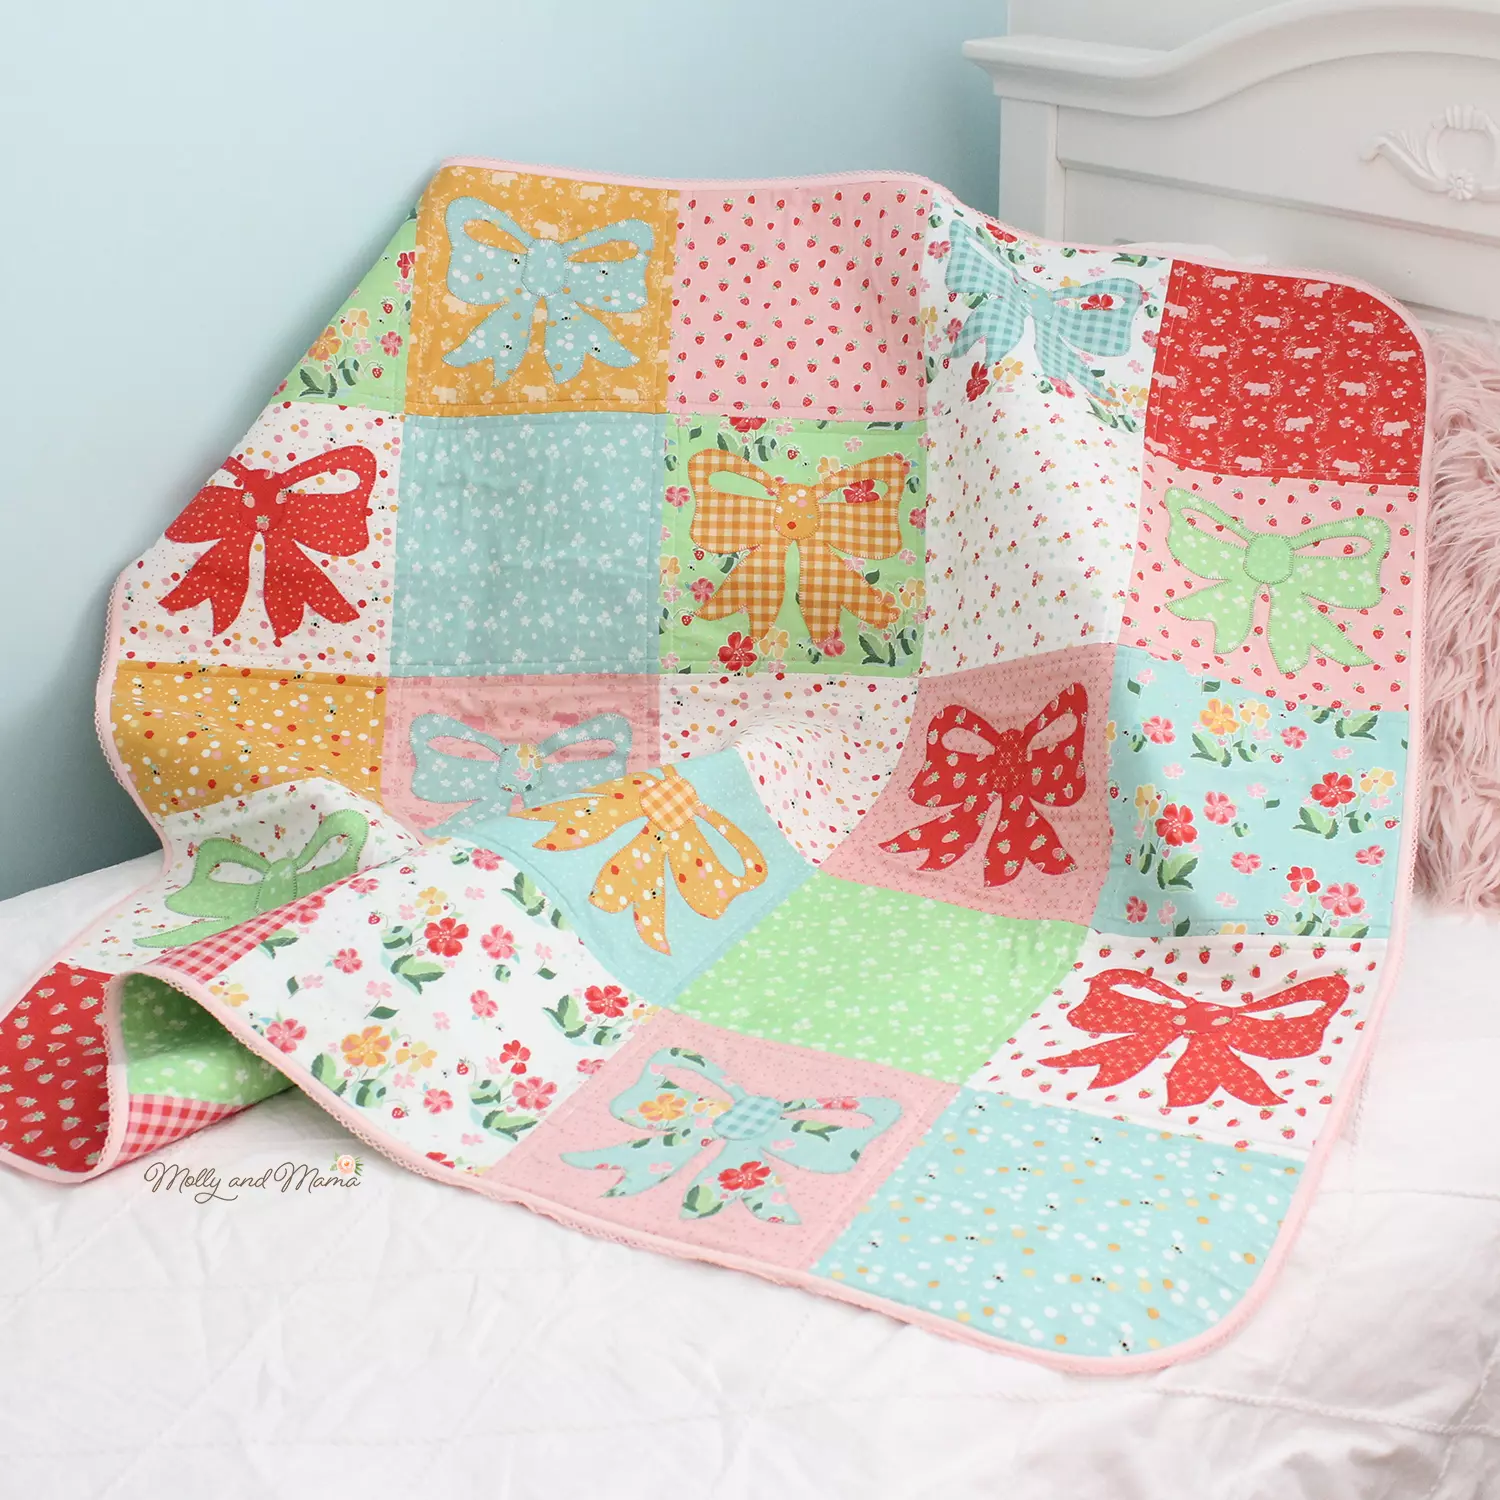
Want to get more adventurous? To learn the basics of quilting, the Betty Bow Quilt Pattern is the perfect introduction. Simple appliqué bows are machine stitched on alternating fabric squares. This quilt makes a lovely addition to a nursery and is also a great lap size. You can buy the pattern HERE.
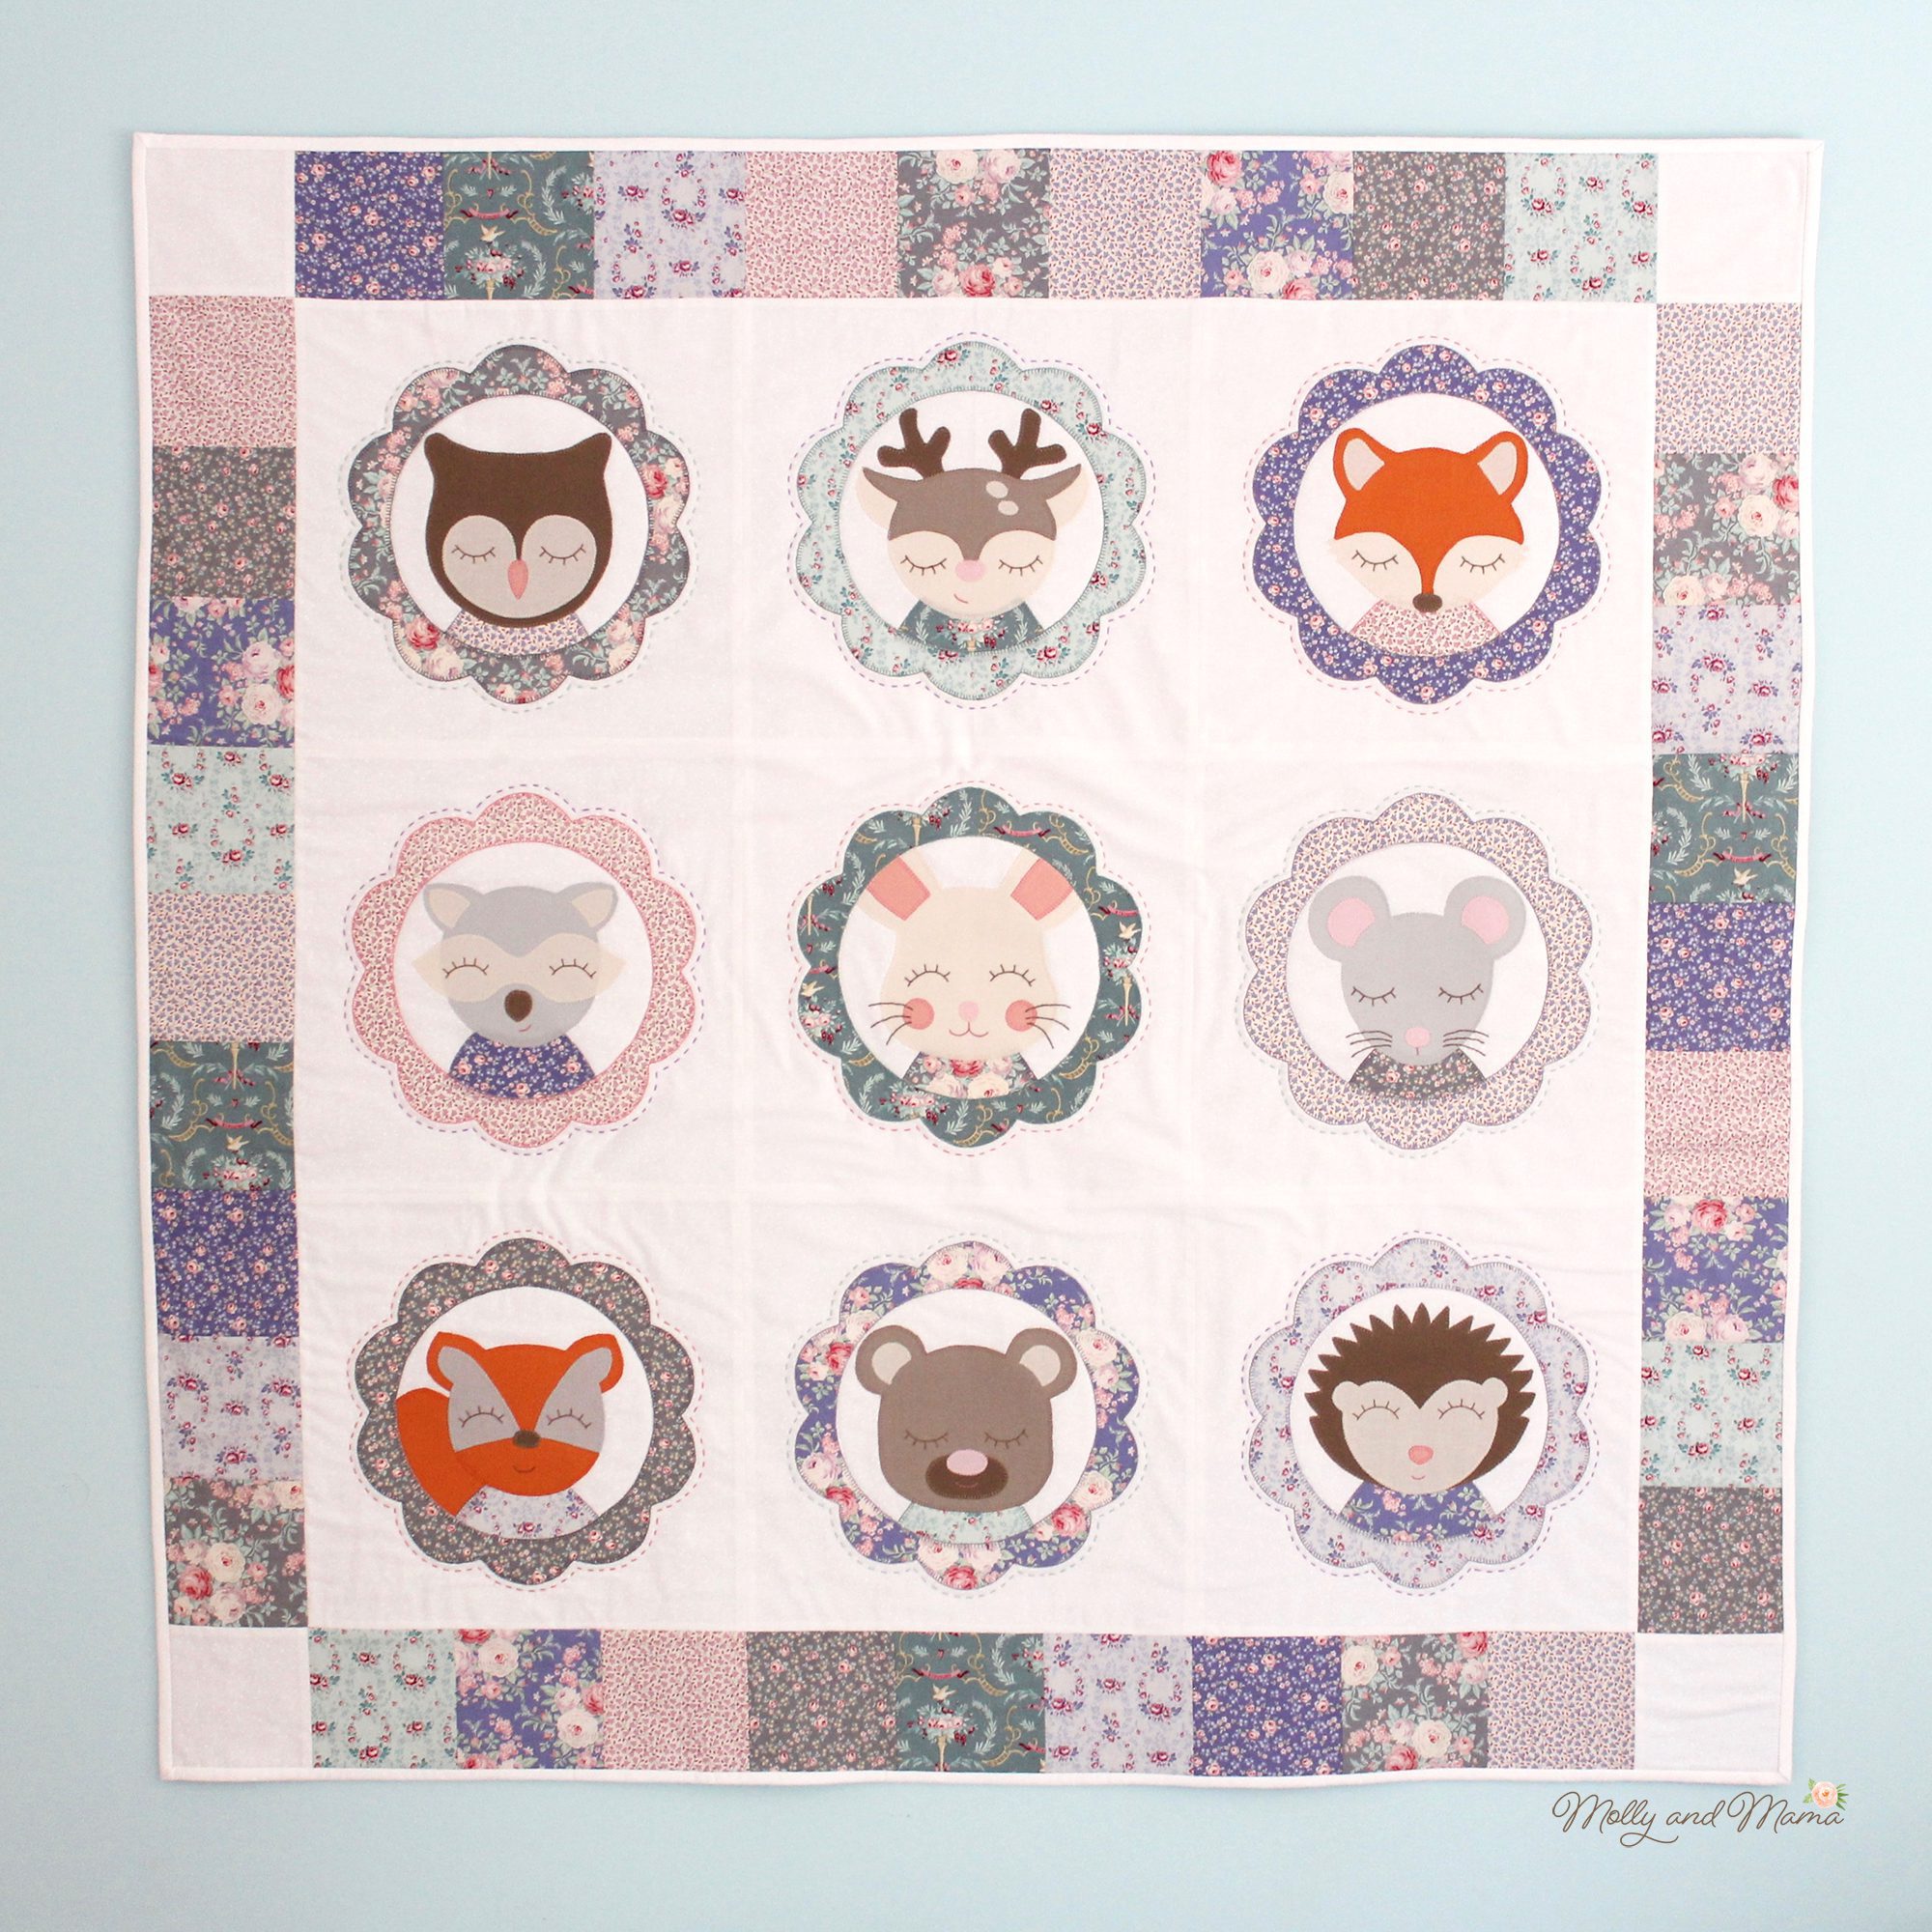
For more of a challenge, the Forest Family Quilt features nine appliqué woodland animal faces framed inside sweet scalloped borders. It has a simple white background, with easy patchwork borders. The hand embroidered faces add extra texture and detail.
The best advice I can give your for appliqué is to have fun, enjoy it and practise, practise, practise! If you have any extra tips or tricks to add, I’d love to hear them. So don’t be shy. Please leave a comment.
You can see heaps more inspiration over on Pinterest and Instagram too. I have a board specifically for appliqué designs, plus lots more. So feel free to follow Molly and Mama.
Thanks for taking the time out of your day to support Molly and Mama. If you’ve found this tutorial useful, let me know. And if you’d like to stay in touch, please feel free to sign up for my newsletter.
Happy stitching, Lauren x
This post was written by Lauren Wright and appeared first on Molly and Mama http://www.MollyandMama.com.au
Just used this for my first attempt at appliqué. Worked great! Thanks!
You’re so welcome Kasey. Thanks so much for sharing your feedback!
Great guide on appliqué, it’s perfect for anyone who wants to try this technique but doesn’t know where to start! Thanks for making this wonderful post!
I linked to this post from my blog, you can see it here: http://www.sewingshop.net/blog/learn-to-applique/
Thanks so much for leaving a comment Linda, and for linking to my post. I really appreciate the support!
You’re welcome Lauren!
How much is the pattern for little deer?
Hi Nancy, the deer template is a free download and the link to save the template is in the description above. Happy sewing!
This first tutorial is great for a beginner. I’ve read through it and will a few more times before I buy some materials. Thanks! Amy
THanks Amy! Happy sewing x
Which sewing machine do you use to do the blanket stitch?
Hi Cheri, I use a button hole stitch function on my basic Janome. Happy sewing.
Hi,
I’ve been trying to do Xmas bows applique. Could you please help me with the ones that are hollow in the middle. I can’t seem to grasp how to make them. Thanks
Hi Doreen, thanks for your comment. I’m not sure which part you’re having trouble with so here’s a brief description. You can cut out the centre of the shape by folding it in half, and cutting a little slit on the fold. This will make a hole large enough to fit your scissor blades through so that you can cut out the rest of the interior (the hollow shape). Secure your shape to the backing fabric (as per the instructions in the tutorial). And then hand stitch the applique raw edges. If you’re using a sewing machine, you’ll have to sew the centre of the hollow shapes from a different orientation to the outside of the shapes. For example, to sew around the hole in a donut you would position the sewing machine foot to the right of the fabric edge, before sewing around the interior hole (and pivoting the fabric around the needle as you go). I hope this helps. Happy sewing, Lauren.
At last instructions that i can follow being the novice that i am! Thank-you! xx
Kathy, I am so pleased that you found this tutorial useful! Thank you for your comment, Lauren.
Very learning friendly and helpful
Hi Lauren,
Thanks for this great step by step tutorial! I am making a tree skirt with some appliqué and have successfully gotten through all the steps, save the last. I noticed I purchased HeatnBond Heavy transfer paper and the package instructions say not to sew on the appliqué once transferred. Is this because the bonding agent will muck up the needle, or will it perhaps weaken the bond? I am thinking of just sewing the blanket stitch you featured by hand anyway, but would love some advice!
Thanks!
Robin
Hi Robin, Do you mean HeatnBond Ultra? The bonding agent can gum up your needle. But I have sewn through it lots before. I just replace my needle afterwards. You can also definitely hand stitch through it too. Perhaps do some tests with some scraps before making the final decision on your project. I hope that helps, Lauren.
Hi Lauren,
I am making a tree skirt with tree appliqués and have successfully gotten through all your steps, save one. I noticed that I purchased and used HeatnBond Heavy transfer paper and on the package it instructs not to sew using the heavy bonding paper. I’m not sure if this is because the bonding agent may goop up my sewing needle or other. In your experience do you think I could just hand sew a blanket stitch and it would be alright? I would love to machine stitch it, but now I’m worried I may ruin it somehow.
Thanks for any advice you can offer!
Robin
Hi Robin, Do you mean HeatnBond Ultra? The bonding agent can gum up your needle. But I have sewn through it lots before. I just replace my needle afterwards. You can also definitely hand stitch through it too. Perhaps do some tests with some scraps before making the final decision on your project. I hope that helps, Lauren.
Thanks for this, it was very helpful! I was wondering if you have ever used the lightweight fusible web from https://flexifuse.com I’ve heard a bunch about them, but haven’t had a chance to try it?
I haven’t tried it Sue, but I’m sure it would be great for appliqué. Happy sewing x
Hi! I am.new to sewing and have always been nervous about applique but have wanted to try it for years! Am so glad i found you , your instructions are super clear and I can’t wait to try it.
Thanks
Kulsum
That’s wonderful to hear Kulsum. Best wishes as you begin your appliqué journey. It’s lots of fun!
Do you have to sow edge
stitch around all appliqués?
I am using fusible interface as my backing to attach them with a iron to cover.
My appliqués are quite small and go on a sowing machine cover. They look great as they are and am thinking that sowing around them will over shadow them.
Thank you.
If your appliqué is going on an item that won’t be washed, you can definitely get away with not sewing around the edges of the shapes. In that instance, you might like to use Heat’n’Bond Ultra or another heat bonding web with a stronger hold. Good luck.
Hi and thanks for posting this. I haven’t tried it yet but have been wanting to make an applique. It’s on my long list of projects to do.
ps. I really like how you answer those who comment on here. You’re very helpful and kind.
My pleasure Rebecca. I hope you get a chance to try it!
I am making a baby quilt with snuggle soft flannel fabric it will be 3layerd thick. I am going to tie it not actually quilt it and want to applique a paw print on it. I love your tutorial I am sure I will be able to get through it but have some questions would you tie the quilt first and then applique on top of the ties or would you put the applique on and then do the ties around it. My ties will be 4 in apart all the way up and down the quilt. When I do the applique and sew around the edges would I sew through all of the quilt layers so on the back would just be the outline of the paw print or should I just go through the first layer and not have anything on the back. I hope this all makes sense I look forward to your answers. Thank you
Thanks for your query Pamella. Appliqué is usually only stitched onto the top layer of fabric in a quilt to avoid sewing through too much bulk. The quilt layers are then joined together with another quilting method. If you’d like more information, feel free to email me at hello (@) mollyandmama.com.au. Thanks, Lauren.
Superb
Thank you!