Embroidery Stitch Basics
Welcome to the wonderful world of hand embroidery! This is post four in my series about Embroidery for Beginners. First we looked at all the supplies you will need, then we talked about how to transfer your design to fabric. The third instalment explores how to actually get started with tips for the basics, like placing your fabric in an embroidery hoop and preparing your needle and thread. Here we talk about sewing the basic stitch types, before exploring how to finish an embroidery hoop for wall hanging.
If you’re new to hand stitching, this stitch guide will highlight the most simple (and often the most popular) stitches, what they are used for and how I like to sew them. Basic hand stitching techniques are used in lots of my sewing patterns. I also love to include embroidery to embellish my designs too.
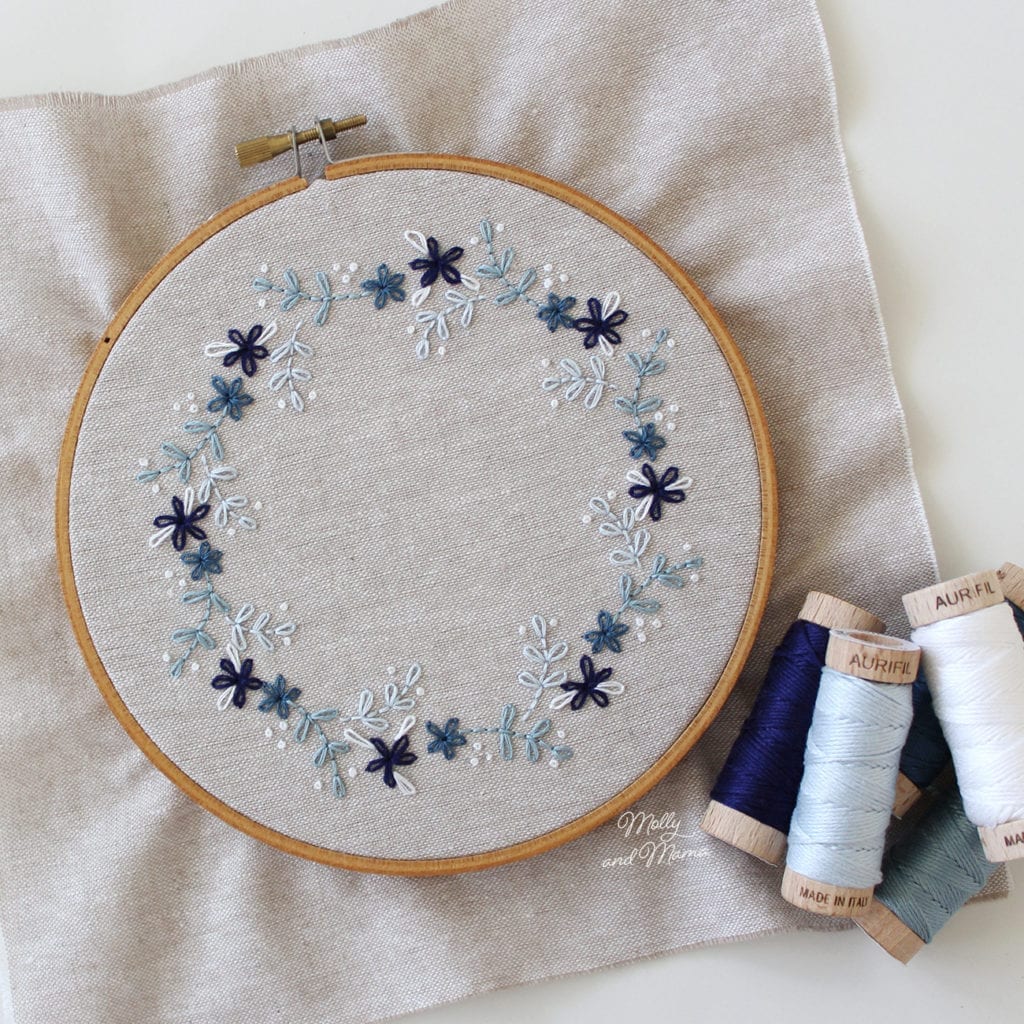
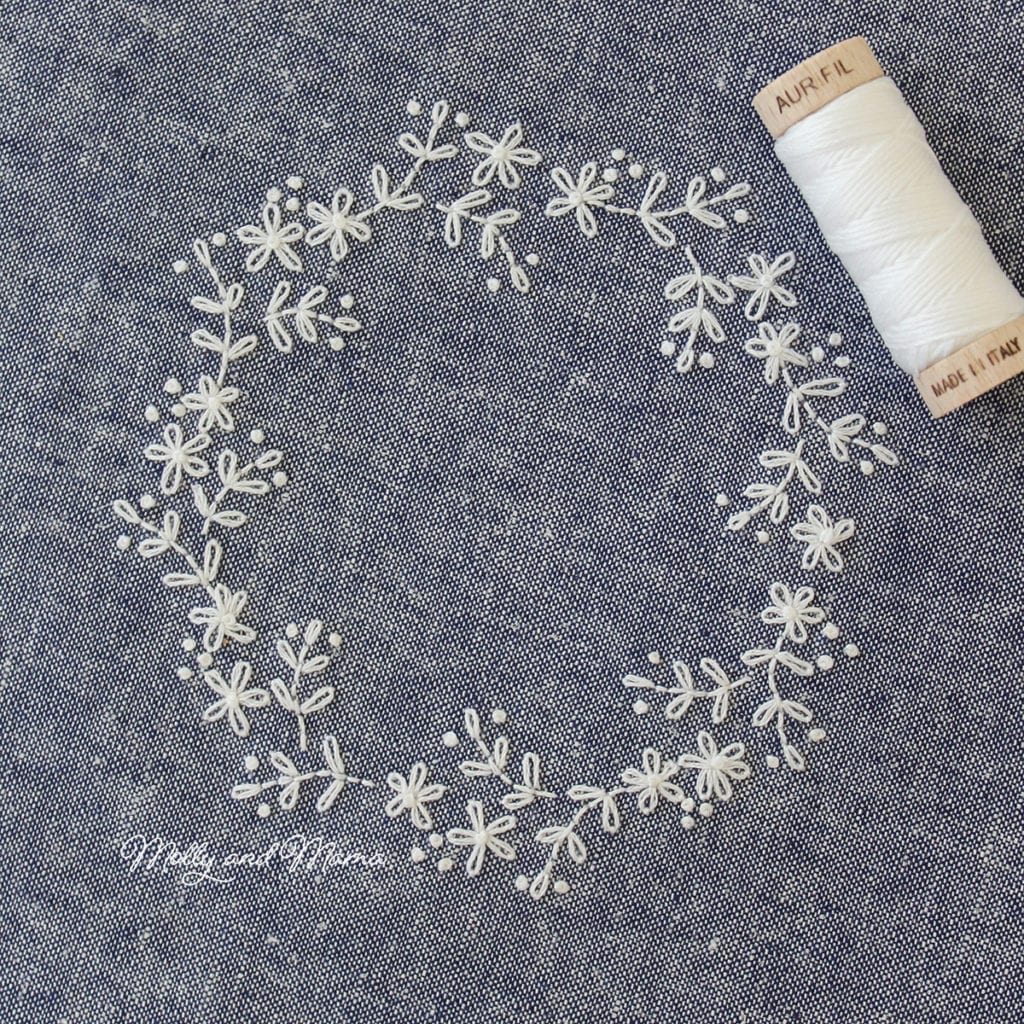
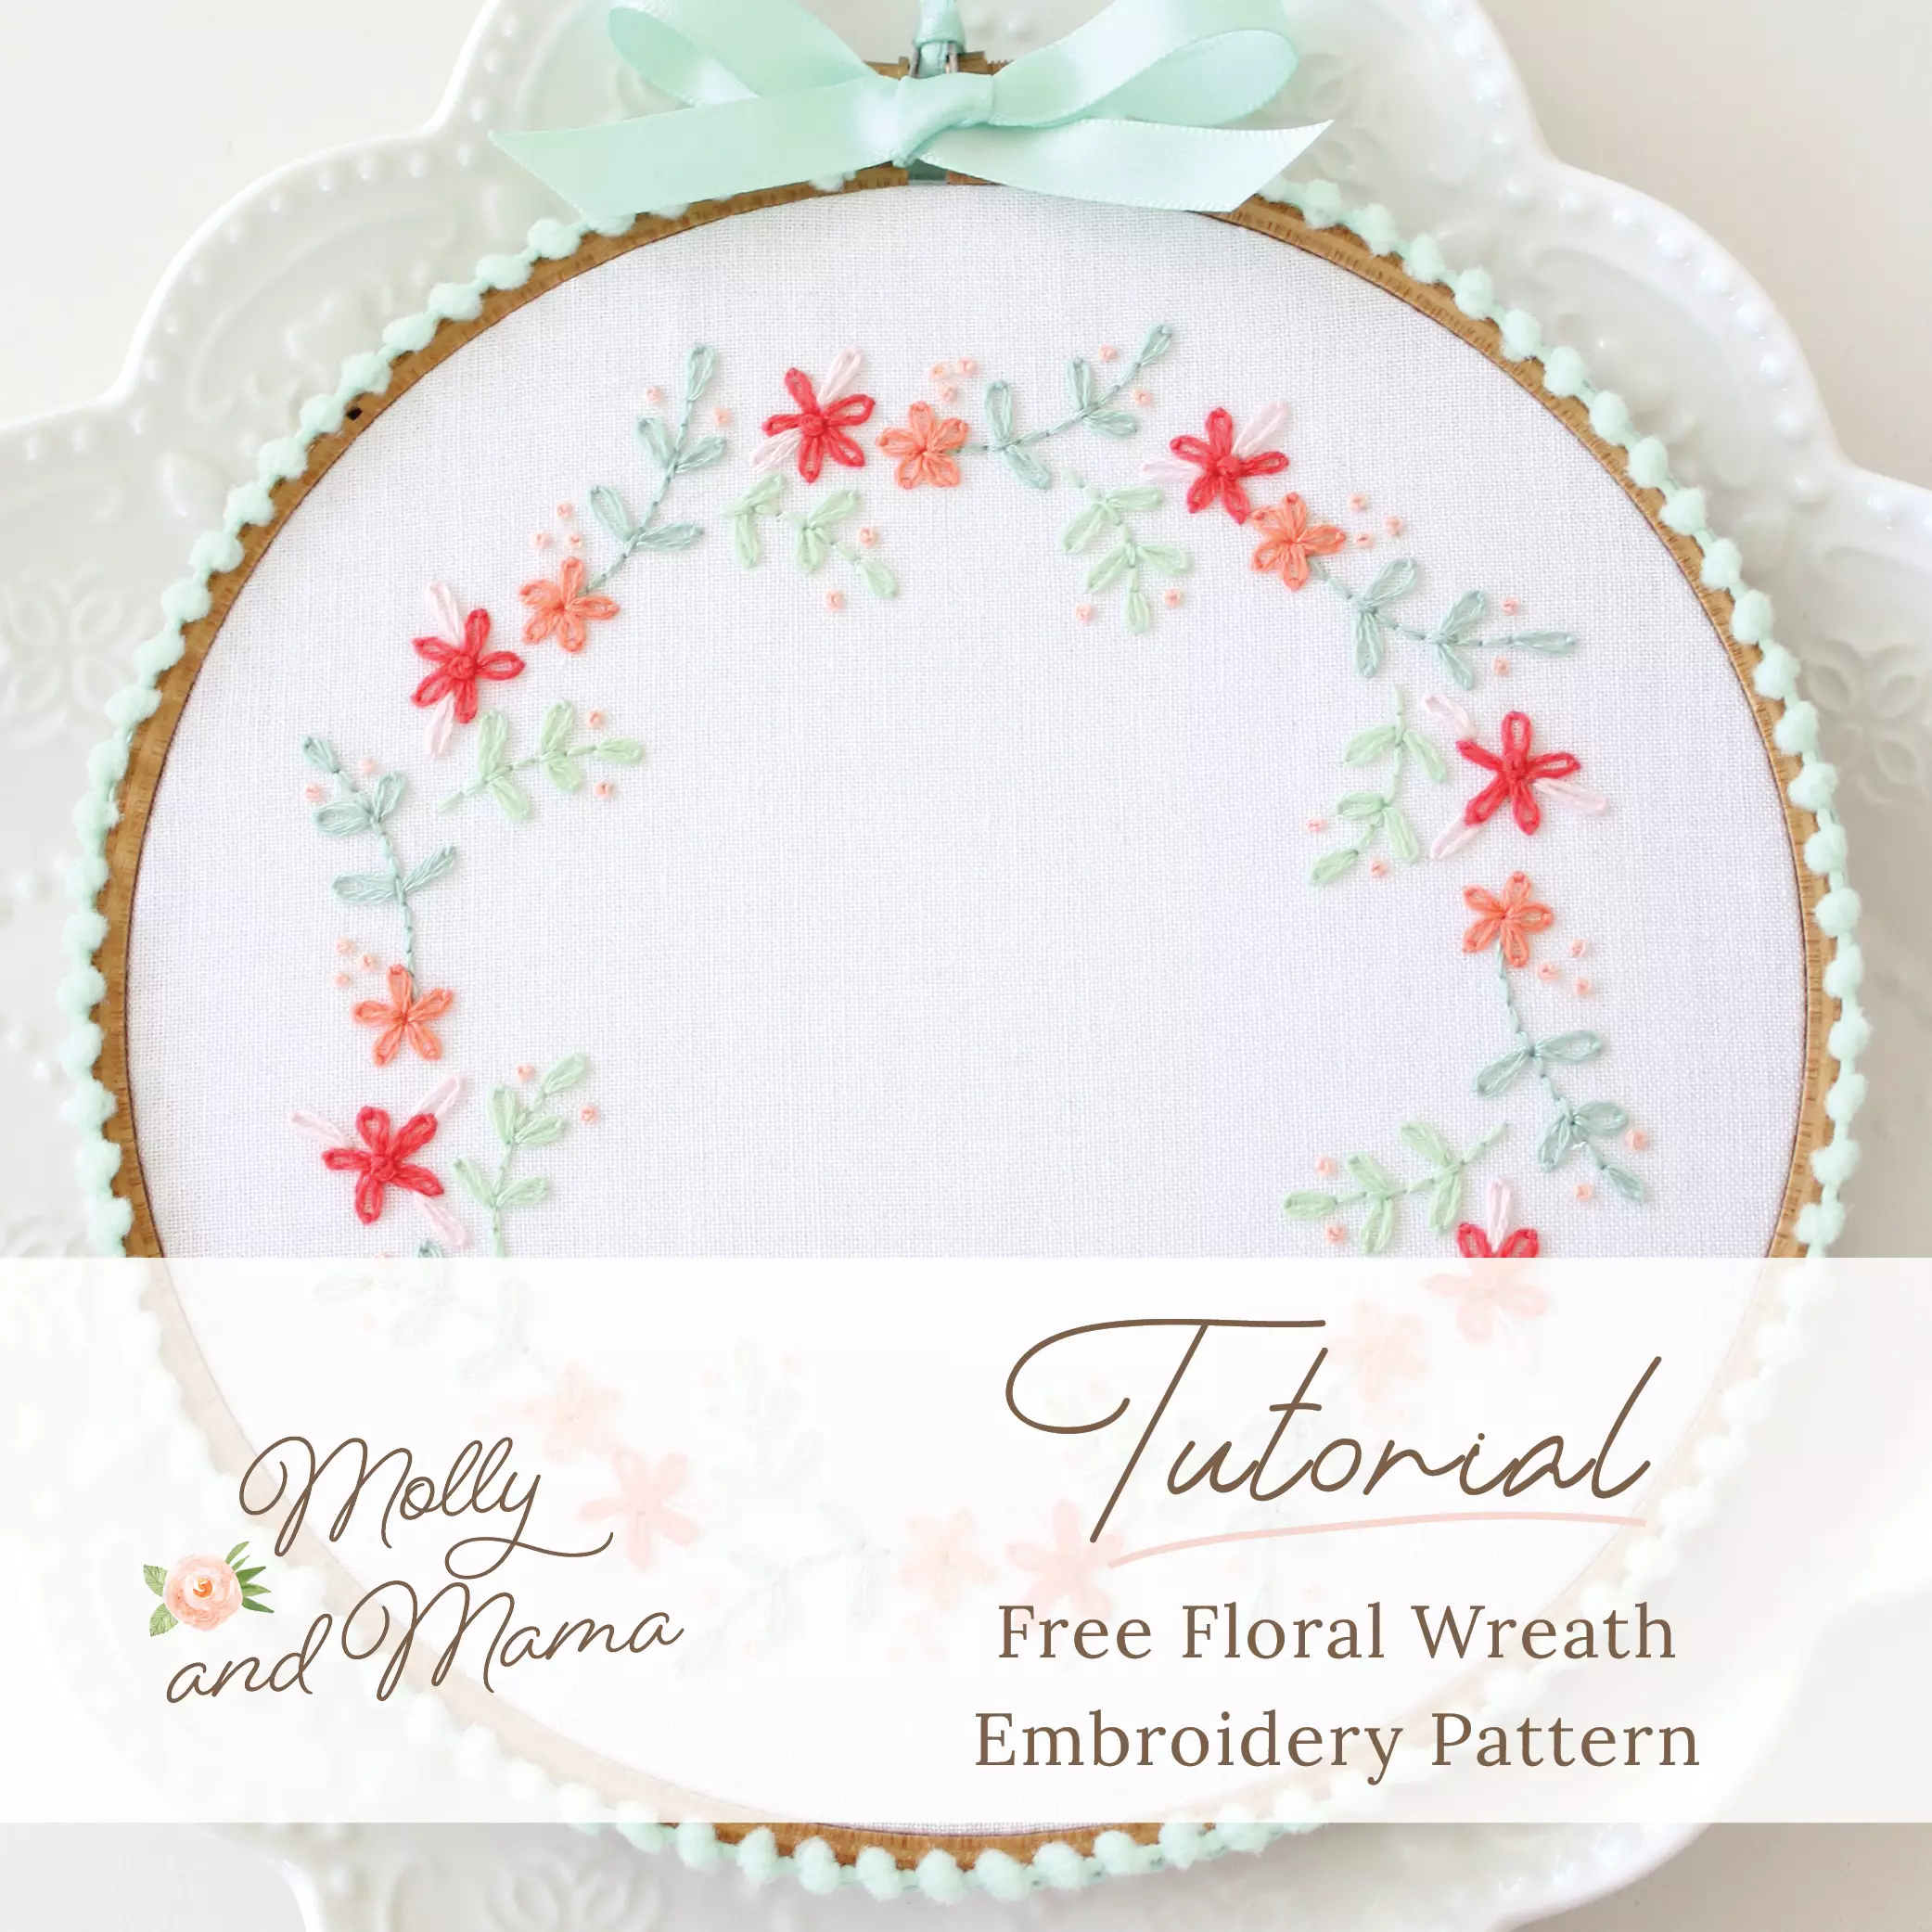
If you’re looking for a free and easy project to get started with, sign up for my newsletter to receive this beautiful embroidery wreath design.

Here’s the same design stitched in different colours and on different fabrics.
Let’s Get Started
There are so many types of hand sewing stitches and they each have different (and sometimes interchangeable) uses. To add to the confusion, sewing stitches are often named differently in different parts of the world, or have alternative names which sometimes change depending on the generation you were born in. But these basic stitches tend to be fairly universal. If you know them as something else, be sure to let me know!
How you stitch can vary, depending on how you were taught and whether you are right or left handed. Being left-handed myself, I have realised that I often sew the stitches in the same direction as a right-handed person would, though sometimes I do them in reverse. Either way the instructions are the same, you may just find it easier to mentally flip the illustrations to help you visualise sewing from left to right.
The important thing to remember is to stitch in a way you are comfortable with, and that you enjoy. After all, that’s why we stitch!
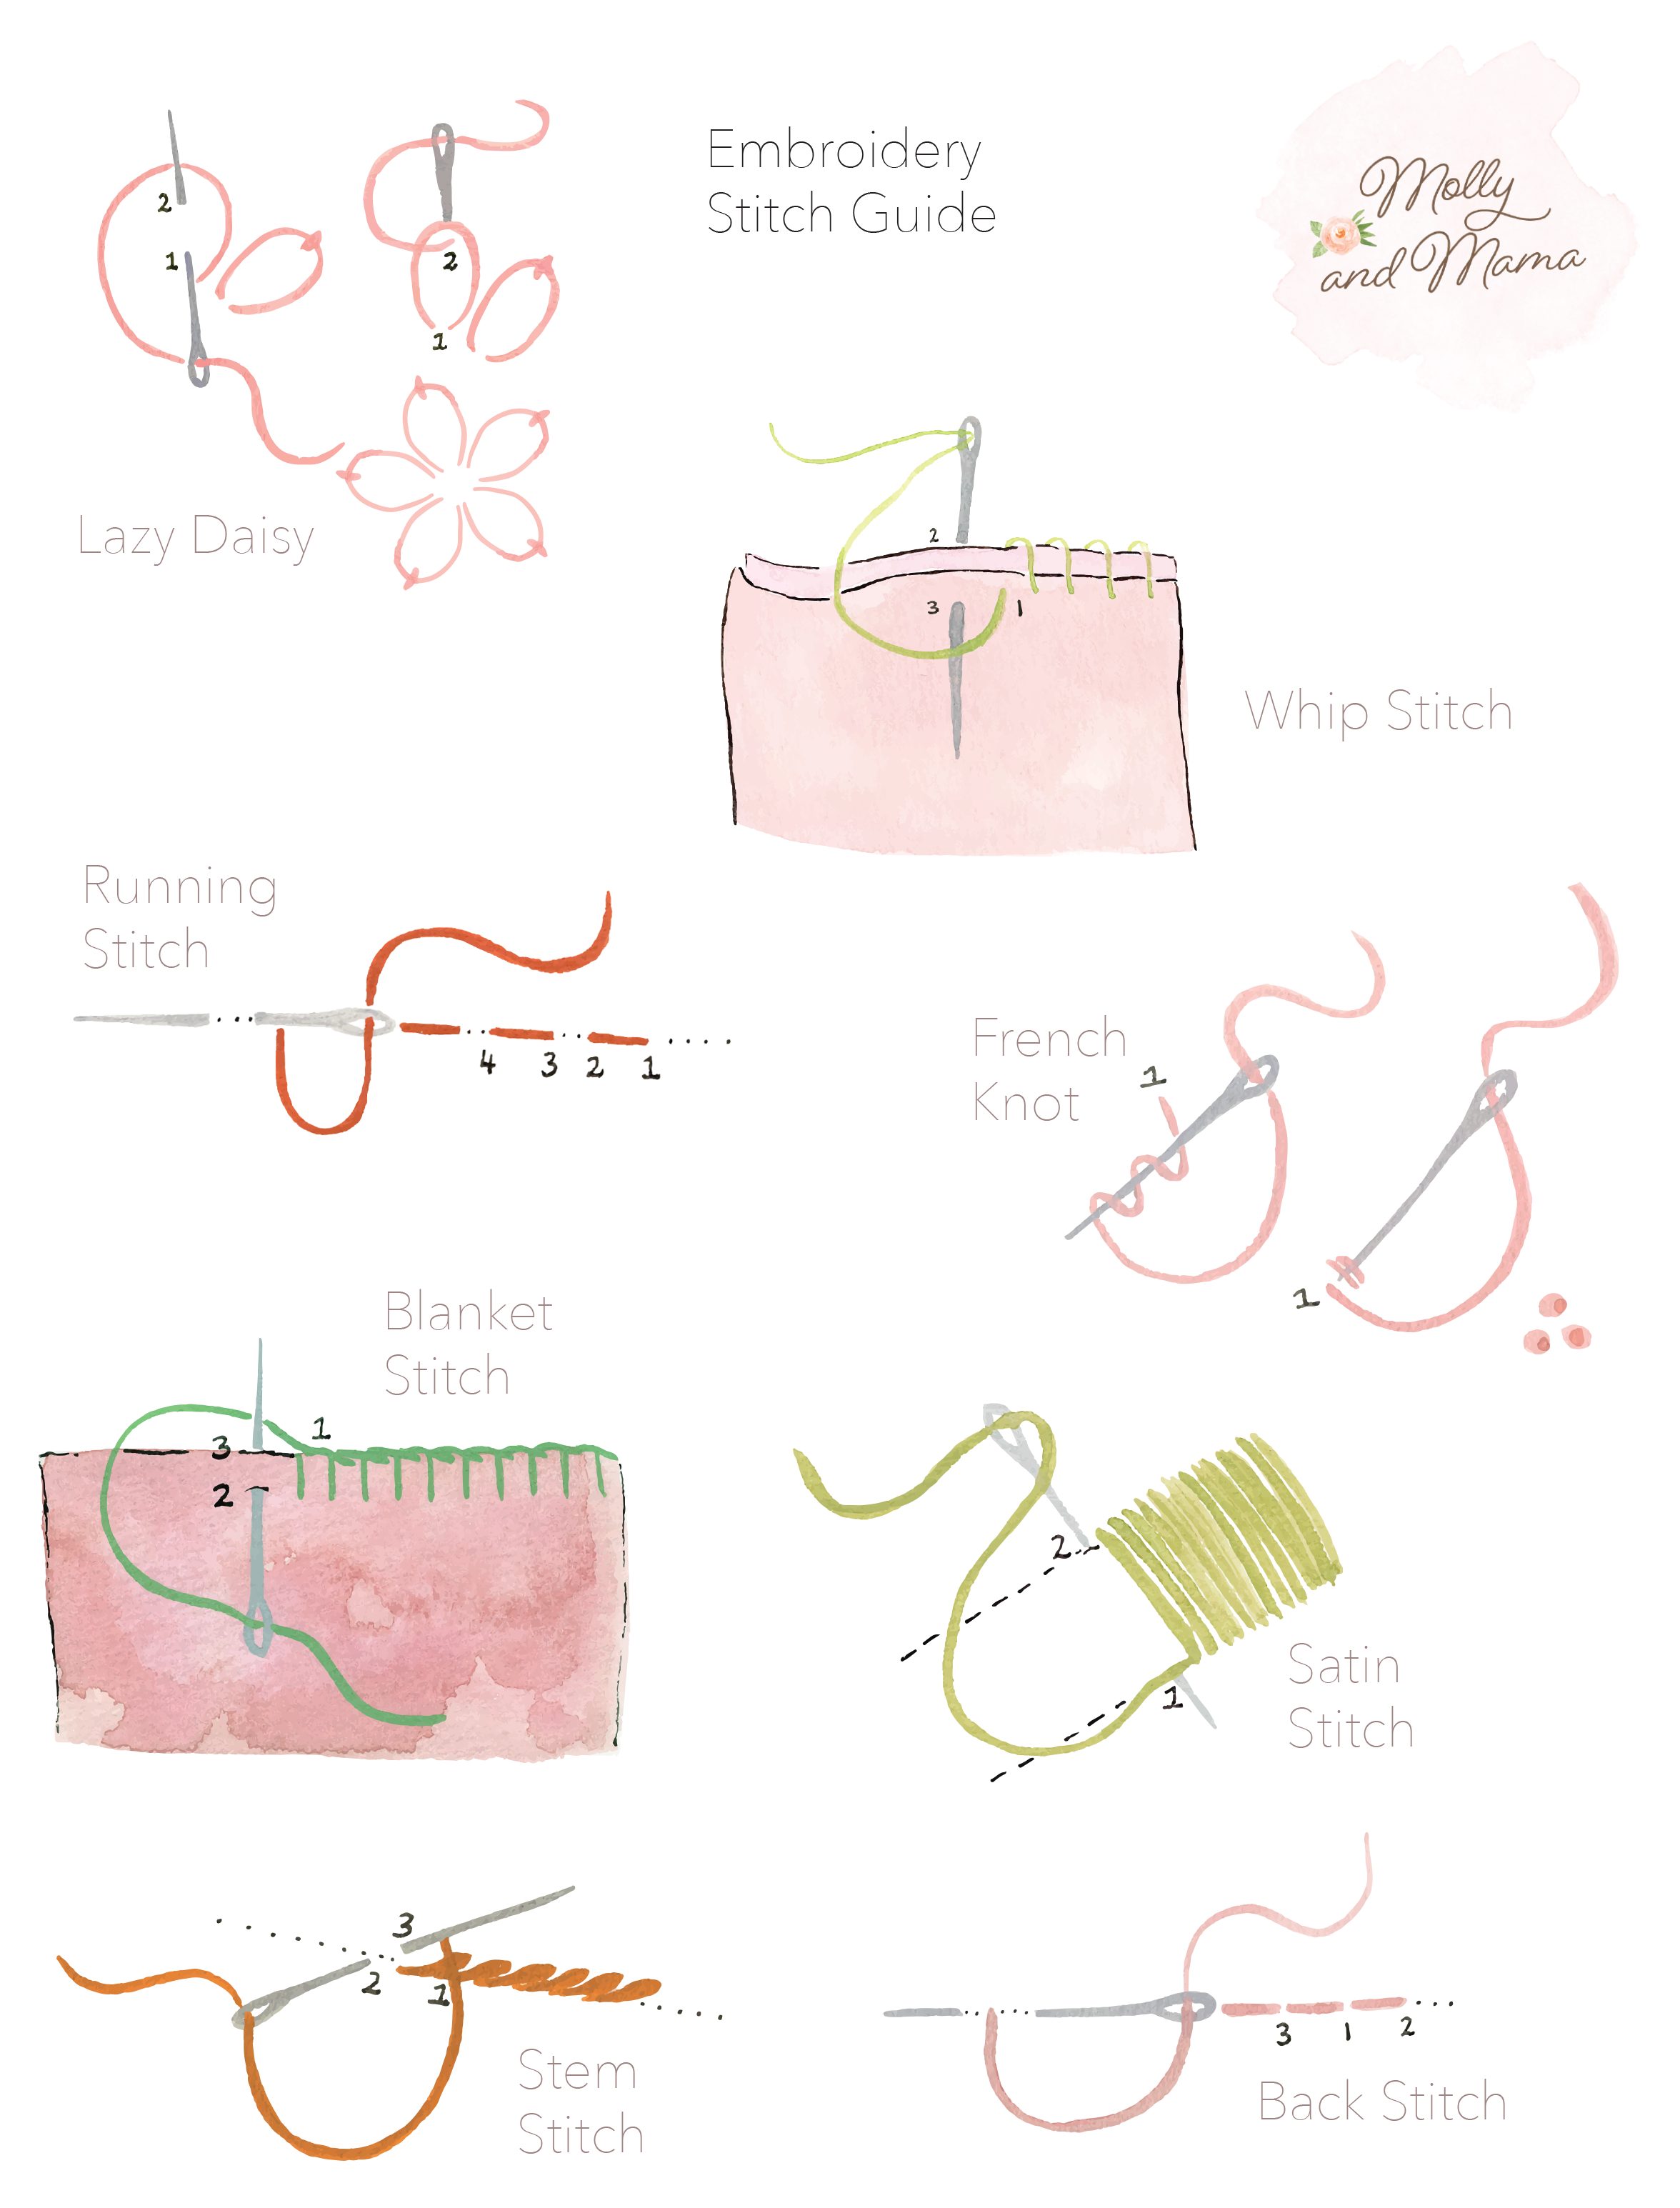
Back Stitch
Back stitch is the perfect choice for quick and easy embroidery outlines because it creates a solid looking line.
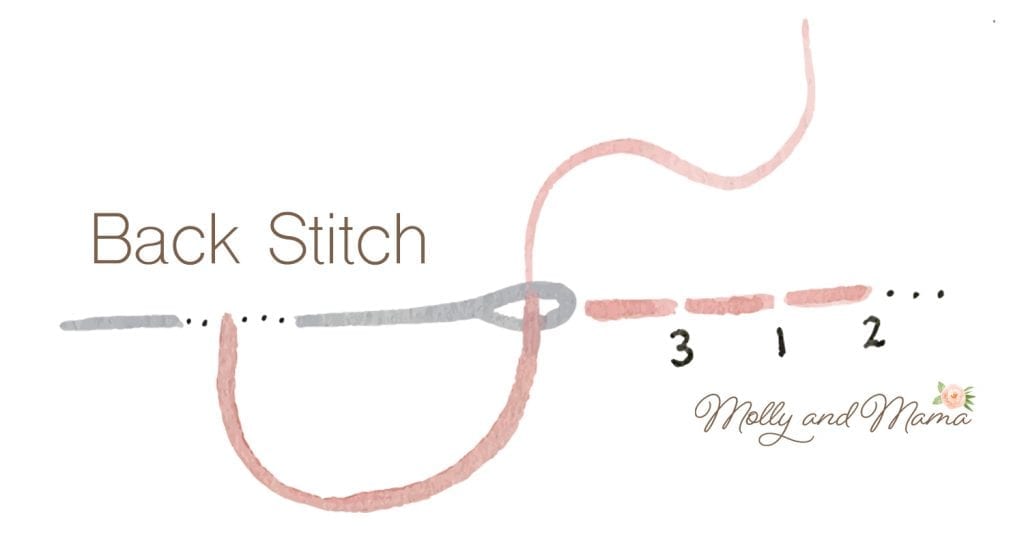
Bring the thread up from the back of the fabric at 1 and take one stitch backward down through 2. Bring the needle up one stitch length in front (3), then stitch back into 1. Bring the needle up again at continue back stitching in this way, ensuring the stitch lengths remain the same with every stitch.
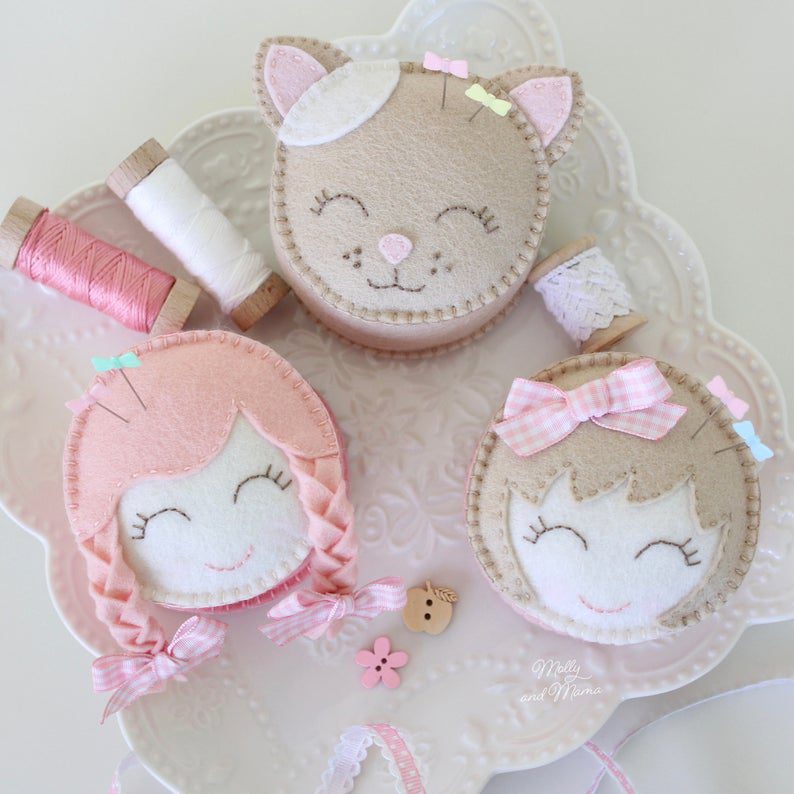
I use back stitch a lot for adding facial details to my felt friends, like the eyes and mouths on my Miss Molly and Friends Pin Cushions below. Stitching with felt is a little different, so I describe how to transfer embroidery designs like back stitch to your felt projects HERE.
Blanket Stitch
Blanket stitch creates a decorative and protective finish on fabric edges. It’s ideal for sewing felt together and for appliqué.
On two raw fabric or felt edges, sew a single stitch around the fabric edge first. Bring the needle from the wrong side of the fabric or felt, and up between the two layers where the thread loops over. This is stitch 1. To make the blanket edge stitch, bring the needle across to make the second stitch. Push straight through both layers of fabric or felt at 2. Catch the thread under the needle before you pull the thread firmly. The stitch will sit on the raw edge of the fabric at point 3. Repeat this step to continue stitching.
I use blanket stitch on lots of my felt projects. I’ve used it here to sew the edges on the Fifi Fox Pin Cushion. It’s used as a flat stitch to sew the fox’s nose onto the face, and also as an edge stitch to sew two pieces of felt together.
French Knot
French knots are small dots which are great for showcasing details, like the seeds on a strawberry or the eyes on a small doll.
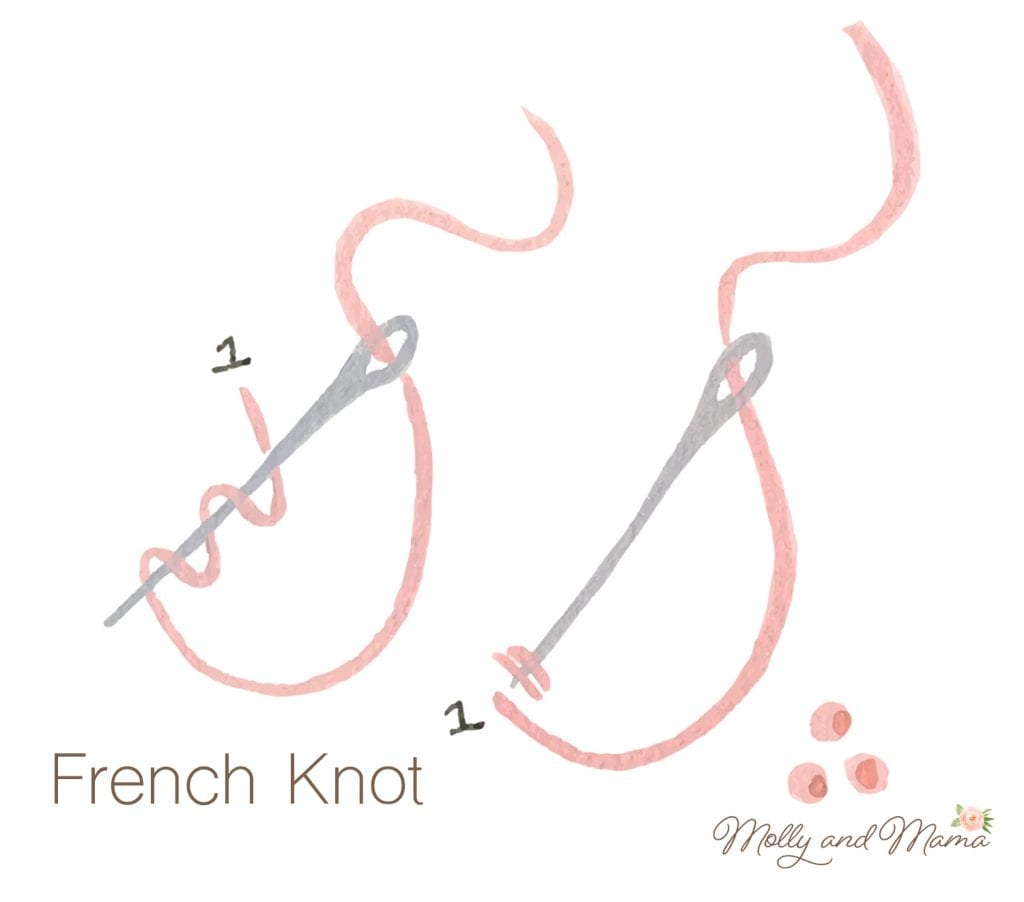
Bring the thread out at the required position for the knot. Hold the eye of the needle on the fabric near the thread starting point. Circle the thread twice around the needle, manoeuvre the needle tip to the starting point, and reinsert it a thread or two beside the starting point (left image). Pull the needle down through to the back of the fabric, holding the thread firmly as you do (right image). Larger knots can be made by increasing the number of floss strands on the needle, or the number of times the floss is wound around the needle.
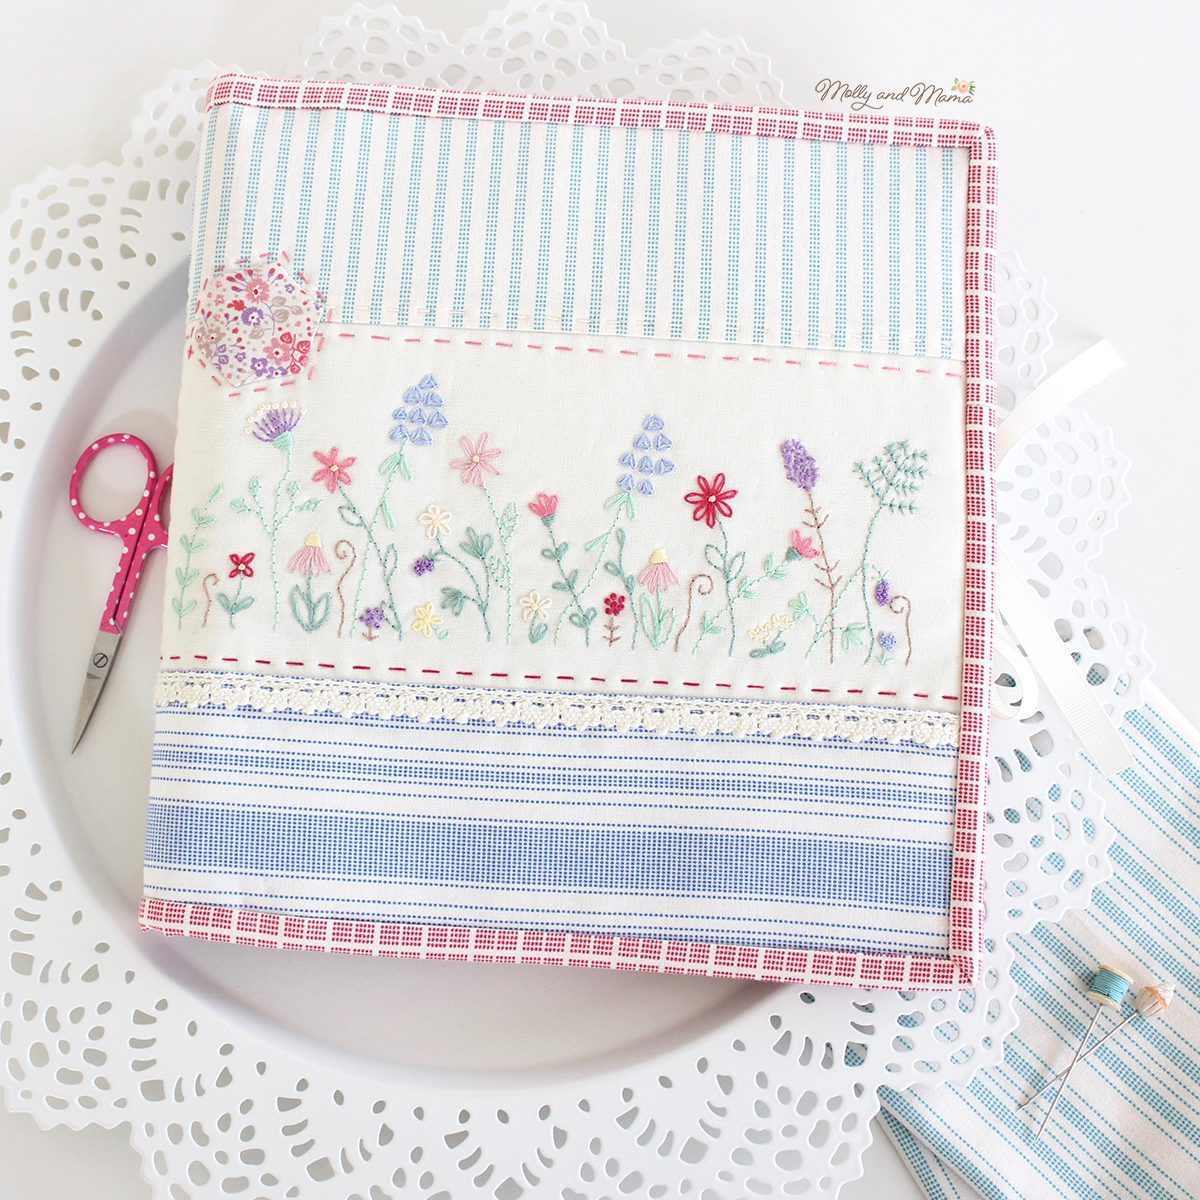
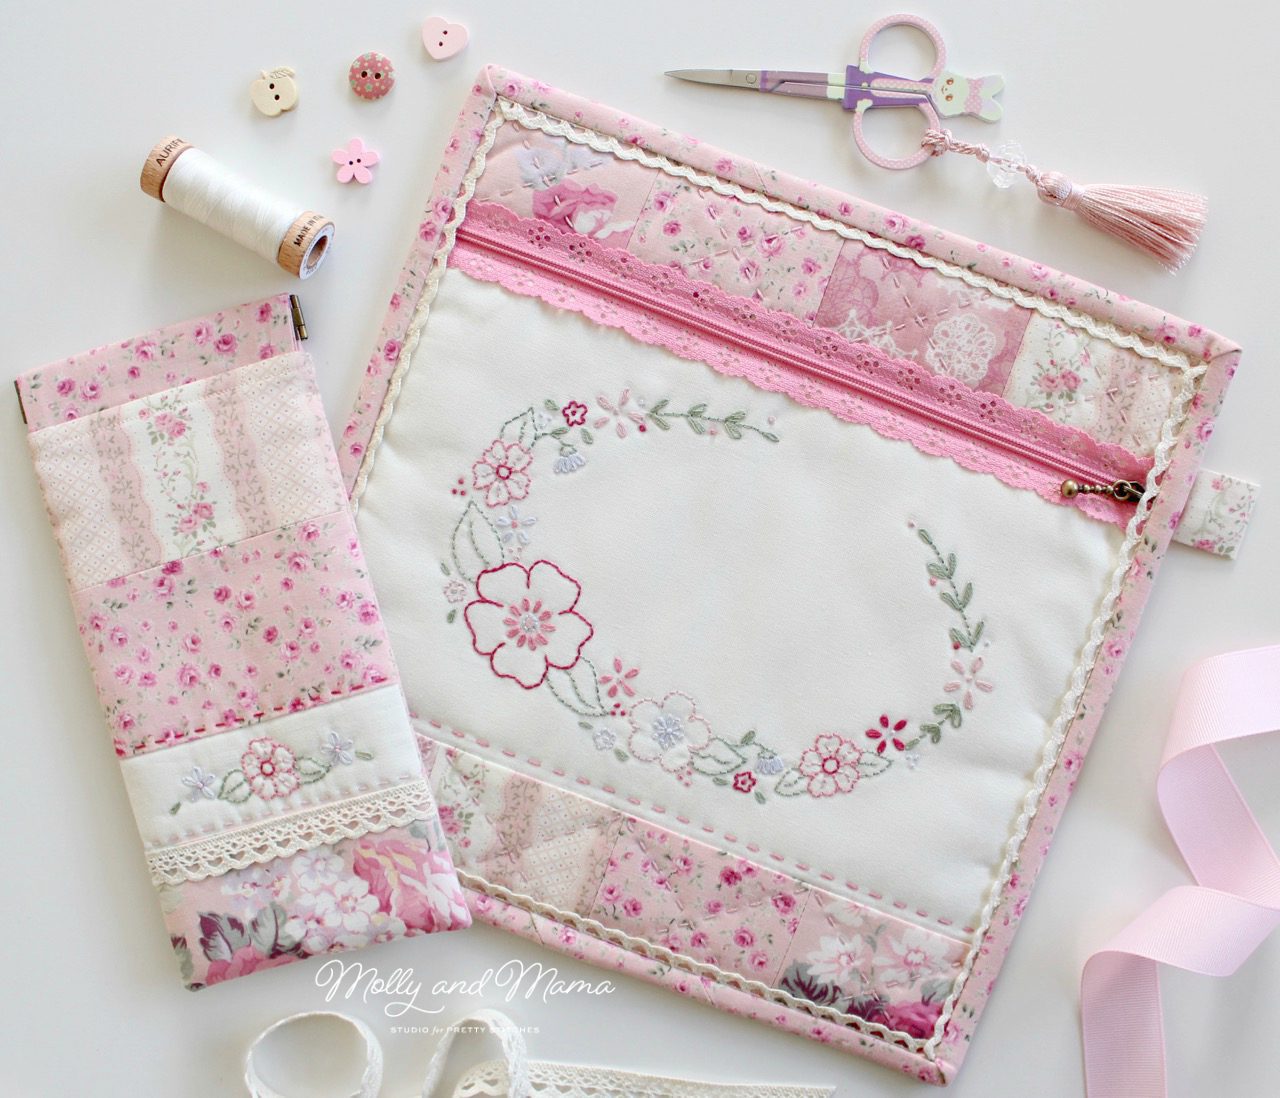
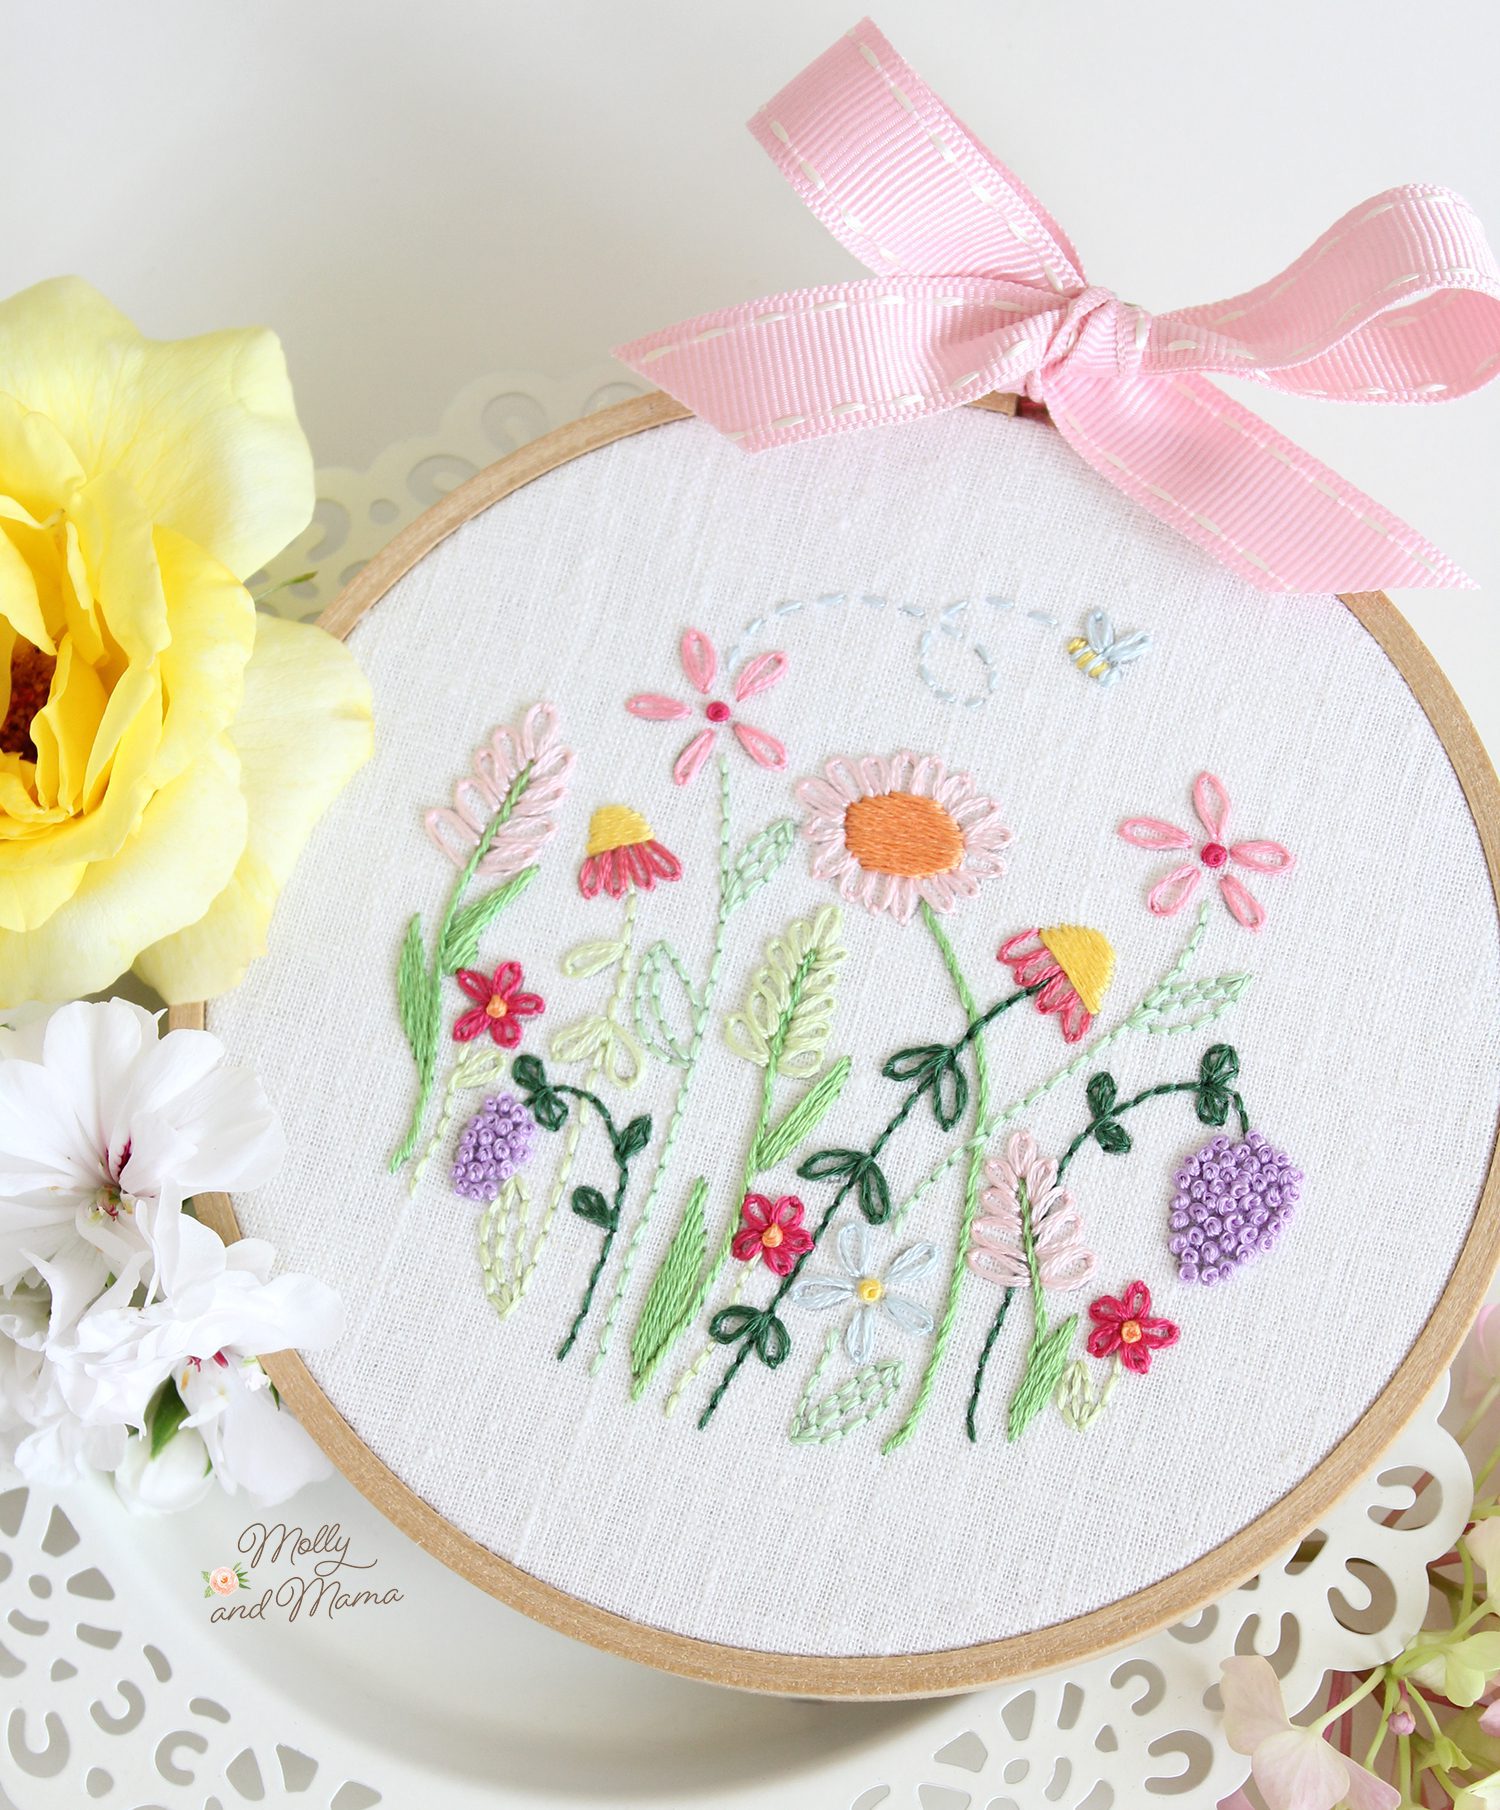
French Knots make great centres for flowers and daisies. You can see them below as yellow flower centres, and also as purple grapes. The Simple Sewing Folder pattern features this embroidery panel that uses all the stitches described here.
Lazy Daisy Stitch
Lazy daisy stitch is ideal for sewing pretty flower shapes. Sew each lazy daisy stitch around a central point like a French knot to create a flower.
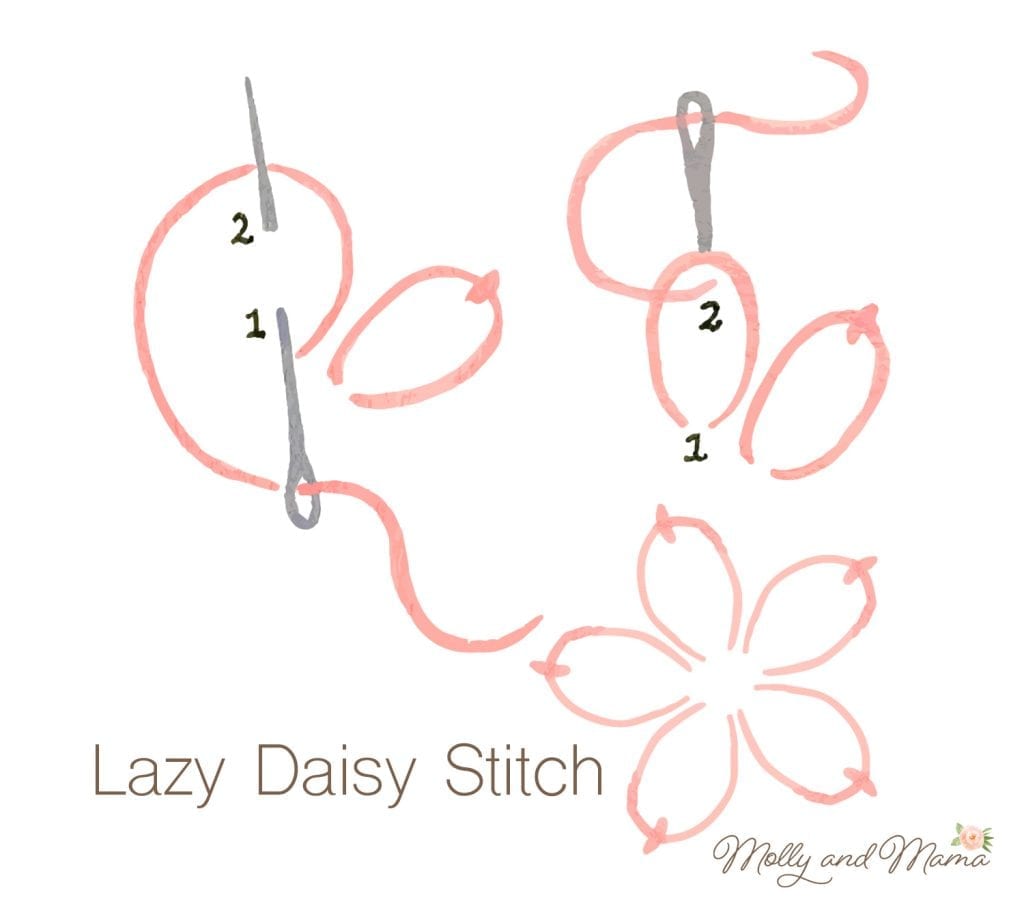
Bring the thread out at point 1 on the top left image. Hold the thread and then insert the needle back into point 1 and then back out at point 2. Pull the needle through but keep the thread under the needle point, to form a loop. Fasten the loop by sewing a small stitch over the loop at point 2 as shown on the top right of the image. Repeat the stitch five times to make a daisy flower shape. The stitches can each be joined around a central point or made separately. Use a French knot to form the centre of the daisy.
Lazy Daisy Stitch is used extensively in the Spring Fling Pouch pattern. Here it forms the green leaves at the end of the wreath and it’s also used for some of the flowers too. You can also see French knots and back stitch here too.
Running Stitch
The most basic of hand stitching techniques, running stitch, is a series of straight stitches sewn in a line. It’s often used as a simple but effective hand quilting technique. It can also be used as a temporary basting stitch to keep fabrics in place while you are sewing pieces together.
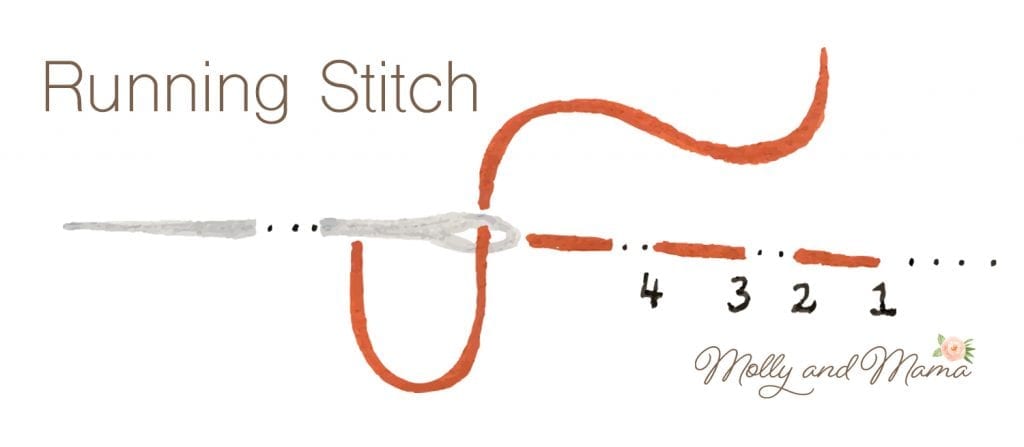
Bring the needle up from the fabric back at 1, and push it down at 2, then up at 3 and down at 4. Continue to pass the needle over and then under the fabric, in a straight line. Adjust the stitch length to change the effect of the quilting.
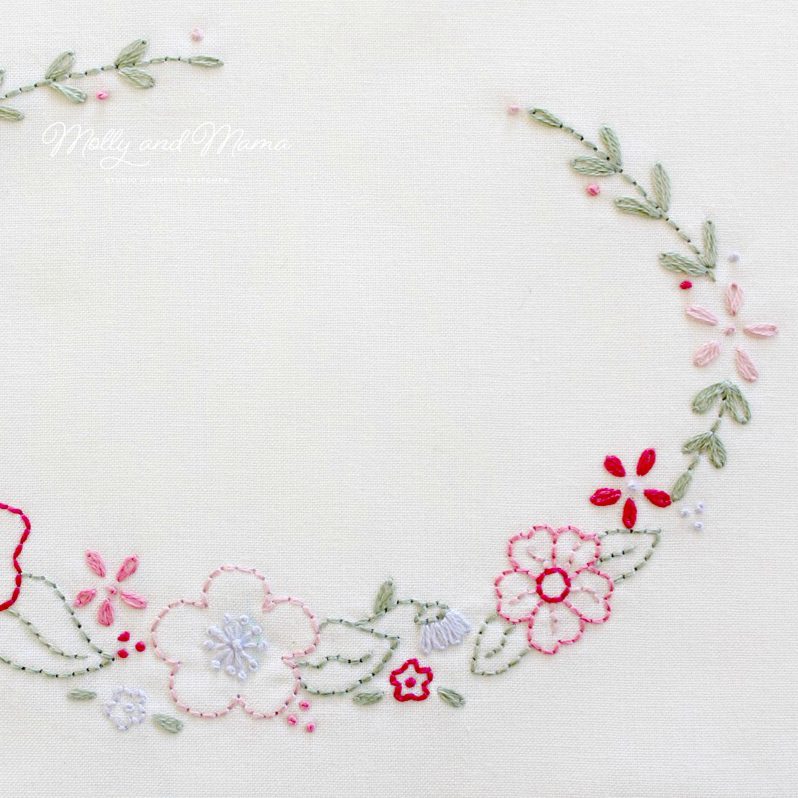
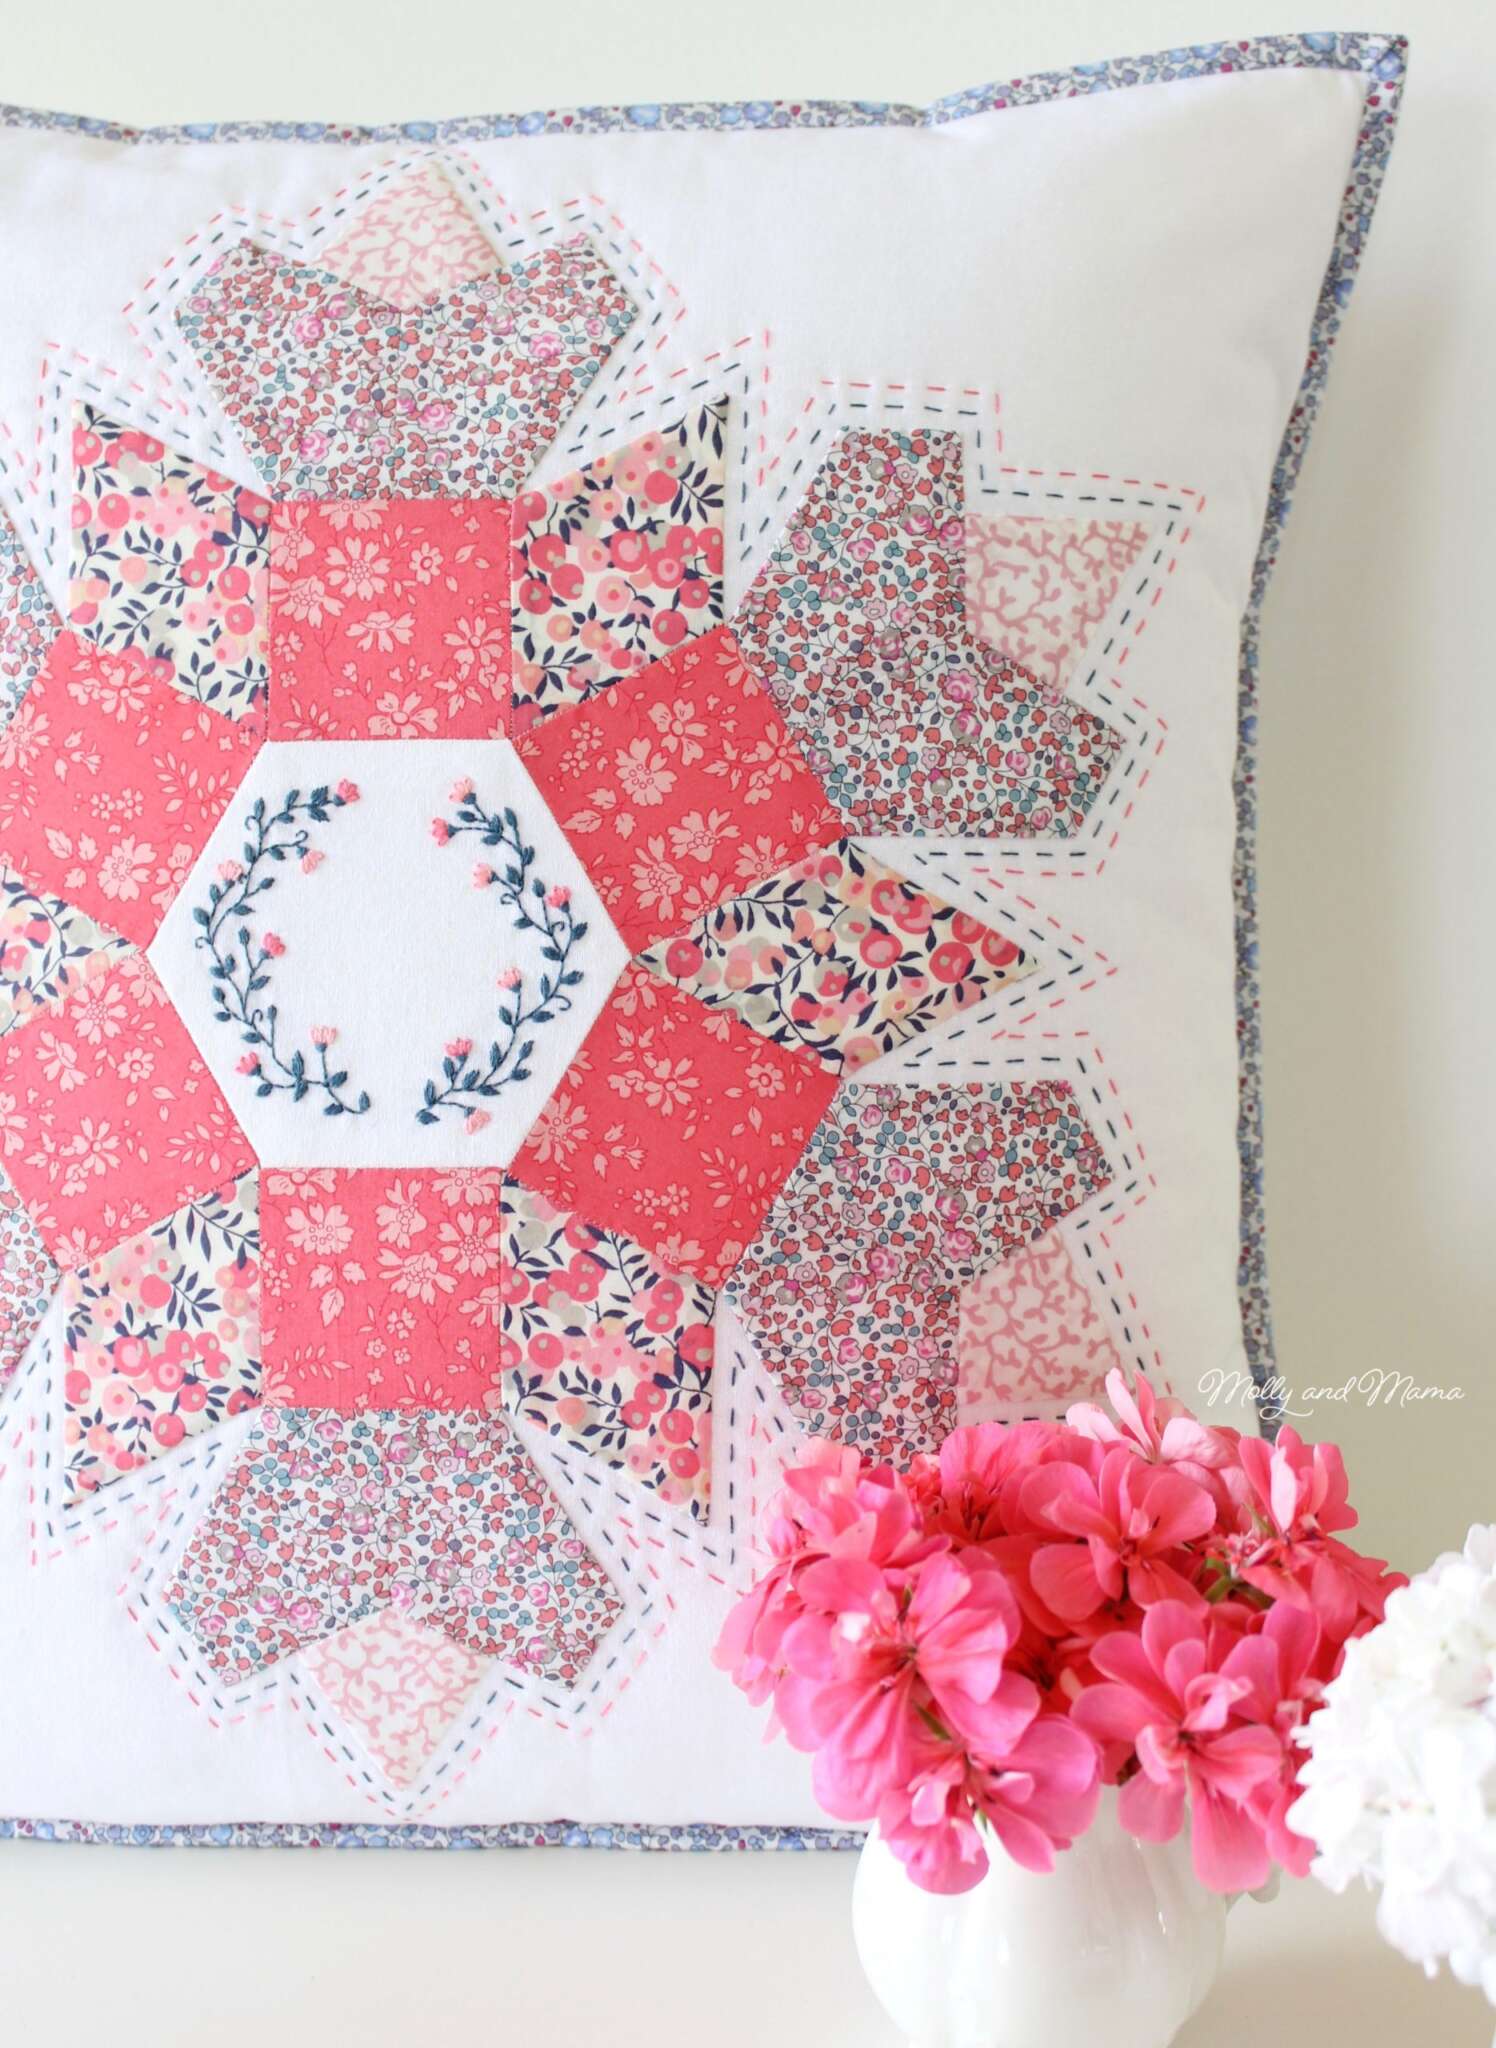
You can see the hand quilting running stitch details I added to the Stella Cushion pattern. Using different coloured floss can create a beautiful visual effect. The centre wreath is a combination of back stitch stems, satin stitch leaves, and lazy daisy flowers.
Satin Stitch
Satin stitch is used to fill small spaces with solid colour. It is made up of straight stitches worked closely beside each other in a parallel fashion.
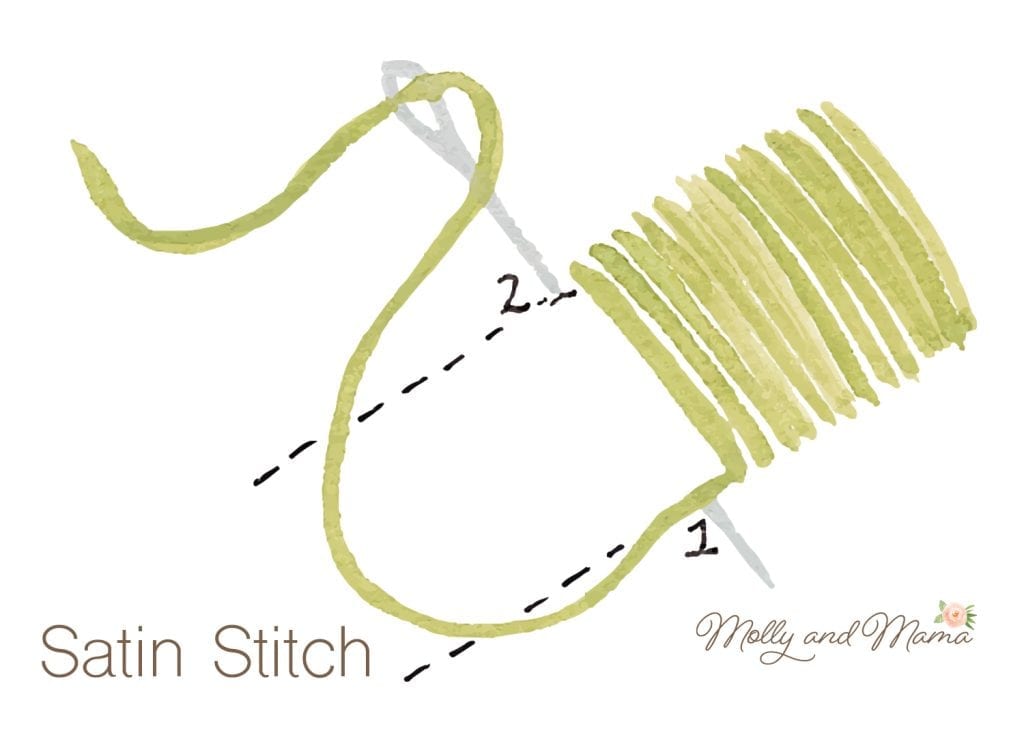
Bring the thread from the back or wrong side of the fabric and out at 1. Sew a straight stitch by taking the needle back in at 2 and bringing it back out again beside 1, ready for the next stitch. Repeat this stitch to fill the space, adjusting the stitch length as necessary.
Some people like to sew a back stitch border around the shape to be stitched before sewing over it with satin stitches.
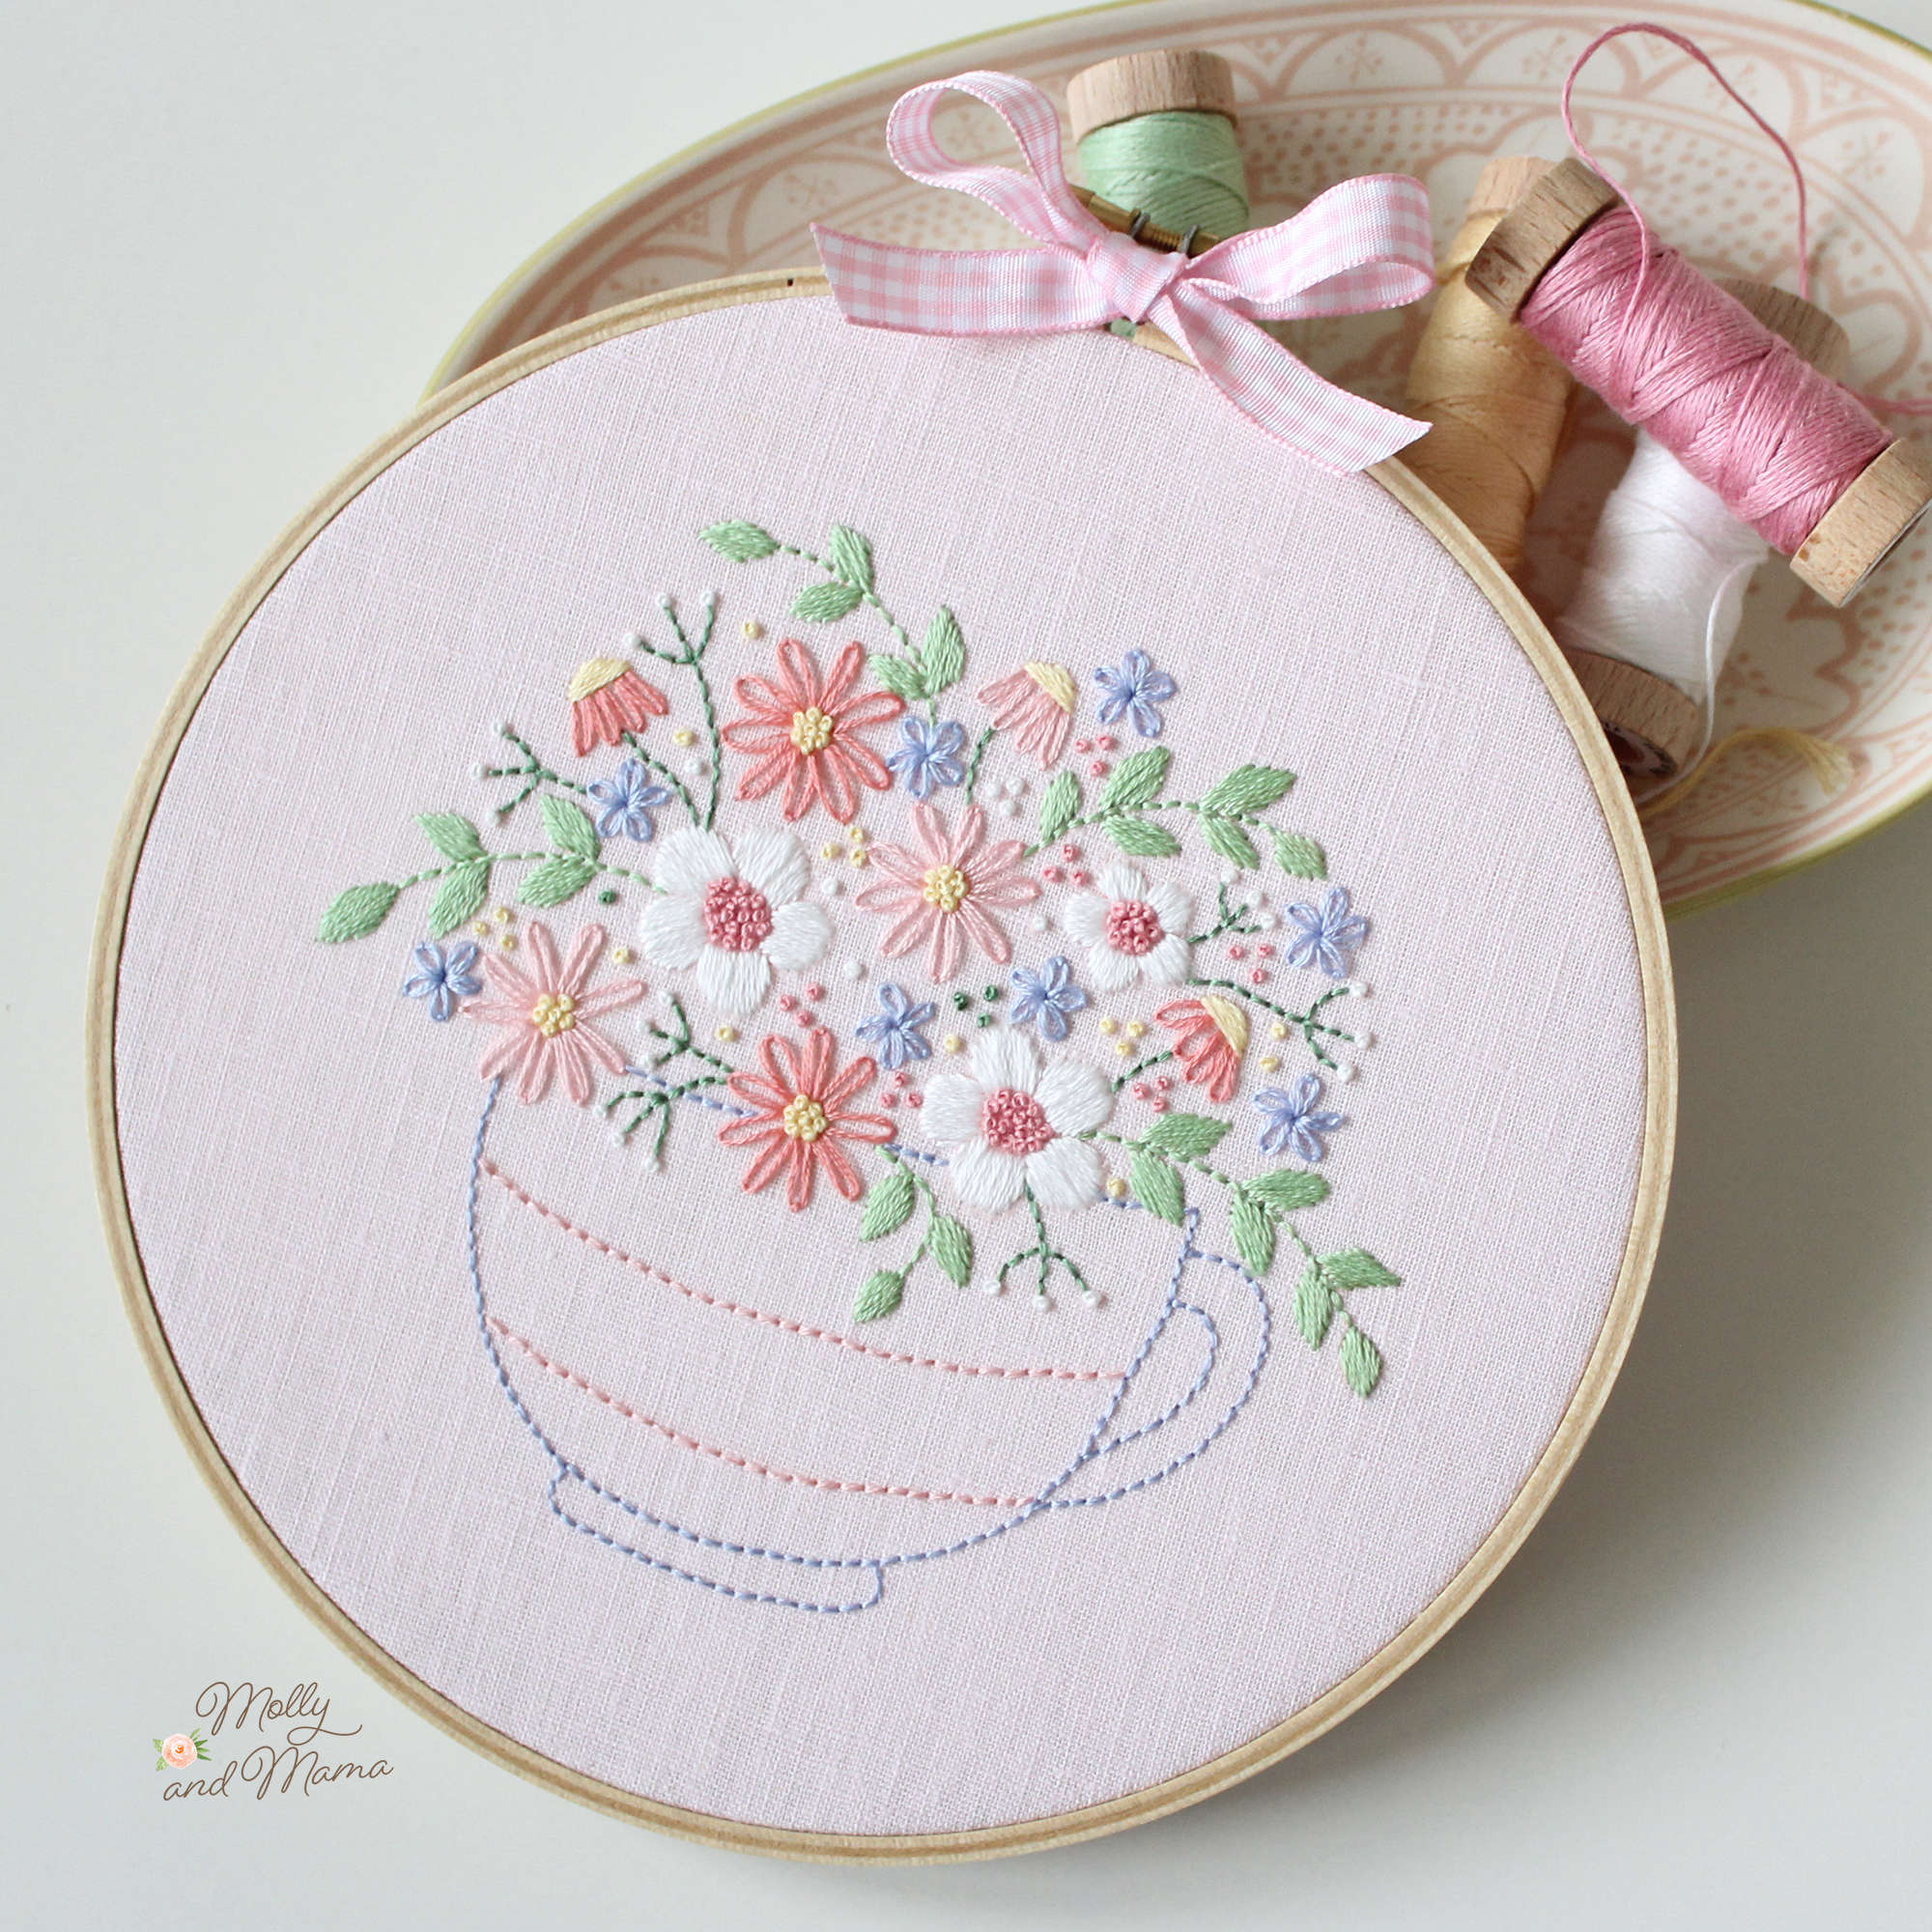
The Tea Time Posy Stitchery Pattern features satin stitch for some of the flower petals and leaves. You can change the look of the stitch by changing the direction that the stitches are sewn in.
Stem Stitch
Stem stitch is created by forming a continuous line of overlapped stitches. It’s perfect for stitching curved lines, or sewing flower stems. It’s almost the reverse of back stitch and has a slightly raised, rope-like finish.
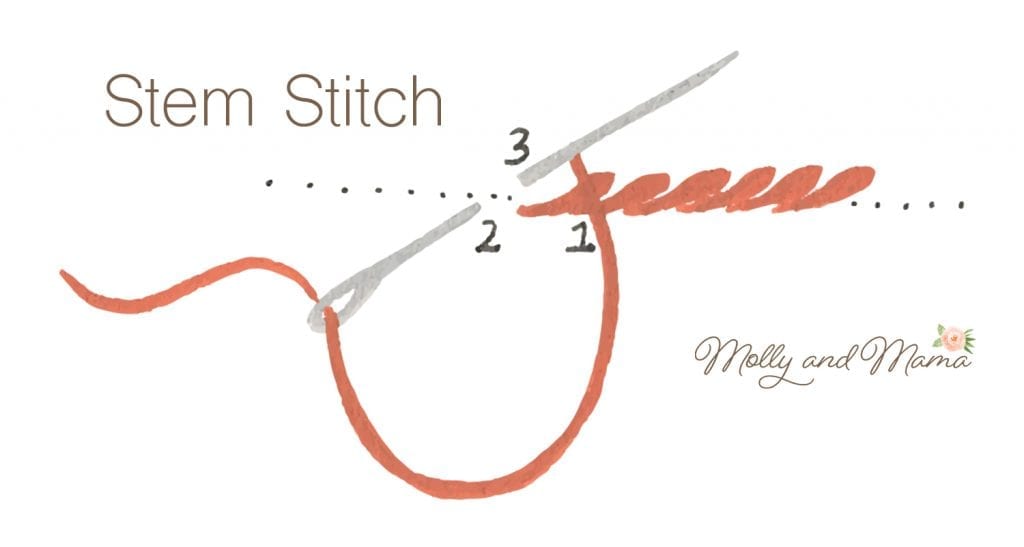
Sew a straight stitch by bringing the needle out at point 1 and back down, a stitch length away, at point 2. Take the needle backwards and bring it out at point 3, which sits on top and is halfway between stitch 1 and 2. Repeat this backwards motion stitch to form an overlapped line.
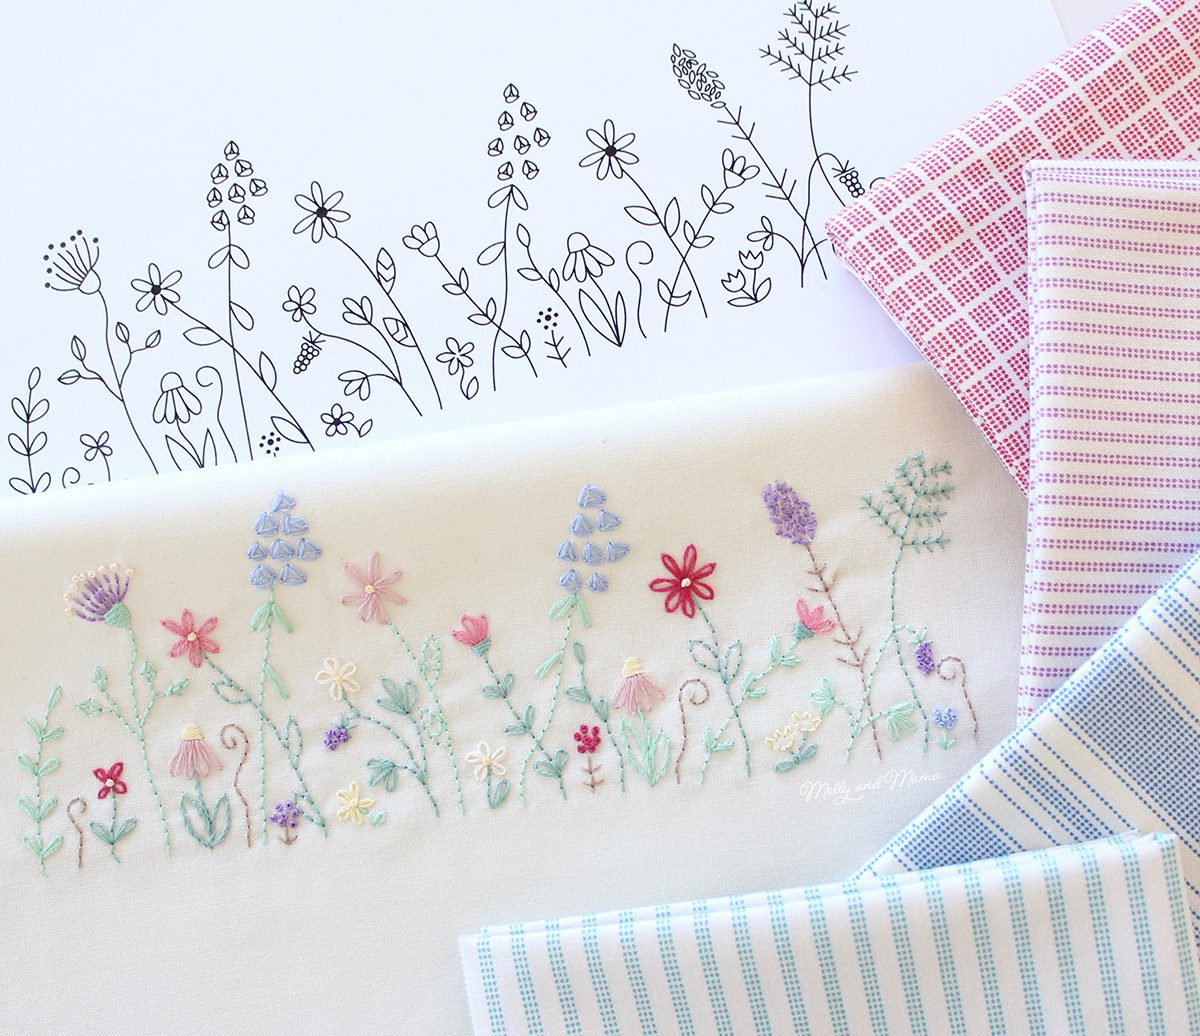
Stem stitch has been used brighter green stems of the flowers in the Nan’s Garden design shown below. It adds more depth and dimension than just using back stitch.
Whip Stitch
Whip stitch is ideal for edging or sewing fabrics like felt together around the raw edge. It’s also a useful alternative when an area is too small for blanket stitch.
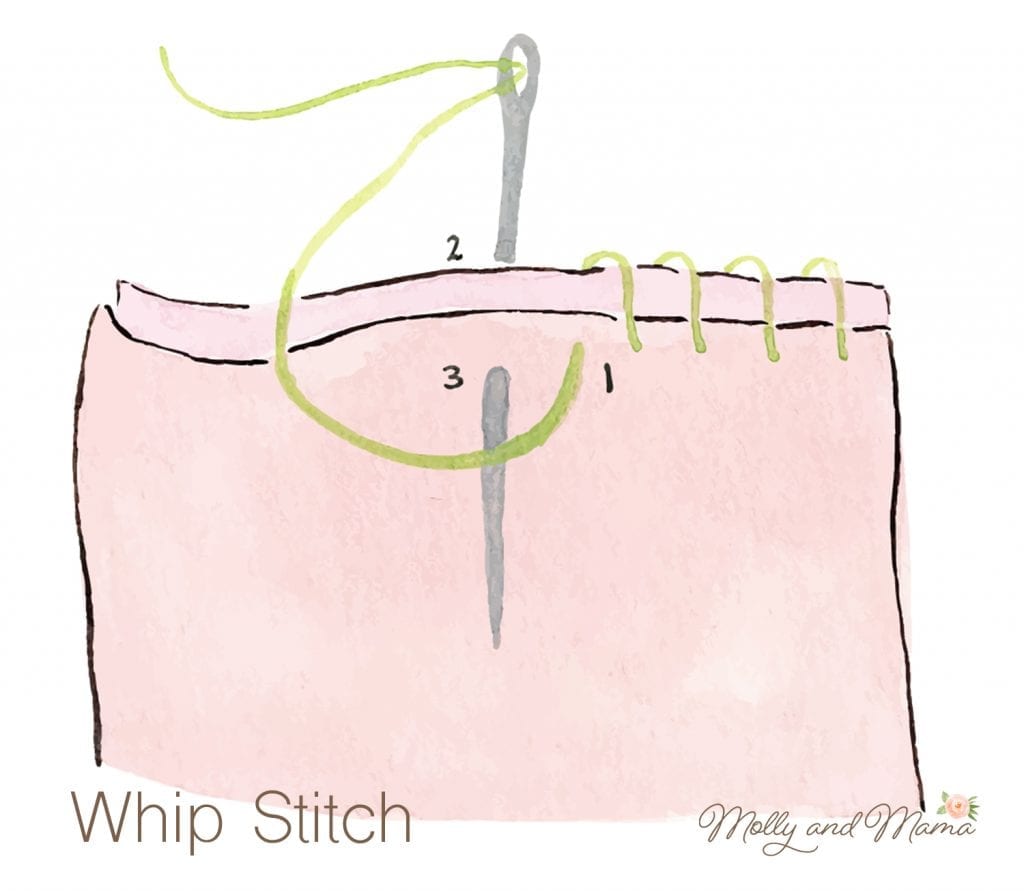
Hold the aligned raw edges of the felt or fabric together. To start, from the wrong side of the fabric or felt (between the two layers), push the needle through the first layer to exit at point 1. Make a stitch by bringing the needle around and through both fabric layers at point 2 and out through point 3.
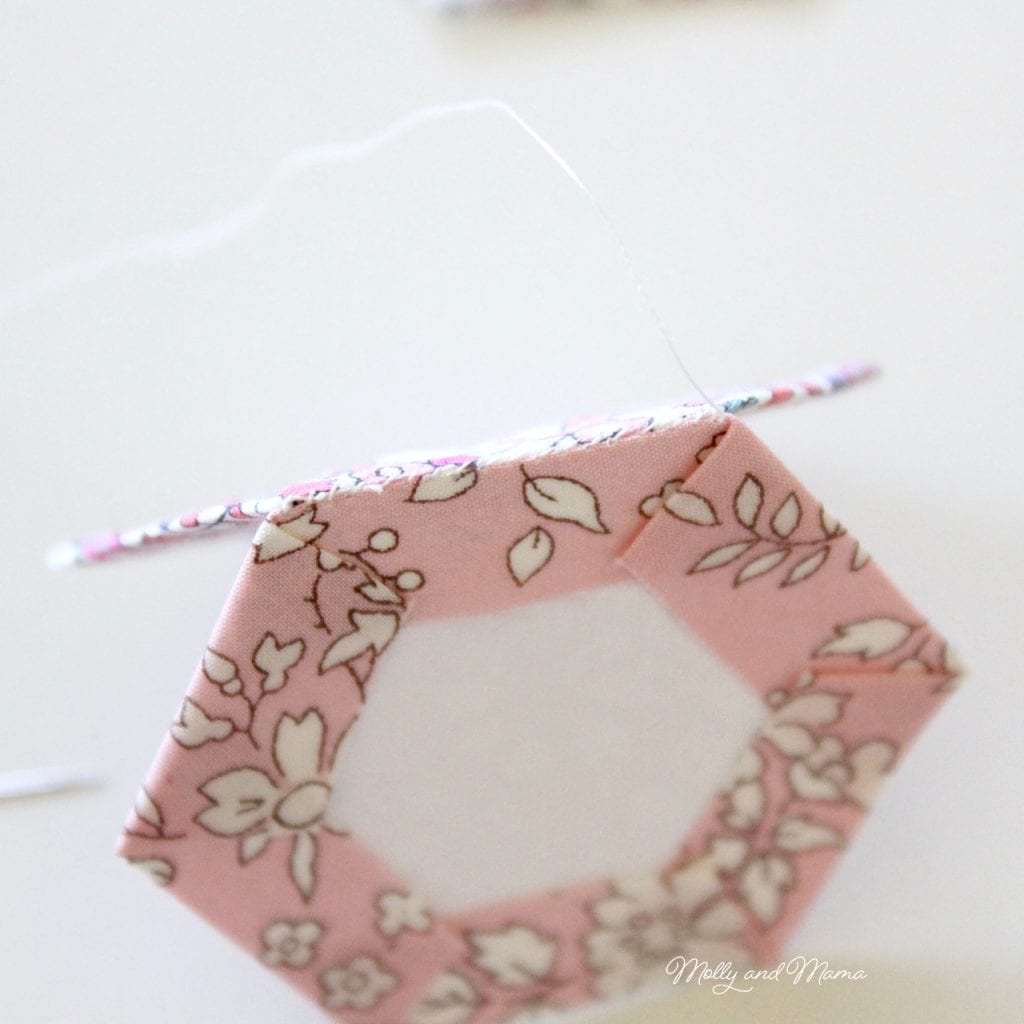
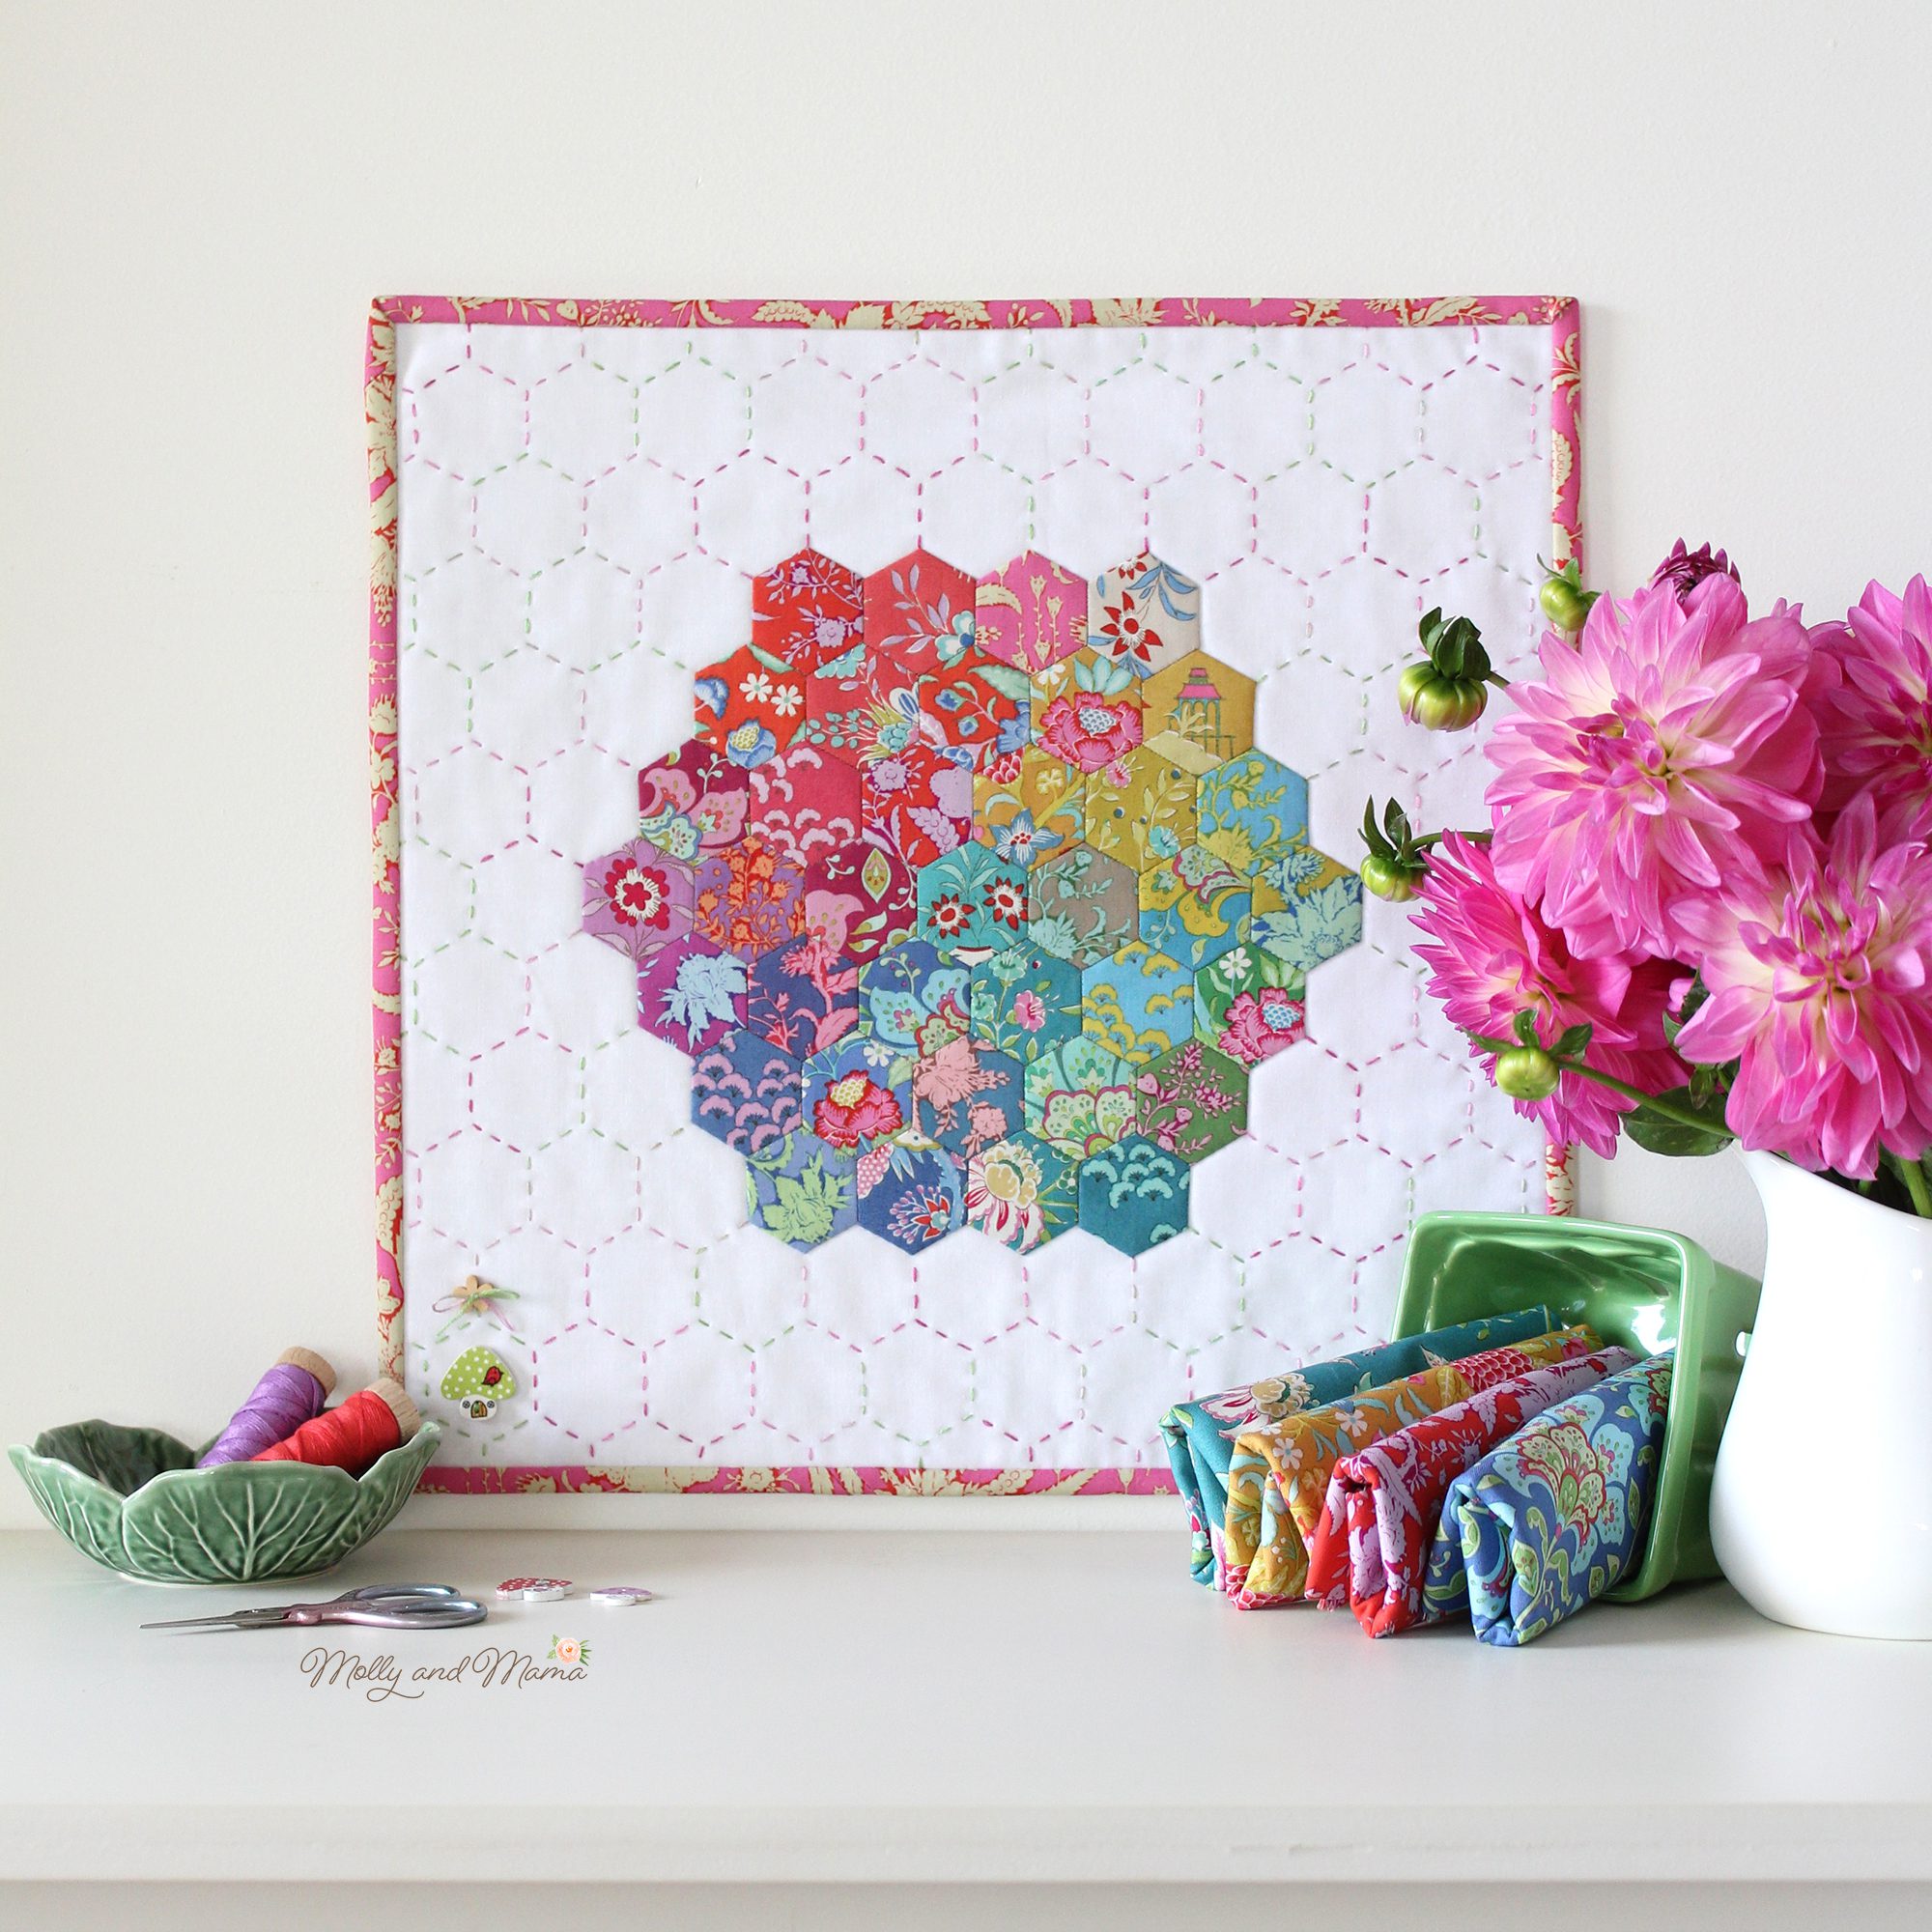
I use whip stitch to sew hexagons together for English paper piecing. You can read more about it in my Hexies Tutorial.
The Hettie Hexie Mini Quilt uses a lot of whip stitching for all those cute hexagons (plus a load of running stitch quilting too)!
Woven Wheel or Woven Rose Stitch
A Woven Wheel is a lovely, simple stitch type that makes a rose flower shape with woven floss. It covers large areas quickly and adds layers of texture to any piece. Tightly woven wheels will create thicker roses. Loosely woven wheels are flatter and softer. You can also alter the look of your rose by changing the number of ‘spokes’ the wheel is made with (you must always use an odd number), or the number of threads you use.
To create a rose, draw a circle (the size of the rose you want) and mark the centre. The outside circle will be used for a guide only. Mark 5 or 7 evenly spaced spokes radiating from the centre of the circle to the outside edge.
To stitch the rose, first stitch each spoke using a single straight stitch. Next, bring the needle up from the back and out near the centre of the circle. Weave the needle under one spoke, then over the next, alternating as you weave the needle around and around the spokes. TIP: Reverse your needle so you are leading with the eye first. This will help stop the tip of your needle catching on the floss already in position.
When the entire circle area is filled (or you run out of floss), push the needle down beside one of the spokes to the back of the fabric and secure it. If you need to add more floss, use the same technique and come up near where you finished off the last length of floss. Continue until your circle is filled.
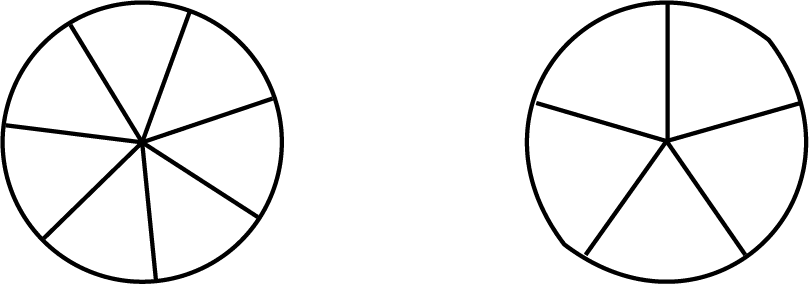
Both of these woven wheels below have been created with variegated floss which gives them more dimension. The centres are made with a single French knot stitched after the rose was completed. The woven wheel on the left is more tightly woven with 7 spokes. For larger wheels, this helps avoid floss that is loosely woven. The wheel on the right is created with 5 spokes.

Is there more?
Once you have acquired the basic stitches, you can really do almost any hand embroidery!
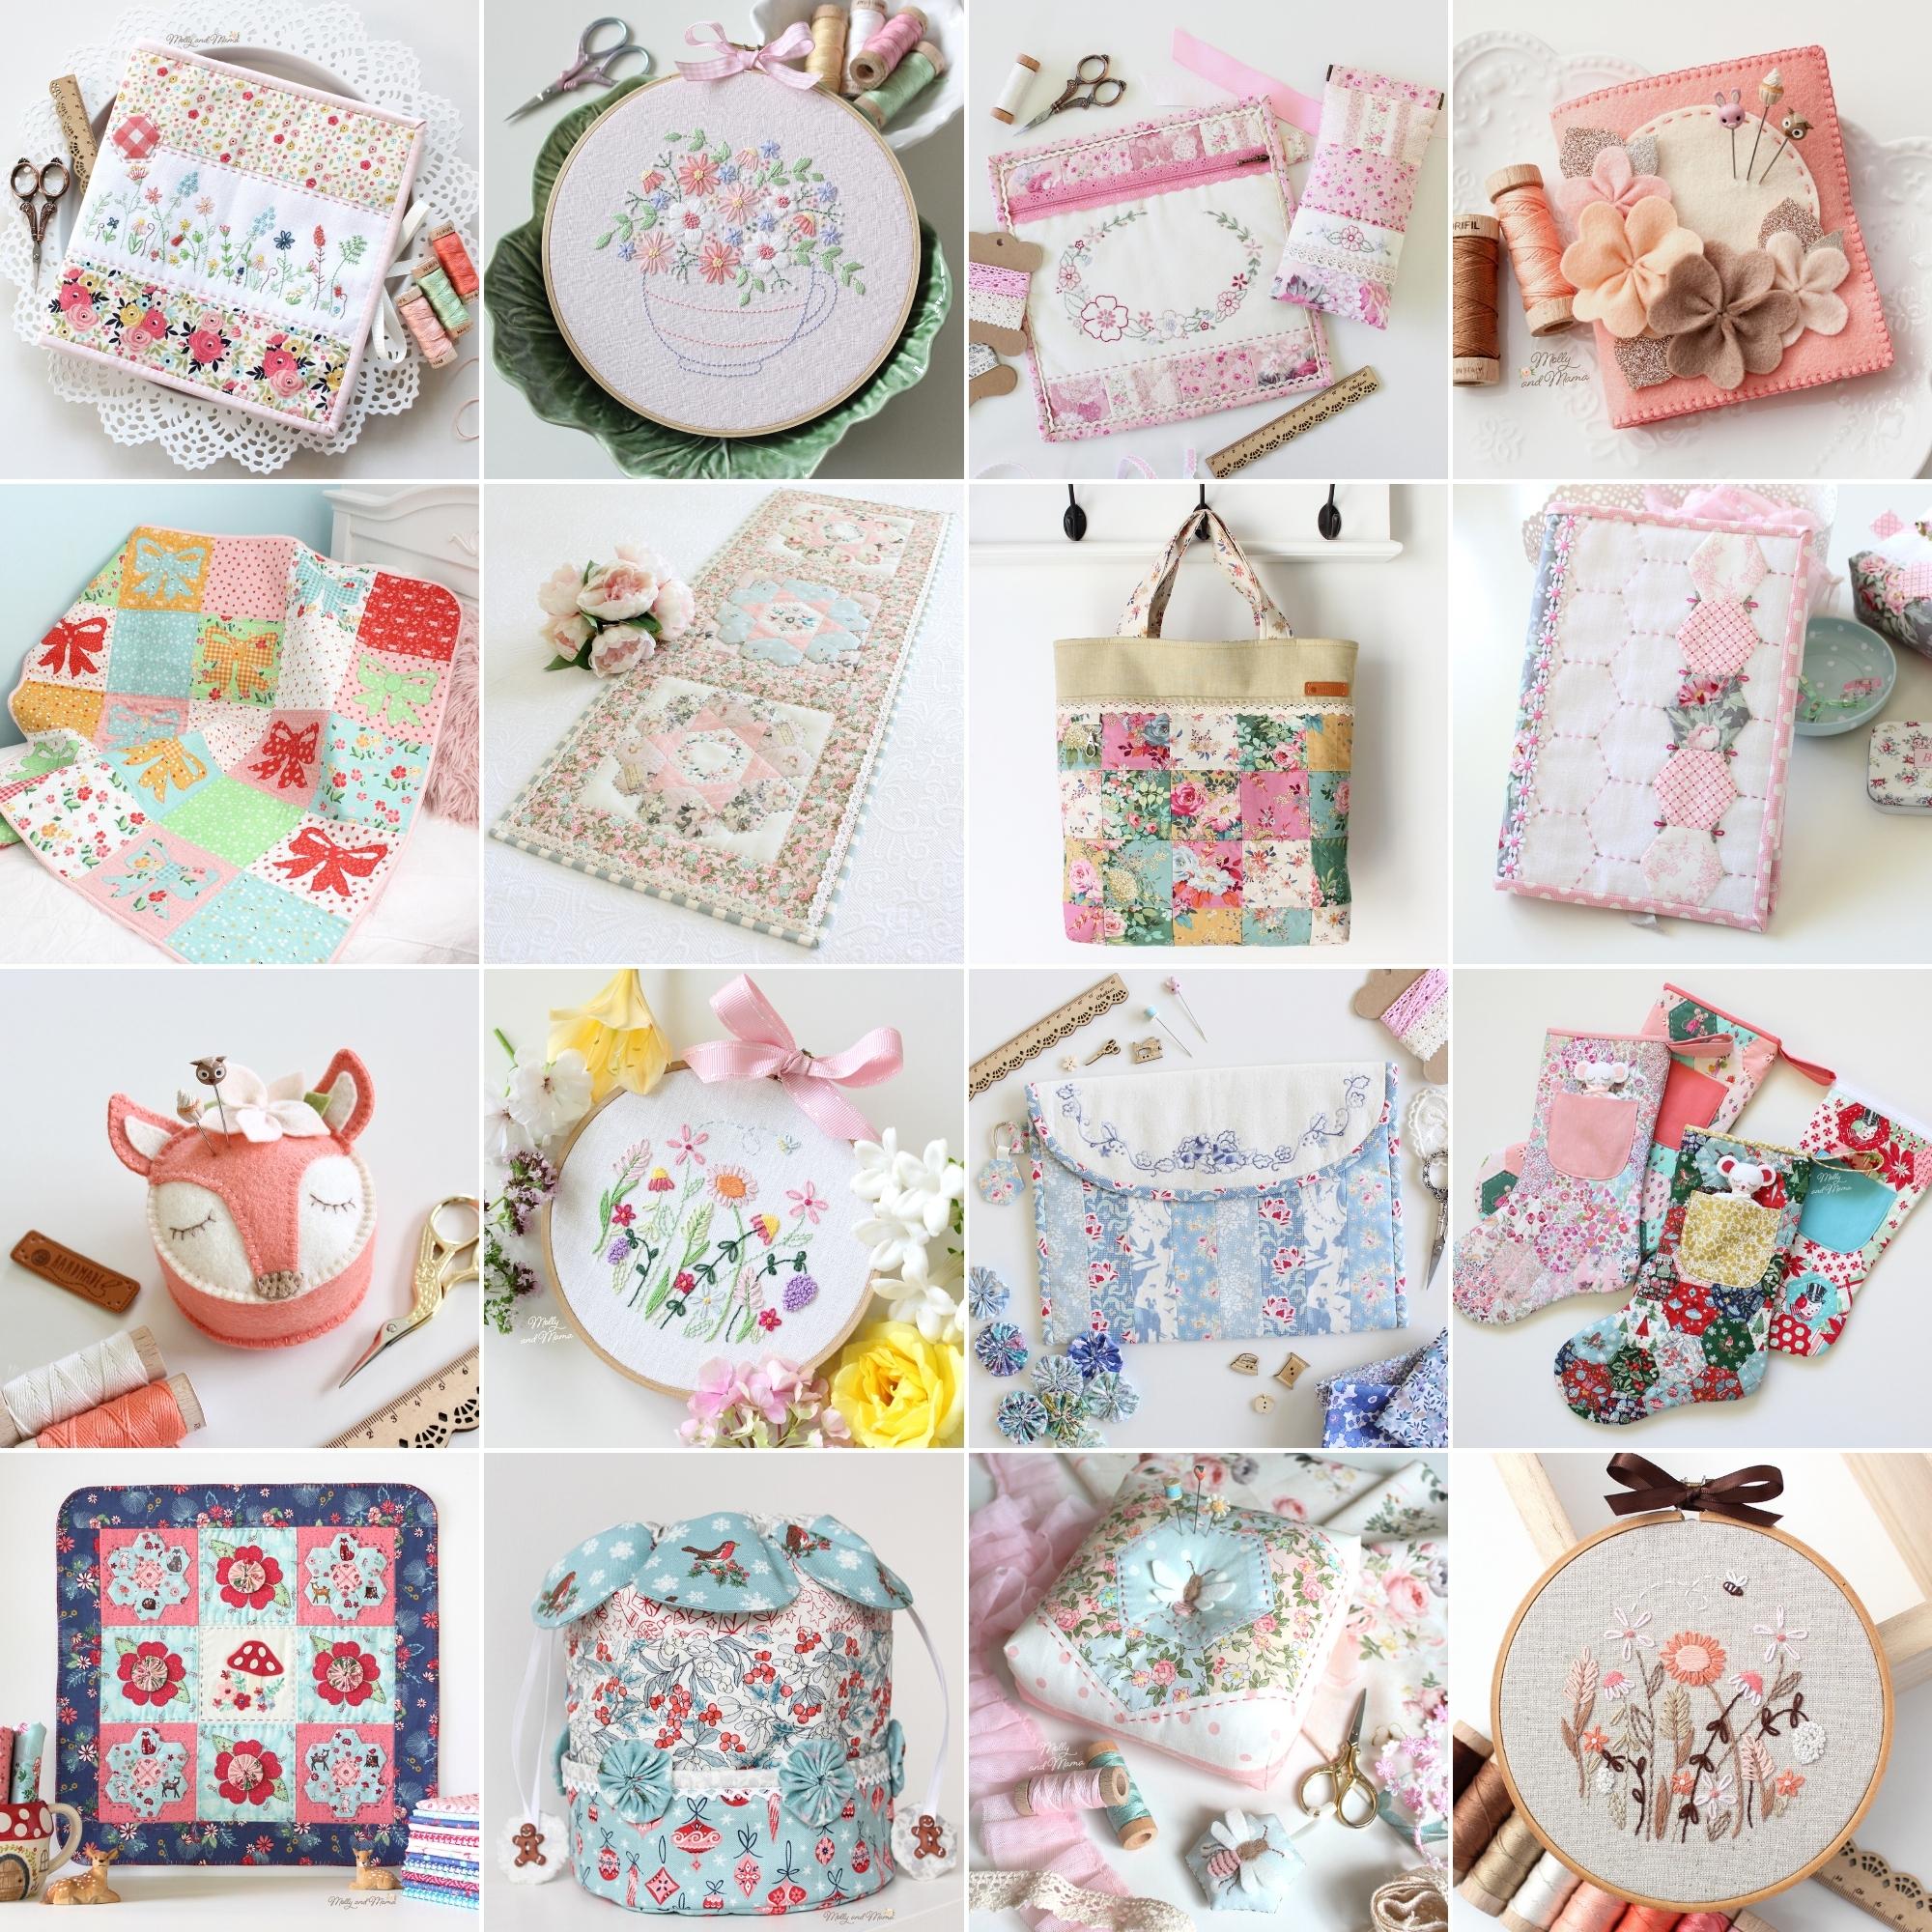
For more inspiration, pop by the store for beginner friendly, easy to follow, instant download sewing patterns!
I hope you’ve found this post helpful. Happy stitching, Lauren.
This was written by Lauren Wright and appeared first on Molly and Mama https://www.MollyandMama.com.au
Thank you so much. I’ve been wondering what size needles and what kind of pens to use. I can’t wait to get you free pattern and get started! So glad I found you!!!
Dianna, I am so pleased you’ve found it useful. Thanks for leaving a comment.
Thank you so much for sharing! I am so excited to to begin!
My pleasure Judith. Enjoy!
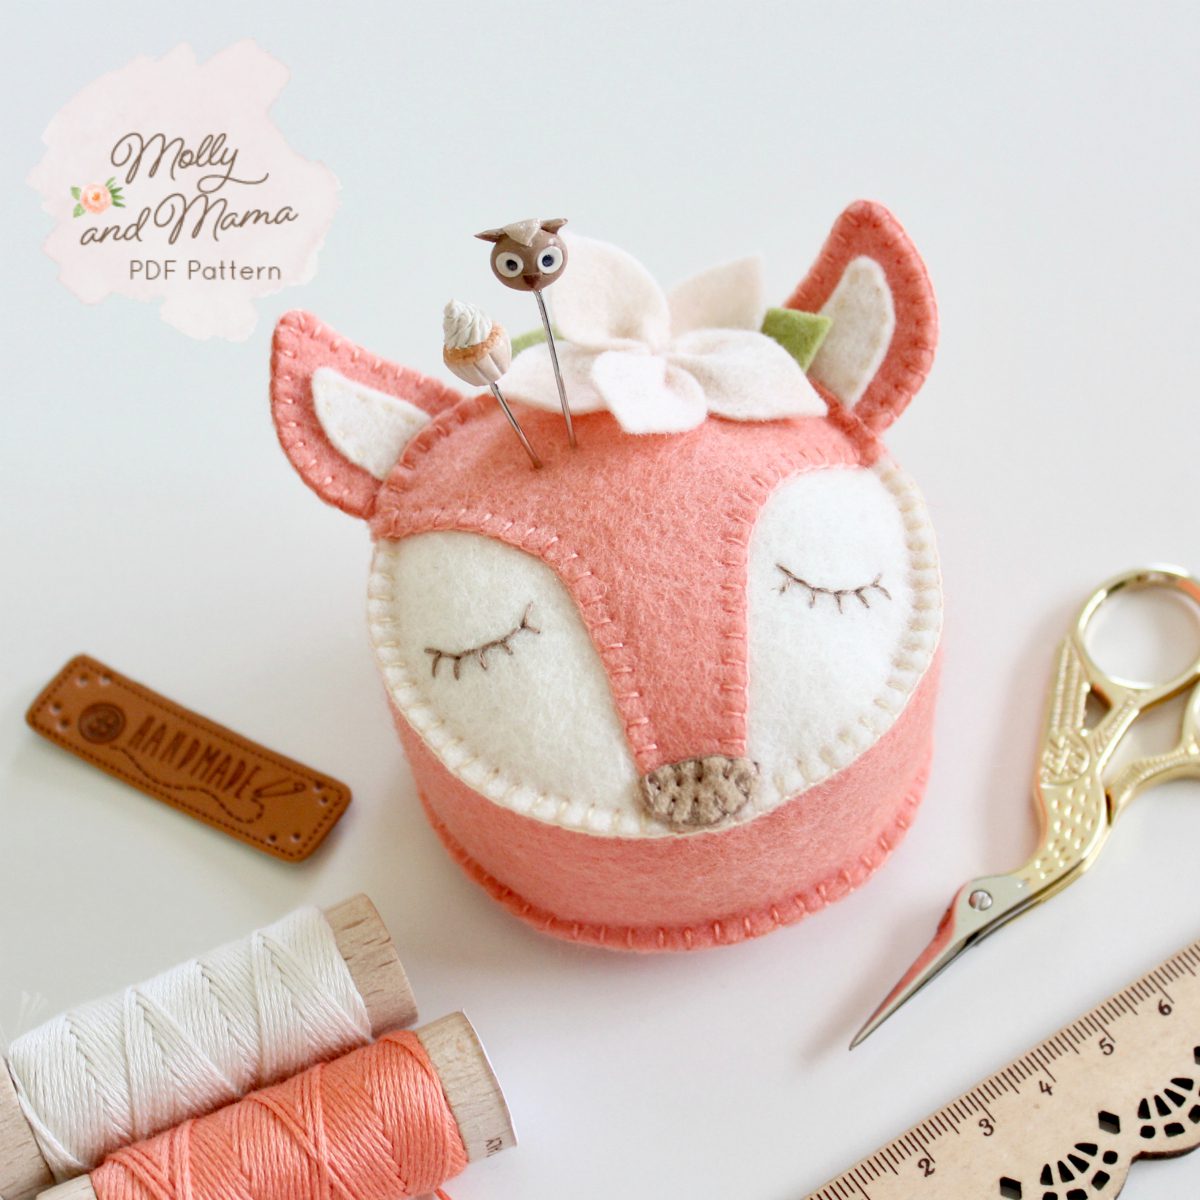
For some reason I can’t follow stitching diagrams. I’m not new to embroidery (been stitching for 3 years). Is there somewhere I can go to see the stitches being executed, from the stitching diagram? I’m planning to make your Fox Pin Cushion.
Thanks
Hi, I don’t have video tutorials for the stitch types available just yet, but my friend Amy has some wonderful You Tube tutorials: https://www.youtube.com/user/amzkallissa. Good luck!