Week 4 – Stocking Sew Along
The last week of the ‘Night Before Christmas Stocking’ Sew Along is finally here! And I think secretly this is my favourite week, because we get to play with felt! Have you been following along?
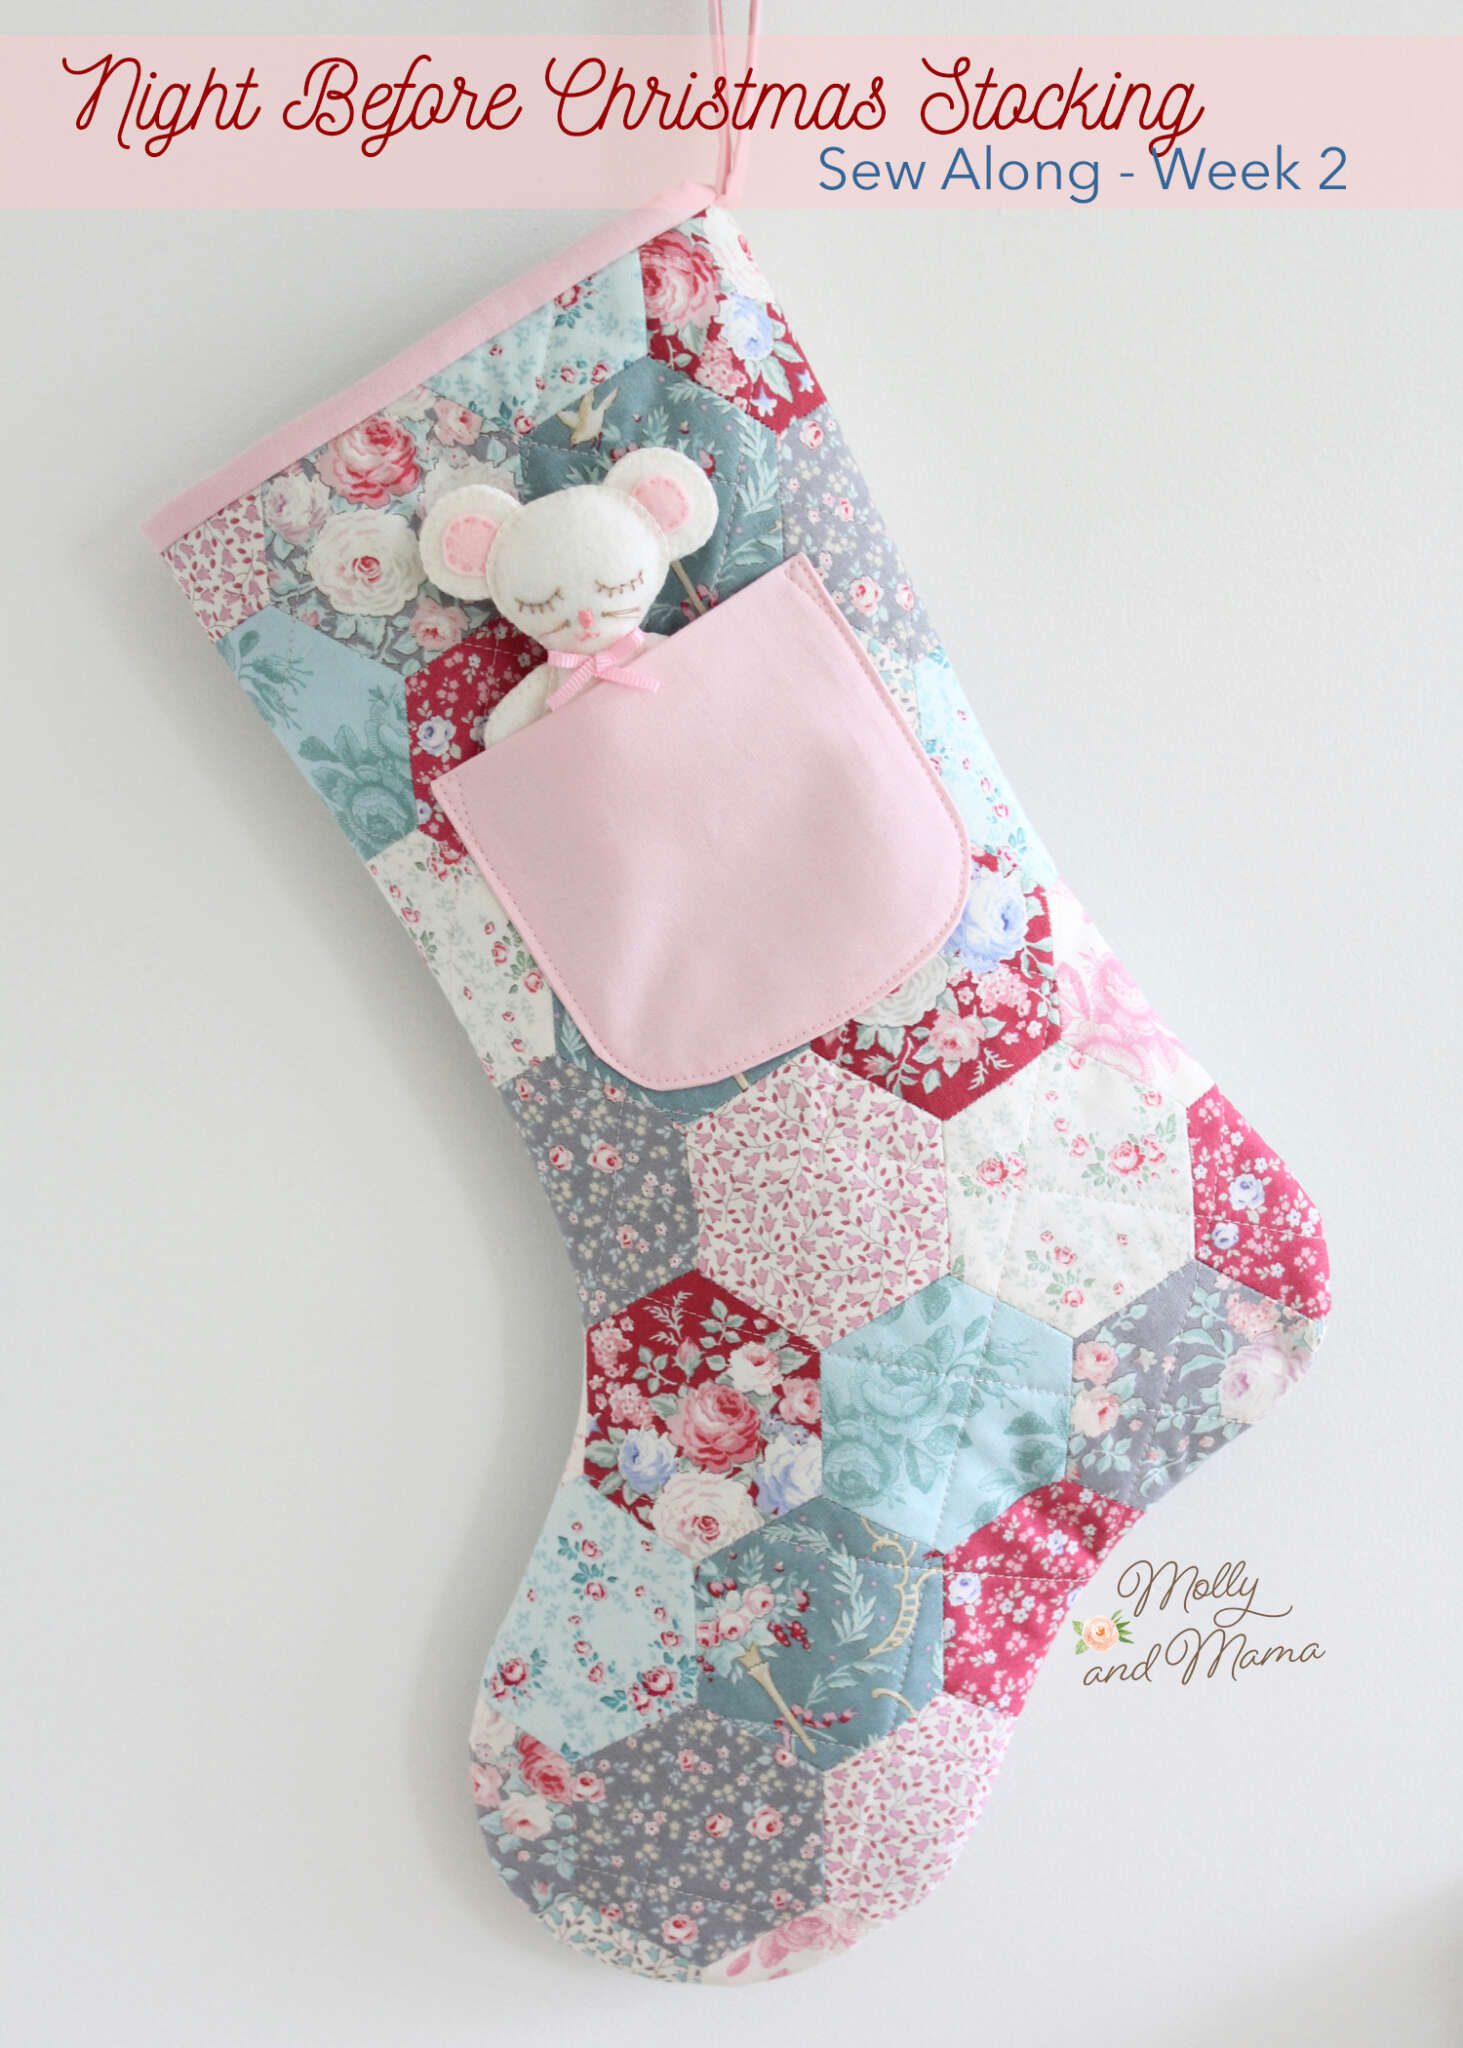
If you’re new to the sew along, head to the main post to find out all the details. Then check out the posts for Week 1, Week 2, and Week 3. We’re making this cute stocking with an English paper pieced front panel, and sewing the mouse in the front pocket too. You’ll just need to buy the pattern.
I’ve been loving all the interaction happening on Instagram. Not only have you been posting your entries under the #NightBeforeChristmasStockingSAL hashtag, but you’ve also been supportive by leaving encouraging words for other makers. That really warms my heart! Seeing the unique way that you are making the stocking your own has also been such an exciting thing for me. It’s why I do what I do!
Week 4
WEEK4 – 9th – 16th December This week is all about felt! We’re making the little felt mouse that goes in the stocking pocket.

This little felt mouse is so sweet to sew. And while it’s small, and possibly a little bit fiddly, there’s lots of tips I can share for felt sewing success! The pattern will give you full details on how to assemble the mouse, but here’s a few extra tips you might like to use.
Please Use Wool Felt
My first tip (and I believe it’s the most important one) is to use 100% merino wool felt for all of your felt sewing. If you’re spending a lot of time hand stitching something sweet, I’d love you to honour your craft and your time by sewing with felt that will last. It won’t bobble or pill. It will keep its shape without warping. It’s so lovely to stitch through and the finish is beautiful! And to make the mouse for this stocking, the required felt from My Felt Lady cost me less than a cappuccino. And I know it will last for years.
Feel free to check out my tips for working with wool felt.
How To Cut Out Accurate Felt Shapes
My second tip is to use freezer paper for cutting out your felt shapes. It’s a paper product that has a plastic coating on the underside. You can trace your template shapes onto the paper side, and then iron the shapes to the felt to give you a guide line for cutting. The templates easily peel away once the cutting is complete.
I’ll be posting a video on Instagram to show you this technique this week. And the best thing about this product is that you can reuse the templates, so I’m making mouse 3 from the templates I used for mouse 1.
If you don’t have freezer paper (which you can buy from quilting stores and big brand sewing stores), there are some other options available. I look at my favourites in this tutorial for transferring templates to felt.

How To Embroider The Mouse’s Face
Once you’ve cut out all of your felt shapes, you’ll need to embroider the mouse’s face onto the felt. I trace the design onto paper to stitch through. I use thin, wax-free, paper lunch wrap. You can also use fine tracing paper or tissue paper. Because you need to sew through it and then tear it away, it needs to be fine and easy to rip apart without damaging your stitching. I’ve written a whole tutorial about this process here. Even though this method is a little more time consuming, I find it gives you the most accurate result.
Some people love to use an adhesive product that dissolves in water after the stitching is complete. However, I don’t like the effect that the water has on the wool felt so prefer not to use this technique. Feel free to use what works best for you!

How To Keep Everything In Position As You Stitch
Before you can assemble the mouse, it’s important to baste stitch any loose parts together. For example, you can use contrasting coloured thread to loosely stitch the ears in place on the mouse. When you’ve sewn the mouse together, you just remove the stitches. Avoid using knots in the thread to make removal easier.

Which Stitch?
I love to use blanket stitch when sewing softies together. However, you can use any stitch type you like. Whip stitch is a great alternative if you’re not as confident as you’d like to be with blanket stitch. Having said that, the best way of learning is by doing. So jump in and you might surprise yourself!
I often get questions about how to blanket stitch when you come to sewing the ears. So you’ve sewn the edges of your felt right up to the start of the basted ear. Now what? You continue to use the same blanket stitch, but you need to actually sew though the ear. This secures the ear in the seam. But it does mean that the ear has the stitch parallel to the felt edge on the front, but there will be none on the back (just perpendicular stitches). I hope that makes sense. You’ll use the same technique for the arms too!

Stuffing
I love using polyester hobby fill for toy making when stuffing my felties. There is a trick to it though, especially when making small toys! I like to stuff gently as I go, so I’m not trying to fill an entire shape by manoeuvring stuffing around tight curves. I use very small amounts rolled loosely into a ball shape (like the size of a pea) and I gently push it inside and position it in place using the end of a chop stick. You can also buy tools specifically designed for toy stuffing that will make this job easier.
I like my felties to be firm but not stuffed so full that the felt is pushed out of shape. Remember that the stuffing will settle over time.

I hope you found these tips useful. If you have any of your own to share, please leave a comment here or over on Instagram. I’d love to hear it!
Week 4 Prize
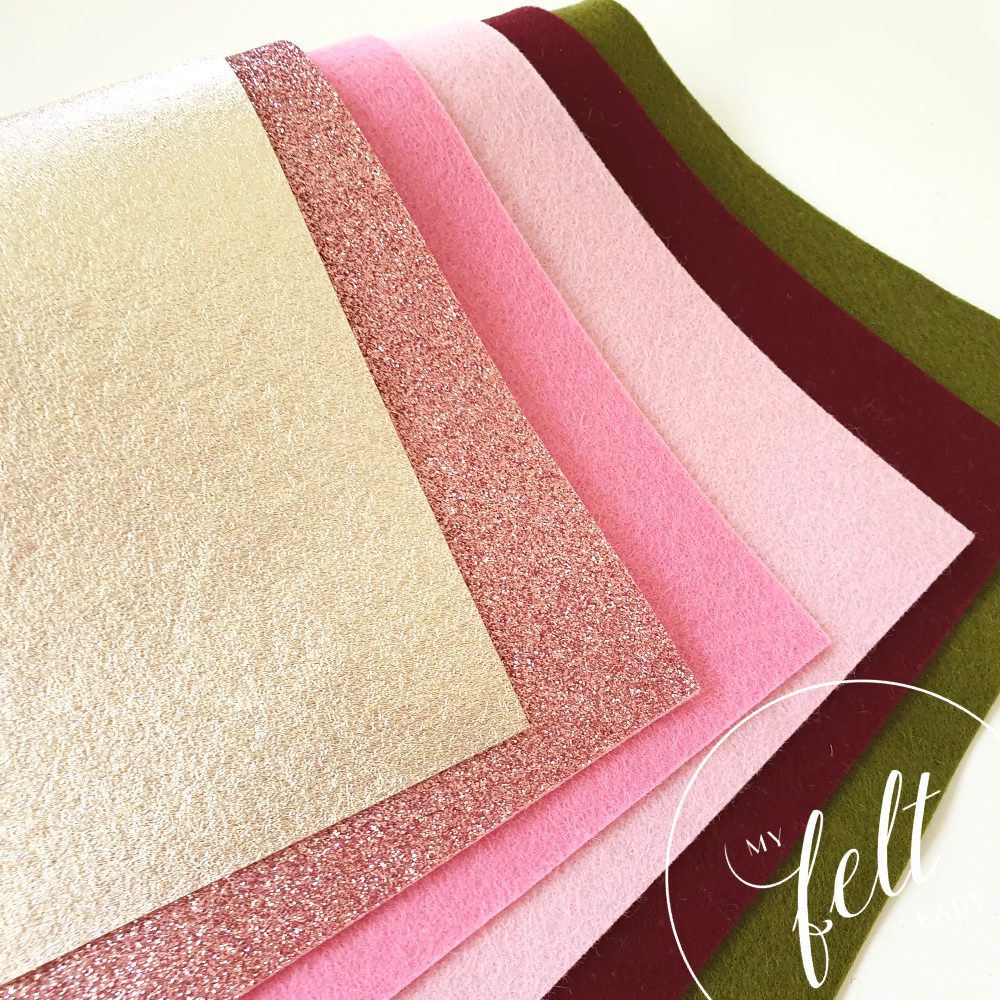
Candice from My Felt Lady has kindly offered a felt pack for our week 4 prize, which includes four sheets of 100% wool felt in Pink Wink, Carnation, Bordeaux and Dark Olive, a sheet of Dusty Rose glitter felt and one of Champagne metallic felt too. Don’t they make a pretty palette?
If you’d like to be eligible to win the Week 4 prize, you’ll need to share a photo of your completed stocking including the felt mouse. Post the photo on your public instagram account and use the hashtag #NightBeforeChristmasStockingSAL so I can find your entry. Please consider following My Felt Lady to show your support. If you’re not on Instagram, never fear. You can email me your progress too. Use the CONTACT form, or send me a message at hello (at) mollyandmama.com.au. I’ll also be keeping you updated on Facebook, but you won’t be able to enter to win the prize there, sorry.
On Monday the 16th December, I will select one weekly winner and notify you by personal message, or email. If you are the selected winner, I’ll need your address to give to My Felt Lady so that you can receive your prize. I may also share your winning photo. By entering via Instagram, you are also giving me permission to share your instagram handle (if applicable) and your first name on the Molly and Mama social media platforms.
The competition is open to all participants over the age of 18 who submit a photographic entry via Instagram or email. This giveaway is in no way sponsored, endorsed or administered by, or associated with, Instagram or Facebook.
I can’t tell you how grateful I am that you are here and joining us in this little sewing adventure. It means so much to me to have your support. And that you are finding moments to sew during the busy time of the year is amazing. Thank you! I really hope you love the stocking that you create.

Stay tuned next week as I’ll announce the week 4 winner, and share some of my favourite stockings! I’ve even been cooking up some prize ideas for a grand prize. It’s my way of saying thanks for joining us.
EDITED TO ADD: Congratulations to Bea from @onedaisyaday on Instagram. She’s the week 4 winner of the felt pack from My Felt Lady.
Happy stitching, Lauren x
2 Comments