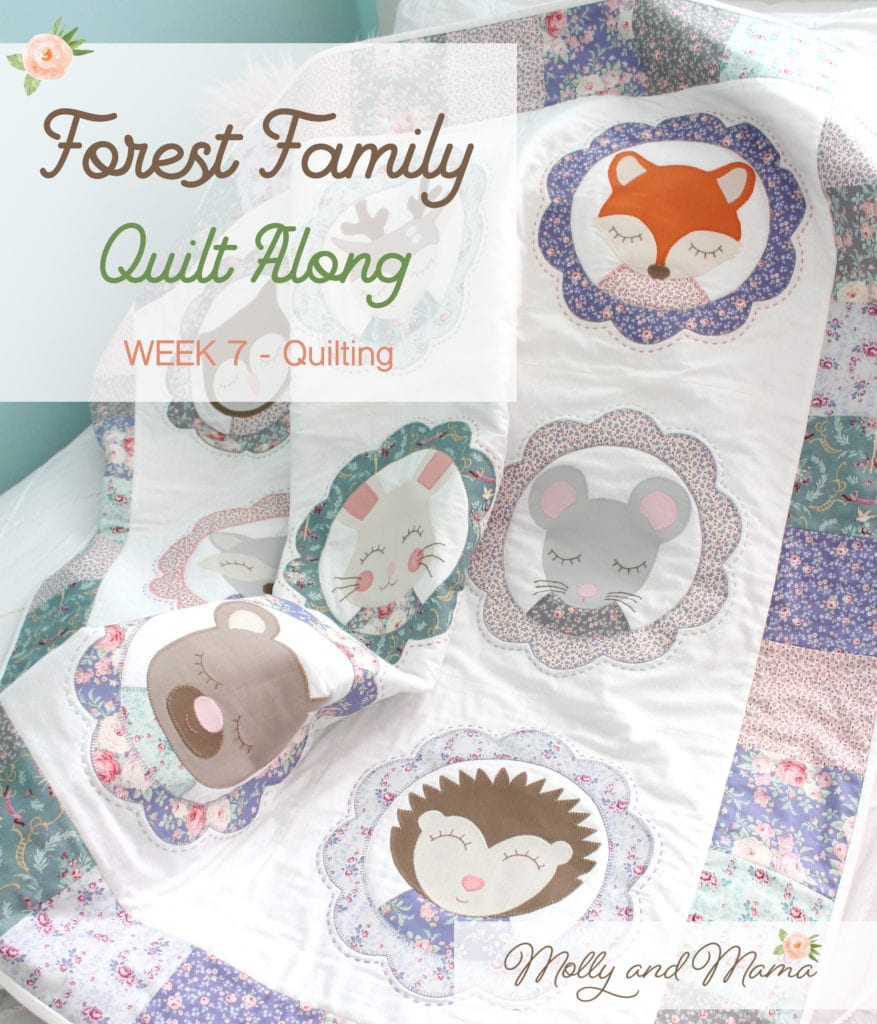
Week 7 – Forest Family Quilt Along
Welcome!
It’s Week 7 of the Forest Family Quilt Along! If you’re new here, head to the Quilt Along Welcome post to find all of the content for the previous weeks. You can purchase the PDF pattern and find links to paper pattern stockists too.
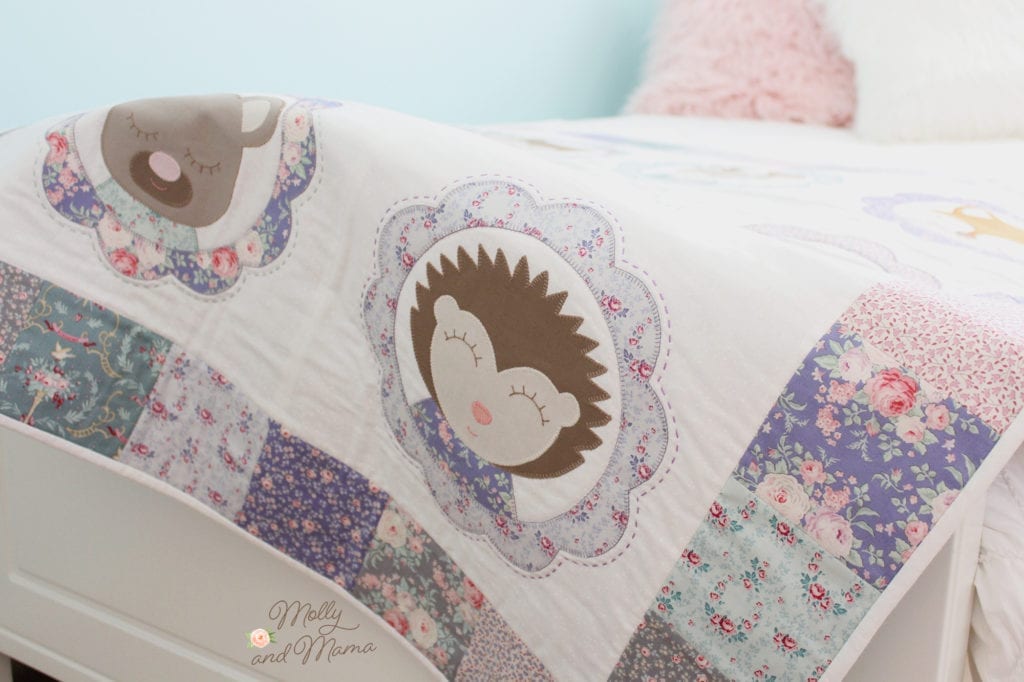
This week we’re assembling the quilt sandwich and quilting our project. I’m so excited to see everyone’s versions. Here’s a preview of mine, quilted by the lovely Fiona at Bubz Rugz.
The Quilt Sandwich
If you’re new to quilting, you might be wondering what I mean by a quilt sandwich! This is just the layering of the quilt top, wadding (or batting) and quilt back. The method you use to combine the three layers is called basting. The process of securing the layers together with decorative stitching is known as quilting.
The size of your quilt backing and wadding will be determined by the type of quilting that you’re going to use. For machine quilting, it’s customary to add about 4 inches or 10cm to each side of the quilt top (especially if the project is going to be free-motion quilted or long-arm quilted). So for our Forest Family Quilt, the completed top is a 44″ square, so we would require a minimum of 52″ for the backing and the wadding.
TIP: WHITE wadding will give a brighter finish behind the white quilt background. Creamy coloured cotton batting can show through, so create a small test square from left overs if you are concerned.
If you’re quilting the project yourself, you’ll know how much extra fabric you prefer to work with. But I included extra in the requirements so you’d have enough for whichever method you choose.
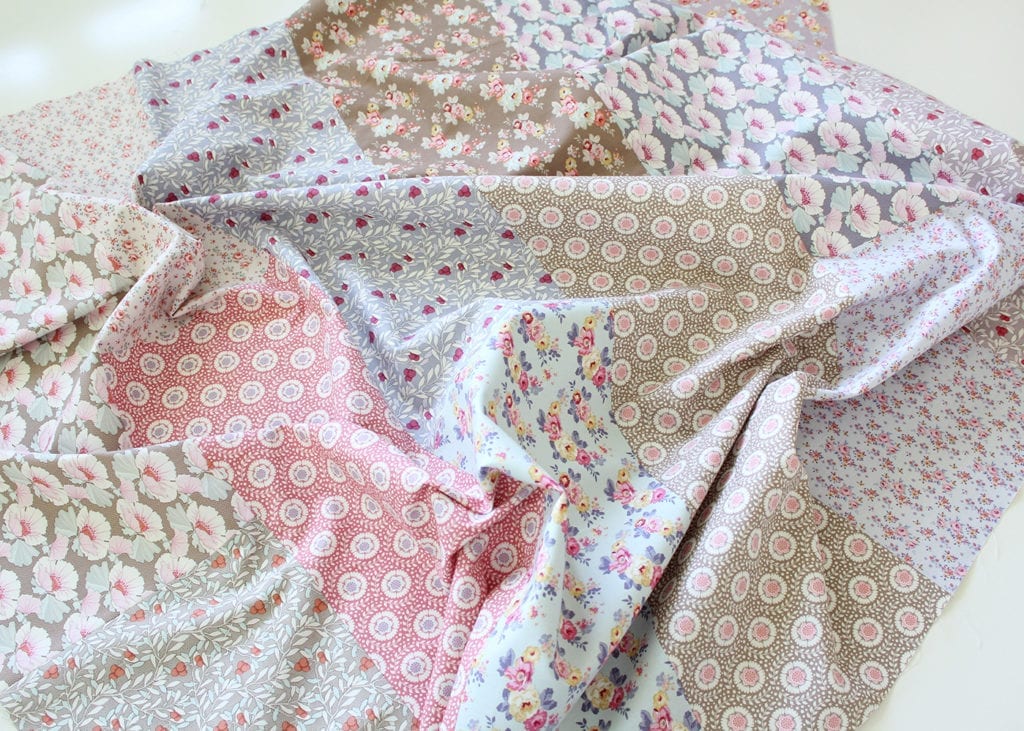
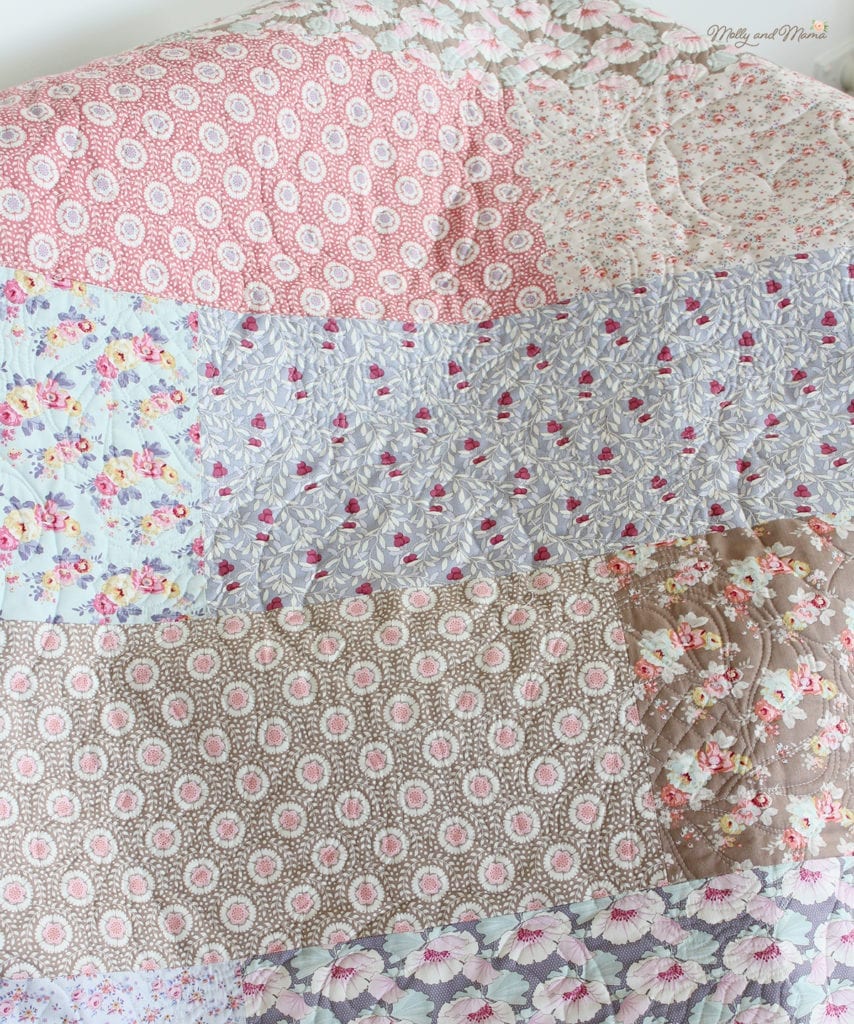
I created a pieced backing for my version, using remaining fabrics from the same Tilda Maple Farm collection.
Basting
To baste the three layers of the quilt sandwich together, you can glue baste, pin, or stitch baste. It all comes down to personal preference (and the size of the quilt). I do love to use 505 Temporary Adhesive for smaller quilts and I used this method for my Tilda Old Rose version.
Be sure to follow the instructions in the pattern to assemble your quilt sandwich. Please ensure your fabrics are pressed well and that your hands and work surfaces are super clean.
TIP: Take some time to remove any stray threads from the back of the quilt top. They’re much more likely to show through with a white quilt background!
Once you’ve basted your quilt layers together, we can get stitching!
Quilting
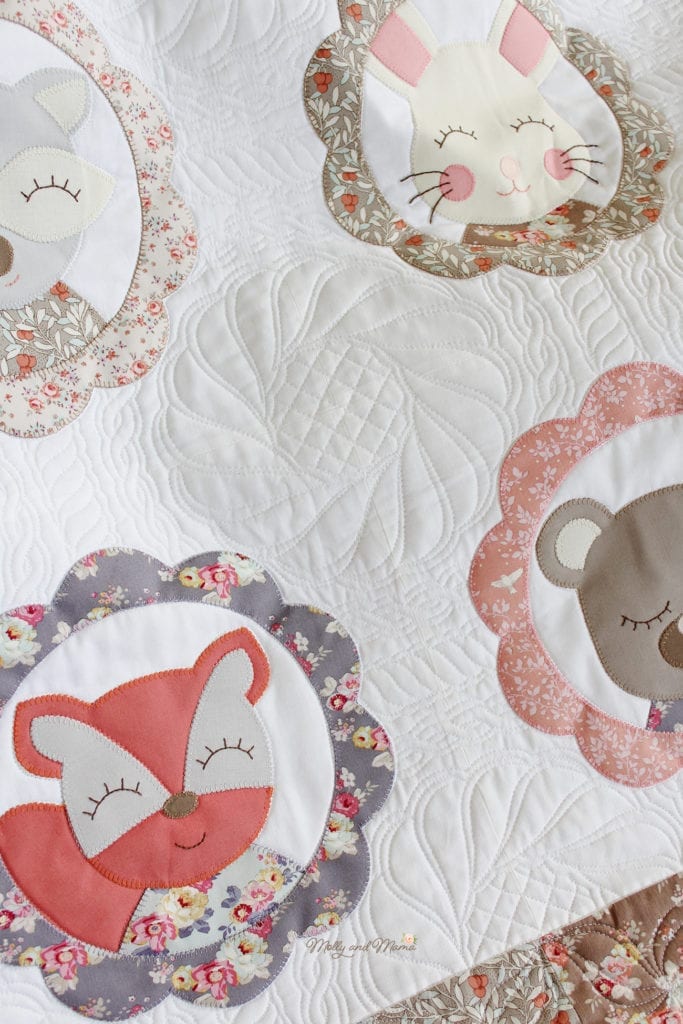
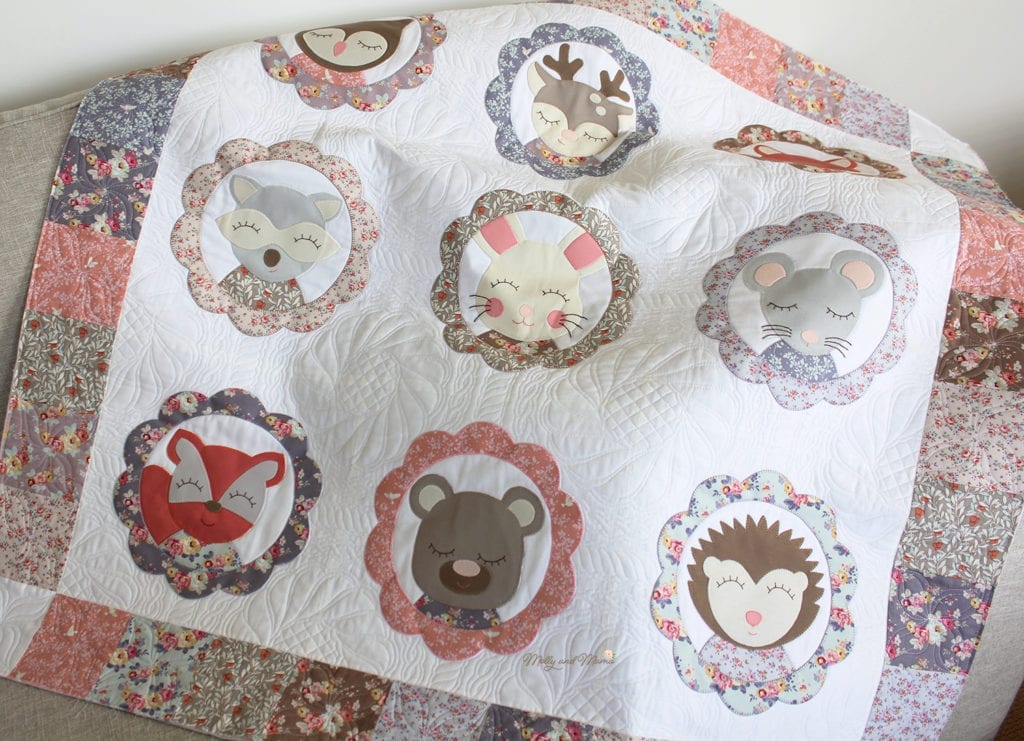
There are many different methods and designs that you could select for your quilting. For the original version, I kept it simple and stitched in the ditch (the channel of the existing seam lines) between the blocks and borders. I also stitched around the circle inside the scalloped borders. I didn’t want the stitching to be noticeable so used a white thread (and a neutral one for the bobbin). Then I added some hand quilted details using embroidery floss around the scallops.
For the Tilda Maple Farm version that I have sewn for this quilt along, I had the quilt professionally free-motion quilted. I chose this custom method instead of long arm quilting as I had specific areas in the quilt that I wanted highlighted and accentuated (instead of it being quilted all over with the same repeating pantograph or pattern). And I needed someone far more experienced to help me, but you might already have these skills yourself!
In consultation with Fiona from Bubz Rugz, we decided to heavily quilt the white background. Fiona chose a medallion style motif that she placed between the blocks, and then added a repeating twisted rope border. It looks amazing. How talented is she?

Then she highlighted each of the border squares using an irregular orange peel design. So clever!

I really love how it turned out, so it was definitely worth the investment for this quilt. Having said that, I really love the original version too!
Here’s a view of the back. Look at all those lovely colours and curves!
TIP: Take a photo of your quilt top and print it out. Play around with quilting ideas by drawing patterns and templates on the photo. It will help you decide on the finished effect you would like to achieve.
Don’t forget you can stitch with white, clear or neutral threads, or get bold and work with bright colours! The options are endless!
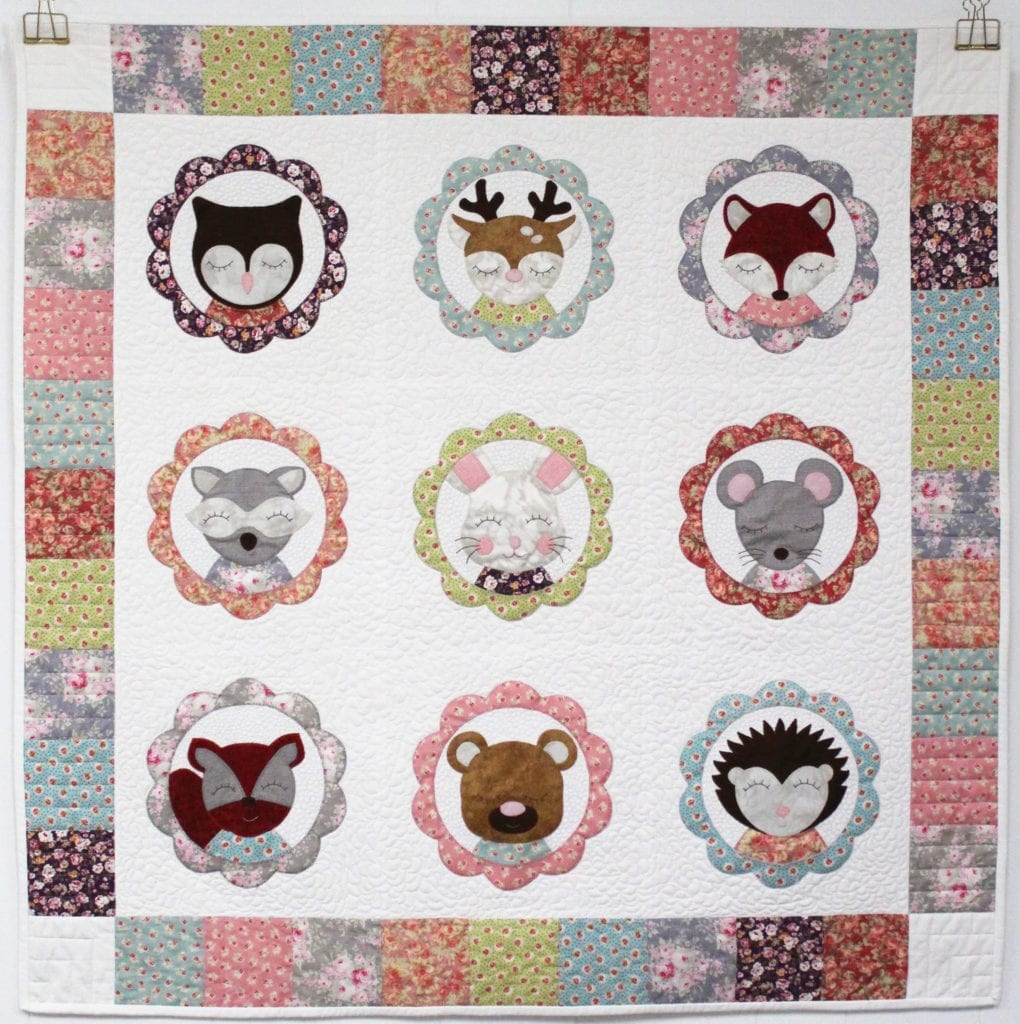
This version from Deborah Boxall is heavily quilted with flourishes and curves and it looks really effective. The higher loft batting really makes the quilting pop!
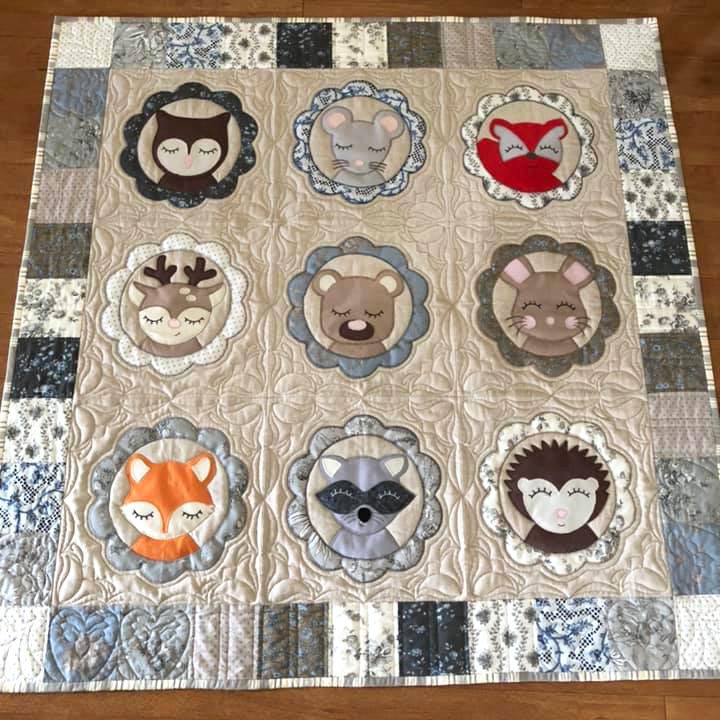
Just Country Crafts used a more dense patterning effect on the white background with tiny pebbling behind the animal faces, and simple, piano key quilting on the border. Both are so different but both look amazing!
There’s so many quilting options, so how do you decide? How will you quilt yours? Please share your progress via email or tag me on Instagram, using the #ForestFamilyQAL hashtag. It’s so wonderful seeing everyone’s quilts come together.
Next week we’re stitching the binding down and then we’re done, so there’s only two weeks to go. I have enjoyed this process so much as it has really helped me to stay on track and get a new quilt completed. I hope you’ve been enjoying it too!
Happy stitching this week, Lauren x