Week 3 – Forest Family Quilt Along
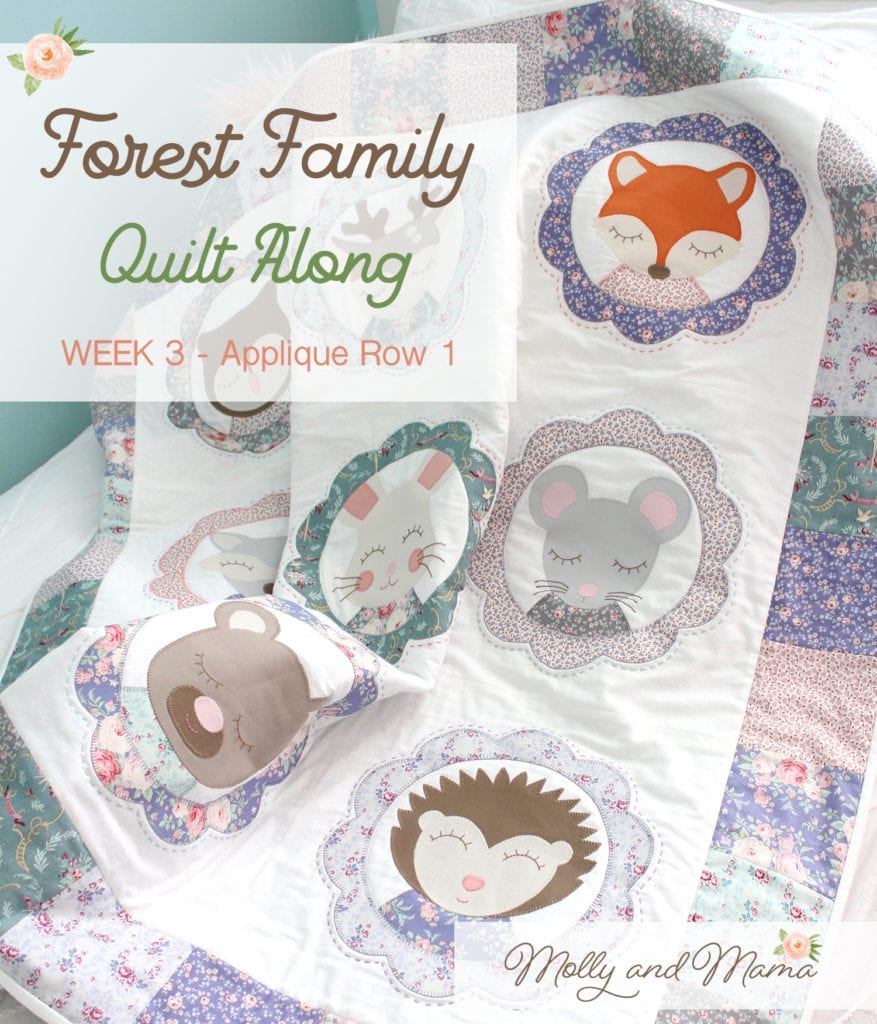
It’s Week 3 of the Forest Family Quilt Along, and we’re starting to appliqué our cute animal face blocks this week. This post will outline all the steps for our third week and provide some helpful tips too.
In case you have missed the previous week’s content, head to the Quilt Along Welcome post. You can sign up for the emails there, purchase the PDF pattern, find links to paper pattern stockists. It has links to earlier posts too.
Cut Out The Blocks
The first step for this week is to make sure your white fabric squares are cut out for each block. You can cut 3 squares from the width of fabric (provided your white or background fabric for your blocks is at least standard width). This will save on wasting fabric. Set aside all but three of your blocks.
Gather Your Threads
This is also a great time to make sure you have thread colours that match your fabrics for the appliqué. There’s no need for them to be the exact colours though. If you want your shapes to stand out, use a thread shade that is darker. Lighter thread colours will showcase the fabric, instead of the fabric edge (so it just depends where you want the emphasis to be).
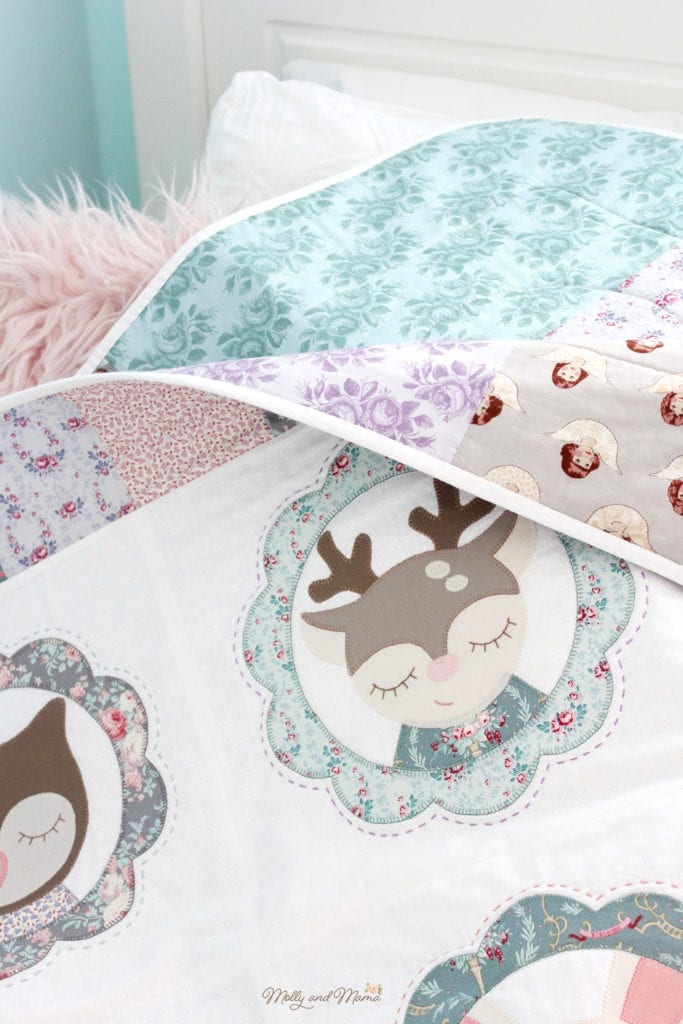
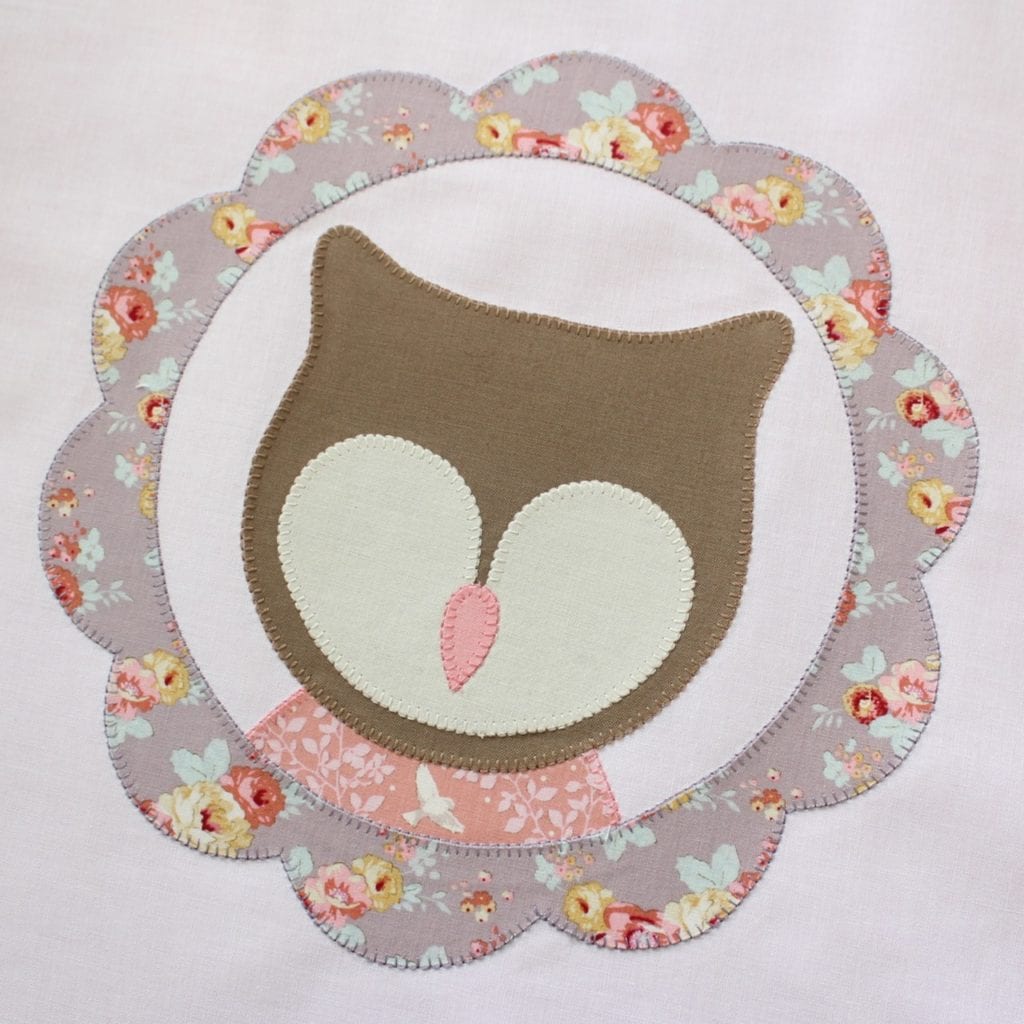
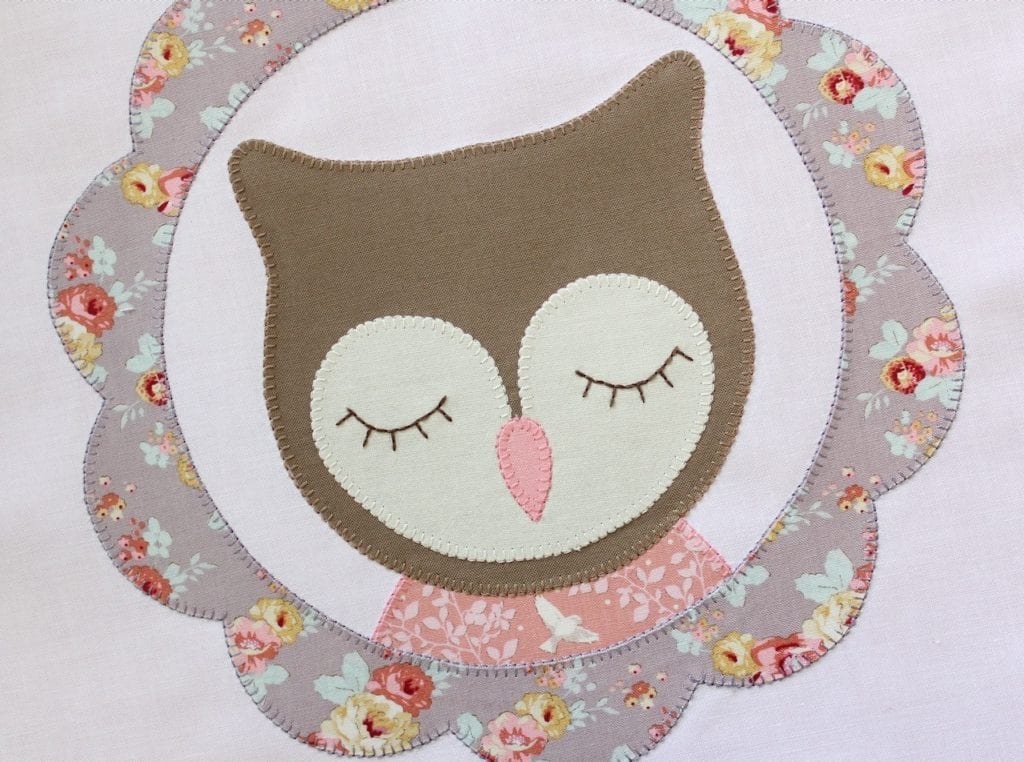
Appliqué The Owl, Deer and Fox
This week we’ll appliqué and sew just the first three animals that make up the top row of the quilt; the owl, the deer and the fox. The next two weeks will see us working on rows two and three, so the instructions and the content will be the same as this week.
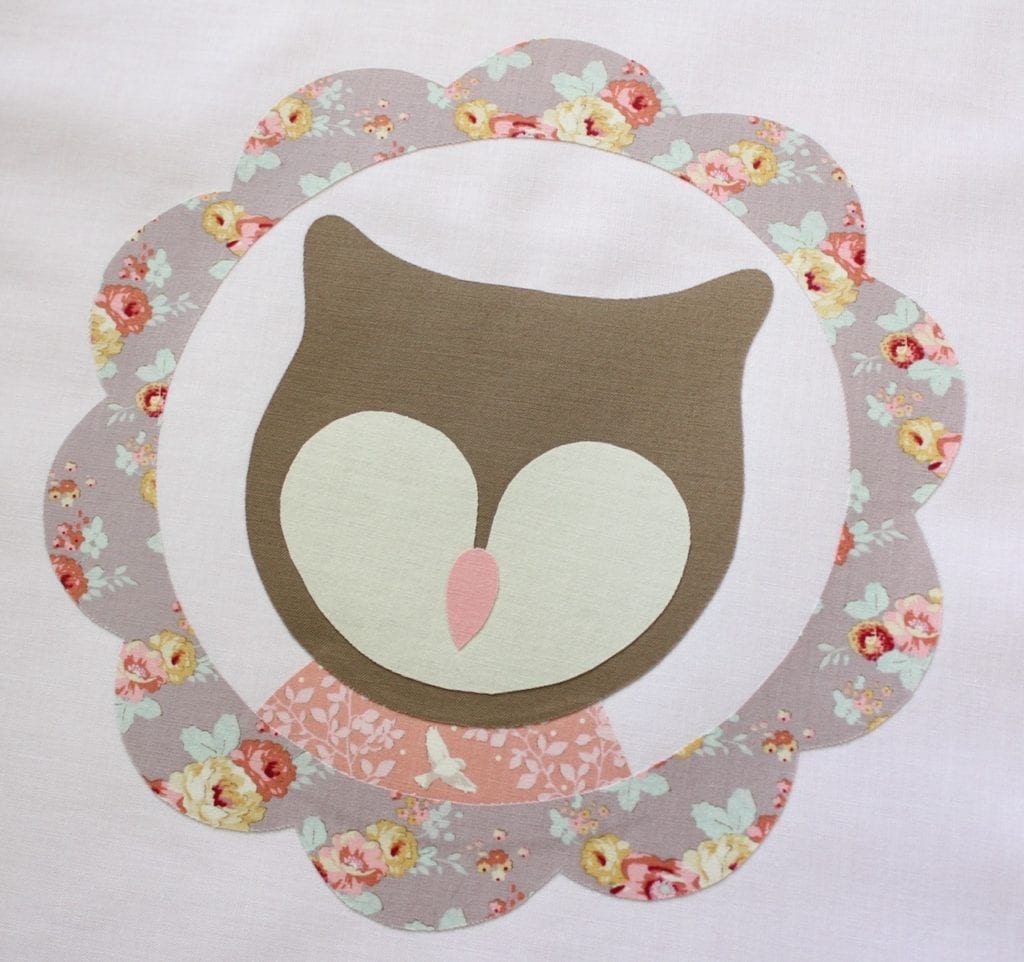
I started with the owl block as it has less shapes to place and is an easy one to warm up on.
If you’re arranging your animals in a different order to mine it won’t matter. You can work on whichever animals you prefer.
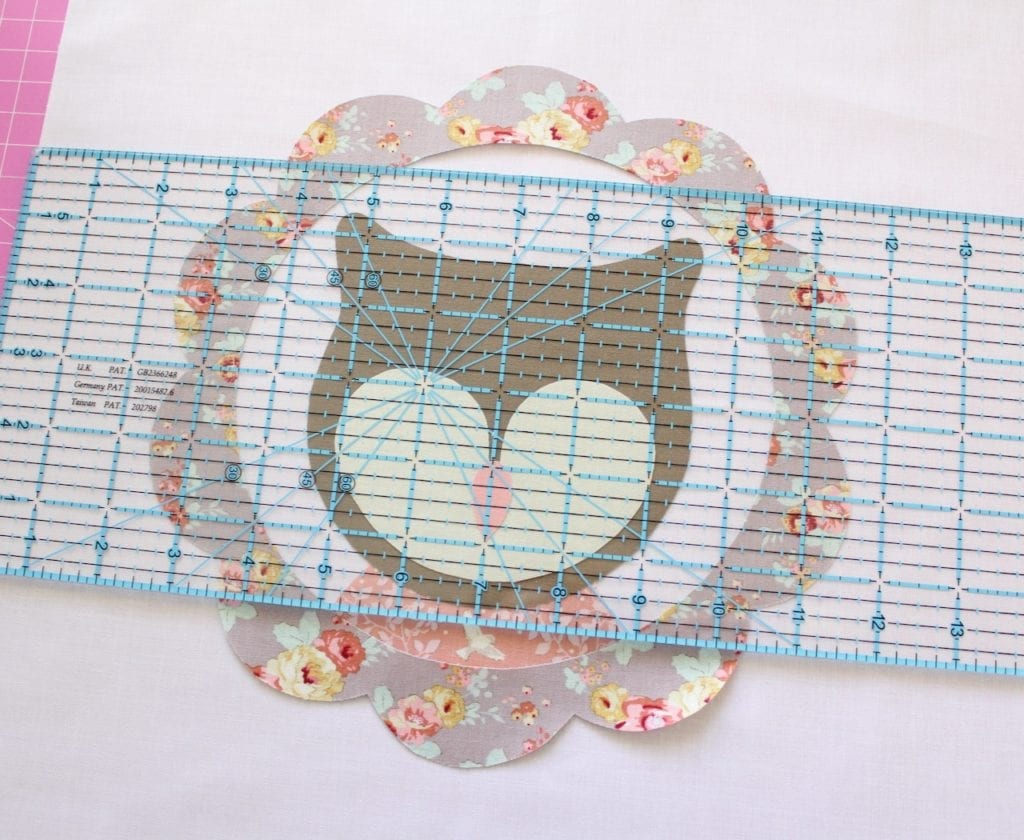
Follow the instructions in the pattern for positioning the appliqué shapes on the block (white fabric square). Use the Shape Placement Guide that appears beside the appliqué shape templates for each animal, so you can see how to position the pieces. There’s photos in the pattern that will also help.
You can see here that I’ve used my acrylic ruler to help make sure all of my shapes are straight and evenly spaced (sort of). Keep in mind that you don’t want everything to be perfectly even, because a little bit of variation and even wonkiness adds to the character of the quilt and gives it interest. If everything is too uniform it can look sterile, so consider this your excuse to not focus too hard on how the pieces are arranged.
TIP: When working on each block, it’s great if they do not need to be moved when you’re ready to iron. So if your ironing board cannot accomodate the fabric block size, then use a wool pressing mat (or something similar) under your block fabric and you won’t need to move it to press it in place!
There are just a couple of things you should be aware of when arranging your shapes;
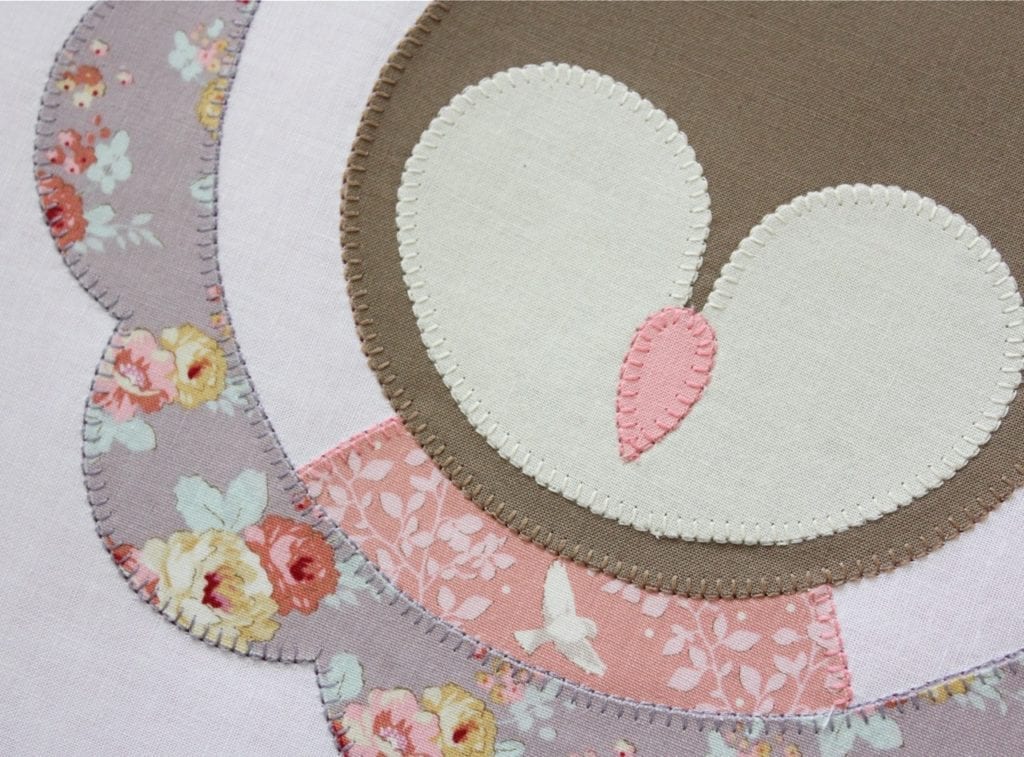
- Be sure that the torso always sits under the scalloped border and the face shape. And also ensure that there is enough fabric overlapping the torso top and bottom so that the raw edges don’t show.
- Make sure there’s some space between the rest of the animal face and the border (especially around the ears). A 1/4″ spacing is ideal. This just gives you a bit of breathing space when stitching on the machine.
Once all of your shapes are positioned for each block, secure them in place with the iron. Follow the instructions that come with your appliqué heat bonding web. I used Heat’n’Bond Lite, so I pressed the shapes in place for a couple of seconds, with my dry (no steam) iron set to medium heat. Be sure to press down with the iron only. Don’t slide it along the fabric, as your unsecured shapes might move with the iron. For further tips, you might find my BEGINNER’S APPLIQUÉ TUTORIAL or THIS VIDEO helpful.
Blanket Stitch The Raw Edges
Now that the three blocks are prepared, let’s appliqué the raw edges of the fabric. Follow the instructions in the pattern to Stitch The Appliqué Blocks. I’ll be using blanket stitch. My bobbin is white as this will save me from having to change it every time I work with a new colour.
If you have an appliqué foot for your machine, or a clear acrylic open toed foot, now is the time to use it!
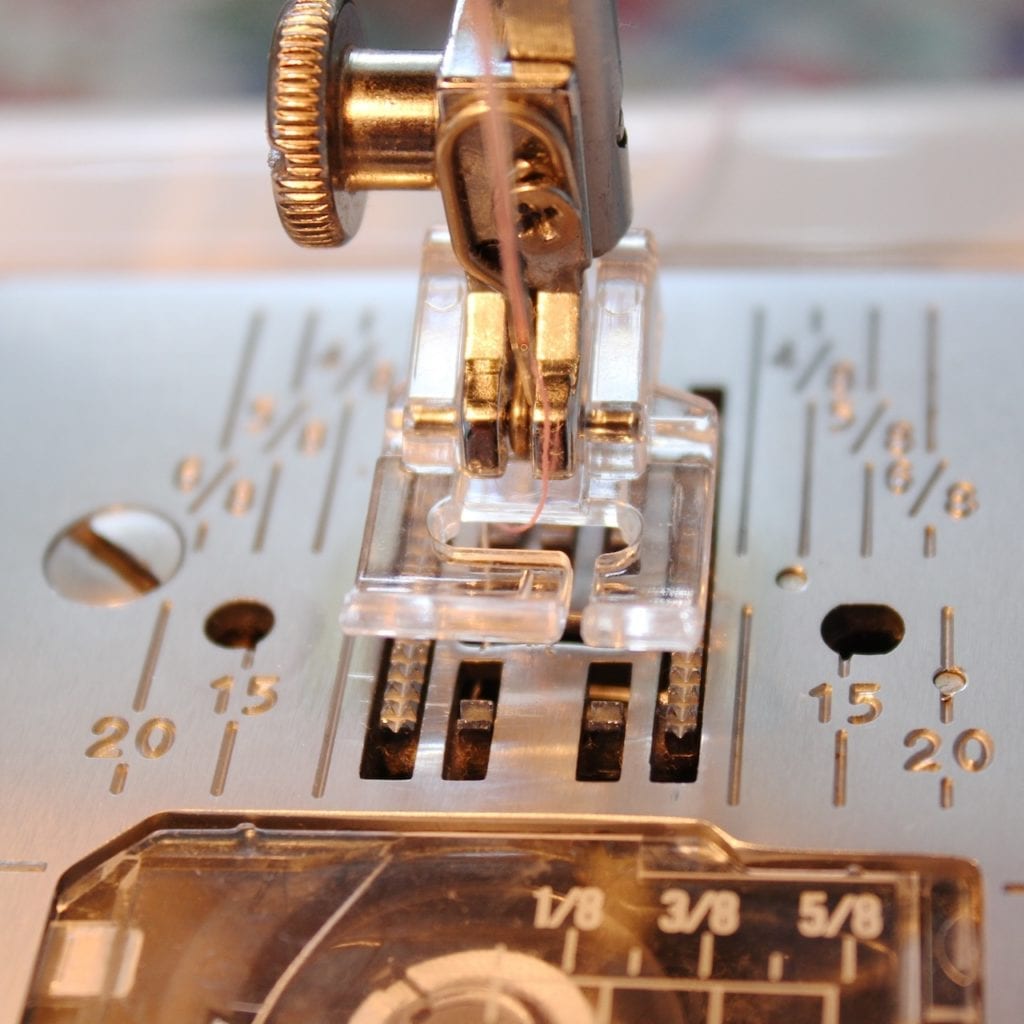
Use some fabric scraps to decide on the ideal blanket stitch length and width on the machine. Once you’re happy with the appearance of the stitch, you’re ready to go. Remember that smaller, tightly spaced stitches will take longer to sew, but will allow for more accuracy as you tackle curves and corners. I try and keep my machine on the same setting for all of the appliqué. I like a blanket stitch width of about 5 and a length of 3. But you might like to adjust your stitch or even use decorative stitches to give your animal a unique and fun look!
For the owl, I stitched the torso first (and the beak because I used the same colour), then the head, face and scalloped border, changing thread colours as I went. On all the blocks, I will always stitch the scalloped border last.
If you haven’t tried blanket stitch on the machine before and you’re interested to see my method, visit this video on BLANKET STITCH that I posted on Instagram for you. Curves and corners require a lot of fabric pivoting and moving the foot up and down. THIS VIDEO on instagram shows how I tackle the corner of the owl’s head. I hope you find the videos useful and reassuring that you can achieve great results, even using the most basic sewing machine.
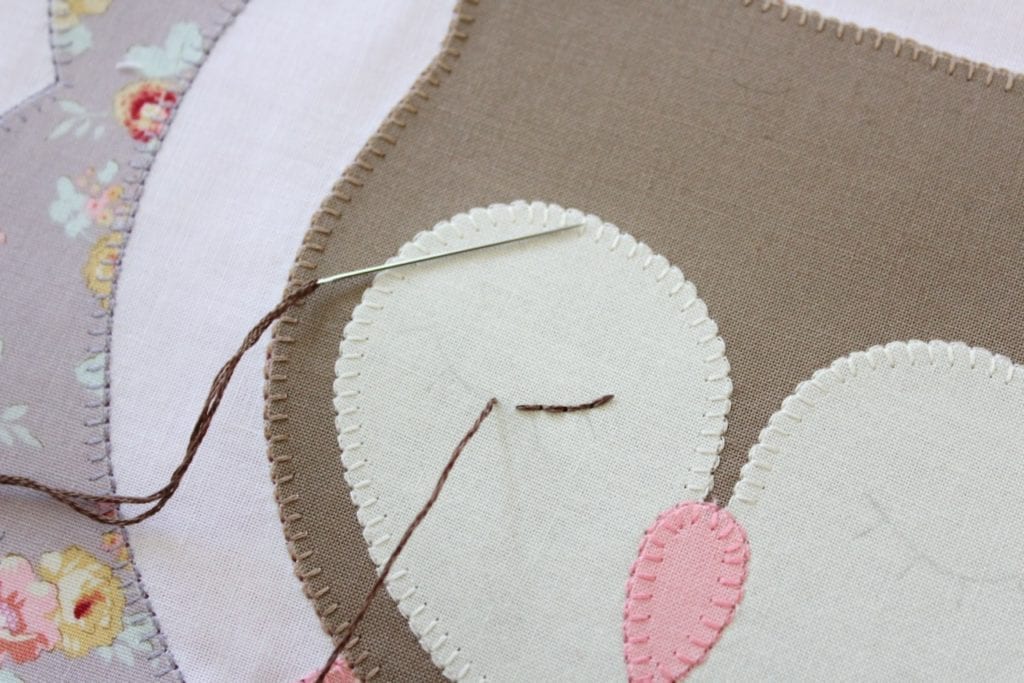
Embroider The Eyes
Once all shapes on each block have been machine appliquéd, it’s time to Hand Stitch the Face Details (those sweet sleepy eyes). For more information on transferring embroidery designs to fabric, you might like THIS POST.
Because the background fabric for this appliqué is dark, I couldn’t use the light transfer method I normally use. Instead, I traced over the wrong side of the Owl Eye template with pencil. I placed the paper template over my fabric, lined up the owl head shape and then used another pen to trace the eye shapes on the right side of the paper. My tracing created a shadow line, where the lead pencil faintly transferred from the back of the template to my fabric.
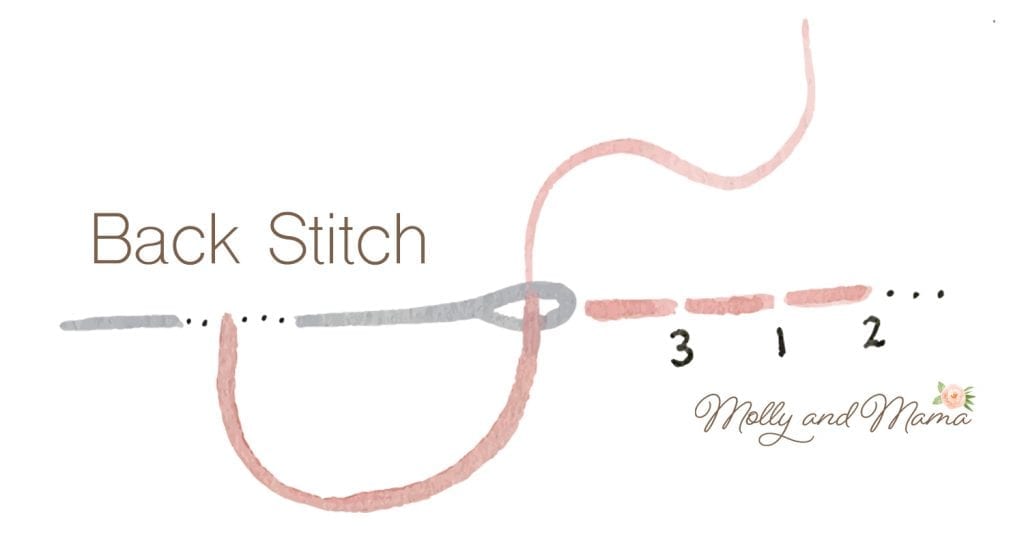
I then back stitched the eyes using three strands of DMC embroidery floss in colour 839.
This illustration is a nice refresher for the stitch, but if you need further details, please see my beginner’s tutorial for the Basic Stitches.
Here’s my owl block, finished and ready!
I’m going to continue to finish my first three blocks this week. Keep an eye out on Instagram for updates. Remember to share your progress over there too, using the #ForestFamilyQAL hashtag so we can all see each other’s work!
Until next week, happy stitching, Lauren x