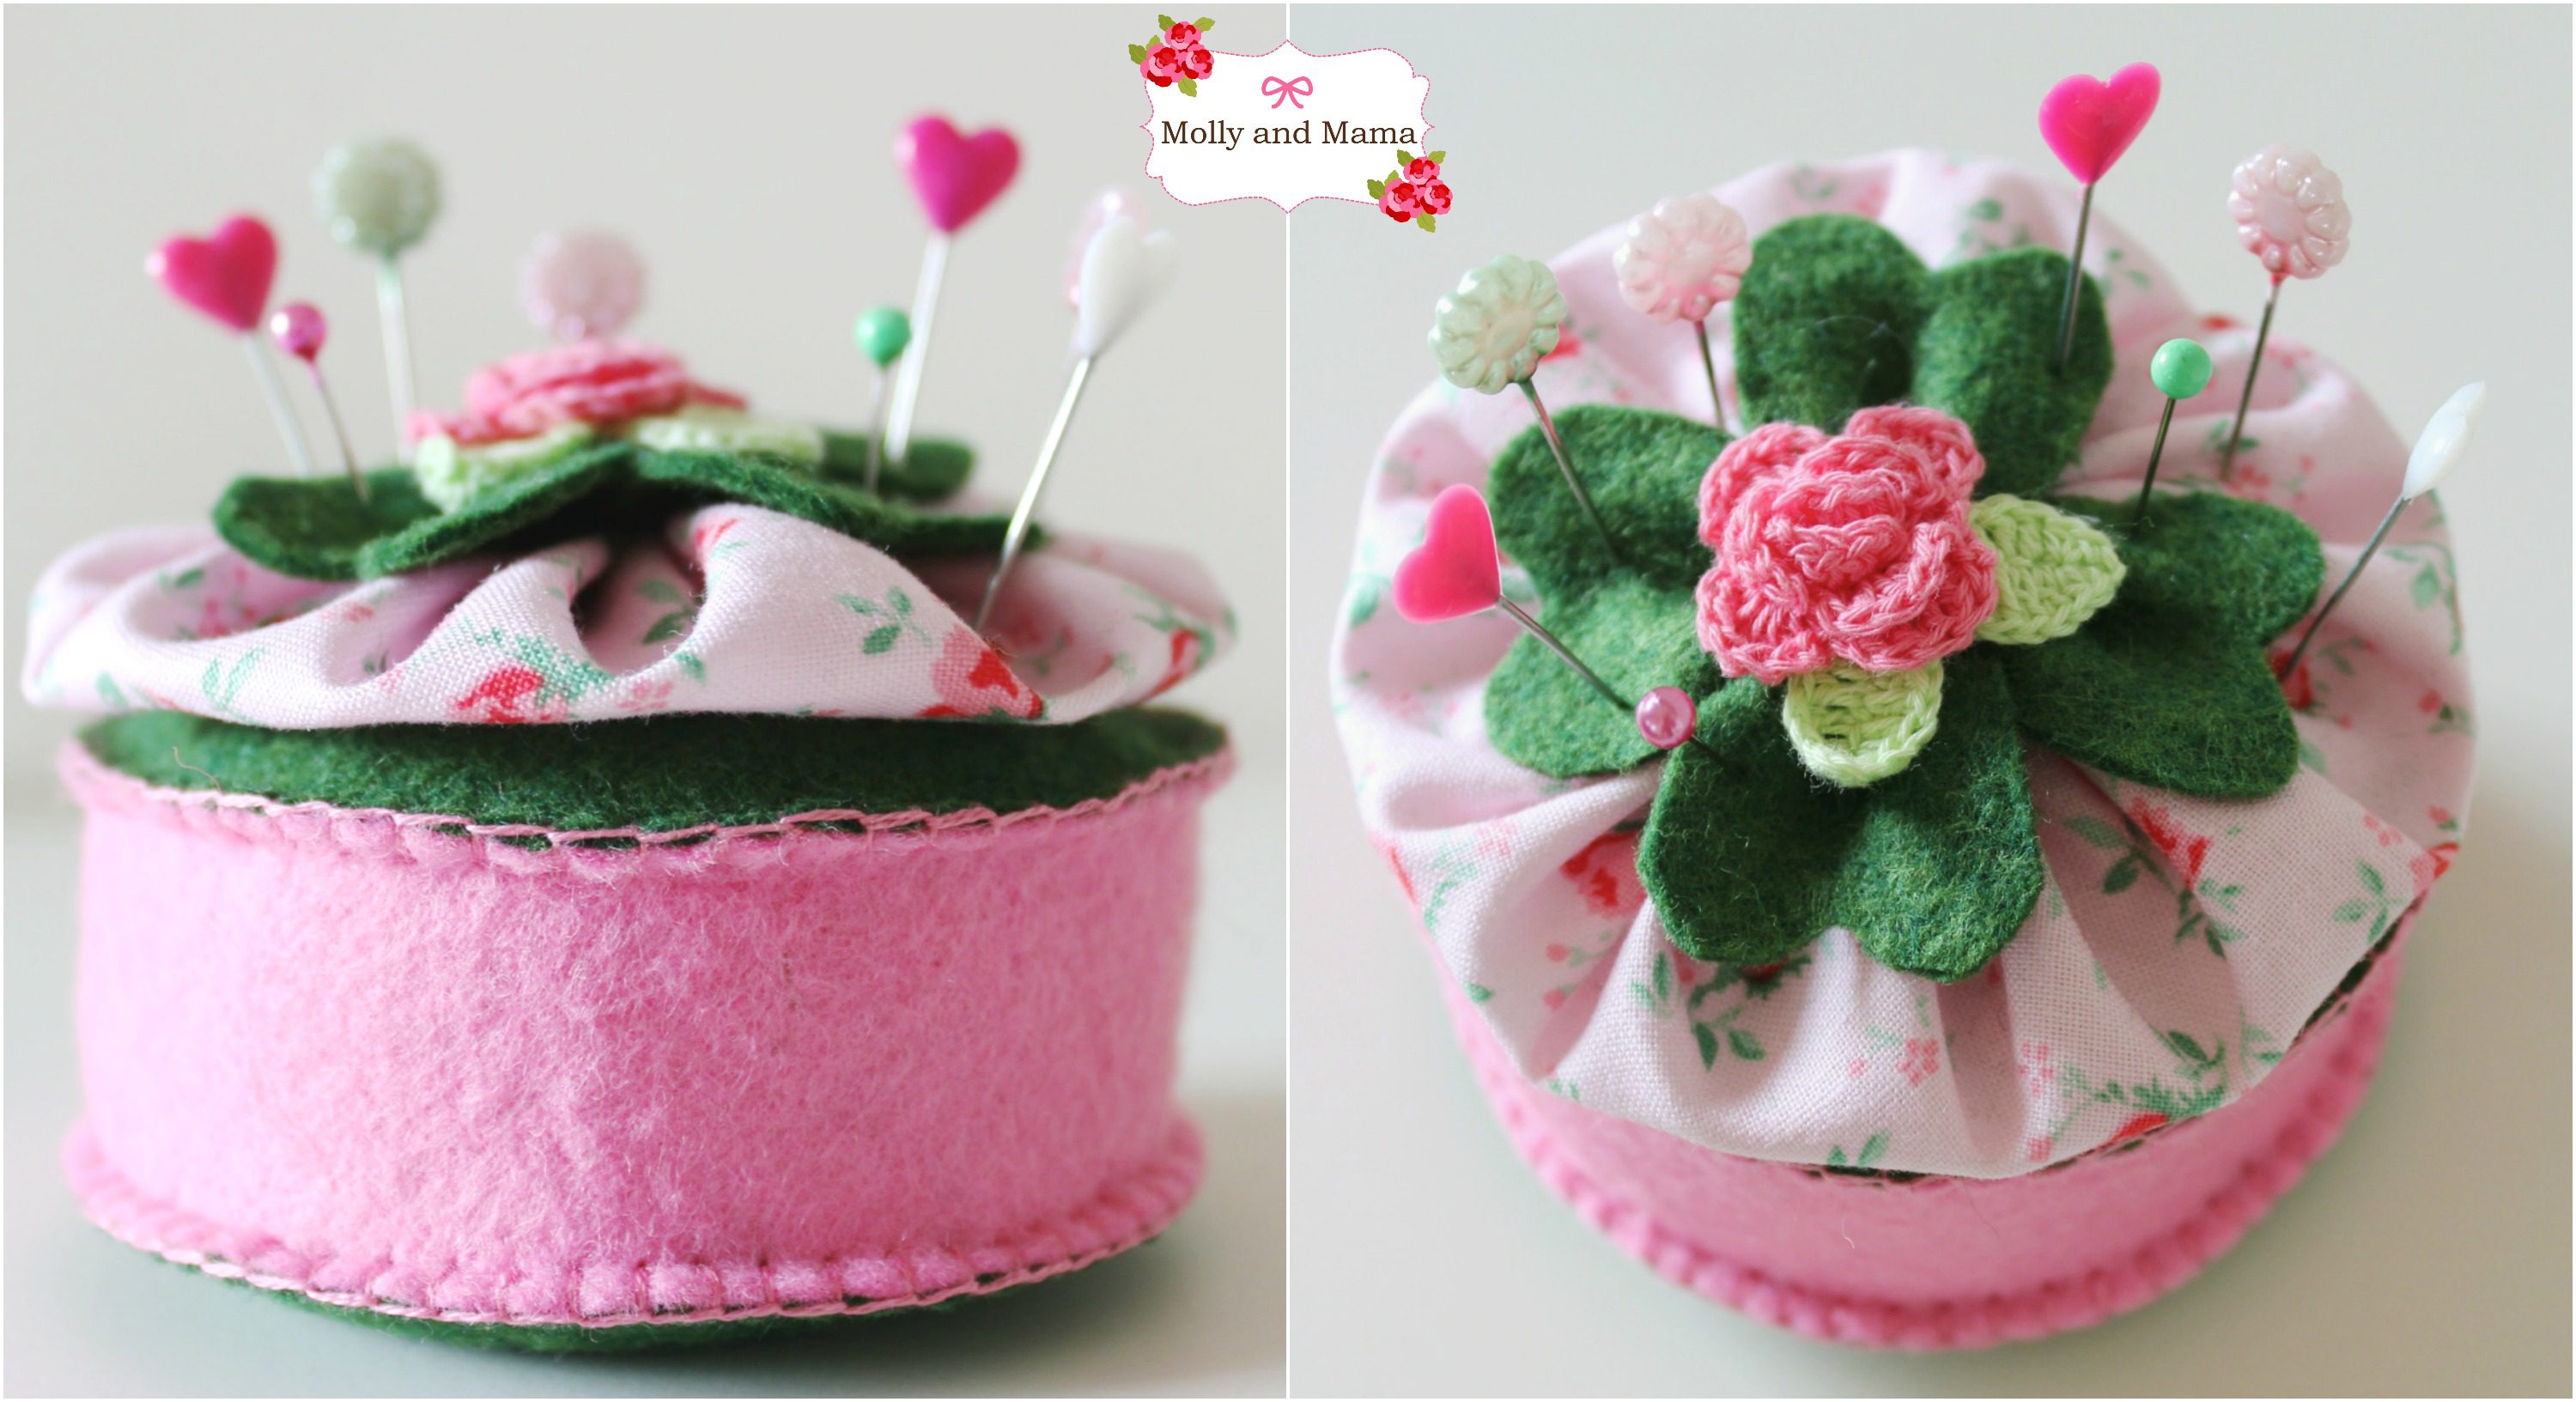
Make a Lucky Pin Cushion for St Patrick’s Day
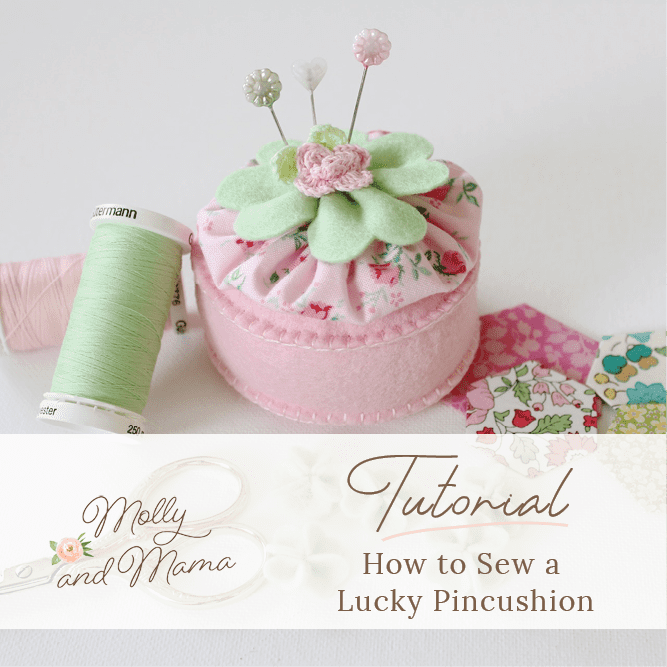
I love this Lucky Pin Cushion, because it’s such a pretty way to incorporate four leaf clovers and Saint Patrick’s Day luck into a pretty sewing project. The whole thing is sewn by hand, so it’s a great portable project too. Plus you can never have too many pin cushions. They make the perfect gift!
To create this easy pin-cushion, you’ll need to make a felt four leaf clover (or a three leaf shamrock if you prefer), then stitch a fabric yoyo, and finally sew the pin cushion base. It’s then a simple task to put it all together. And most of it can sewn while watching the tv, or listening to your favourite podcast.
You Will Need
- 7″ (17cm) square of print fabric for the yoyo
- green 100% wool felt – 3″ (8cm) square – for the shamrock
- 3.5″ (9cm) x 6.5″ (16.5cm) 100% wool felt for the pin cushion top and bottom
- 1.25″ (3cm) x 10″ (25cm) strip of 100% wool felt for the pin cushion side
- a needle and thread
- an embroidery needle and pink embroidery floss
- scissors
- crochet flower, button or other embellishment for the top of your shamrock
- polyester filling
- rice or similar to weigh down the pin cushion
- a print out of the clover template to make the shamrock
- a print out of the circle template to make the yoyo
- a print out of the circle template to make the pin cushion circles
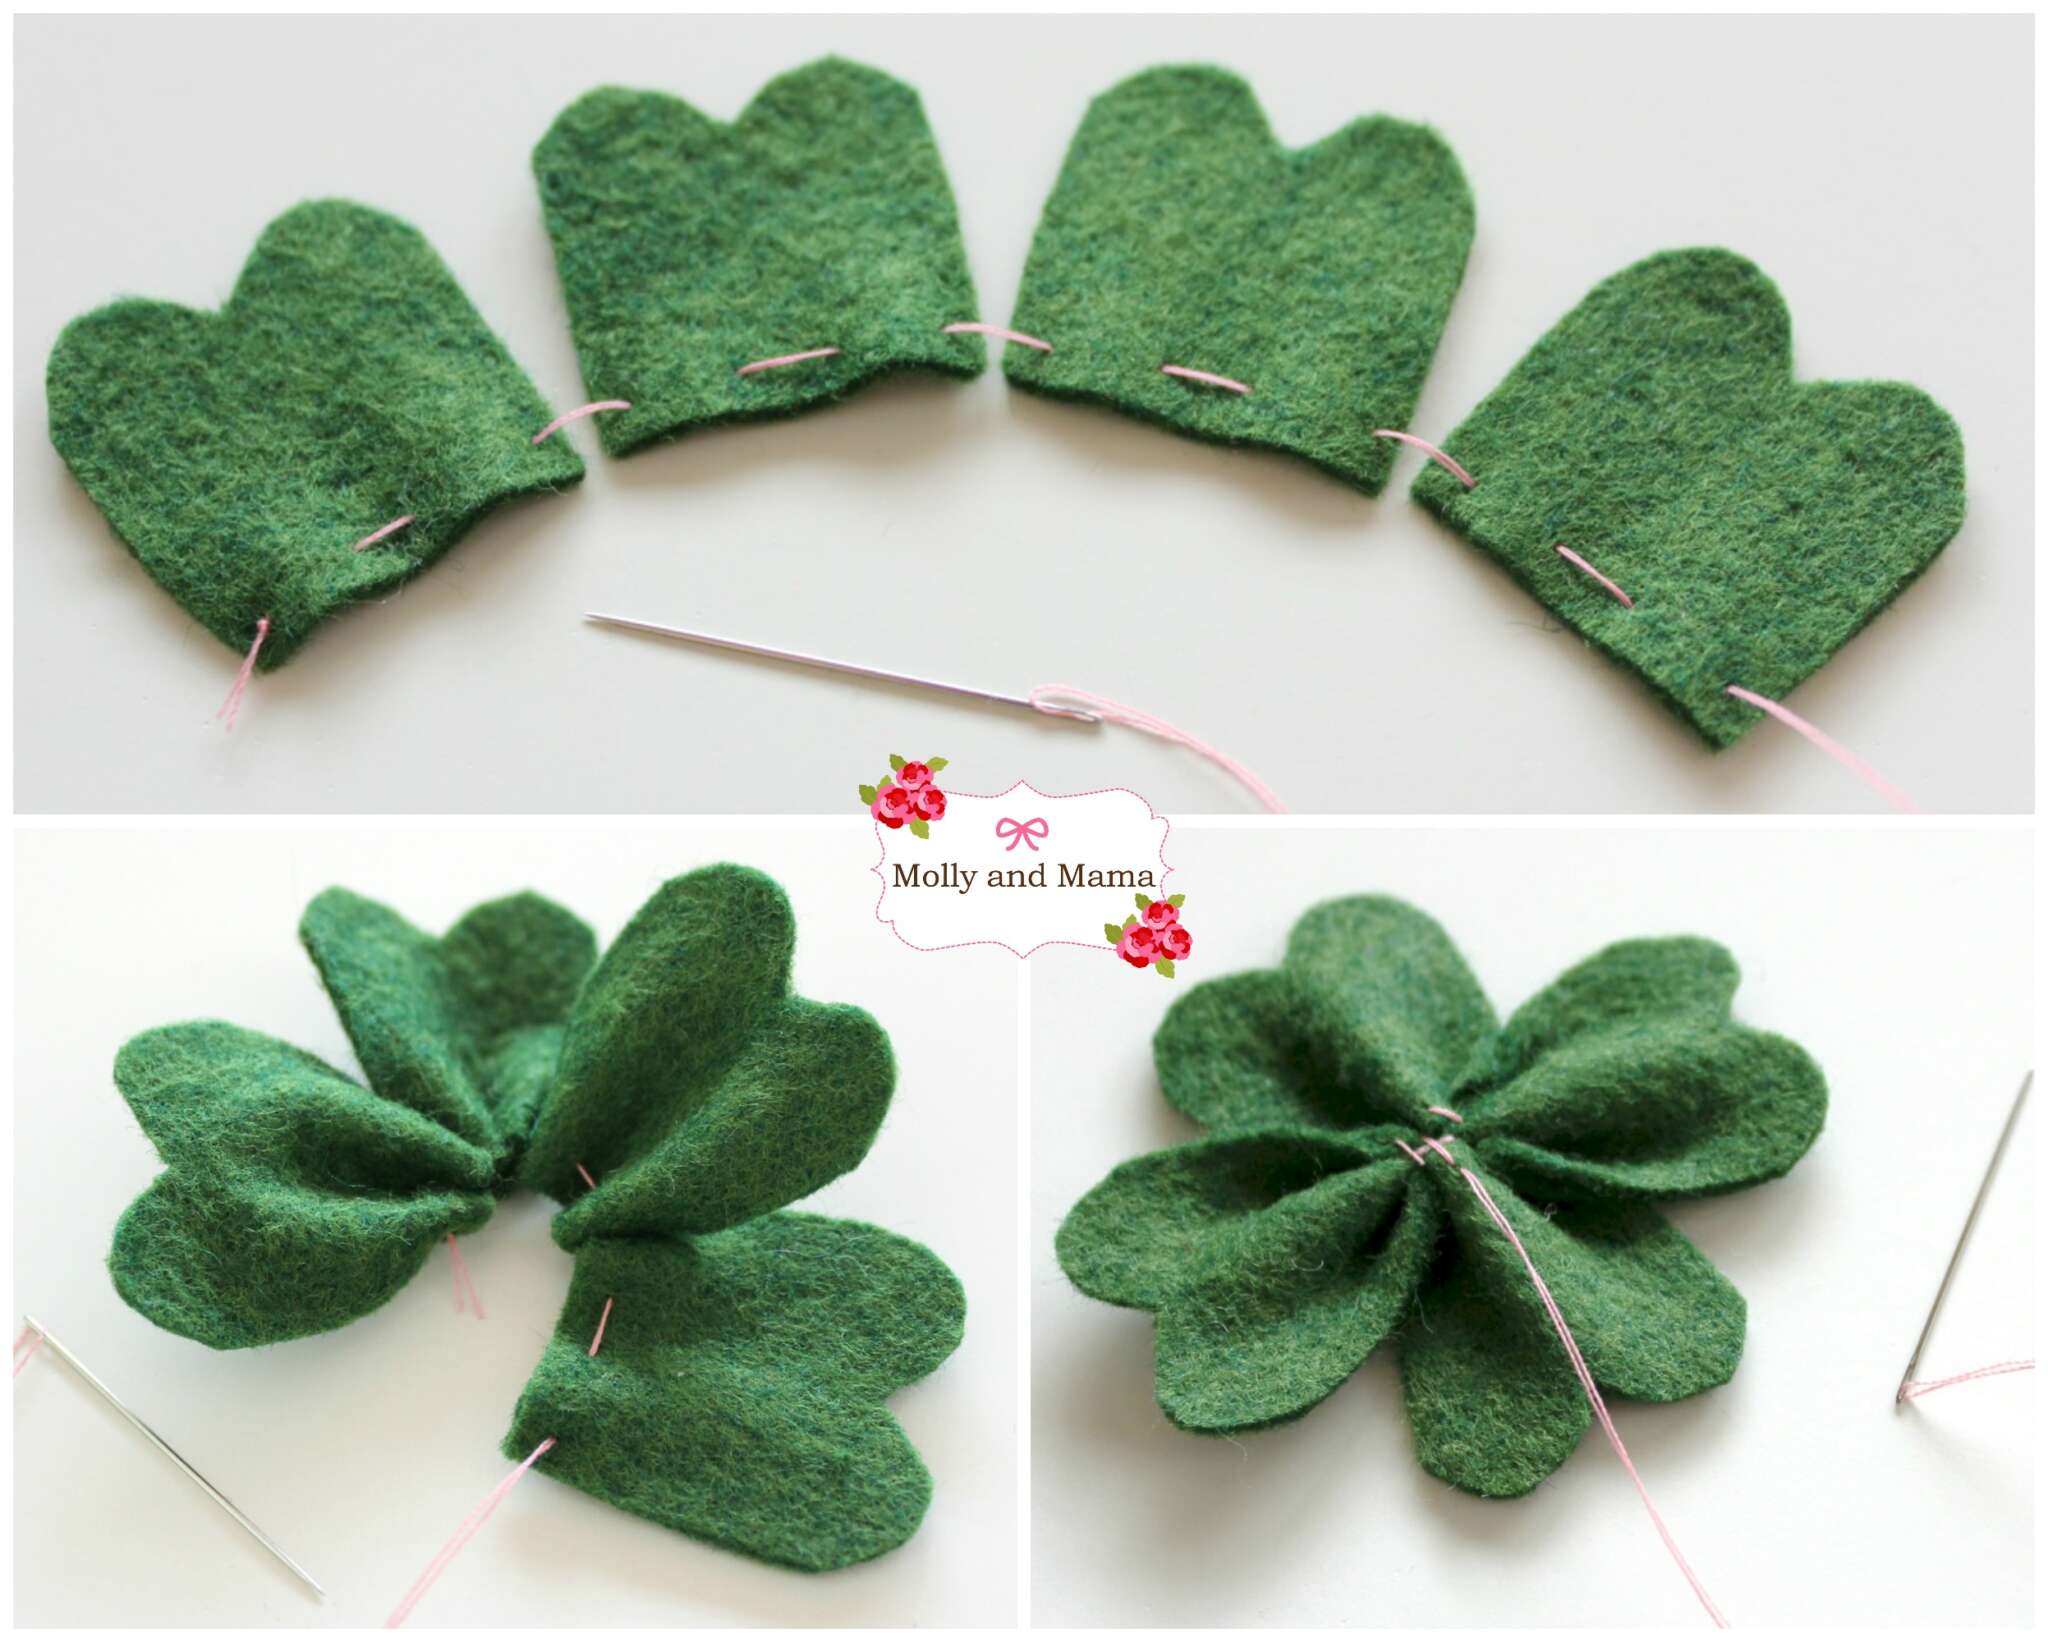
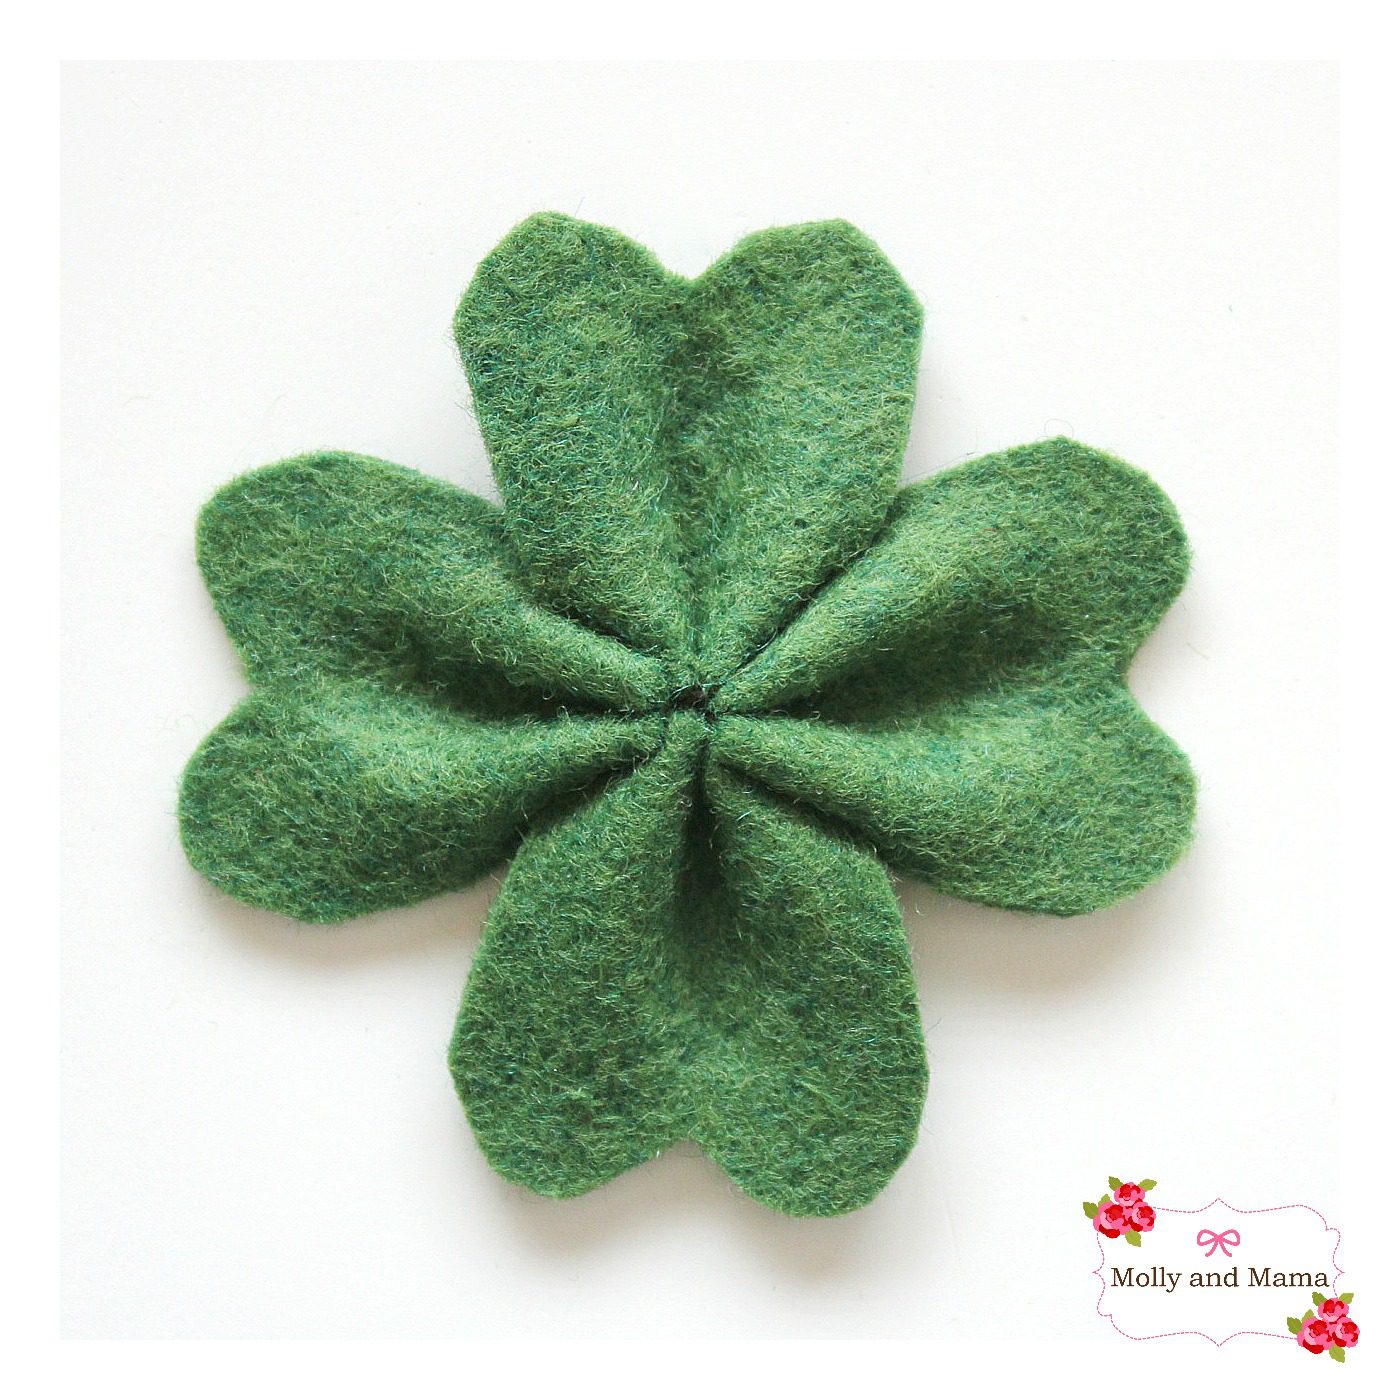
Make a Four Leaf Clover Or A Three Leaf Shamrock
Print out the Clover Template and then use this tutorial to follow the instructions and make a four leaf clover (as shown in the images below).
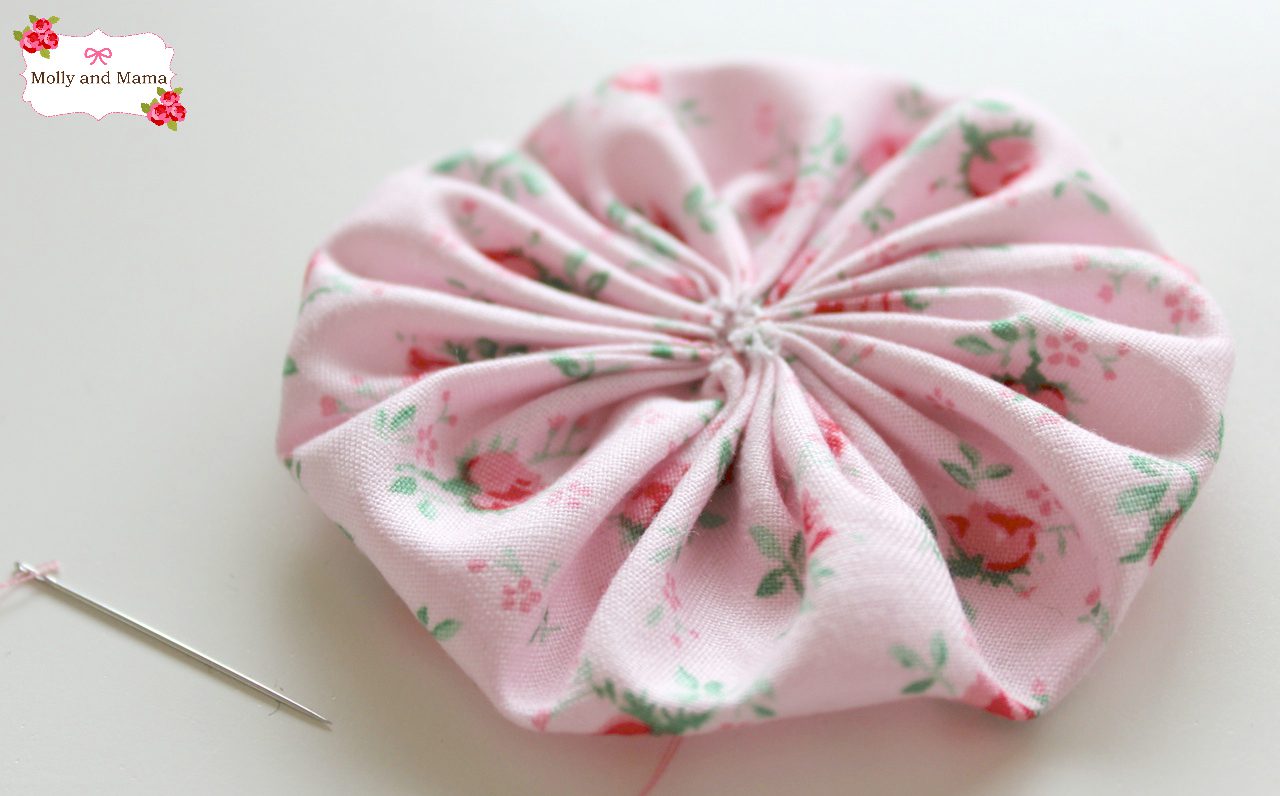
Stitch A Yoyo Or Suffolk Puff
Now let’s stitch a pretty yoyo (you may also know it as a Suffolk puff). If you haven’t made these before, they are super simple. And I have very conveniently included a link HERE to a previous tutorial that explains exactly how to make them.
To make the yoyo used for this project, I used a 16.5cm (6.5″) fabric circle from THIS TEMPLATE. This made a yoyo with an 3″ (7.5cm) diameter. But you can play around and choose a yoyo size that works best for you.
Print the Yoyo Circle Template and cut the circle out on the line. Trace the circle shape onto your square of printed fabric, and cut out a fabric circle. Stitch a running stitch around the outside edge of the fabric, and then pull the thread to gather the fabric into a puff. Flatten it out and secure with some extra stitches. Don’t forget that the Yoyo Tutorial contains lots more detail.
Make The Pin Cushion Topper
Use some small stitches to secure the shamrock or four leaf clover to the yoyo, and then stitch a flower or button embellishment on the top. I used a pretty little crochet flower on top, but you can use whatever takes your fancy! Set it aside for later.
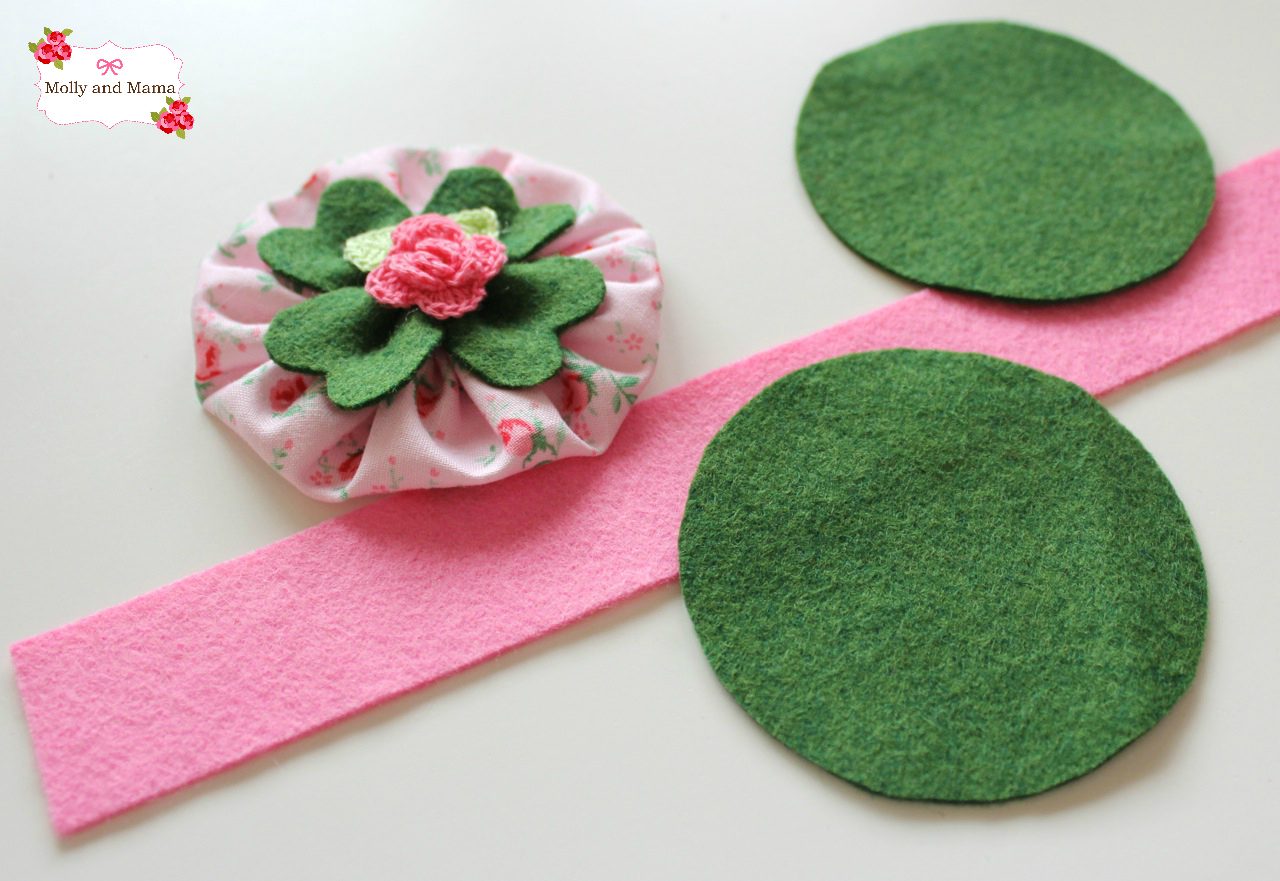
Cut Out The Pin Cushion Felt
Print out the circle template to trace and cut out 2 x 3″ (7.5cm) wool felt circles to form the top and bottom of the pin cushion (you can see them in dark green below). Cut one felt strip for the side of the pin cushion measuring 10″ (25cm) x 1.25” (3cm) – seen below in candy pink. For tips on cutting out wool felt, please see this easy tutorial.
Make The Pin Cushion Base
I have already written a super detailed blog post on how to create this type of felt pin cushion base. So if you’re after instructions that cover things with a little more depth, be sure to head HERE.
Take one felt circle and the felt strip. Pin the strip carefully around the perimeter of the circle. This will make the base and side of your pin cushion. I found it easier to pin a section, and then stitch a section, at a time.
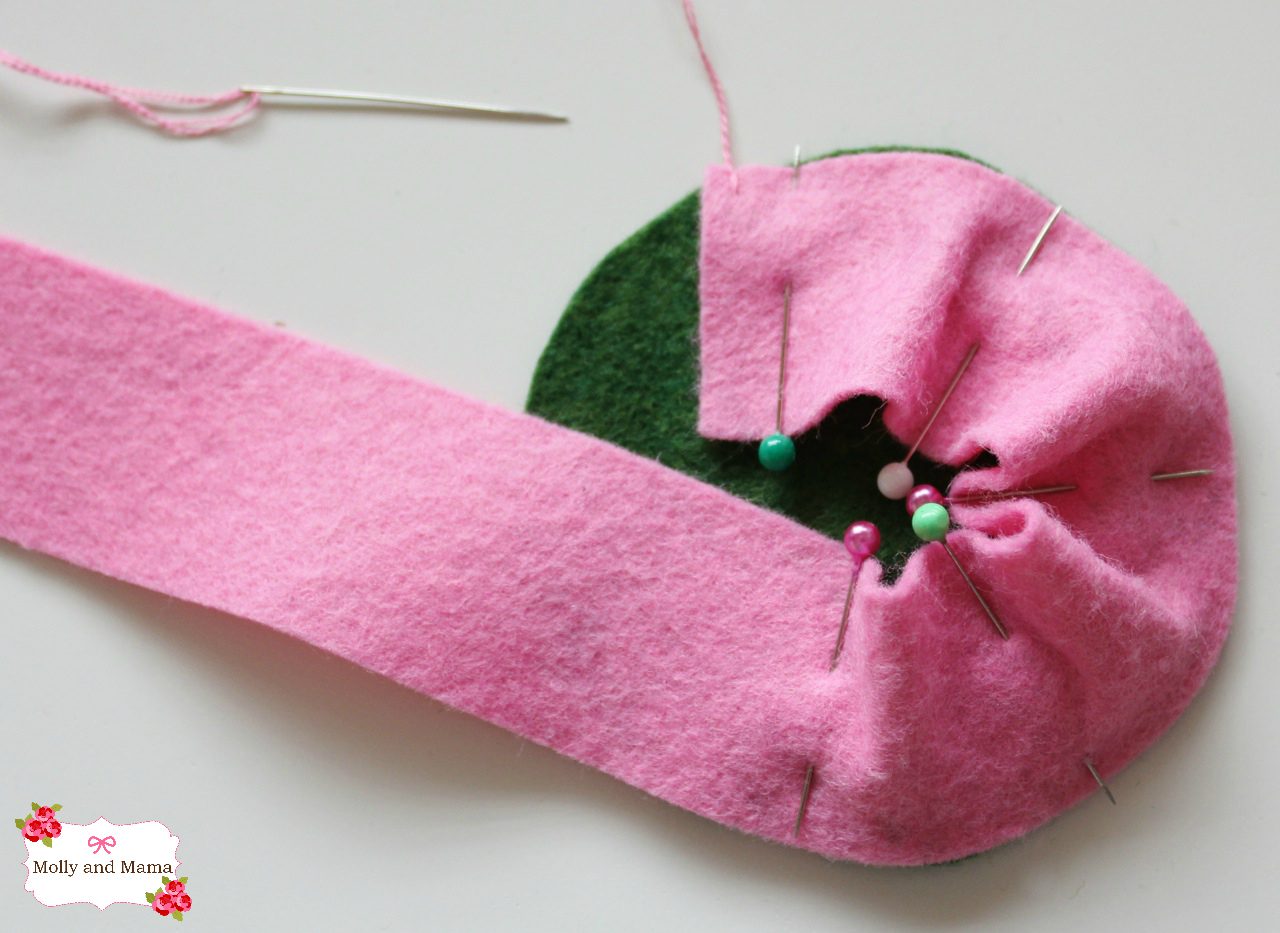
Thread your embroidery needle with two strands of separated embroidery floss in a shade to match the felt. Stitch the side strip of felt to the base using blanket stitch. Continue to stitch around the perimeter of the base until you reach your starting point. You may need to change your thread once or twice.
As a quick refresher, this illustration shows you what Blanket Stitch looks like. You can also read more about it HERE.
Overlap the felt of the side piece by 1/2″ (5mm) and trim away any excess felt length. Blanket stitch the sides together (image 1 below).
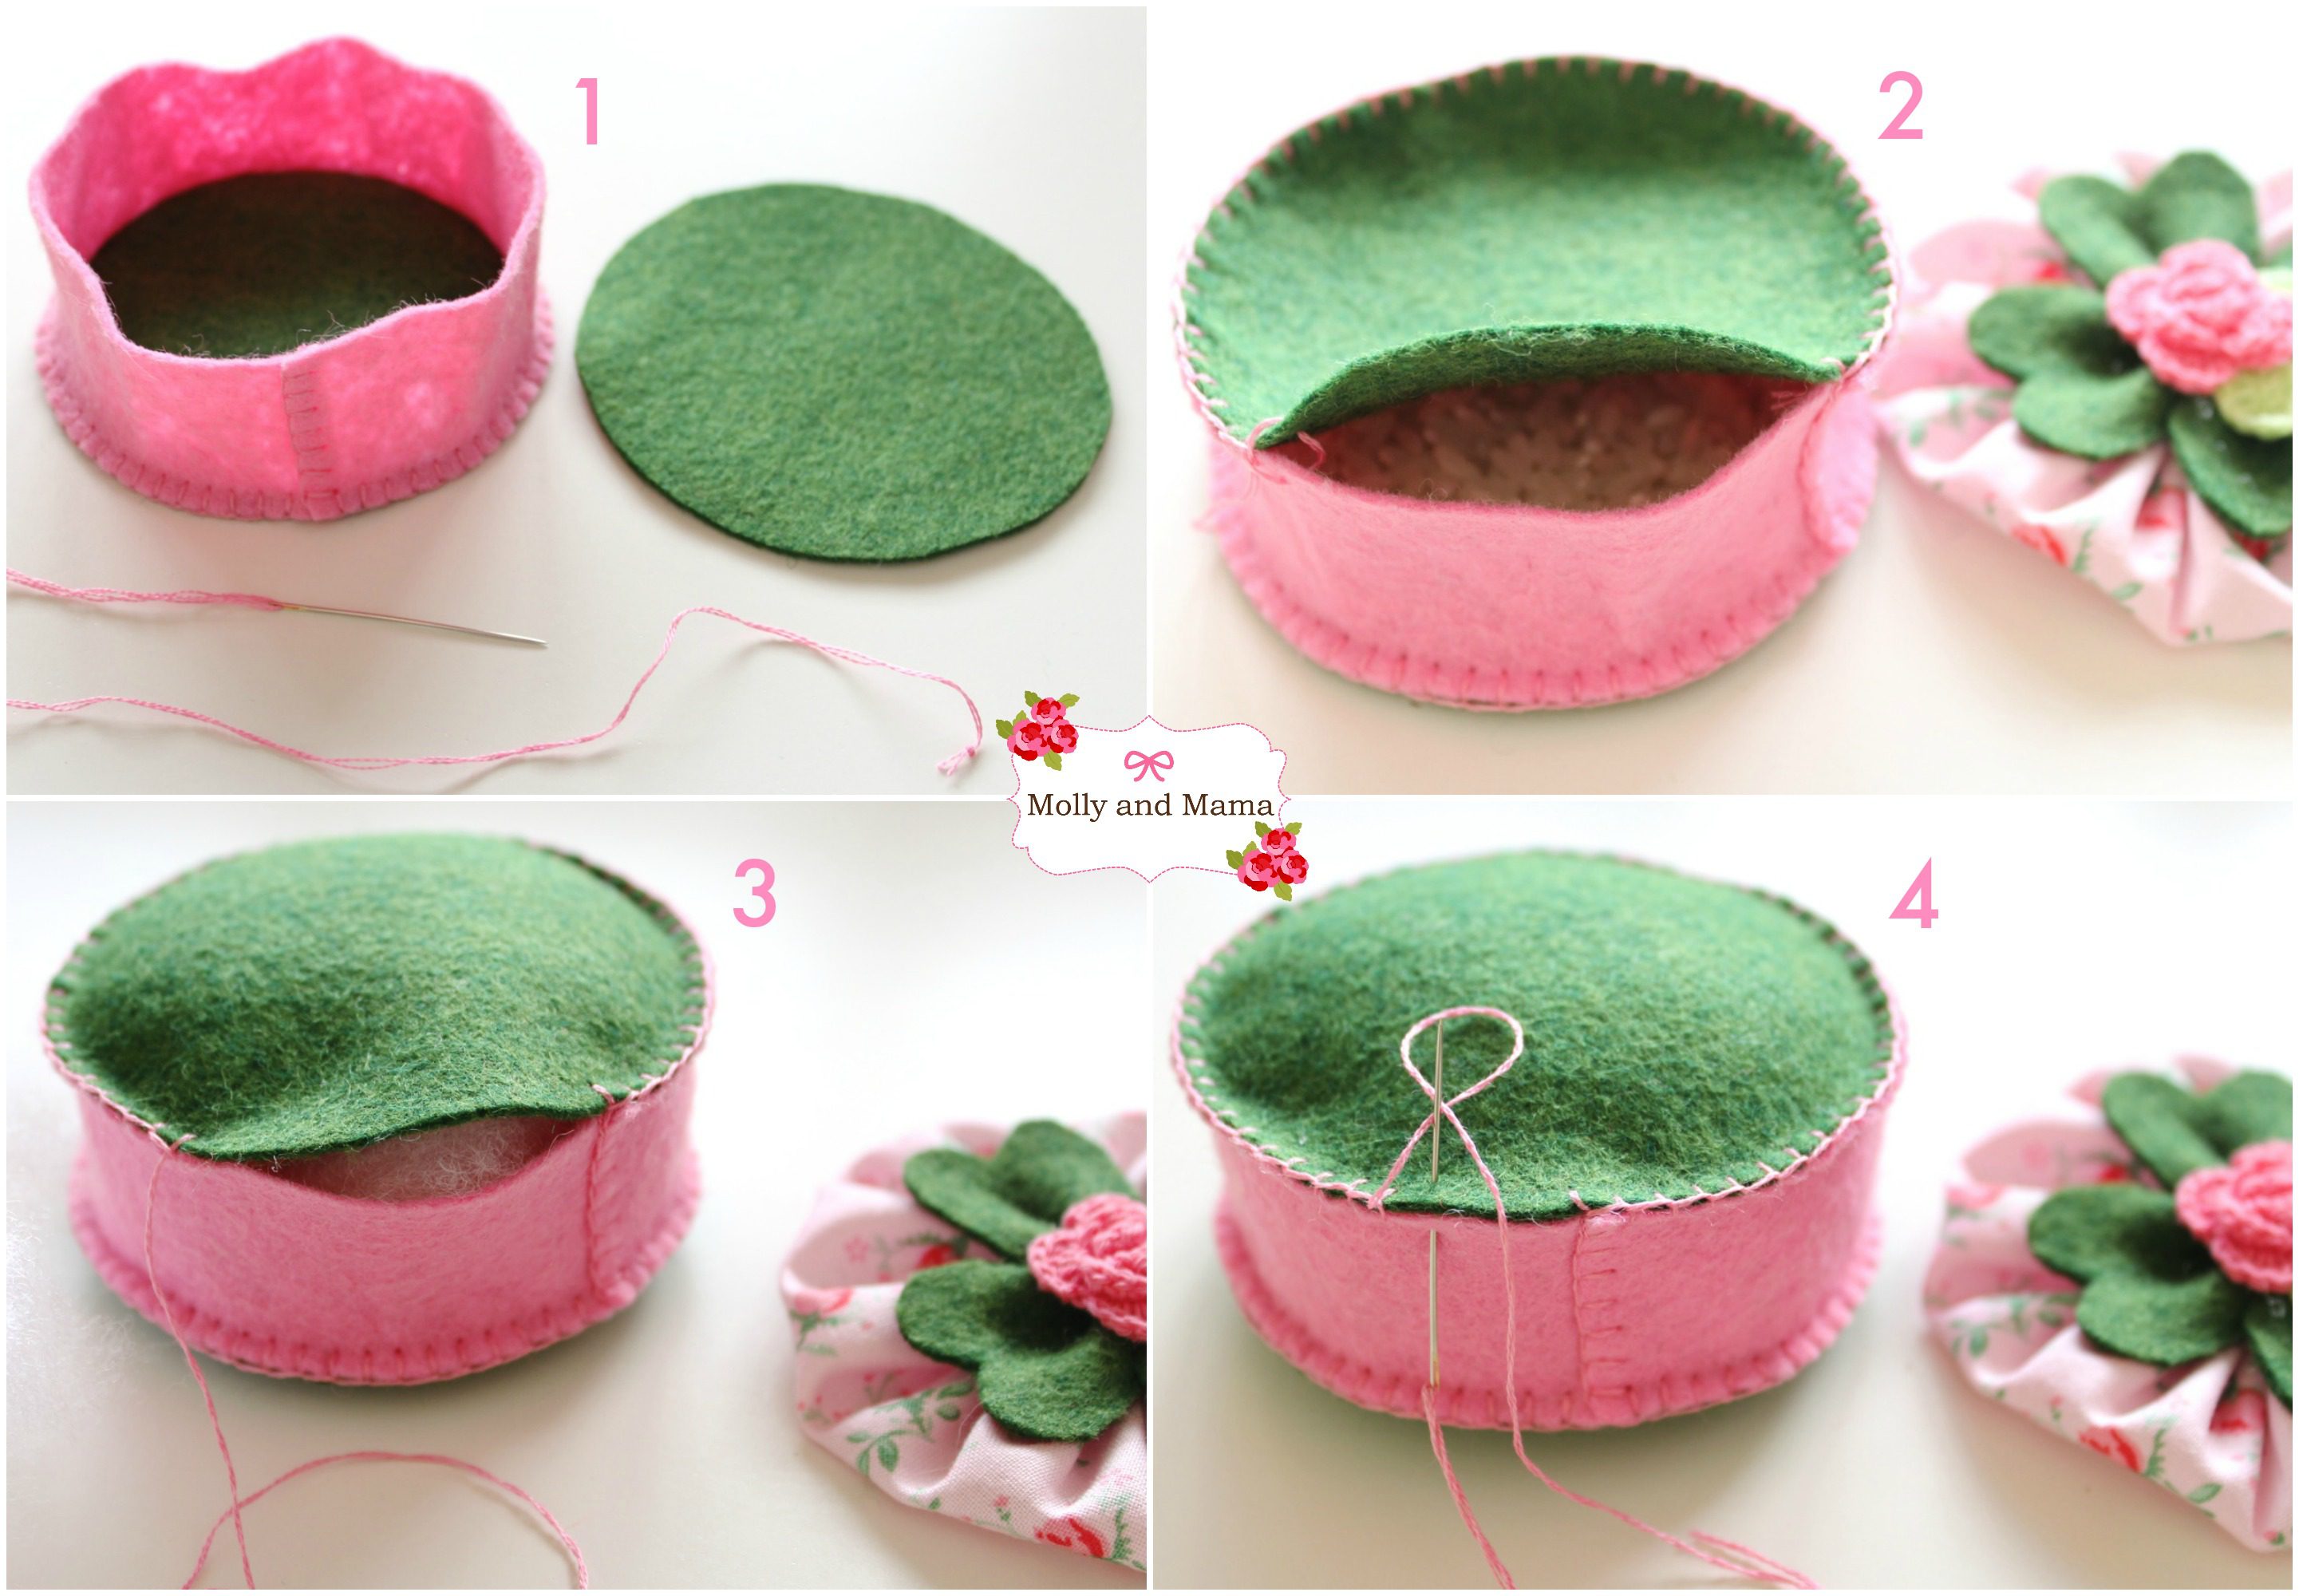
Pin the top circle of felt to the rim of the pin cushion. Blanket stitch the top in place by starting at the side seam. Change thread when necessary.
Stop stitching when you are three quarters of the way around the circle, but leave your thread intact (to continue stitching after stuffing). Fill the base of the pin cushion with a layer of rice. This will add weight (image 2 above).
Add polyester stuffing to firmly fill the pin cushion (image 3 above). Continue to blanket stitch the pin cushion closed (image 4 above).
Your completed pin cushion makes the perfect base for any pin cushion project. And it’s so easy to add our ‘topper’.
Put It Together
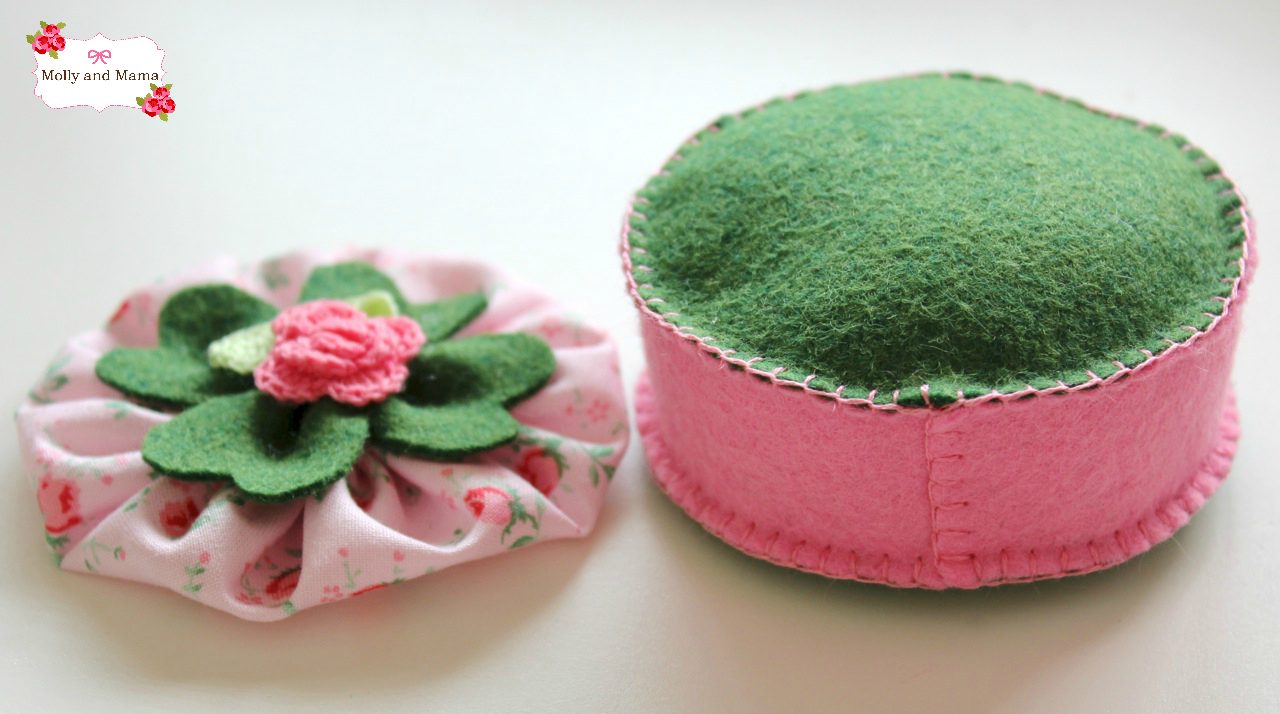
Sew the shamrock and yoyo pin cushion ‘topper’ to the top of the felt pin cushion using small, well disguised stitches. Mine were hidden in the folds of the felt shamrock and in the crochet flower. Once secure, you’re all done! And your pin cushion is all set to take on some sewing pins!
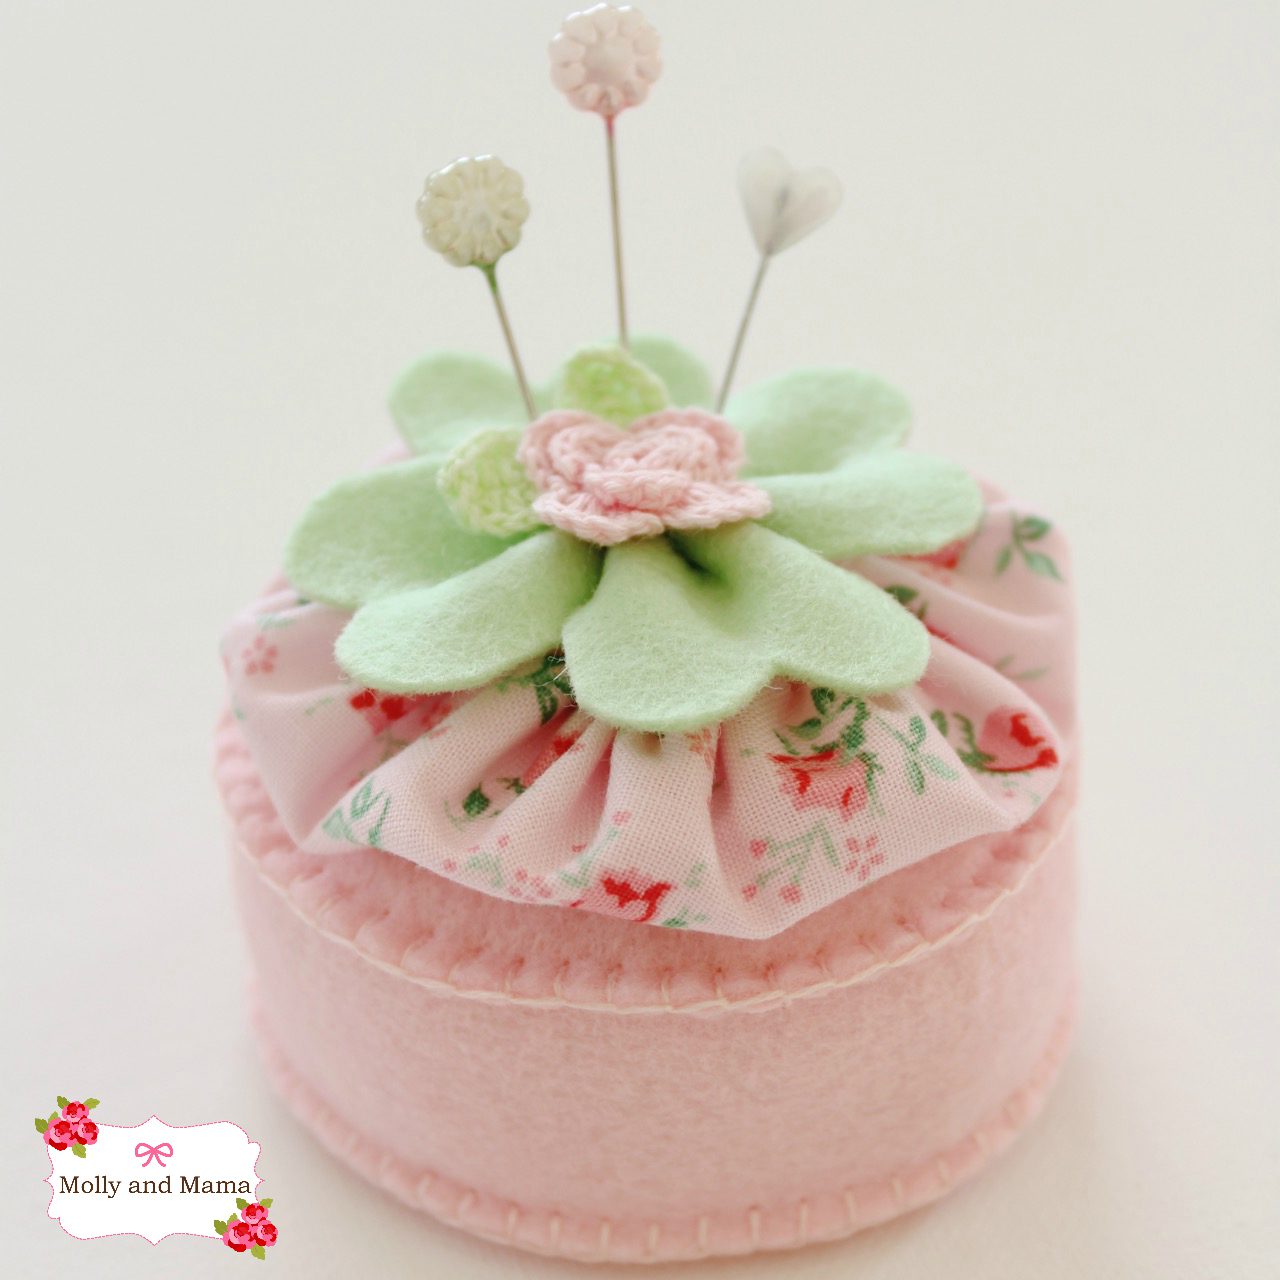
Here’s another pretty version I made is pastel shades.
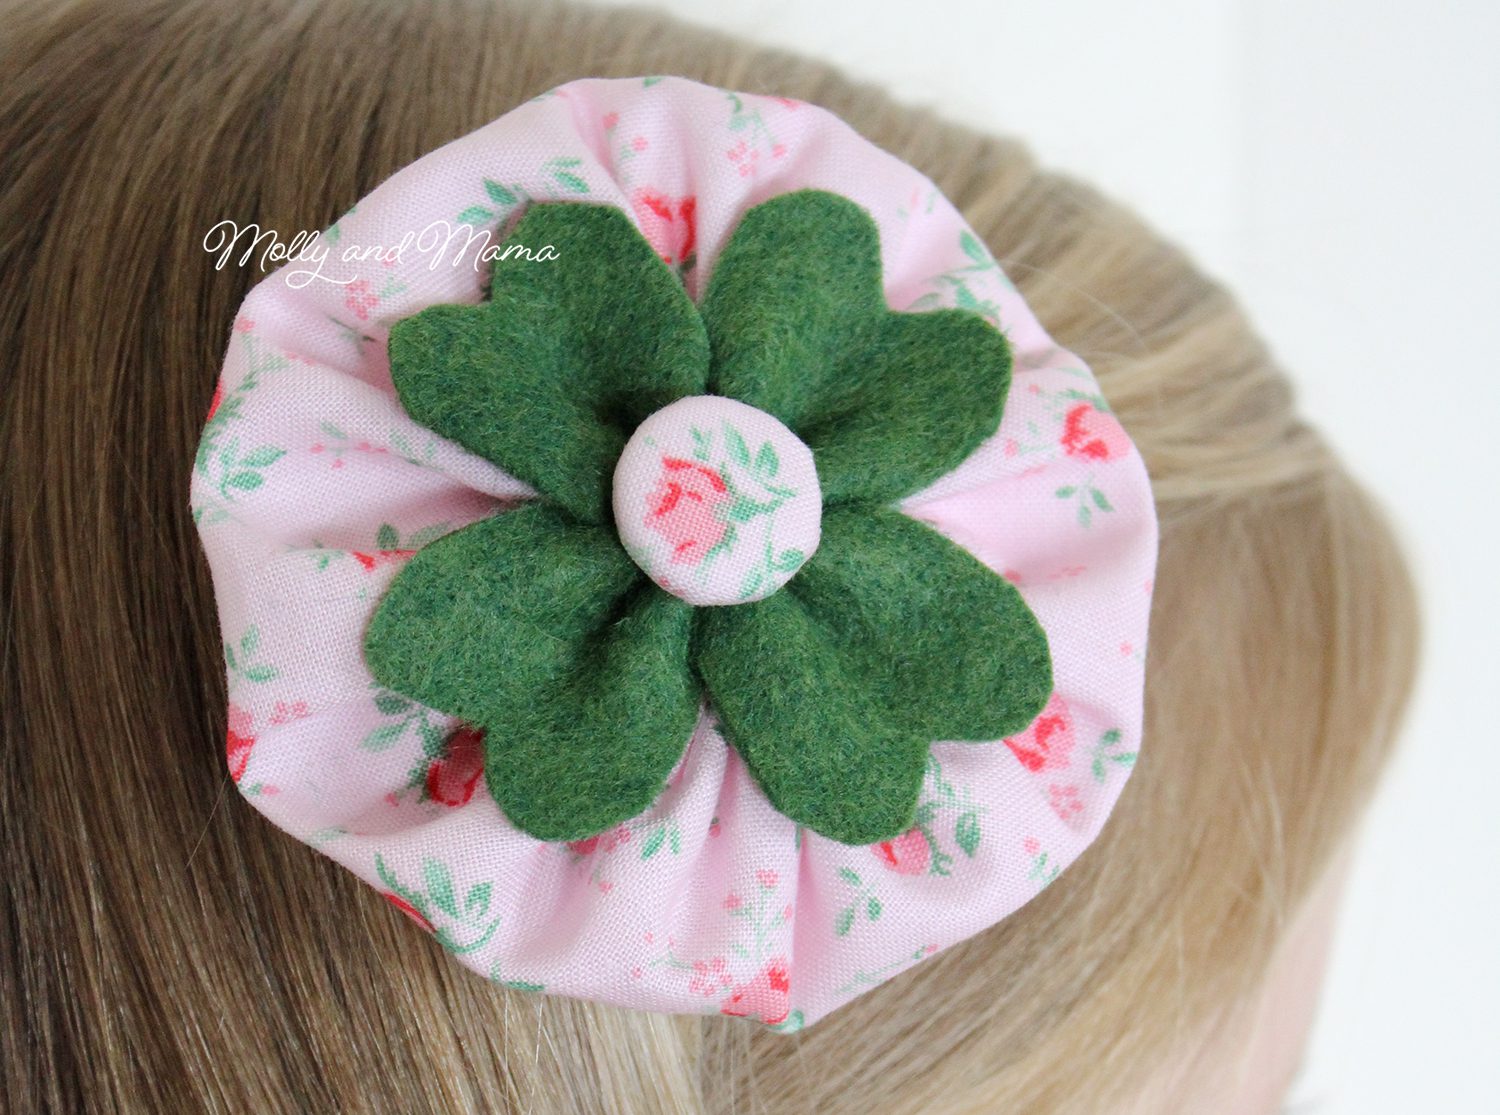
You can also make brooches and hair clips by attaching the pin cushion top to a brooch back or an alligator clip. And surprise, surprise, I have a tutorial explaining how to do that right HERE.
For more tutorials from Molly and Mama, be sure to check out the TUTORIALS tab. The PATTERN store shows all the new sewing patterns available at the moment also.
Happy Saint Patrick’s Day to you. I hope your day is full of luck!
Happy stitching, Lauren x
This post was written by Lauren Wright and appeared first on Molly and Mama www.MollyandMama.com.au
How pretty! I love the base of this.
Thanks Jessie!
I love the pincushion. About time I used some of the hand sewing techniques I have learnt over the years. Now to find some pretty felt and fabric. Thanks for sharing.
Thanks for your lovely comment Janine. And happy sewing, Lauren x
Oh my gosh this is absolutely ADORABLE ?, you caught me with the hair pin , then I seen that it could be a brouch( Mother’s Day /church) and a sewing pin cushion to boot ! Hot diggity dog !!! This is AWESOME!!!❤️?Thank you SO MUCH for posting , children’s church activity and brownie troop to help them get their “sewing badge ” I LOVE IT ?
Thanks for your kind words Kim!
Uma peça linda e útil.