Make a Fabric Yo Yo or Suffolk Puff
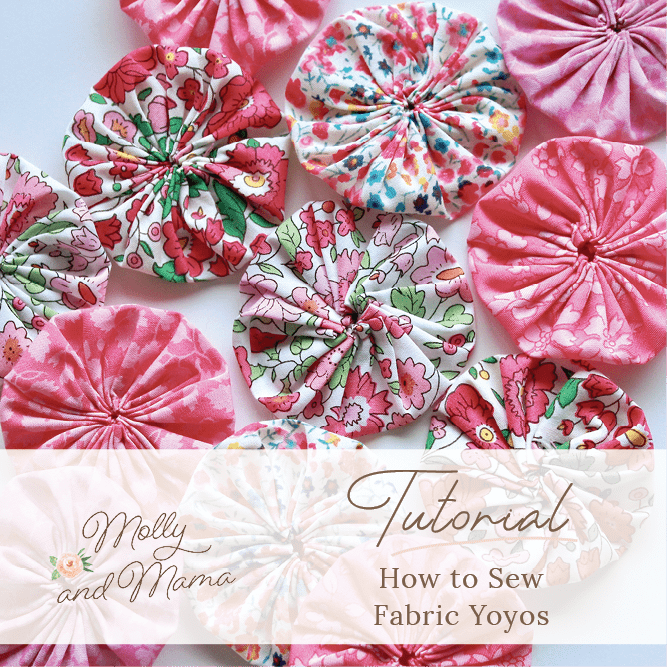
Never made a fabric yoyo before? Well let me tell you, nothing could be simpler. These adorable little fabric puffs have been adorning quilts and all manner of sewing projects for 100’s of years. Yoyo’s gained popularity in the USA for quilting projects in the 1930’s. They’re also known as Suffolk Puffs (and believed to have originated in Suffolk, England in the 1600’s). But they’re also referred to as Yorkshire daisies (also UK) and fuxico in Brazil. No matter what you call them, they’ve always been a popular way to use up fabric scraps. And I just love to make them!
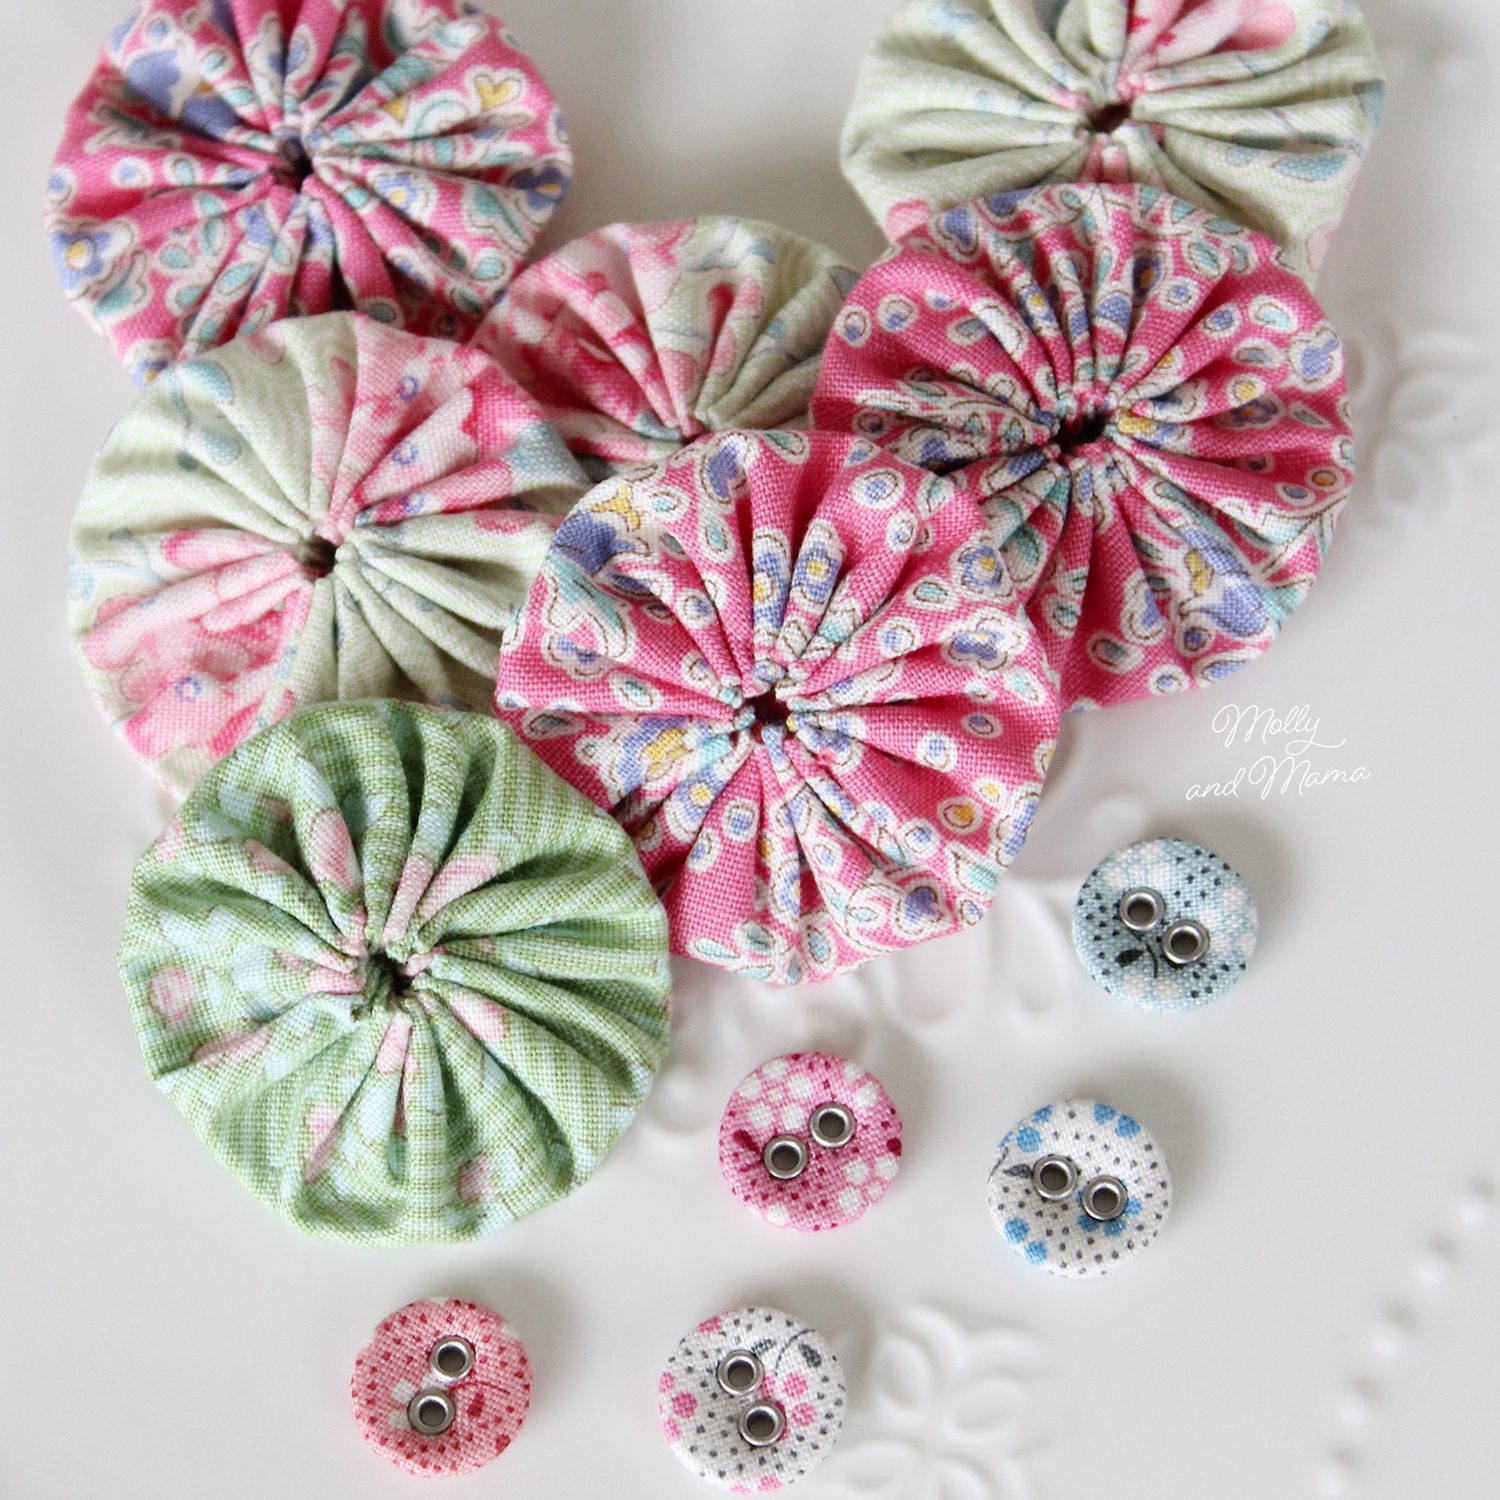
Being completely hand stitched, they’re a practical and portable project. You can make them in any size you wish and use them however you want. I love to make pretty hair accessories with them. You can use them on all sorts of projects. I even added some to this pin cushion tutorial.

Looking for more inspiration? My Yoyo Pinterest Board has lots of ideas too!
So here’s some simple, step-by-step instructions to sew your own yoyo’s.
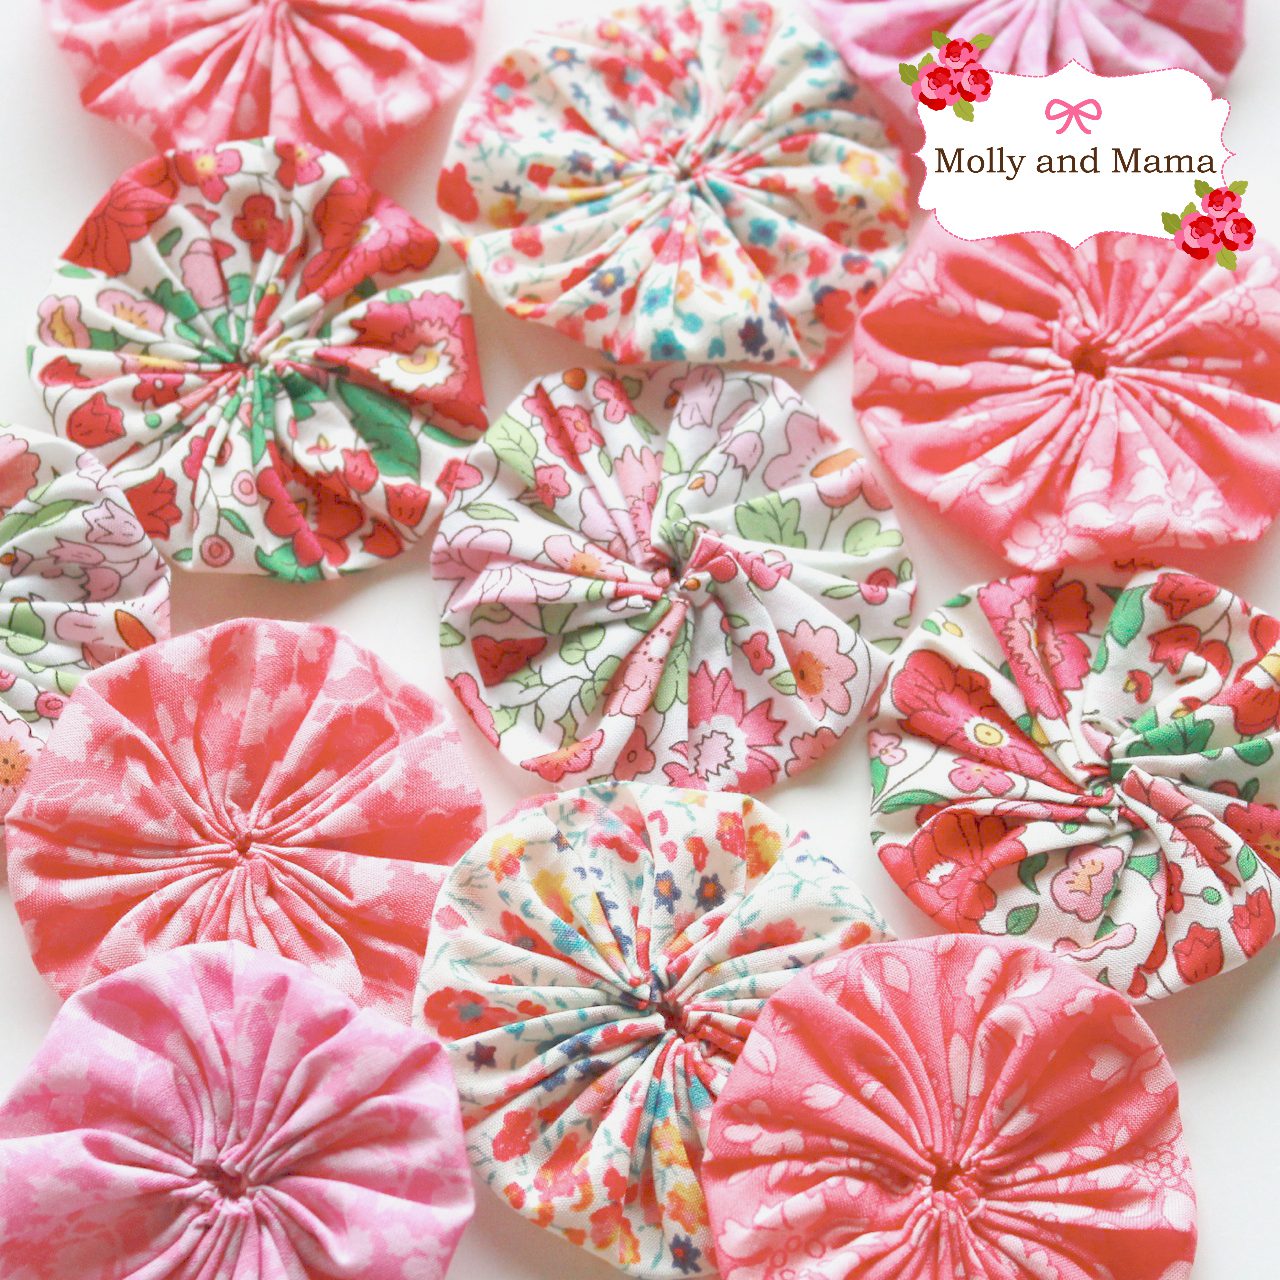
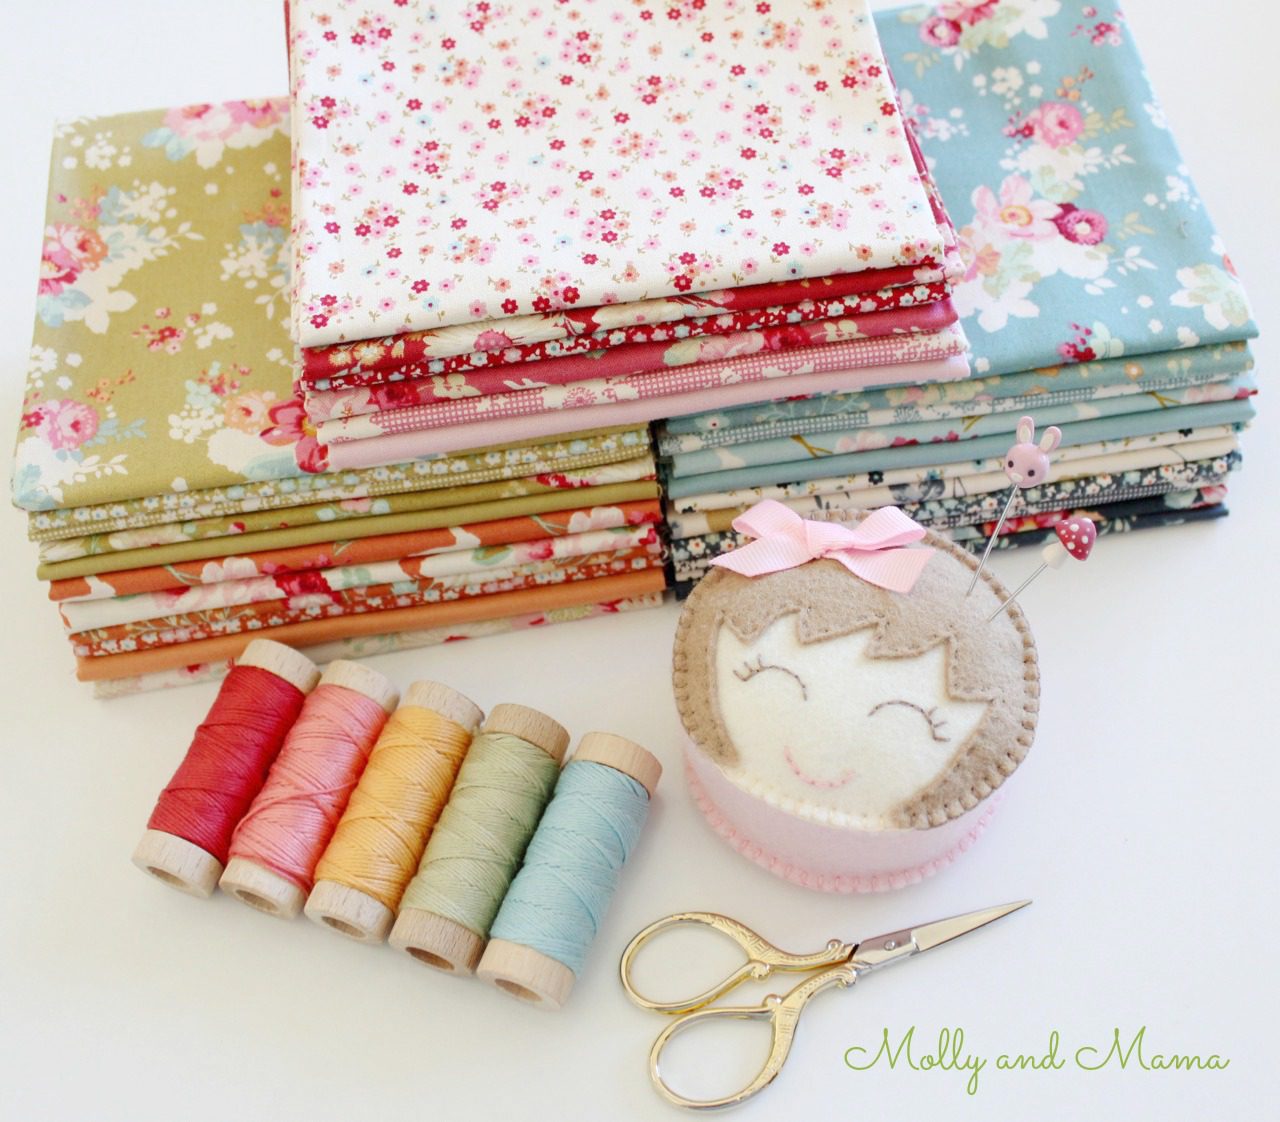
I’ve used gorgeous Liberty tana lawn for mine, but you can really use any fabric. Experiment with different prints and fabrics or even lace. You can get some beautiful results! And once you’ve stitched one yoyo, I promise you won’t be able to stop. They’re just so easy, and so cute!
You Will Need
- Ironed fabric scraps
- a circle template or a circular object to trace around. You can download and print my useful circle template HERE. It contains templates for 3″, 2″ and 1.5″ finished yoyo’s.
- erasable marking pen
- scissors
- needle and thread
Let’s Get Started
If you’re making more than one yoyo for a project, and you’d like them all to be the same size, it’s useful to create yourself a reusable template. Trace your preferred circle size onto cardboard or template plastic. I tend to use a 5″ (12.5cm) circle which creates a yoyo around 2″ (5cm) across.
Download my circle template which has a few size options. Remember that each completed yoyo will be slightly less than half the size (or diameter across) as the template it came from – depending on the size of your seam allowance (or folded over hem).
Alternatively, you can use an object from around the house. I like side plates, jar lids and old CD’s, but anything with the right diameter will do. Cut out your template and label it for future use.
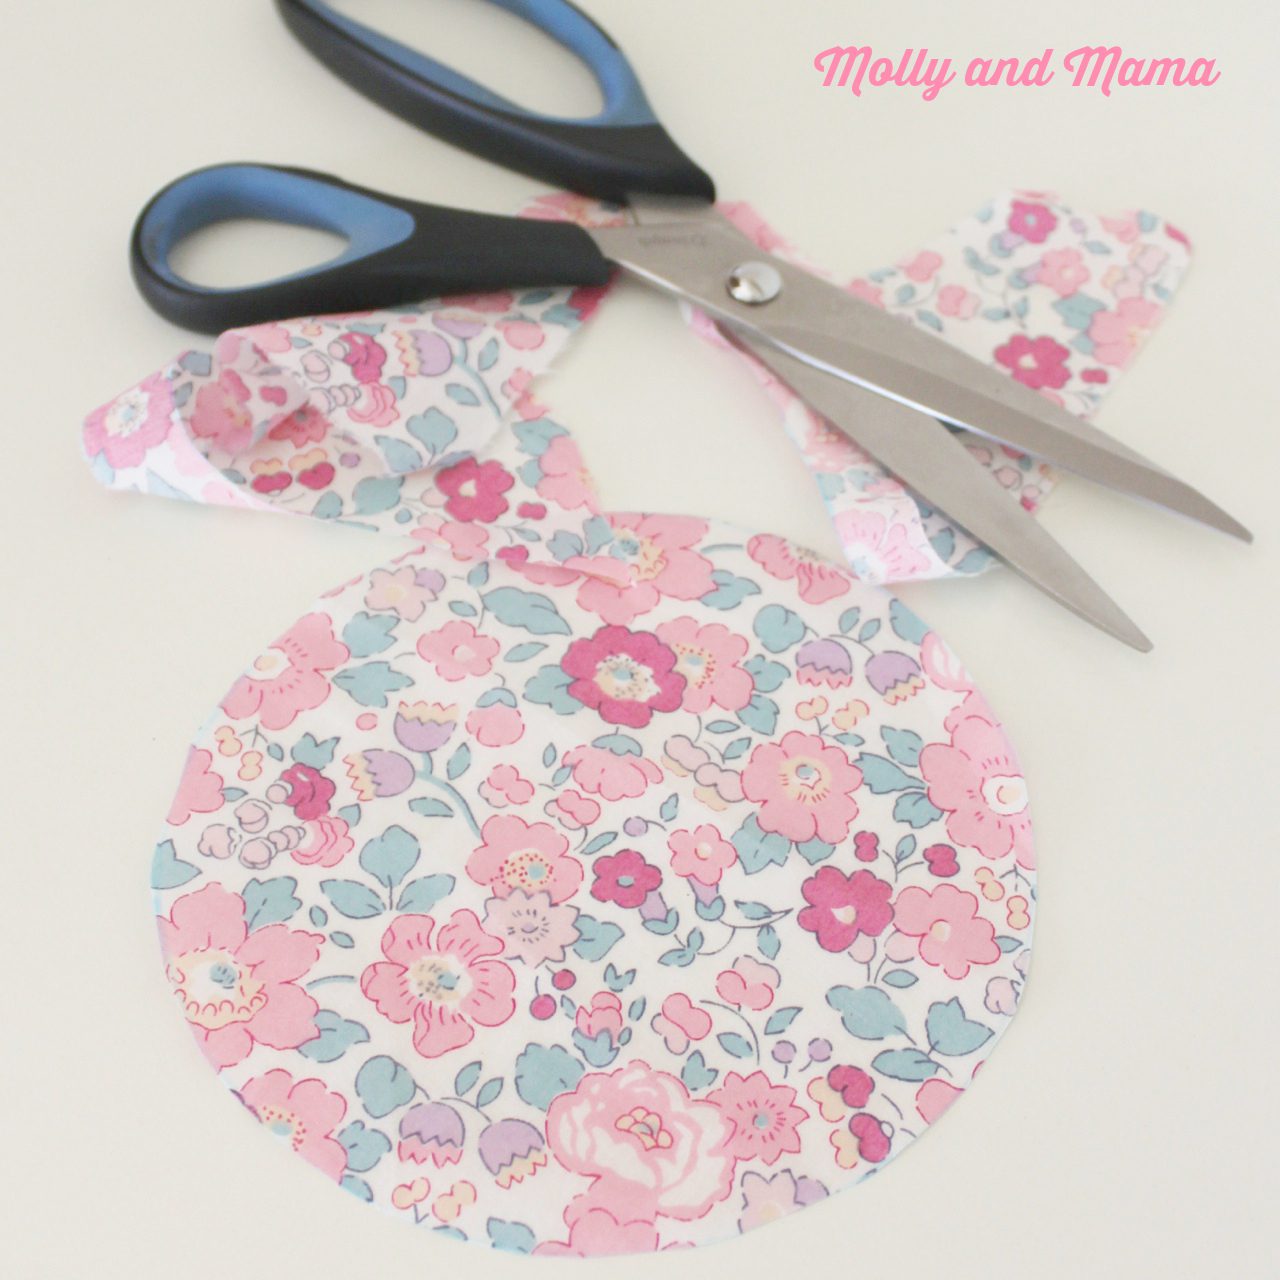
Cut out your printed template in the size you want. Then trace around your template (or your chosen circular object) onto the wrong side of your fabric, using an erasable marker.
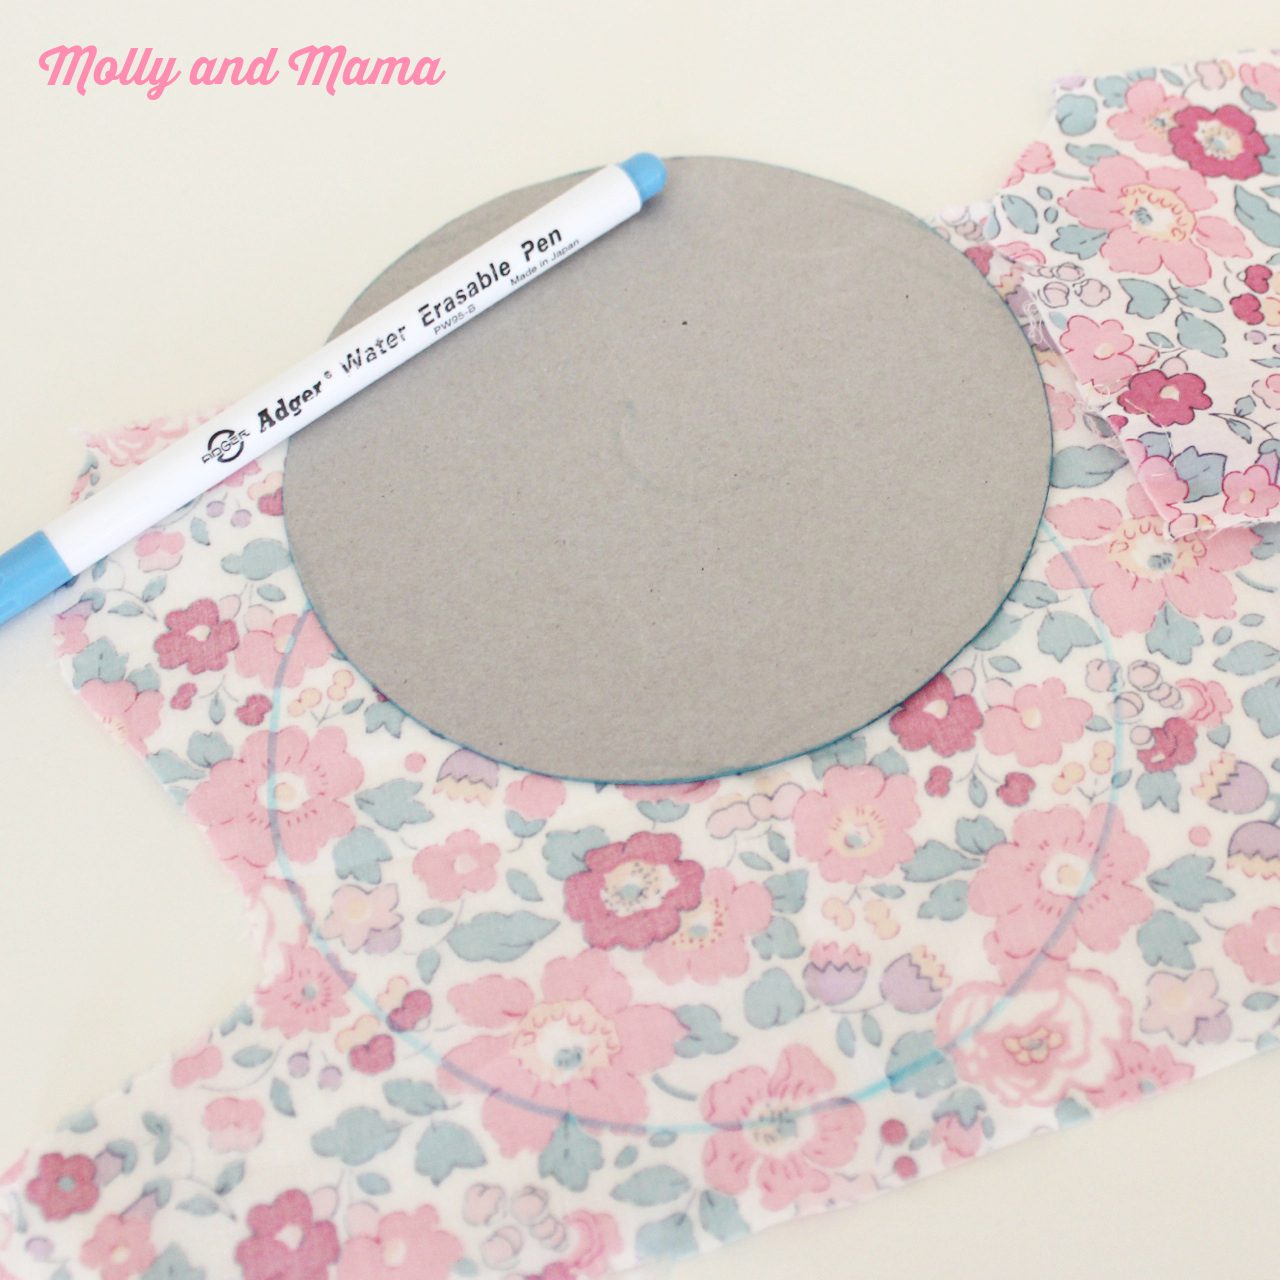
Carefully cut out your fabric circle and give it a quick press with the iron if you haven’t already done so.
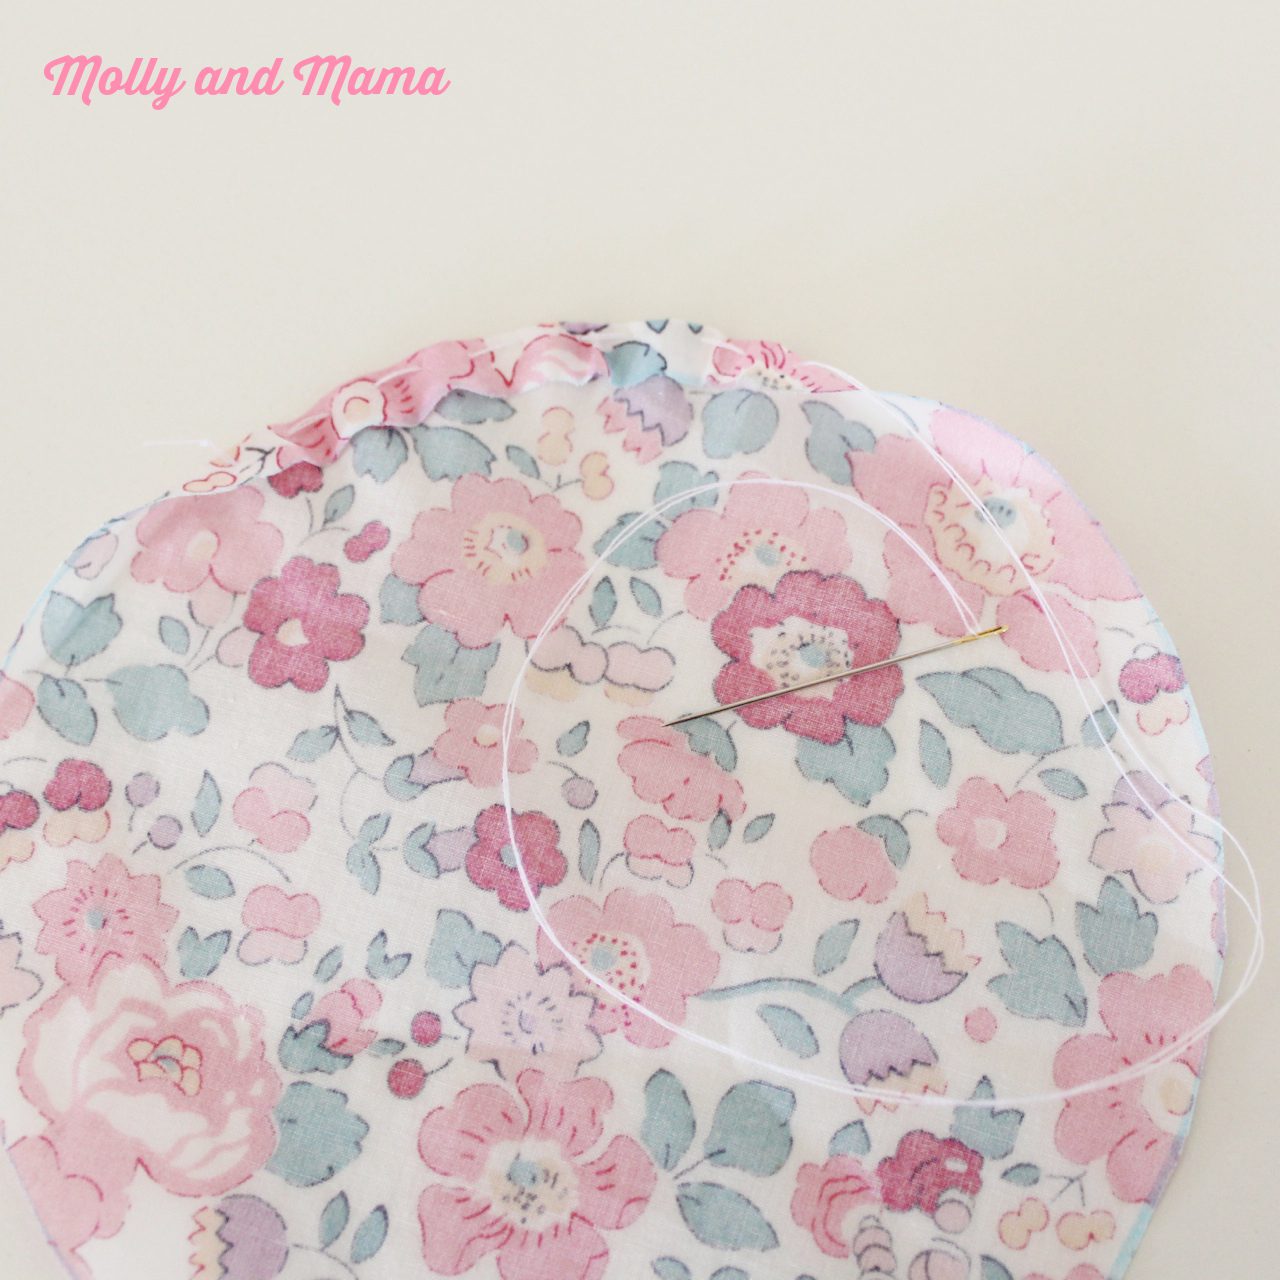
Now we’re set to get stitching. Thread a needle with sewing thread, join both ends and tie a knot so your thread is doubled. Make sure you have enough thread to stitch the circumference (or outside edge) of the circle.
TIP: For delicate fabrics, use a finer thread so that your stitches are more difficult to see. I like Aurifil 80 weight cotton.
Place your fabric circle right-side down on a flat surface. Begin by folding over a scant hem about 1/4″ (5mm) and sewing a running stitch around the outside edge of the circle. Start stitching on the right side of the fabric so that the knot shows on the outside (we’ll hide it later).
If your stitches are close together, you’ll create a larger ‘opening’ at the centre of the yo yo. I like wider stitches that close the gap in the centre instead. Experiment to see what you prefer.
I find it quicker to ‘load up’ your needle with a number of stitches at once. It is also easier to check that your stitches are the same size. When the needle is full, you can pull your thread through and continue loading it up again.
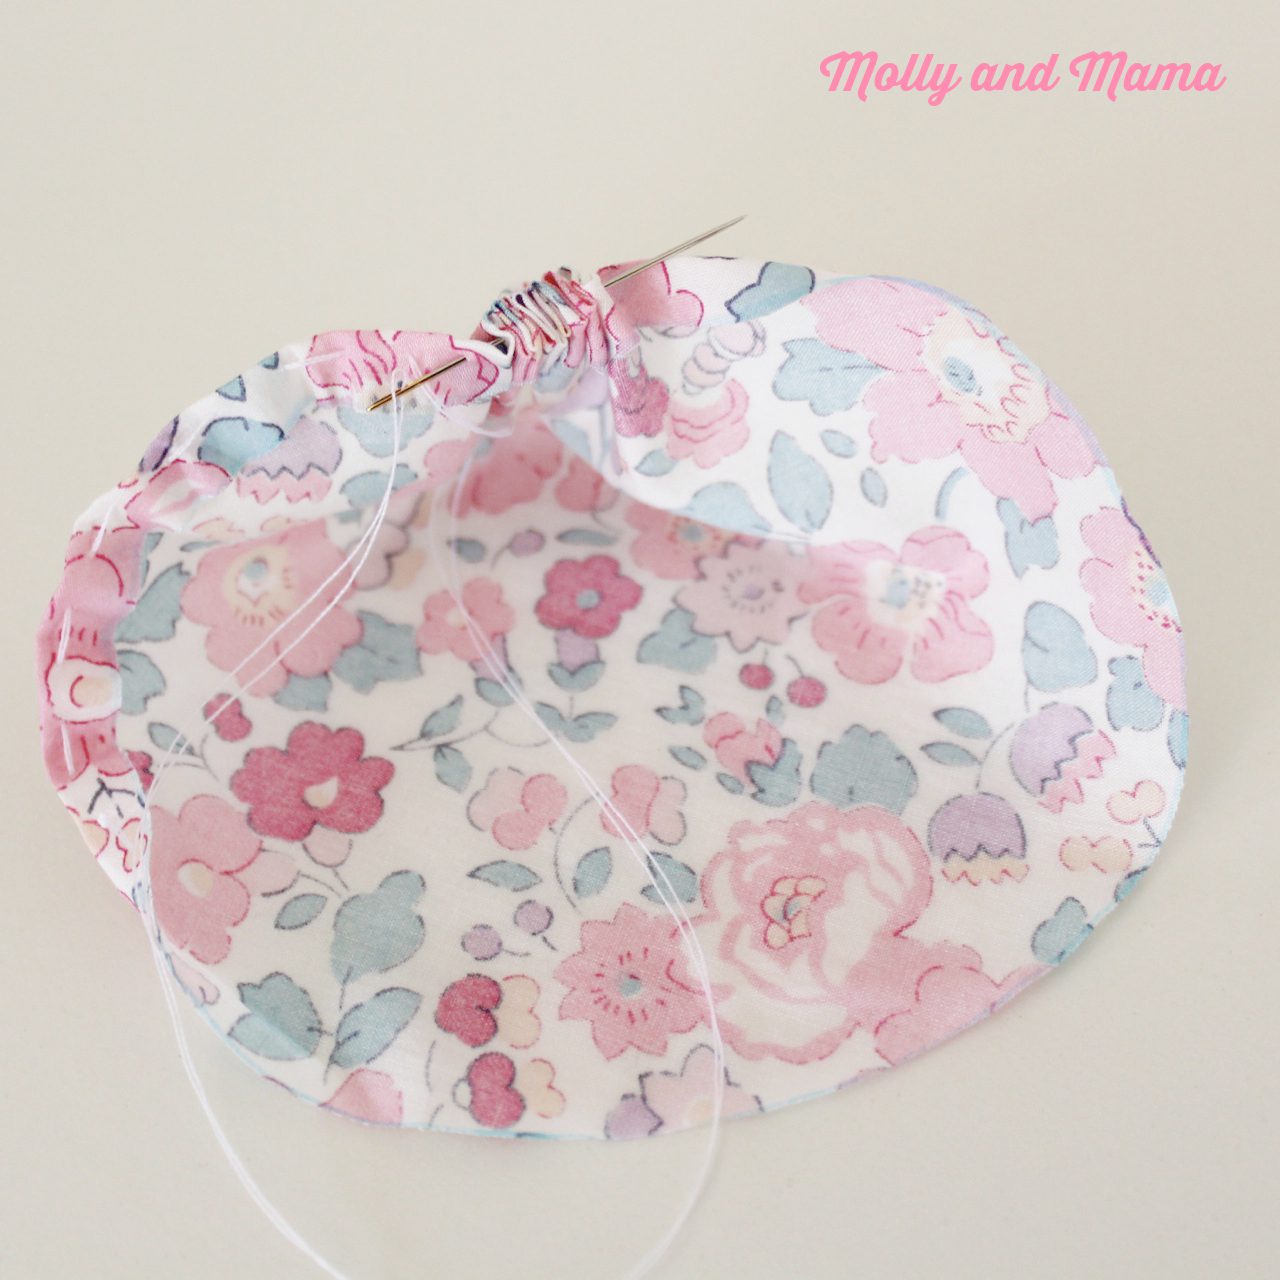
When you have completed ‘hemming the circle’, ensure that your last stitch exits on the right side (or same side of the fabric that you started on). This will make for a neater finish when you finish your yoyo.

Gently pull your thread to gather up the stitches into a little puff.
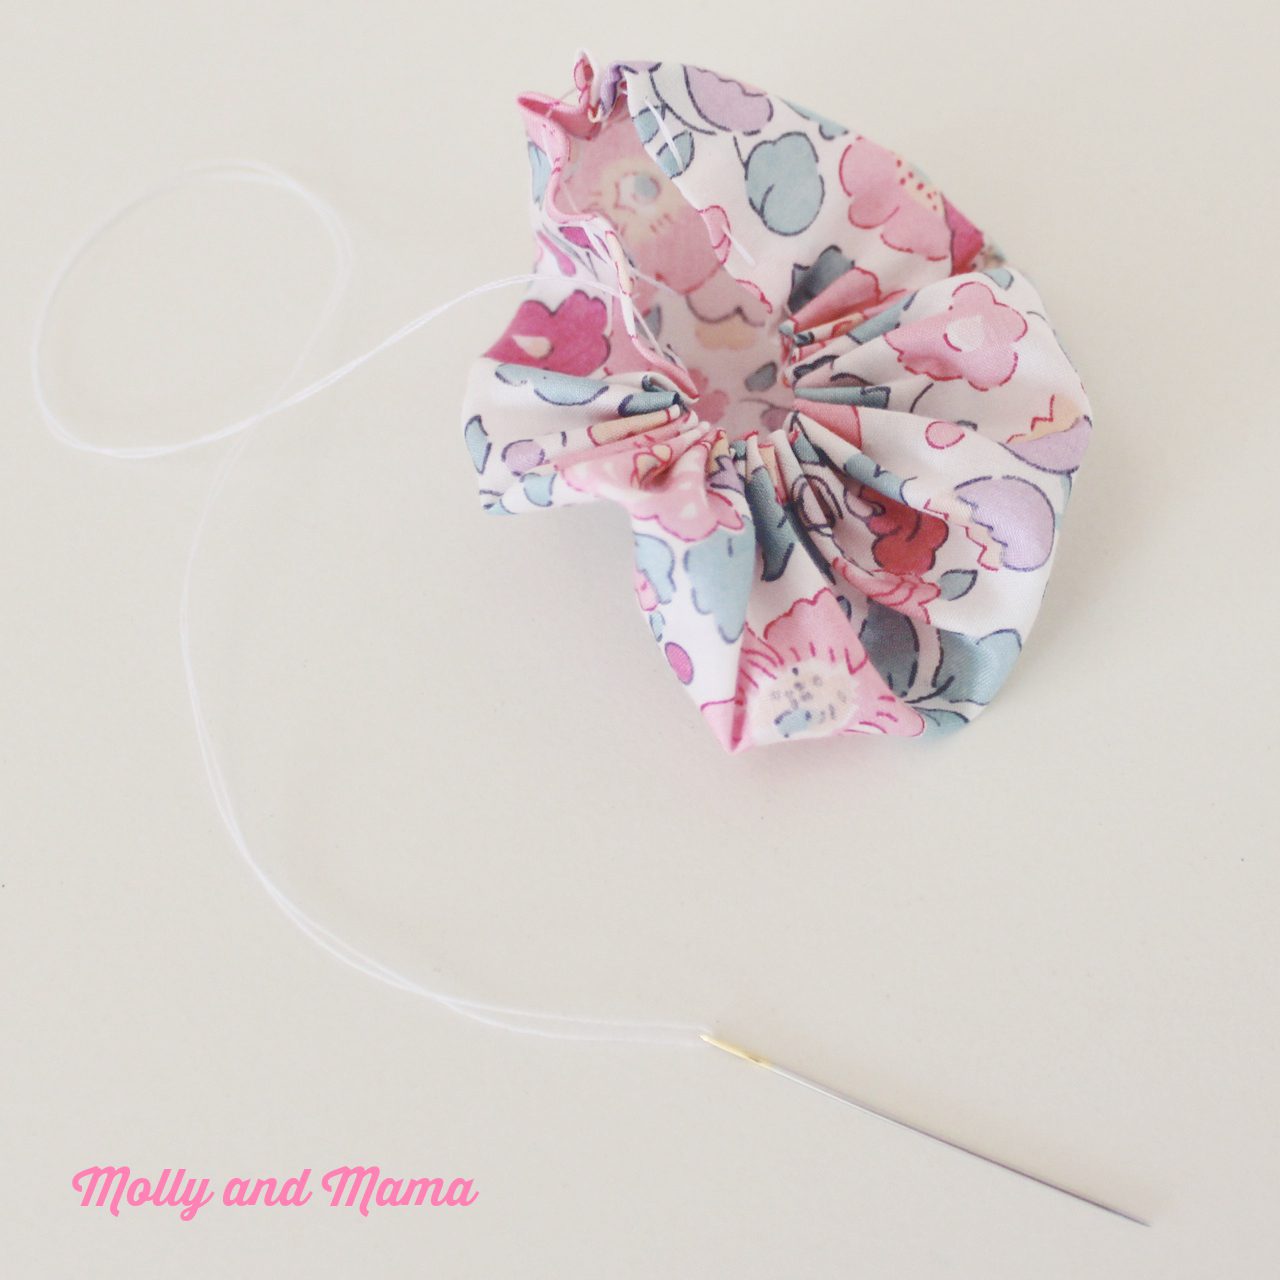
Flatten the puff and then shape the yoyo with your fingers, helping the ‘pleats’ to be evenly spaced. Ensure the knot is hidden in the pleats. (You may wish to trim off any excess thread after the knot).
One way to quickly complete your yo yo is to tie the ‘knot’ end of your thread to the ‘needle’ end and trim the knot once secure. I like to use invisible stitches and stitch through the pleats to ensure my sewing is secure instead. So when you’re happy with the shape, use a few extra stitches to secure your yoyo. These could be following your first running stitches. Or they could be stitching through the pleats of the centre of the yoyo, down though the un-pleated bottom and then back up through the pleats again.
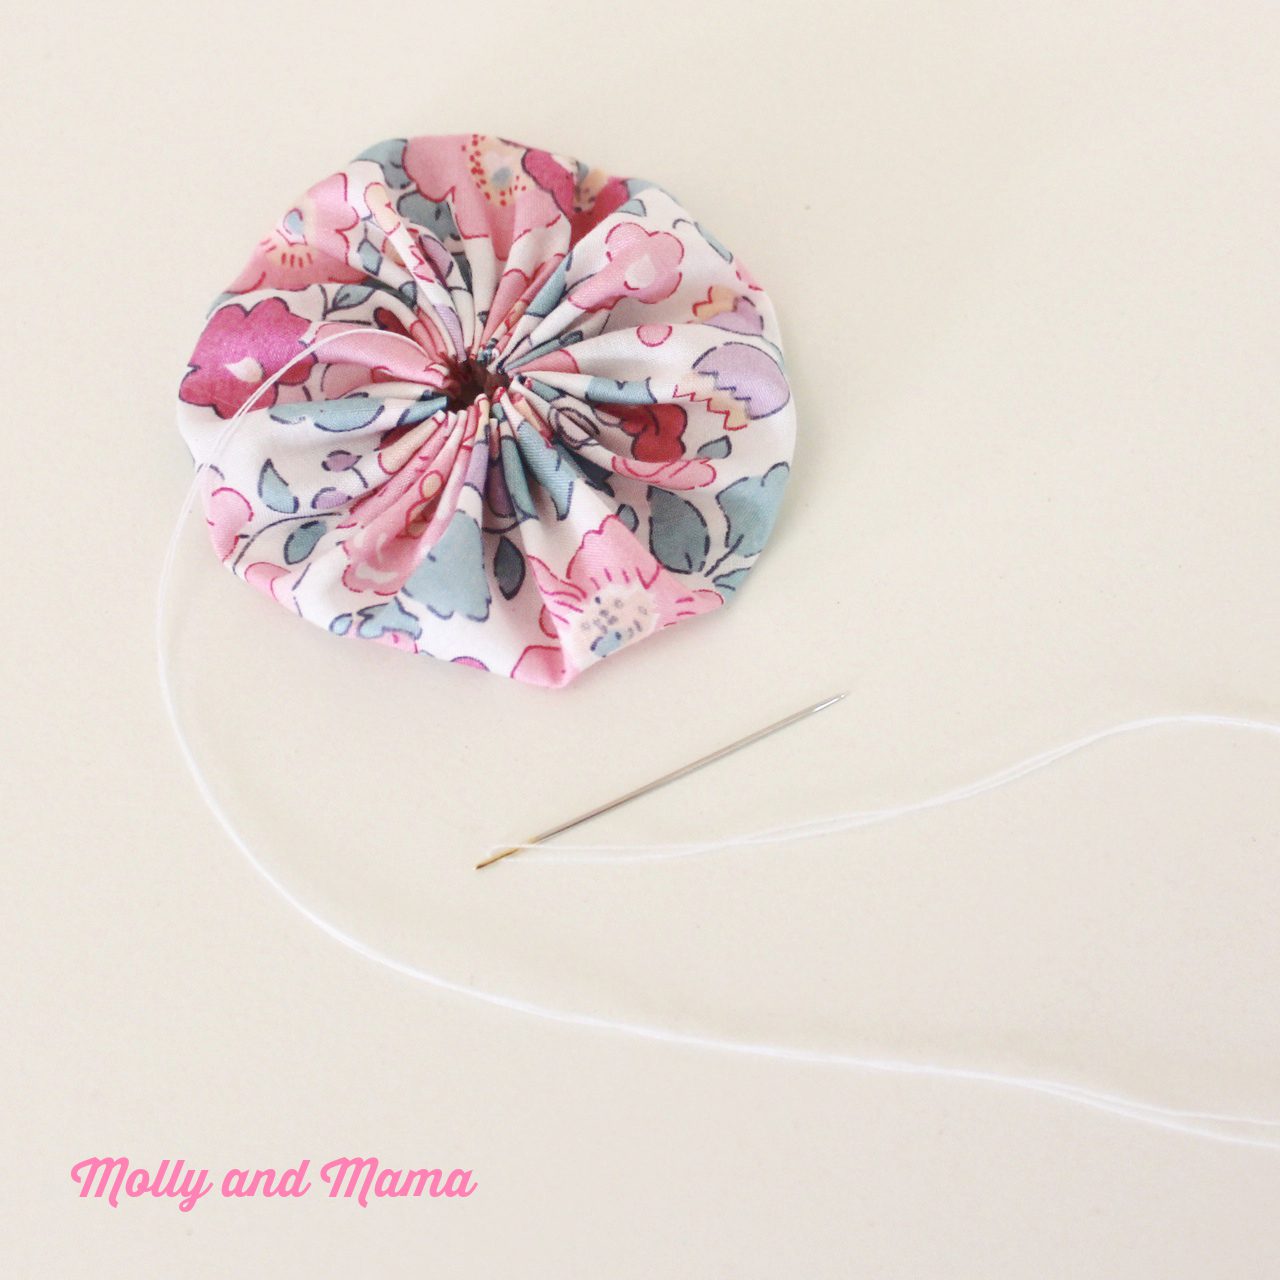
Remember to trim off extra thread and keep any threads hidden inside the yoyo.
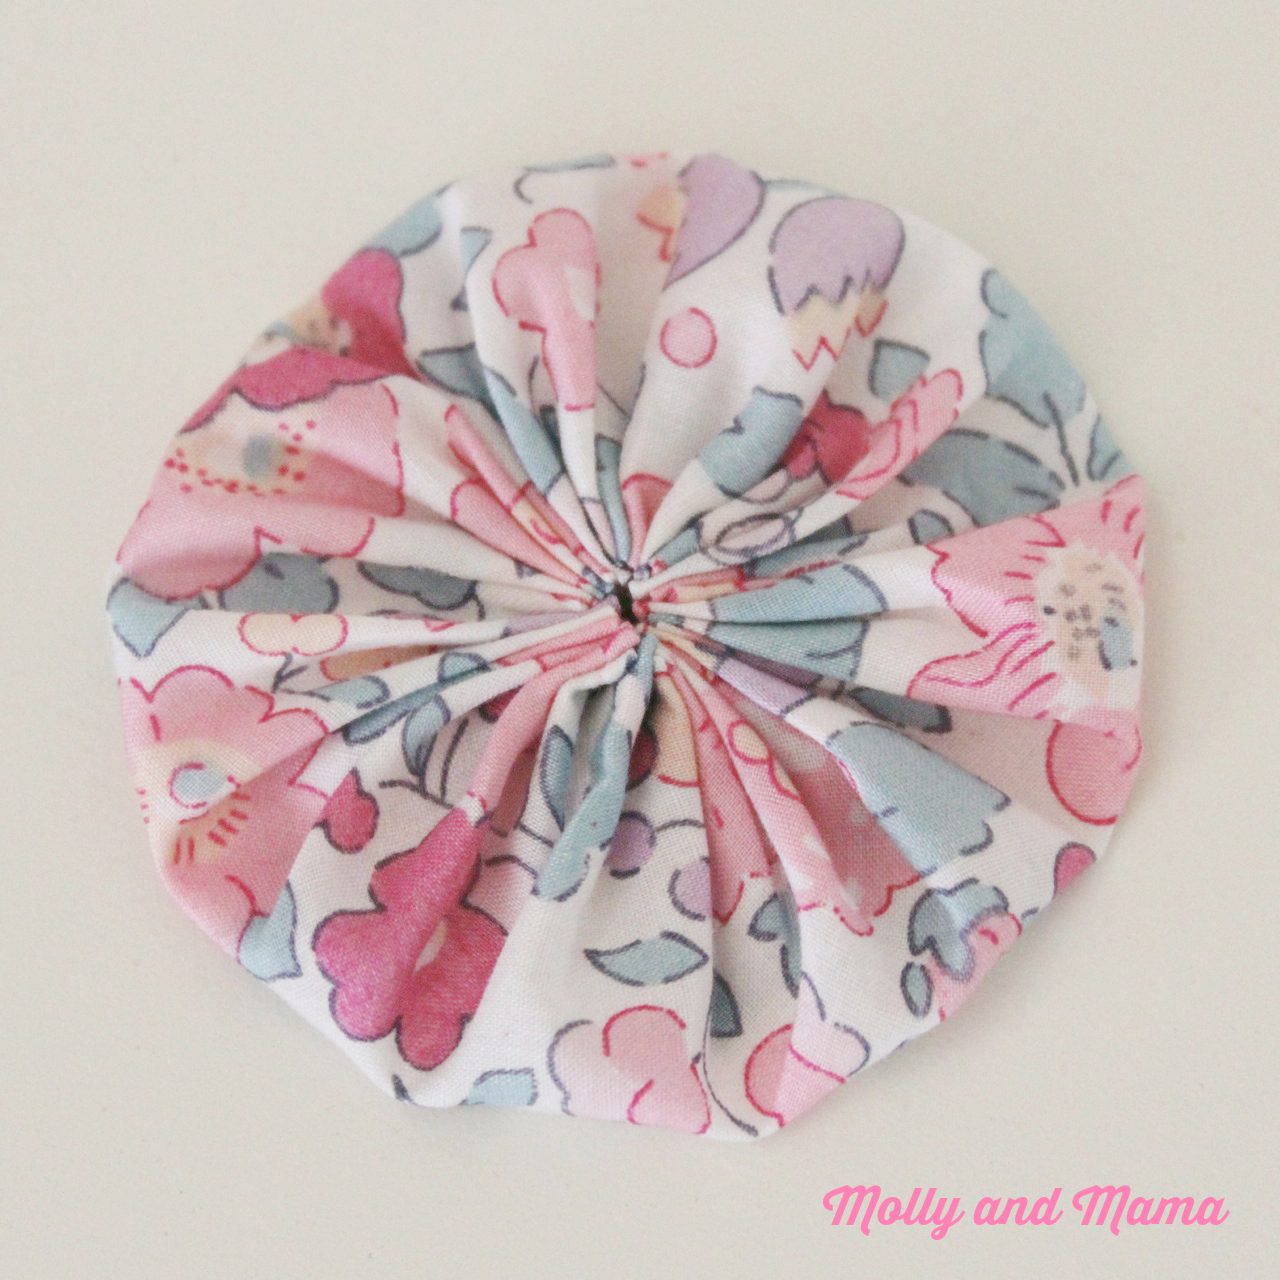
Now your completed yoyo is ready for use!
I’ve used this kind of yoyo to create a hair clip by attaching a pretty crochet flower to the front, and a ribbon covered clip to the back. You can follow my tutorial for this project HERE.
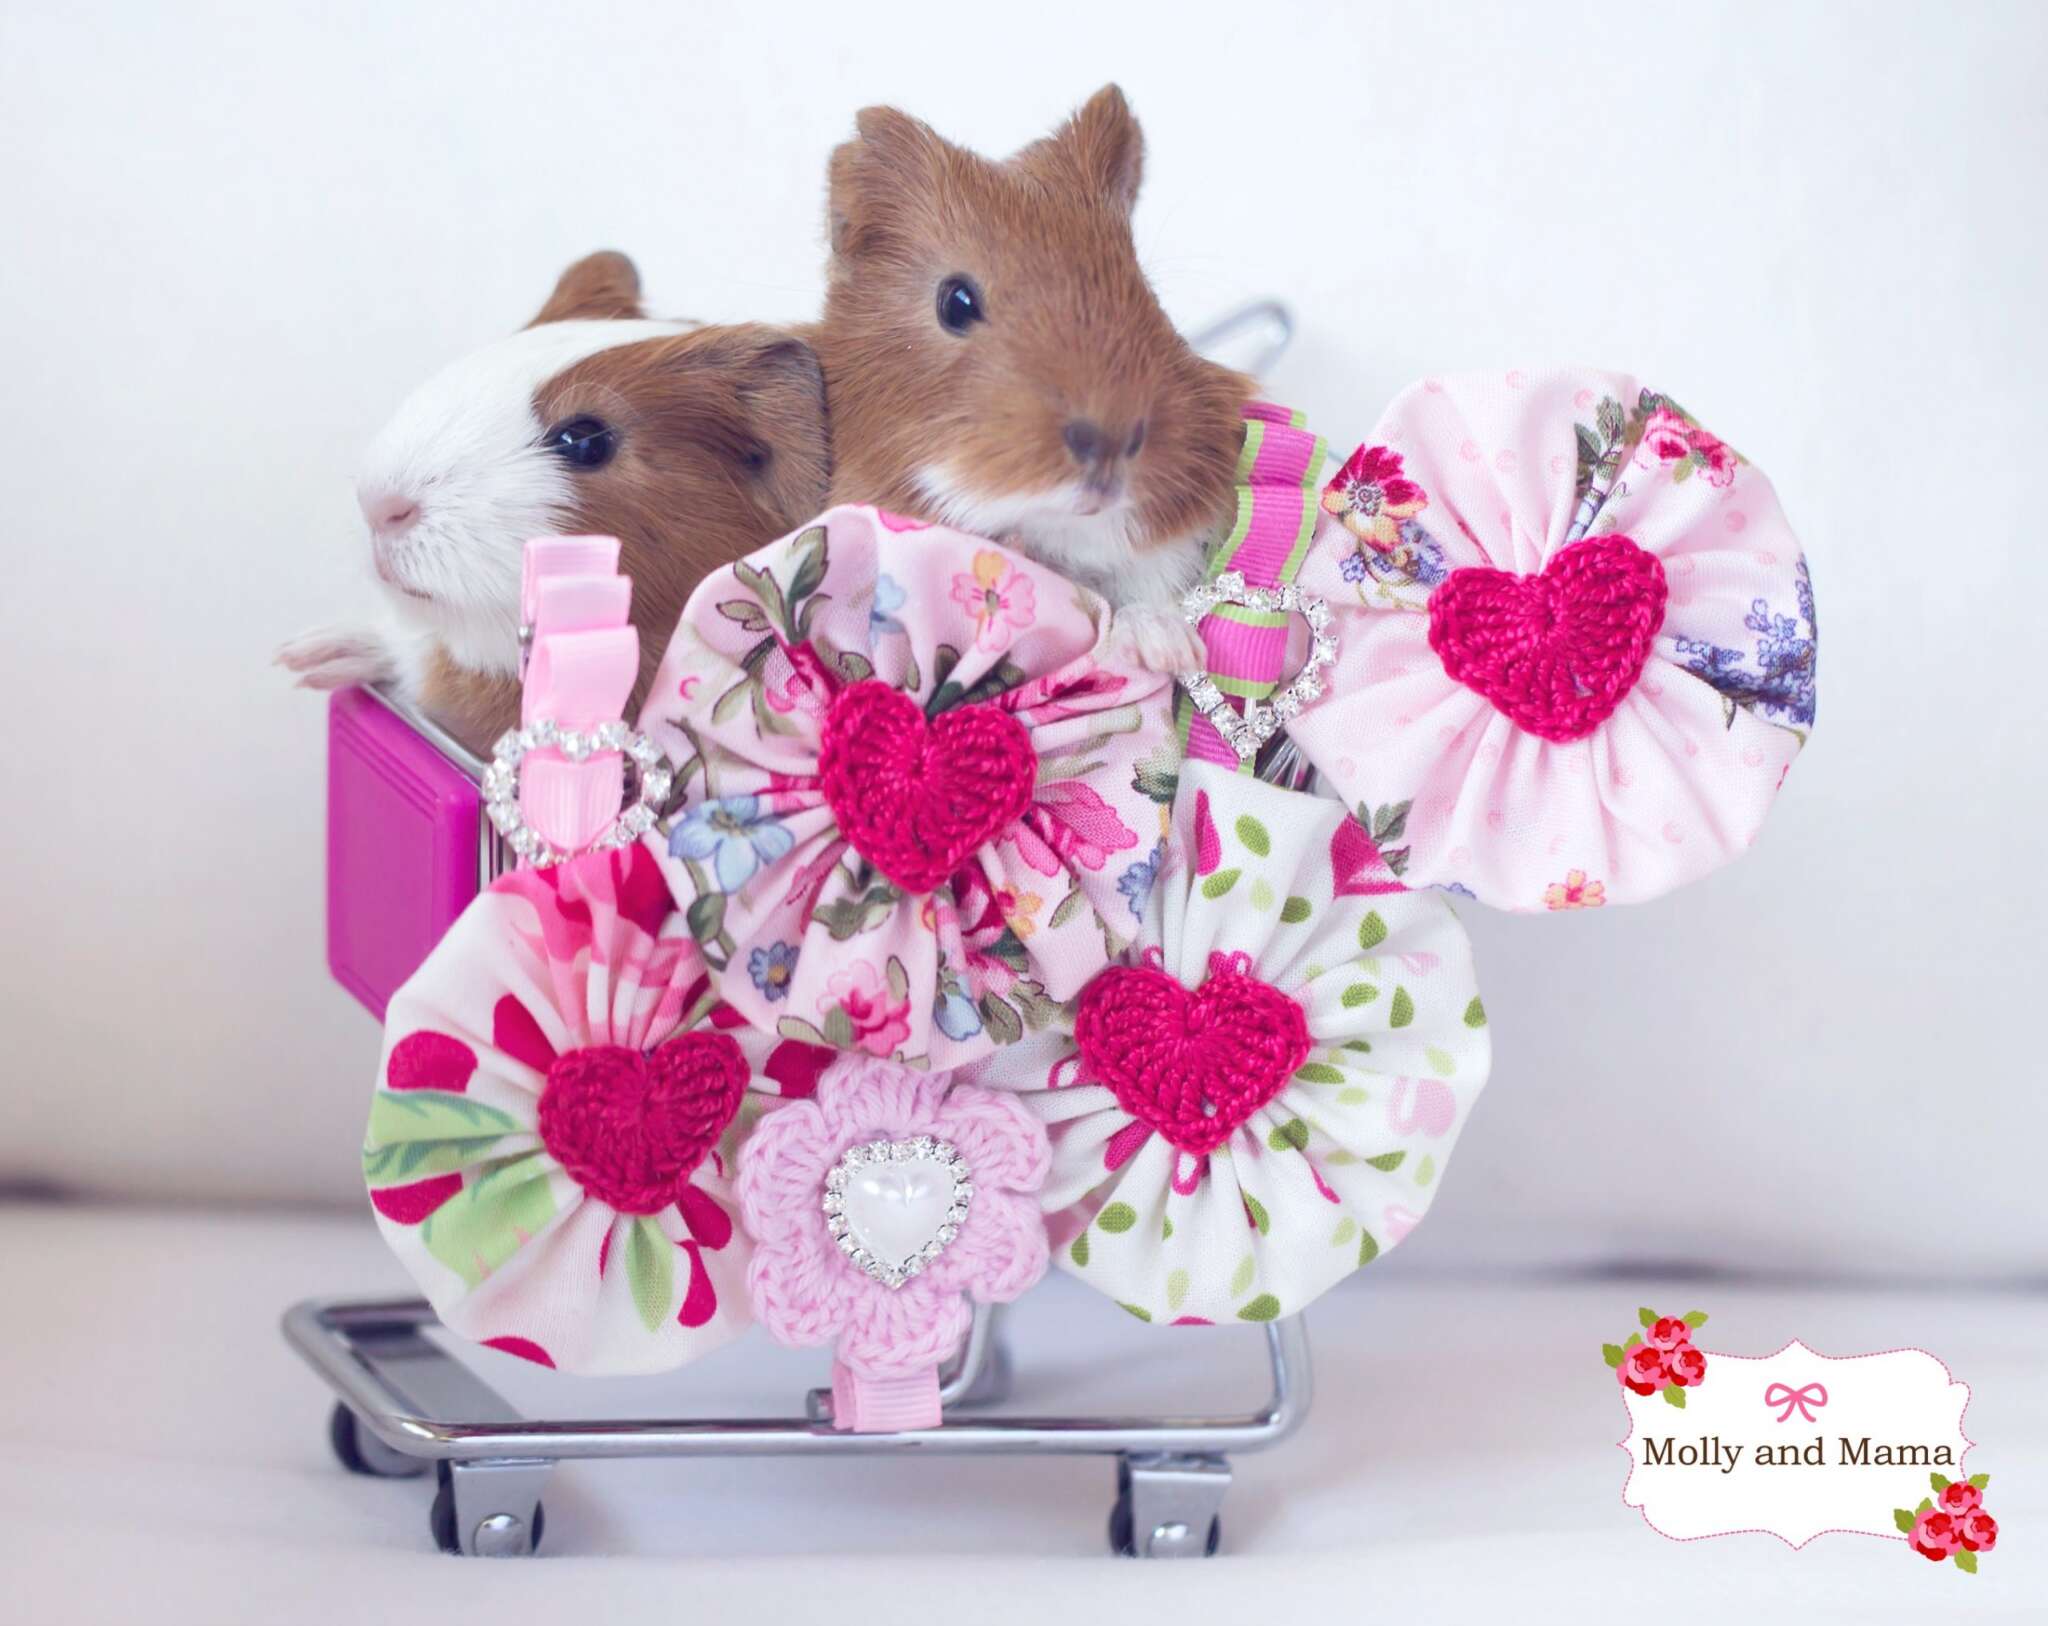
(Thanks to MiaMia Photography for the gorgeous baby guinea pig photos!)
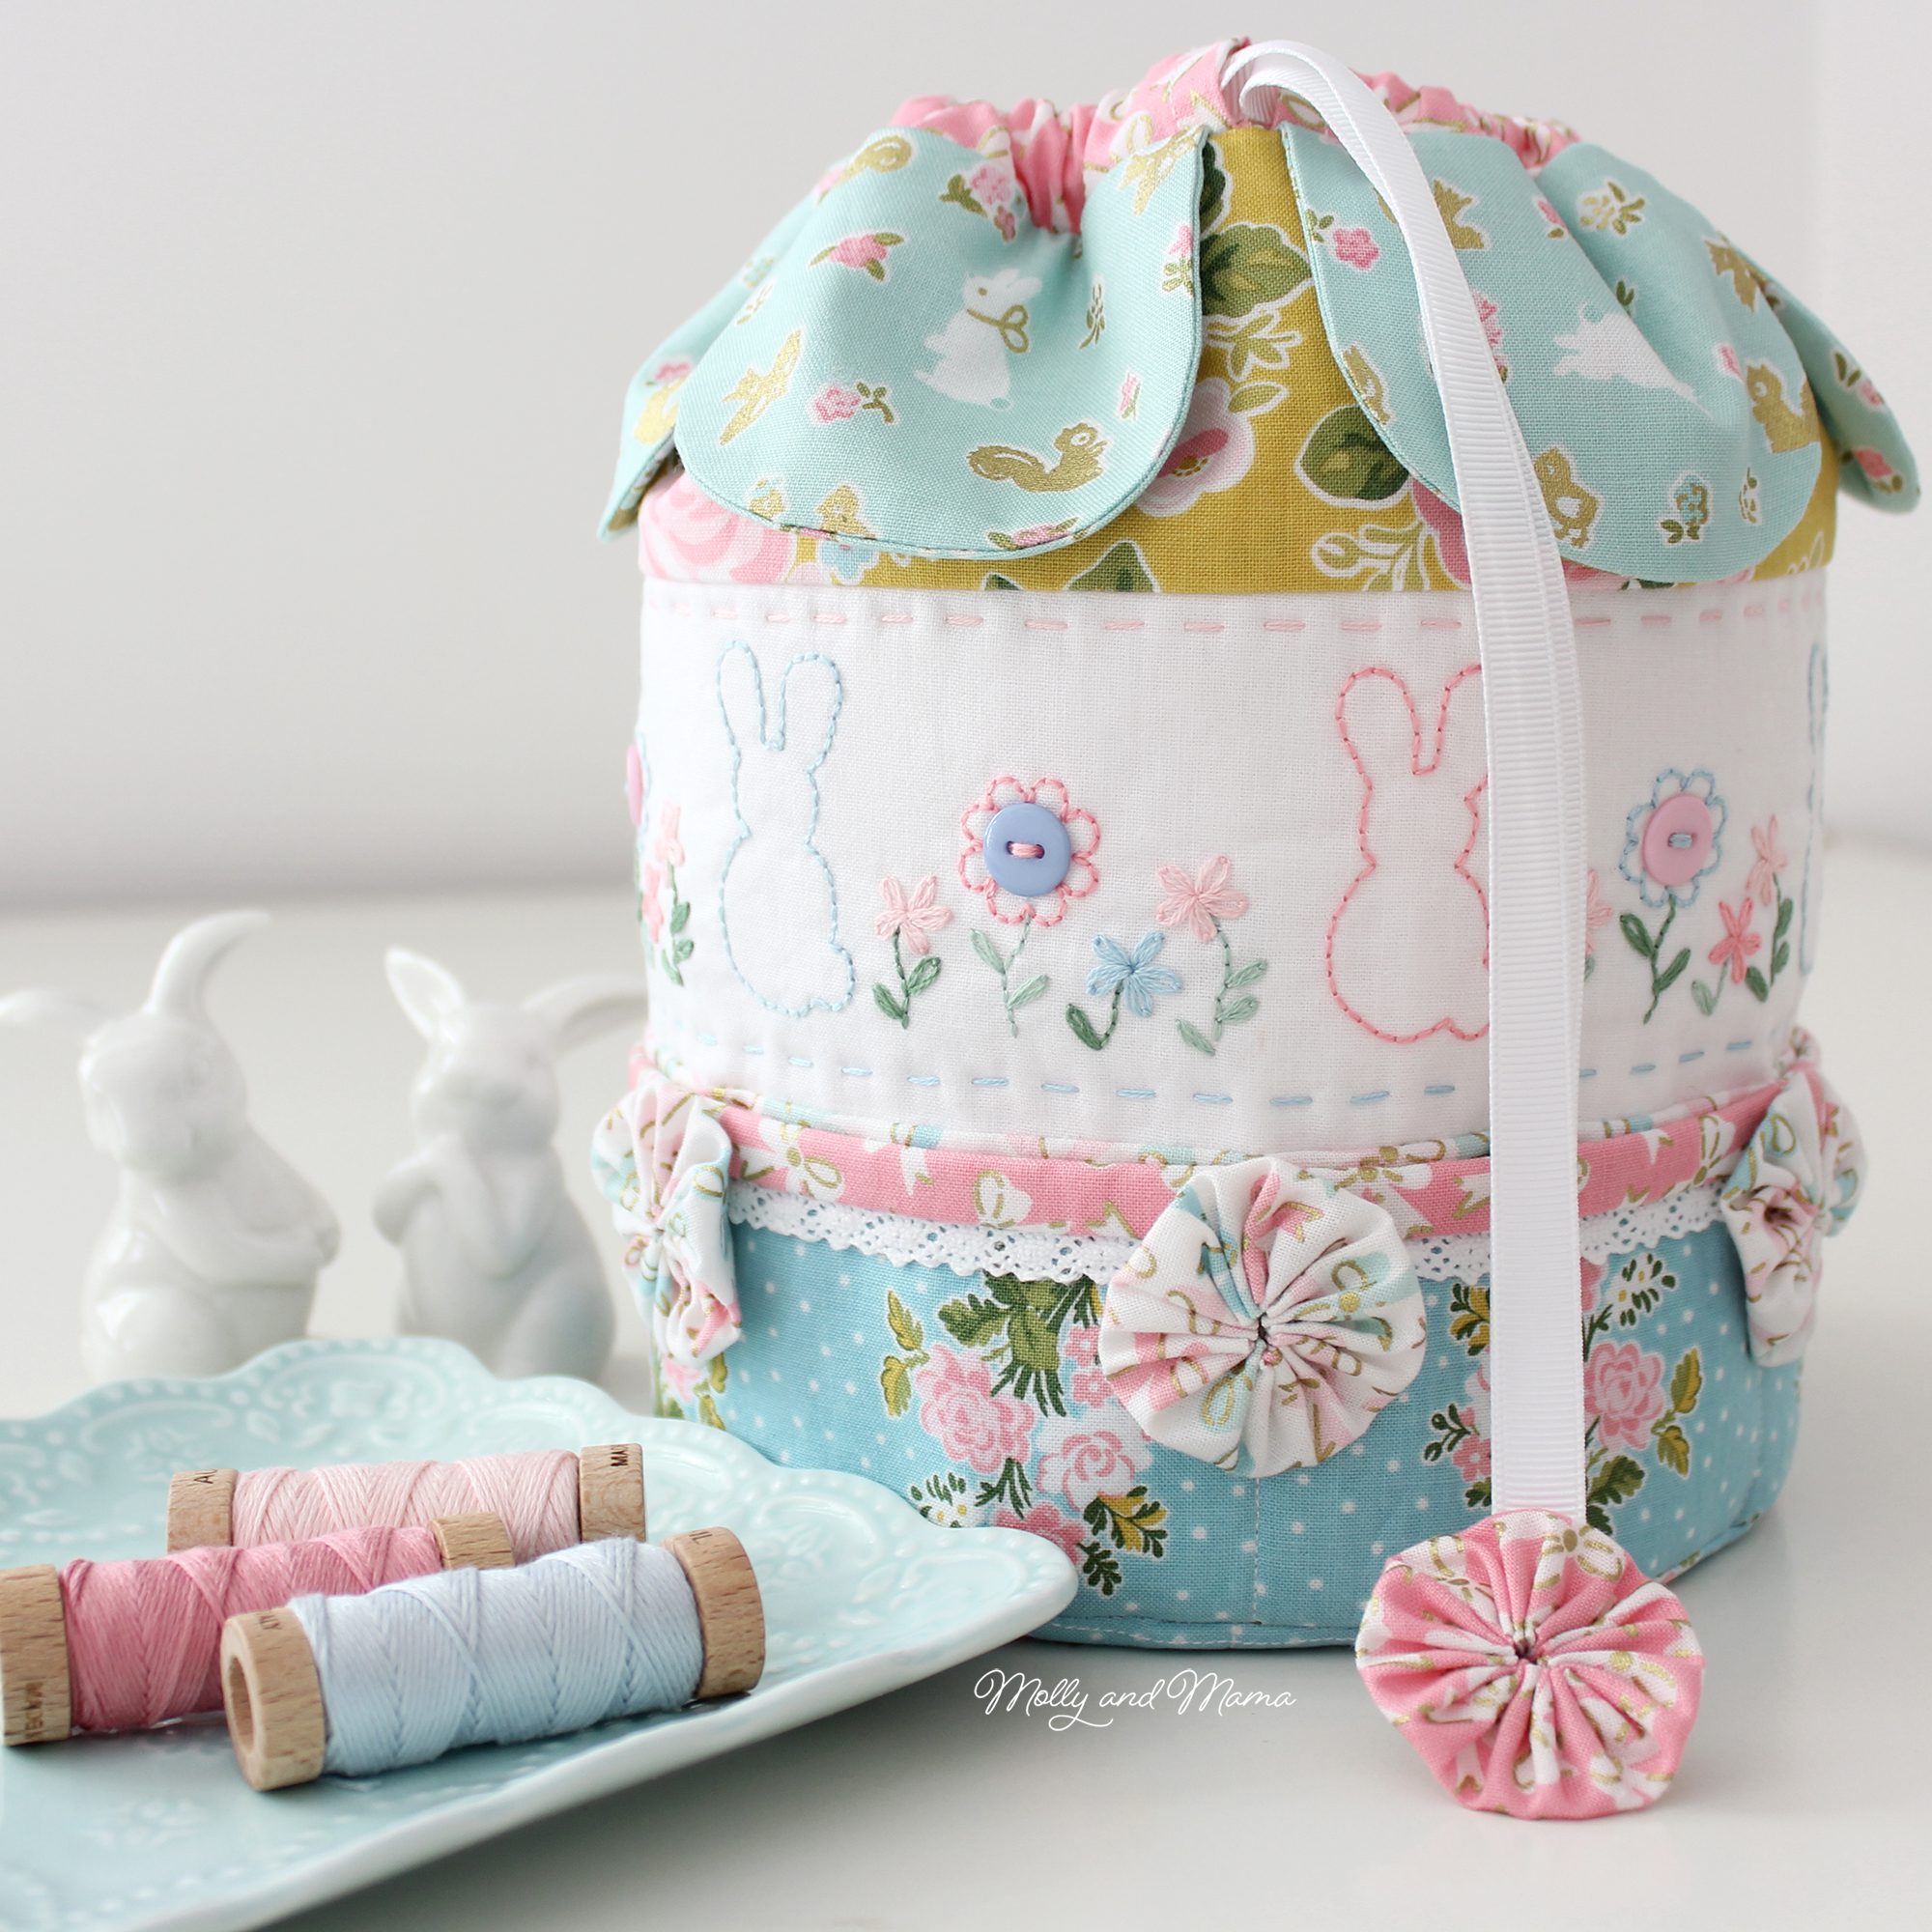
Yoyo’s have also been used the adorn the sides of my Easter Dilly Bag. How cute do they look?
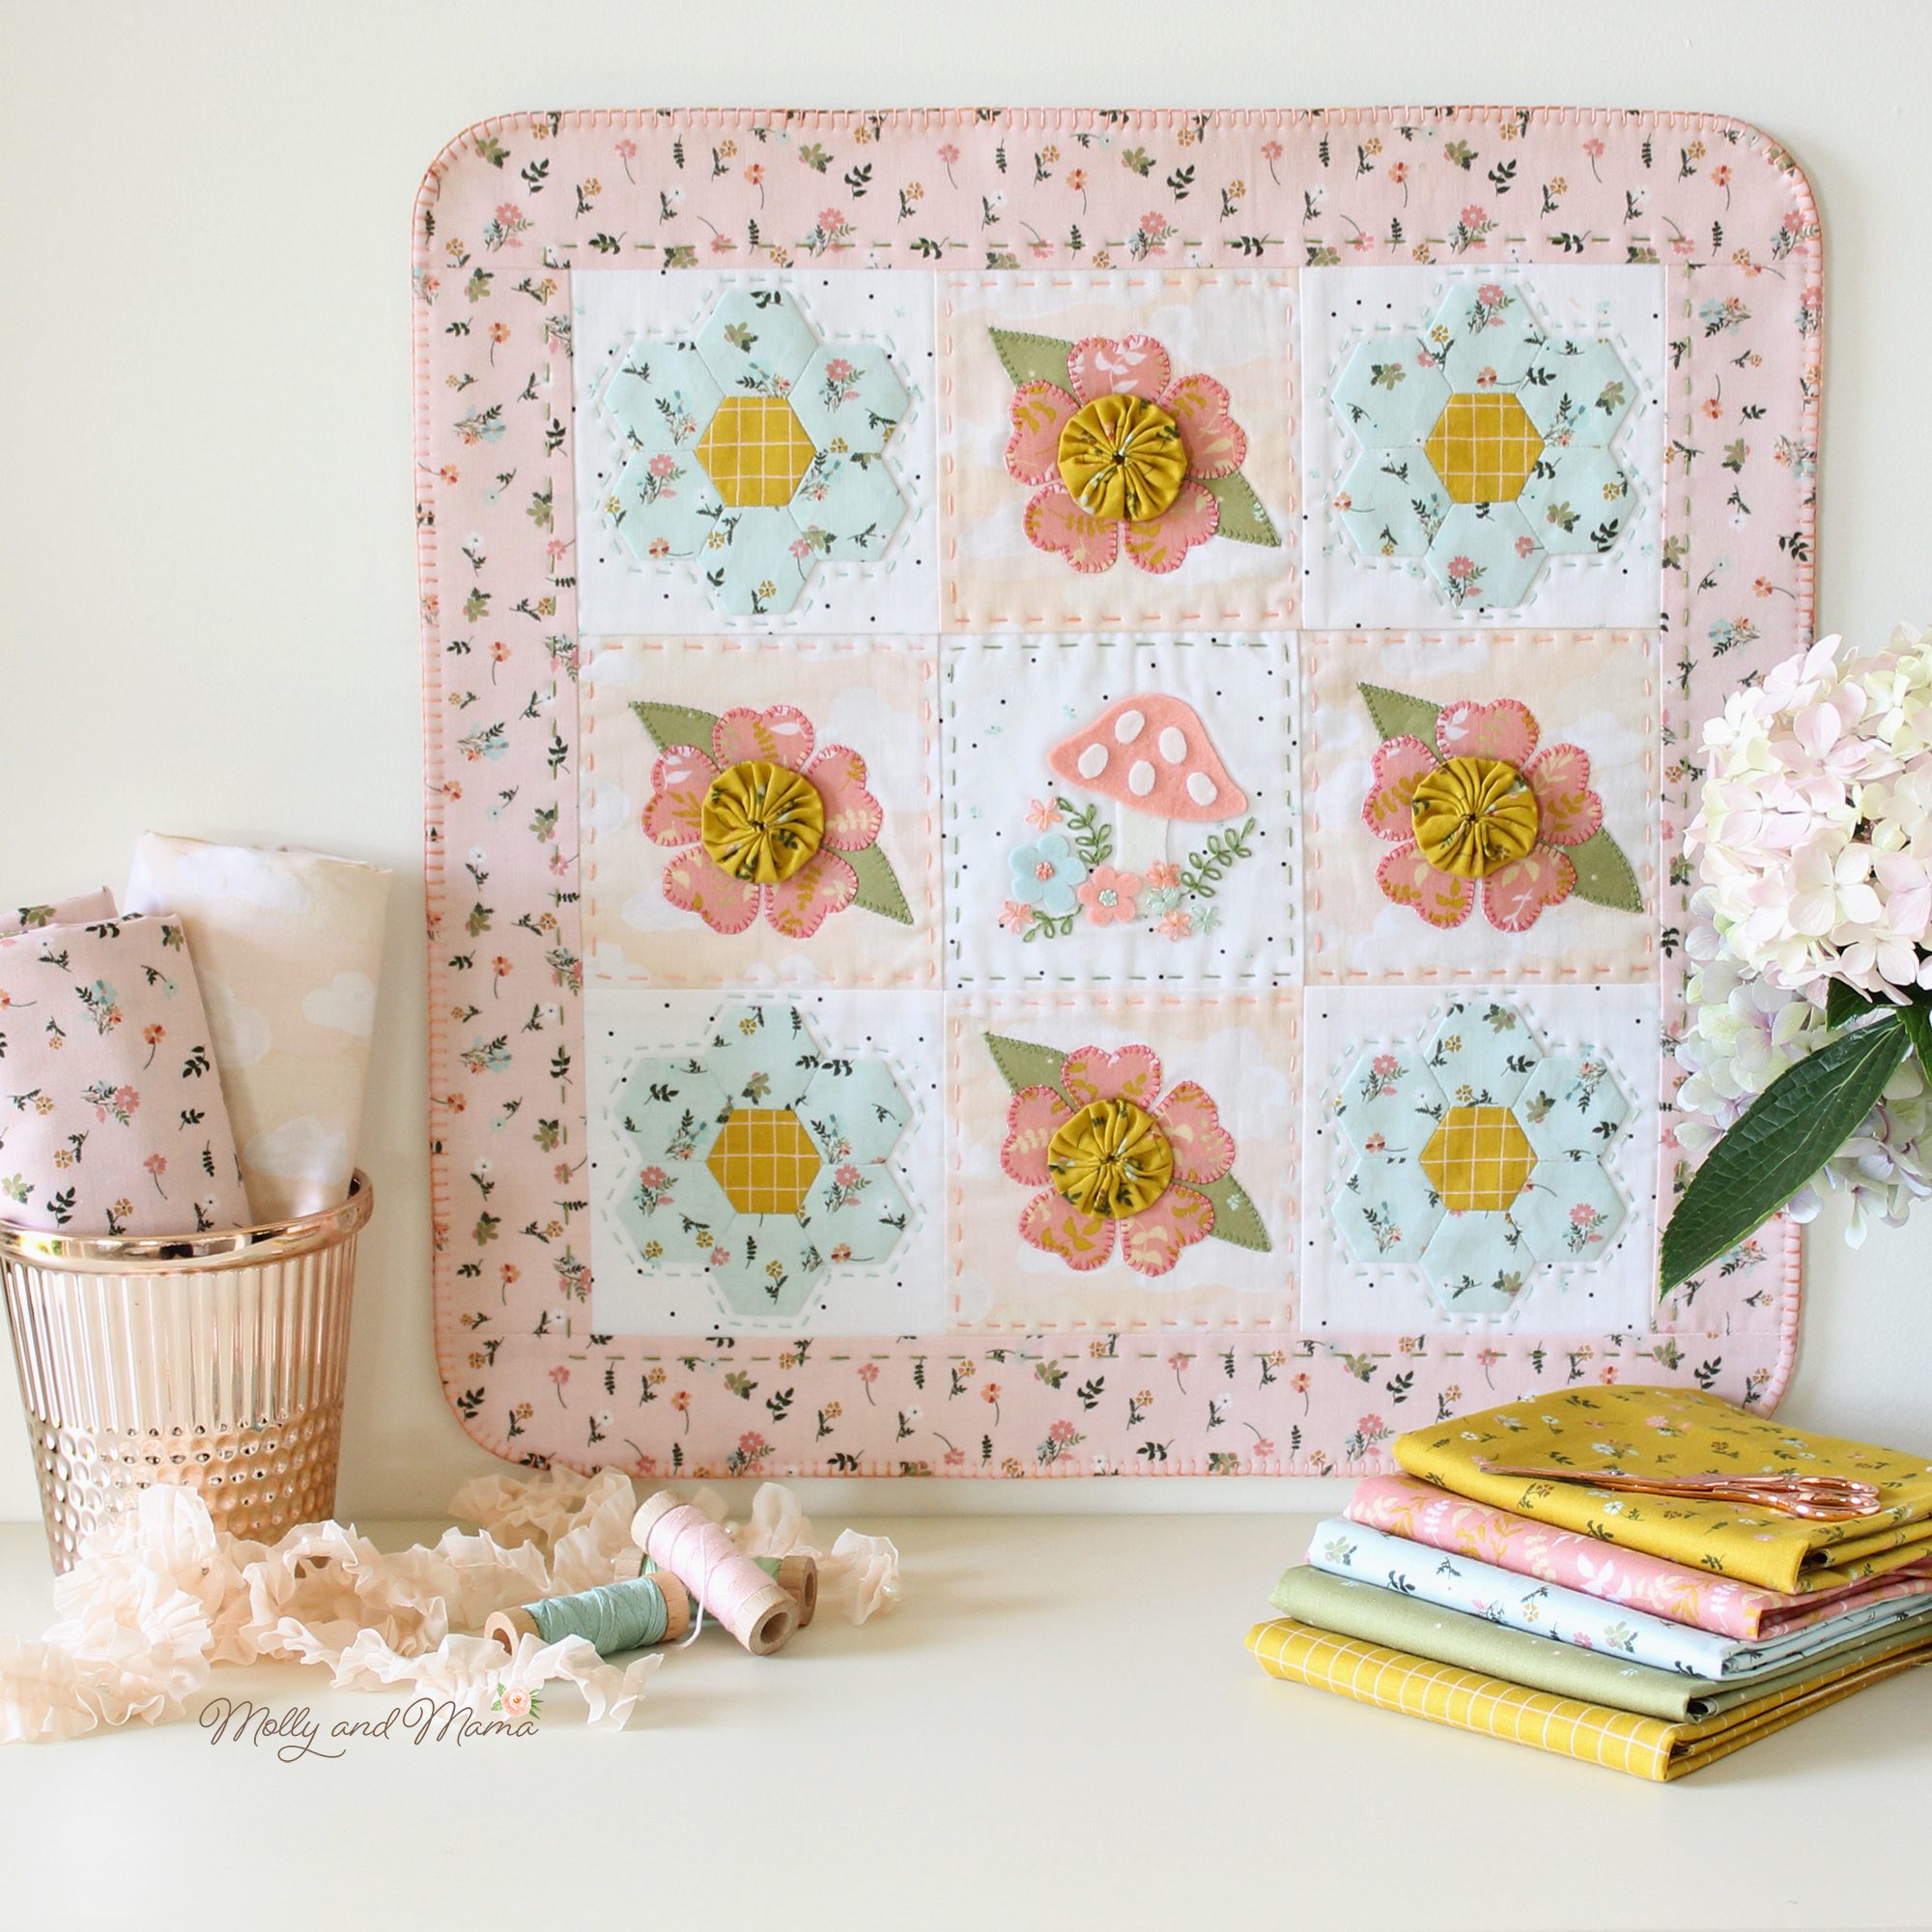
They’re also used in this skill building mini quilt that teaches you English paper piecing, raw edge fabric appliqué, yoyo making, felt appliqué, simple embroidery and hand quilting. The Sweet Stitches Sampler is perfect for beginners.
Thanks for being here for another Molly and Mama tutorial. You can find more projects for beginners HERE. Sign up via email so you don’t miss a thing!
Keep up to date with my sewing and project ideas by visiting PINTEREST. And feel free to share your creations on the Molly and Mama Facebook Page and tag me on Instagram.
What projects will you be making with yoyo’s? Happy stitching, Lauren x
This post was written by Lauren Wright for Molly and Mama http://www.MollyandMama.com.au
So cute! I love little yoyo’s
They’re such a practical little project Jessie. I can’t wait to make a little coverlet with them.
Thanks for linking Chrissy! Your cushion project is adorable!
Love Yoyos .. Use as emblellishments on quilts and tea towels. I have a yoyo quilt that was made by my Grandma which consists of approximately 1400 yoyos… all made from the scraps of sewing for her 6 daughters MANY years ago. My treasure!
Joyce, the story of your Grandmother’s quilt is so precious. It’s lovely to hear so thanks for sharing!
To complete the yo-yo, you say to “tie the ‘knot’ end of your cotton to the ‘needle’ end and trim the knot once secure.” I don’t understand what that means.
Thanks for your question Rebecca. As an alternative to securing the yo yo with backstitches, some people like to tie the sewing cotton ends together instead. You can leave a long tail when you tie the knot in the end of your cotton before you start stitching. When you stitch around the circle you’ll come back to your cotton knot. After gathering your yo yo, you could tie your cotton to the tail you created and make a new knot that will hold all your stitches together. Does that make more sense? If not, let me know and I’ll post a photo for you. Cheers! 🙂
This is a terrific tutorial on yo-yos … thank you so much for sharing it. I really like some of the ways you’ve used yo-yos and you’ve given me some good ideas. ^^
Kate, I’m so glad you’re feeling inspired. I’d love to see some of the projects you create! Have fun!
I always thought small close stitches were best to create a closed look, now I know why mine never closed! Thanks a zillion!
Thanks for your feedback Valerie. Glad to be of help 🙂
I love yo yo’s! This is a great tutorial thanks for sharing with us.
You’re very welcome Debbie. I love them too!
Never guess what I made with my yo yo’….A King size quilt!
Yes I cut out over 1,300 yo yo ‘s and then appliqué them onto the
frantic. I’m now about to start appliqueing my second King size
quilt that no two yo yo’s are a like. I love making them. I also enjoy
hand appliquéing
What a fantastic achievement Becky. I’m so impressed!
I love those buttons! Is there a kit for them or something?
Hi Annie, the fabric covered buttons are made by Tilda.
Love Suffolk Puffs, they’ve been going way longer than the 1930s, alway the way back to the 1600s, in Suffolk (England) hence the name!
Thanks for the information Louise. I’ve done a little bit more research and updated my post accordingly. I appreciate you reaching out!
Thank you for the pattern and the tutorial.
I love it.
Laura in Houston, Texas
You’re very welcome Laura. Enjoy!