‘My Little Felt Busy Book’ Pattern Review
It’s no secret that I love working with felt. So much so, that I’ve even written an article with Tips for Working With Wool Felt! You can see it in the current issue of One Thimble magazine* on page 90. So it should be no surprise that I jumped at the chance to start sewing the ‘My Little Felt Busy Book’ pattern also found in the same issue. Kerry from Sutures & Sandpaper created the most adorable template and instructions. It’s well laid out, easy to follow, and has lovely clear photos and simple instructions. So I pulled out my stash of wool felt and got to work. And I just love how the first two ‘busy book’ pages turned out!
(*This post contains affiliate links to One Thimble PDF Sewing E-Zine. If you choose to buy from One Thimble via these links, I may earn a small commission. This doesn’t affect your purchase price, but helps me to continue bringing you free tutorials, projects and more. Thanks for your support.)
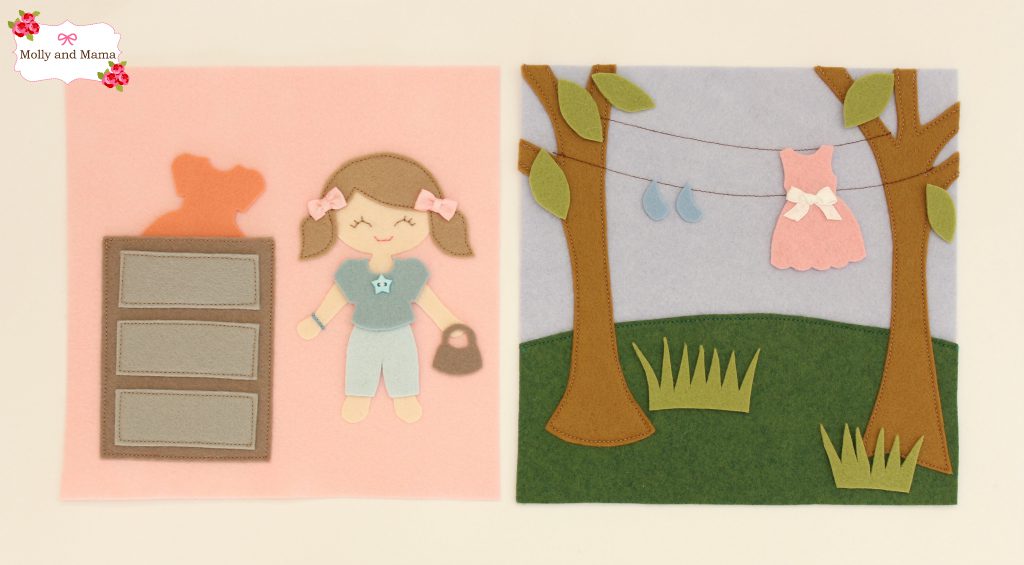
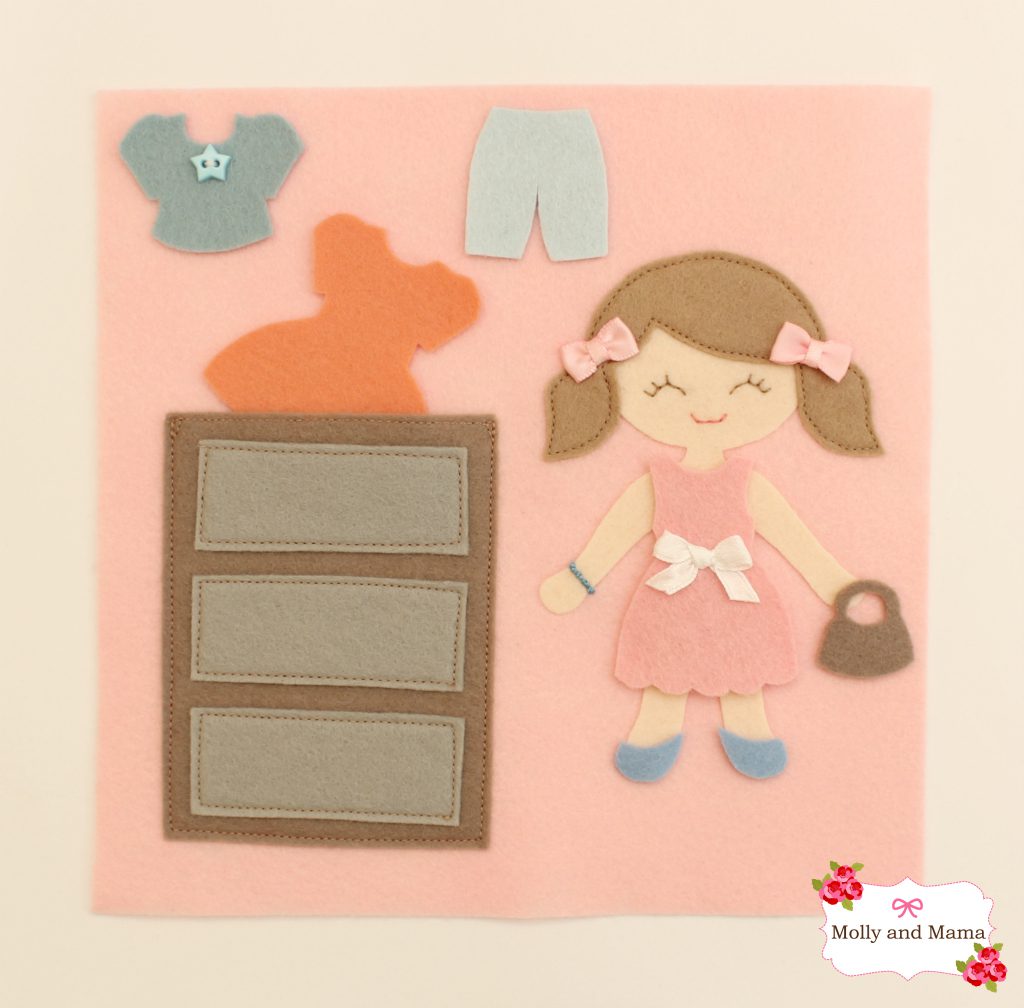
Kerry created a cute little girl (or boy) template to use for the first page. But I wanted to challenge myself and try something just a little bit different. So I used the Miss Miranda appliqué pattern from Issue 5 of One Thimble as an alternative to the template. If you haven’t got a copy of the magazine, you can buy it HERE. Alternatively, you can pick up the pattern on it’s own in the Molly and Mama Etsy store. I simply printed the template at 50% and used the same doll outline, dress and hair for this project, then sketched some new pieces too.
The doll shape, the hair and the new knickers were all backed with iron-on adhesive (easy fix) so that they could easily adhere to the felt background. If you choose to do the same, just be sure that the temperature setting isn’t too hot on your iron. And if you’re not working with 100% wool felt, be sure to use a press cloth to protect the felt as you iron it.
I then straight stitched the hair and knickers in place using the sewing machine. I also hand stitched her facial features, gave her a French knot bracelet, and added hair bows.
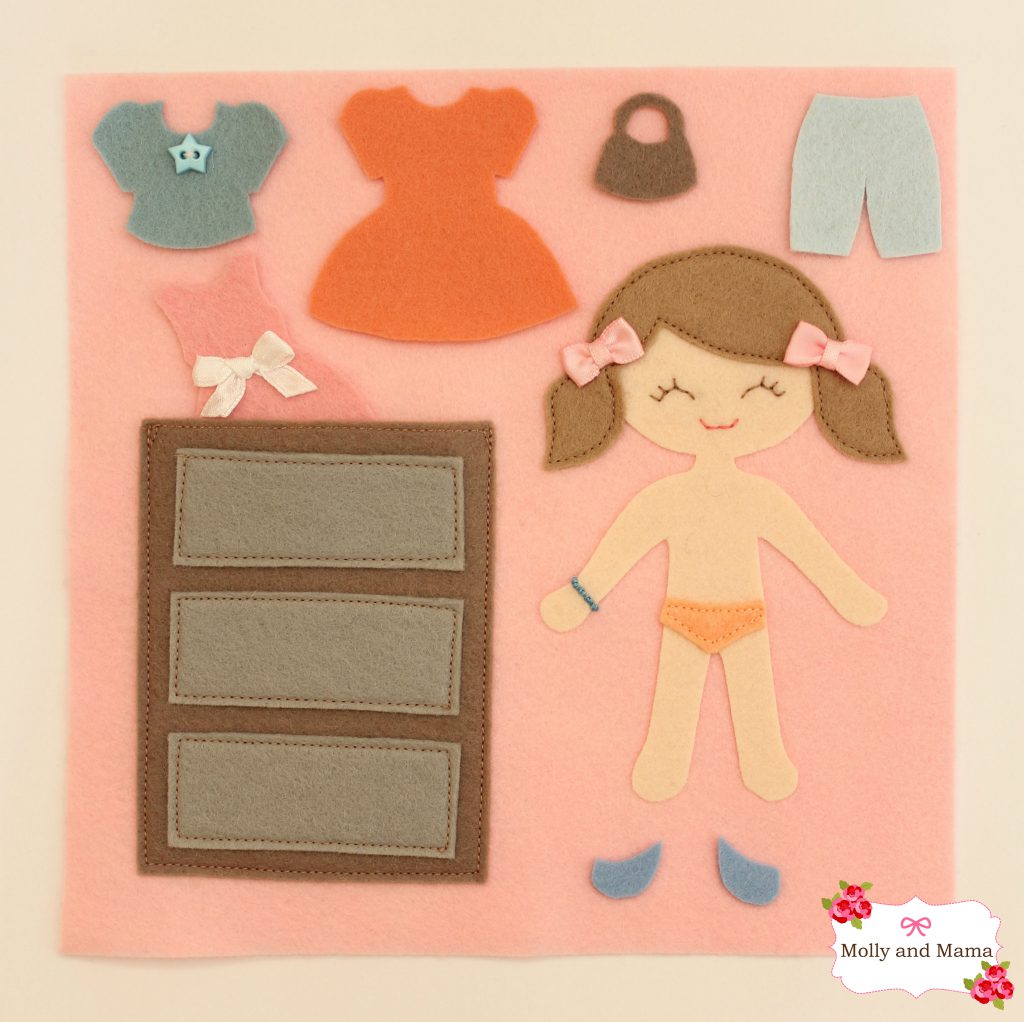
I also created some new clothes for Miss Miranda including pants and a top, another sundress, shoes and a handbag. Her wardrobe (and the clothesline) will be full! I love that all of these pieces can be rearranged, and changed.
Each piece of clothing was drawn on freezer paper. This product sticks to the felt when ironed, which means it’s really easy to use your drawn lines as a cutting guide for small and fiddly pieces of felt. It was particularly handy for the shoes and knickers. And best of all, the paper backing peels off when you’ve finished cutting. It leaves no residue, so you just have a clean cut edge on a shape that’s just the right size.
Embellishments were added to some of Miranda’s clothes too. Bows and buttons are such pretty additions! Now all of Miranda’s clothes can be safely stored in the open top of her chest of drawers!
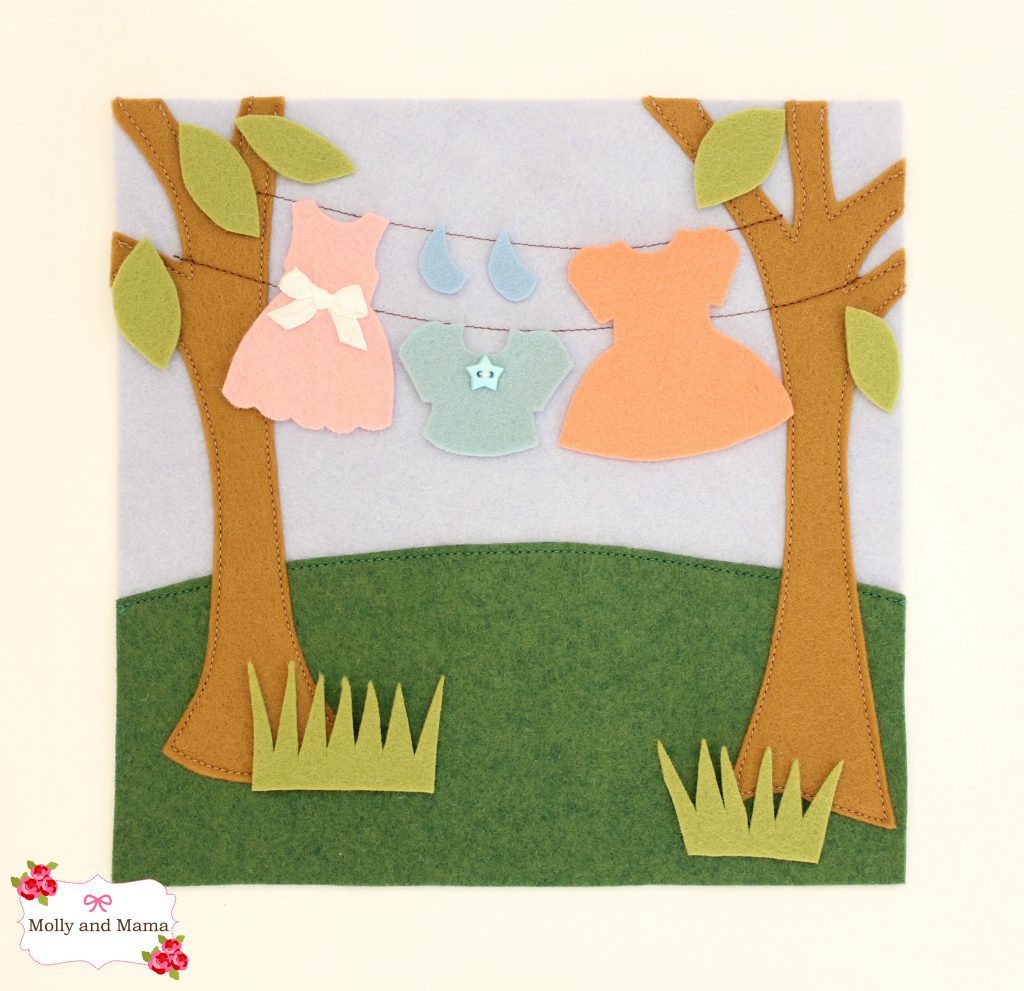
The Clothes Line page was next, and it was also very straight forward to assemble. Once again I used iron-on adhesive to attach the grass to the backing piece. I straight-stitched the top edge on the machine, before I added the two trees. These were also ironed in place, and topstitched. Two rows of stitching were added for the clothes line too, leaving plenty of room for Miranda’s washing!
I was tempted to add more embellishments but settled on cutting out some ‘grass’ and ‘leaves’ freestyle. These will be left loose for more imaginative play. Little fingers will have lots of fun rearranging these extra shapes too!
Now that I have completed two pages from the busy book, I am looking forward to working on the rest. I’m planning this little book as a special gift for my niece. However, you could also use these gorgeous templates for appliqué on wall hangings, hoop art, or even a floor mat. The options are endless. Thanks for such a cute pattern Kerry! One thing is for sure. This little project is as much fun to make, as it will be to receive!
If you’d like to learn more about the appliqué process, you may find this tutorial useful. It pretty comprehensive! There’s also heaps more ideas on the TUTORIALS tab. And there’s always a mountain of inspiration to be had at One Thimble!
Happy stitching, Lauren x
This post was written by Lauren Wright for One Thimble and Molly and Mama