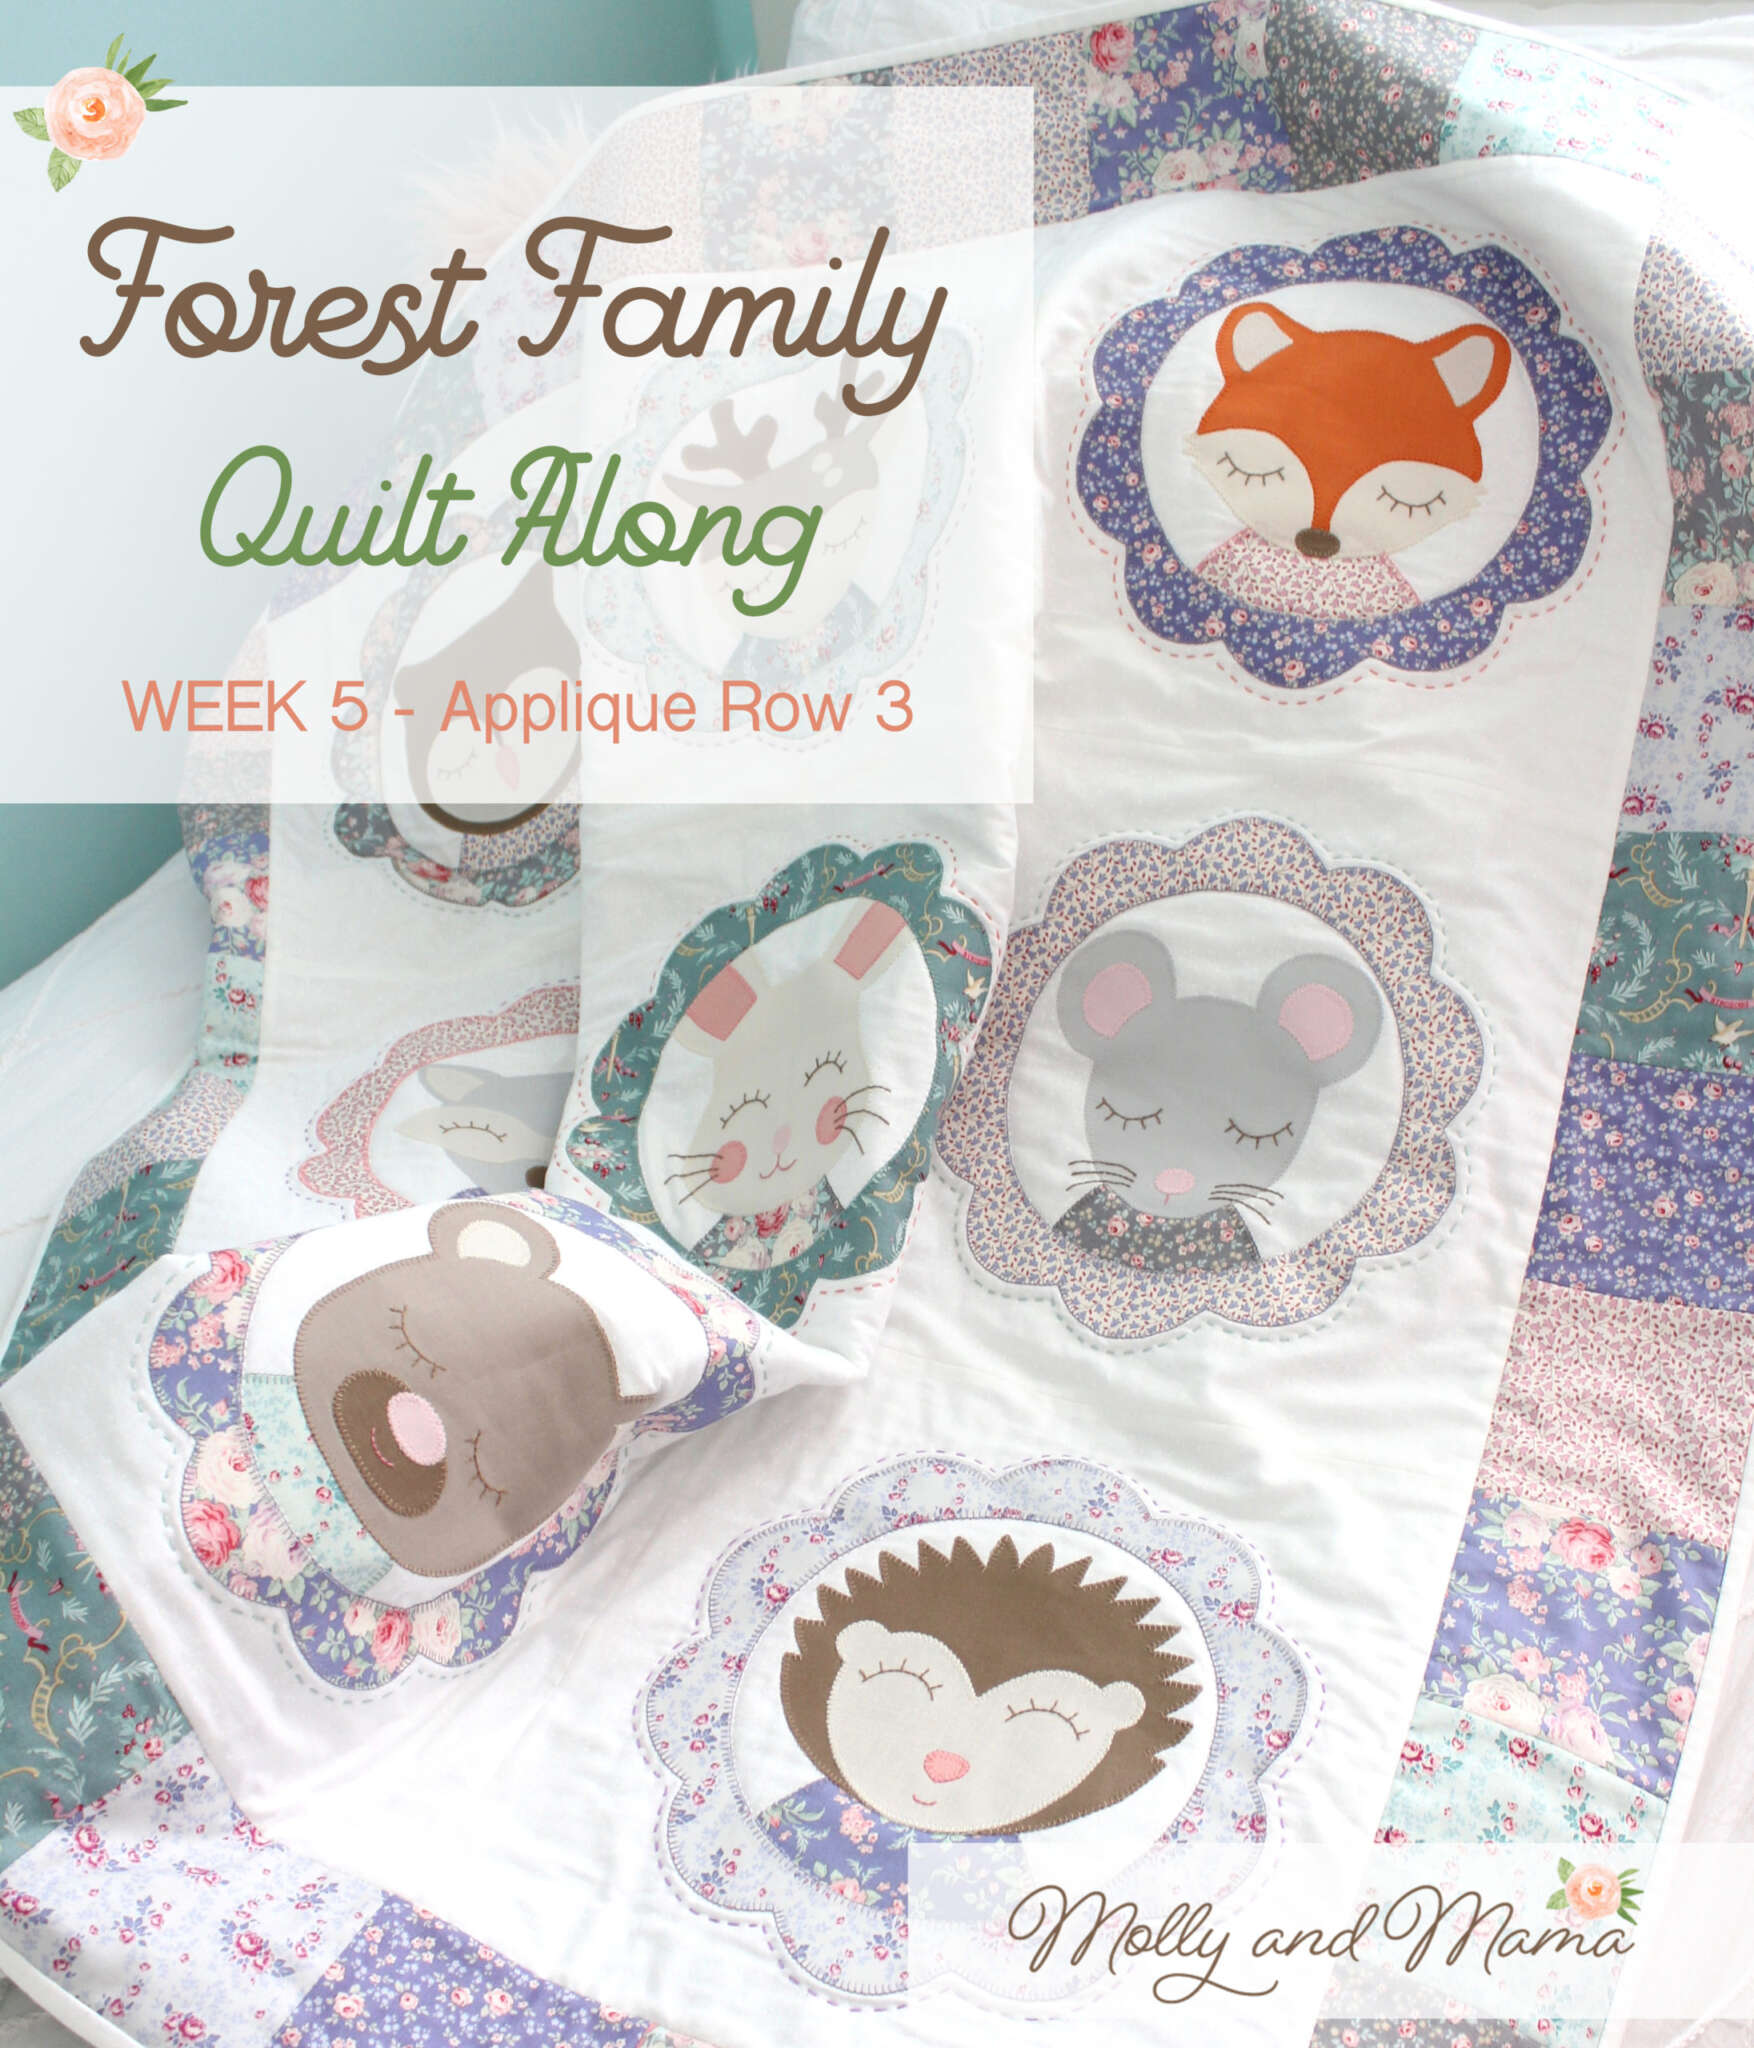
Week 1 – Forest Family Quilt Along

Welcome to Week One of the Forest Family Quilt Along! Getting started on a new project is so exciting. And I’m so thrilled to have you along for the journey! A quilt along is a great way to continue that motivation to get a project completed in a specific time frame. And the eight week time allowance for this project is generous, so we’ll just be completing a little bit each week to achieve a stunning result in less than two months! Are you with me?
You’re not too late to join us! For an overview of the Quilt Along, head to THIS blog post that contains all the specific details. You’ll also need to make sure you have signed up to receive the weekly email prompts and that you have a copy of the pattern. You can grab an instant download pattern in my store (don’t forget the coupon code included in the emails when you sign up) or head to your favourite quilting shop and ask for a copy of the printed version. There’s a list of stockists in the Welcome Blog Post.
Let’s Get Started!
Week 1 runs from the 1st – 7th of October. It’s an easy week, where we make sure we have all our materials ready to go. So we’ll look at supplies and fabric selection. Then you might like to make a start on tracing your appliqué shapes.
Post a photo of your progress on your public instagram account so we can all share in your journey. Use the hashtag #ForestFamilyQAL and #MollyandMama so we can find your photos, leave encouraging comments and perhaps answer a question or offer other help if it’s needed. We all come to these events with different levels of experience, skill, and expertise. And we’re a kind bunch who like to share what we know and help others, so be sure to get involved. As an extra incentive, they’ll also be a little prize pack up for grabs for Instagram participants at the end of the eight weeks.
Sourcing Supplies
The first place to start is to gather your supplies like fabric, heat bonding web for appliqué, thread, wadding, embroidery floss and your basic tools. Use the Pattern Requirements List to decide what you need. It’s also a great time to read the pattern so you can work out what you need everything for, and what you might like to invest in for this project.
You might have a great stash of goodies at home (and you could be like me, where it’s just a matter of finding them in your sewing space). Now’s the time to find everything you need and put it in one central location, ready for you to use over the next eight weeks. I like to place everything in a box or neat pile on my cutting table so I can readily access it when I get a few moments for sewing. This process will also help you work out what’s missing and what you might need to buy.
If you find you’ll be needing specific supplies (especially fabric), be sure to support your local quilting store if you can. They can offer you wonderful advice with your purchases. Otherwise, look online for stores in your country. I have written a list of pattern suppliers in the Introduction Post, and they will also sell fabrics and other supplies. I know a couple of my local Australian stores also have kits. Head to the Fabric Pixie for a kit in Tilda Old Rose (the same fabrics used on the cover version of the pattern, like the image below).
Fabric Selection and Inspiration
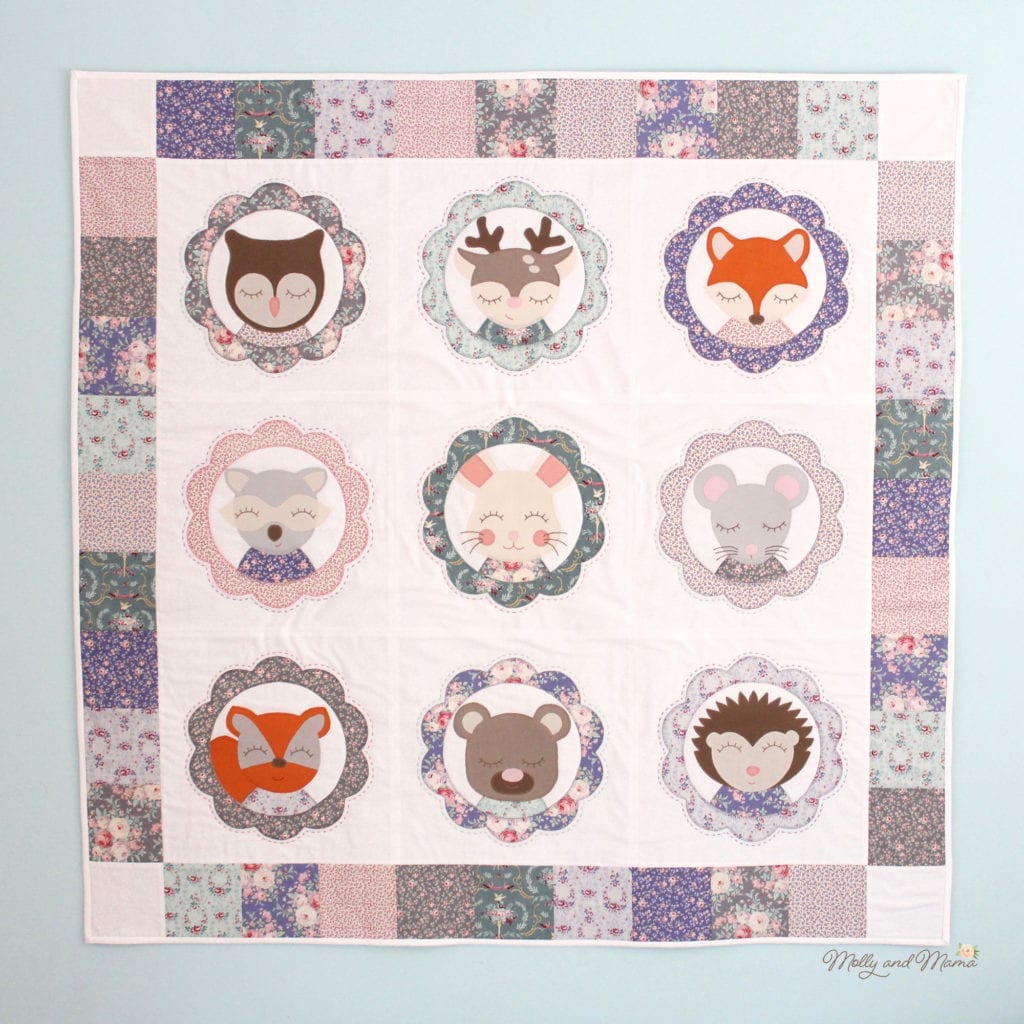
Choosing fabrics for any project can be a fun process but sometimes daunting too! So where do you begin? With nine different florals used in this design, you can showcase some of your favourite prints from a single fabric collection, or pull scrappy prints from your stash that work together well. You could choose florals, plains, brights or more muted tones. But the most important thing to consider with the Forest Family Quilt, is the colours you’ll be using in the faces of the animals (as they’ll have to complement whatever prints you choose).
For this version of the Forest Family Quilt I decided to use the Tilda Maple Farm range. The earthy Autumnal shades used in the collection work beautifully with the browns, grey, rust and cream colours I need for the animal faces. This range has just been released, so ask for it at your local store! Mine was kindly provided by Two Green Zebras, the Australian Tilda distributor.

I started auditioning fabrics by putting them altogether. I had my ‘animal’ coloured plain fabrics already put aside, and I grabbed different combinations of the prints to see what worked together well.
When deciding on prints, I was making sure the motifs weren’t too large or too widely spaced apart as they would go ‘missing’ on the narrow scallop border and torso pieces. I was also making sure they worked well with the solids, so there was a bit of substitution happening. I also wanted to make sure that the fabrics weren’t too similar or similarly coloured, as I wanted to ensure there was a bit of variety to make a balanced quilt.
Here’s the selection I came up with;

I have chosen to use the same nine prints for the scalloped borders on each forest animal and also for the simple patchwork border (exactly like the pattern). But you might like to get scrappy here too and mix and match a whole range of prints.
I like the simplicity of the white binding against the patchwork print border (so will be following the original pattern here), but you might like to select a specific print or floral for that too! Really the choice is yours and the options are endless!
When selecting your own fabrics for the quilt, here are some points to consider;
- Who is the quilt for and what colours, patterns or styles do they like?
- Will the quilt need to match in with the existing colour palette of your home decor?
- Does the fabric collection (or pull from your stash) have a range of varying colours?
- Does the print size vary enough for interest?
- Is there a mix of high volume and low volume prints? Are there spots, stripes, checks or geometric patterns to break up the fabric with prints, florals or detailed backgrounds?
- Are the fabrics all the same weight and type? All quilting cotton?
Make sure that once you have selected your fabrics, you have a range of matching threads, as you’ll be using those to appliqué the shapes. So you’ll need colours to match the animal face solids, as well as the prints. Colours for the solids can be a little darker or even contrasting for interest. However, keep in mind that the colours for the prints don’t always have to match perfectly. Using a contrasting colour can really help a scallop border pop. And neutrals like greys and mauves can work well with many prints, so this will save you having to buy lots of different thread colours.

It’s really important to say here that whilst you can take time to consider your fabric and thread selection and look at all the features of the collection, your final fabric pull will be based on what you like the look of. There’s no right or wrong, but I think it’s really important to work with fabrics you love. It’s easy to get excited about a project and stay motivated if you love looking at what you’re creating!
To show you some different ideas, I like the way Gwawr has used a scrappy approach to her blocks. They’re bright and light and fun.


I used the woodland prints from Tied With A Ribbon’s ‘Baby on Trend’ fabric to create the bear block from the quilt and I turned it into a cushion. Visit THIS POST for links and to read more. I used a grey, brown and taupe for the bear face which matched the triangle print in the scalloped border.

Just Country Crafts used a range of florals for the scallops and they matched perfectly with the grungy solids used for the animal faces.

So What Are We Working On This Week?
Each week of the quilt along focusses on a different stage in the construction. This week you might be still gathering supplies, or you may be bounding ahead! There is no requirement each week to finish the stages outlined for the week’s preparation or sewing. We’re all at different stages and we all have varying amounts of time available to us. My hope is that you feel encouraged and supported by sewing along with our community at the same time. Please sew at your own pace.
That being said, this week is a great opportunity to trace all the appliqué shapes onto your heat bonding web for appliqué. I like to use Heat’n’Bond Lite by Therm O Web. I trace my shapes using an ink pen onto the paper side of the webbing. I find the pen tip copes better with the small ridges from the glue on on the underside of the Heat’n’Bond than using a biro.

Remember that most of the templates are symmetrical so there’s no need to reverse them for appliqué. However, pieces like the squirrel’s tail have already been reversed for you.
You can find more tips for appliqué on this Appliqué for Beginners post.
The template should be dark enough for you to place the Heat’n’Bond directly over to trace. If not, tape the template to a brightly lit window or use a light pad. My light pad has been one of my best investments!
Follow the instructions in the pattern and trace the scallop borders first. I made a cardboard template which made this process a lot easier.

Don’t waste any of the off cuts! Use the space inside the scallop border to trace the face shapes. And trace the remaining shapes from the spaces around the borders and the left over scraps. Keep all the scrap pieces because you can always use these for other projects too.
Label each piece as you trace it and cut it out, so that you know what’s what and that you have every piece you need. When cutting your shapes, don’t cut them on the line, but leave a small 1/4″ border around each shape.

If you’re not coming back to your project for a while, use labelled brown paper bags, envelopes, folders or large, clear, zip lock bags to store your shapes by block. That way you have everything at hand so you’re ready to fuse the Heat’n’Bond to the fabric next week.

Next week, we’ll decide which fabrics are being used for each block and we’ll start the process of ironing the fabric onto our template shapes, so those storage bags will really come in handy!
Be sure to stop by Instagram each week to see my progress unfold. Have fun this week and see you soon for the second instalment.
Happy stitching, Lauren x


I keep seeing this and know I have far too many projects but have finally crumbled, It is so pretty and different. So I have zero fabric for it as I don’t really keep a stash and what I do have is mostly brights and jewel colours. Oh well… in for a penny, in for a pound
I know the feeling Sue, but it’s always fun to have something new to look forward to too. Thanks for joining us!
I’m really glad you’re doing a quilt along for this – it keeps me on track to have a set number of tasks to do each week!
It keeps me on track too Jen! So great to have you with us x
Hello to all and GREETINGS from far NE Oregon, USA 😀
I need to really step up some applique skills. Forest Family is to be gifted to my great-great niece Amelia June (AJ)
We are dealing as many around the world with Covid, in addition SMOKE. Our western states have had a phenomenal fire season, and it is still going on. Years like this it can last until mid late November and later. Good season for quilting and a busy one.
I am with Rocky Ridge Quilters in a tiny logging town and farm based community. We meet weekly at our local Grange Hall and the basement becomes a place of great friends, great potluck lunch and much merriment. Not to mention the amazing quilting that happens. We have a private FB group for our local and “distance” quilters (folks from all over who share our lessons, patterns and general quilty goodness) simply request at Rocky Ridge Quilters on FB
Our local and distance members help with a number of community and general projects. We were unable to have our 4th Annual Quilt Show this year due to the virus… 🙁 We are always busy regardless. MANY have lost their homes and entire communities. Nowhere on earth is immune from the devastation of fire. We are helping with quilts for families who have lost all. (details updated weekly on our group)
So looking forward to learning better applique skills and an adorable “BIG GIRL” quilt for AJ who will be turning 3 in January. GREAT TIMING!
Nice to cybermeet everyone 🙂
Karen
Great to have you join us Karen. Your quilter’s group sounds wonderful! Best wishes, Lauren.
One of the best and informative site. Bookmark for future read.