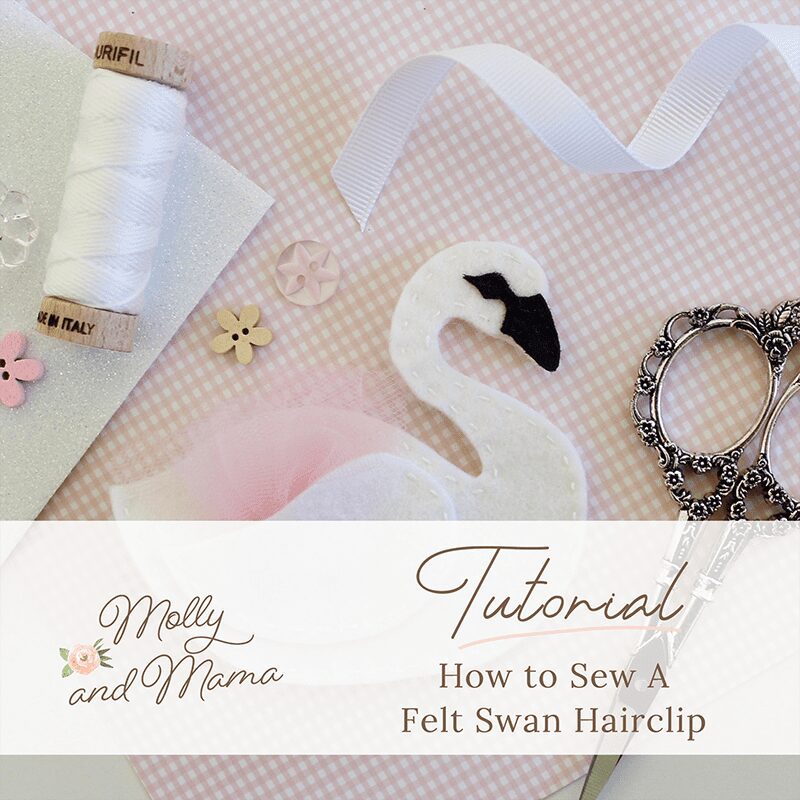
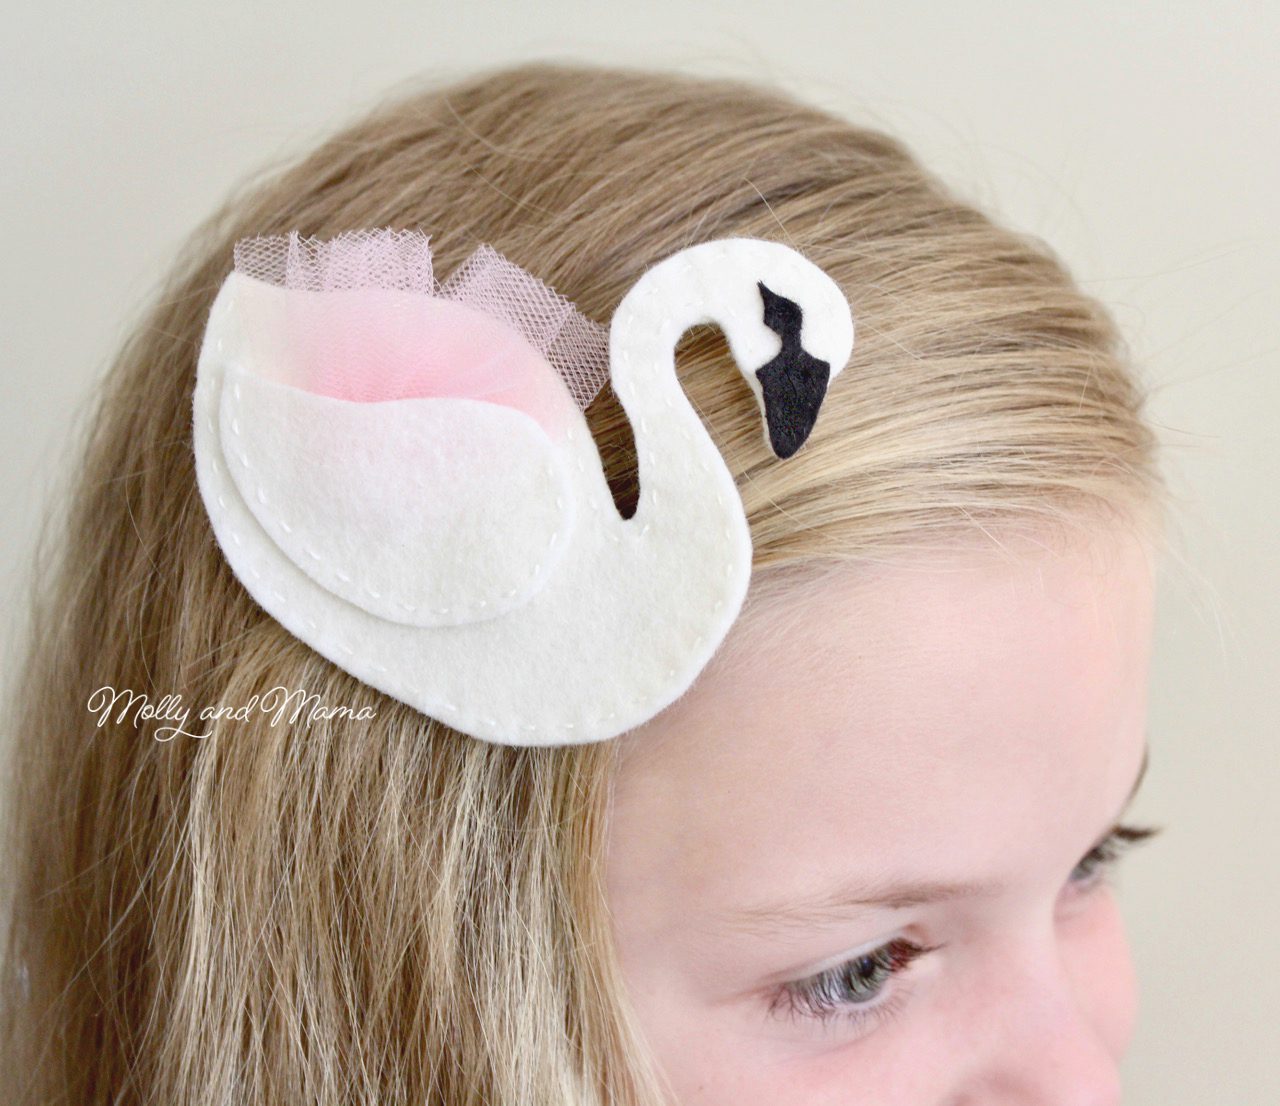
Sew A Felt Swan Hair Clip
Every year for the month of July, Trixi from Coloured Buttons hosts Sew A Softie. She explains that it is “a month long event where anyone can host or join the many workshops, online tutorials and sewing events around the world, teaching and learning the skill of hand sewing through the creation of simple to sew softies.” It’s aimed at encouraging parents and carers to help teach children the joy of hand stitching. So of course, that’s something I LOVE to be involved with!
Trixi has links to more information and tutorials on her blog, on instagram and also in the dedicated Facebook Group (you’ll find me there too).
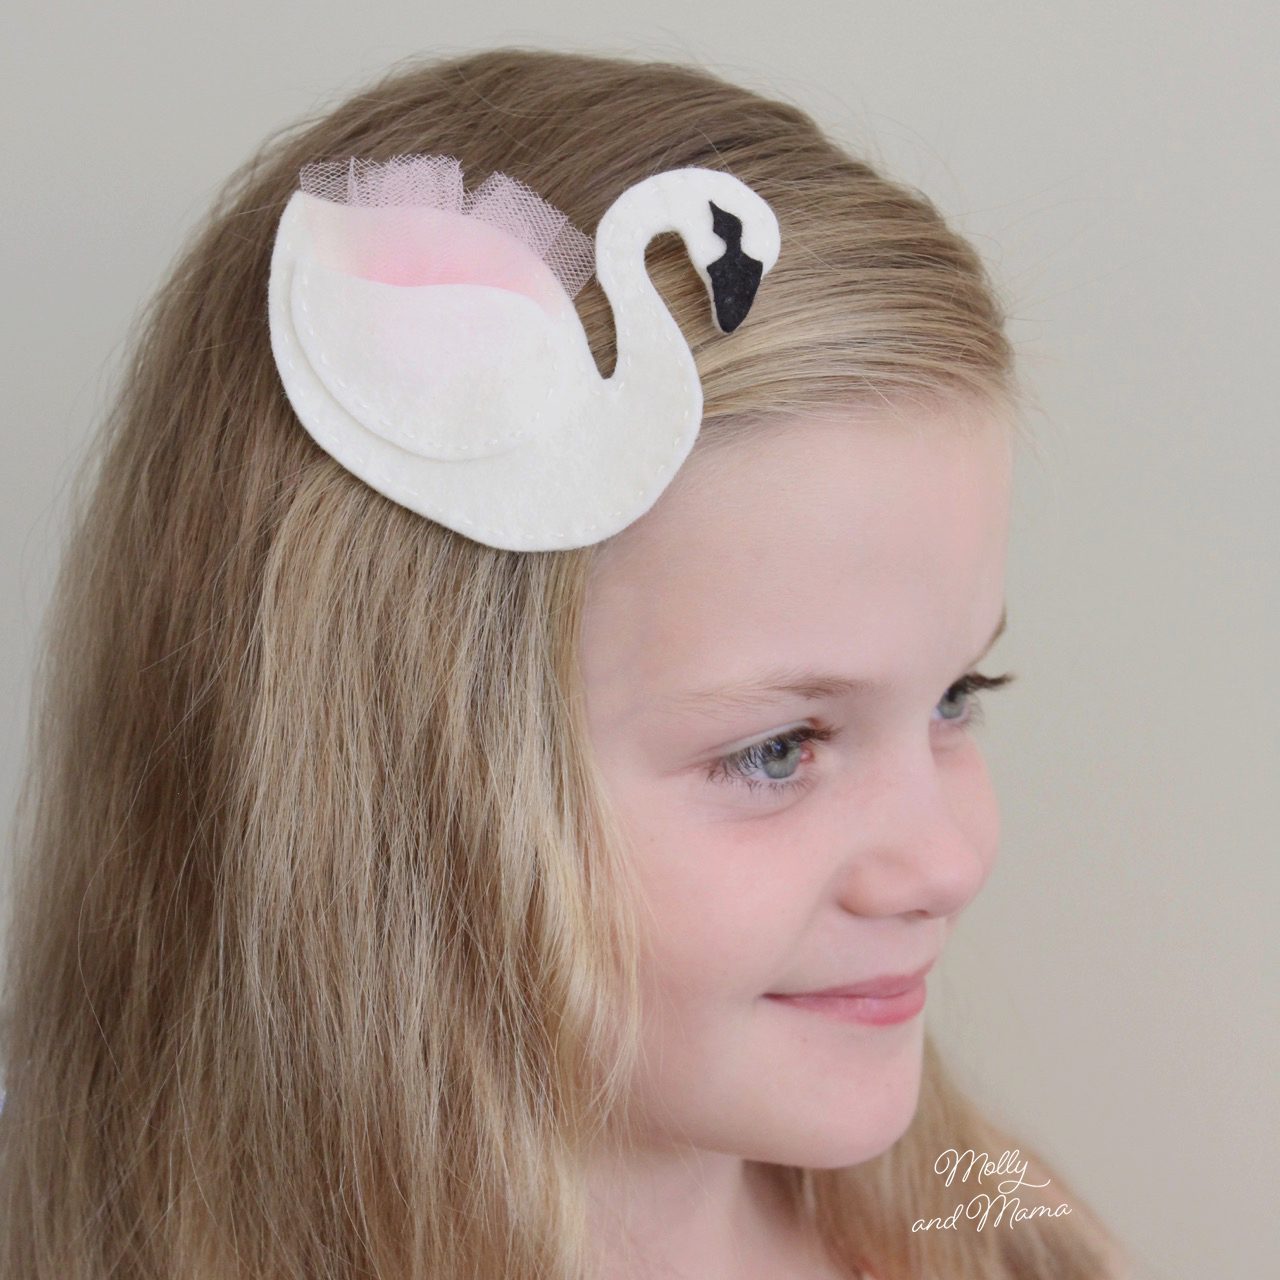
Last year I created a tutorial for Cinnamon Kitty. And this year I have made a cute felt swan hair accessory. She’s attached to an alligator hair clip but you could use her to decorate anything you like.
To make the swan, you will need some basic supplies including felt. I love using wool felt and I explain why HERE. But you could use any felt you like.
Kids are easily able to help make the swan part, but covering the alligator clip with ribbon requires the use of hot glue, which is definitely an adults only activity. Please exercise caution when using a hot glue gun and provide lots of supervision.
FINISHED SIZE: approximately 8cm (3 1/8″) x 7cm (2 3/4″)
You Will Need;
- 20cm (8”) x 10cm (4”) rectangle of white wool felt
- 2.5cm (1”) square of black wool felt
- 35cm (14”) x 2.5cm (1”) rectangle of pale pink tulle (or another recycled material like thin plastic, netting, or even fabric)
- 10cm (4”) square of freezer paper (to transfer the template to the felt)
- Sewing needle and thread
- Embroidery needle
- White six stranded embroidery floss (separated into two strands)
- Small, short blade scissors for cutting felt
- Appliqué or craft glue
- 48mm Alligator clip
- 12cm (4 7/8”) length of 1cm (3/8”) wide grosgrain ribbon
- Heat sealer or cigarette lighter
- Hot glue gun
- Print out of the template
NOTE: This tutorial is for personal use only, for sewing at home and/or teaching another person or child to sew FOR FREE. Reusing or repurposing free Molly and Mama tutorial instructions, templates and images for paid classes, or distributing the materials in classes, to groups, or for commercial purposes, is strictly prohibited. For clarification, or to seek a commercial arrangement, please contact Molly and Mama.
Let’s Get Making!
Print the Pattern
Save a copy of the pattern template PDF to your computer and then print it in full size without any scaling or cropping.
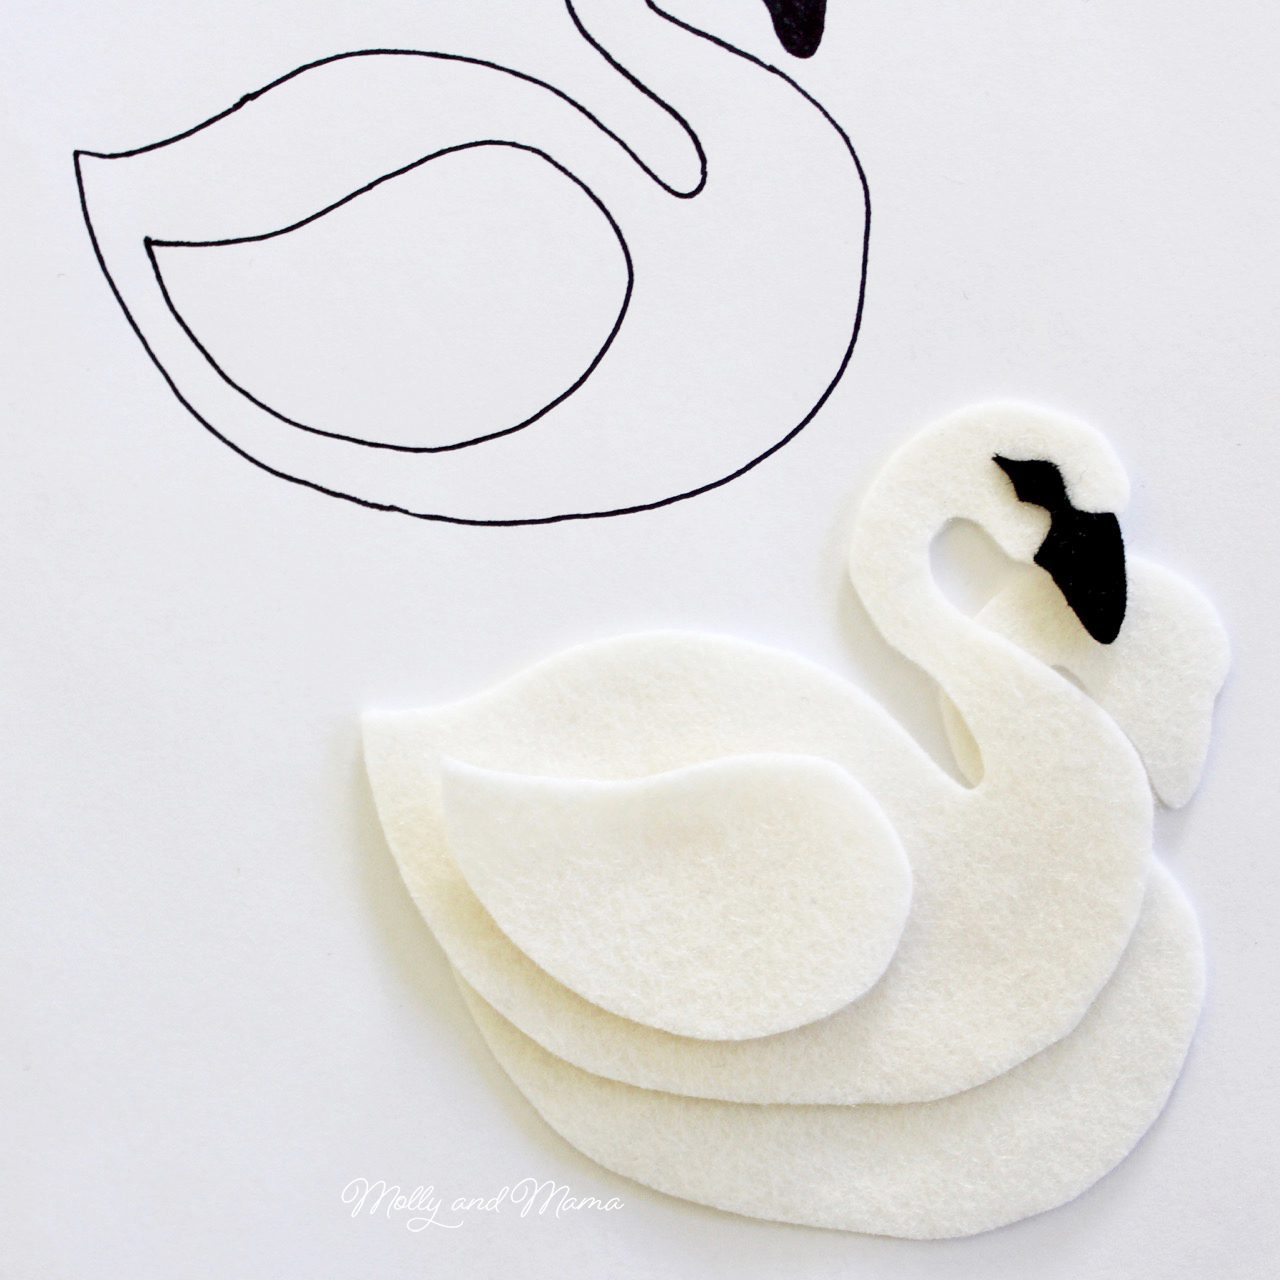
Cut Out The Felt Pieces
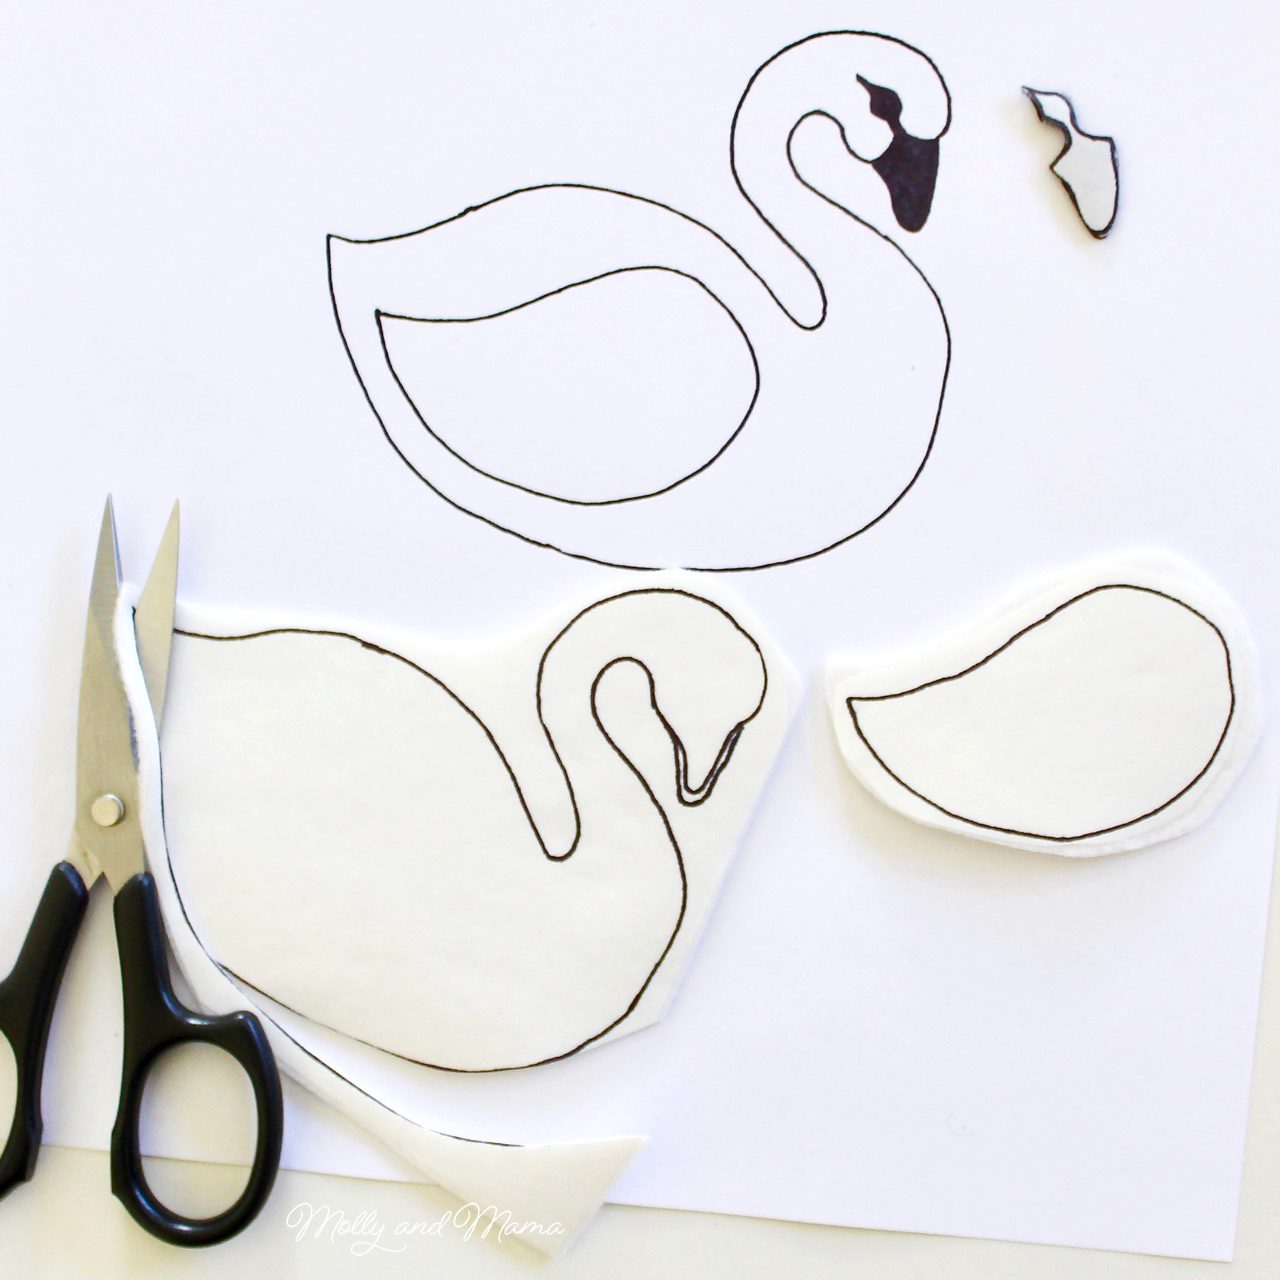
Use your favourite method to cut out the required felt pieces. You can pin or stick the template pieces to the felt or use the freezer paper method to cut out the shapes. Visit my beginner’s tutorial for a more detailed description.
TIP: Do all of your cutting with very small and sharp scissors that have short blades. This will give your felt a neater edge, and you’ll also find your shapes are more accurate.
You will need to cut;
- Two white felt body shapes (I tapered the beak on the second felt body (as shown in the picture) so that the white edges wouldn’t show when I added the beak).
- One white felt wing
- One black felt eye/beak
*This process is best suited to 100% merino wool felt. Test a small area of your felt with the iron and paper before commencing. Please be sure to cover your felt with a press cloth (or scrap piece of cotton fabric) so as not to damage it (especially if the felt is not 100% wool).
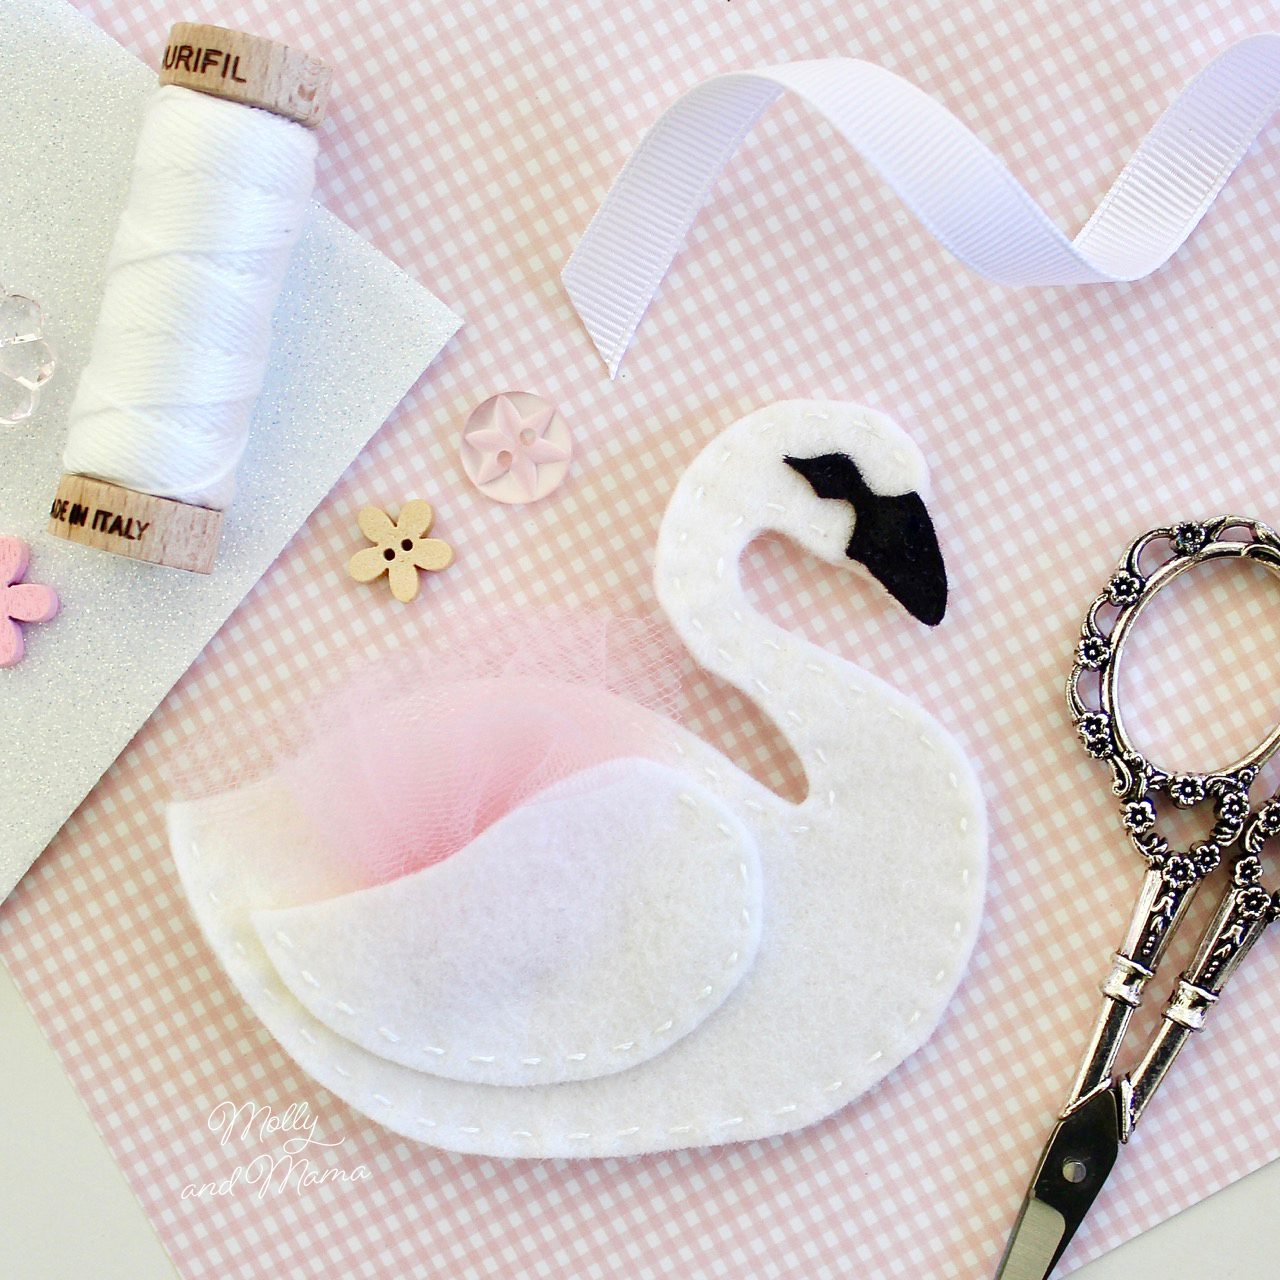
Assemble the Swan
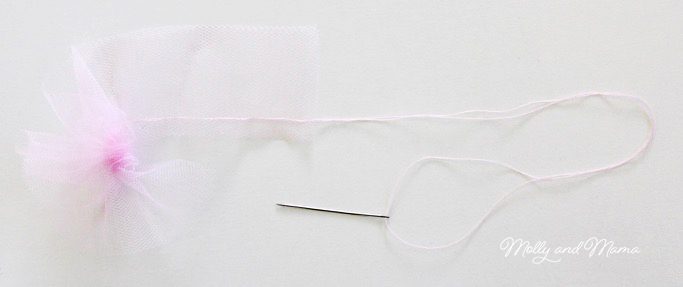
Use a doubled length of matching coloured sewing thread and a sewing needle to hand sew a running stitch along the base of the long edge of the piece of tulle. Pull the thread to gather the tulle and secure the gather with a few extra stitches in the tulle.
Sew the gathered tulle to the felt piece that will be used for the top of the swan. Centrally position it on the body so that the top edges of the tulle poke over the top of the swan’s back. Hold the wing shape over it to ensure correct placement, then secure the tulle in place with a few small stitches.
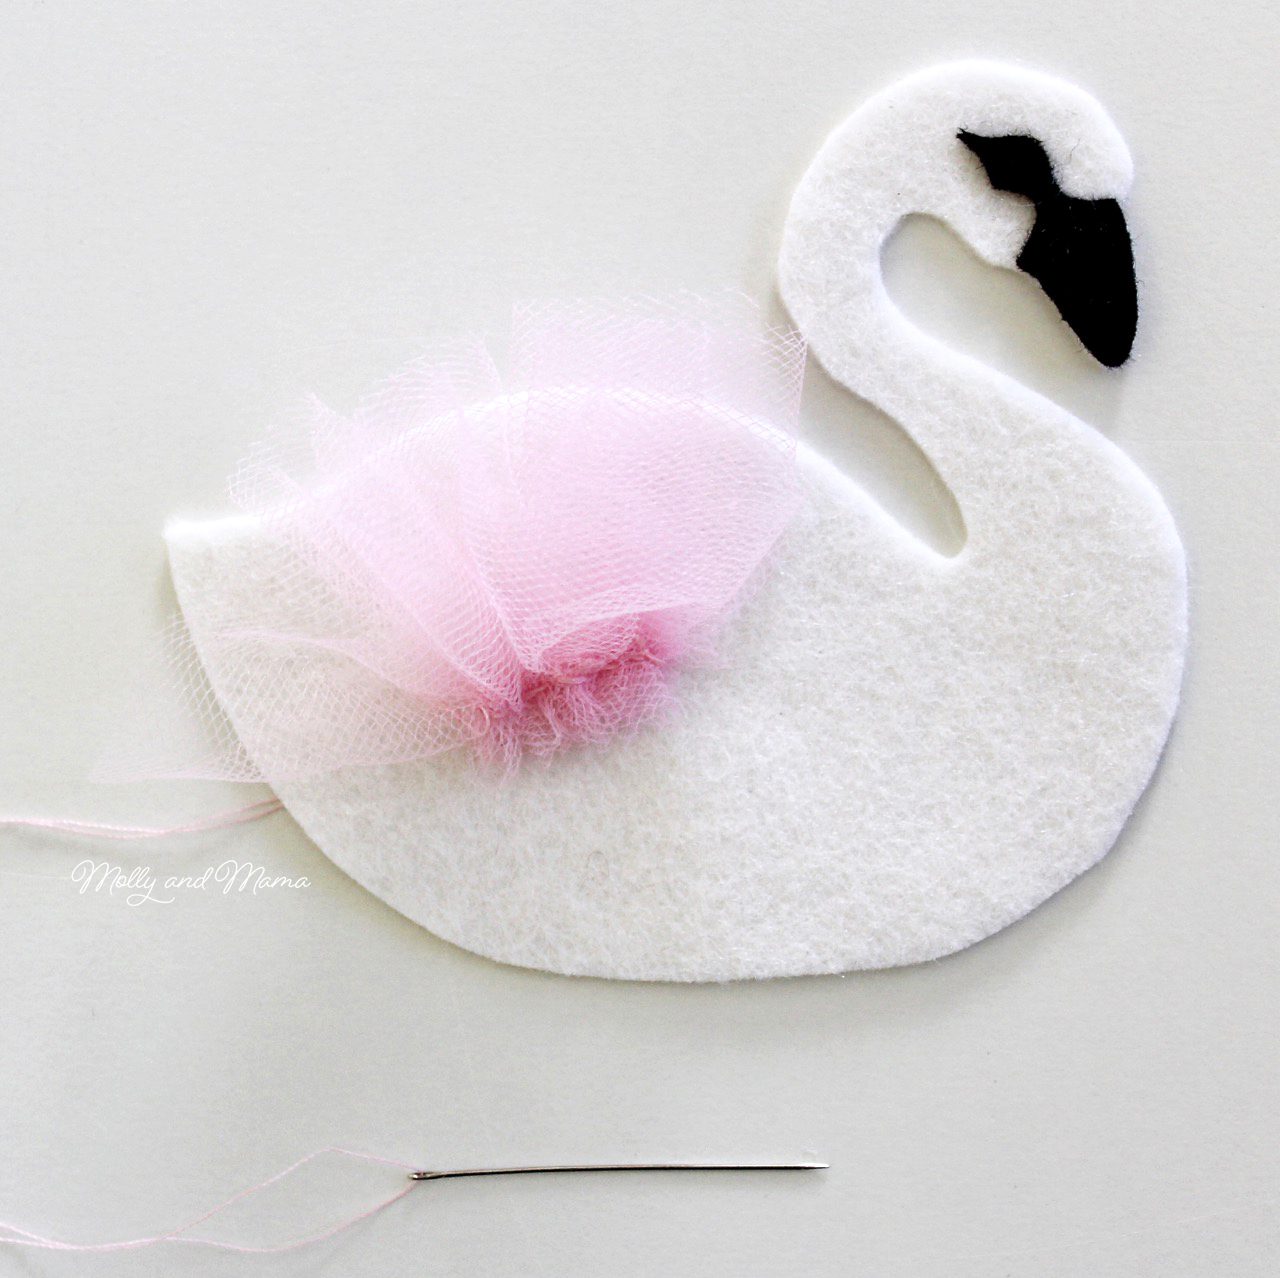
Thread an embroidery needle with two strands of white floss. Hold or pin the wing shape in place over the tulle. Sew the wing in place using a small, fine running stitch. Be sure to leave the top of the wing unstitched so that the tulle can poke out the top and add fullness to the wing.

Place the second felt swan body behind the first and pin in place. Sew the two swan body pieces together using two strands of white floss and a fine running stitch. Sew around the entire outside edge of the felt shape. Be sure to hide your knot and the end of your thread on the inside of the felt swan.
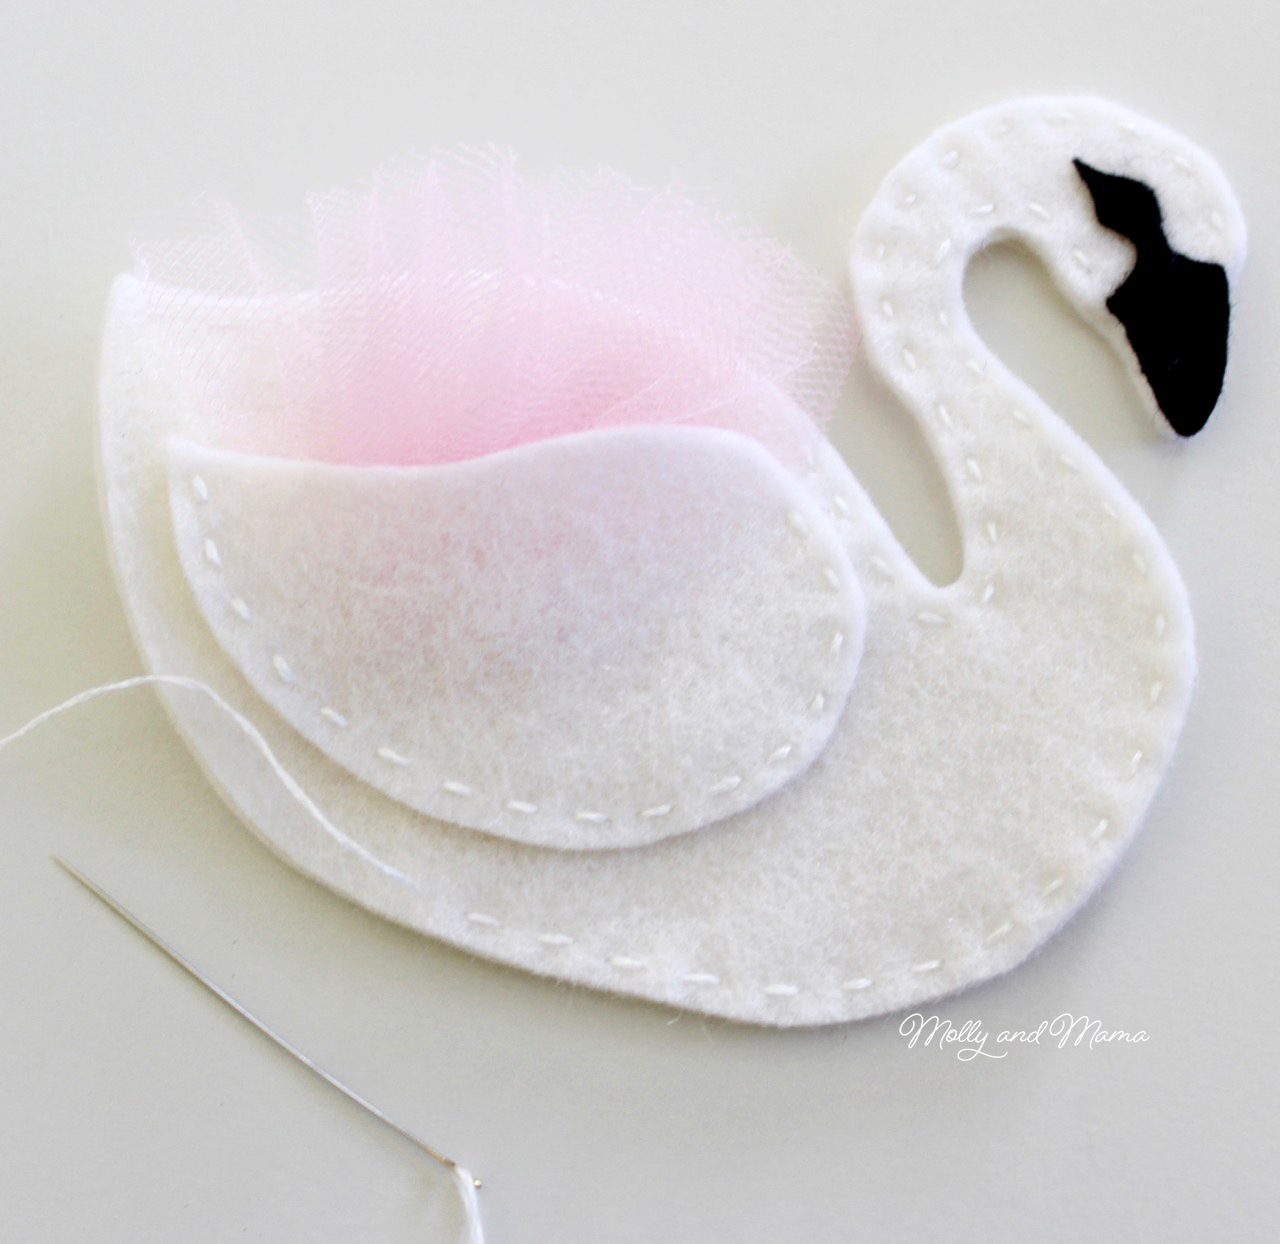
Be careful to hold the tulle out of the way as you stitch behind it.
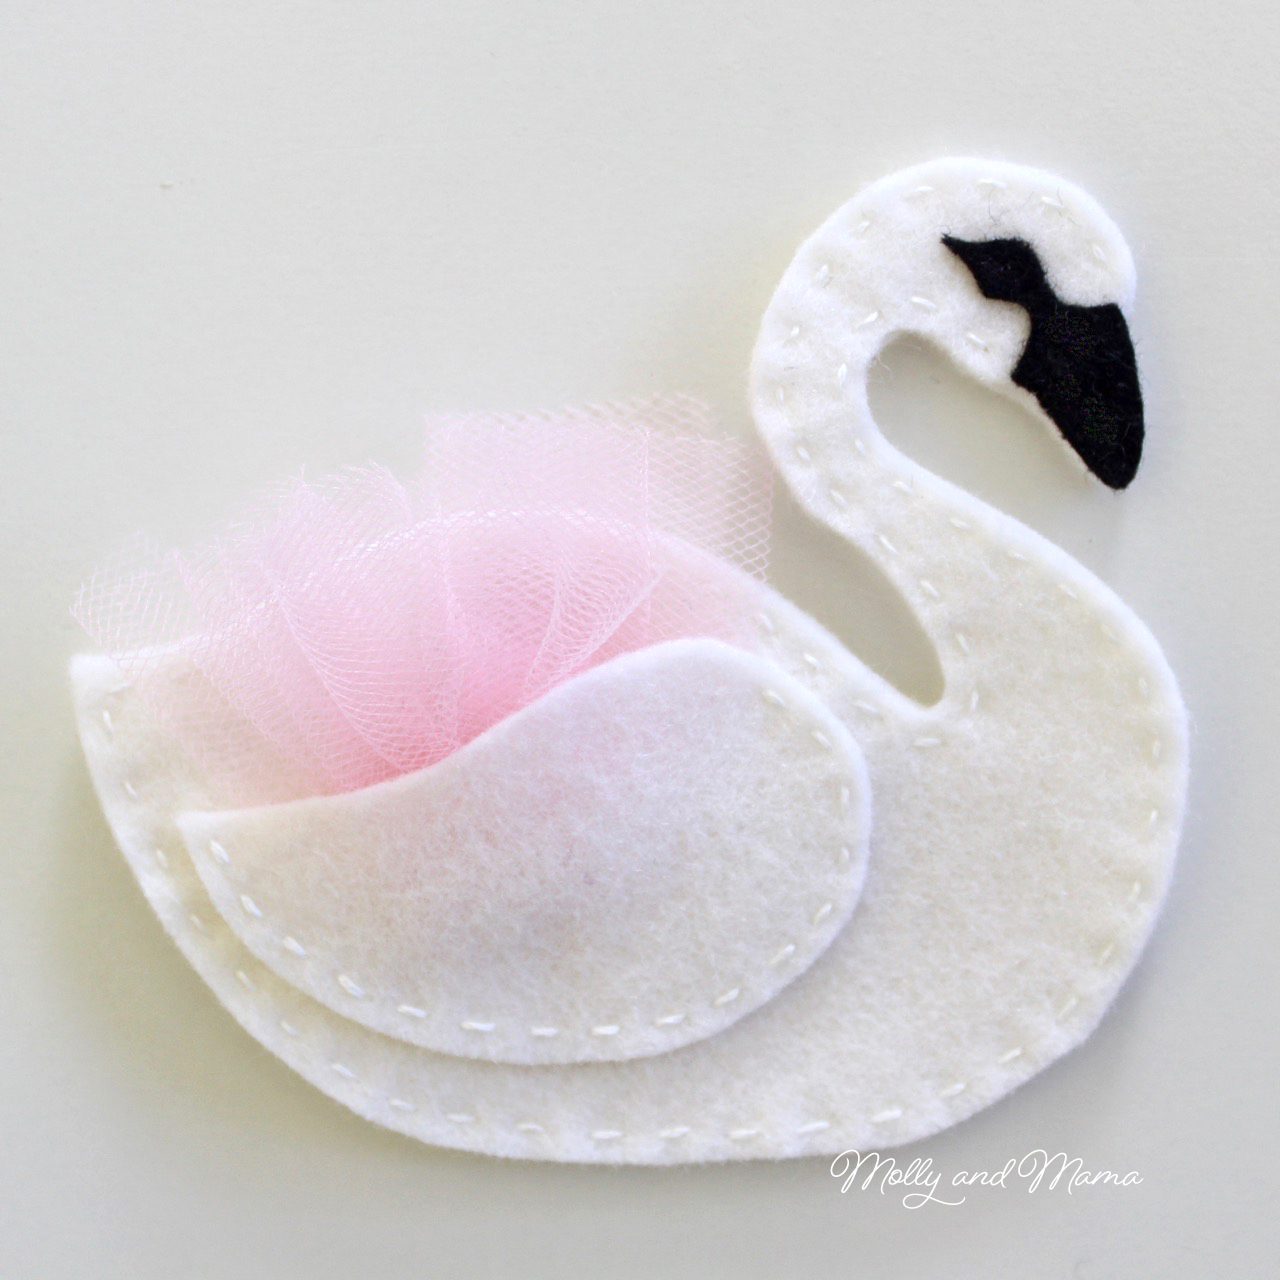
Finally, attach the eye/beak piece with a small amount of appliqué or craft glue or some very fine stitches with black sewing thread. (You’ll notice the beak in my assembly photos, but it’s definitely easier to add the beak at the end!)
Your felt swan is finished and ready to adorn a hair clip, head band and more!
Add a Hair Clip
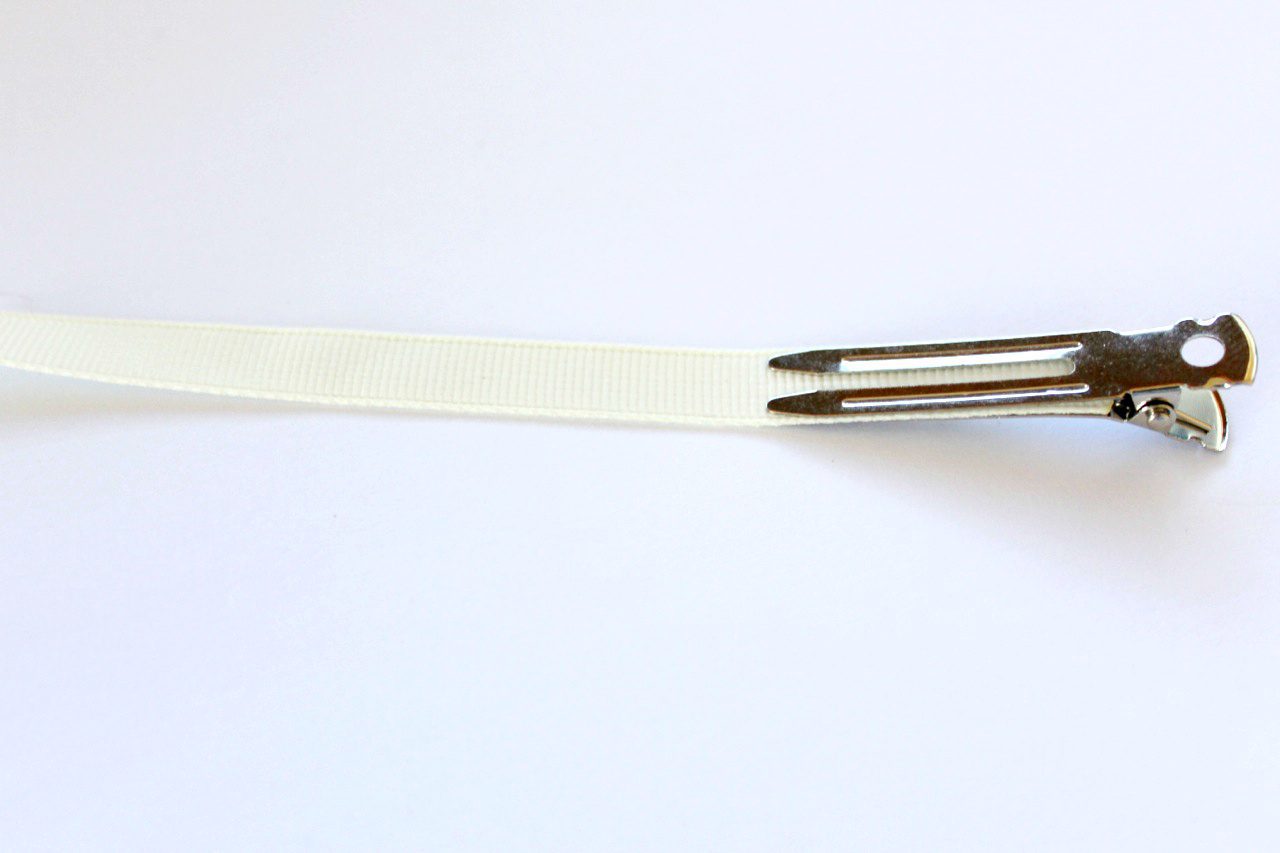
Cut a length of grosgrain ribbon 12cm (4 7/8”) long. Use your heat sealer or lighter to seal the ends of each piece (definitely an adults only activity – please consider children’s safety and exercise caution).
Set up your glue gun and allow it time to heat up. Don’t forget to lay down a work mat. (Again, please keep children away from the hot glue gun and leave this part of the tutorial for adults.)
Open the clip and run some hot glue along the underside of the top ‘jaw’ of the clip. Slide your ribbon into the open space between the jaws and attach it to the glued area. (This step is seen below where the clip is upside-down. This gives you a better view of where to place the ribbon.
With your clip facing up, run a length of hot glue across the top of the clip right to the end of the jaw. Fold your ribbon back over the top and gently smooth it across the top jaw using your thumb.
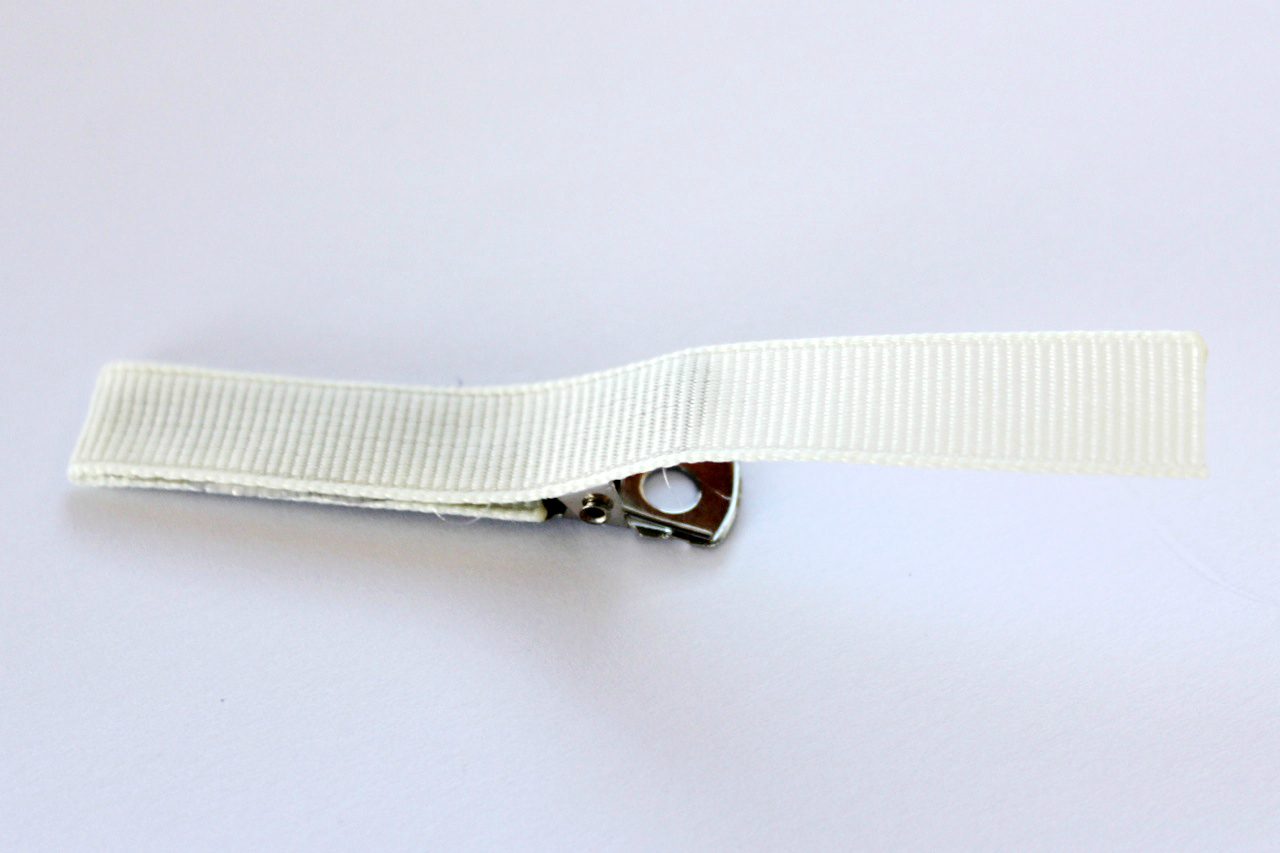
Place a small dab of hot glue on both ends of the inside of the jaws at the back. Be careful not to get any glue near the spring though, or you’ll have a clip that won’t close properly. Gently push the ribbon into the space at the back.
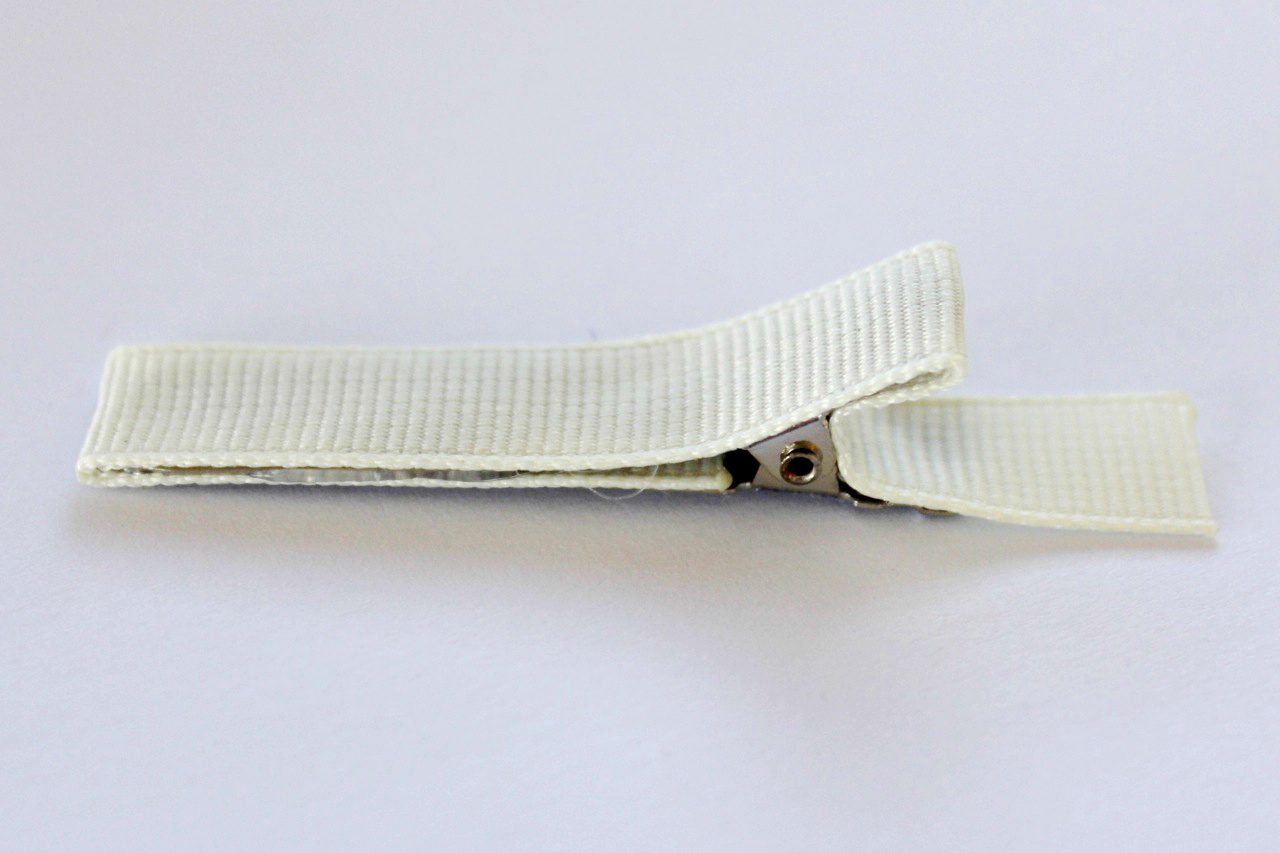
Lastly put a small dollop of hot glue on the underside of the clip. Fold the remaining length of ribbon over and press it down gently on the glue to secure.
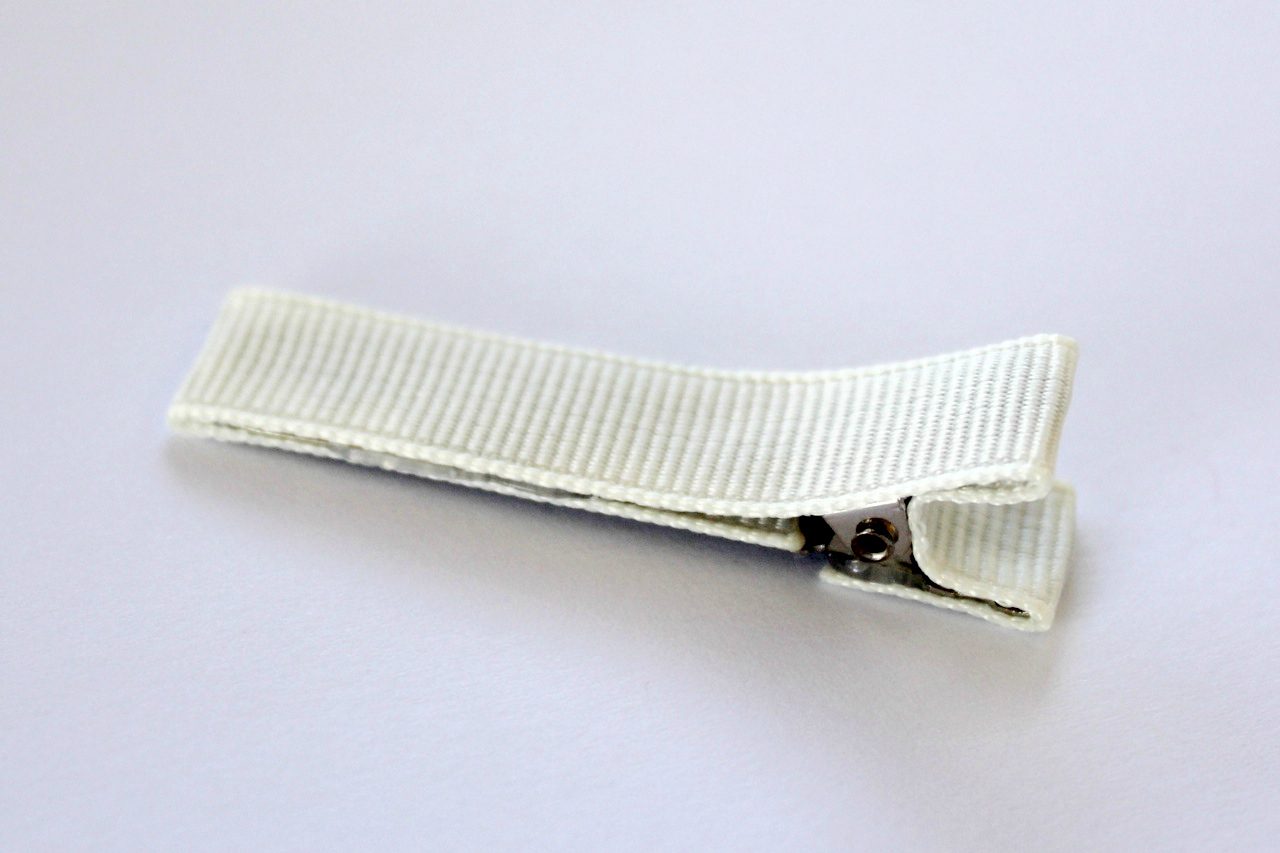
Place the swan face down on a flat surface. Run a line of hot glue along the ribbon lined top of the alligator clip. Position the clip horizontally and in the centre of the back of the swan. Press in place.
TIPS AND TRICKS
- Reduce or enlarge your template on your printer to create different sized swans for other uses.
- Line the felt with interfacing to give the pieces more strength.
- Add a small amount of polyester hobby-fill or stuffing, to fill your swan. Alternatively, you could line the wrong side of the felt with pellon (or fusible quilt wadding) to add depth to your swan.
- To clean the felt swan, just dab with a damp cloth. Do not rub. Avoid getting the clip wet (or putting it in wet hair) as it will deteriorate over time.
- Create a garland by sewing lots of swans in different colours!
- Use the swan template to decorate wall banners, t-shirts, cushions, bedding and more.
- Take your time with your project. Practice makes perfect!
A SAFETY NOTE These items are not suitable for small children as they are made with small parts which could pose a hazard for choking. Always ensure hair accessories are worn under supervision and removed from children for sleep and rest times.
I hope you’ve enjoyed this little sewing activity. Be sure to check the Tutorials Tab to find more projects you might like to try. They’re all aimed at Beginners! And feel free to sign up to the newsletter so that you don’t miss any upcoming tutorials either.
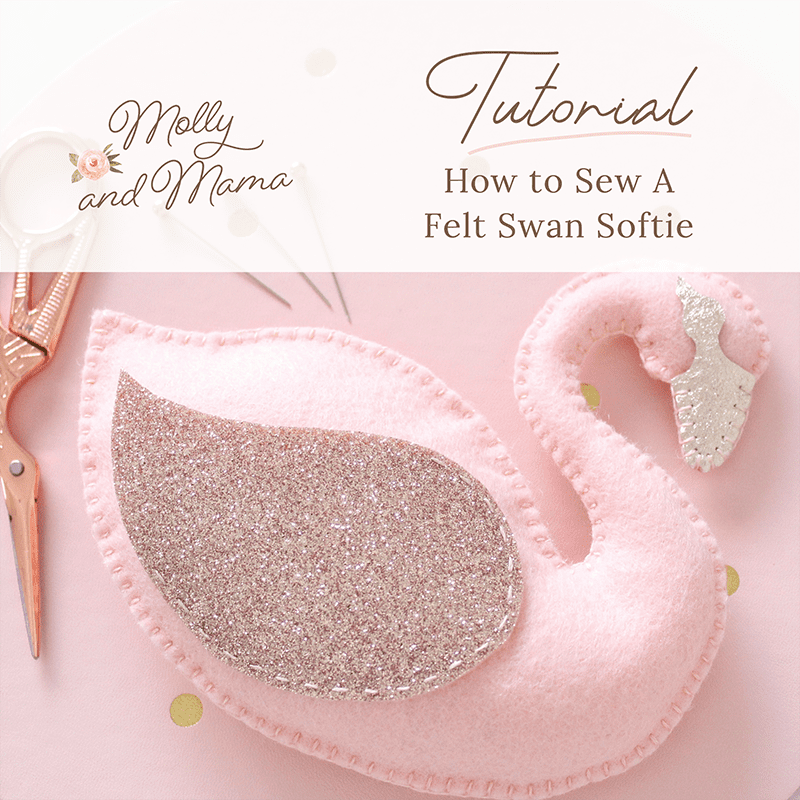
Here’s another swan project you might enjoy too. Head to the blog to see more.
Thanks for joining me and happy stitching, Lauren x
This post was written by Lauren Wright, originally designed for One Thimble Digital sewing magazine and appeared in Issue 18.

What a great tutorial. I love how clearly and thoroughly everything is explained. Thanks for joining in to Sew a Softie again. Your swan clip is adorable!
Today is the first day I have visited your site, really enjoying viewing the projects, appreciate your imagination and talents. Please keep up the work as I see a project or two that will be perfect for making for my granddaughter and grandson.
Thank you Catherine. I am so glad you are finding the projects helpful. Enjoy!