Make a Pretty Pillowcase
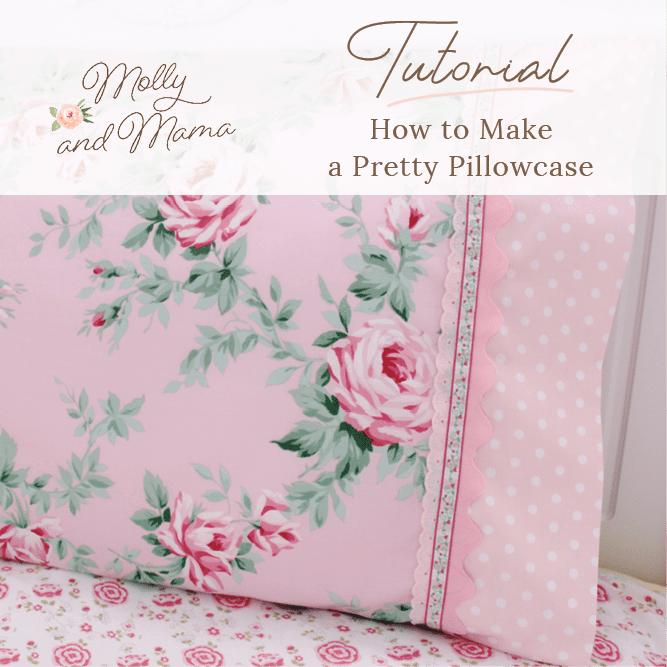
Today we’re sewing simple, pretty and fun pillowcases. They’re easy to whip up, they’re great for using up leftover fabric scraps and trims, and they’re a perfect project for beginners.
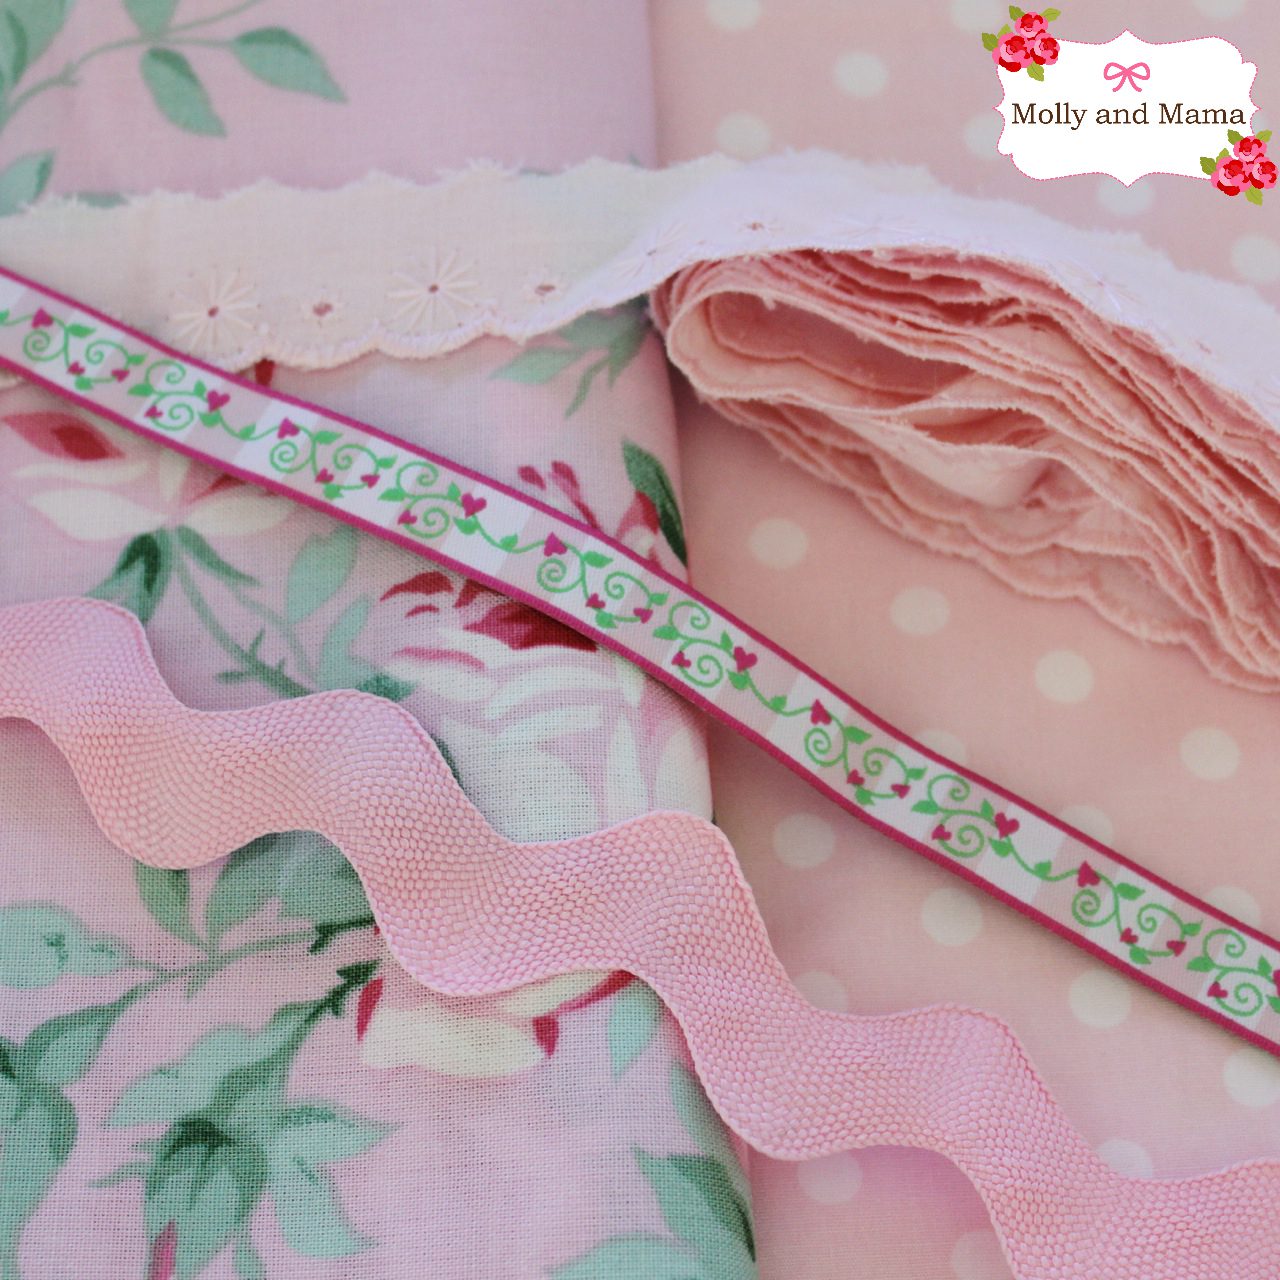
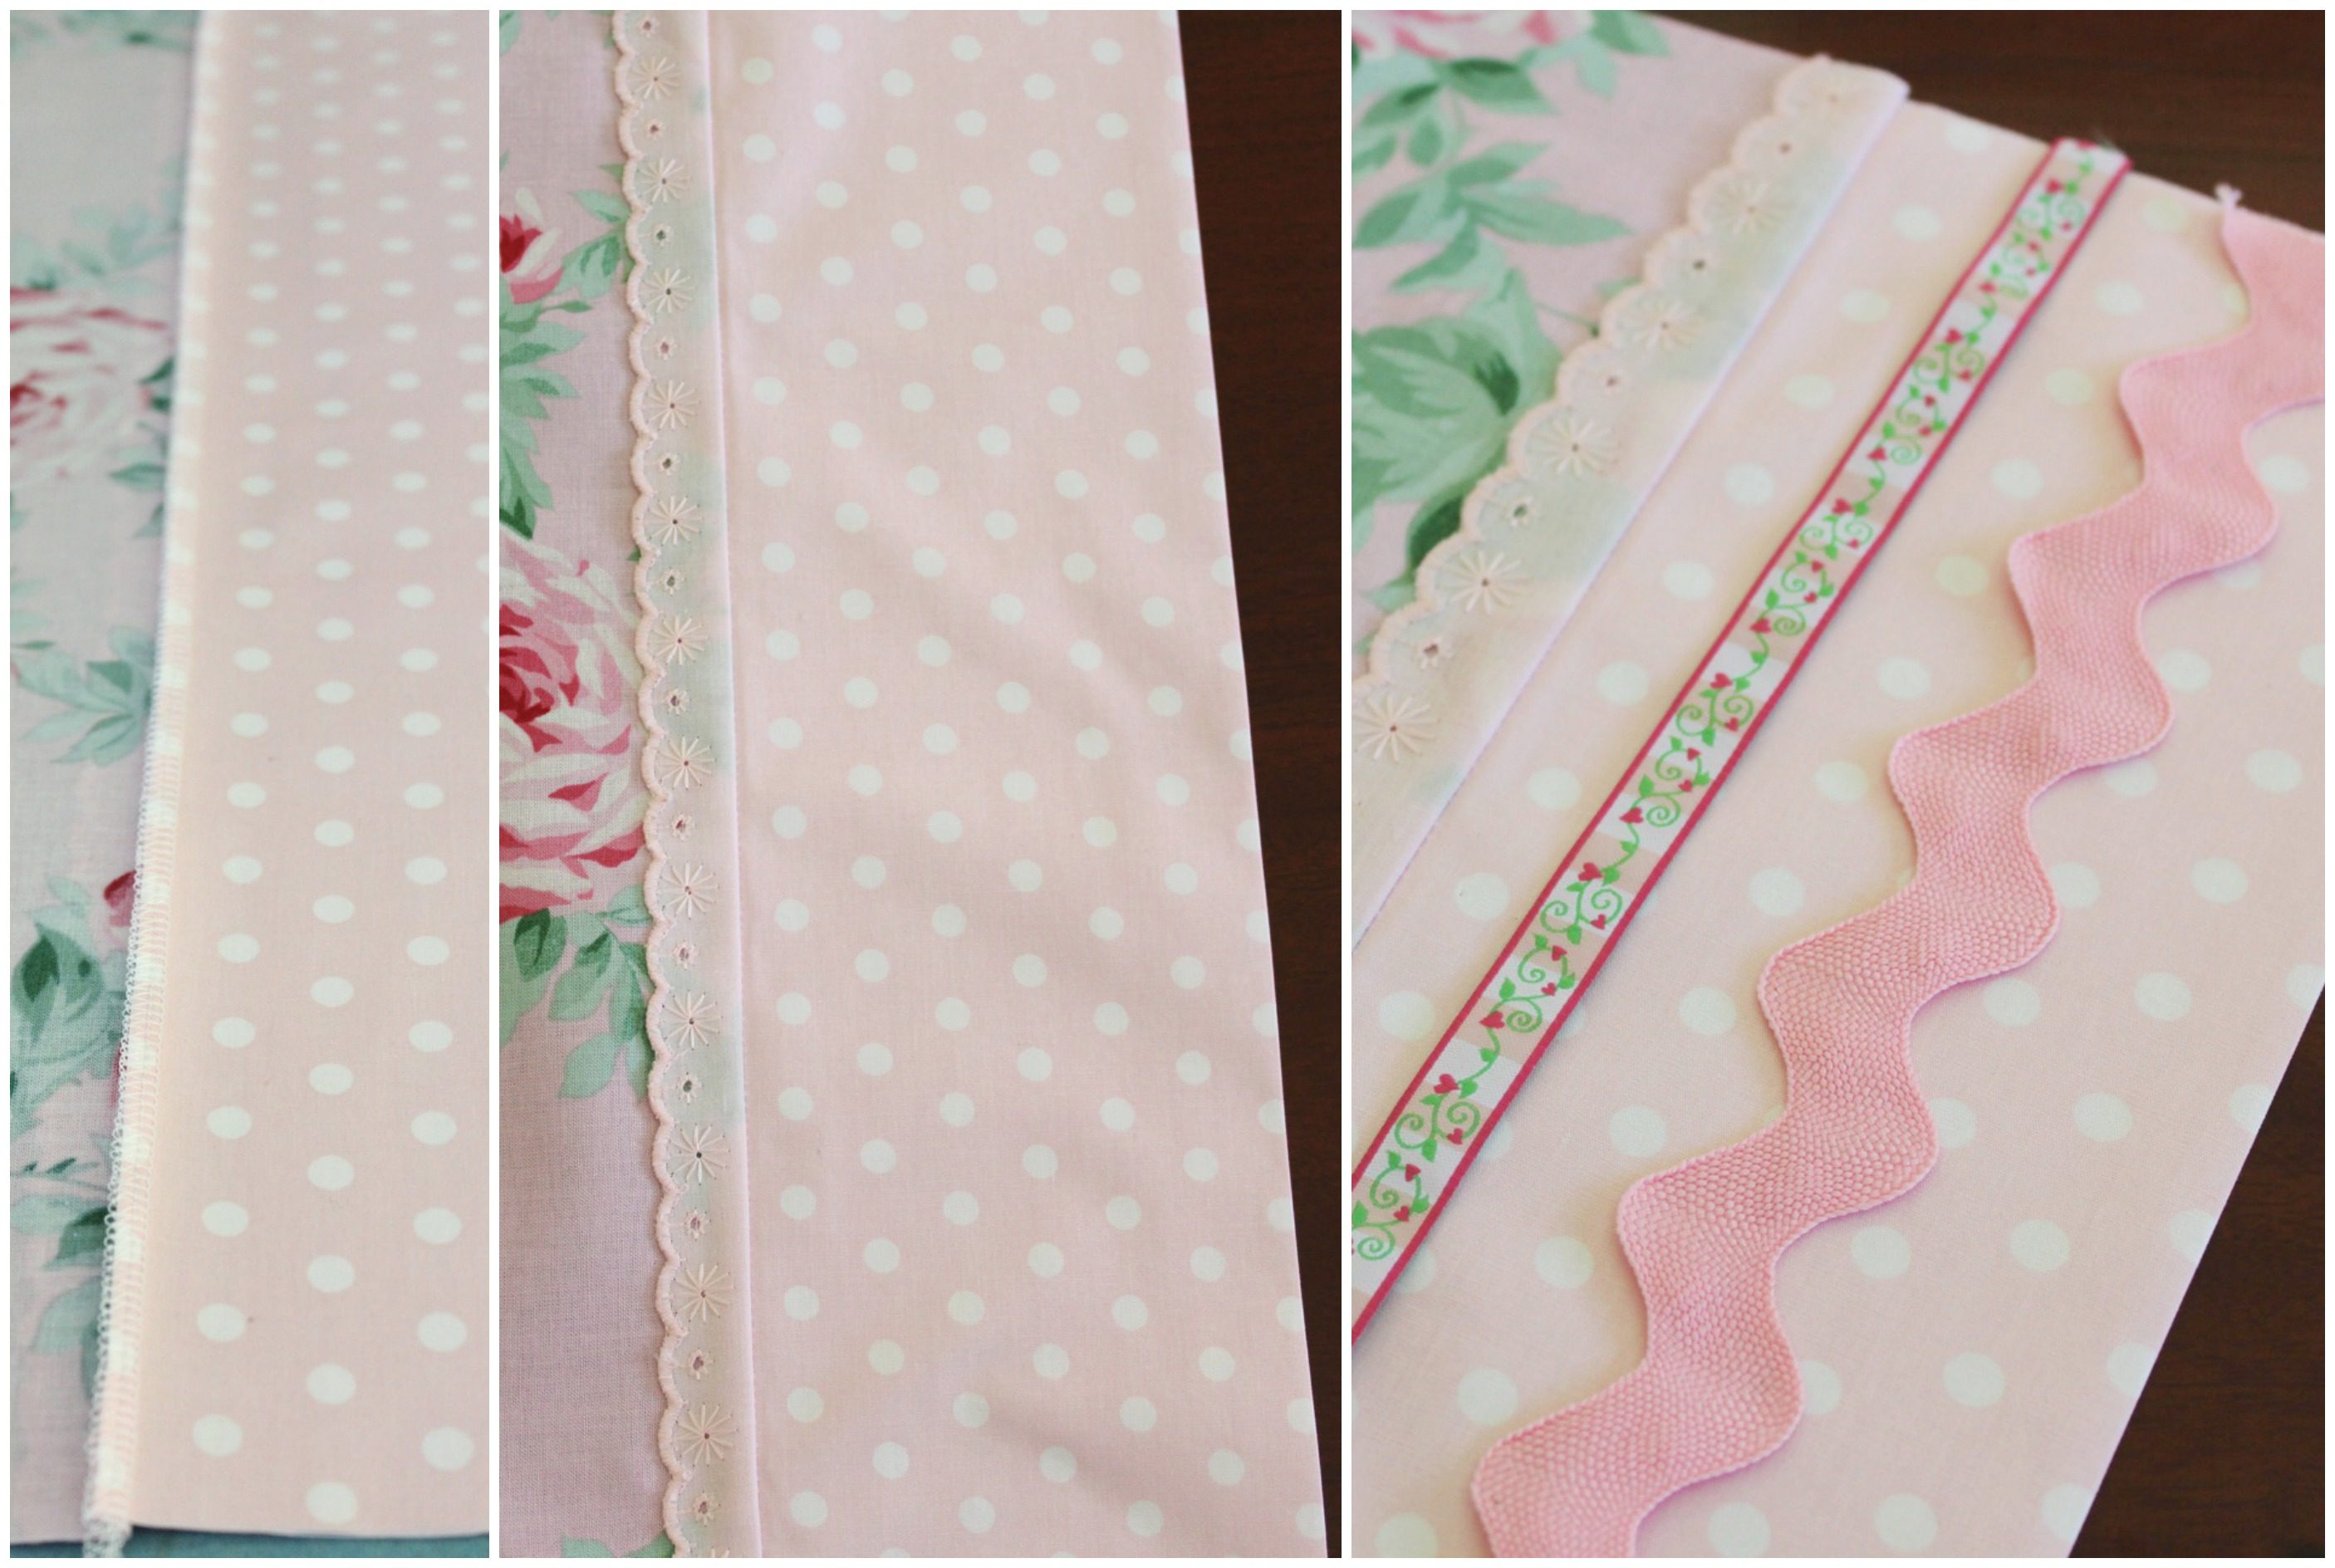
For this project, I chose a pretty floral quilter’s cotton for my pillowcase fabric and a coordinating cuff from polka dots. Sheeting and poly cottons are probably more ideal fabrics for bedding. But I couldn’t resist those roses! I also discovered some pretty lace, ric rac and braid that worked together well. You could use ribbon too.
I’ve written this tutorial for a pillowcase based on the standard USA size of 20” x 26”. However the tutorial is easily adjustable to fit other sized pillows or cushions.
YOU WILL NEED
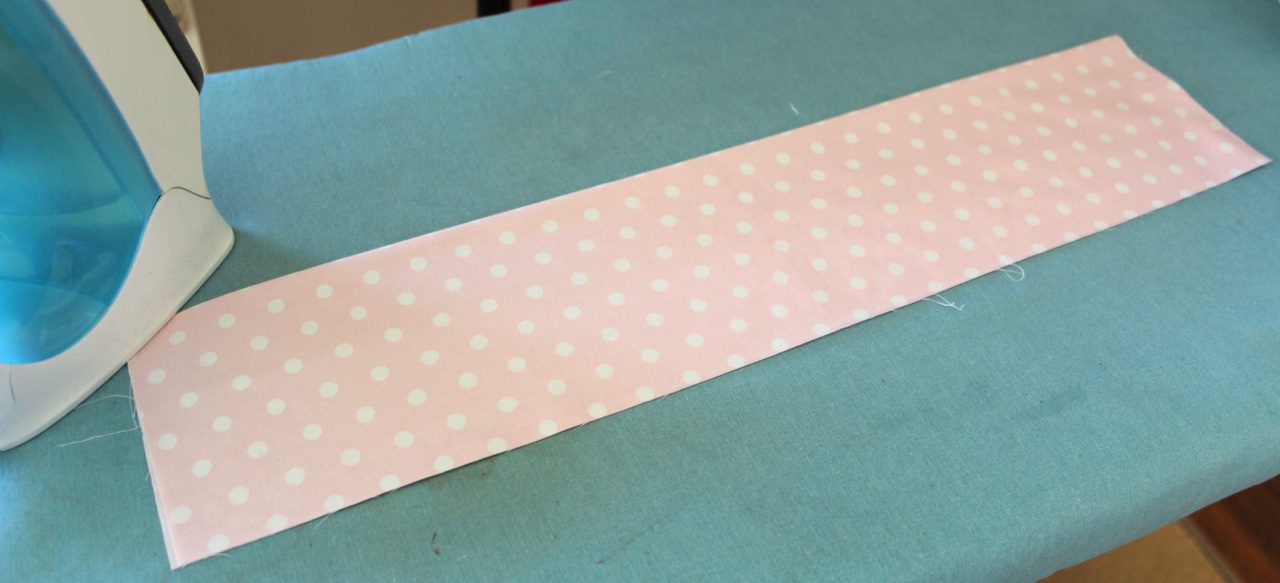
- 1.5 metres or yards of coordinating fabric, cut into the following sizes; Pillowcase top – 21″ of fabric length x 23″ of fabric width, Pillowcase back – 21″ of fabric length x 33″ of fabric width, Pillowcase cuff – 21″ of fabric length x 9″ of fabric width.
- 21 inches of trims like lace, ric rac, and braids that work well together.
- general sewing supplies
- sewing machine and overlocker (serger)
DIRECTIONS
MAKING THE PILLOWCASE TOP
First we’ll attach the lace and cuff to the width of the pillowcase top. Take your cuff piece of fabric and fold it in half lengthways with wrong sides together. Give it a good press.
Lay your piece of lace right side up, on the right side (width) of the pillowcase top. Take your cuff and lay it carefully over the lace so that all the raw fabric edges align.

Pin then sew the layers together. I used my four-thread overlocker (serger), which creates a straight seam stitch, as well as finishing the edges at the same time. You can also stitch the layers together on your sewing machine first. Then finish the seam with your overlocker (serger) or with a zig zag stitch afterwards. Be sure to use a smaller seam allowance, no more than 3/8”. And be sure not to stitch over your pins, but remove them as you go.
Press your seam towards the body of the pillowcase so that it rests under the lace (be very careful with your iron heat settings if your lace or trims are polyester based).
Flip it over and gently press the lace down flat (use a press cloth if necessary).
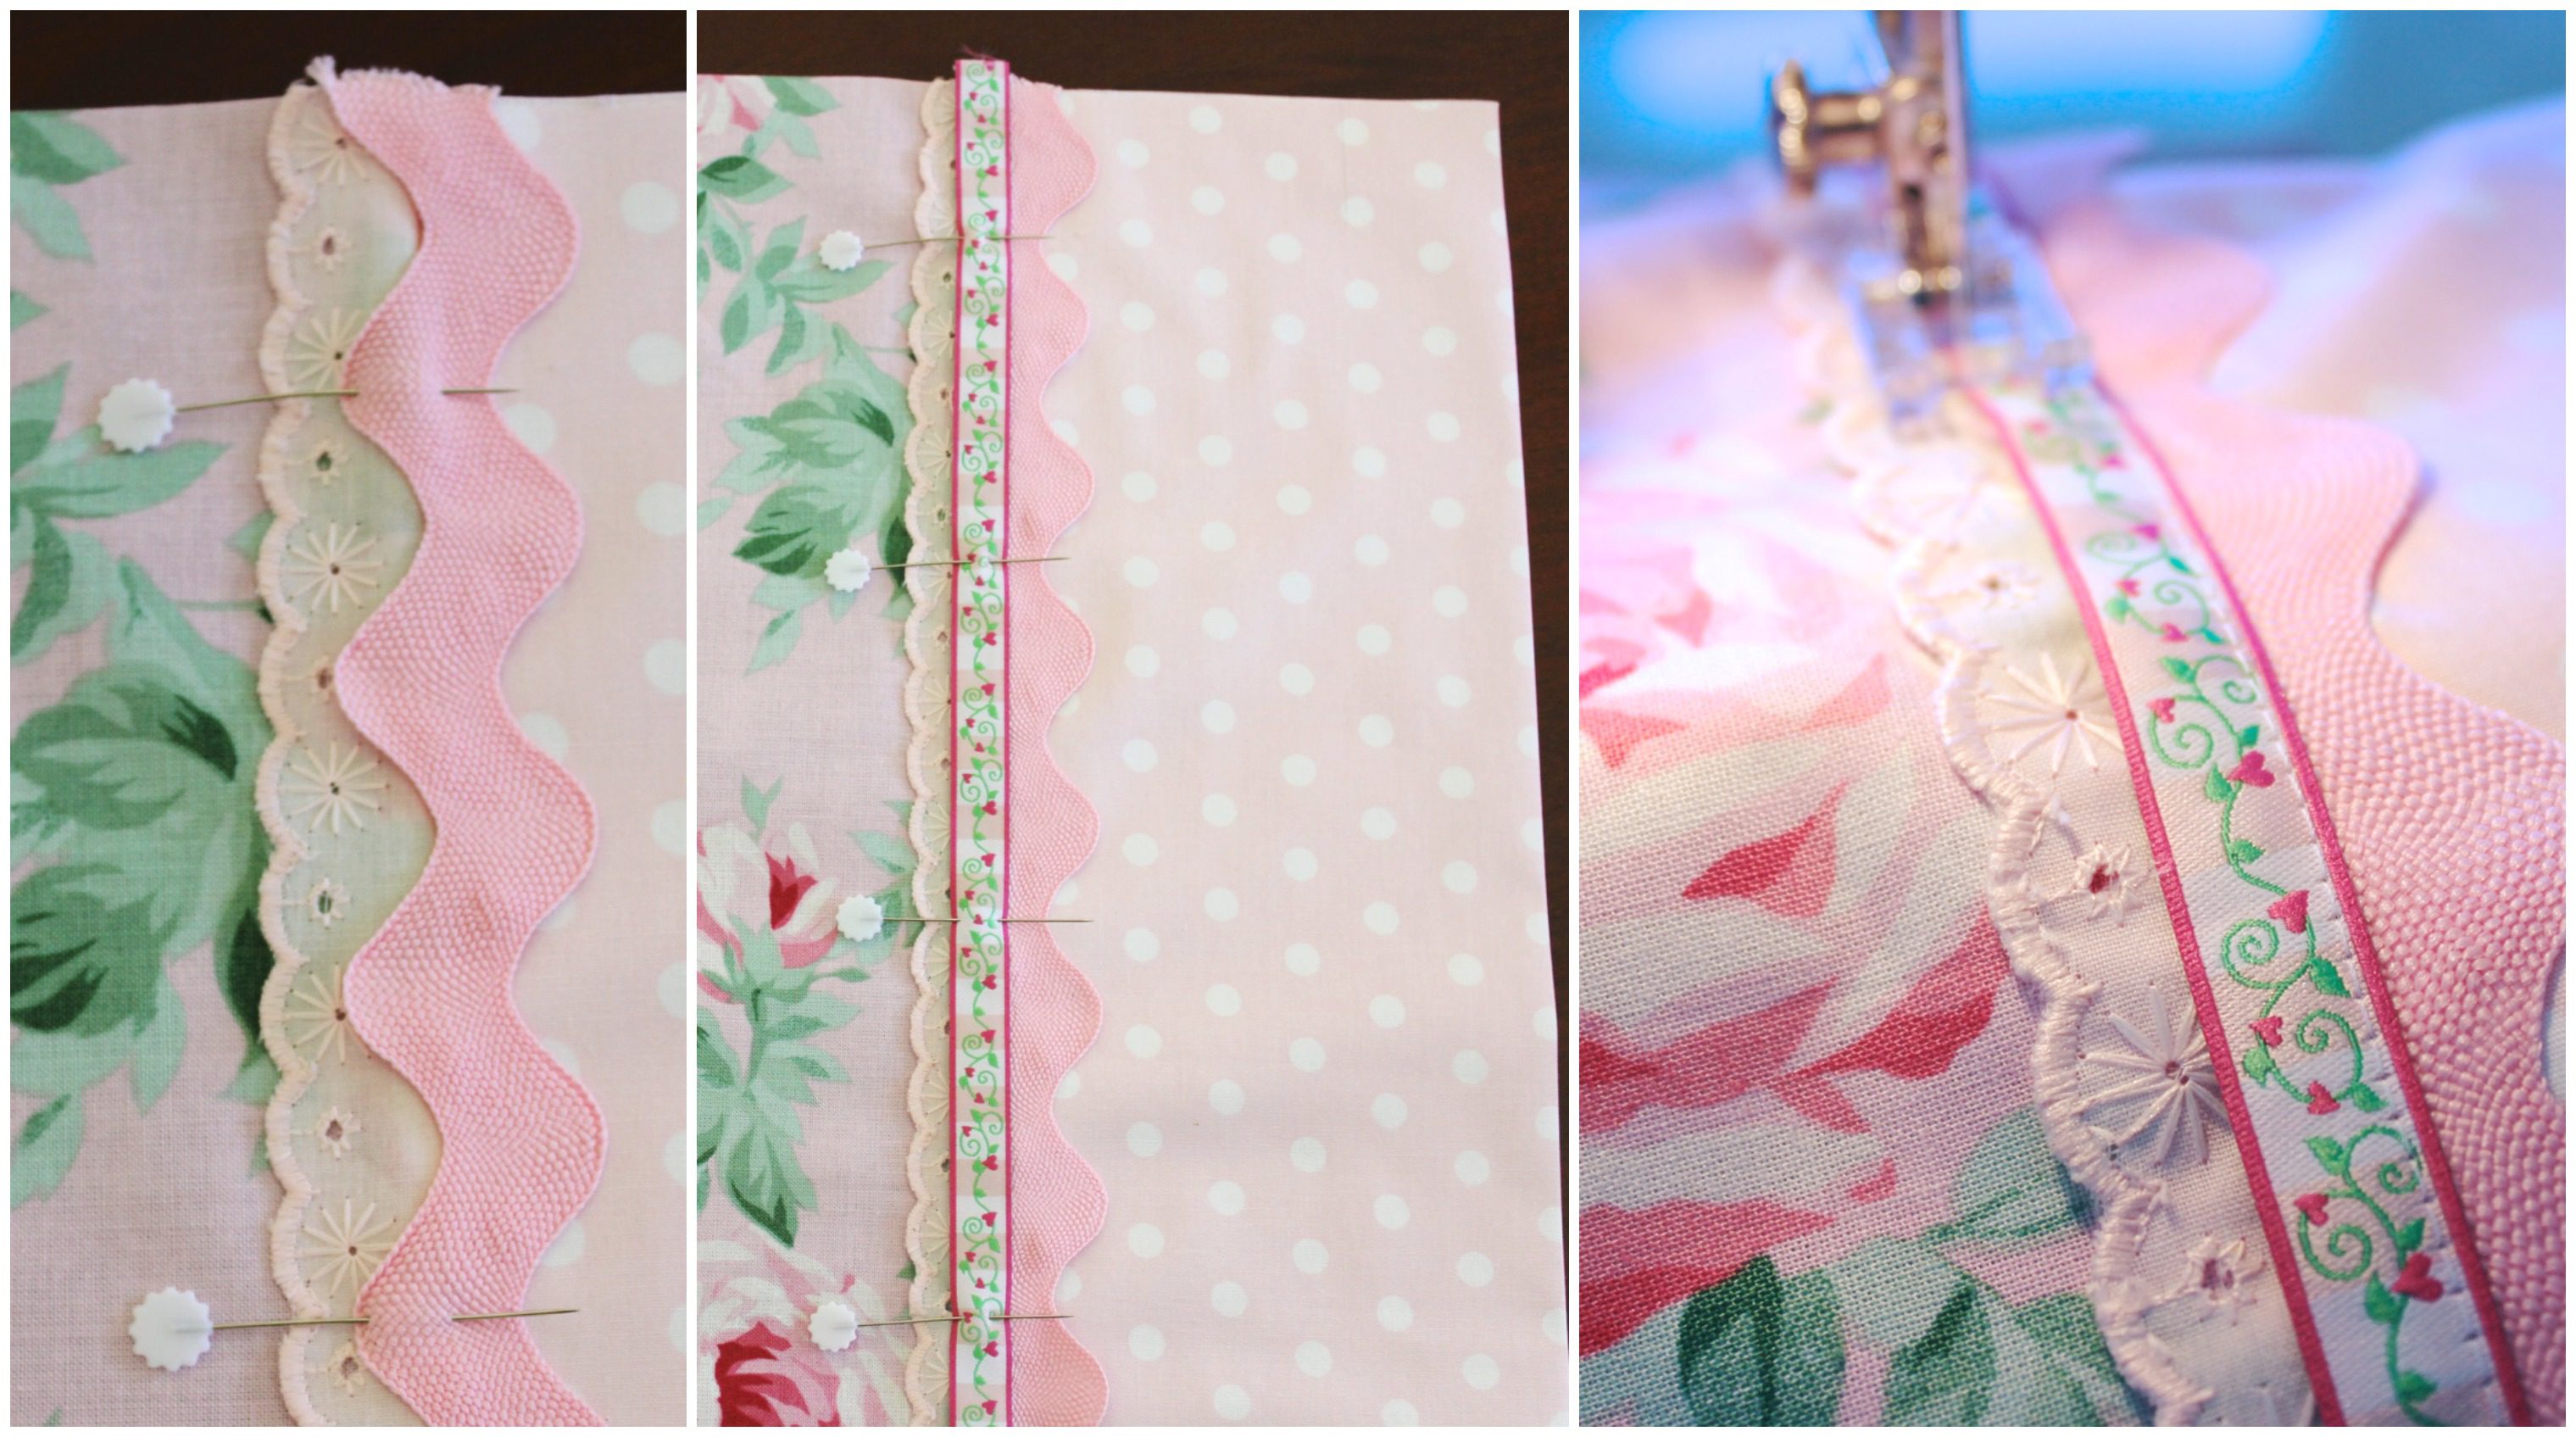
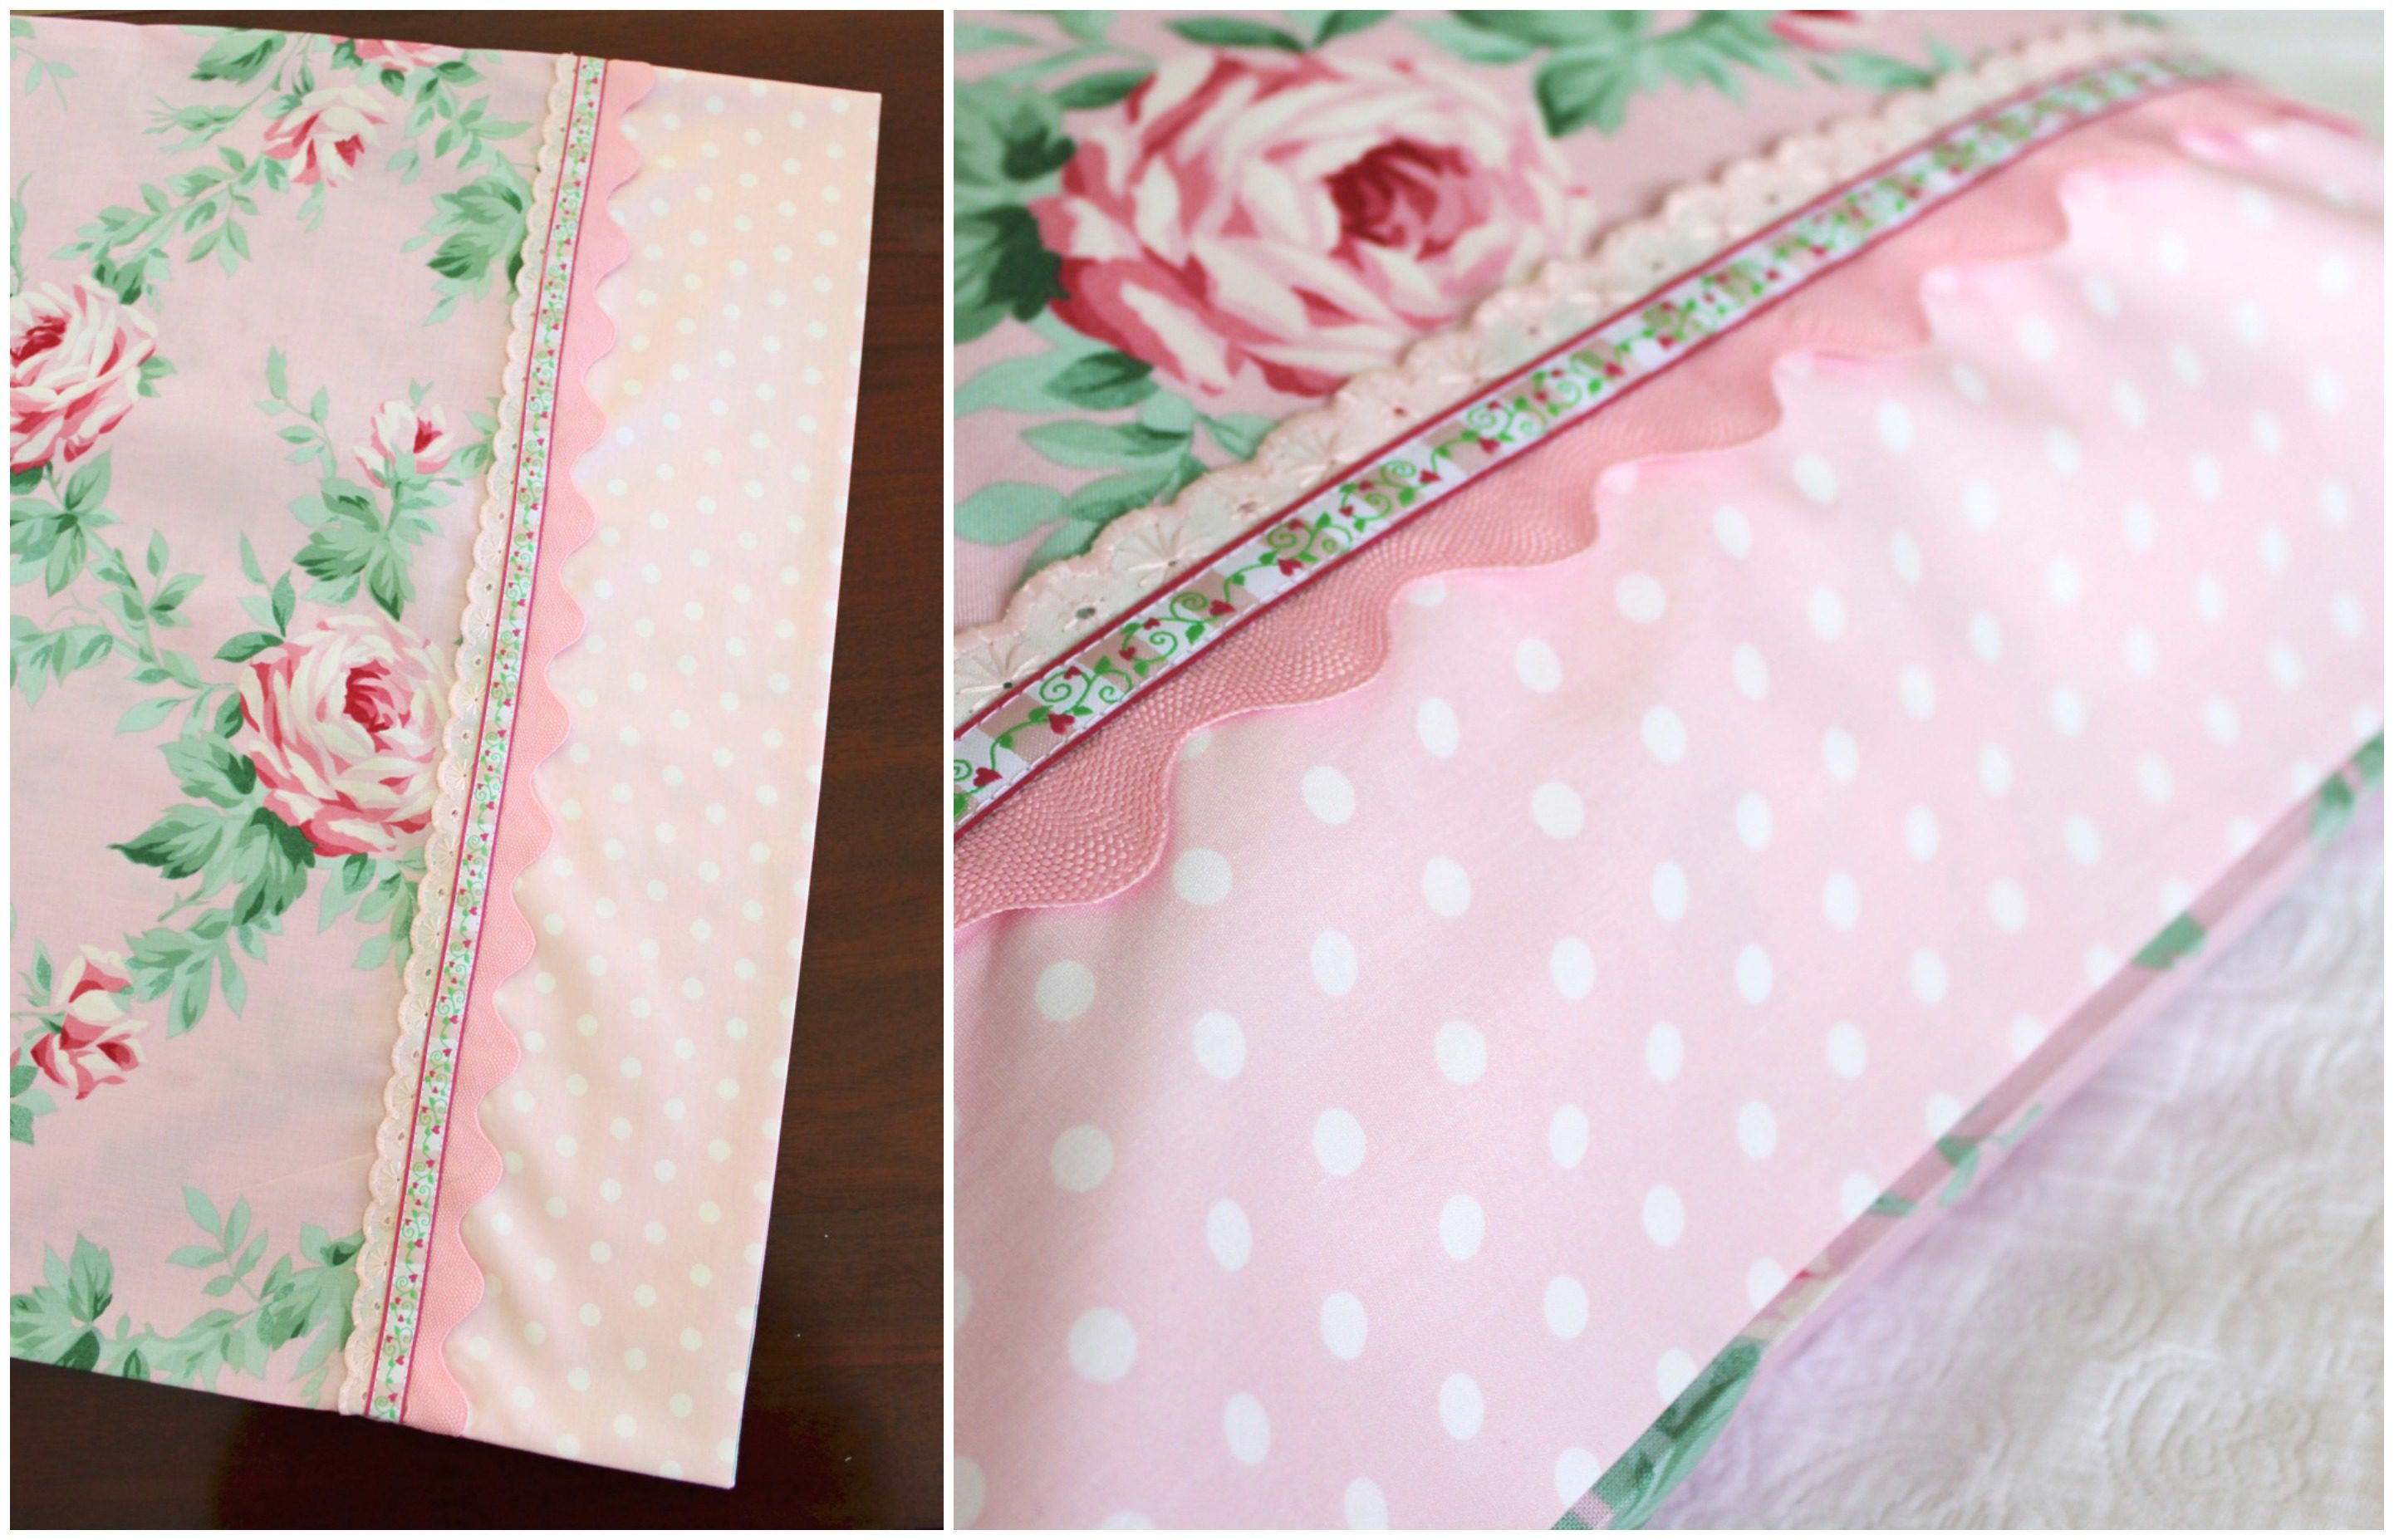
Lay out your trims to decide the best way to pin and stitch them.
I pinned my ric rac over the seam line first.
Then I pinned my braid in place.
Using complementary threads, stitch down your braid with the sewing machine. Use a stitch length suitable for the project. If it’s too small, it may create puckering through your layers. I stitched the right side first, then the left. I used my clear sewing machine foot (sometimes called an appliqué foot), so that it was easier to see what I was doing. And I used the foot edge as a stitching guide for straighter seams.
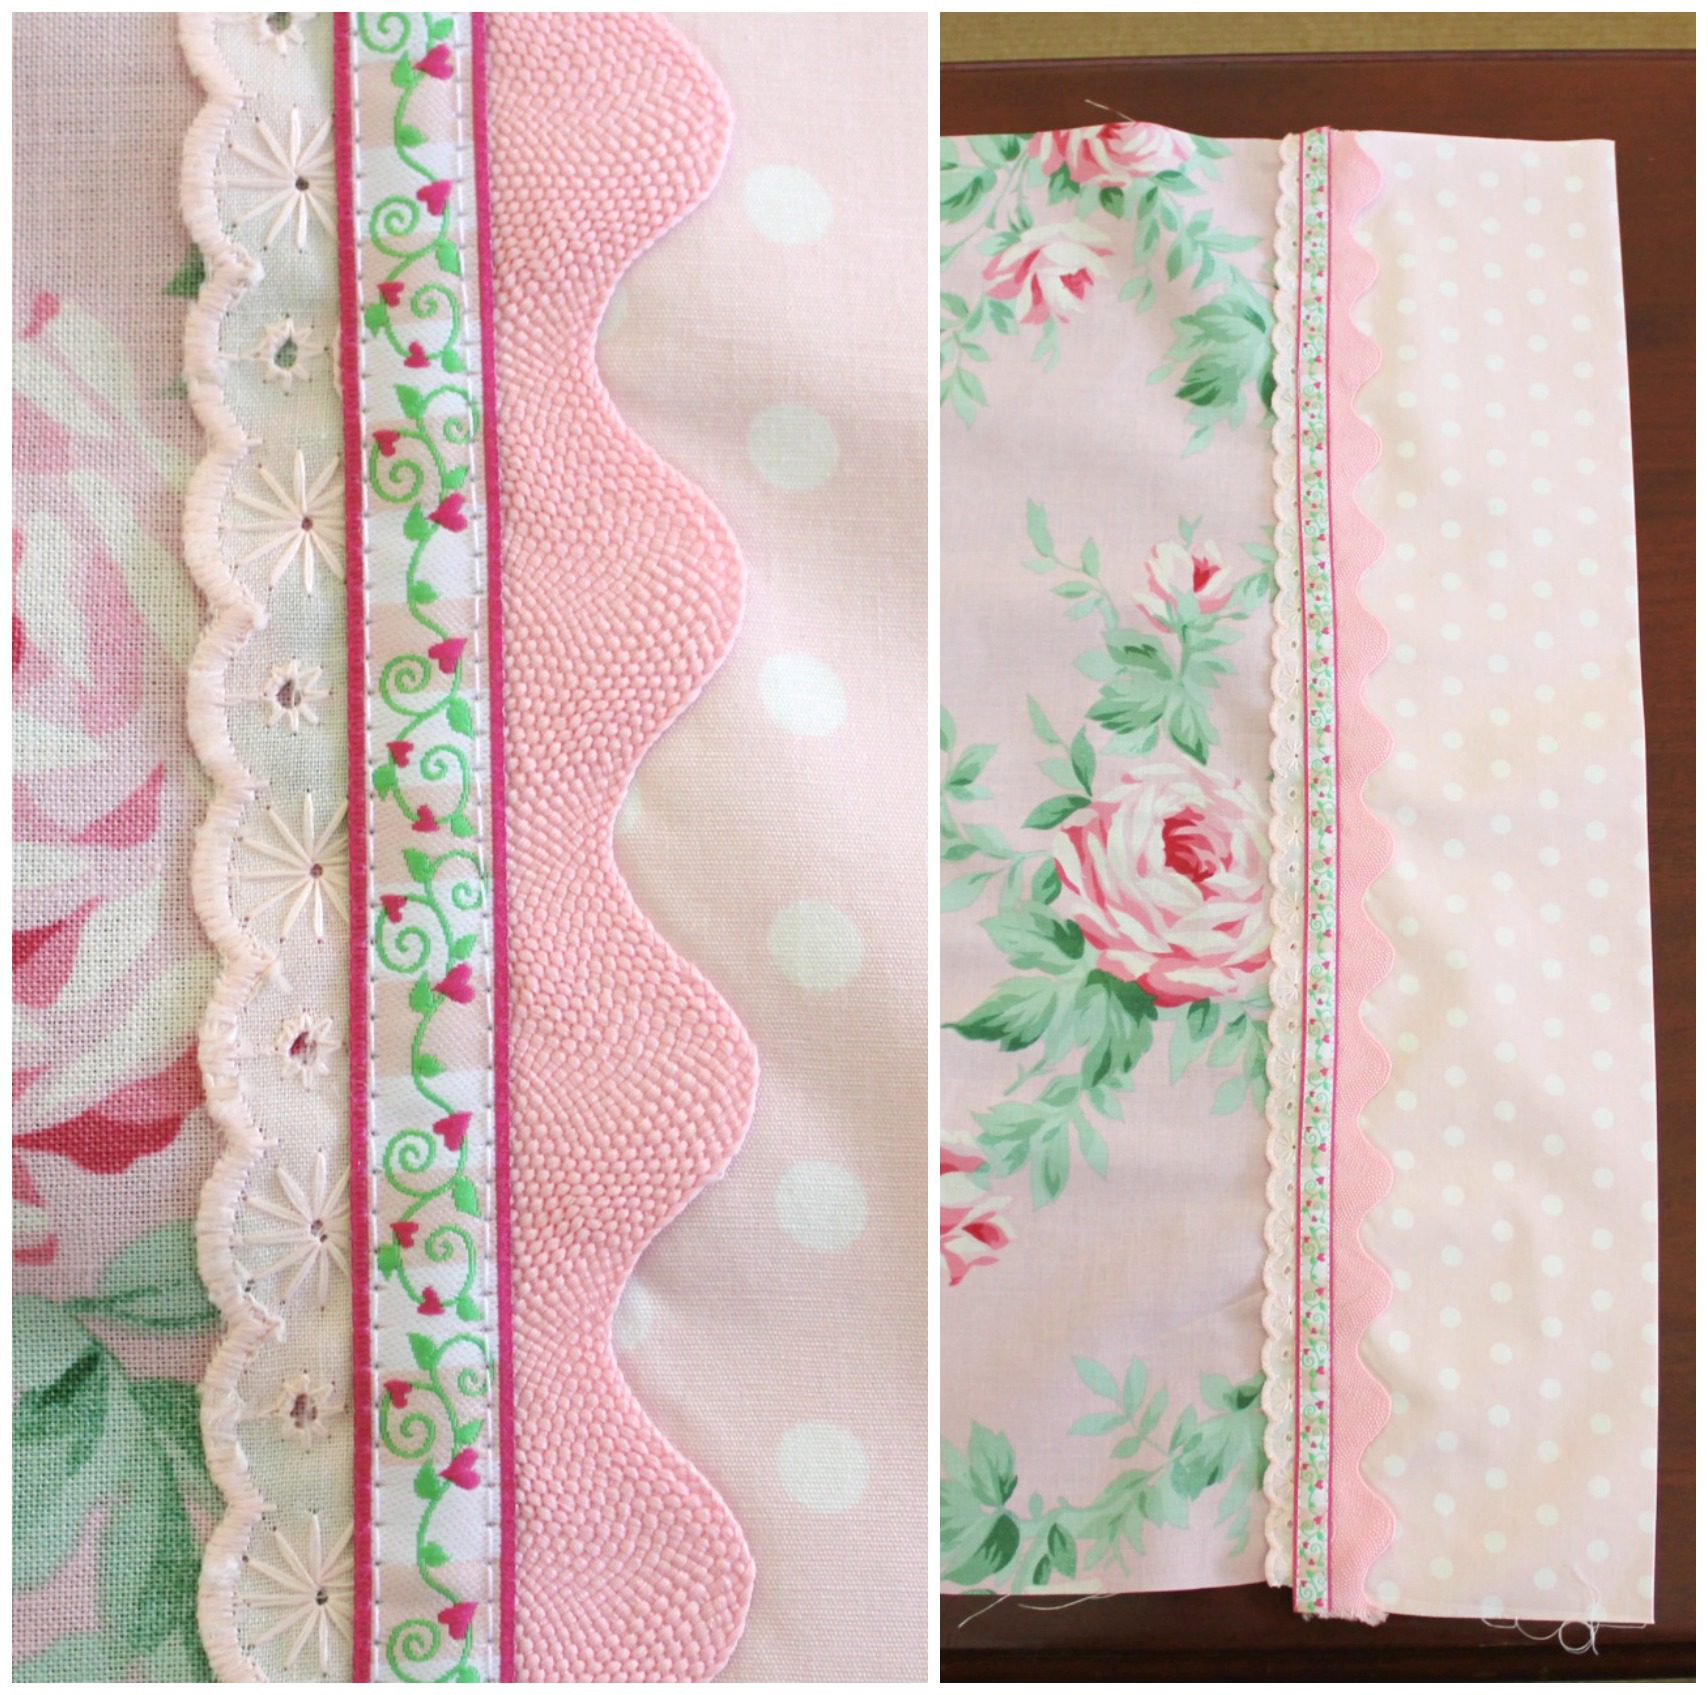
When you’ve finished, your pillowcase top should look like this.
PREPARING THE PILLOWCASE BACK
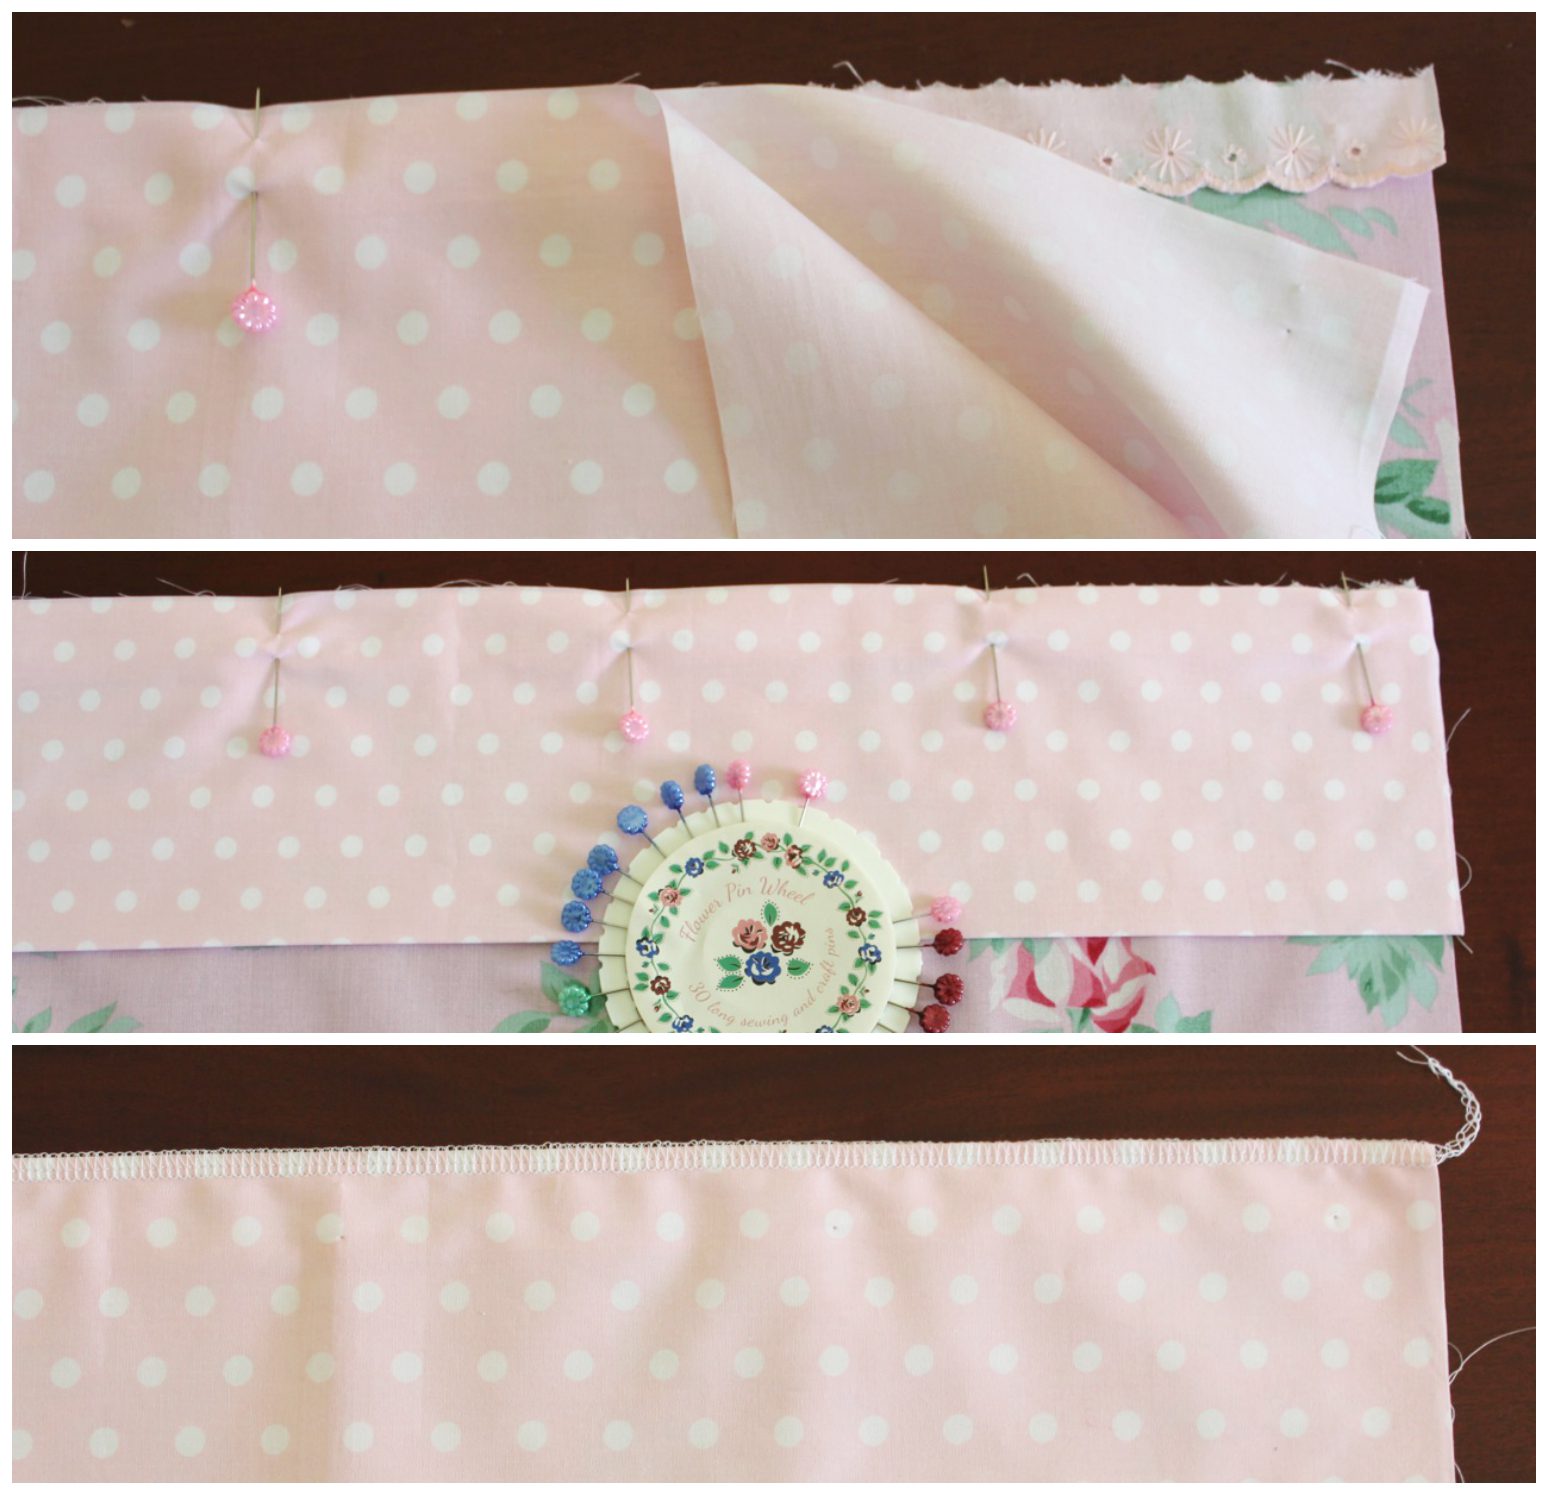
First we’ll need to hem one edge of the fabric width. This will form part of the fold that we tuck our pillow into.
Take your pillowcase back piece and press over a 1/4” fold on one side of the width of the fabric. Fold it over the same again and press flat.
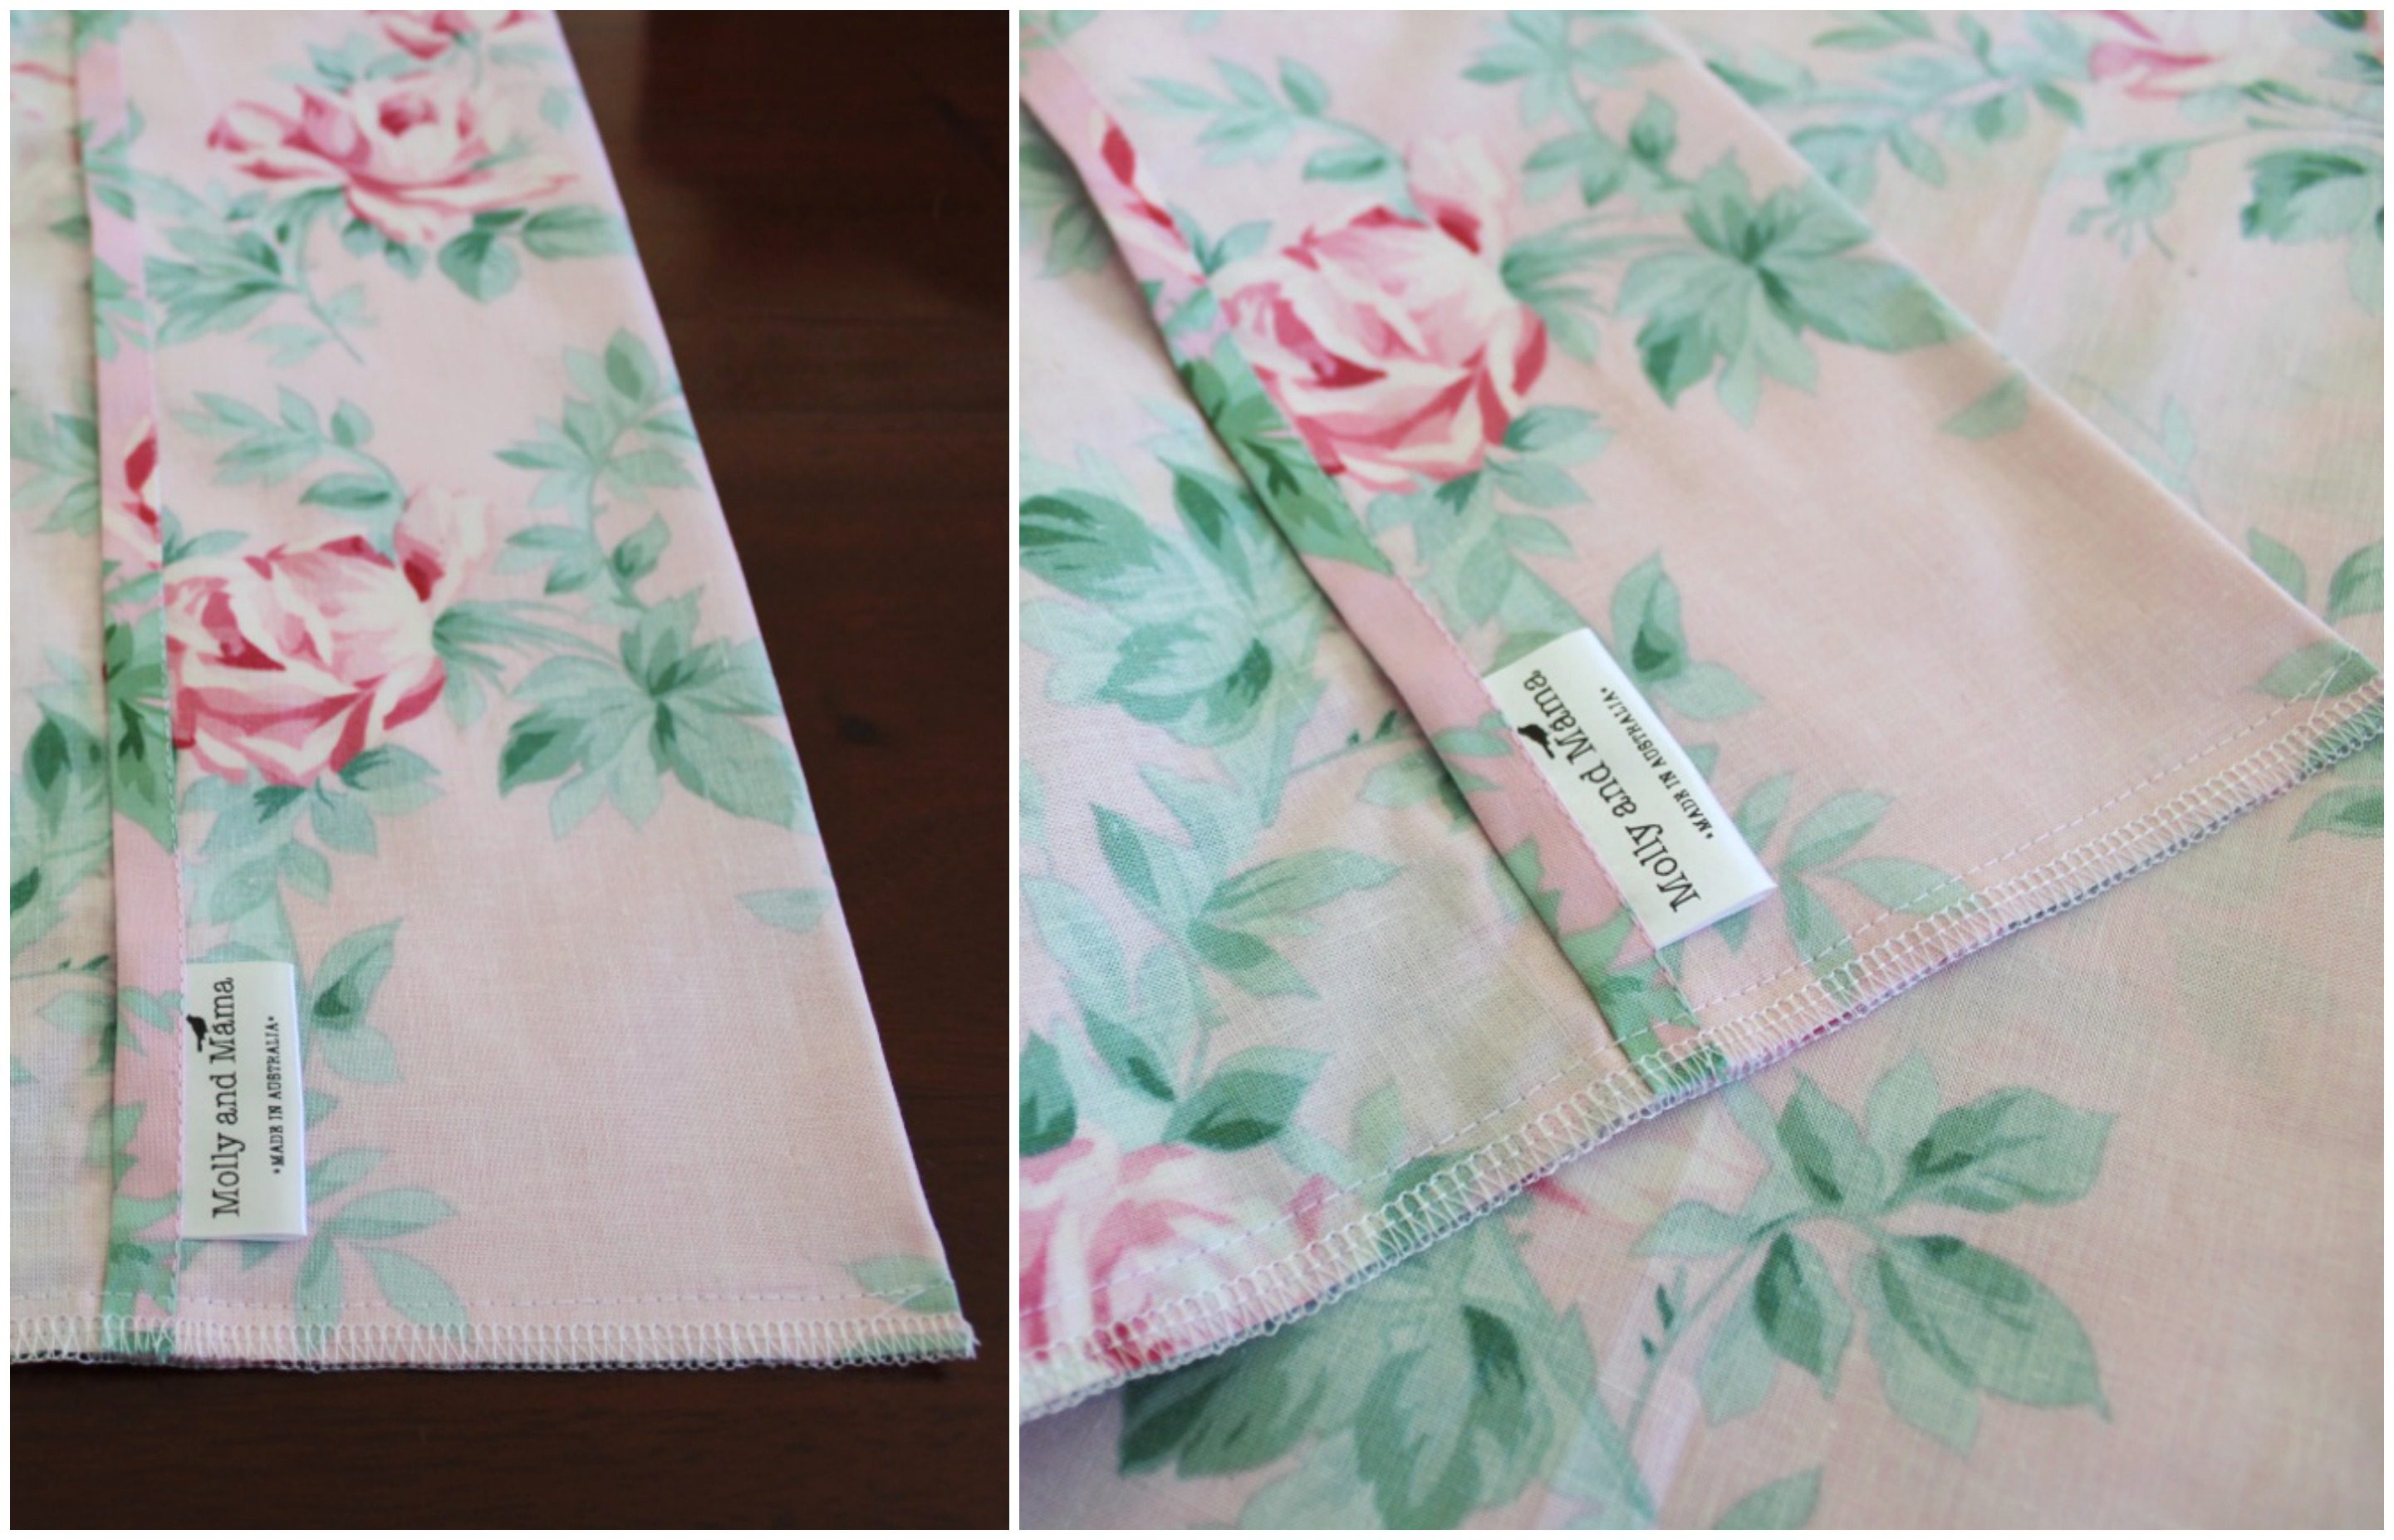
Pin the hem down for easier stitching and use a straight stitch on your machine to hem the fabric. Be sure your threads (especially your bobbin) are coordinating colours! At this stage, I like to sew a care tag in the seam.

Give everything a quick press and we’re ready to put it all together.
LET’S PUT IT ALTOGETHER
Lay your pillowcase base ‘face up’ on a flat surface. Lay your pillowcase top ‘face down’ over the base piece (so right sides are facing together). Place the raw unfinished edges together on the left.
On the right hand side (or opening of your pillowcase), the back piece will have a large overhang. Take that piece and fold it over the edge of the pillowcase top, so that you are covering the cuff.
Pin the sides of the overhang down (by replacing any pins you’ve used to pin the pieces together underneath). At this point, make sure that your folded fabric sits exactly over your decorative cuff underneath and that there is no gap.

Using your sewing machine, stitch together the seams on three sides. Start at the top right of your pillowcase (we’re stitching the fold down here too).
Continue down this seam, pivot about 1/4” from the base, stitch again, pivot again at the next corner, and then stitch up until you reach the other end of the fold. Overlock (or serge) your edges, to give a neat finish. Here’s a close up image.
We’re almost there. Fold back the overhang and flip the pillowcase right way out. Give your seams a gentle press. Check your iron temperature and don’t forget to be careful of your trims!
Pop in your favourite pillow and you’re ready to go!
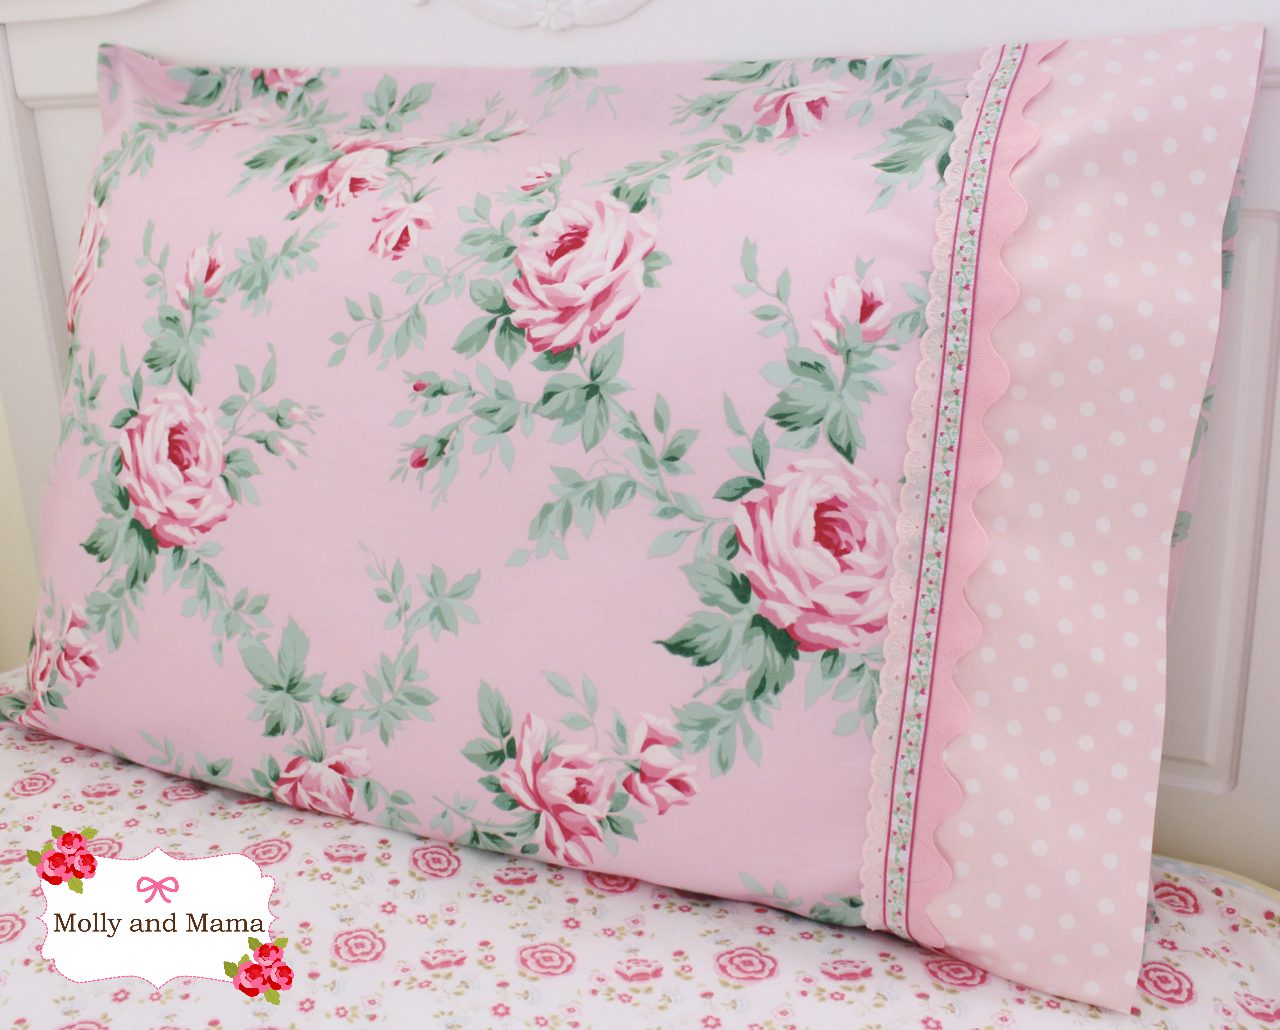
AND THERE YOU HAVE IT!
How simple was that? And how pretty does it look?
THINGS TO CONSIDER
– The direction of the pattern or print on your fabric. You don’t want your pillowcase fabric to be upside down when it’s displayed on the bed. So be sure if it’s a directional pattern, to cut it and sew it right way up.
– Where the bed is positioned in the bedroom will affect where you would like the pillowcase’s decorative edge to be. My daughter’s bed is against a left wall, so I want the decorative edge to be on the right hand side of the pillowcase.
– Laces, braids and ric racs may all have a polyester content so be very careful when ironing your trims down. Use a press cloth (or scrap of quilter’s weight cotton) if necessary.
– Add other adornments like applique to really give your project a personal feel. You can learn how to applique HERE.
And if you’ve gotten this far, thanks for staying with me! I hope you’ve gotten something useful from the tutorial. I have another pillowcase tutorial which you may also enjoy HERE.
Happy stitching, Lauren x
This post was written by Lauren Wright and appeared first on Molly and Mama http://www.MollyandMama.com.au

Thank you Julieanne. Drag out the sewing machine. You’ll enjoy it!
Great tutorial. Attempting a few lap quilts for Christmas. This would be a great add on.
What a great idea Carly! Thanks for your feedback.
Can I ask where you got your Personalized Tags made? I absolutely love that idea!!!
Hi Joey, I purchased the sew in tags used in this project from the store ‘Ikaprint’ on Etsy. I also use World Wide Label for sew on labels. I hope that helps! Happy stitching!
Hi
I’m a beginner at sewing so can’t work out what I am doing wrong. I placed the cuff over the fabric and cut it to 21 inches wide but the top piece is 23 inches wide as per instructions. What happens to the extra 2 inches?? Apologies if I am being dumb??
Hi Sandy, Thanks for your question. The cuff needs to be folded in half and placed on the fabric end that is 21″ long and not the side that is 23″ tall. I hope that helps. And there are no dumb questions! Best of luck 🙂
Many many thanks Lauren. Understand now 😃
Hi,
Could you tell me what measurement for a queen pillow 20×30.
Thank you
Regards
Judy-Ann
Hi Judy-Ann, are you after fabric measurements to sew a pillowcase? Is this for a pillow that measures 20cm x 30 cm or 20 inches by 30 inches? Feel free to send me an email at hello (at) MollyandMama.com.au so I can help you out. Many thanks.
Love it
Would love to know the fabric can be purchased for the pillow case. Love the design.
Hi Christina, This project was made in 2014 so I can’t recall the fabric range, sorry.
thanks Lauren, for the inspiration . I made a cushion today, it’s so great ;
if i didnot do it before, i found it too beautiful .. for me … I “ll send you a picture .
I am working on several projects at once but these pillowcases are beautiful. Problem is that I can’t pin them to use later. Please help me. Thank you, Peggy Wilson
Hi Peggy, if you hover over the image you wish to pin, a red ‘Pin It’ button should appear for you to click on and save the image to Pinterest. Thanks, Lauren.