Sew a Hexie Christmas Ornament
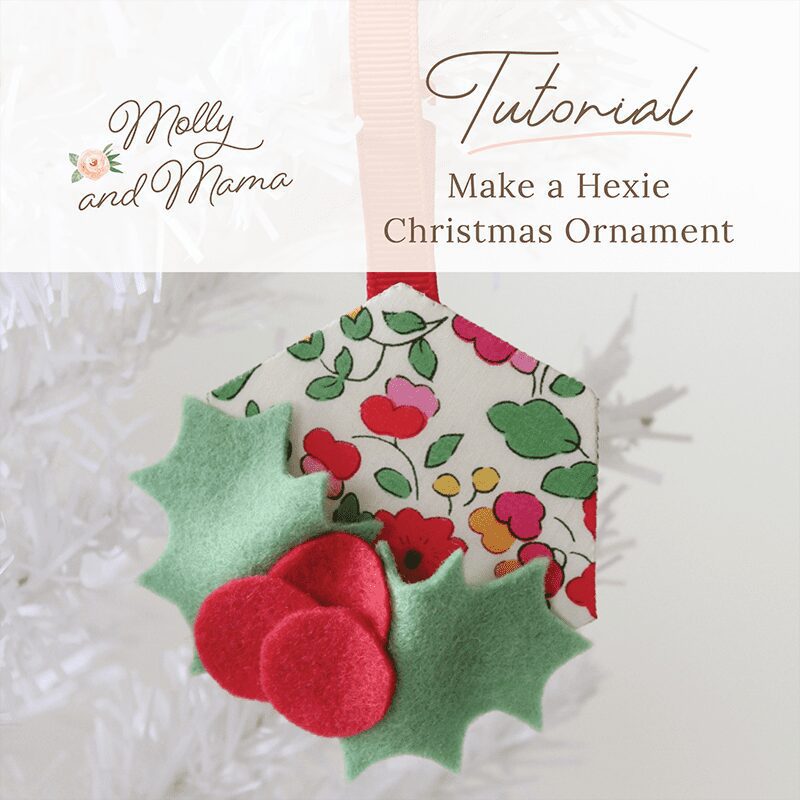
This sweet and simple hexagon Christmas ornament is a great way to use up small felt and fabric scraps. With very little sewing and easy assembly, this project will be finished in no time!
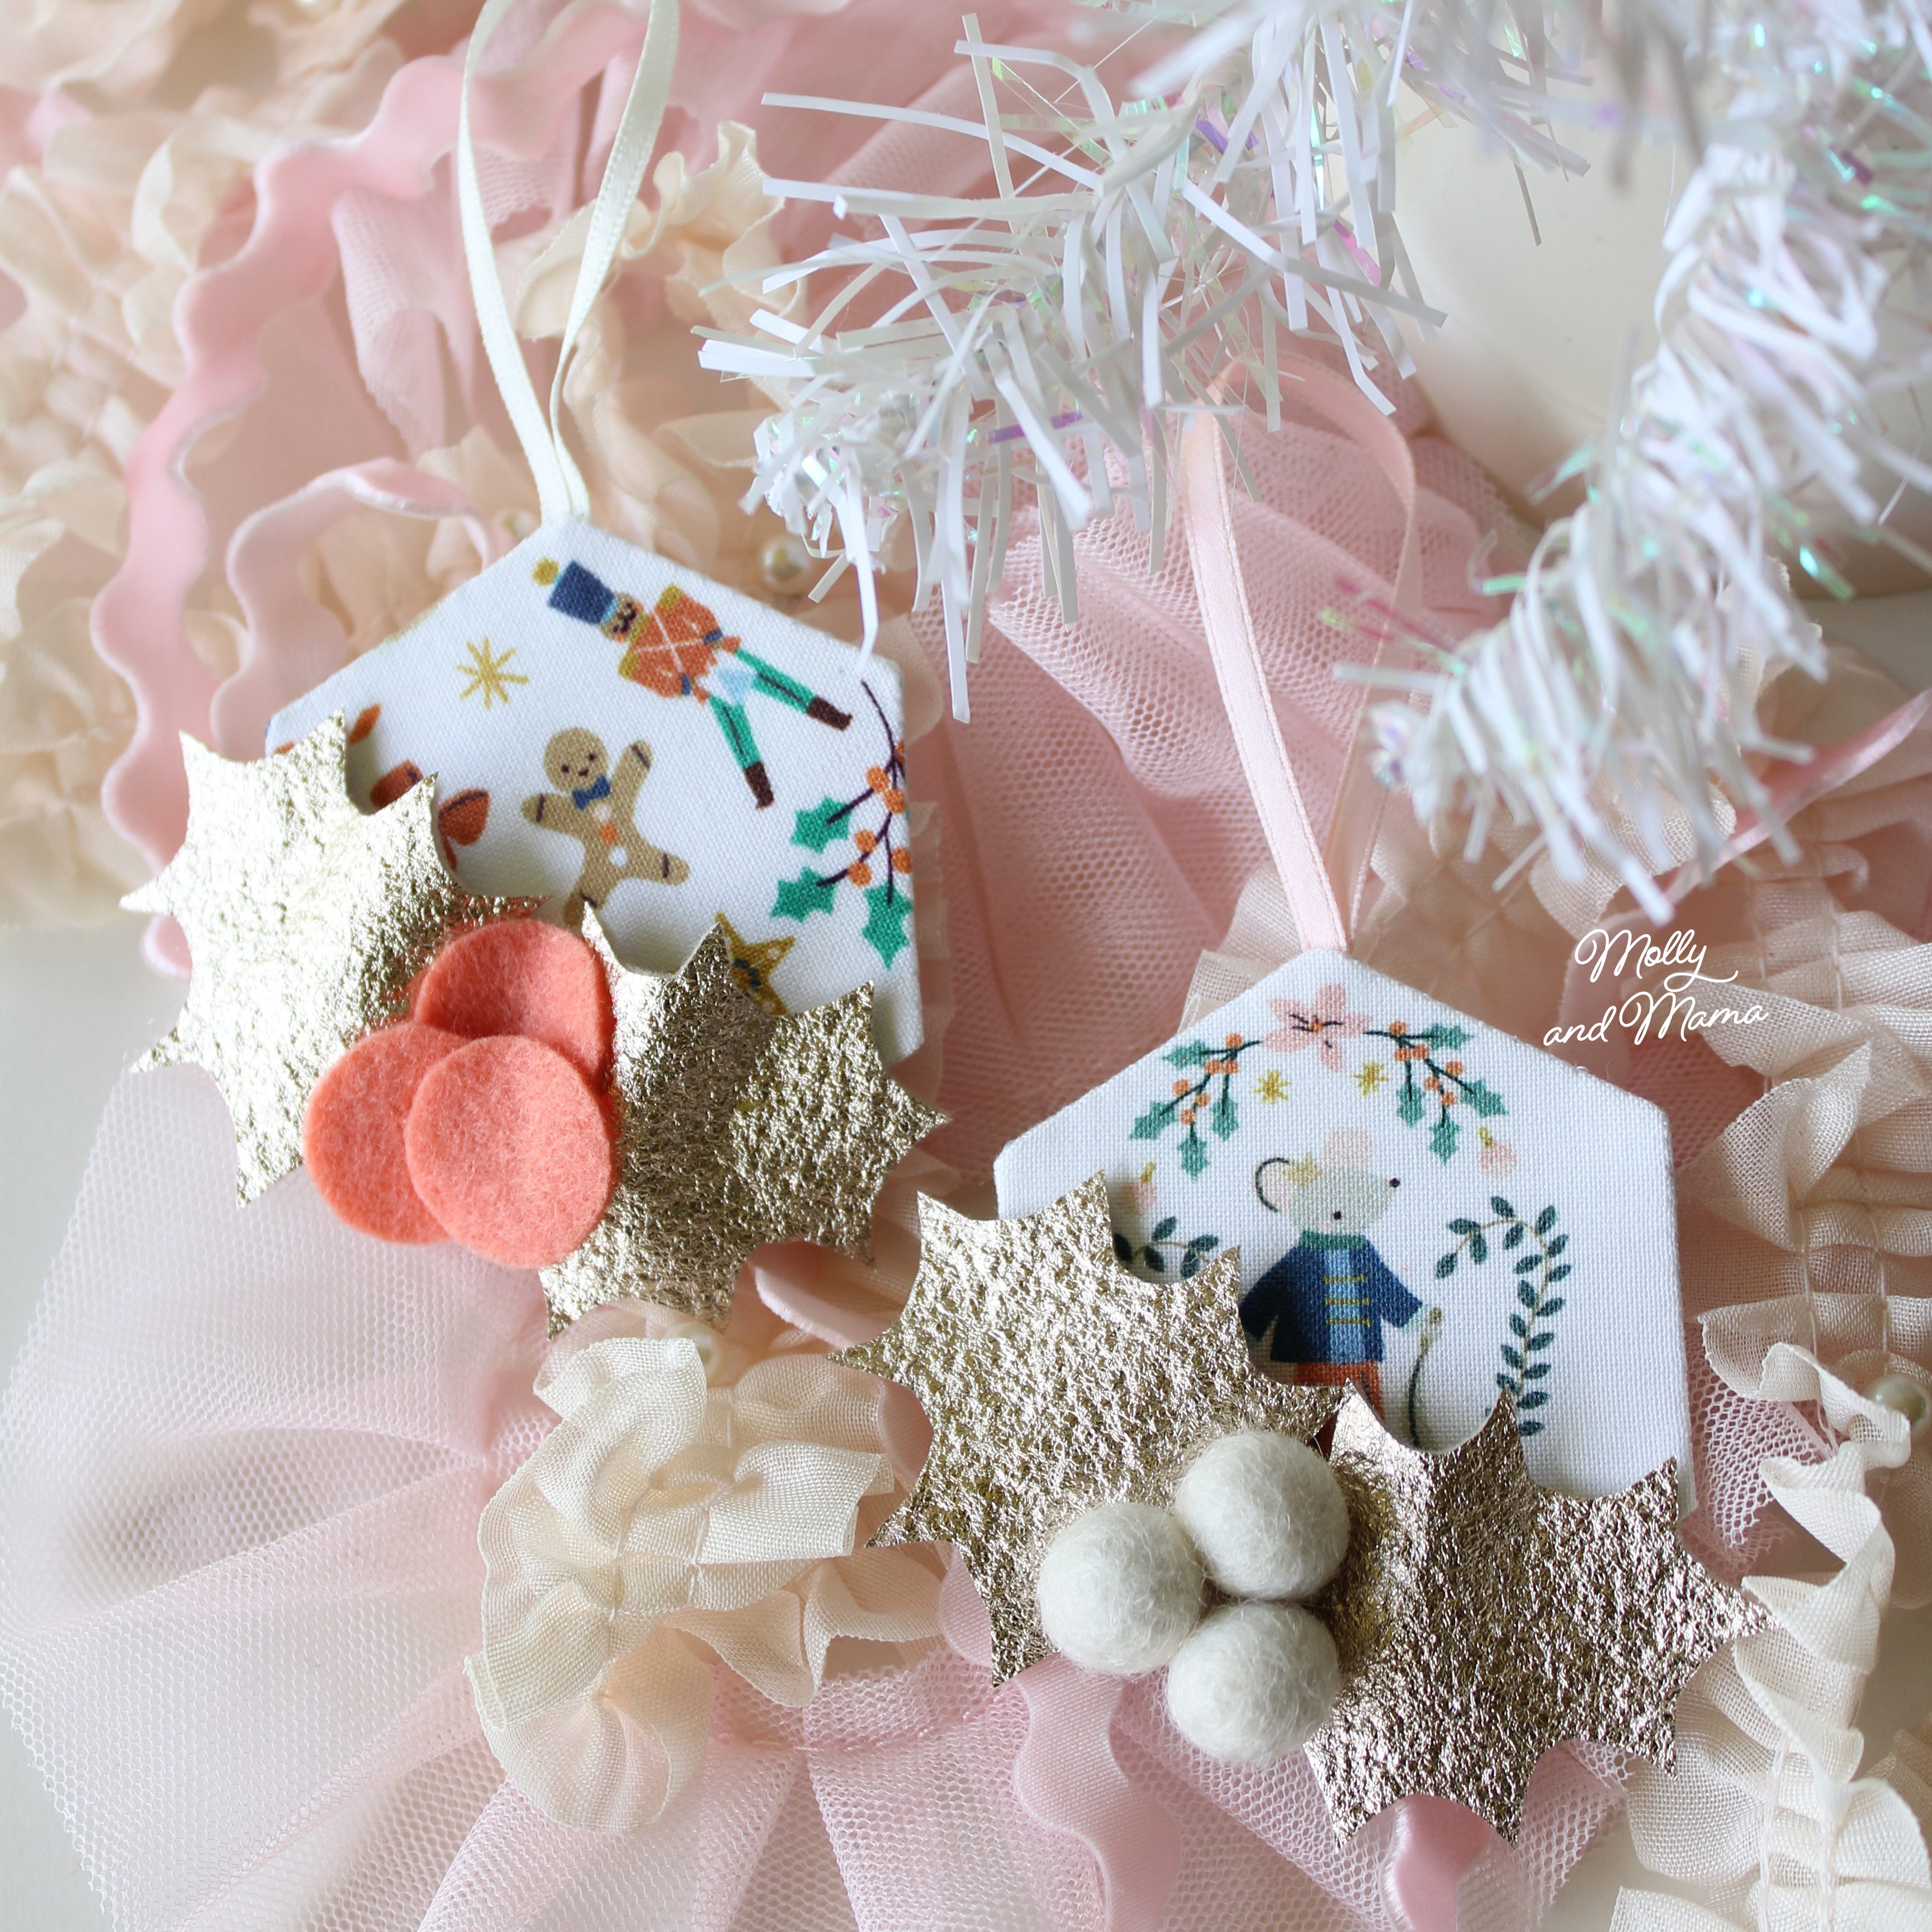
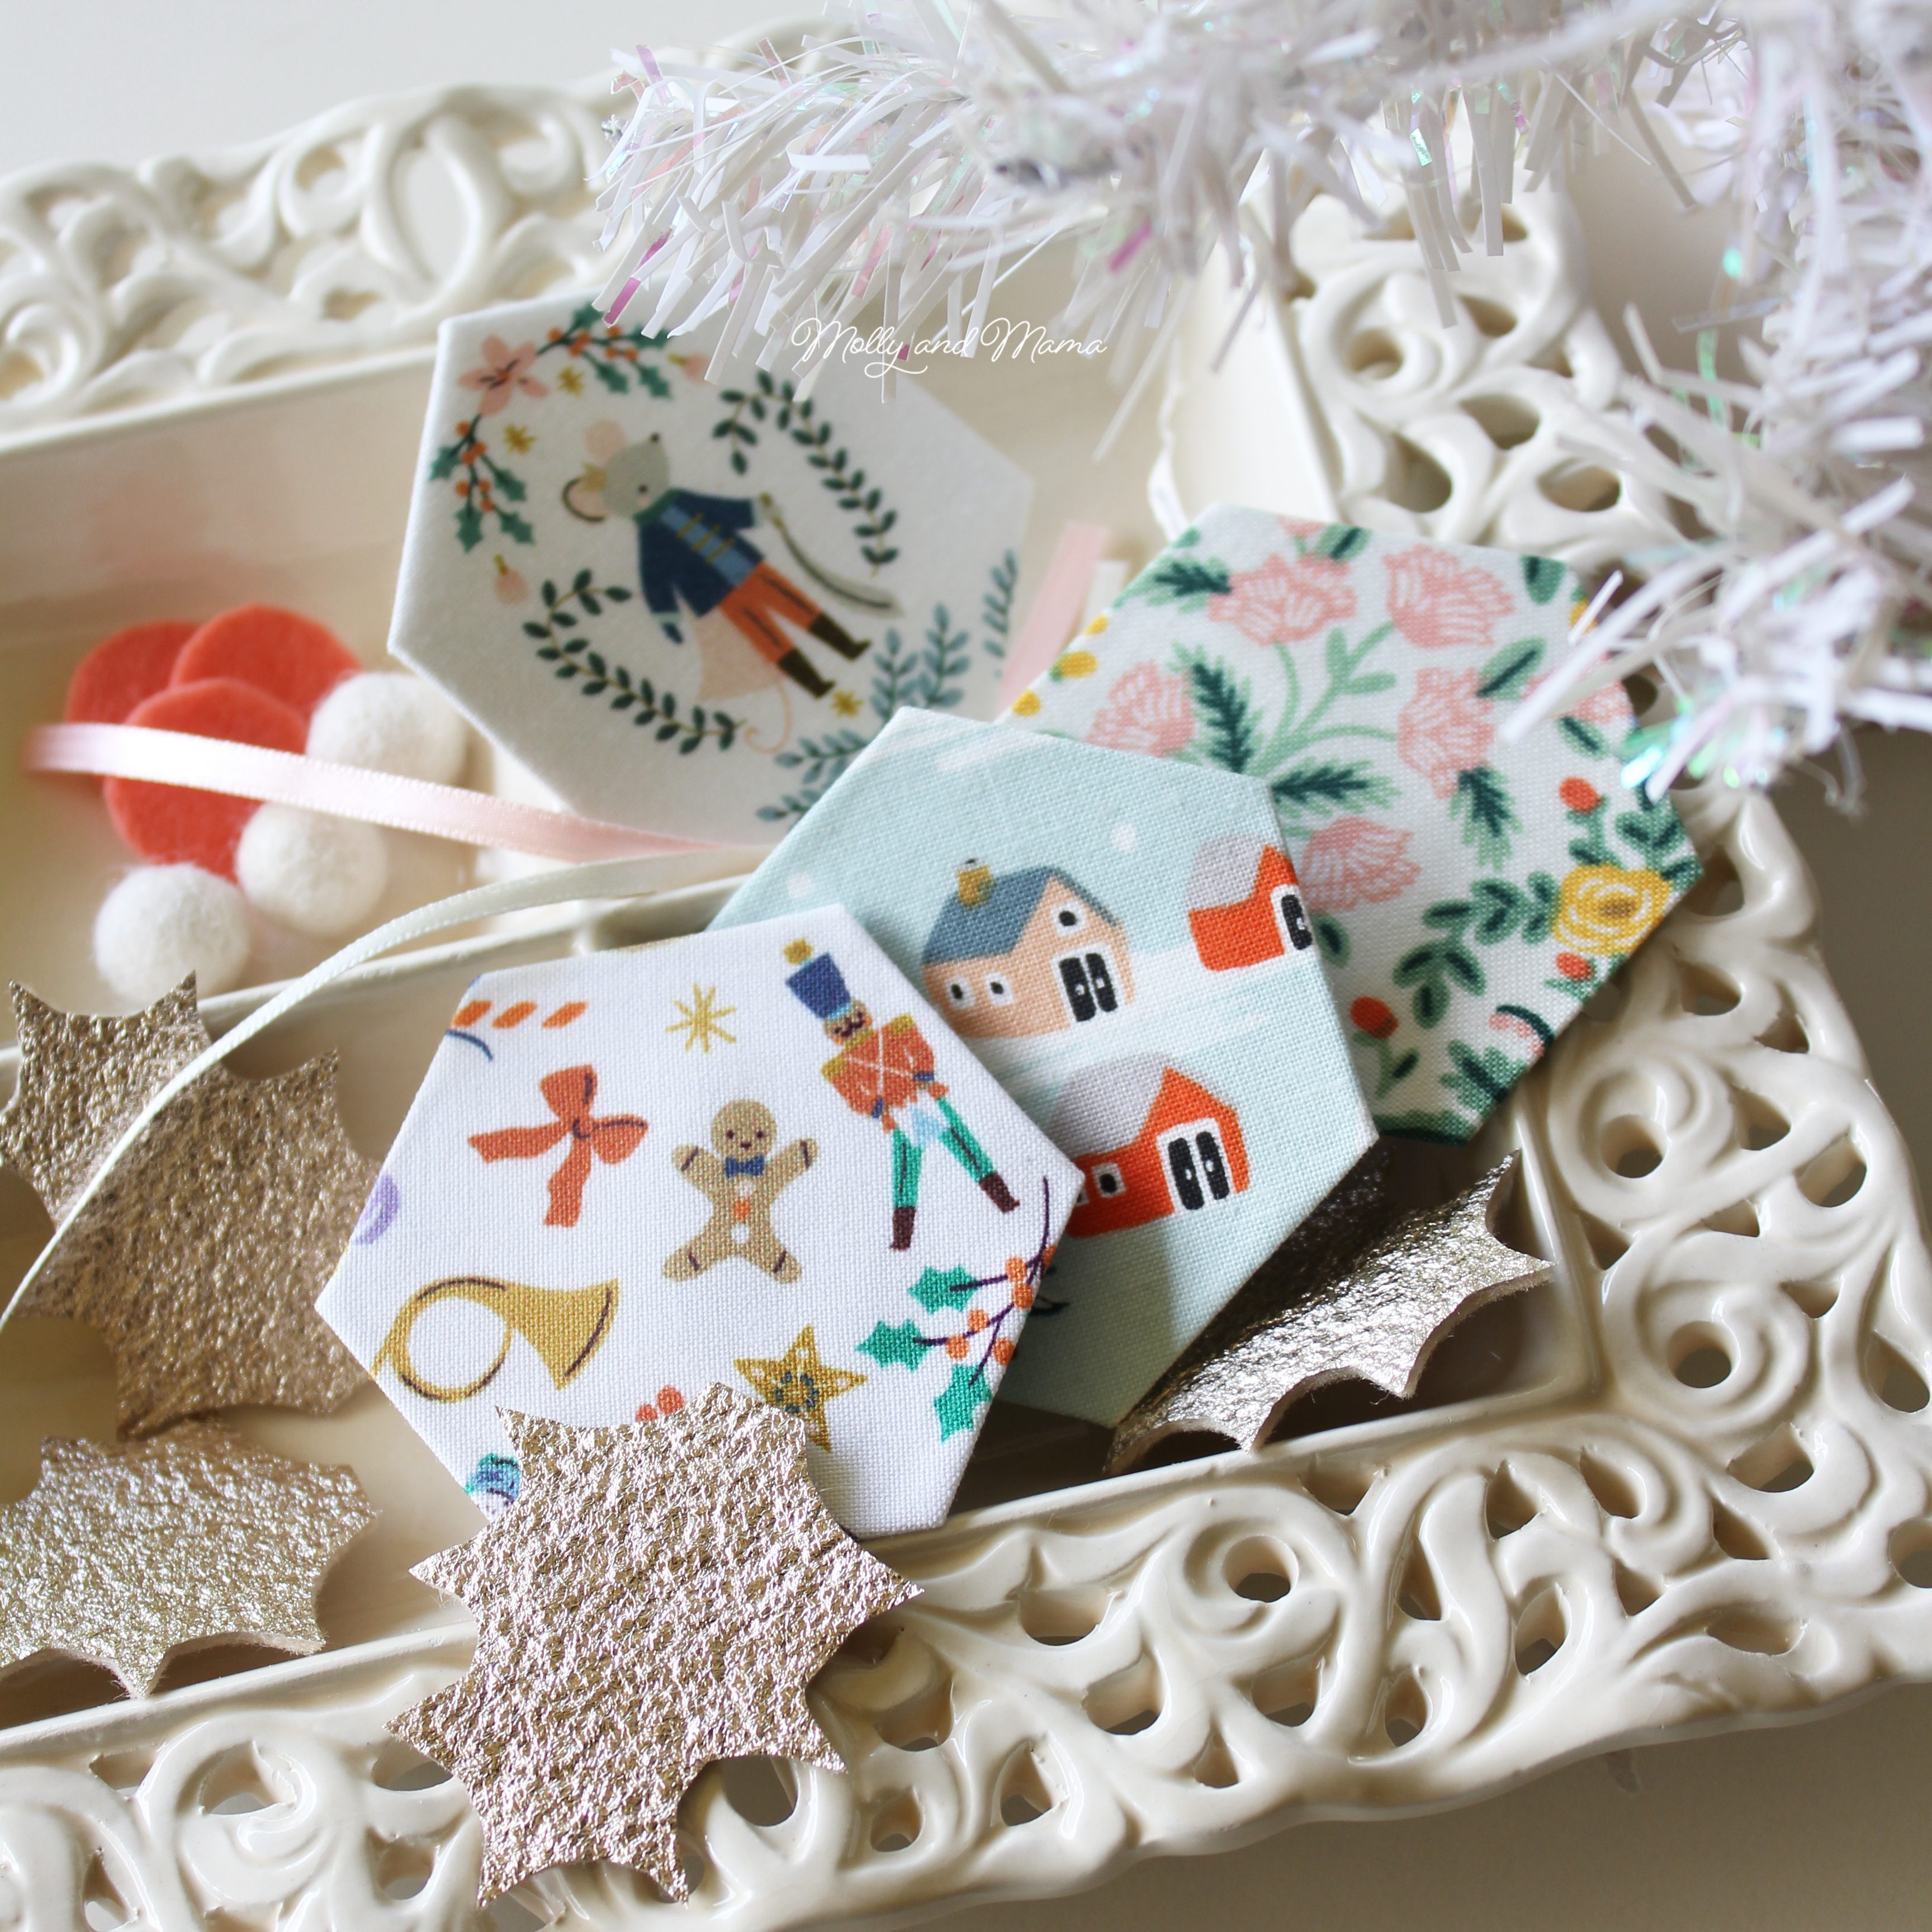
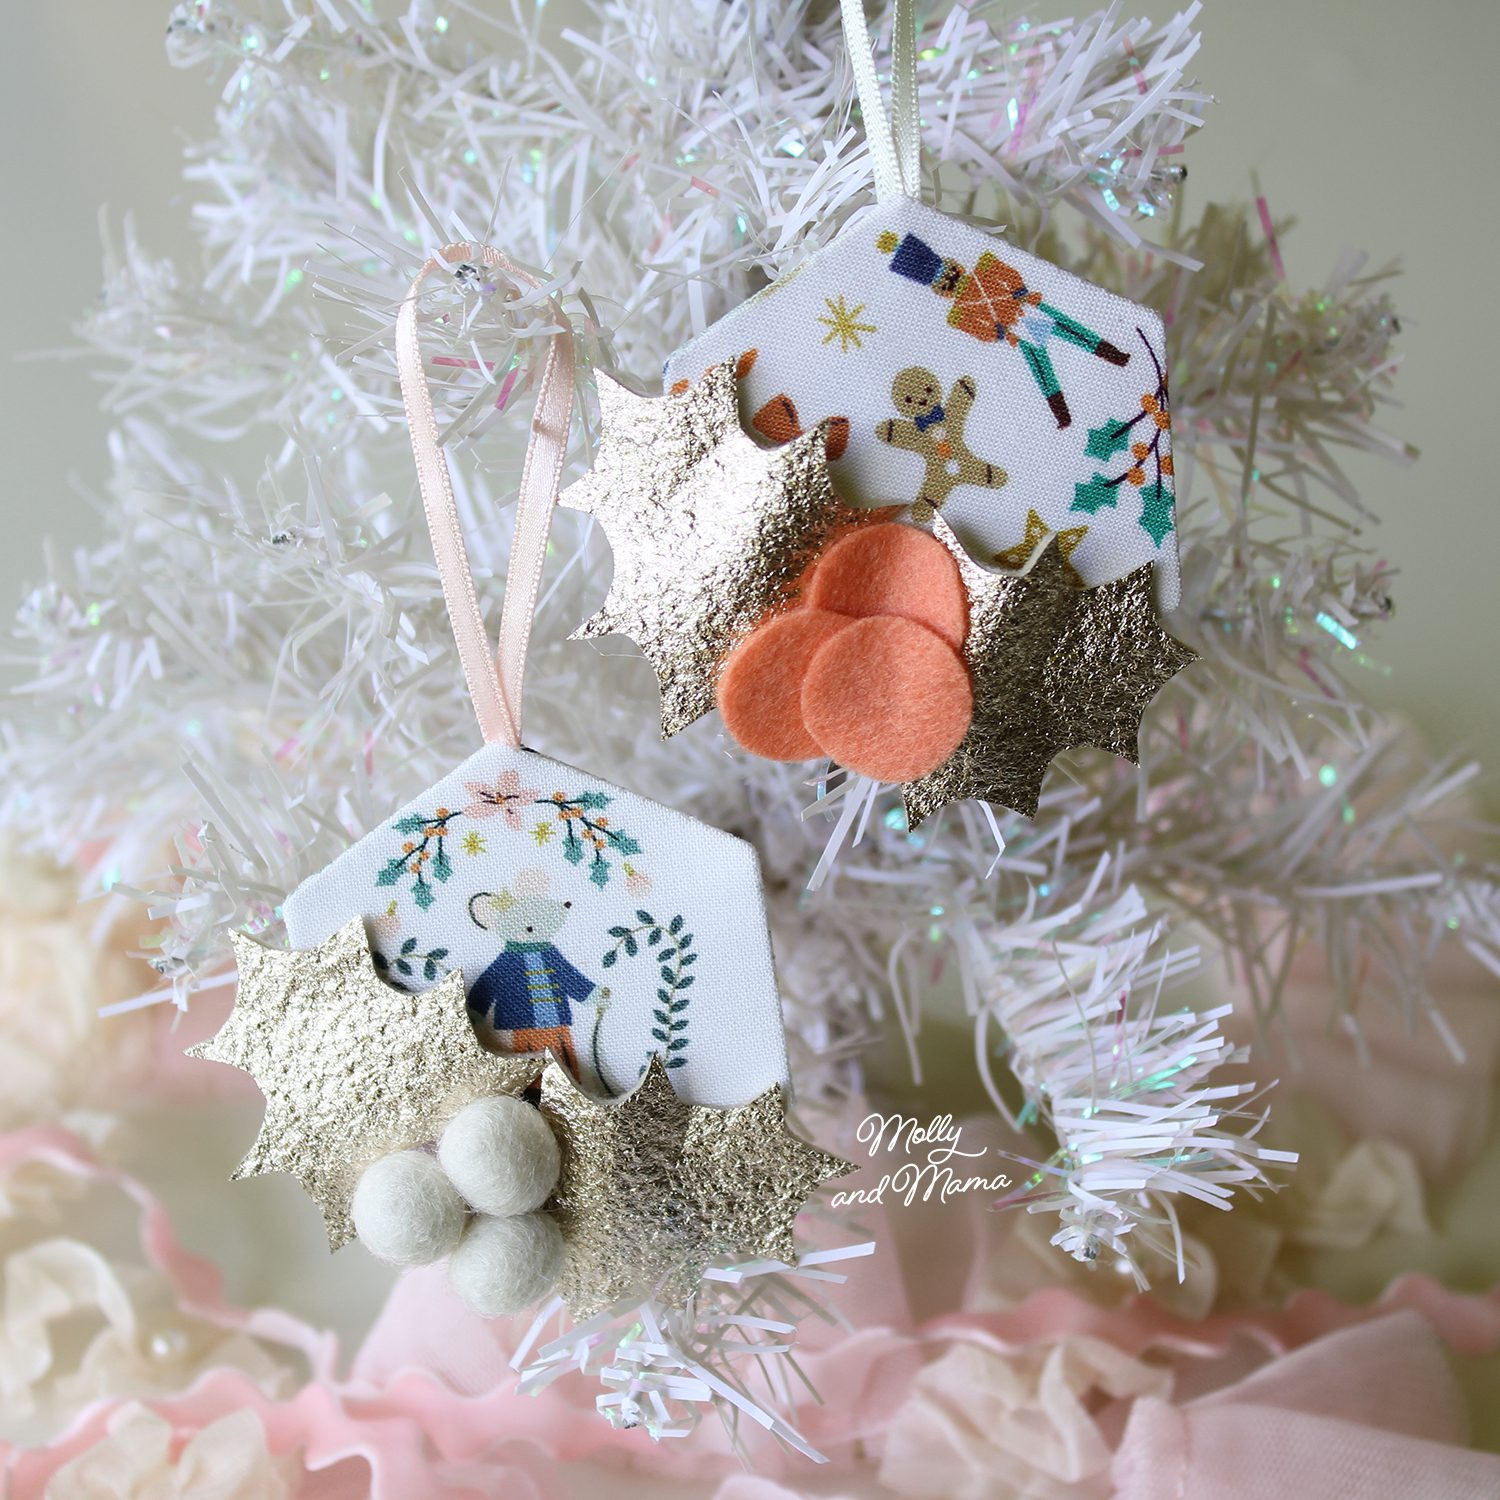
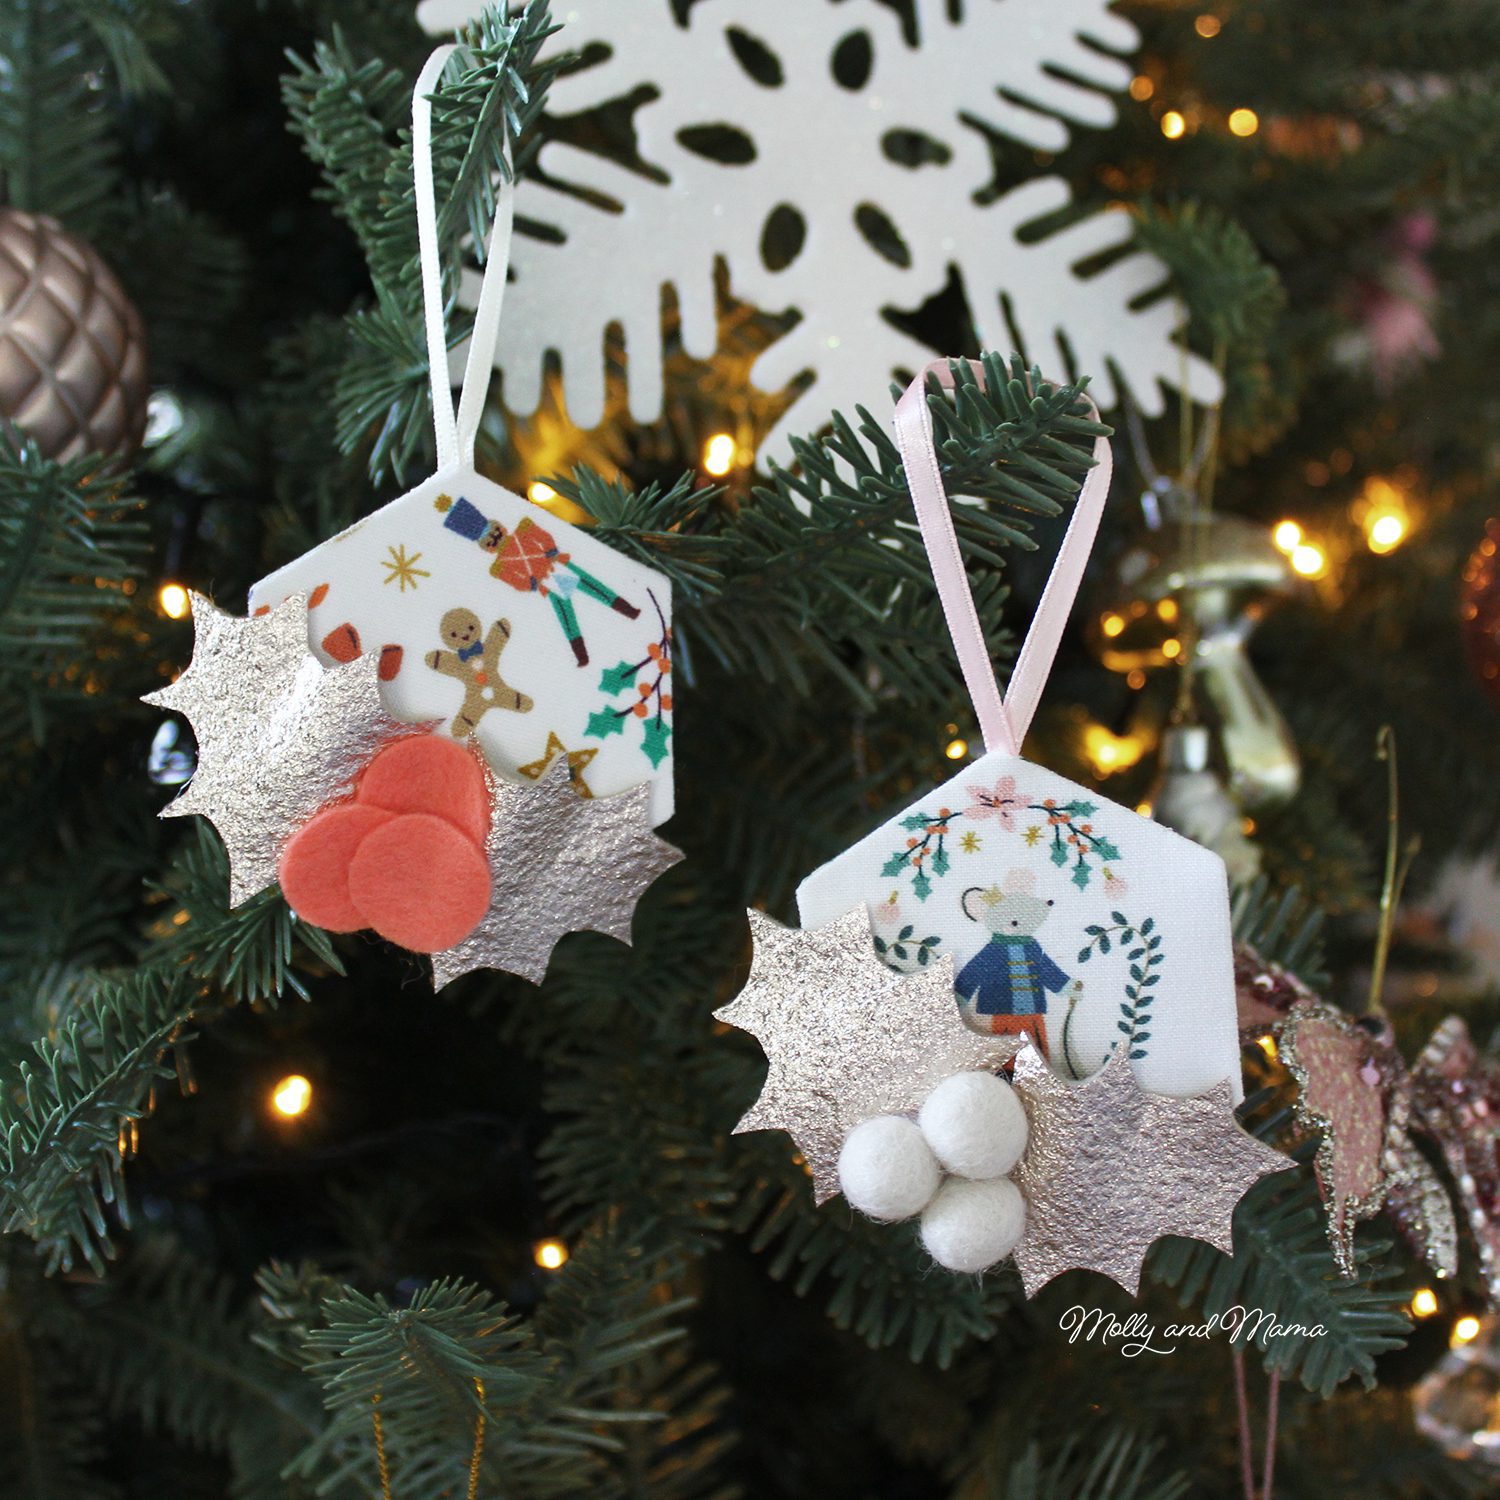
Here’s a look at some more recent ornaments made in 2023. I’ve used metallic felt instead of plain felt, and one of the decorations uses felt balls, instead of felt circles.
Finished Size – 4 ¾” (12 cm) tall (including hanging loop)
MATERIALS REQUIRED
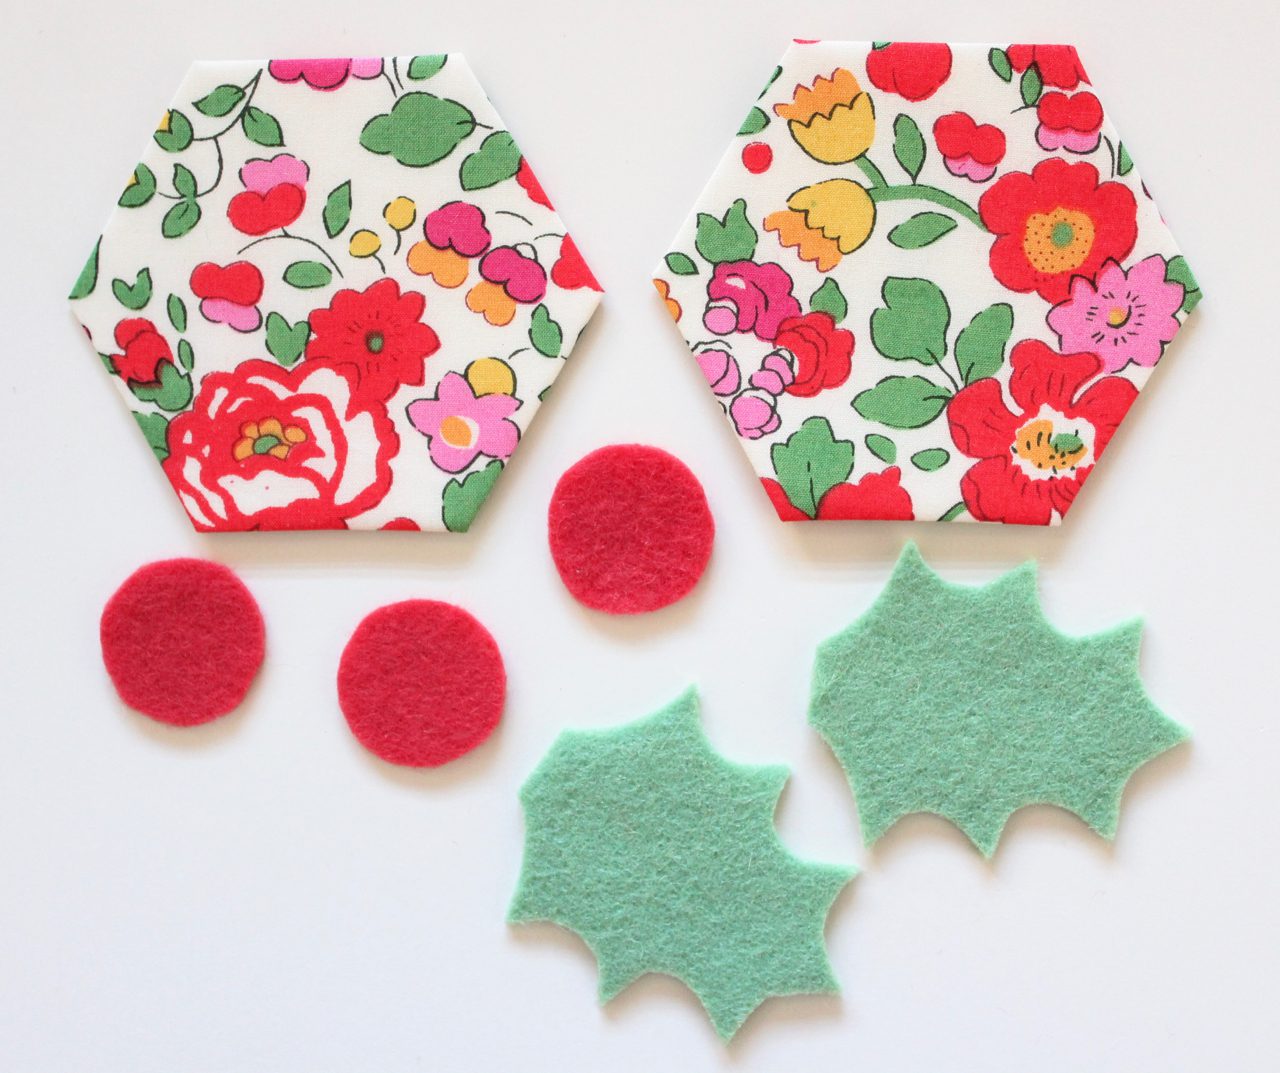
- Two 4” (10cm) squares of print fabric
- Scraps of Wool Felt (or wool balls) for the leaves and berries
- 5” (12cm) of narrow ribbon
- Embroidery needle
- Fine sewing thread like 60 weight polyester thread in a neutral colour
- 2 x 1 ¼” hexagon paper templates, or light card to trace and cut out your own from the template provided
- Freezer paper (optional)
- Glue stick or English paper piecing glue basting pen
- Hot glue gun (optional)
- General sewing supplies
- Light weight card stock to print template
- Download the template for printing HERE
Here’s the supplies needed for a traditional Christmas colour palette.
But you could also change things up with a more modern selection of materials. Fussy cut sweet Christmas motifs so that they are featured on the front of your hexagons. Choose glitter or metallic felt for the leaves for some extra sparkle! And add wool felt balls instead of felt circles for the berries.
NOTE: This tutorial is for personal use only, for sewing at home and/or teaching another person or child to sew FOR FREE. Reusing or repurposing free Molly and Mama tutorial instructions, templates and images for paid classes, or distributing the materials in classes, to groups, or for commercial purposes, is strictly prohibited. For clarification, or to seek a commercial arrangement, please contact Molly and Mama.
*This post includes Affiliate or Ad Links. If you make a purchase using an affiliate link, I will earn a small commission that doesn’t change your purchase price, but helps me to continue to bring you this content. Thanks for your support!
LET’S GET SEWING
Glue Baste the Hexagons
1. Print the TEMPLATE onto light card stock at full size (100%) with no scaling or cropping. Cut out the 1 ¼” hexagon shapes. Alternatively, use pre-packaged laser cut hexagon papers.
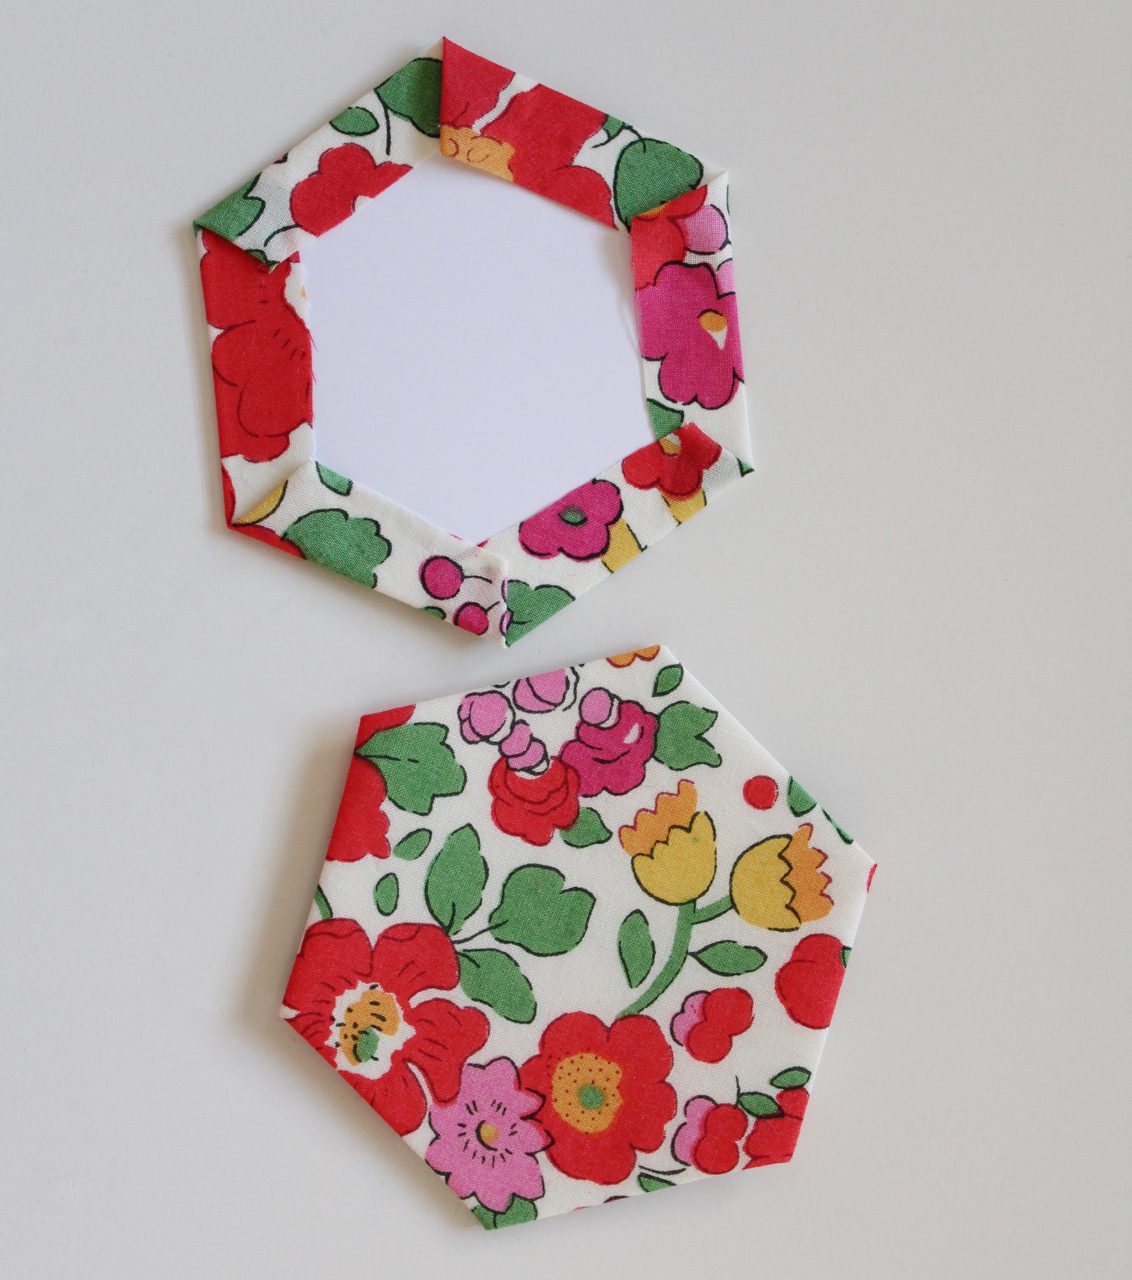
2. Place a hexagon paper on the wrong side of a fabric square and hold in place. Roughly cut around the hexagon shape leaving at least a ¼” (6mm) seam allowance.
3. Using a glue pen, run a small amount of glue along the edge of one side of the hexagon paper. Fold the fabric over firmly and secure.
4. Glue the second side and then fold it over, including the edge of the first side. Fold the third side next, continuing in a clockwise direction.
5. Repeat this process to fold over all six sides of the fabric. Be especially careful to keep the fabric folded firmly near the points or corners.
6. Create a second fabric covered hexagon using the same process. KEEP THE PAPERS INSIDE THE HEXAGONS! This will give your ornament more structure.
For more information about English paper piecing and sewing hexagons, please see my comprehensive Tutorial.
7. Place the two hexagons together with wrong sides facing, being sure to line up the edges and corners.
8. Thread your needle with a single strand of fine polyester thread and knot one end. Use very fine and small whip stitches to sew the two sides of the hexagons together. Start at one corner and stitch along the edge to the next corner. As you stitch, catch 2 – 3 threads from the folded edge of both pieces of fabric, being careful not to stitch through the actual paper. Small, closely spaced stitches are best.
9. Repeat the method described above to sew around four sides of your hexagons. As you near the corner between the fourth and fifth sides, insert the raw ends of the piece of ribbon that has been folded in half to make a loop. Align it in the corner.
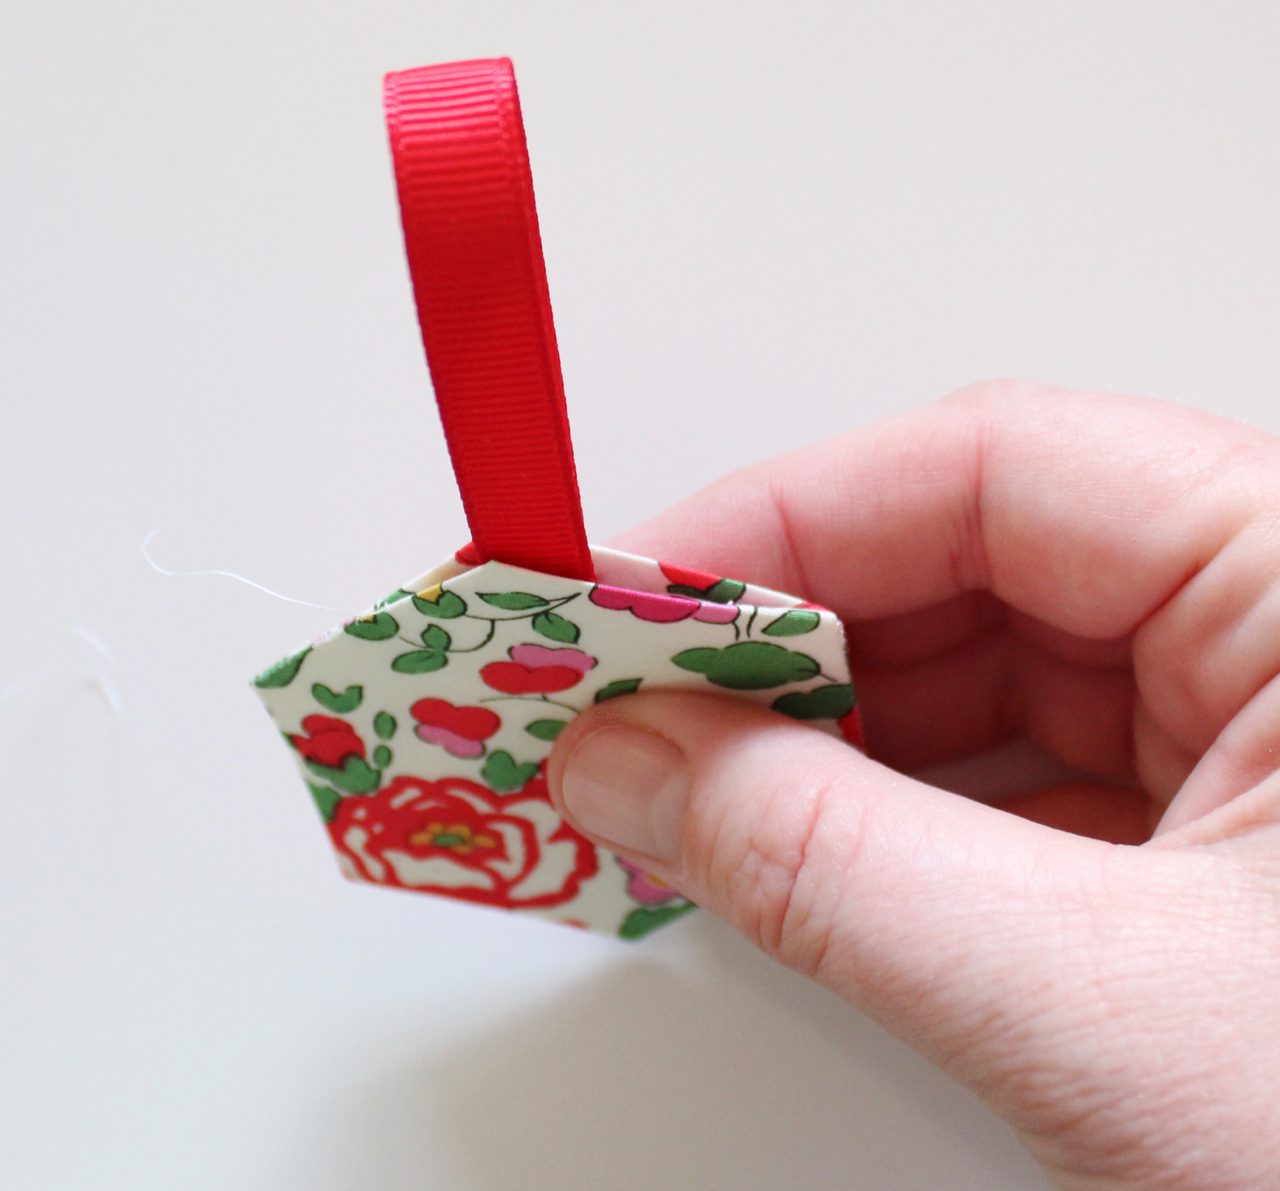
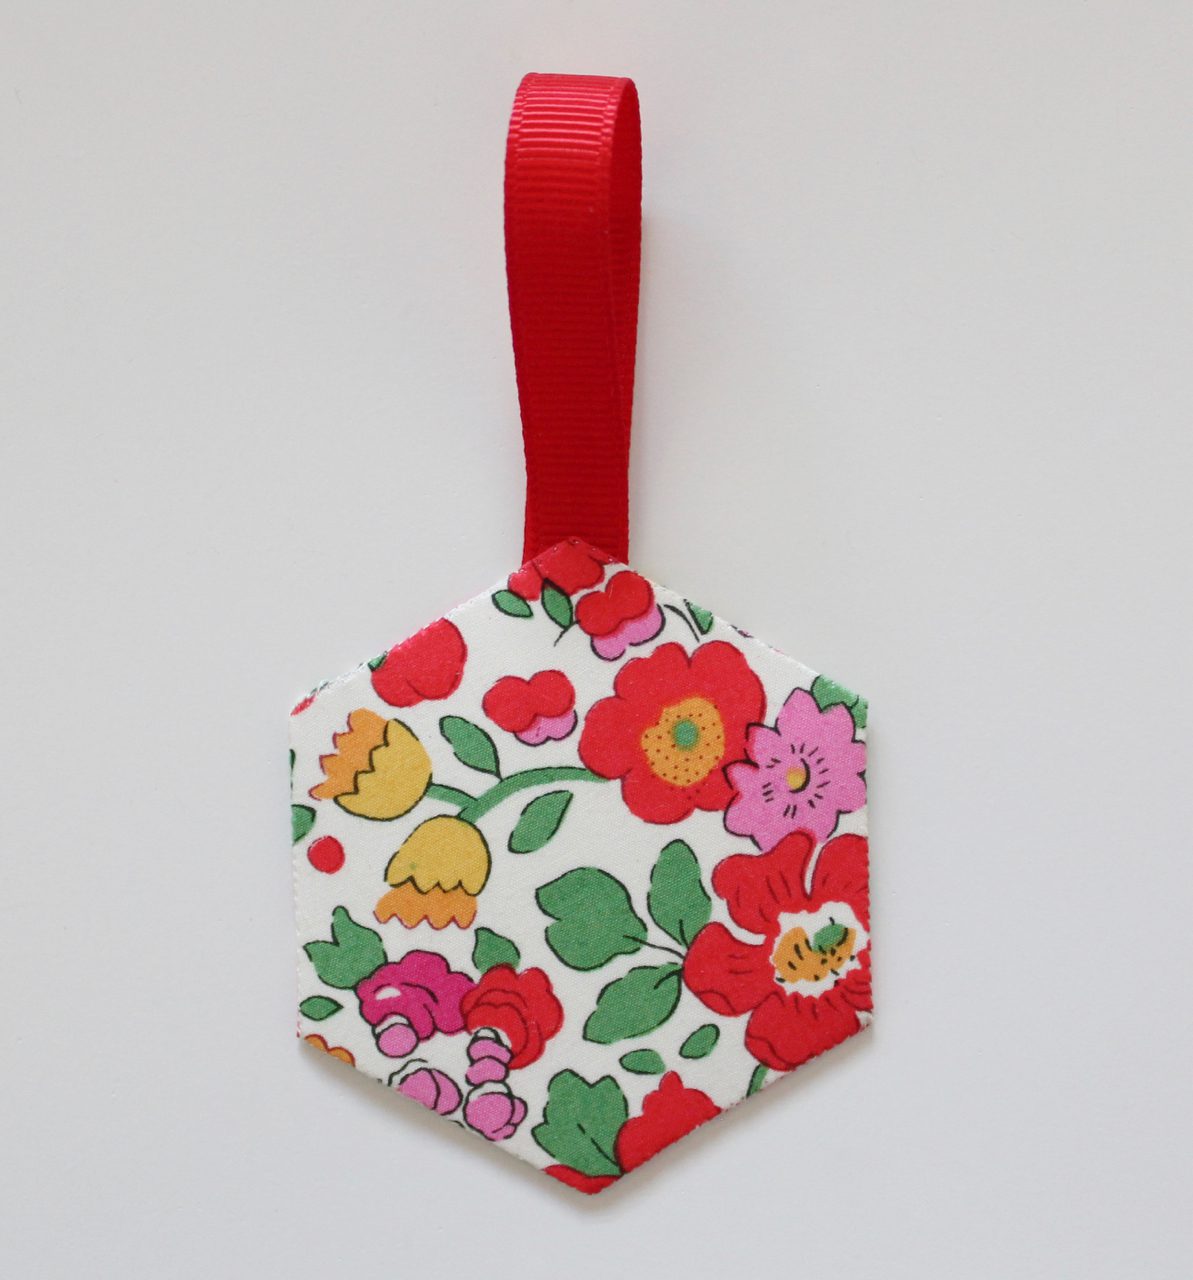
10. As you sew the remaining sides, catch the ribbon in your stitches, to secure it in place.
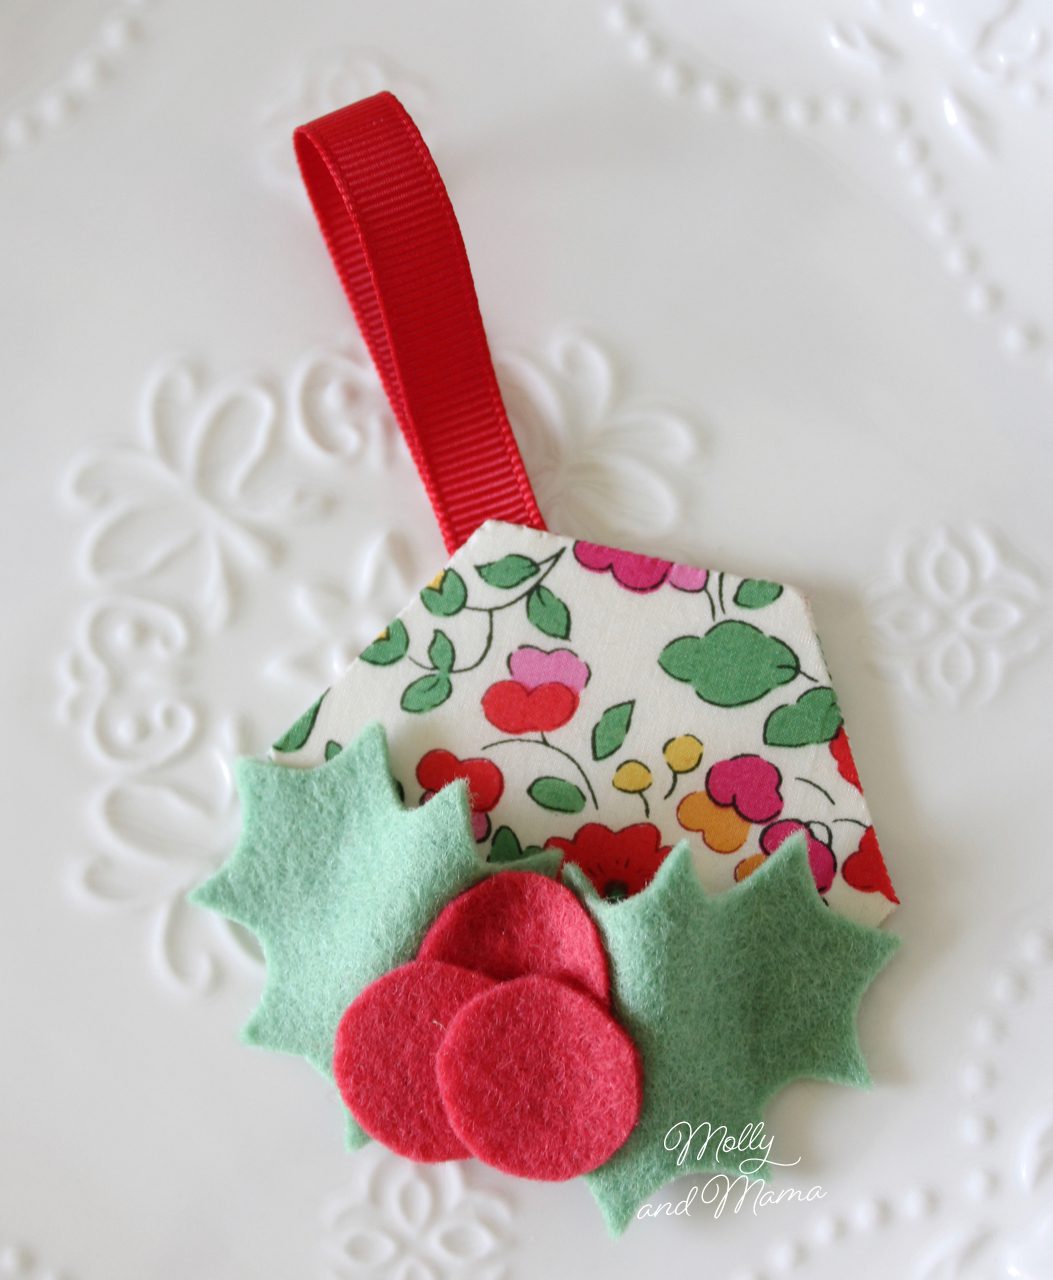
11. Cut out two holly leaves from green felt and three holly berries from red felt. There are a couple of ways you can transfer your pattern template to your felt, in preparation for cutting. Trace the berry and leaf design onto freezer paper, or cut out the paper shapes and trace them. Check this tutorial for more details on cutting out felt.
12. Adorn one side of the hexagon ornament with holly leaves and berries. Stitch or glue the two holly leaves in place on the base of one side of one hexagon.
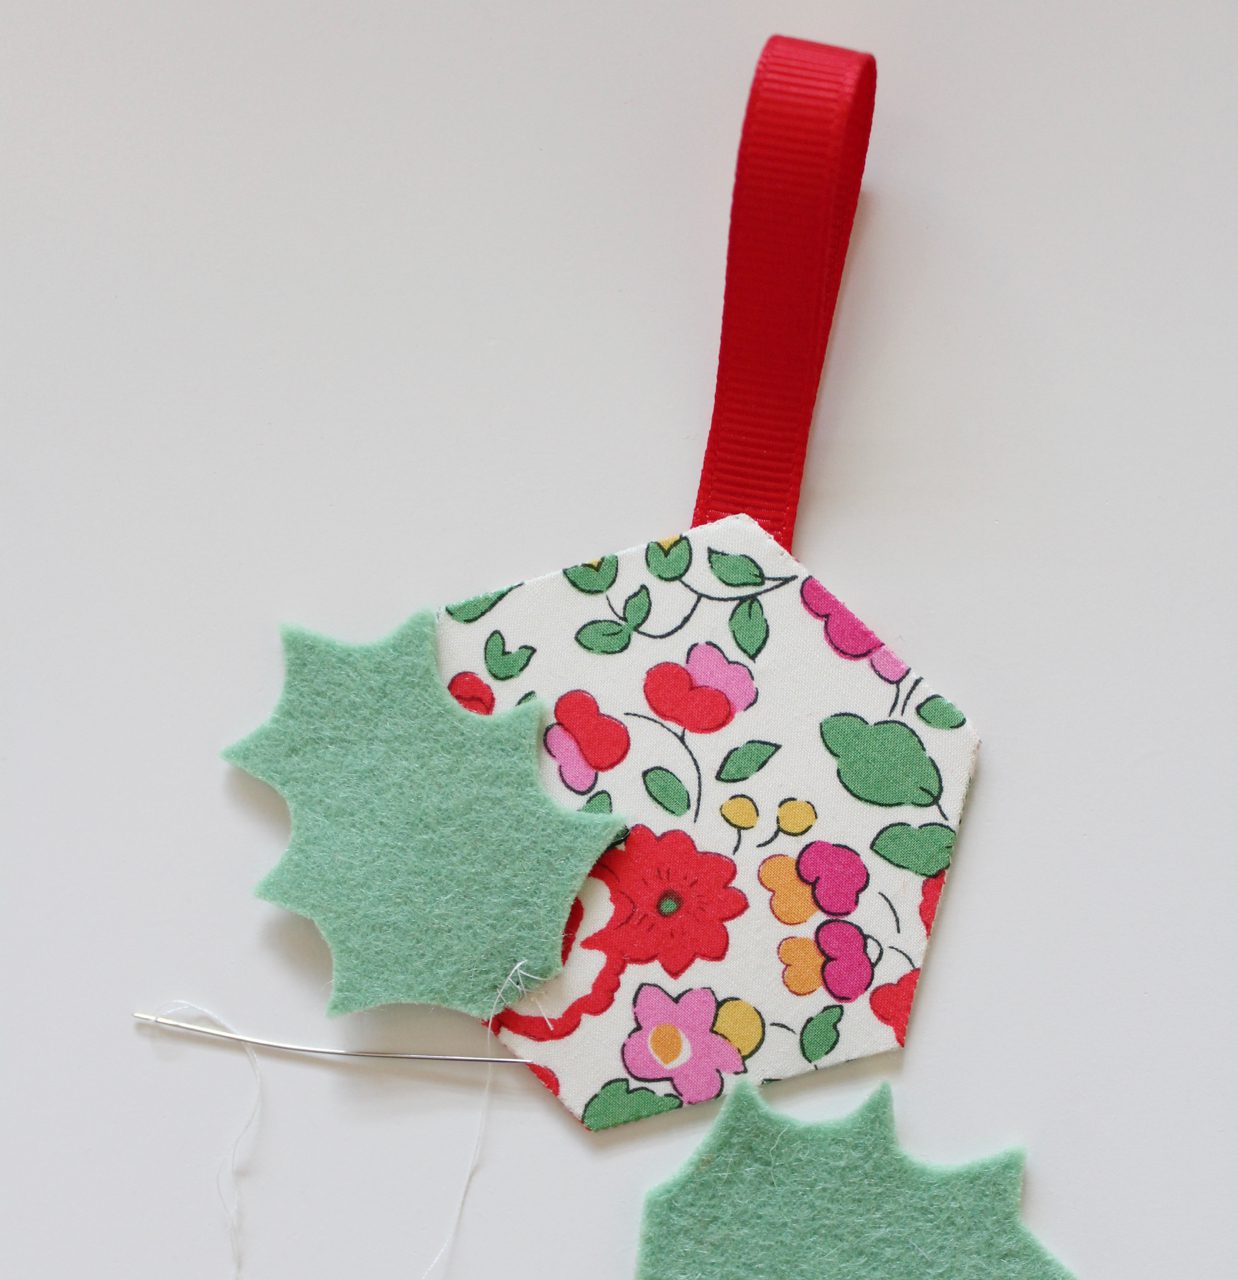
13. Glue the overlapping red berries in the centre. Now your pretty ornament is all set to decorate your tree!
EXTRA PROJECTS, TIPS AND TRICKS
- Customise or personalise your ornament with a name embroidered on one side.
- Add holly and berries to both sides of the ornament.
- Create a whole collection of ornaments in different print fabrics and colours.
- Use the ornament as a Christmas present gift tag instead of a decoration.
- Reduce or enlarge your hexagon template on your printer to create different sized hexagons for other projects. Alternatively, you might find yourself buying English paper piecing templates of all shapes and sizes!
Feel free to share your creations on the Molly and Mama Facebook Page. Use the hash tag #MollyandMama on Instagram.
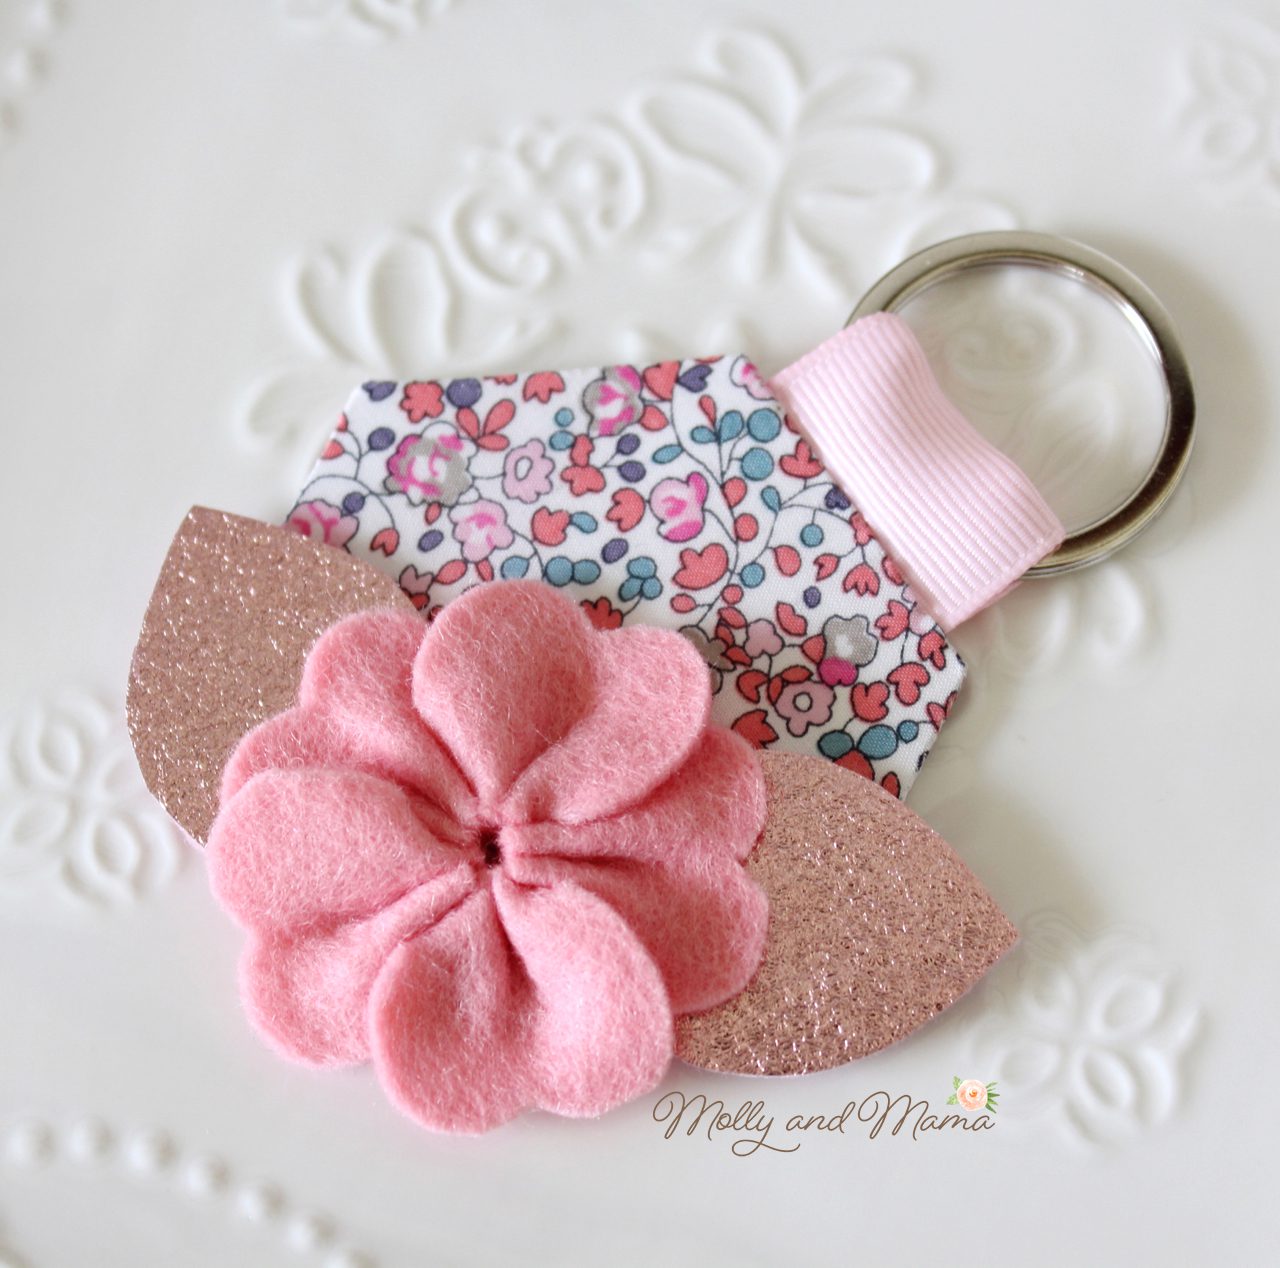
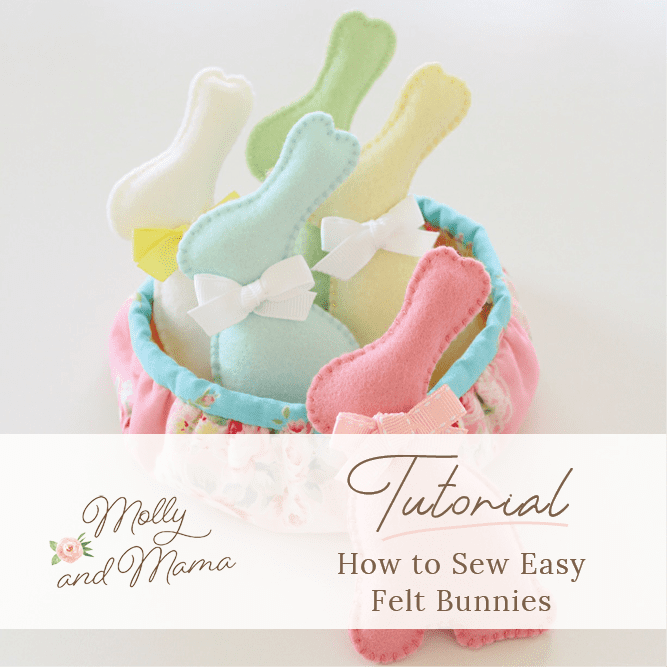
If you’ve had fun creating this project, you might like some of my other tutorials. This hexagon key ring one is so easy!
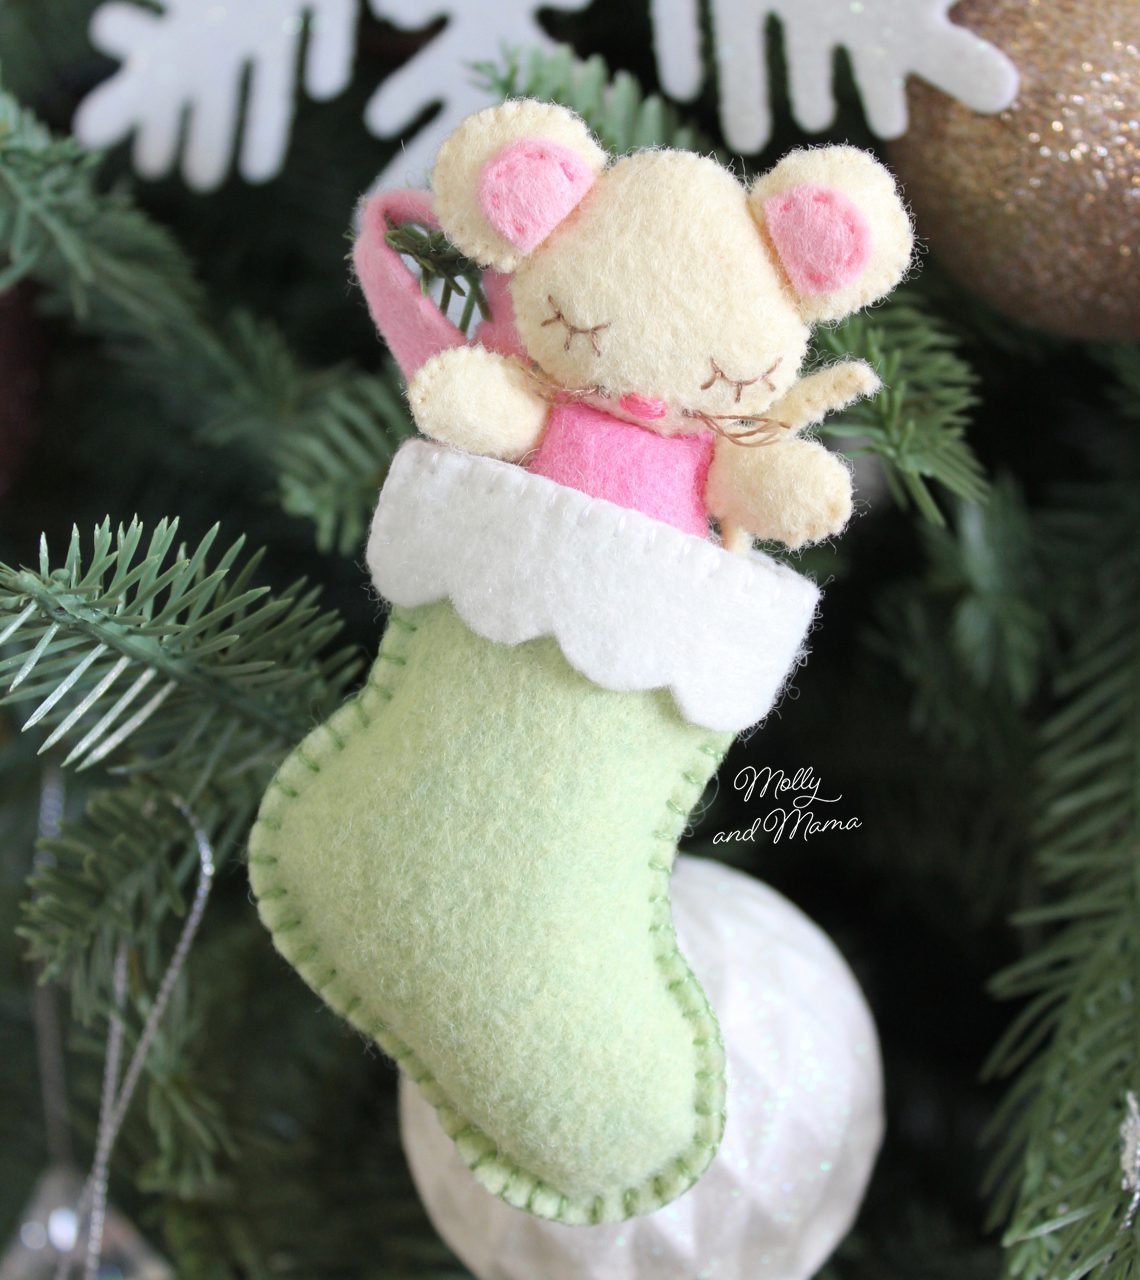
I also have lots of other Christmas tutorials, including the Sugar Mouse project. Check the Tutorials tab for more ideas.
Feel free to check out my patterns in the store too!
Happy sewing, Lauren x

Thanks, I just happen to have a drawer full of 1-1/4″ hexagon pieces, and a lot of Bohin refills! This is really cute!
These are so cute! I have a pile of Liberty scraps from some other projects. What a great idea for using them. Did you leave the paper patterns inside the hexies when you stitched up the ornament? I can see how that would add a bit of structure to the ornament.
Yes, leaving the hexie papers intact adds more structure to the ornaments. Thanks Susan.