Sew Felt Mushrooms – Sew A Softie 2020
It’s Sew A Softie month and it’s my turn to share the cute little felt mushroom tutorial I created to celebrate this awesome event. Wishing a very warm welcome to those who have found their way here for the first time today. We’ll be making felt mushrooms that are super simple and can be used for a whole range of projects!
If you’re wondering what Sew A Softie is, Trixi (the founder) explains that it is ‘an initiative that aims to ignite a love of hand sewing in a new generation’. That’s exactly the reason for my own blog, so this is the third year I have joined Trixi’s month-long celebration of sewing with kids. If you’d like to see more Sew A Softie tutorials, head to the website, or join the Facebook group for daily updates and links for the entire month of July.
If you’re new here, take some time to look around. Head to the Tutorials tab too, because I have some really sweet projects you might like to make after this one!
Now, on to the sewing!
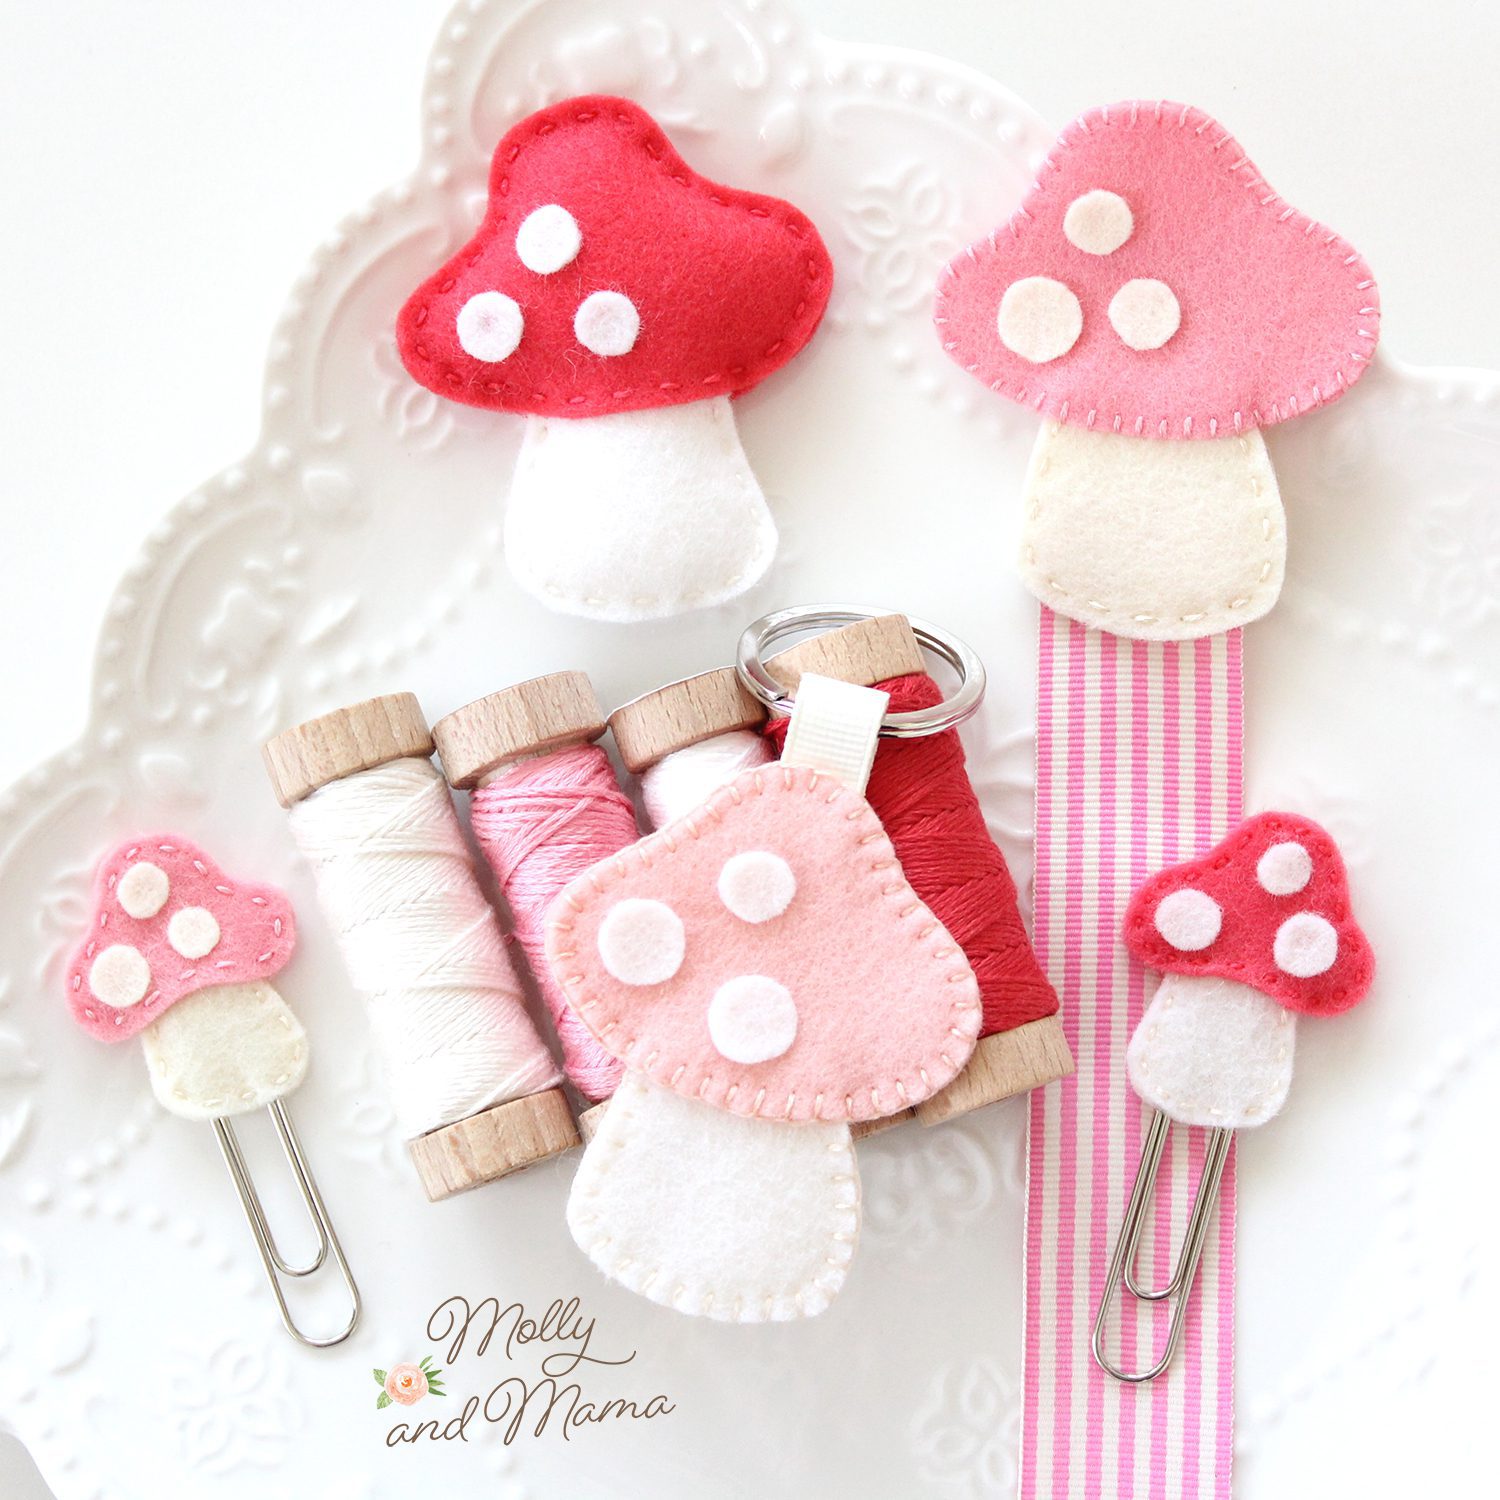
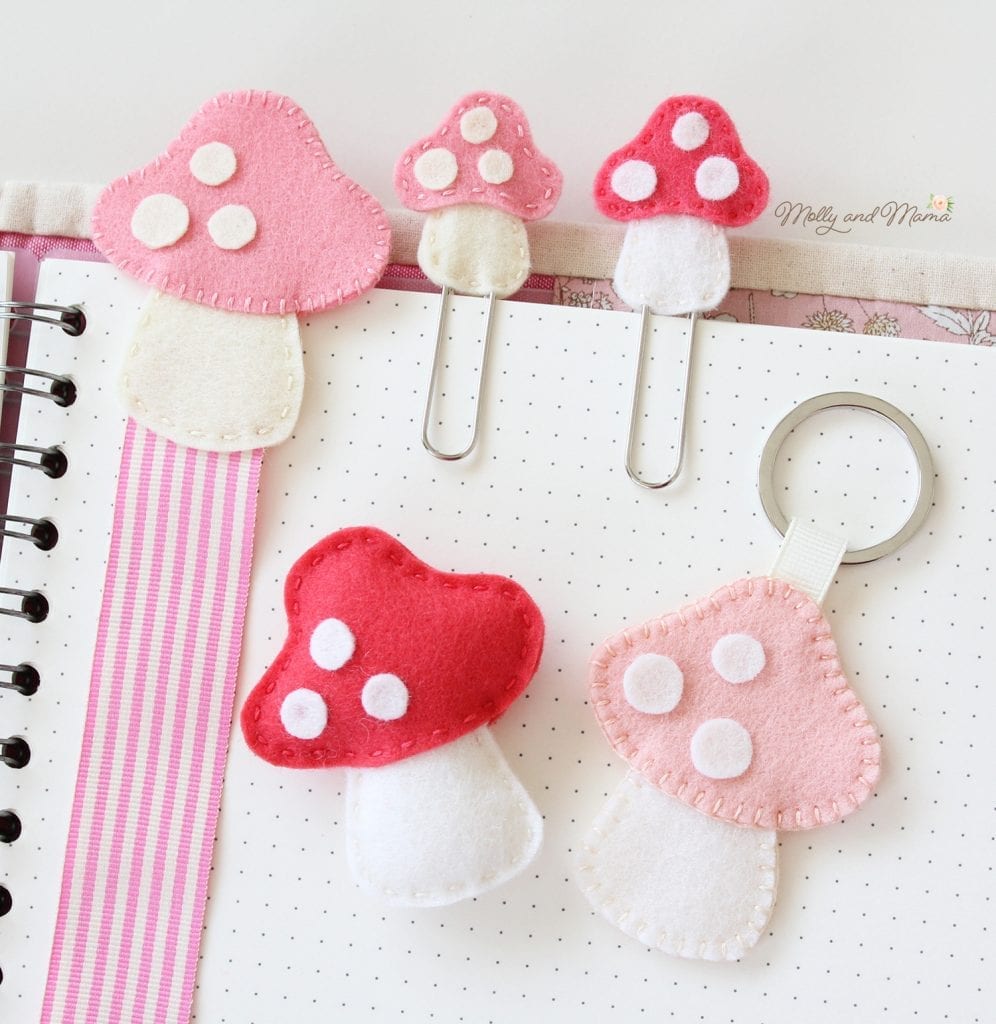
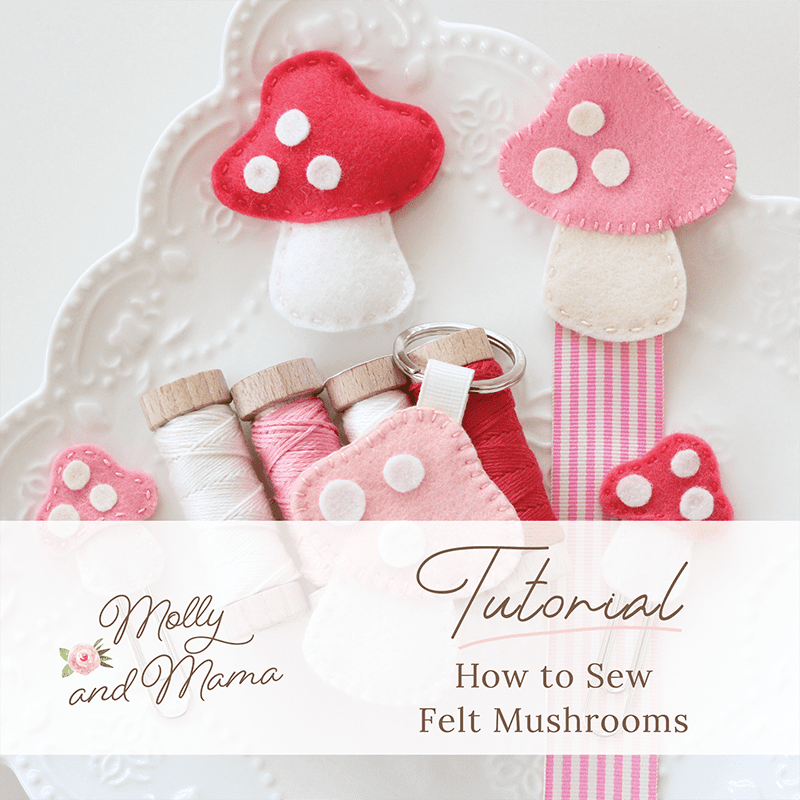
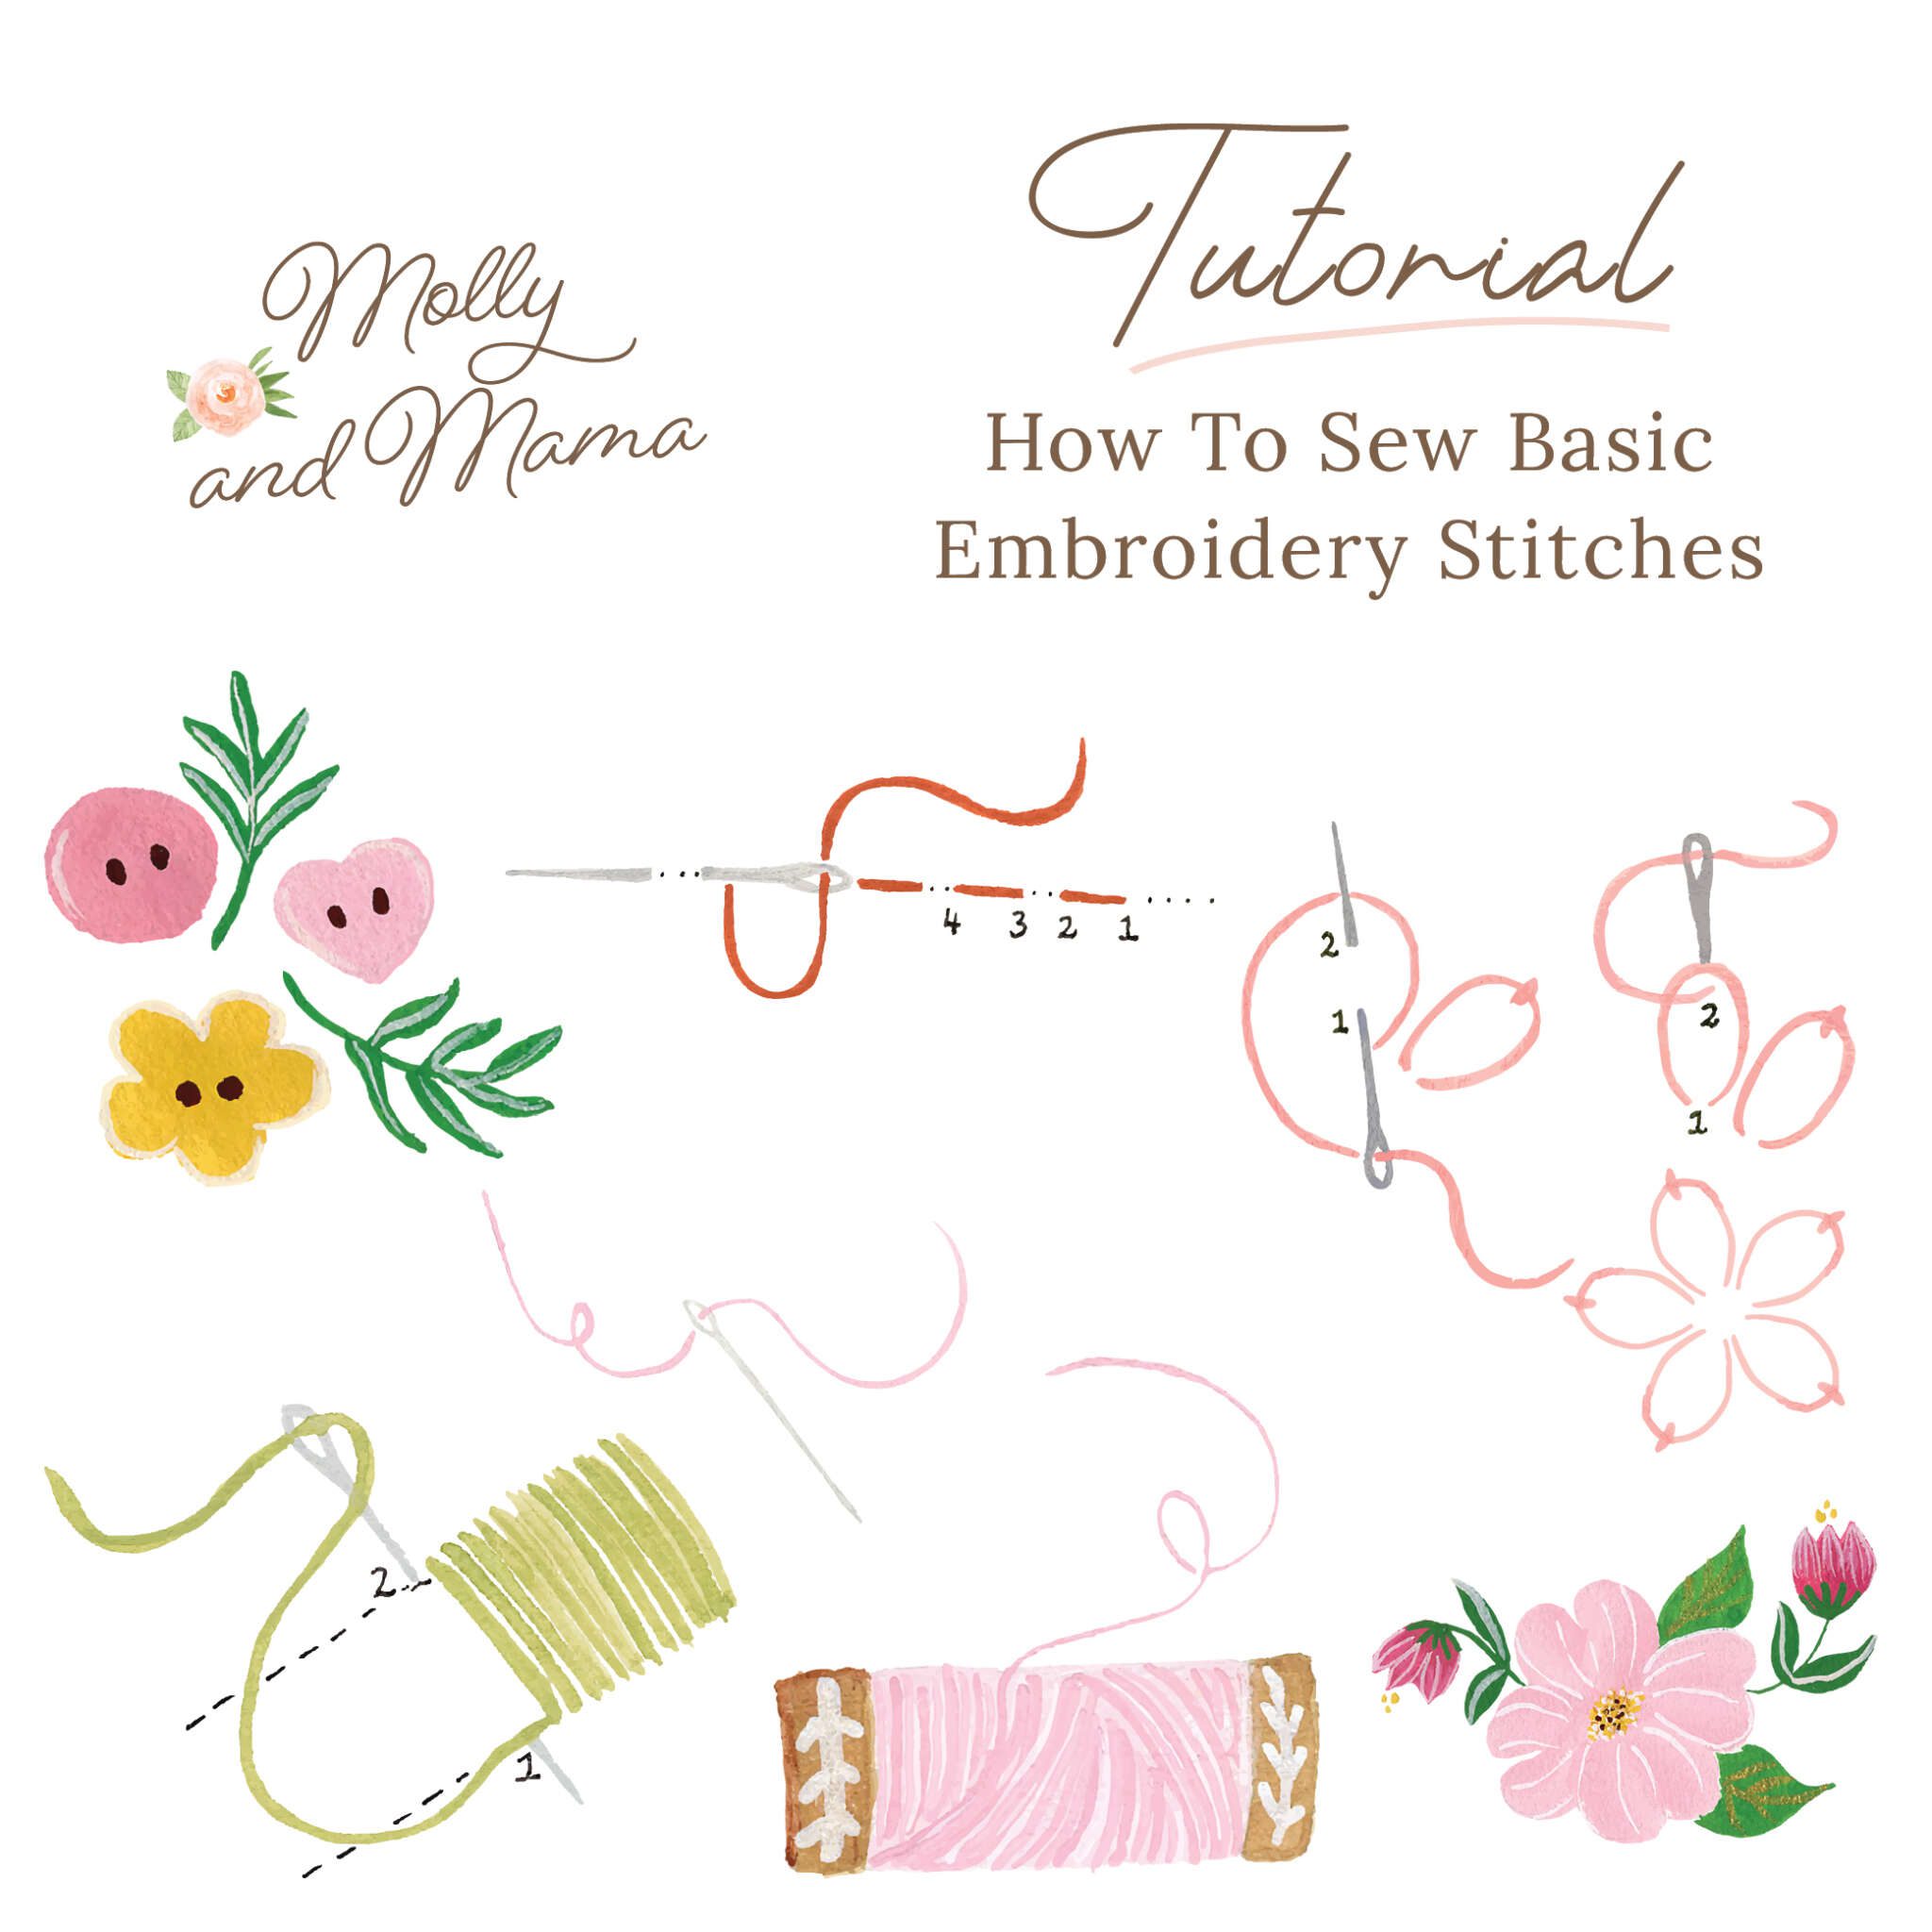
This tutorial is all about mushrooms! I’ve made a range of projects using two different sized templates, so you can choose which mushroom appeals to you the most! I’ve used wool felt because it’s such a fun and forgiving medium to use. You might like to see my Working With Wool Felt tips.
This tutorial will explain how to make all the examples above. Here’s some trivia for you… did you know that a group of mushrooms is called a troop? I had to look it up. You learn something new every day!
FINISHED SIZE: Large Mushroom – approximately 2.5″ (6.5cm) tall and 2″ (5cm) wide. Small Mushroom – approximately 1.5″ (4cm) and 1.25″ (3cm) wide. But you can enlarge the template to create any size of mushroom you would like!
NOTE: This tutorial is for personal use only, for sewing at home and/or teaching another person or child to sew FOR FREE. Reusing or repurposing free Molly and Mama tutorial instructions, templates and images for paid classes, or distributing the materials in classes, to groups, or for commercial purposes, is strictly prohibited. For clarification, or to seek a commercial arrangement, please contact Molly and Mama.
You Will Need;
- 3″ (8cm) x 4″ (10cm) rectangle of wool felt for the large mushroom top (less for the small version)
- 2″ (5cm) x 4″ (10cm) rectangle of wool felt for the large mushroom stalk (less for the small version)
- 2.5cm (1”) square of white wool felt for the spots
- Embroidery needle
- Six stranded embroidery floss (separated into two strands) to match the colours of your felt
- Small, short blade scissors for cutting felt
- Appliqué or craft glue
- Print out of the template
Optional Extras;
- 25cm (10”) square of freezer paper (to transfer the template to the felt)
- Tiny amount of hobby fill or polyester stuffing to make a softie
- 8″ (20cm) of 1″ (2.5cm) wide ribbon to make a bookmark
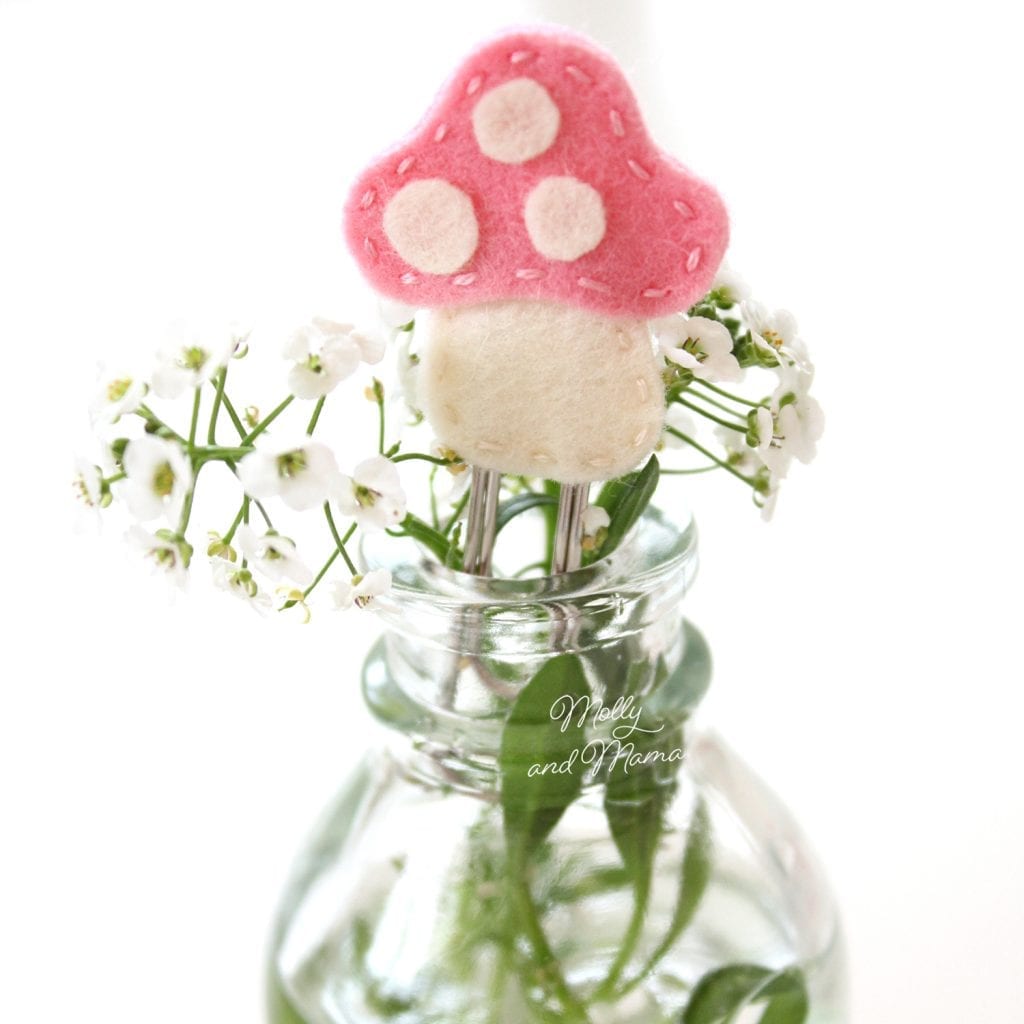
- Large 2″ (5cm) paperclip to make a decorative paperclip
- 1″ (2.5cm) ring to make a key ring
- 2″ (5cm) of 3/8″ (1cm) wide ribbon for the key ring loop
Let’s Get Making A Mushroom Softie
Print the Pattern
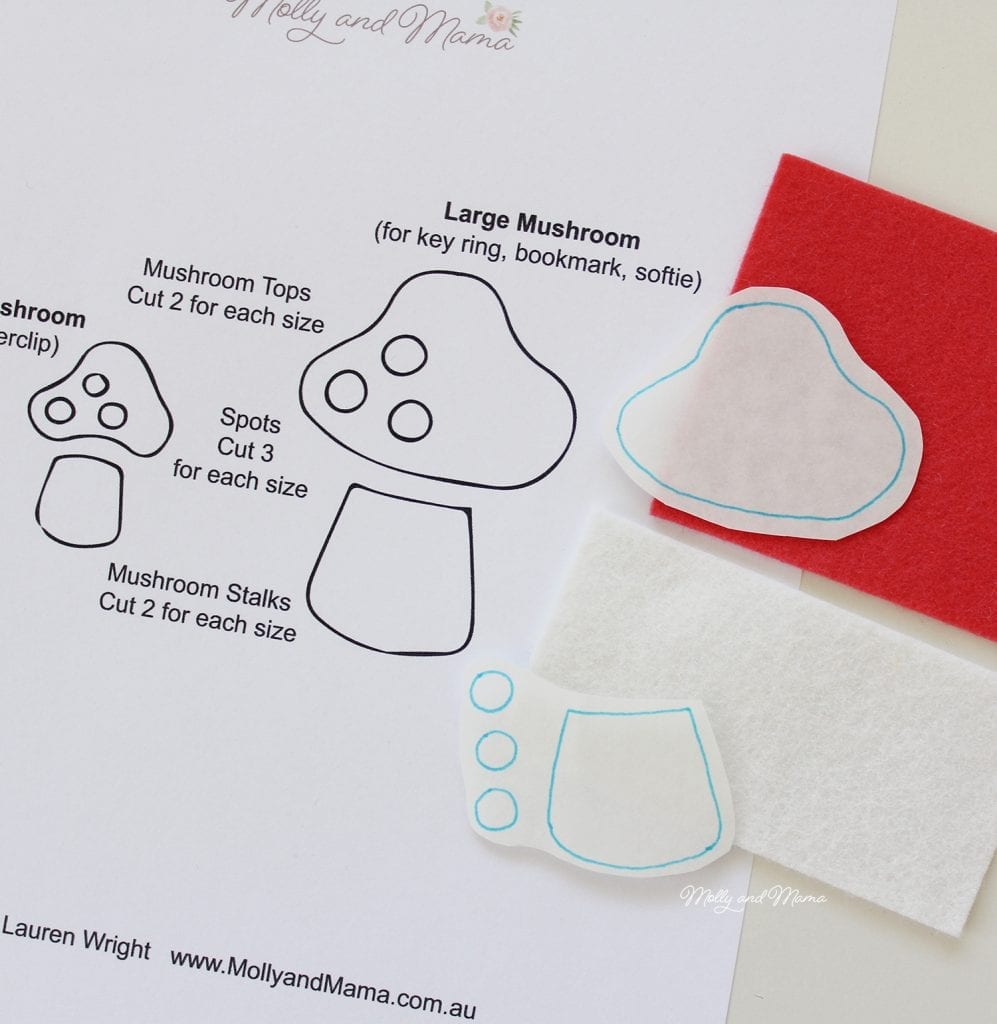
Save a copy of the pattern template PDF to your computer and then print it in full size without any scaling or cropping.
Cut Out The Felt Pieces
Cut out the required felt pieces using your favourite method. Visit my beginner’s tutorial for a more detailed description on the different methods you can use, including my easy but accurate Freezer Paper method.
For each mushroom you will need to cut;
- Two mushroom tops
- Two mushroom stalks
- Three mushroom spots
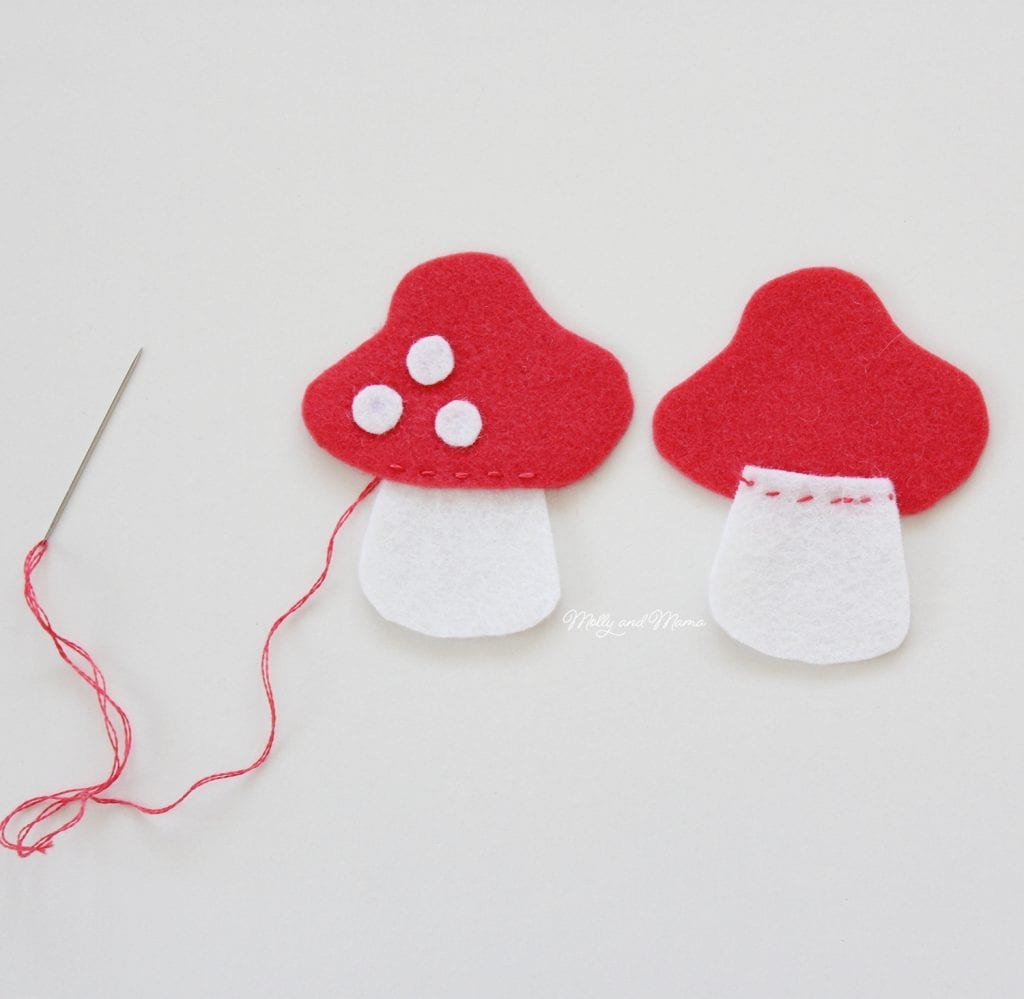
On one mushroom top, use fabric glue or a few small stitches to secure three felt spots in place.
Overlap the mushroom tops over the stalks and then place them back to back to make a matching sized pair. You might need to pin them or clip them in place. Use a running stitch (or your stitch of choice) to sew the stalks to the mushroom tops, using two strands of coordinating floss. Sew the stitching across the tops of the stalks only (as shown below).
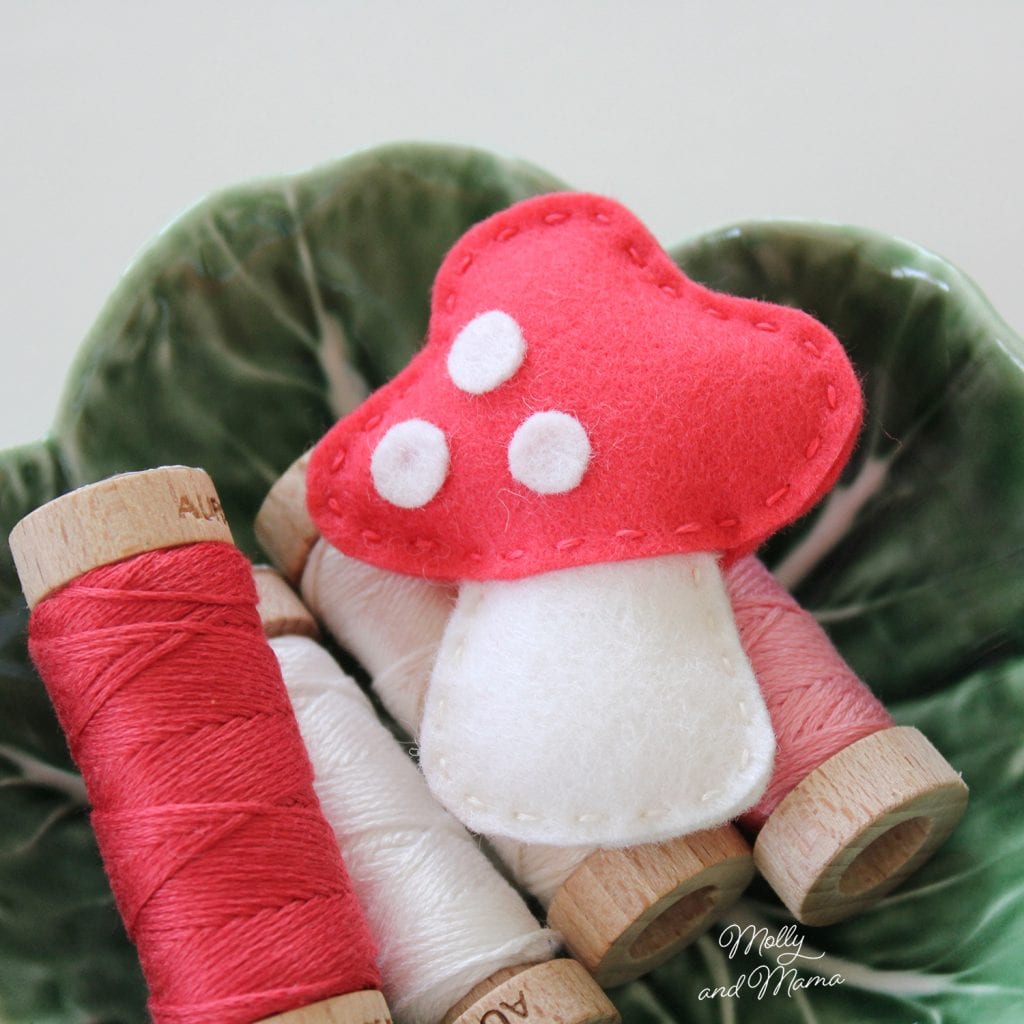
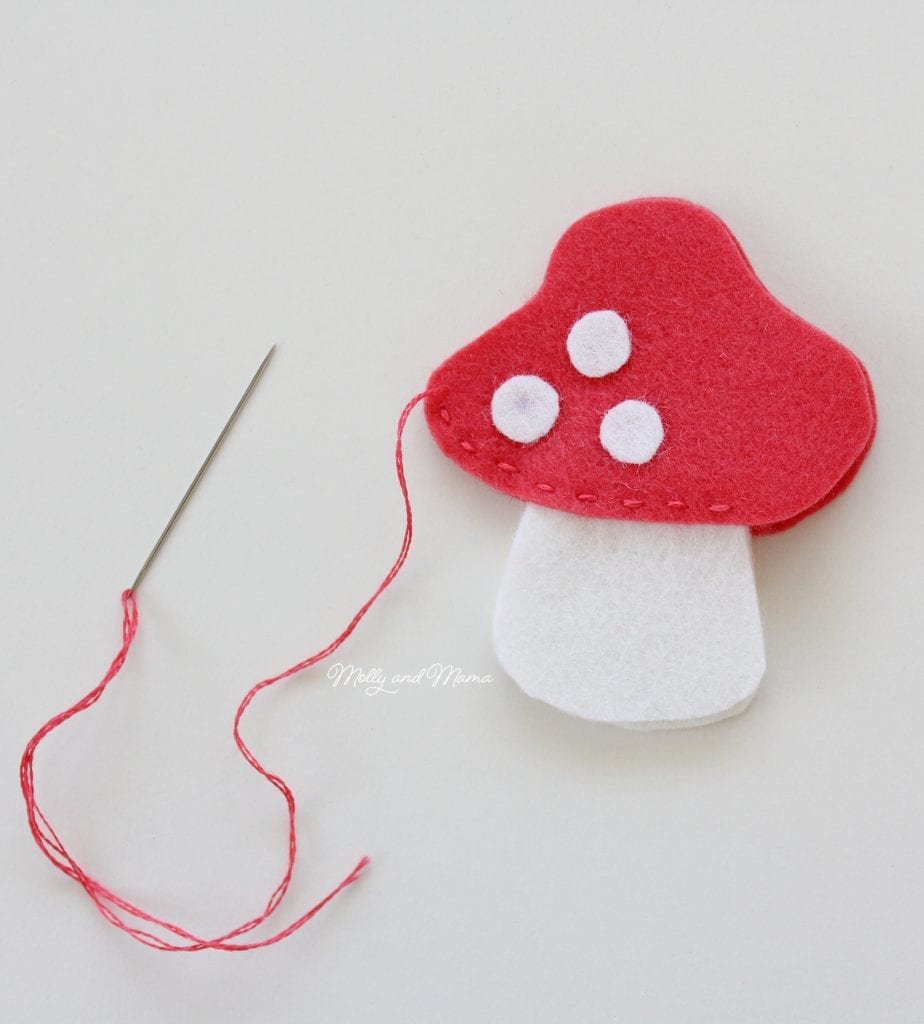
Next, place the two mushroom halves together with their wrong sides facing and stitch them together, through both layers of felt. Sew the mushroom top first, from one side of the stalk all the way around the top and over to the other side.
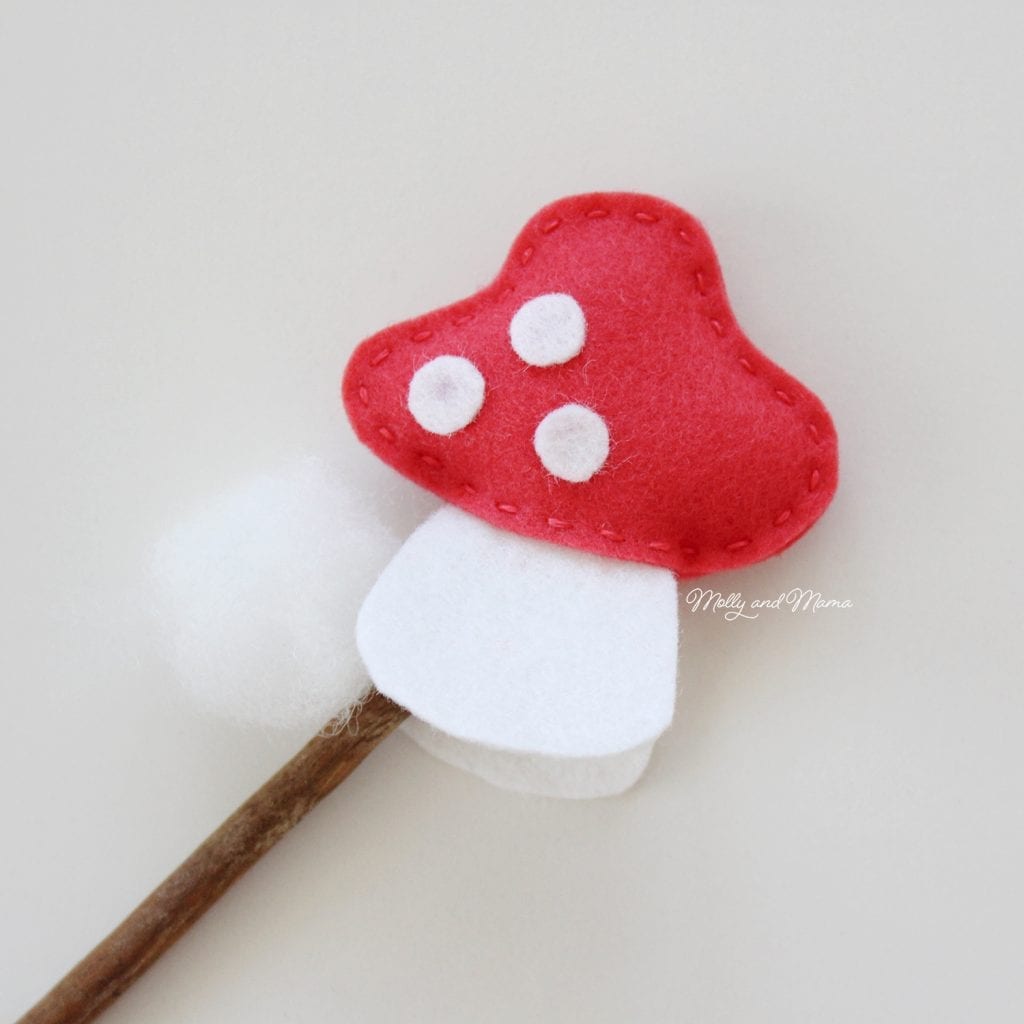
Manoeuvre small balls of stuffing into the opening of the mushroom top (through the stalk), using a chopstick or stuffing tool.
Running stitch the stalk together starting under the mushroom top on one side, and travelling down and around the base. Add more stuffing to the stalk before stitching the stalk closed.
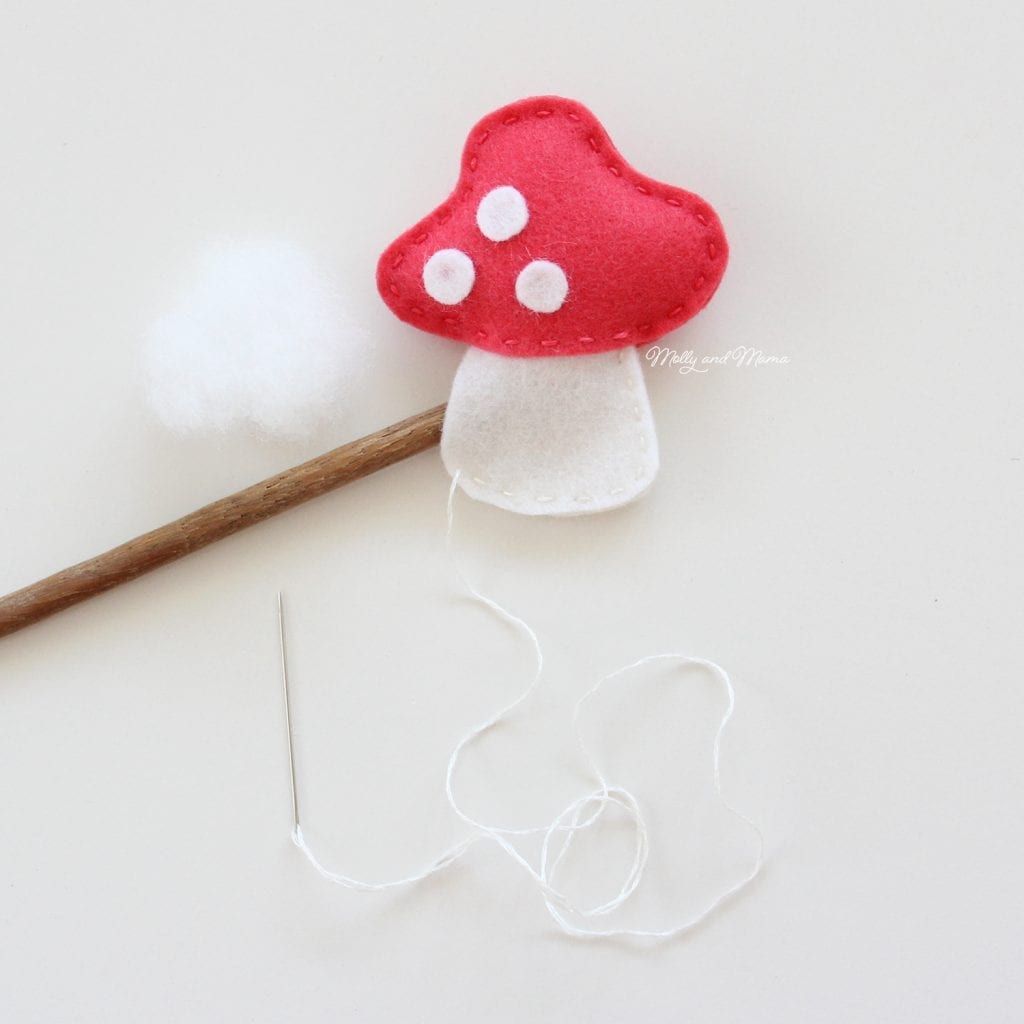
Be sure to start and end all stitching on the wrong side (or underside) of the felt, so that the knots and thread ends can’t be seen.
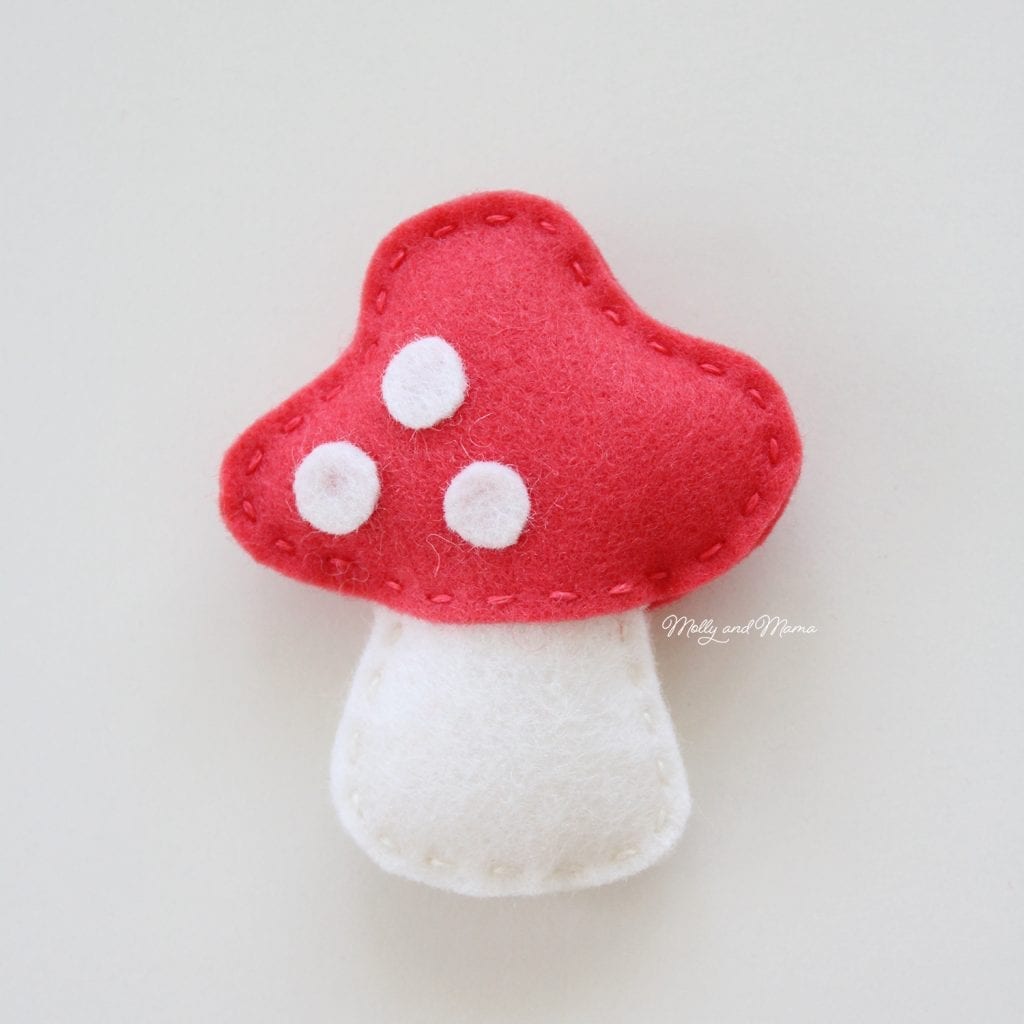
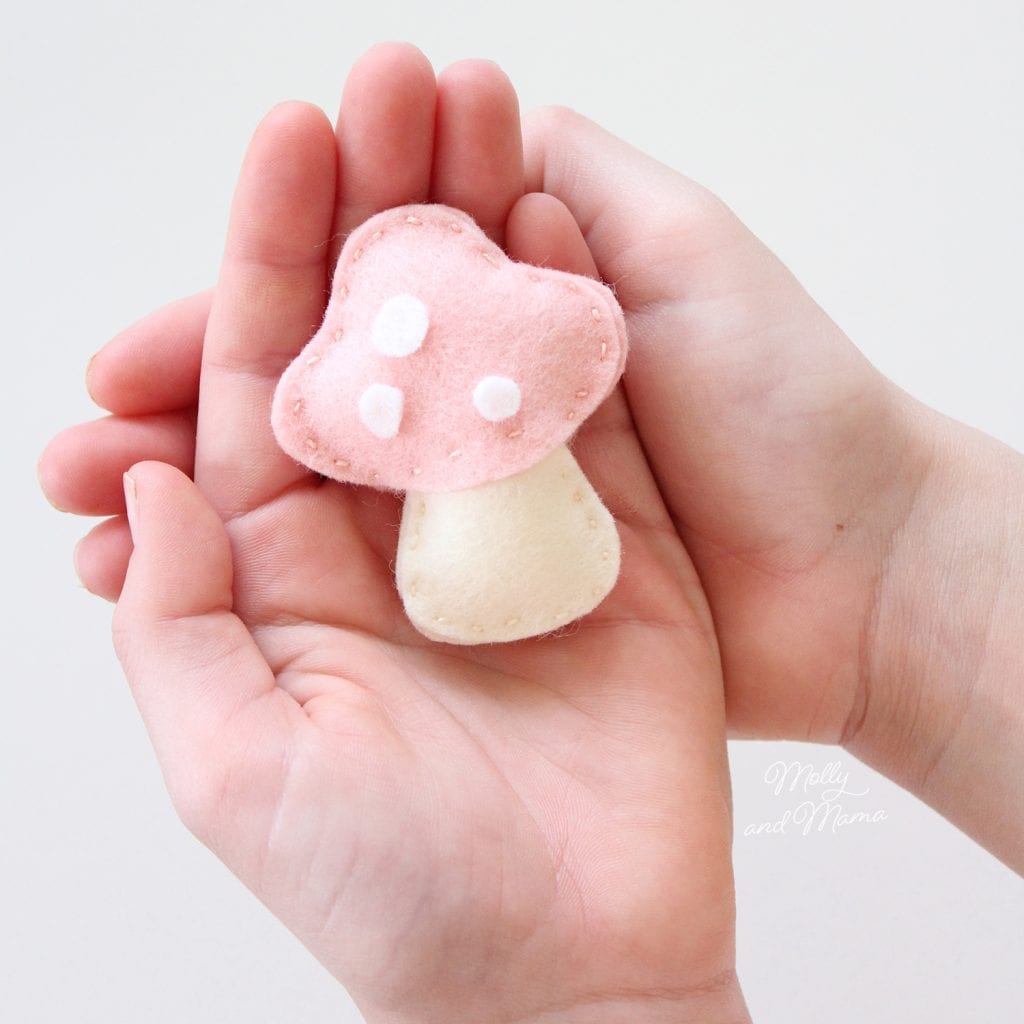
You’re all finished! The red version above is the mushroom I made for this tutorial. The peach one below was made by my 10 year old daughter who was absolutely thrilled with the results and has consequently ‘borrowed’ all the mushrooms we made for this tutorial!
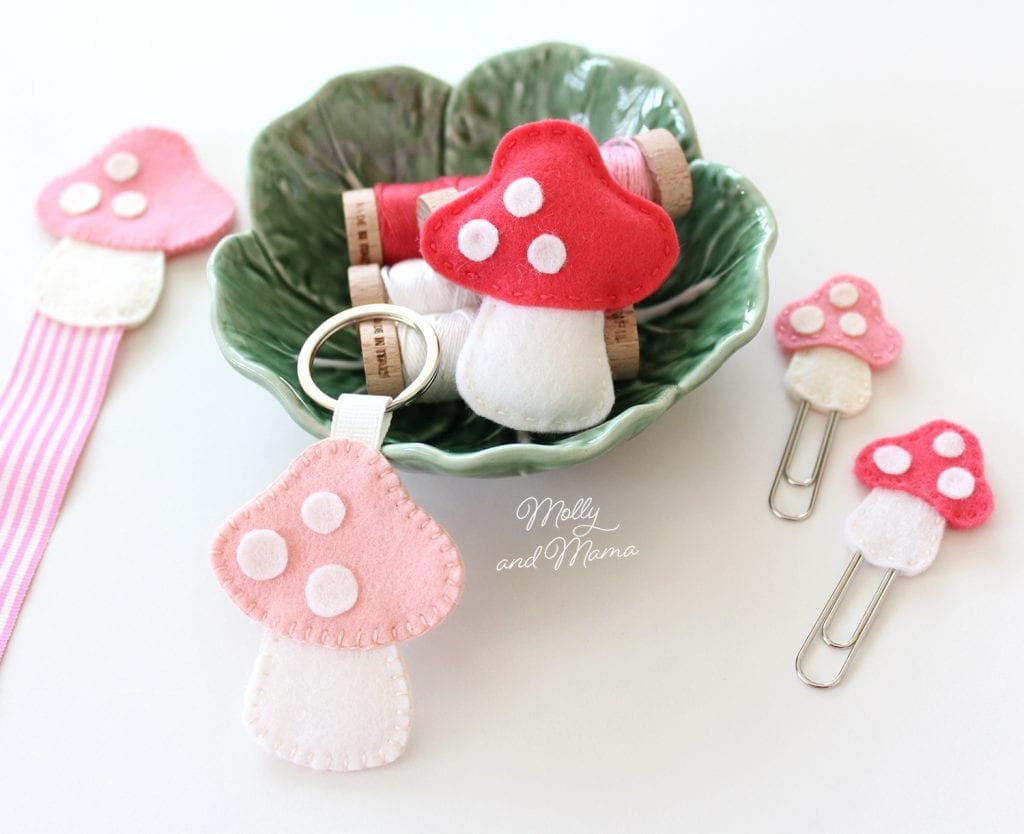
Sew a Key Ring
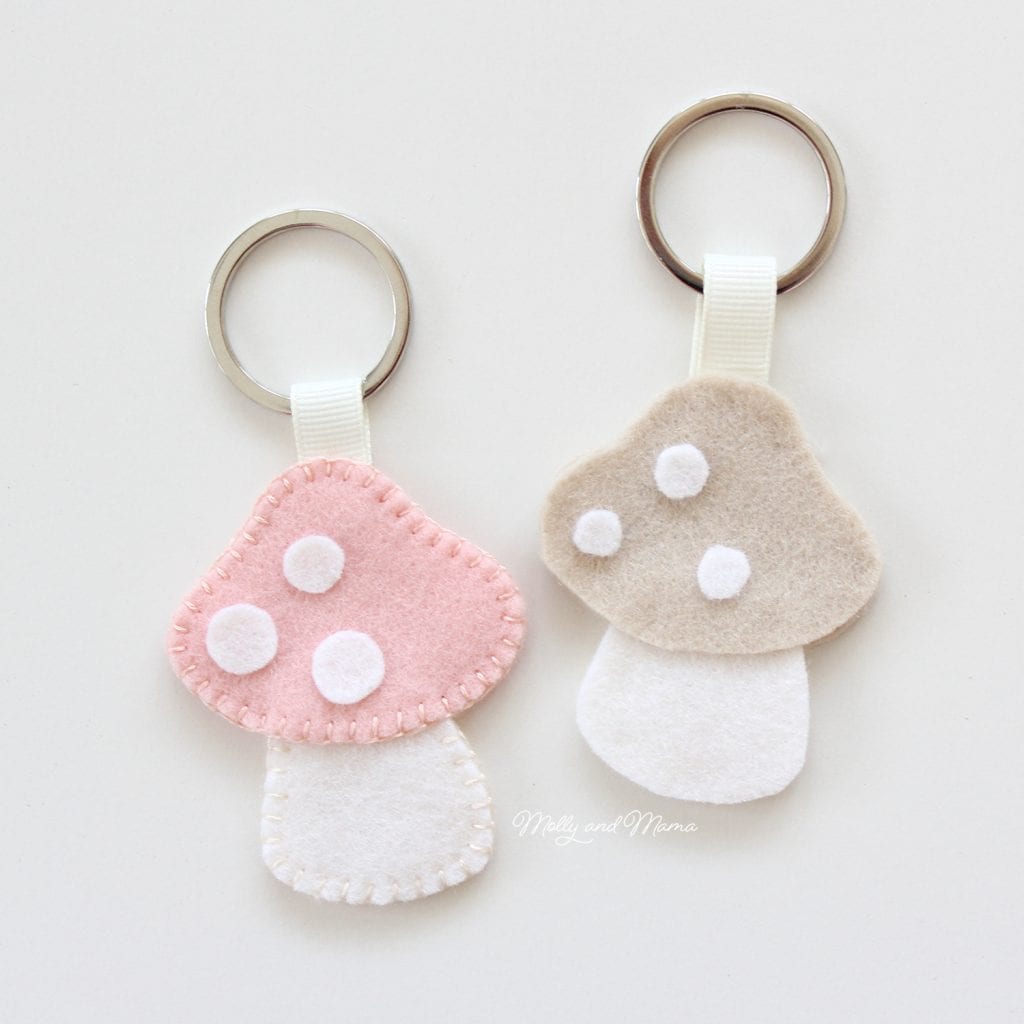
To make a keyring, cut out the large mushroom shapes as described for the mushroom softie above. Add the three felt spots to the front of one mushroom top.
Loop a 2″ (5cm) length of ribbon through a metal ring. Baste the two ribbon ends onto the back of the mushroom top to help hold the ribbon loop and ring in place while you stitch.
Follow the instructions for the mushroom softie to assemble the pieces, to sew the mushroom top together (stitching directly through the ribbon loop to secure it in place) and to sew the mushroom stalk together. Then remove the basting stitches.
In this pink version above, I did not add stuffing, though you could if you wished. The mushroom was stitched together using blanket stitch. My daughter made the beige mushroom on the right, using fabric glue to keep everything together – the perfect no-sew option!
Stitch a Bookmark
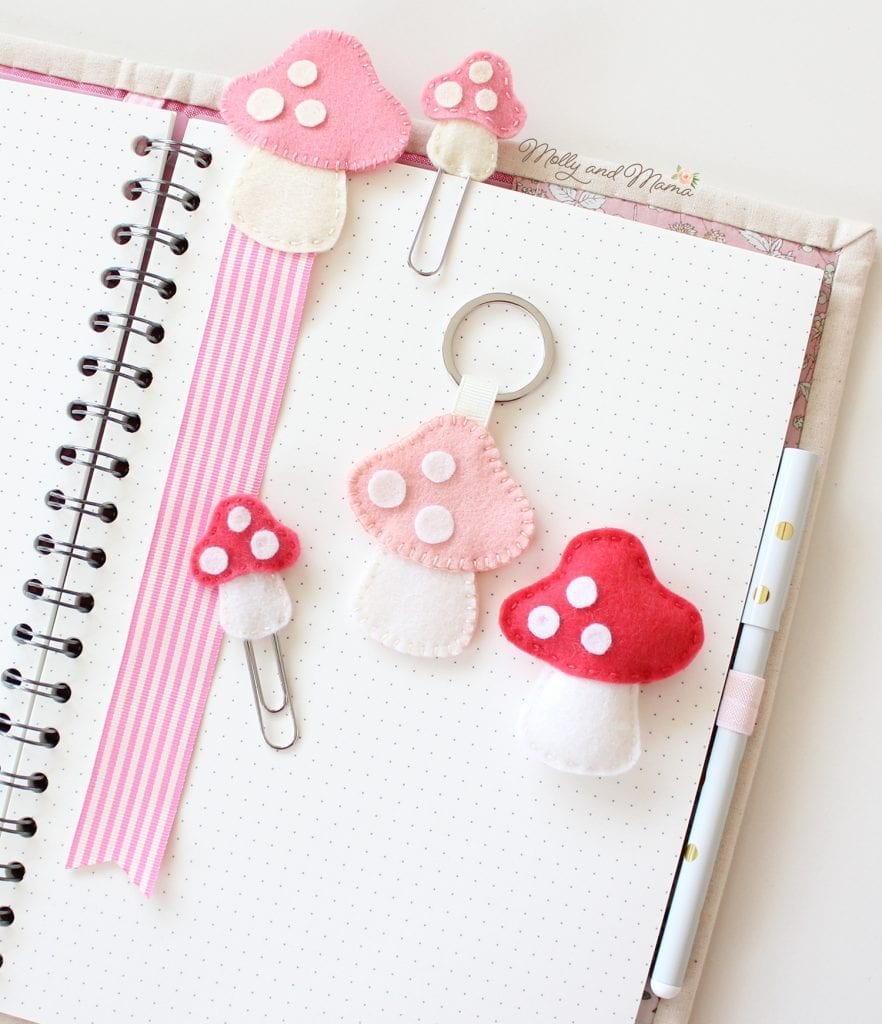
To make the bookmark option with the striped ribbon, follow the instructions to create the large mushroom softie as described above but leave out the stuffing. For this version I used whip stitch for the mushroom top and running stitch for the stalk.
When stitching the stalk base together, insert an 8″ (20cm) length of 1″ (2.5cm) wide ribbon into the opening at the base. Stitch through the ribbon to secure it in place. Trim the ends of the ribbon and heat seal them to prevent the ribbon from fraying. You’re all set to jazz up your planner or stylishly keep your place in your latest book.
Decorate a Paperclip

Planner accessories are so popular right now. This small mushroom paperclip would be perfect. To make one, use the small mushroom template and cut 2 tops, 2 stalks and 3 dots. Assemble the small mushroom using the same method as the large one. However, insert a large 2″ (5cm) long paperclip into the base of the stalk before stitching through it to secure it in place. Cute, right?
Try Something Else? Here’s some more cute mushroom ideas!
When sewing the mushroom top together, stitch a ribbon loop in the top so you can make a hanging ornament.
Sew a metal brooch clip to the back of the large mushroom to make a decorative brooch.
Glue a hair clip to the back of the large mushroom. You can use my Hair Accessory Tutorial for more information.
Imagine a whole row of sweet little mushrooms, sewn in a range of different colours and strung up on decorative twine to make a garland. What a beautiful way to add decor to a bedroom or even a celebration.
I hope this tutorial gives you lots of fun ideas and an opportunity to sew with (or for) a loved one. And if you like these projects, you might like the projects I made for the last two years too. Click on the photos to learn more.
Happy stitching, Lauren x
This post was written by Lauren Wright and appeared first on Molly and Mama www.MollyandMama.com.au
These are so cute. I’m new to the world of working with felt but have very limited access to felt here where I live. It’s only acrylic felt mainly. Occasionally I can get a wool blend.
I only found your website today through Fiona Fee Ransley on her Tilda Group
I’m so glad you found my website Catherine. Thanks for being here!
Do you do any custom makes?
Thanks for your query. I don’t offer custom makes at this time.