Molly and Mama

Studio for Pretty Stitches - Inspiring ideas for Felt, Stitchery and Patchwork

  • Home
  • Start Here!
  • PATTERNS
    • PDF Pattern Shop
    • Paper Pattern Stockists
    • Pattern Corrections
  • TUTORIALS
  • Classes
  • BOOK
  • Contact

Line an Alligator Clip and Make a Simple Hair Bow

July 2, 2014 By Lauren at Molly and Mama 17 Comments

When I had my daughter, I wanted her to wear all the adorable hair accessories I kept finding everywhere. But I didn’t realise how long I’d have to wait until she had hair long enough to hold a clip. One of the first things I made her, was a simple hair bow on an alligator clip. And it wasn’t long before she had a huge collection of pretties.

In this tutorial, I’ll be teaching you how I cover an alligator clip and add a bow with a rhinestone slider. This project is really easy and you don’t need any fancy supplies!

Keep in mind that this is the method I now use after a lot of trial and error. But I’ve seen lots of different ways to make bows. You may have other suggestions and tips, so be sure to leave me a comment and let me know.

TO MAKE ONE CLIP YOU WILL NEED

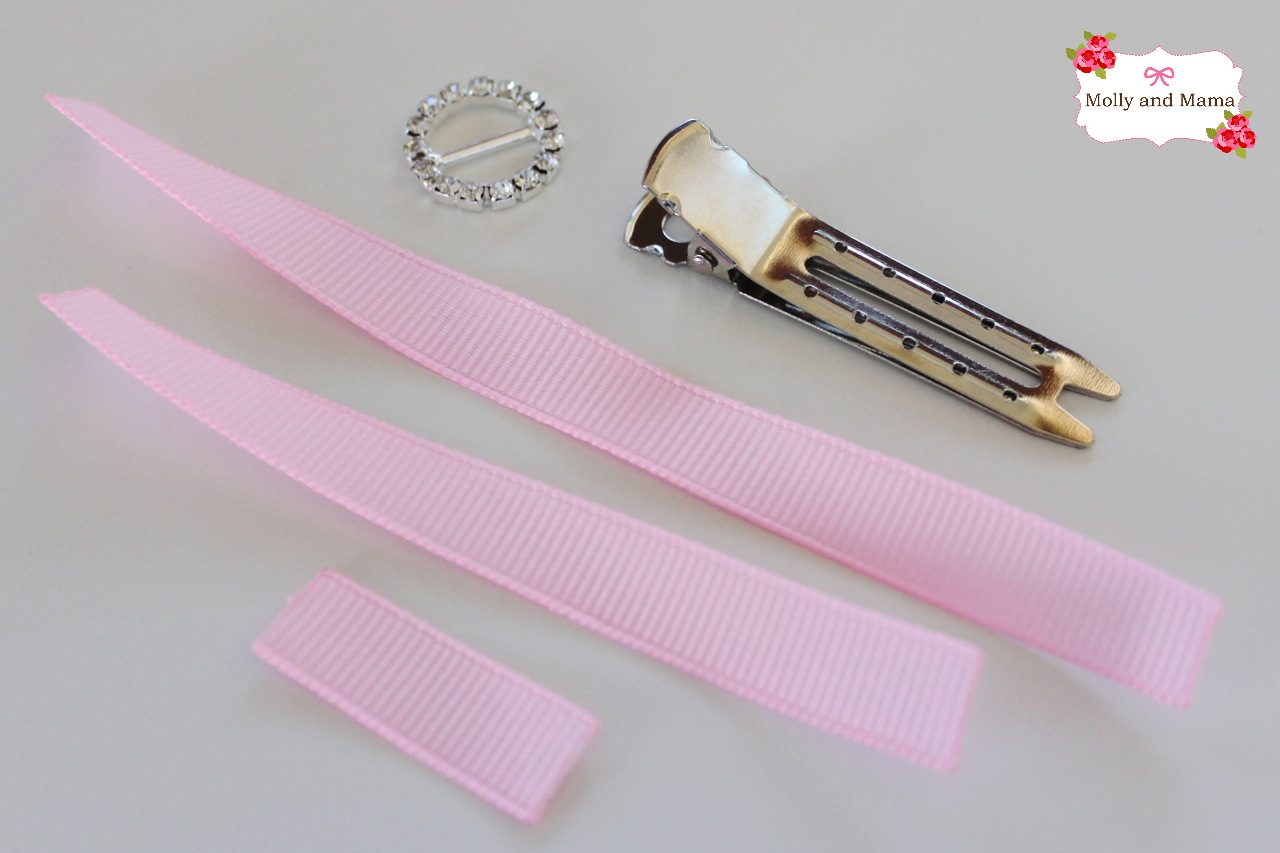
  • 25cm of 10mm (3/8″)wide grosgrain ribbon
  • one 48mm double pronged alligator clip
  • one round rhinestone slider made to fit 10mm (3/8″) ribbon
  • hot glue gun and glue sticks
  • ruler
  • scissors
  • heat sealer or cigarette lighter

Materials to make a simple hair bow - a Molly and Mama tutorial

LETS BEGIN

From your piece of ribbon, cut three lengths – 12cm (4.75″), 9cm (3.5″) and 3cm (1.25″).

Use your heat sealer to seal the ends of each piece. Alternatively, run the flame from a cigarette lighter across the end of the ribbon to melt the fibres and seal the ends.

Set up your glue gun and allow it time to heat up. Don’t forget to lay down a work mat. Glue guns can get messy! If you haven’t used one before, spend a bit of time practising. And watch your fingers! Each step in this tutorial is straightforward, but will need to be completed swiftly as the glue tends to dry very quickly.

LINE THE ALLIGATOR CLIP

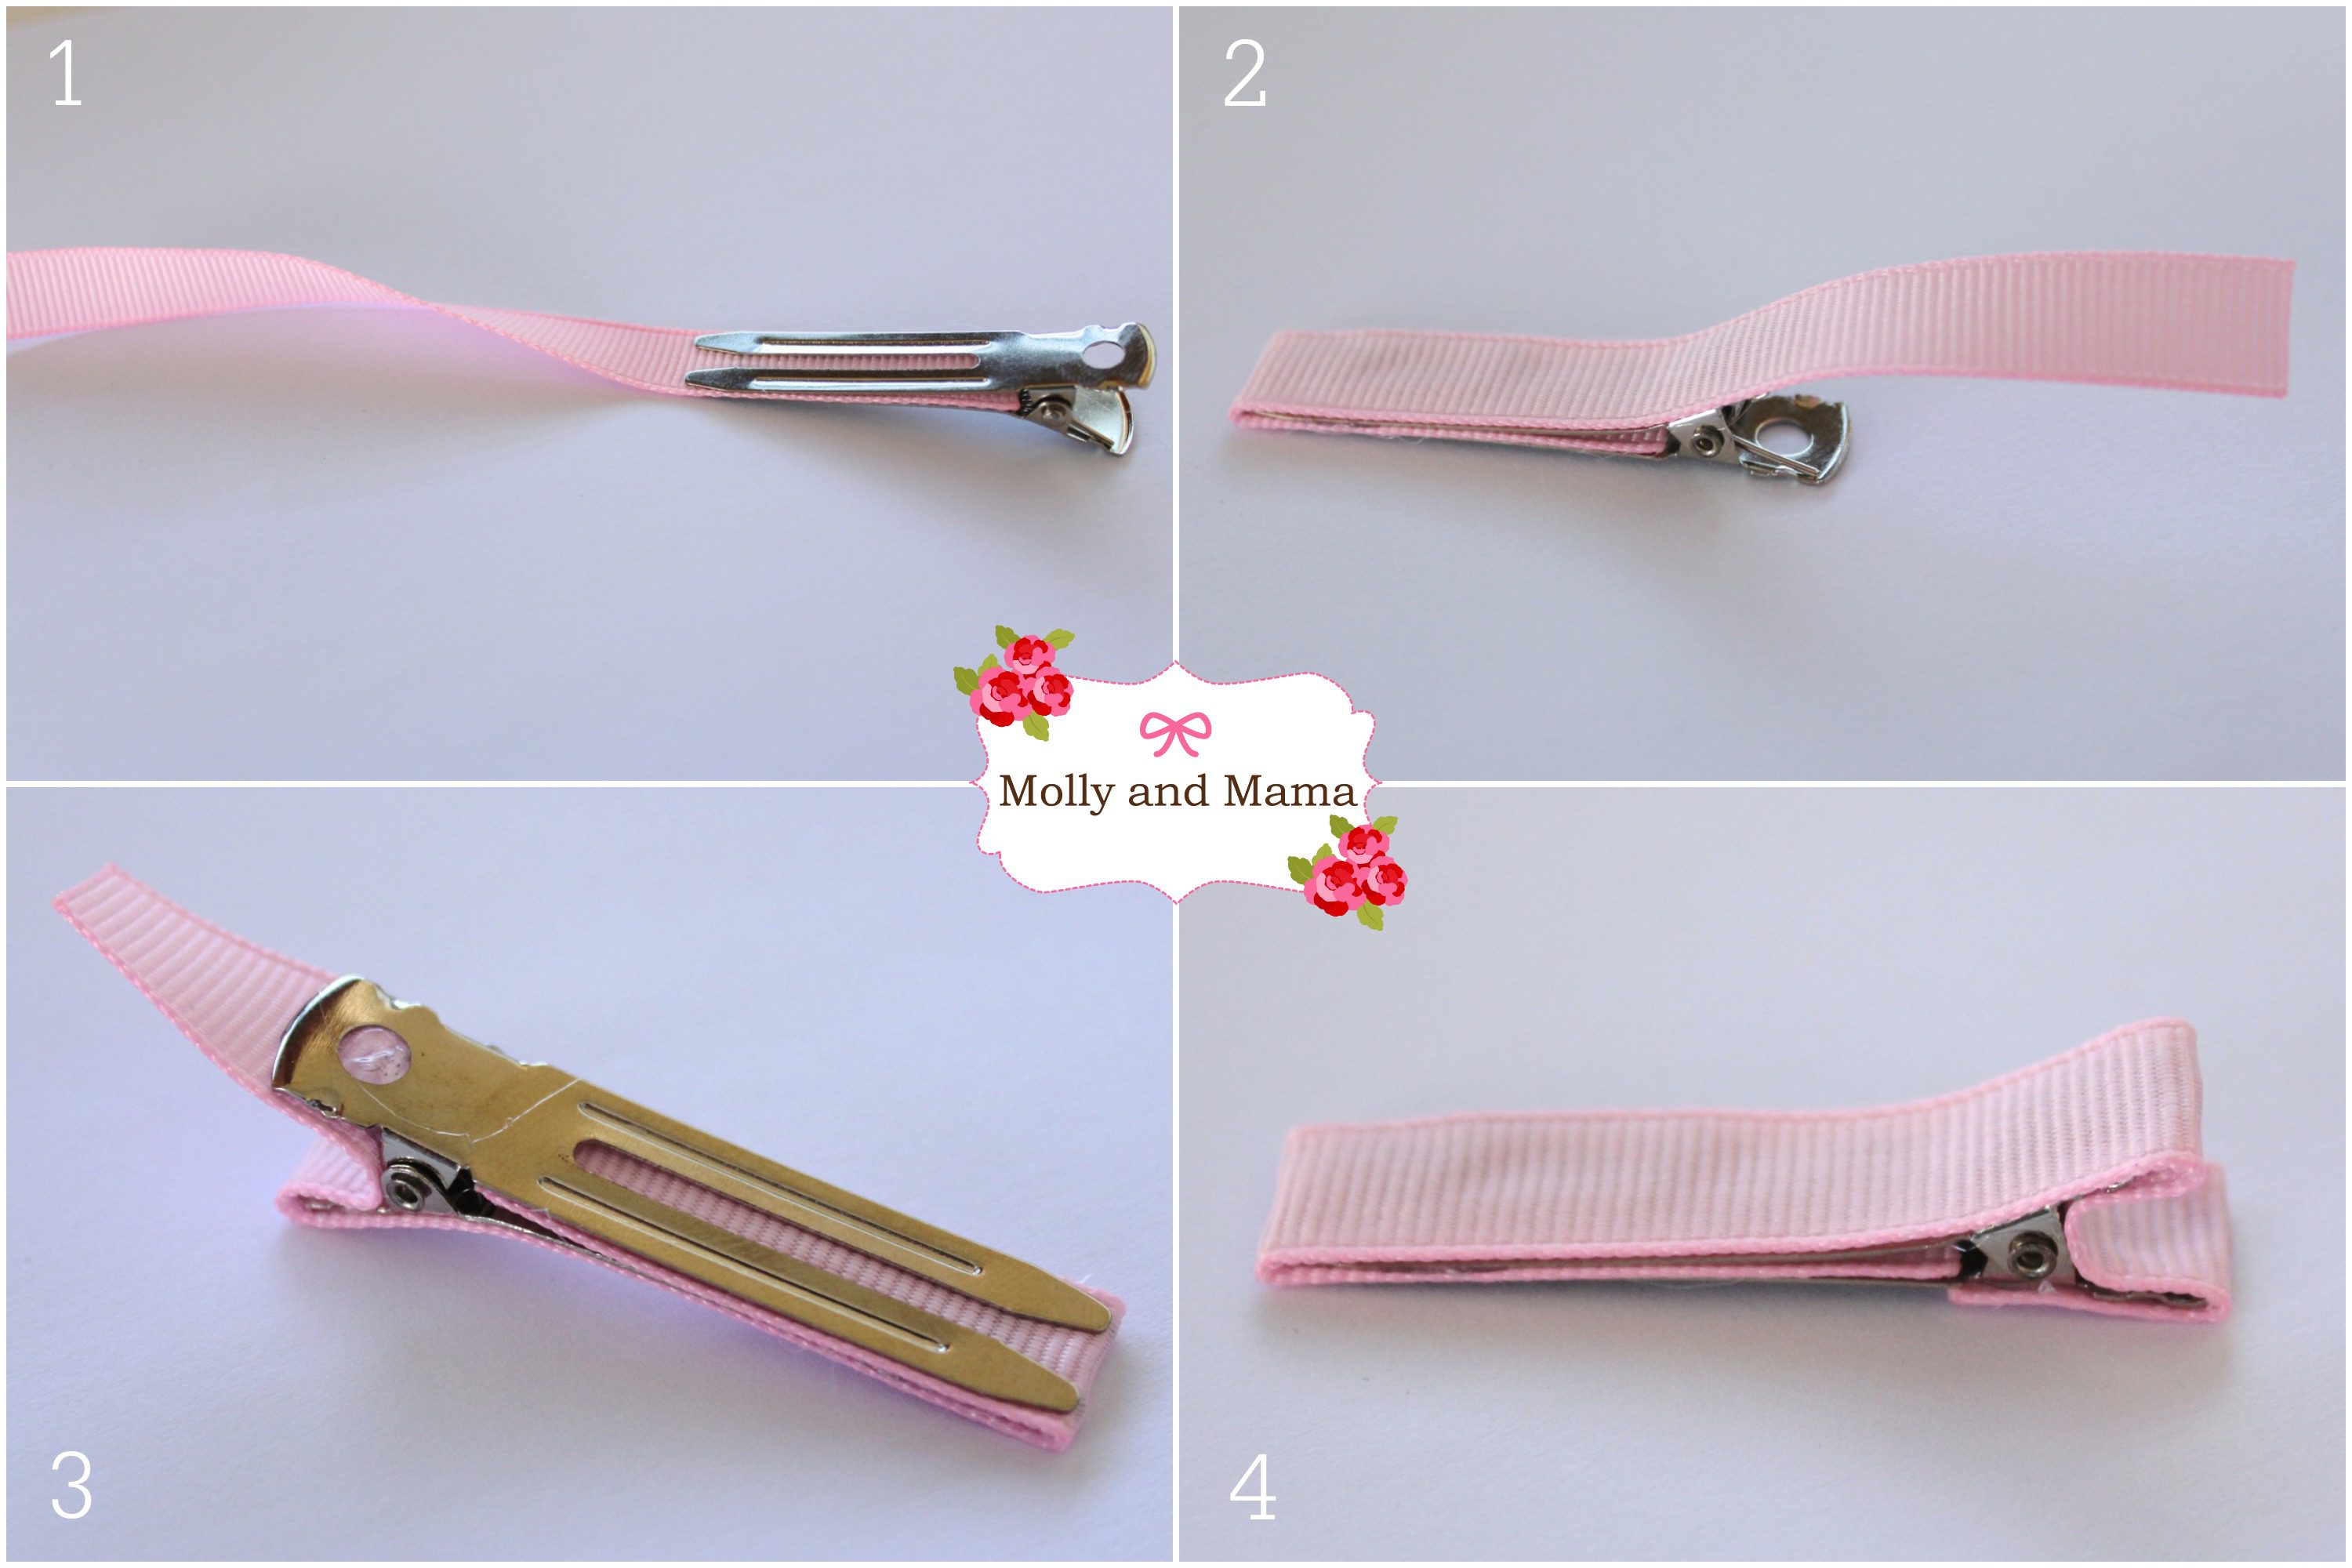
1. Have your 12cm (4.75″) length of ribbon handy. We’ll use this to line the alligator clip. Open the clip and run some glue along the underside of the top ‘jaw’ of the clip. Slide your ribbon into the open space between the jaws and attach it to the glue. If your ribbon is patterned, ensure that the back side is the side being glued. You can see my clip in image 1 below. It’s turned upside down here though so you can see how I’ve positioned the ribbon.

2. With your clip facing up, run a length of glue across the top of the clip right to the end of the jaw. Fold your ribbon back over the top and gently smooth it across the top jaw using your thumb. Your clip should now resemble image 2 below.

3. Place a small dab of glue on both ends of the inside of the jaws at the back. Be careful not to get any glue near the spring though, or you’ll have a clip that won’t close properly. Gently push the ribbon into the space at the back. You can see my clip upside down here in image 3.

4. Lastly put a small dollop of glue on the underside of the clip, just over the space where the circular hole is shown in image 3. Fold the remaining length of ribbon over and press down to secure. Your lined clip should look like image 4. That wasn’t too difficult, was it?

Line an Alligator Clip - a beginner's tutorial by Molly and Mama

MAKE THE BOW

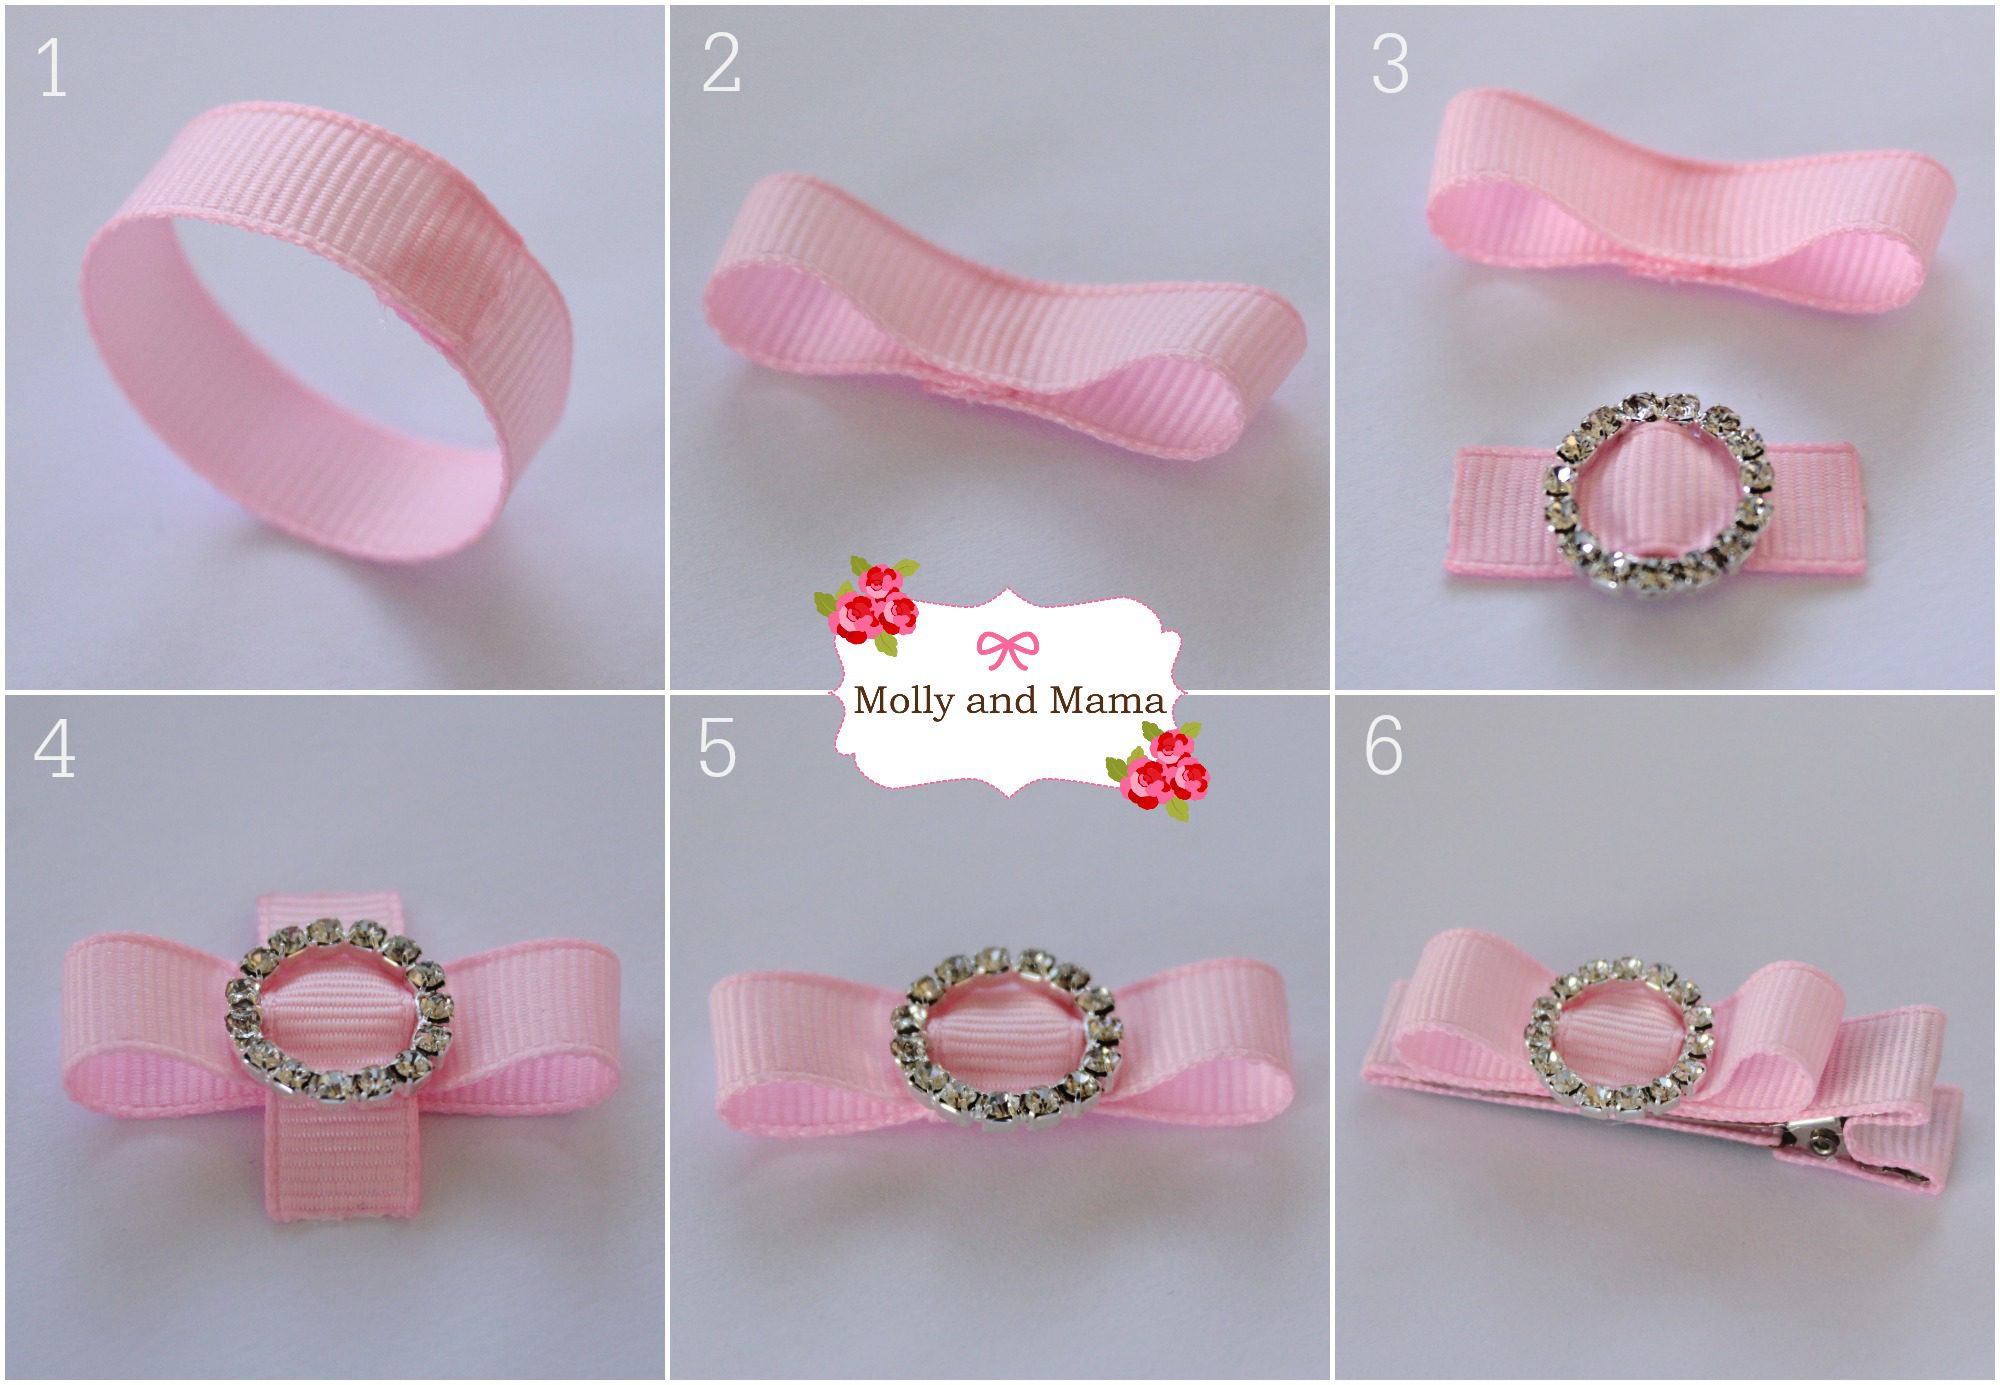
1. Now it’s time to create a pretty bow to pop on top of the clip. Take your 9cm (3.5″) length of heat sealed ribbon and place a small amount of glue at one end. Bring the other end around and join them to make a loop with a small overlap (as shown in image 1 below).

2. Place another small spot of glue on the inside of the overlap and press the loop down so that your bow now has two loops and looks like image 2 below.

3. Thread your 3cm (1.25″) length of heat sealed ribbon through the slider of your rhinestone accessory. You can see this in image 3 below. A small dab of glue on the back will help the stop the slider from ‘sliding’ off. If you choose, you can also leave the slider off and just create a pretty bow without the bling!

4. Place the slider and ribbon over the centre of your bow loops as shown in image 4 below.

5. Hold the pieces together, turn them over and place a dollop of glue on the back of the bow loops. Fold each end of the 3cm ribbon over the glue to secure it to the bow loops. Image 5 shows how your bow should now look.

6. Now all you need to do is attach the pretty bow to your clip. Run a short length of glue along the centre of the top jaw of the alligator clip. (Don’t run the glue along the whole length of the clip top as the bow won’t cover that far). Gently press your bow in place and your pretty clip is all complete!

Make a Pretty Bow for an Alligator Clip - a Molly and Mama tutorial

When making hair accessories, I also like to add a non-slip grip to the underside of the top jaw. It’s a small self adhesive strip of thin pre cut foam that helps the clip to stay put in fine hair. It’s a useful addition but not a necessary one though.

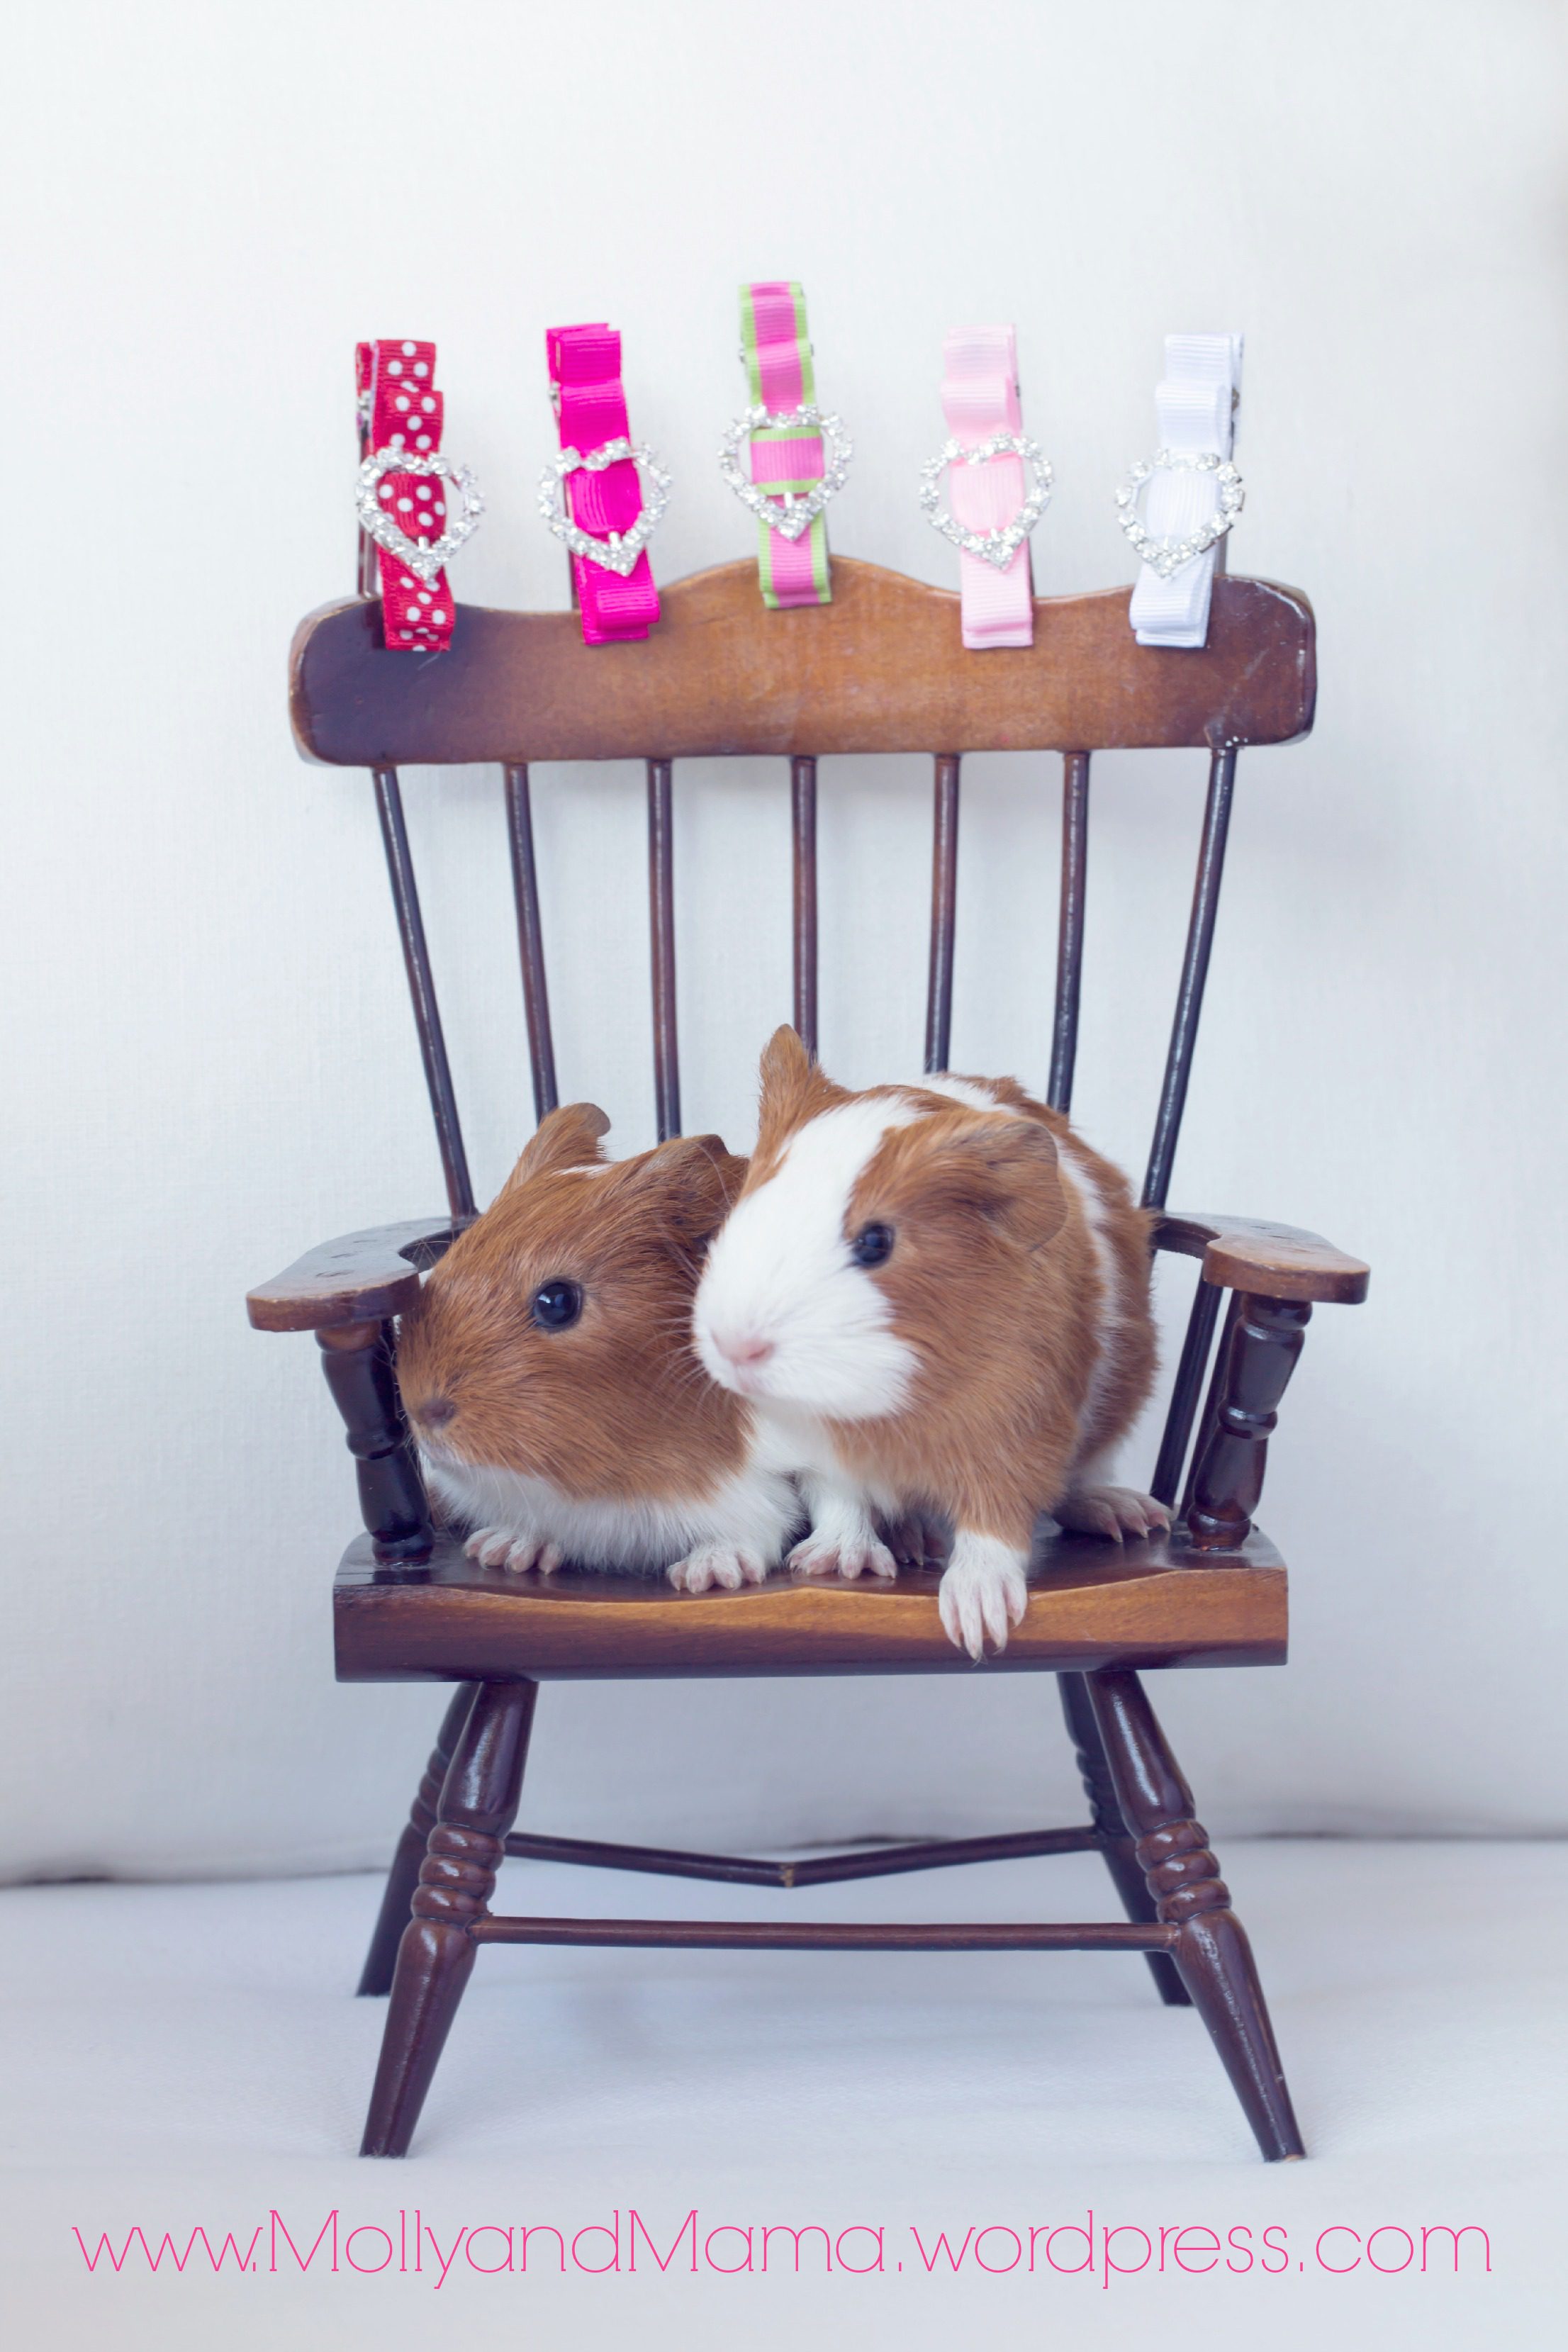
So there you have it – a very simple bow on a ribbon lined alligator clip! Now that you’ve made one, you can create a whole collection! Here’s a few that I put together for a very special photo shoot! A big thanks to MiaMia Photography for the beautiful image.

Heart Alligator Clips by Molly and Mama

You can see more bow inspiration on my Pinterest board for Hair Accessories.

You might like to try your hand at some of the other hair bow and accessory tutorials I have too!

And then you can create a Hair Clip holder to store them on! I’ve created a tutorial for this too, so make sure you head over and have a look. You’ll be surprised at how easy this is too!

A Hair Clip Holder tutorial by Molly and Mama

Thanks for stopping by once again. I hope you’ve picked up some ideas and inspiration today!

Happy creating, Lauren x

This post was written by Lauren Wright and appeared first on Molly and Mama www.MollyandMama.com.au

Filed Under: Tutorials Tagged With: bow, clip, grosgrain ribbon, hair accessories, hair bow, hair clip, rhinestone slider, tutorial

Comments

  1. Kylie says

    July 3, 2014 at 6:29 pm

    Absolutely gorgeous

    Reply
    • Lauren at Molly and Mama says

      July 3, 2014 at 6:39 pm

      Thanks Kylie!

      Reply
  2. Kylie says

    July 3, 2014 at 6:29 pm

    Absolutely gorgeous

    Reply
    • Lauren at Molly and Mama says

      July 3, 2014 at 6:39 pm

      Thanks Kylie!

      Reply
  3. Ashlynn says

    March 30, 2015 at 1:39 pm

    I’d love to share this on my website at: http://www.thethreadfultruth.com/

    Also if you’re interested in sharing your work on a Pinterest group board I’d love to have you as a contributor. https://www.pinterest.com/Threadfultruth/

    Reply
    • Lauren at Molly and Mama says

      March 30, 2015 at 1:55 pm

      Hi Ashlynn, thanks so much for asking. I’d love for you to feature Molly and Mama on your website. And I’m a pinterest addict, so I’ll see you there! I appreciate the support, Lauren.

      Reply

Trackbacks

  1. Make a Yo Yo Hair Clip | Molly and Mama Makes says:
    July 17, 2014 at 10:08 pm

    […] the back of your yo yo. And guess what? I’ve got a tutorial for that too! You can head over HERE to find out how to make a simple bow and cover an alligator clip at the same […]

    Reply
  2. Make a Yo Yo Hair Clip | Molly and Mama Makes says:
    July 17, 2014 at 10:08 pm

    […] the back of your yo yo. And guess what? I’ve got a tutorial for that too! You can head over HERE to find out how to make a simple bow and cover an alligator clip at the same […]

    Reply
  3. Make a Headband Holder | Molly and Mama says:
    October 28, 2014 at 12:09 pm

    […] like to have a go at making your own hair clips, you can read the tutorial for basic clips HERE and for yo-yo […]

    Reply
  4. Make a Headband Holder | Molly and Mama says:
    October 28, 2014 at 12:09 pm

    […] like to have a go at making your own hair clips, you can read the tutorial for basic clips HERE and for yo-yo […]

    Reply
  5. Pretty Felt Bows for Christmas | Molly and Mama says:
    December 20, 2014 at 10:45 am

    […] you’re not sure how to cover clips, you can read all about it in my tutorial HERE. But this image also gives you the […]

    Reply
  6. Make a Koala Hair Clip - Molly and Mama says:
    June 17, 2015 at 8:44 am

    […] ribbon covered clip. Covering clips is really straightforward, and I have a great tutorial about it HERE. But this image shows the […]

    Reply
  7. Make A Hair Clip Holder using an Art Canvas - Molly and Mama says:
    February 24, 2016 at 9:54 am

    […] I really hope you enjoyed this tutorial.  If by some strange chance, you need to fill your hair clip holder, I have a couple of hair bow tutorials you may really enjoy. Here’s how to make a simple hair bow on an alligator clip. […]

    Reply
  8. Make Felt Flower Hair Clips / Daily inspiration from our bloggers says:
    October 24, 2016 at 5:27 pm

    […] Cover the alligator clip with 12cm of grosgrain ribbon, using your hot glue gun. For more information about covering hair clips, head to this detailed step-by-step tutorial on the Molly and Mama blog.  […]

    Reply
  9. Make Felt Flower Hair Clips with Sizzix - Molly and Mama says:
    October 25, 2016 at 5:01 am

    […] The last step was to attach a ribbon-covered alligator clip to the back of the felt flowers. You can read all about making simple covered hair clips in my easy to follow tutorial. […]

    Reply
  10. Make a Shamrock Clip for St Patrick's Day - Molly and Mama says:
    March 9, 2017 at 11:12 am

    […] the back of your yo yo. And guess what? I’ve got a tutorial for that too! You can head over HERE to find out how to make a simple bow and cover an alligator clip at the same […]

    Reply
  11. Make a Hair Bow Holder and Matching Clips - Molly and Mama says:
    March 10, 2017 at 11:12 am

    […] the steps outlined in my alligator clip tutorial (and in the image below), I covered a number of clips with grosgrain ribbon using the Bosch Glue […]

    Reply

Leave a Reply Cancel reply

Your email address will not be published. Required fields are marked *

Categories

  • Christmas (37)
  • Christmas Stocking Sew Along (6)
  • Easter (10)
  • Embroidery For Beginners (6)
  • English Paper Piecing (9)
  • Felt Fun (12)
  • Forest Family Quilt Along (10)
  • Holidays (11)
  • Molly and Mama Patterns (54)
  • Pattern and Book Reviews (38)
  • Projects (40)
  • Quilting Help (3)
  • This and That (49)
  • Tutorials (49)

Cart

mollyandmama

Studio For Pretty Stitches
🐝🌸 You’ve seen my pretty floral Serious Se 🐝🌸 You’ve seen my pretty floral Serious Sewist’s Set, but here’s a sweet Liberty Wiltshire version. I love @libertyfabrics tana lawn, especially when it’s paired with linen.

Find out more about this new pattern in the listing details. Tap the photo or head to the shop link in my profile. 

#mollyandmama #serioussewistsset #libertyfabric #libertytanalawn #iloveliberty #libertywiltshire #felt #woolfelt  #feltapplique #appliquebee #feltbee #scissorkeeper #scissorcharm #hexies #hexagons #englishpaperpiecing #epp #handstitched #slowsewing #aurifil #aurifloss #aurifilfloss #embroideryfloss #aurifilartisan
I’m loving @mabletandesigns new collection ‘B I’m loving @mabletandesigns  new collection ‘Birds & Blooms’ for @pbsfabrics. And hand quilting with @aurifilthread embroidery floss is a dream! Can you guess which of my patterns this will become? 

#mollyandmama #mabletandesigns #birdsandbloomsfabric #pbsfabrics #australianflorafabric #australianafabric #cockatoo #parakeet #parrot #stellacushions #fatquarterbundle #fabriccollection #fabricpull #aurifulthread #aurifloss #aurifilartisan #embroideryfloss #aurifilfloss
🐝🤍 It’s here! Thank you so much to those w 🐝🤍 It’s here! Thank you so much to those who have already purchased the Serious Sewist’s pin cushion and scissor charm pattern set. Tap the photo for a direct link, or head to my profile. 

#mollyandmama #serioussewistsset #felt #woolfelt  #feltapplique #appliquebee #feltbee #scissorkeeper #scissorcharm #hexies #hexagons #englishpaperpiecing #epp #handstitched #slowsewing #missrosesisterviolet #rileyblakedesigns #iloverileyblake #rileyblake #roseandvioletsgardenfabrics #aurifil #aurifloss #aurifilfloss #embroideryfloss #aurifilartisan #fatquarterbundle #roseandvioletsgardenfabric
🦜🌼 On the cutting table this week is this su 🦜🌼 On the cutting table this week is this summery fun Australiana collection called Birds & Blooms from @mabletandesigns for @pbsfabrics. It’s described as combining classical botanical illustration styles with a modern, trend-worthy colour palette. And it’s so true! Check with @pbsfabrics for stockists near you. 

I love all of Mable’s designs, this one especially! What should I make? 

#mollyandmama #mabletandesigns #birdsandbloomsfabric #pbsfabrics #australianflorafabric #australianafabric #cockatoo #parakeet #parrot #gumblossom #fatquarterbundle #fabriccollection #fabricpull #aurifulthread #aurifloss #aurifilartisan #embroideryfloss #aurifilfloss
How sweet does Miss Maisie Pin Cushion look sittin How sweet does Miss Maisie Pin Cushion look sitting here on this cute ‘I Spy’ style doll’s quilt?  It’s based on the Rising Sun mini quilt pattern from @blossomheartquilts’ book ‘Mini Masterpieces’. You can see more photos and find links to the book on my latest blog post (there’s a link in my profile). 

Miss Maisie is part of the Miss Molly And Friends Pin Cushion Pattern in my store. Tap the photo for a link. She’s quick to stitch, lots of fun to make and comes with two other friends; Miss Molly and Miss Kitty. 

#mollyandmama #missmollypincushion #missmollyandfriends #missmaisiepincushion #felt #woolfelt #feltpincushion #applique #appliqué #appliquequilt #ispyquilt #minimasterpiecesbook #blossomheartquilts #aurifilartisan #aurifilthread #aurifilfloss #aurifloss #blanketstitch #rawedgeapplique #quiltersofinstagram #makersgonnamake
🪡✂️💗 Thank you so much for your wonderfu 🪡✂️💗 Thank you so much for your wonderfully positive response to my Serious Sewist’s Set. The pattern is now live! Visit the link in my profile to head to the store 🐝💕.

#mollyandmama #serioussewistsset #serioussewistspincushion  #felt #woolfelt  #feltapplique #appliquebee #feltbee #scissorkeeper #scissorcharm #hexies hexagons #englishpaperpiecing #epp #handstitched #slowsewing #missrosesisterviolet #rileyblakedesigns #iloverileyblake #rileyblake #roseandvioletsgardenfabrics #aurifil #aurifloss #aurifilfloss #embroideryfloss #aurifilartisan #fatquarterbundle #roseandvioletsgardenfabric
💗 Have you started the year with some English p 💗 Have you started the year with some English paper piecing? The weekly #sipteaandepp party is continuing with the lovely Larisa from @stitchingnotes and this year I’m making way for the very talented Irina from @nordiccrafter to become the new co-host. Please go and visit the profiles of these clever creatives to learn all about what 2021 holds for #sipteaandepp. The girls have some exciting plans in place and I know you’re going to love it!

This week’s theme is all about Introductions, where you’re encouraged to share a few random facts about yourself. So here’s a little about me. 

🤍 Before starting this wonderful journey into sewing, I was a primary school teacher

🤍My first degree was a bachelor of Behavioural Science / Psychology

🤍 I’ve been crafty for as long as I remember but I also love art, illustration, gardening and baking

🤍 I’m not a traditional tea drinker (which was a little strange as the co-host of #sipteaandepp 😂 

🤍 I’m inspired mostly by colour and nature. I’m drawn to anything muted, delicate, pastel, pretty, dainty and floral. Yet nothing in my home or wardrobe would give you that impression! 

With so many new followers joining me in the new year, I’d love to know more about you. And if you have any questions for me, feel free to ask! Lauren 💗
🌸💚 I’ve had lots of requests for informati 🌸💚 I’ve had lots of requests for information about pattern releases and more. The best way to stay in the loop is to sign up for the fortnightly newsletter. That way you’ll also get the new release discount code. And you’ll even get this embroidery design as a FREE PATTERN! 

It’s just a friendly space where I share previews of my current projects, a tutorial or pattern, and some of your makes for added inspiration. I’d be thrilled to have you join me. I’m also working on the next free pattern, which gives you a taste for what my projects are all about - beginner techniques with beautiful finishes, so everyone can experience sewing success! 

Head to my profile for the sign up link. There’s a new felt freebie coming soon 💗

#mollyandmama #embroidery #freeembroiderypattern #freeembroiderydesign #handembroidery #handstitched #freepattern #freeproject #floralwreath #floralwreathembroidery #flowerwreath #flowerwreathembroidery #aurifil #aurifilthread #aurifilartisan #aurifilfloss #embroideryfloss #spoolofthread #embroiderersofinstagram #embroideryhoop #embroideryhoopart #stitchersofinstagram #makersgonnamake #makersgonnashare #craftersgonnacraft #happystitching #slowstitching
Honey bees are so amazing! I really wish I wasn’ Honey bees are so amazing! I really wish I wasn’t allergic. So while we gave my father in law a hive, we keep native Australian stingless bee hives instead. And they are the friendliest little creatures. I love finding sewing inspiration from our garden 🐝💐

This scissor fob is part of the Serious Sewist’s Pin Cushion Set. Find it in the store or tap the photo for a direct link 🥰

#mollyandmama #felt #woolfelt #feltapplique #appliquebee #feltbee #scissorkeeper #scissorfob #scissorcharm #hexies hexagons #englishpaperpiecing #epp #handstitched #slowsewing #missrosesisterviolet #rileyblakedesigns #iloverileyblake #rileyblake #roseandvioletsgardenfabrics #aurifil #aurifloss #aurifilfloss #embroideryfloss #aurifilartisan #fatquarterbundle #serioussewistsset #roseandvioletsgardenfabric
Follow on Instagram
This error message is only visible to WordPress admins
© Copyright 2020 - Molly and Mama