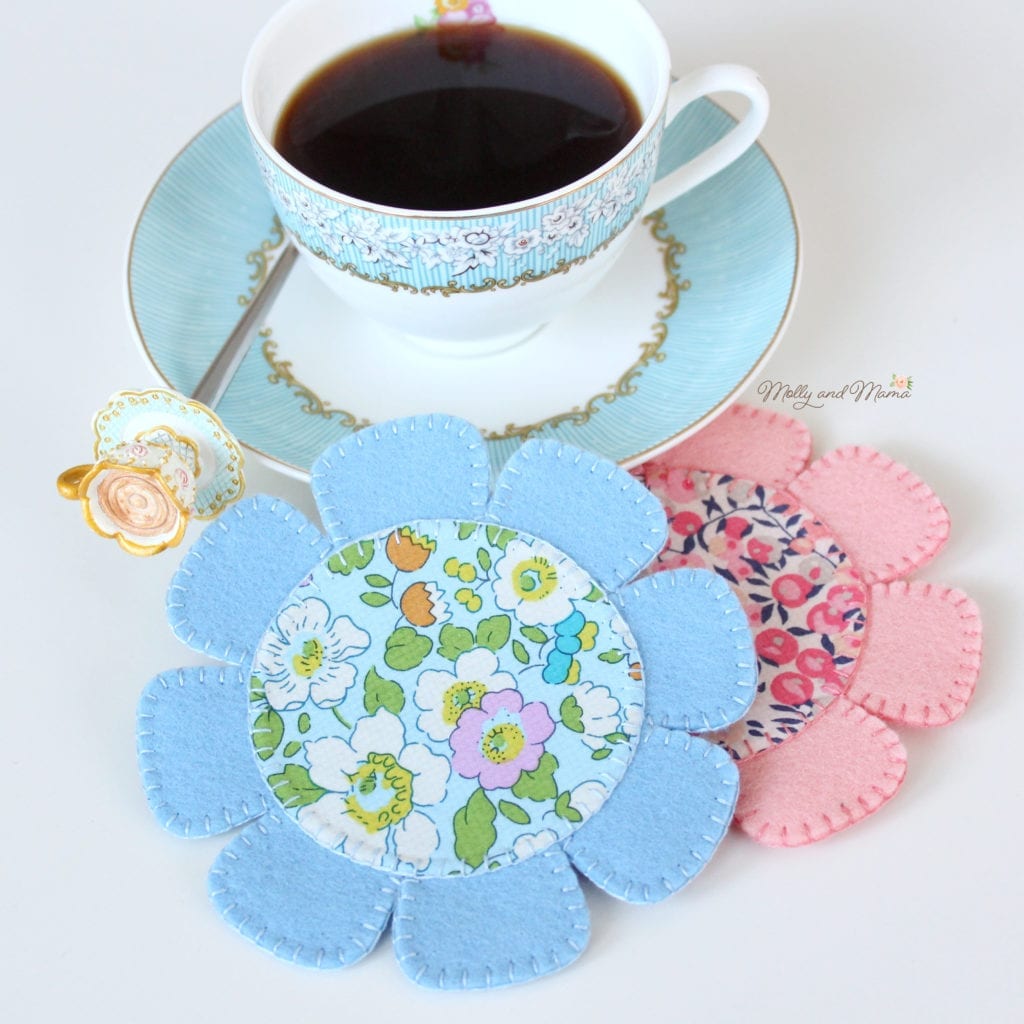
Sew a Felt Flower Coaster
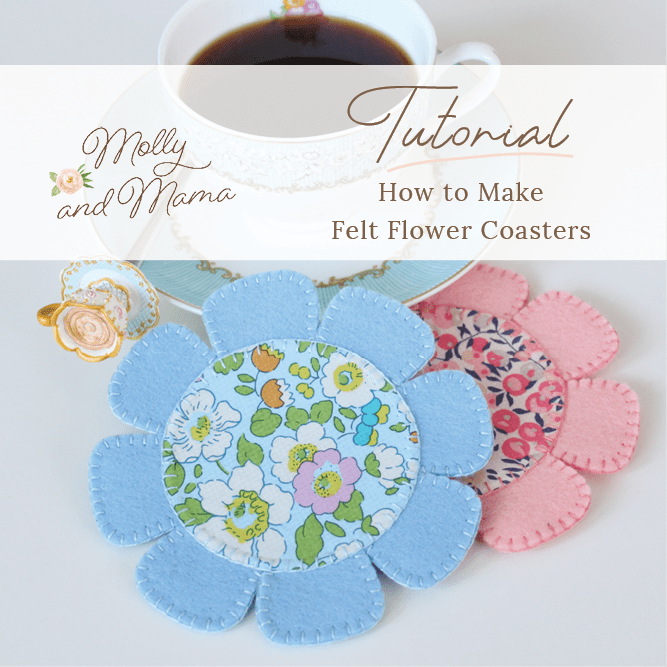
Add a handmade touch of charm to your table with this delightful Wool Felt Flower Coaster! Perfect for a quick afternoon project, this completely hand stitched coaster is both practical and pretty, ideal for brightening up your coffee table, gifting to a friend, or adding a handmade flourish to your décor.
These felt flower coasters are so easy to stitch. They’re a great way to showcase your favourite fabric prints and treasured scraps. And they make a lovely gift. Whether you’re a confident beginner or a seasoned stitcher, you’ll love how quickly and beautifully these simple coasters come together! Read on to learn how to make them, or to download the free PDF pattern.
Grab The Free Pattern
You can follow the instructions shared below to learn how I created these Felt Flower Coasters. But I also converted this tutorial to a free and convenient PDF pattern that you can download and print at home. To grab the freebie, simply sign up for the Molly and Mama newsletter list. Don’t worry, you can unsubscribe at any time.
You Will Need
- Two x 5 1/2″ (14cm) squares of wool felt. See this blog post for tips on working with Wool Felt
- 4″ (10cm) square of print fabric
- 4″ (10cm) square of paper-backed fusible heat bonding web like vliesofix
- 5 1/2″ (14cm) square of freezer paper
- embroidery floss to match your fabric and felt
- embroidery needle
- printout of the template
NOTE: This tutorial is for personal use only, for sewing at home and/or teaching another person or child to sew FOR FREE. Reusing or repurposing free Molly and Mama tutorial instructions, templates and images for paid classes, or distributing the materials in classes, to groups, or for commercial purposes, is strictly prohibited. For clarification, or to seek a commercial arrangement, please contact Molly and Mama.
Let’s Get Stitching
Download, save and then print out the template at 100%, with no page scaling or cropping. (However, to make coasters that are larger or smaller, feel free to reduce or enlarge the template when printing).
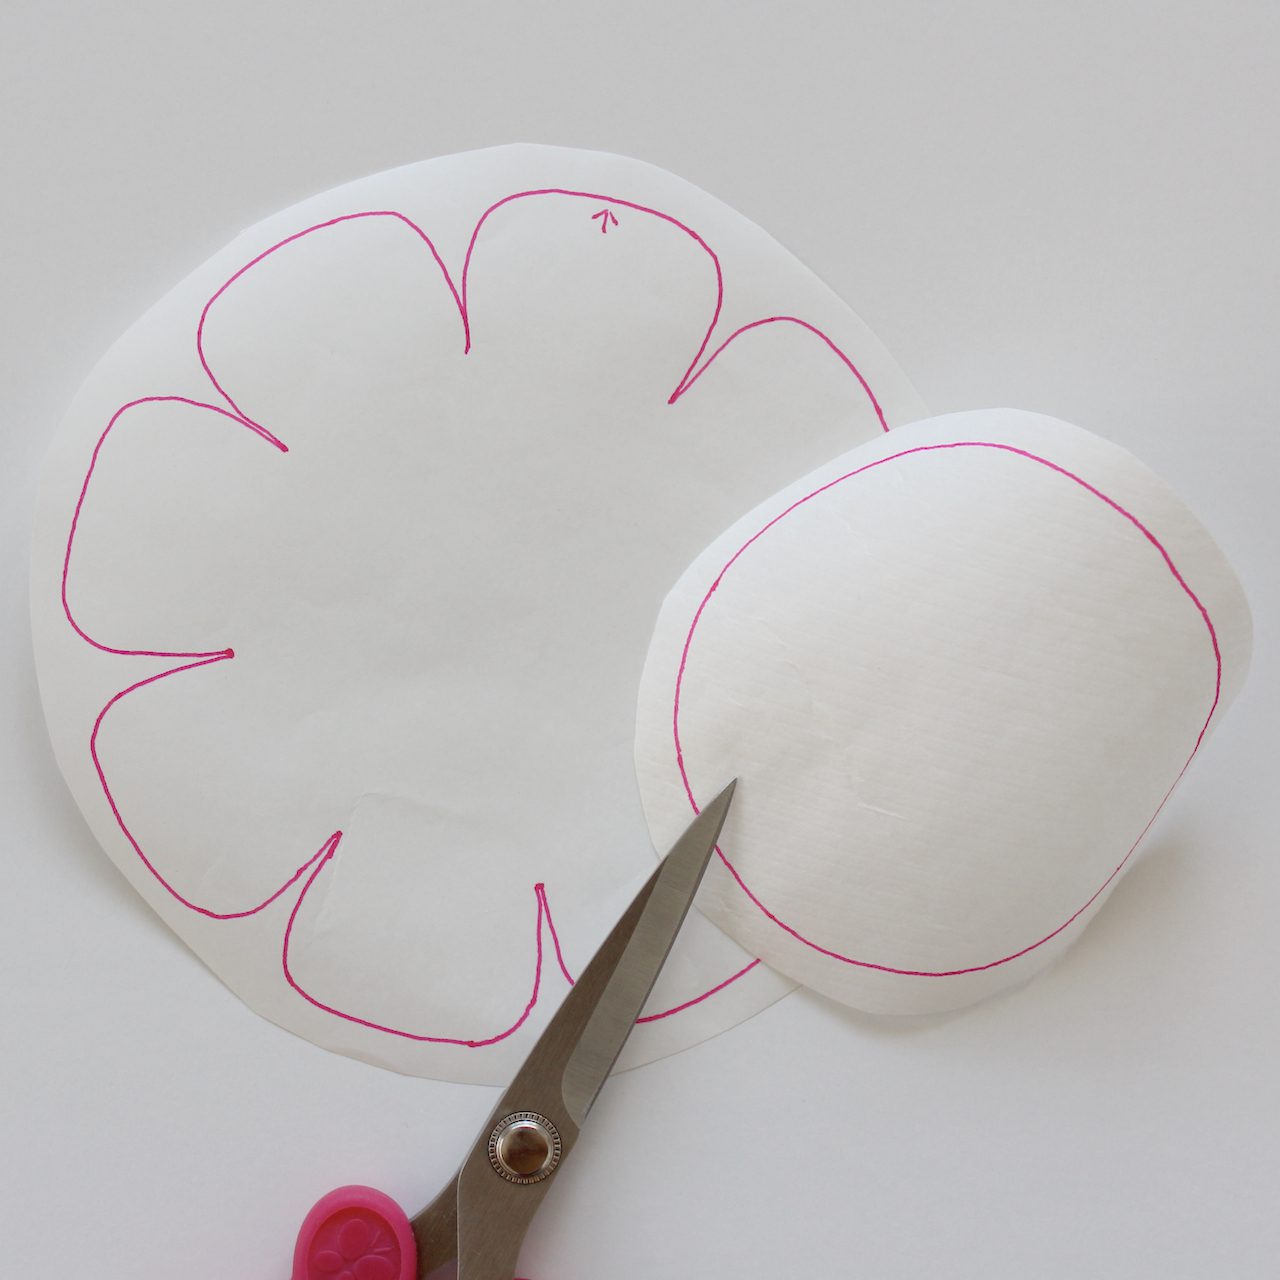
Trace the centre circle onto the paper side of the fusible heat bonding web. Roughly cut around the outside of the shape, leaving a 1/4″ allowance from the shape edge.
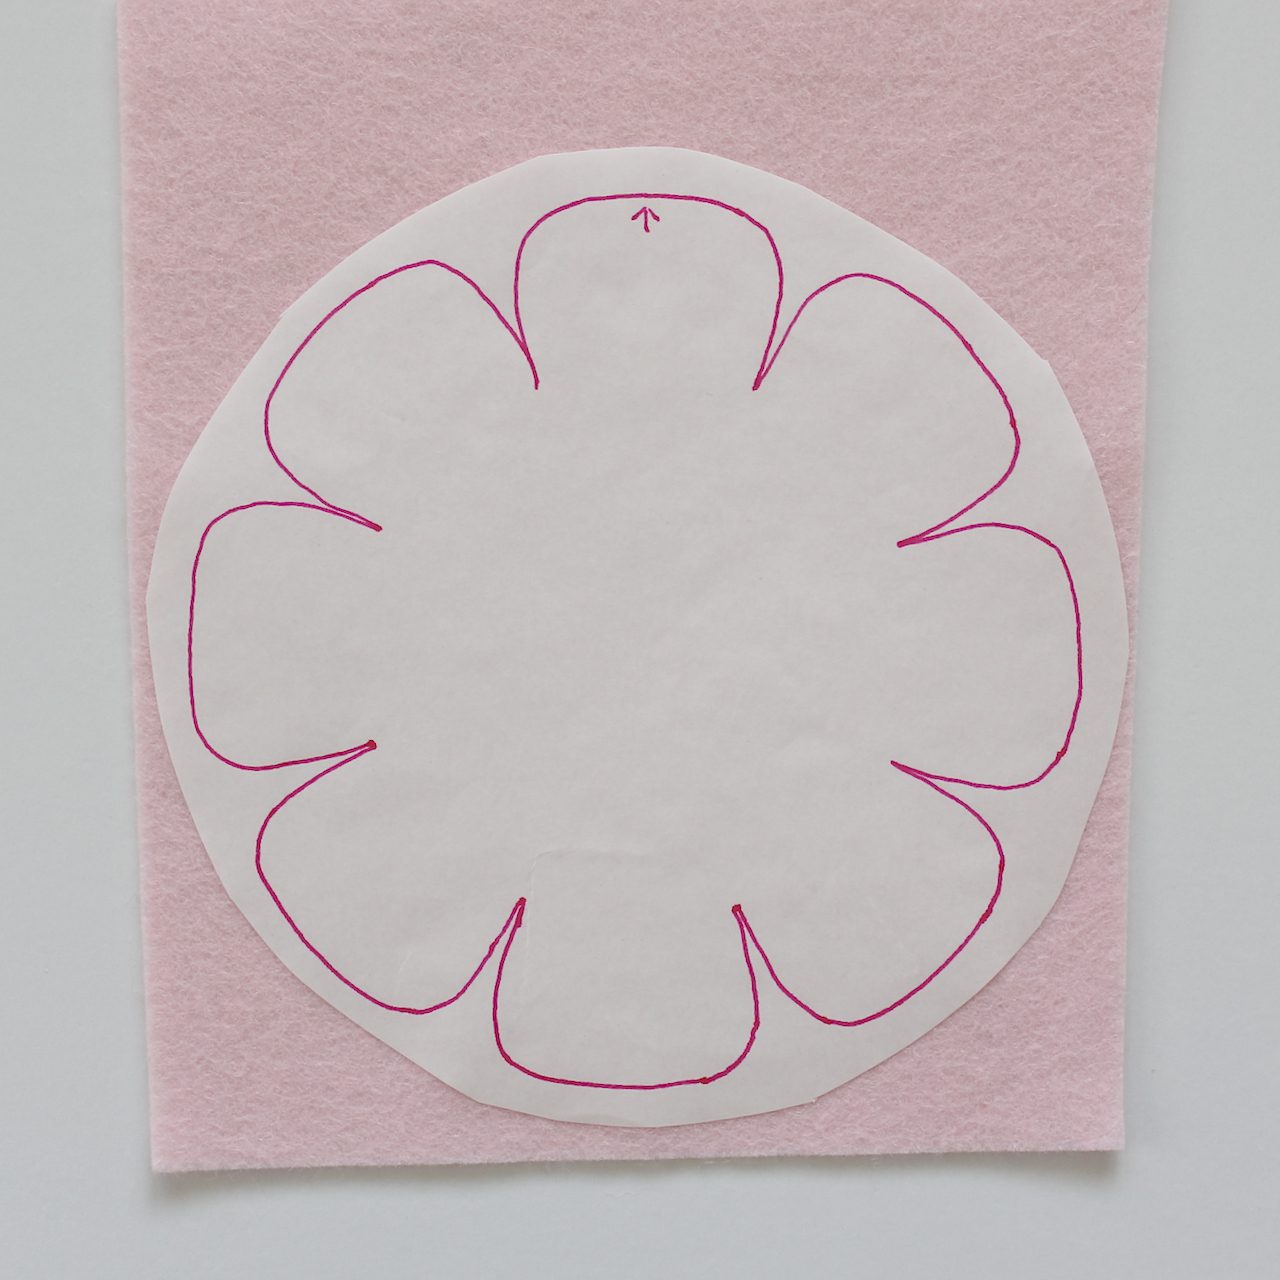
Trace the flower template onto the paper side of the freezer paper, making a mark (like the small arrow in the image below) to indicate the top of the template. Roughly cut around the outside, like you did with the heat bonding web.
Position the heat bonding web circle onto the wrong side of your chosen print fabric. Follow the manufacturer’s instructions for the heat bonding web, to secure it to the fabric with a warm iron.
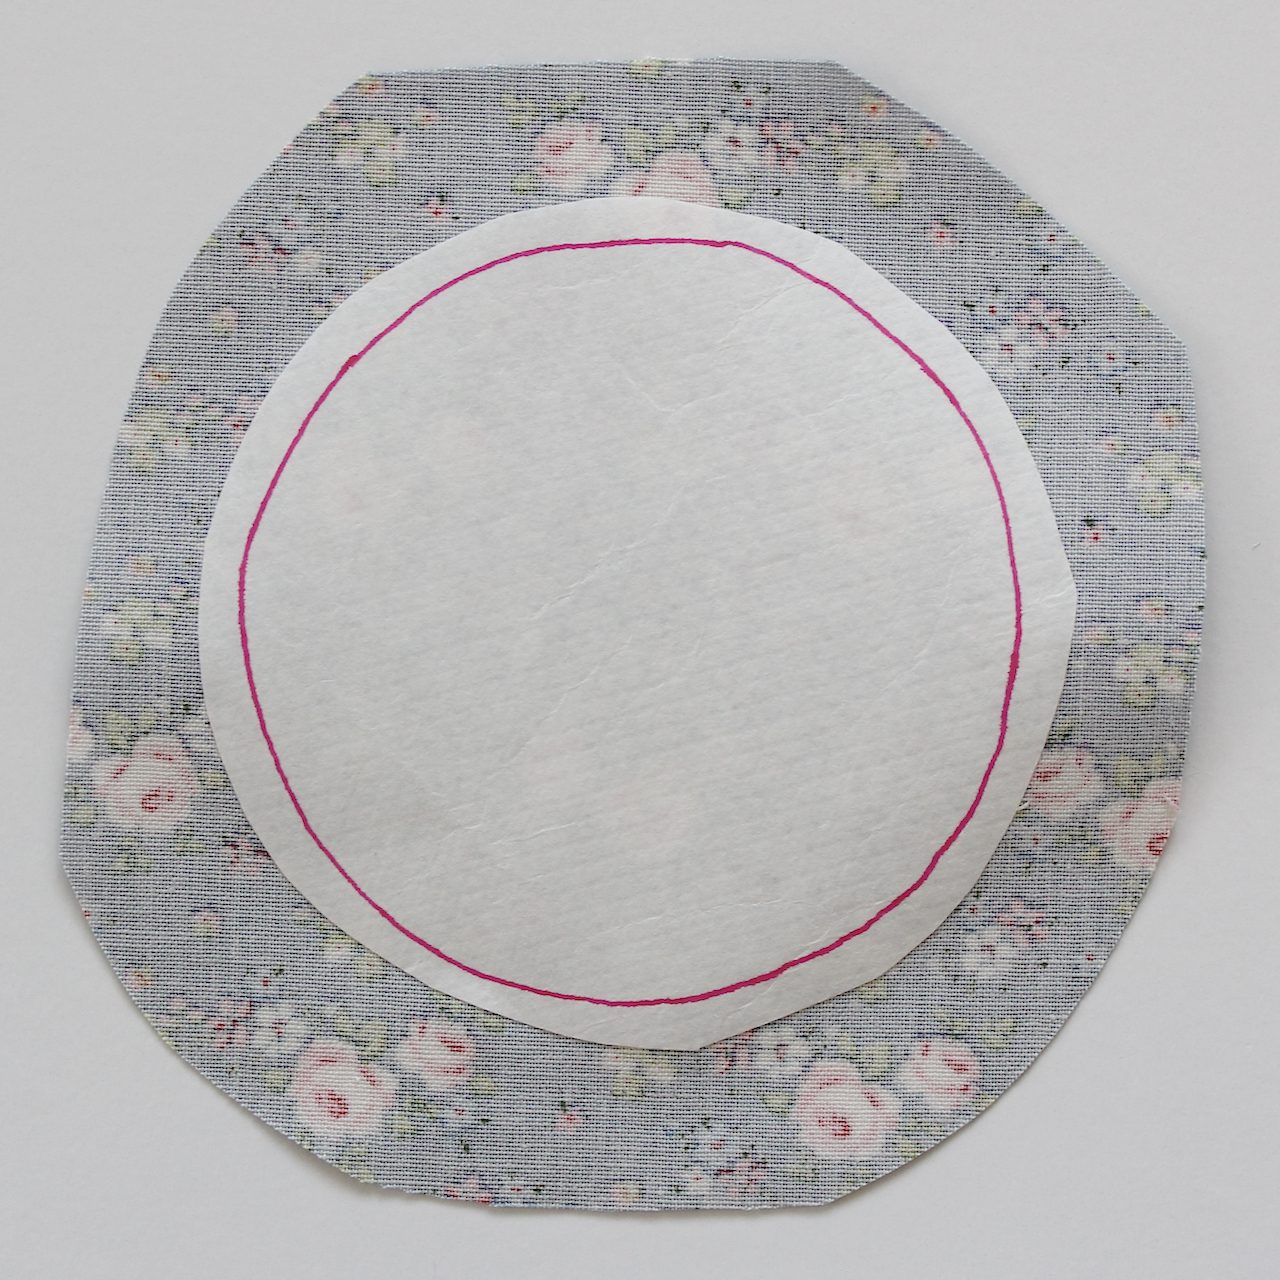
Cut out the template circle on the line, then peel off the backing paper. Set your fabric circle aside.

Position the freezer paper flower shape onto the felt and press carefully in place with a dry, warm iron. Note: use a press cloth or fabric scrap to cover the felt and paper, to avoid damaging the felt (especially if the felt is not 100% wool).
Cut out the felt flower on the template line. When you peel off the freezer paper, mark the top of the flower (where the arrow is) with a pin or clip.
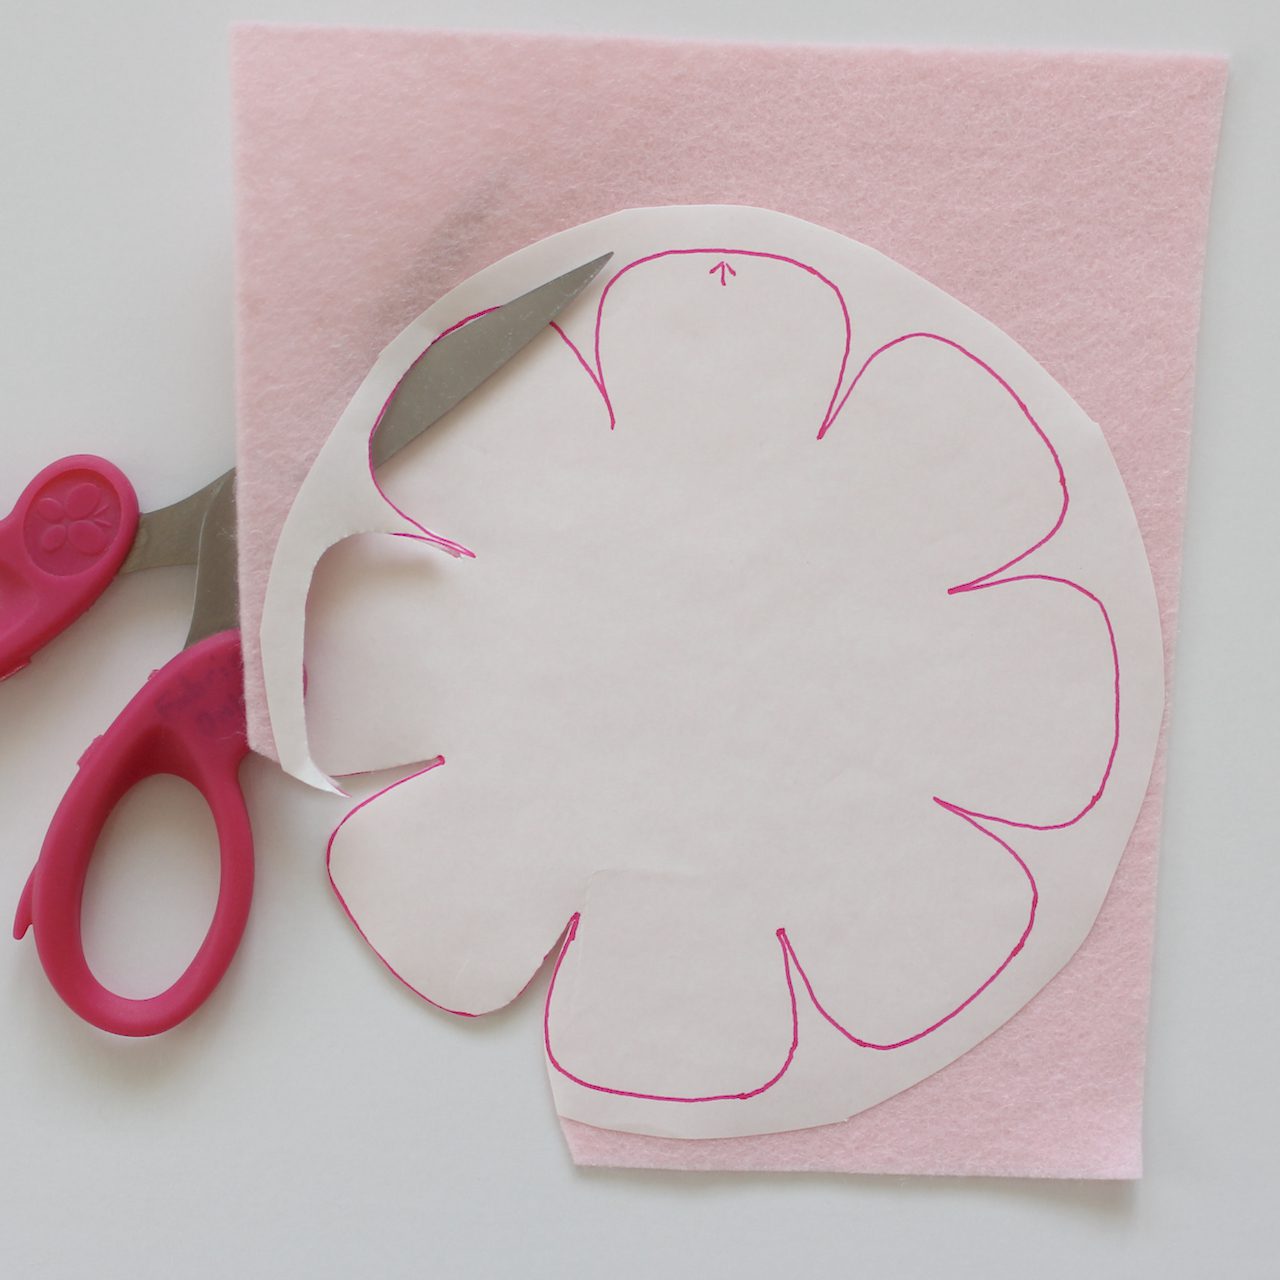
Use the same method (re-using the same freezer paper flower) to cut out a second identical felt flower. This time cut as close as you can to the template edge. Be sure to use a pin or clip to mark the top petal on this second felt flower, as you remove the freezer paper.
TIP: Put the flower template aside to re-use when you’d like to sew another coaster, as freezer paper can be used many times over!
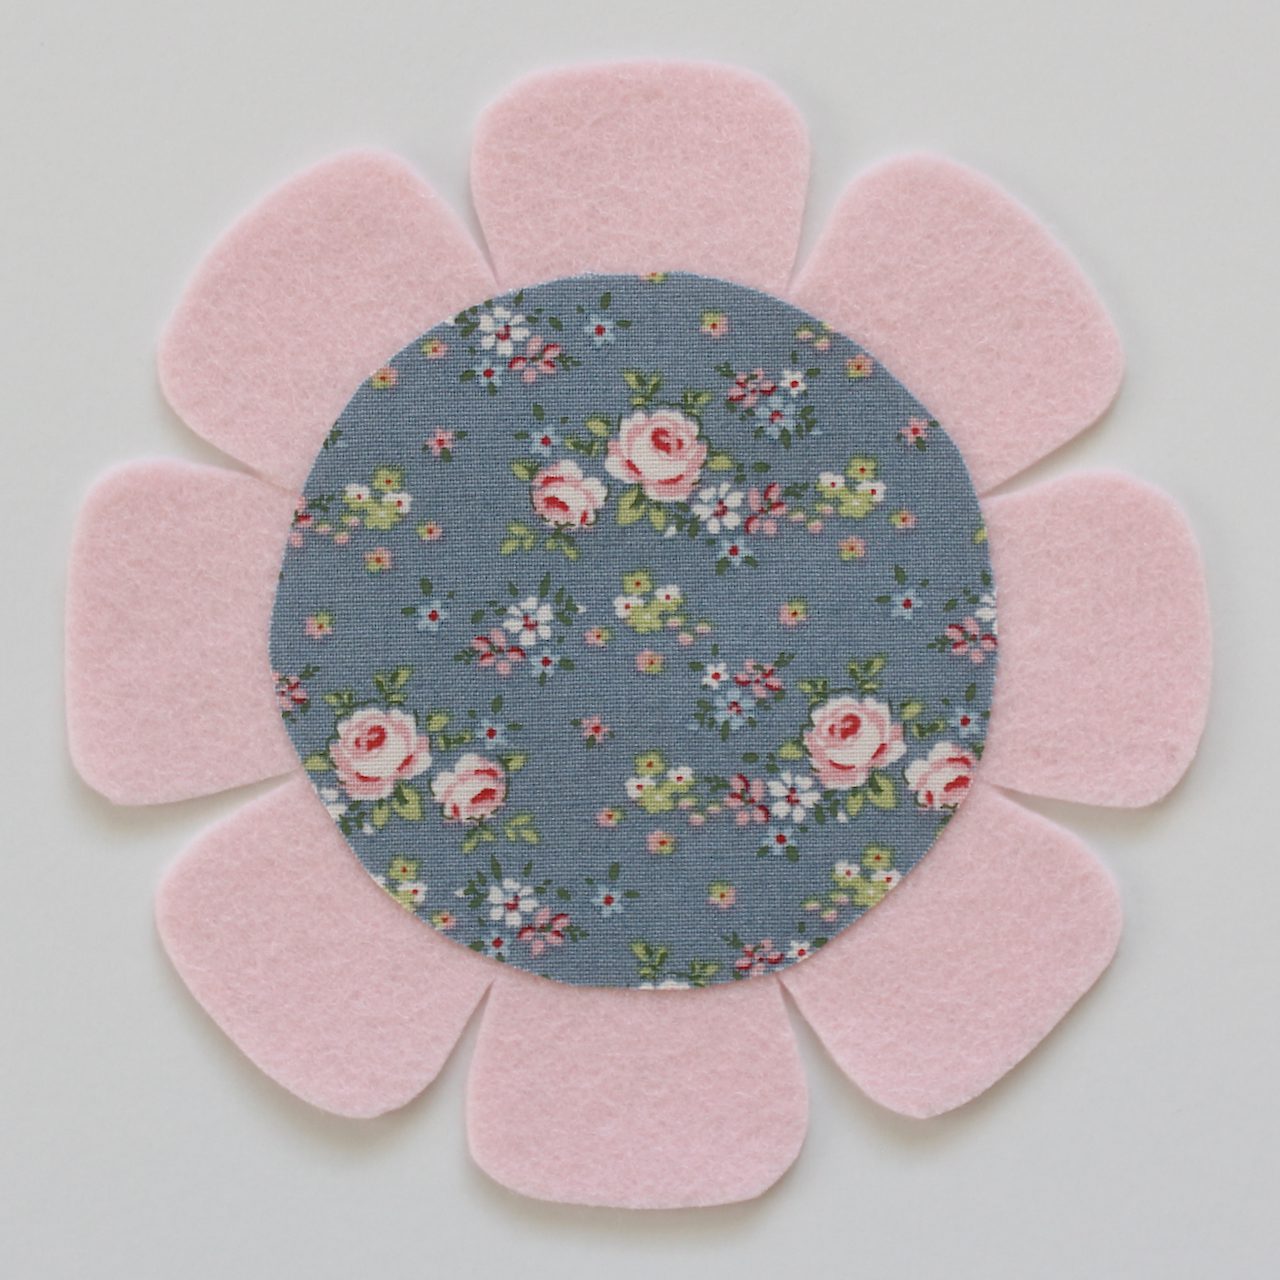
Centre the fabric circle on one of the felt flowers, so that the fabric is facing out. If your fabric is directional, make sure the pinned top petal is at the top. Following the manufacturer’s instructions iron the fabric circle in place with a warm, dry iron. Again, use a press cloth to protect your fabric and felt.
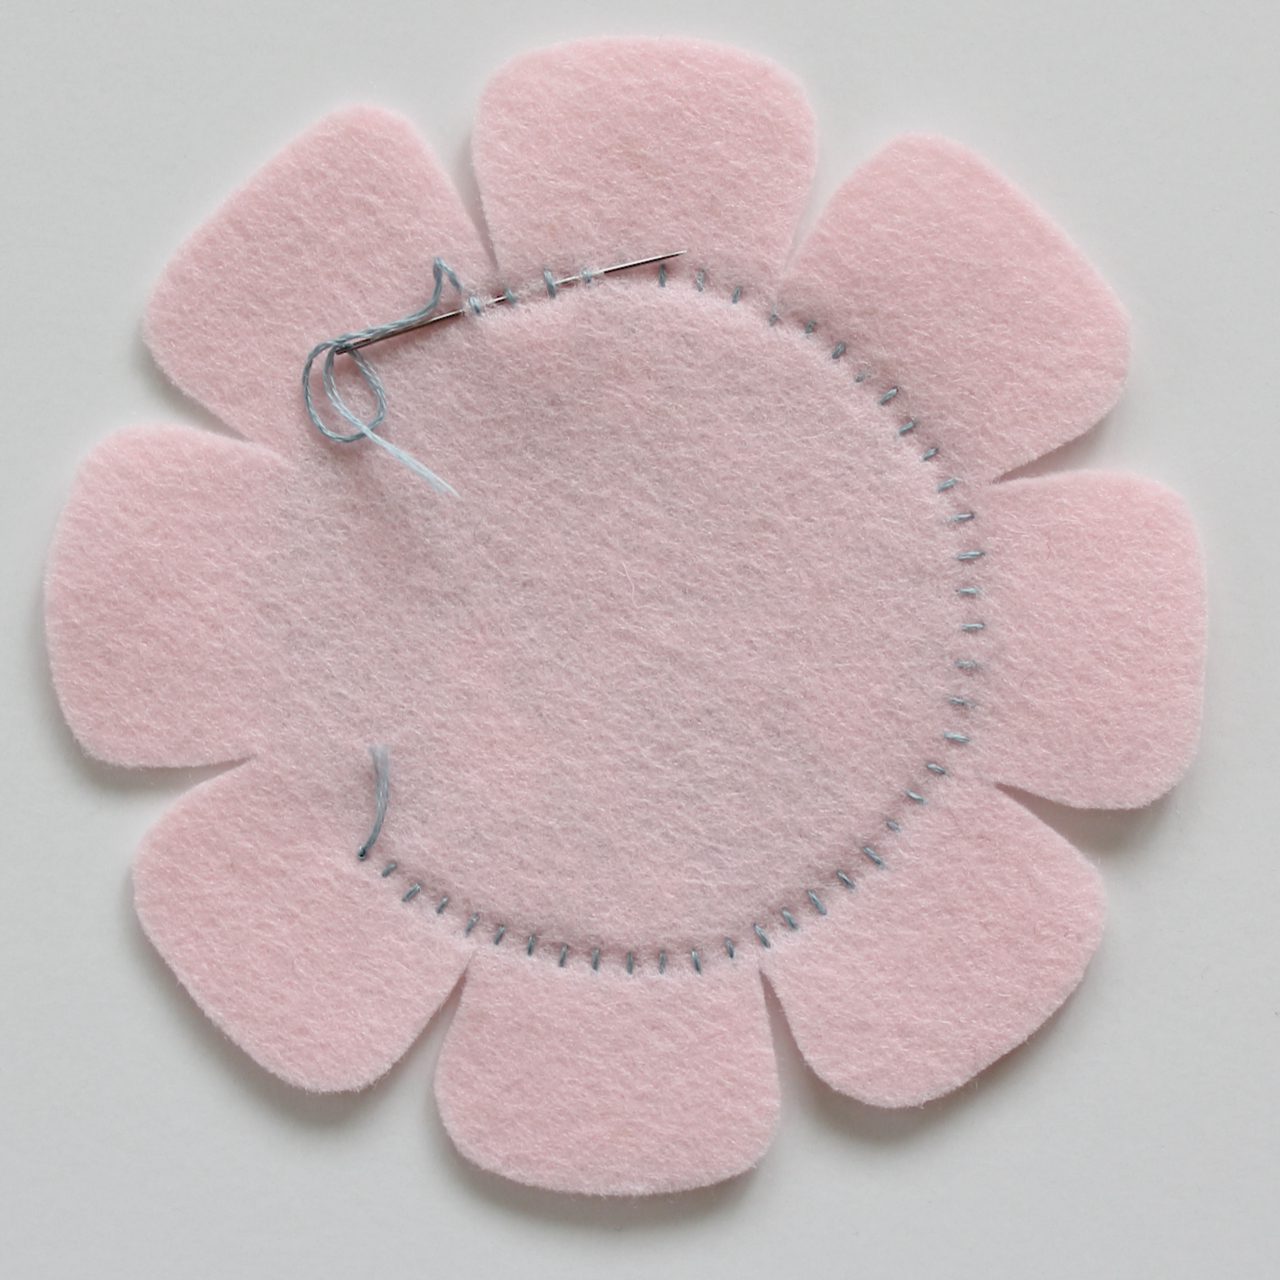
Thread your embroidery needle with two strands of embroidery floss to match your fabric print. Blanket stitch around the outside edge of the fabric circle. If you need a refresher on blanket stitch, please visit the Molly and Mama Stitch Library.
Secure your stitching well on the back of the flower as you change thread, or when you finish.
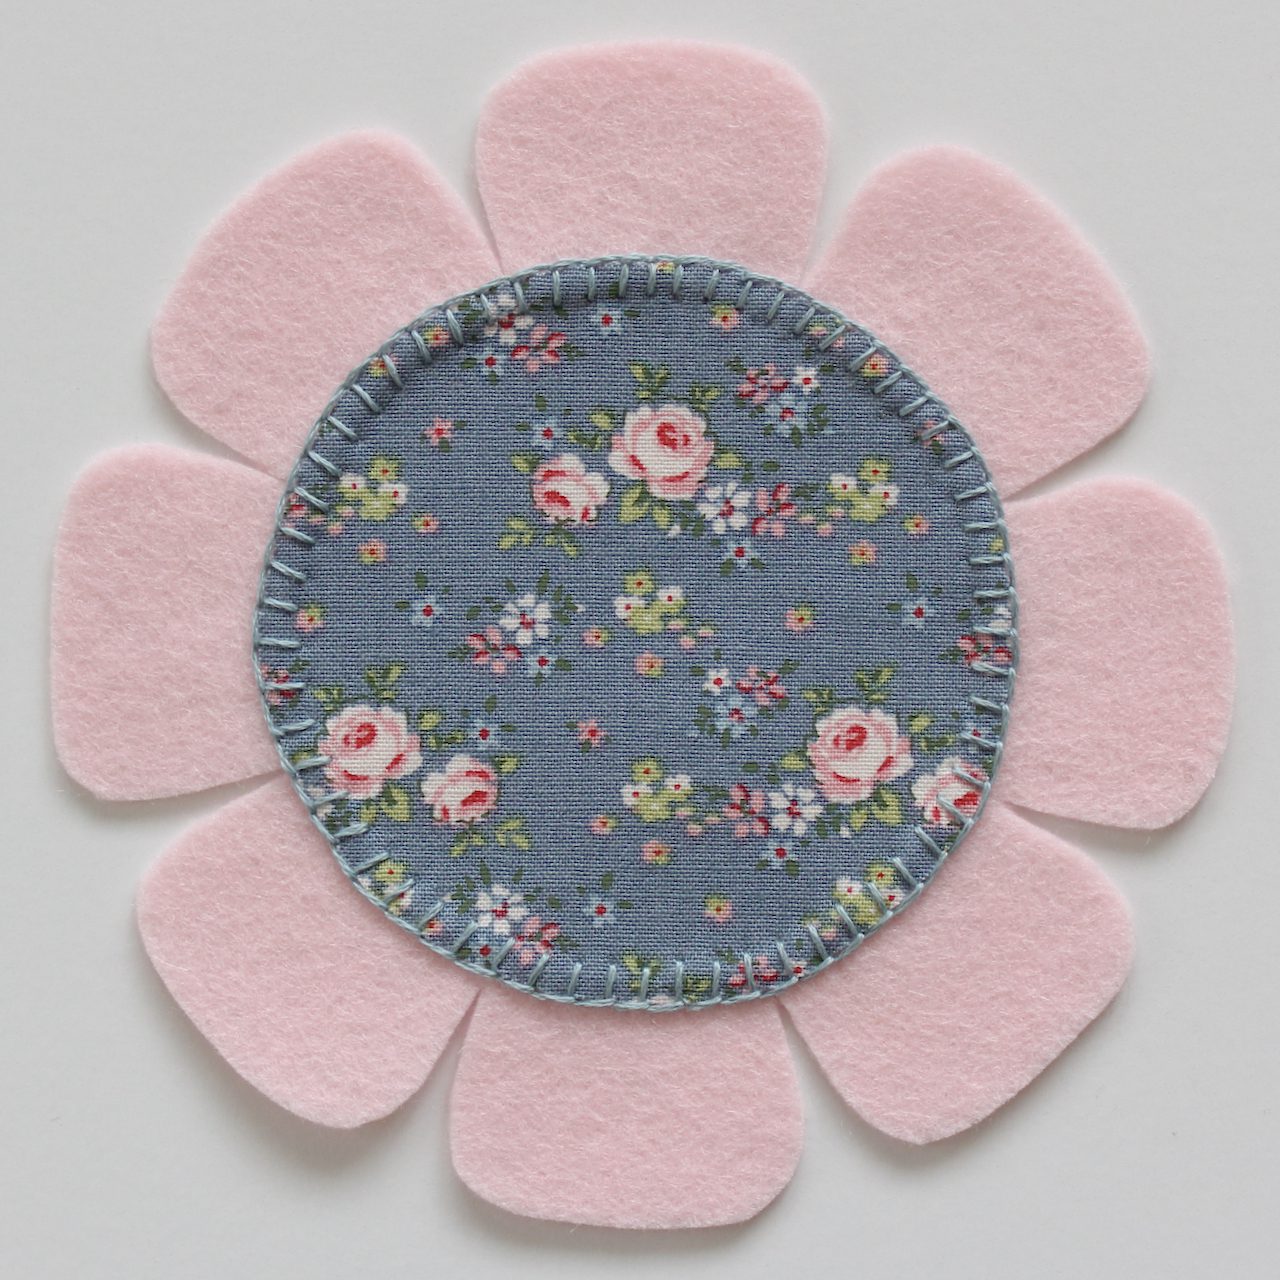
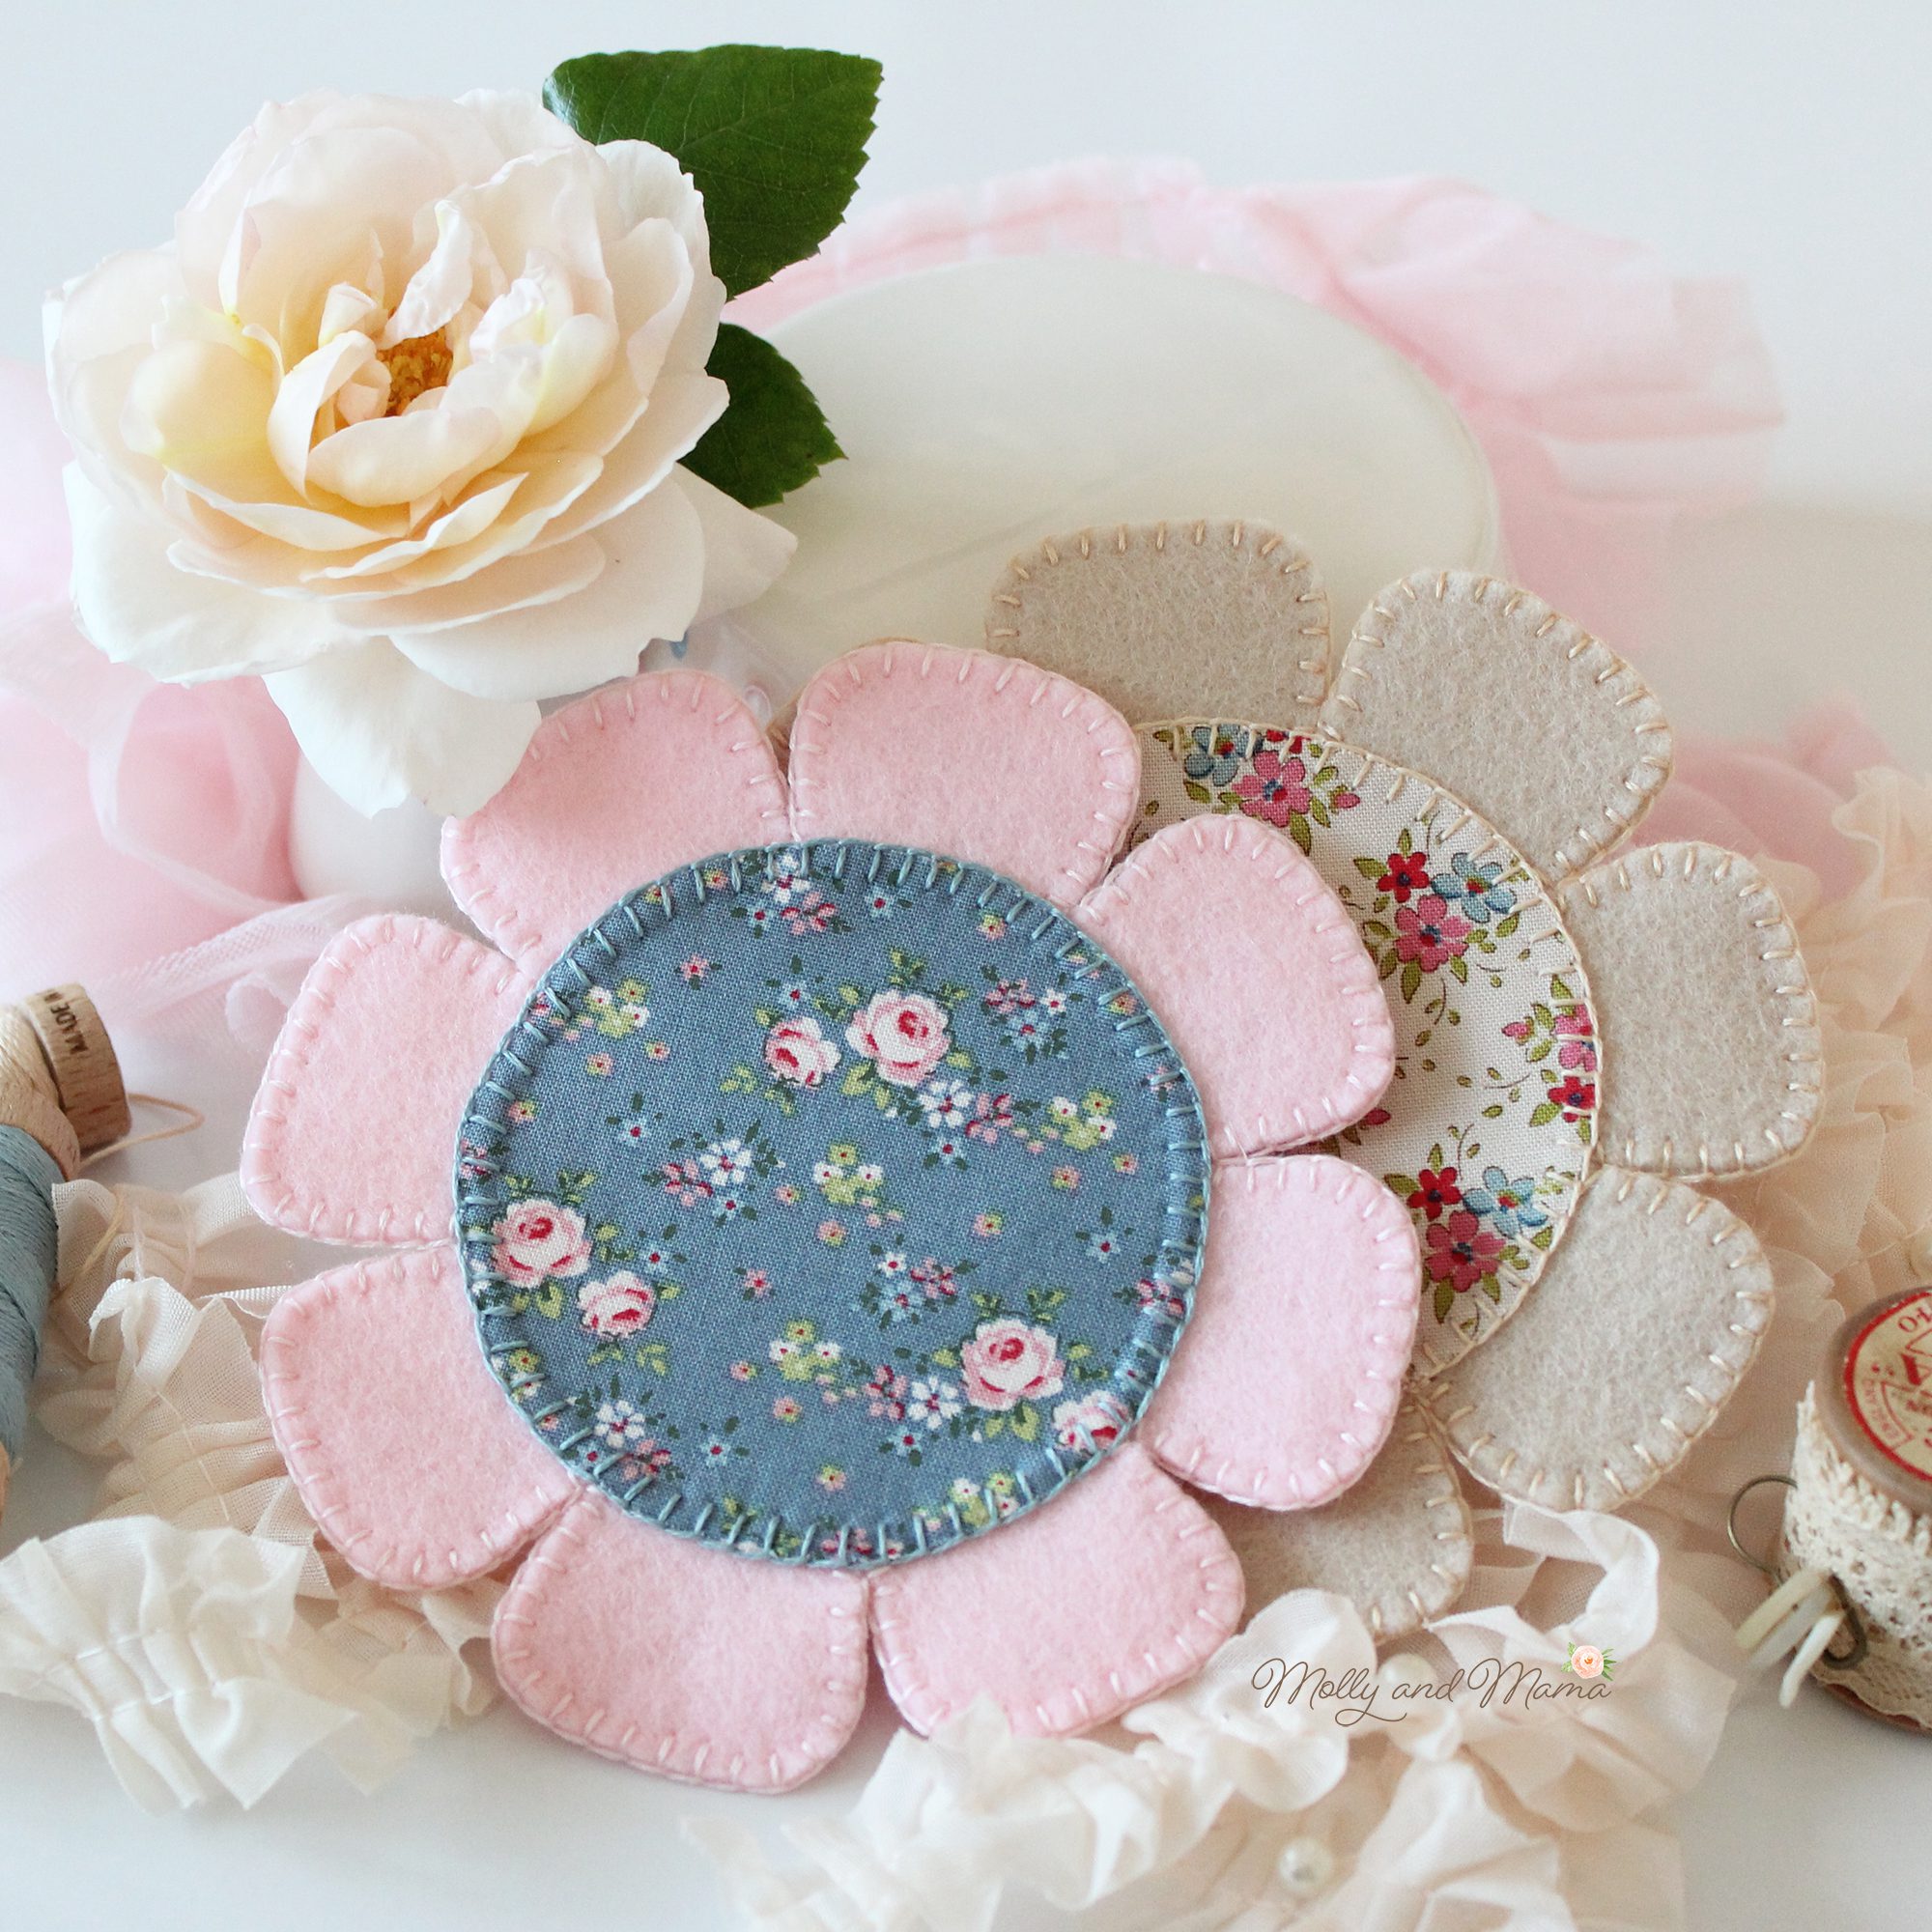
The finished flower front will look like this;
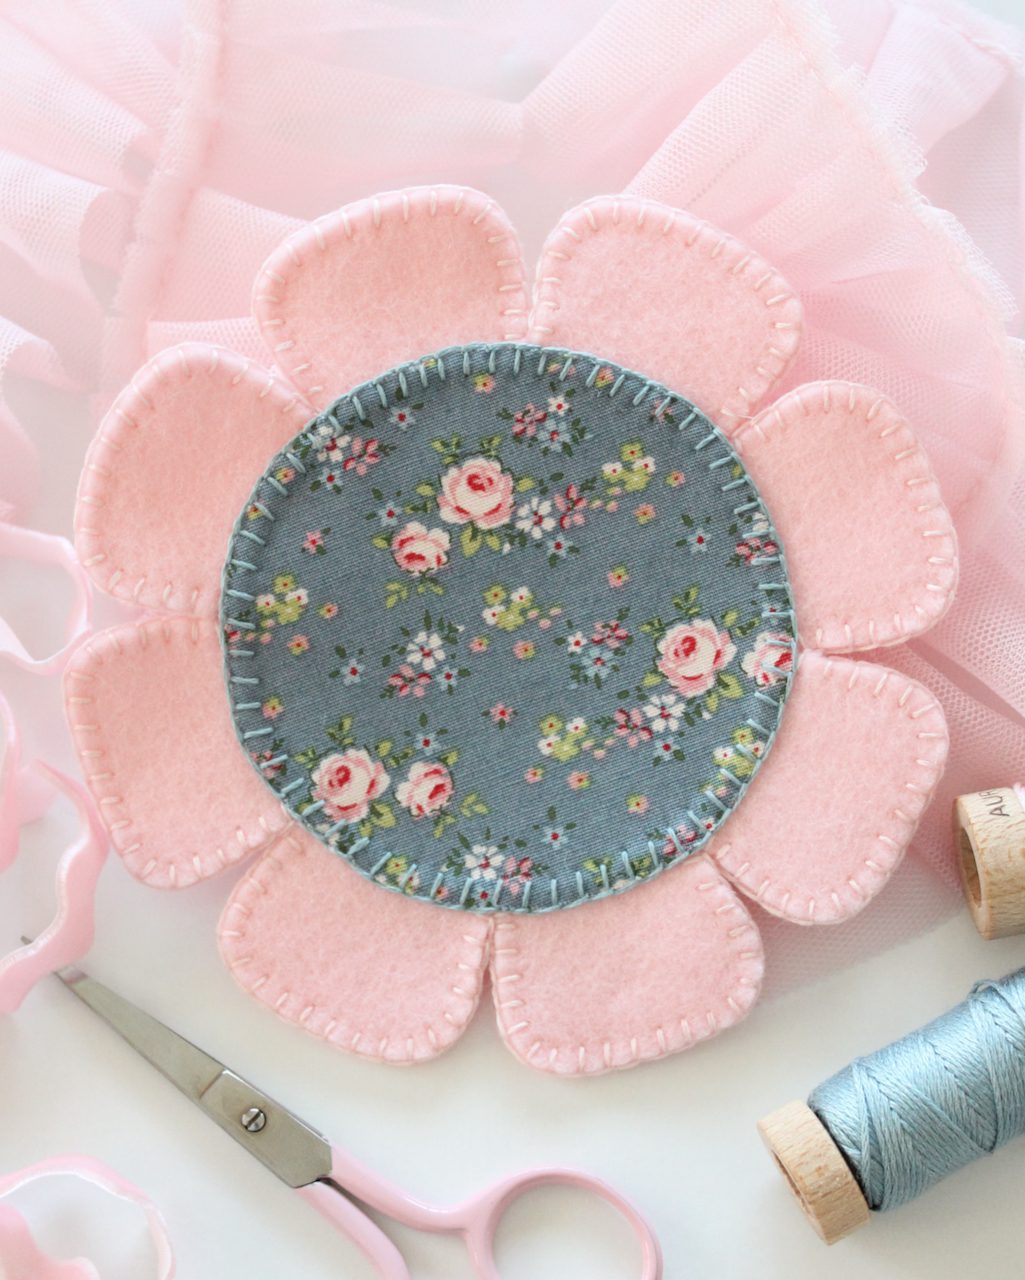
Pin the second felt flower behind the first (making sure the top petals match each other). Thread your needle with two strands of embroidery floss to match your felt colour. Blanket stitch the raw edges together, sewing around the outside edge of each petal until you return to the starting point. Hide your knots and the end of your floss on the inside of the two felt layers, as you start, as you change threads and when you finish. Your completed coaster is all ready for use.
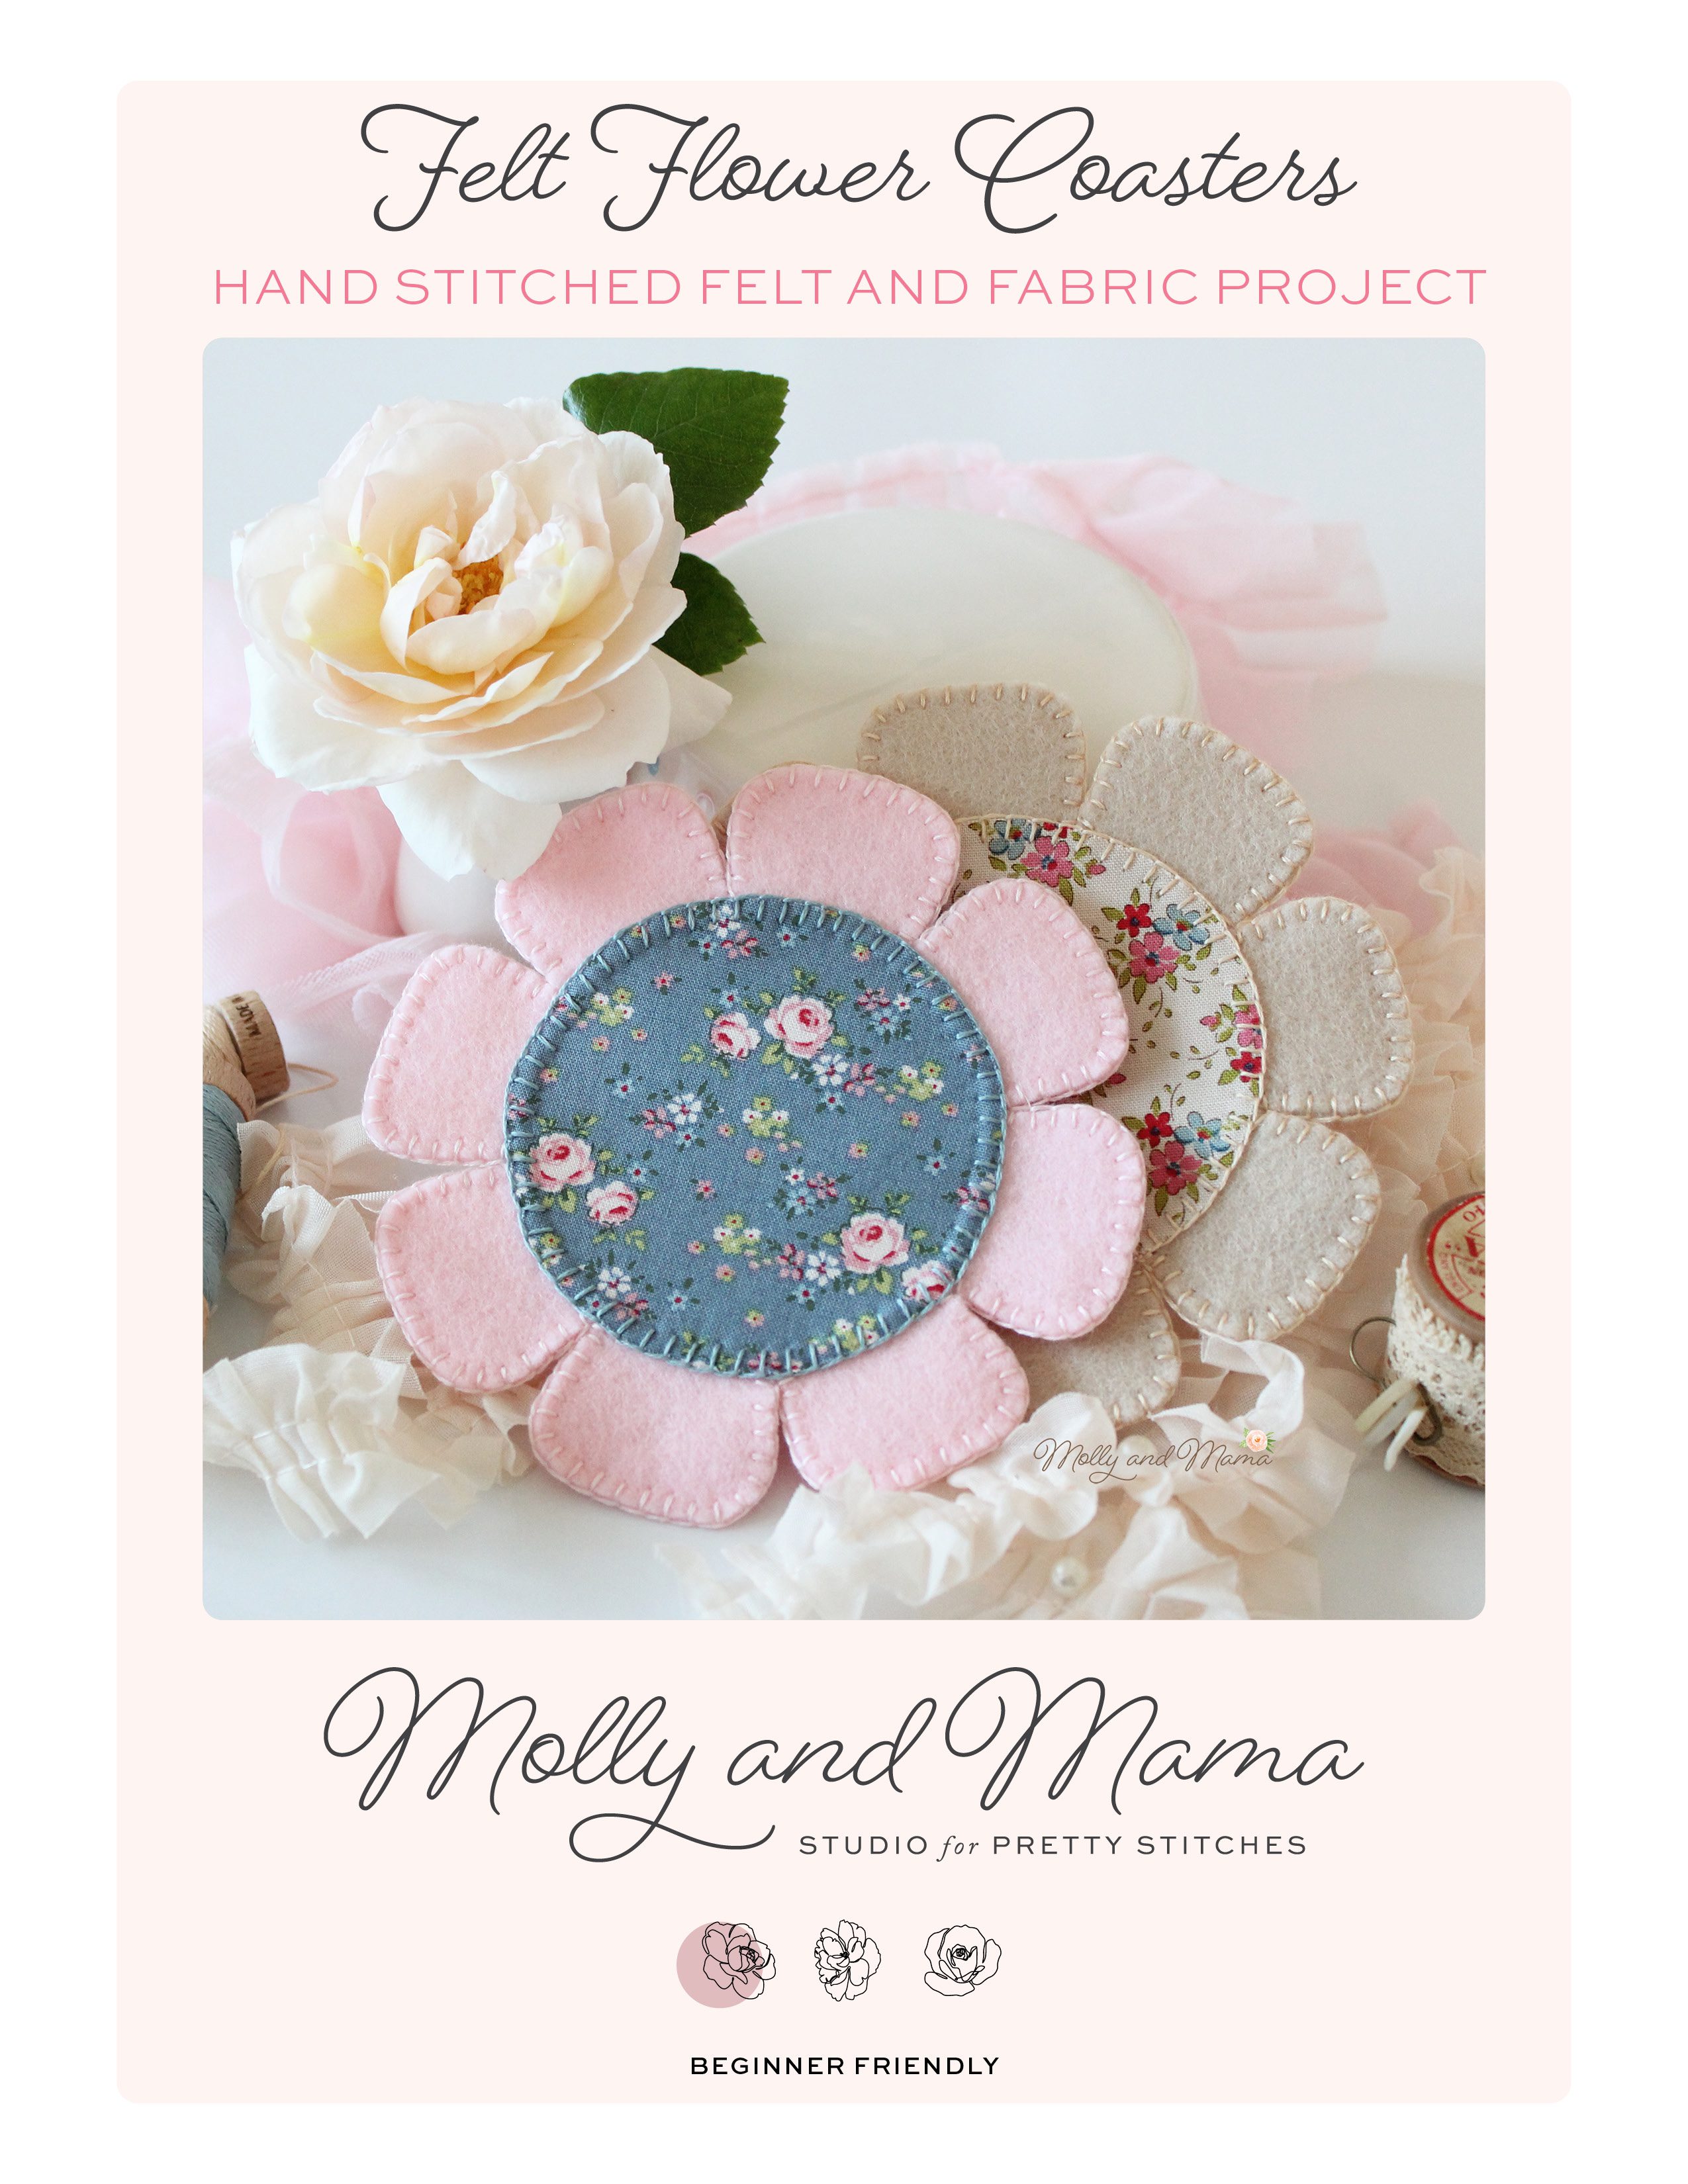
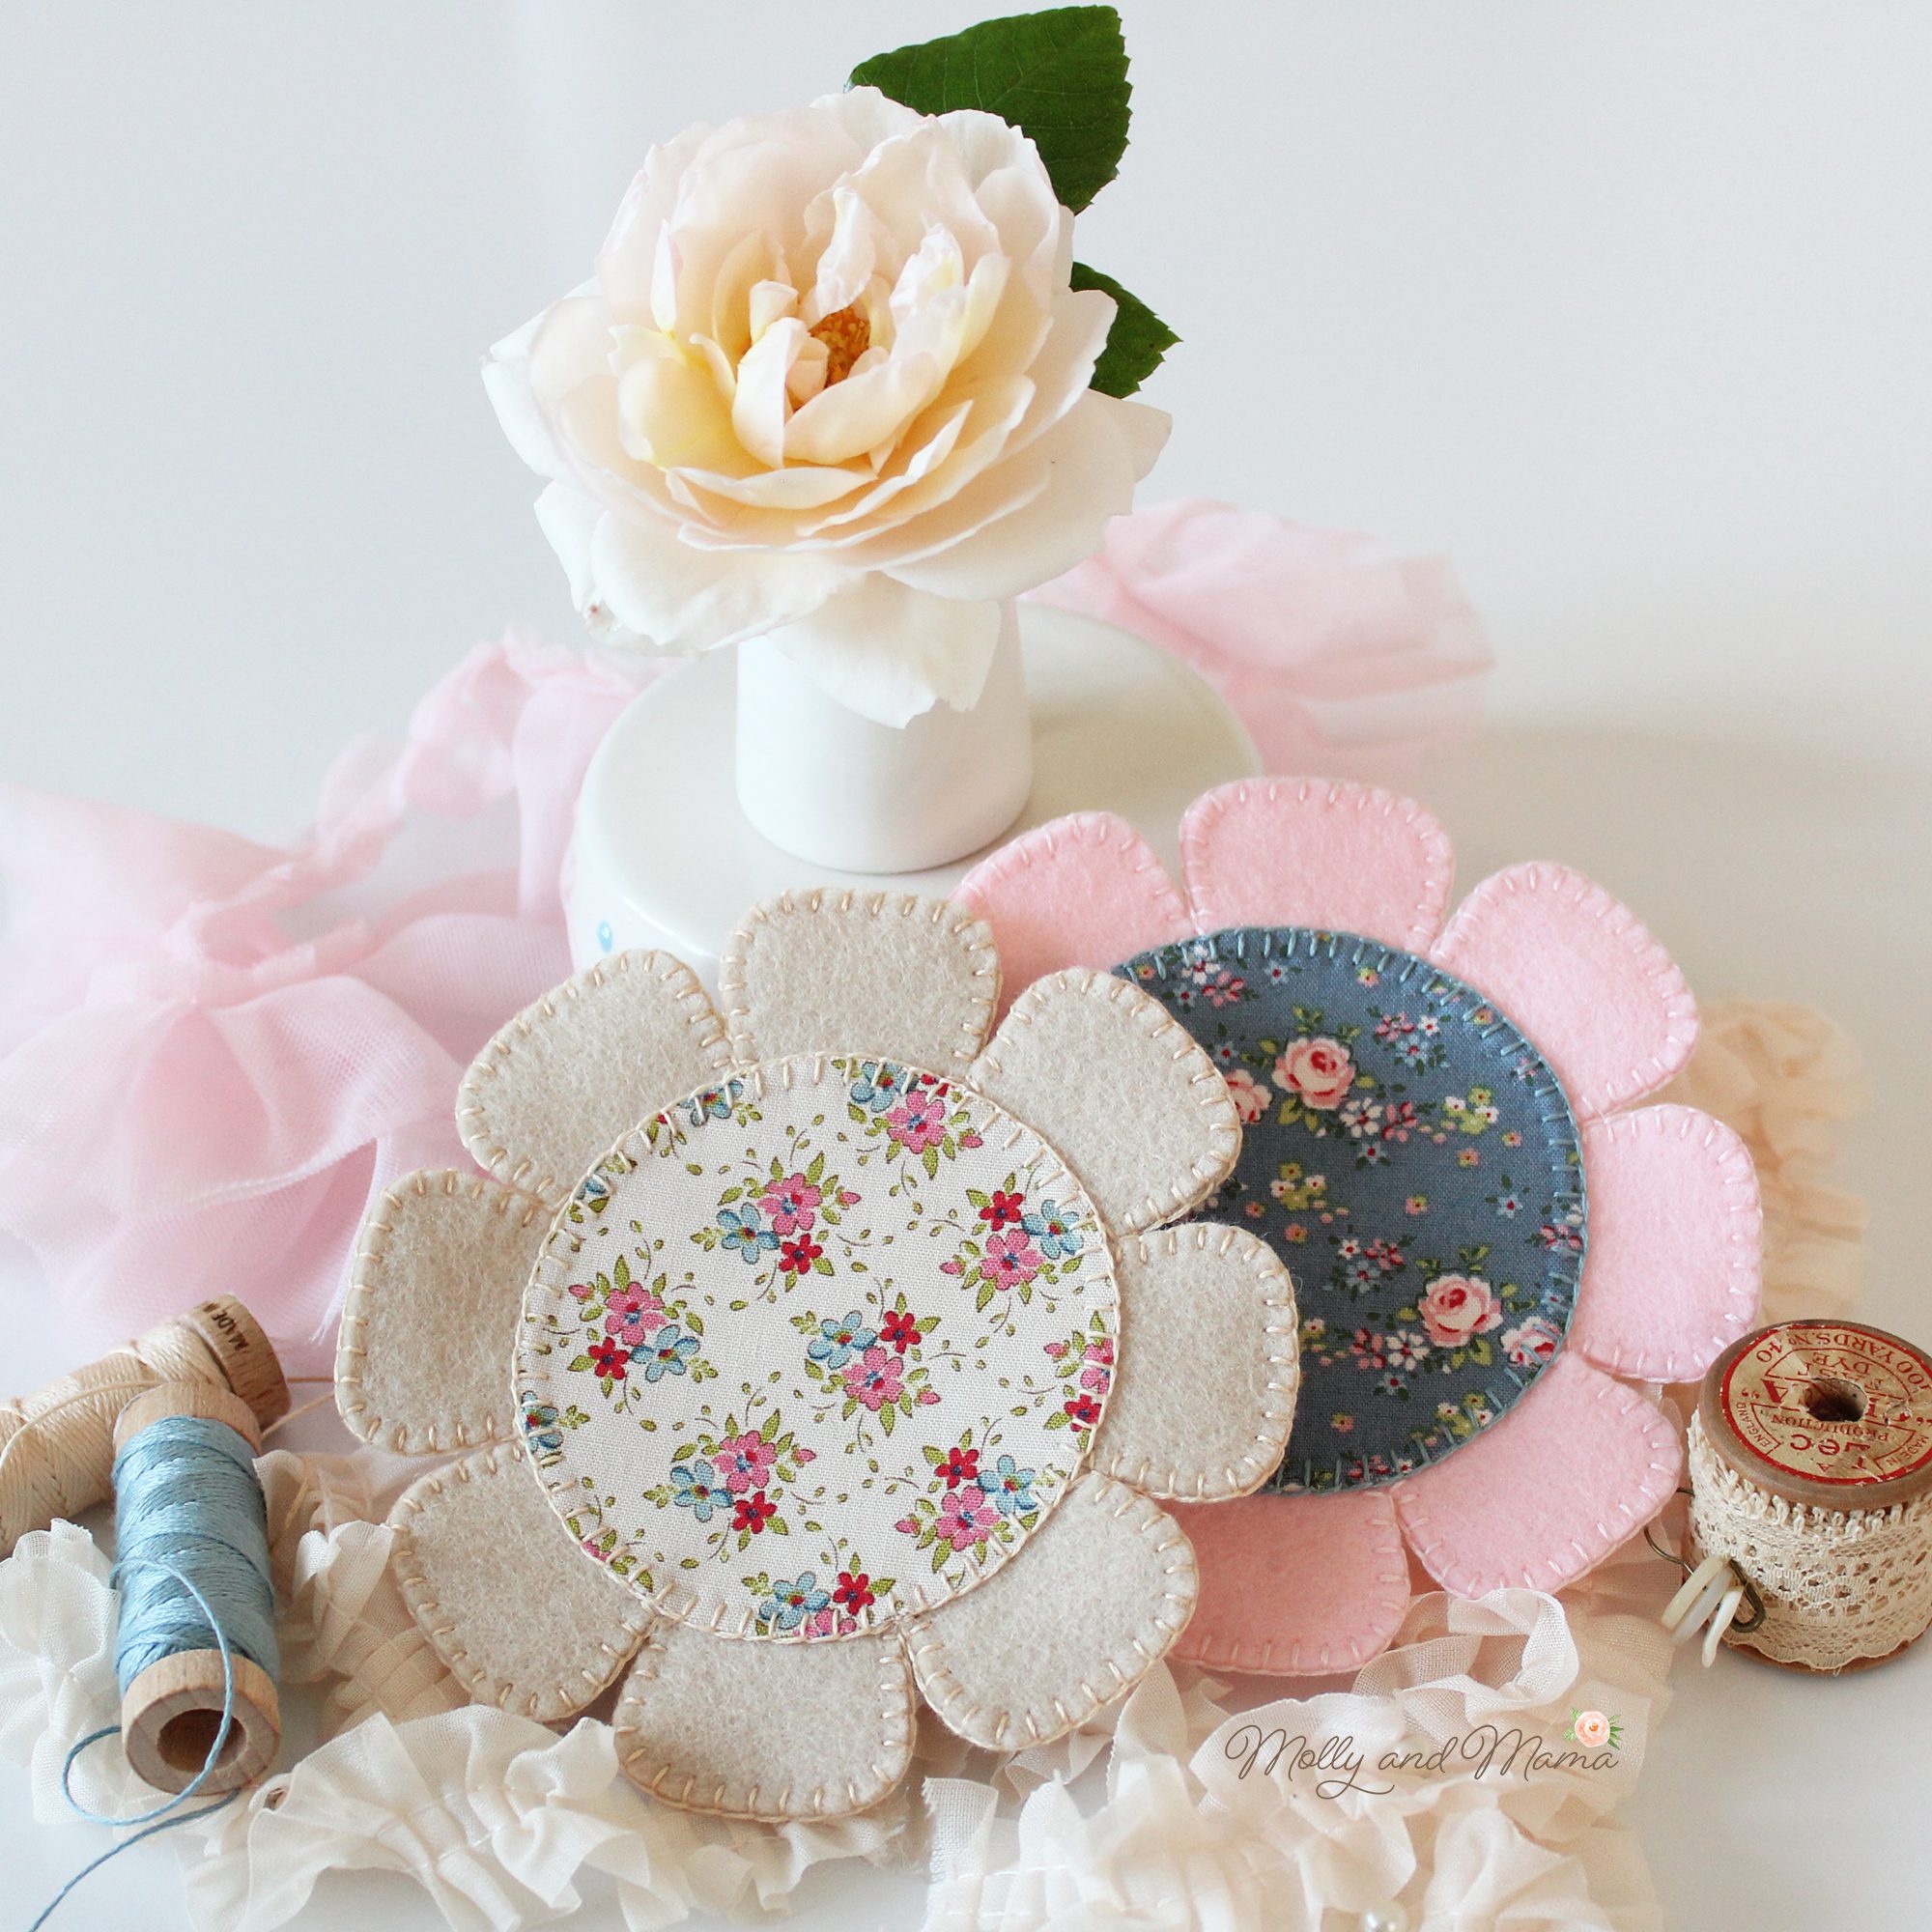
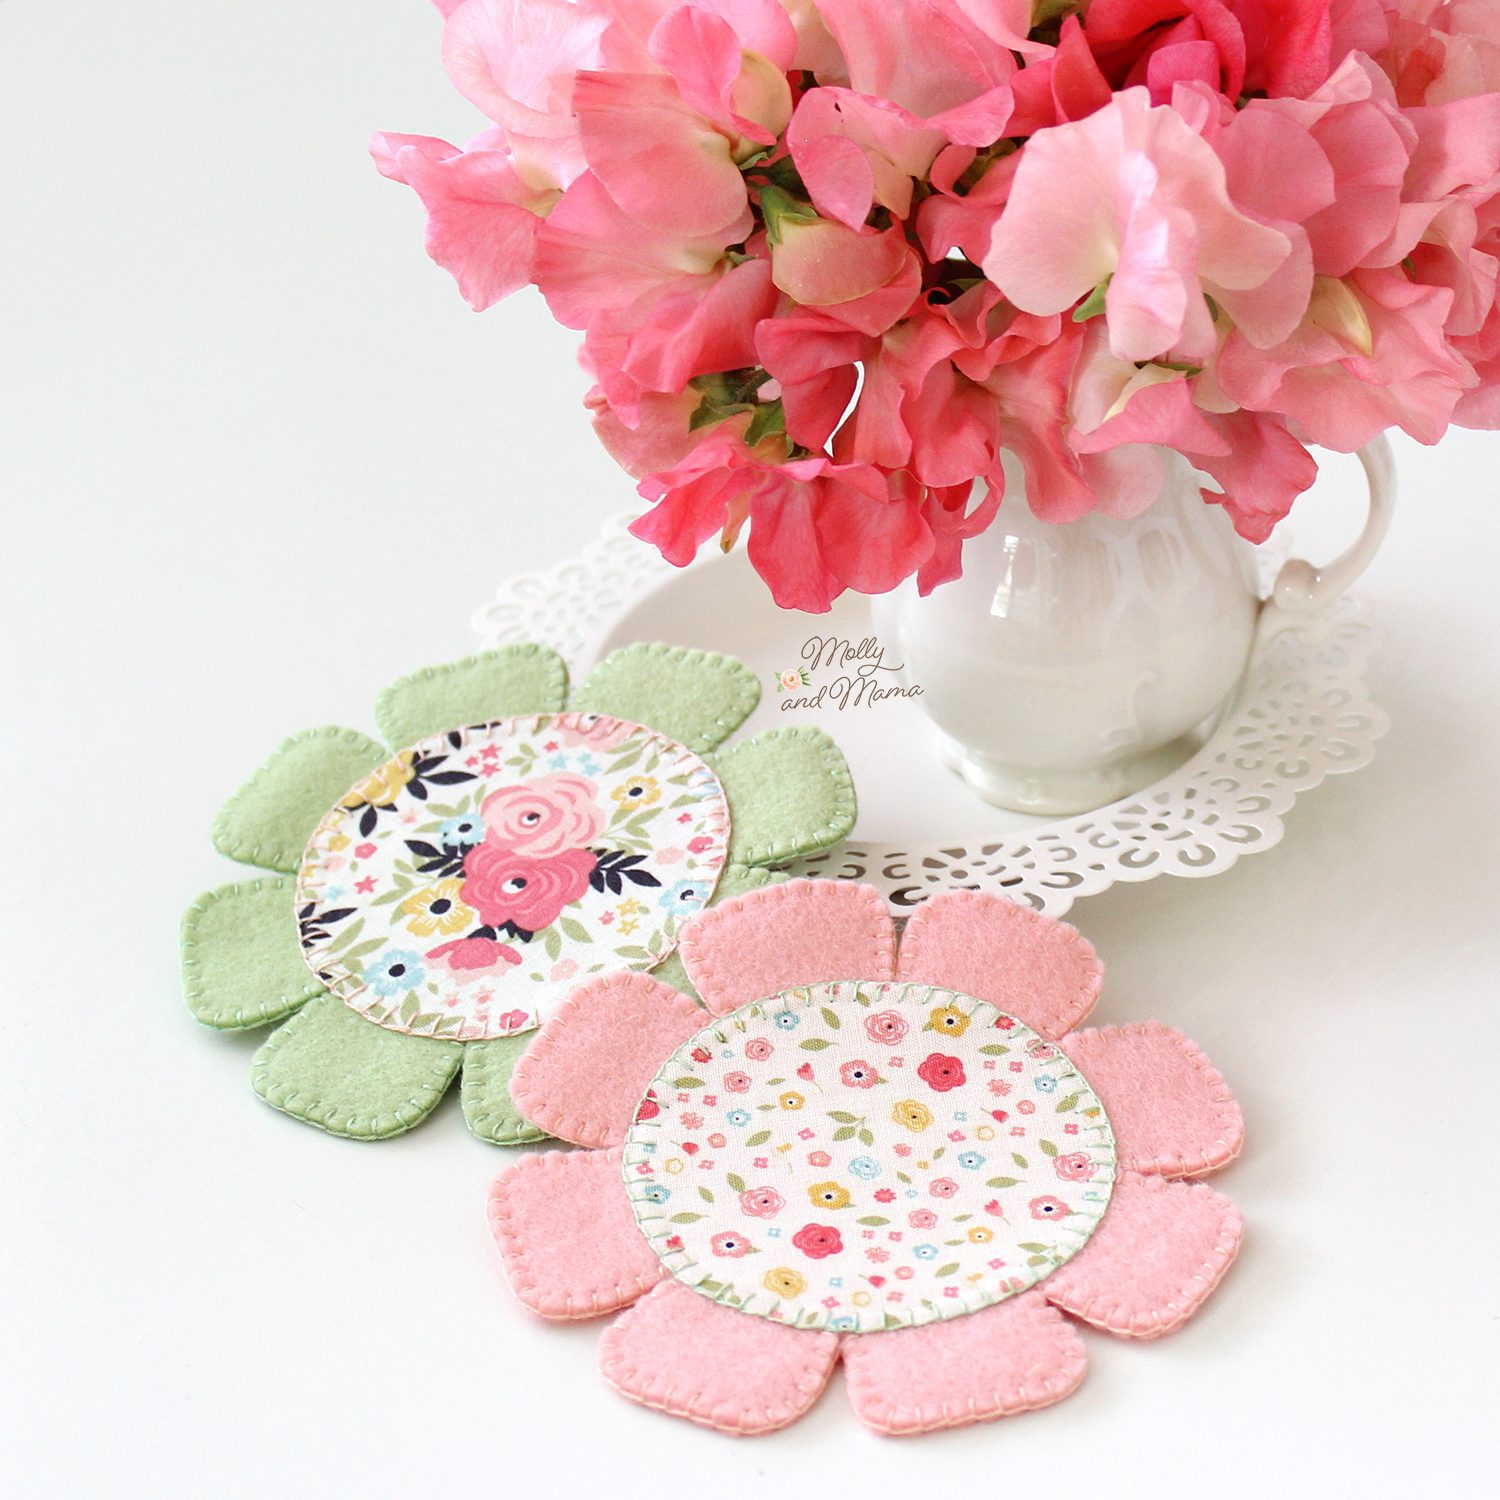
I’ve made several of these now and I love choosing different fabric scraps and felt colours to match. They look so pretty!
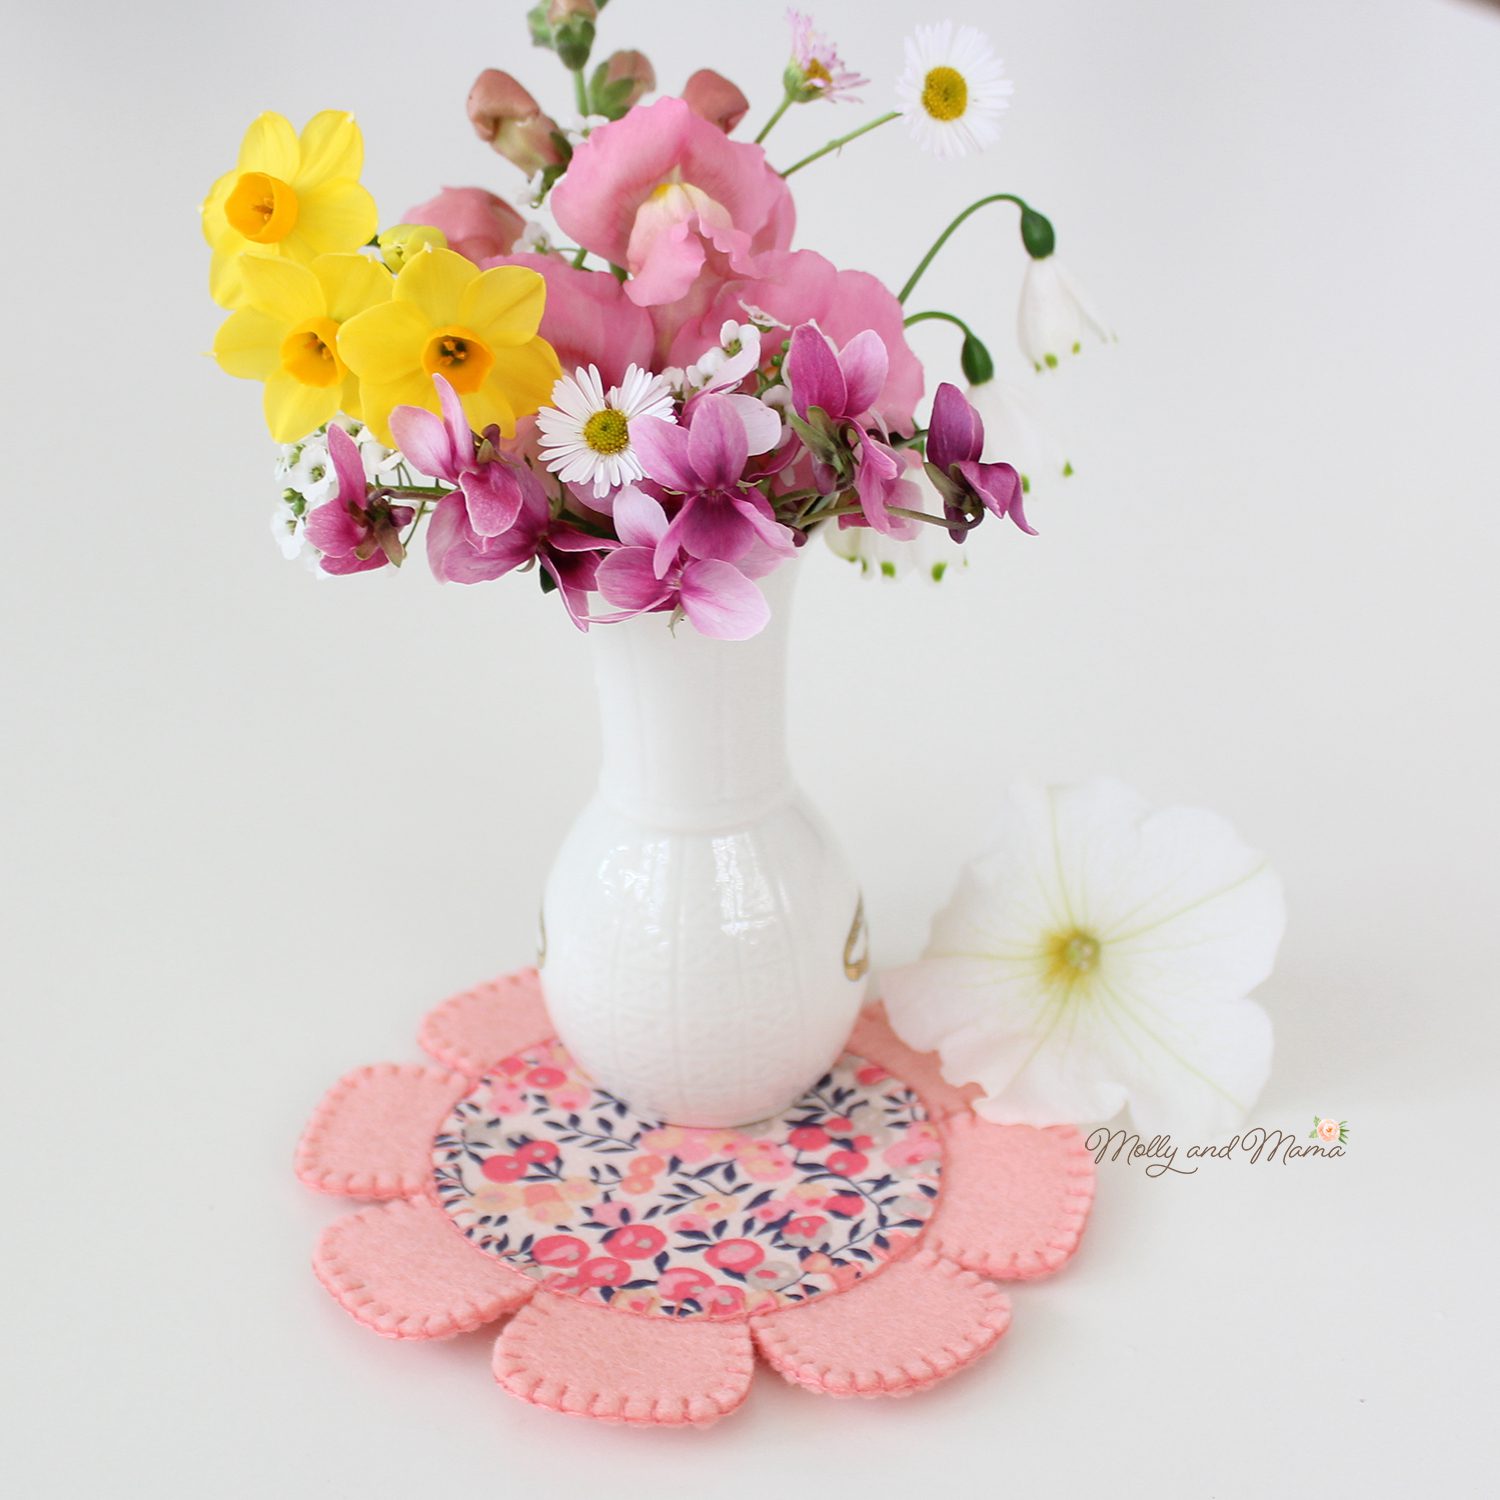
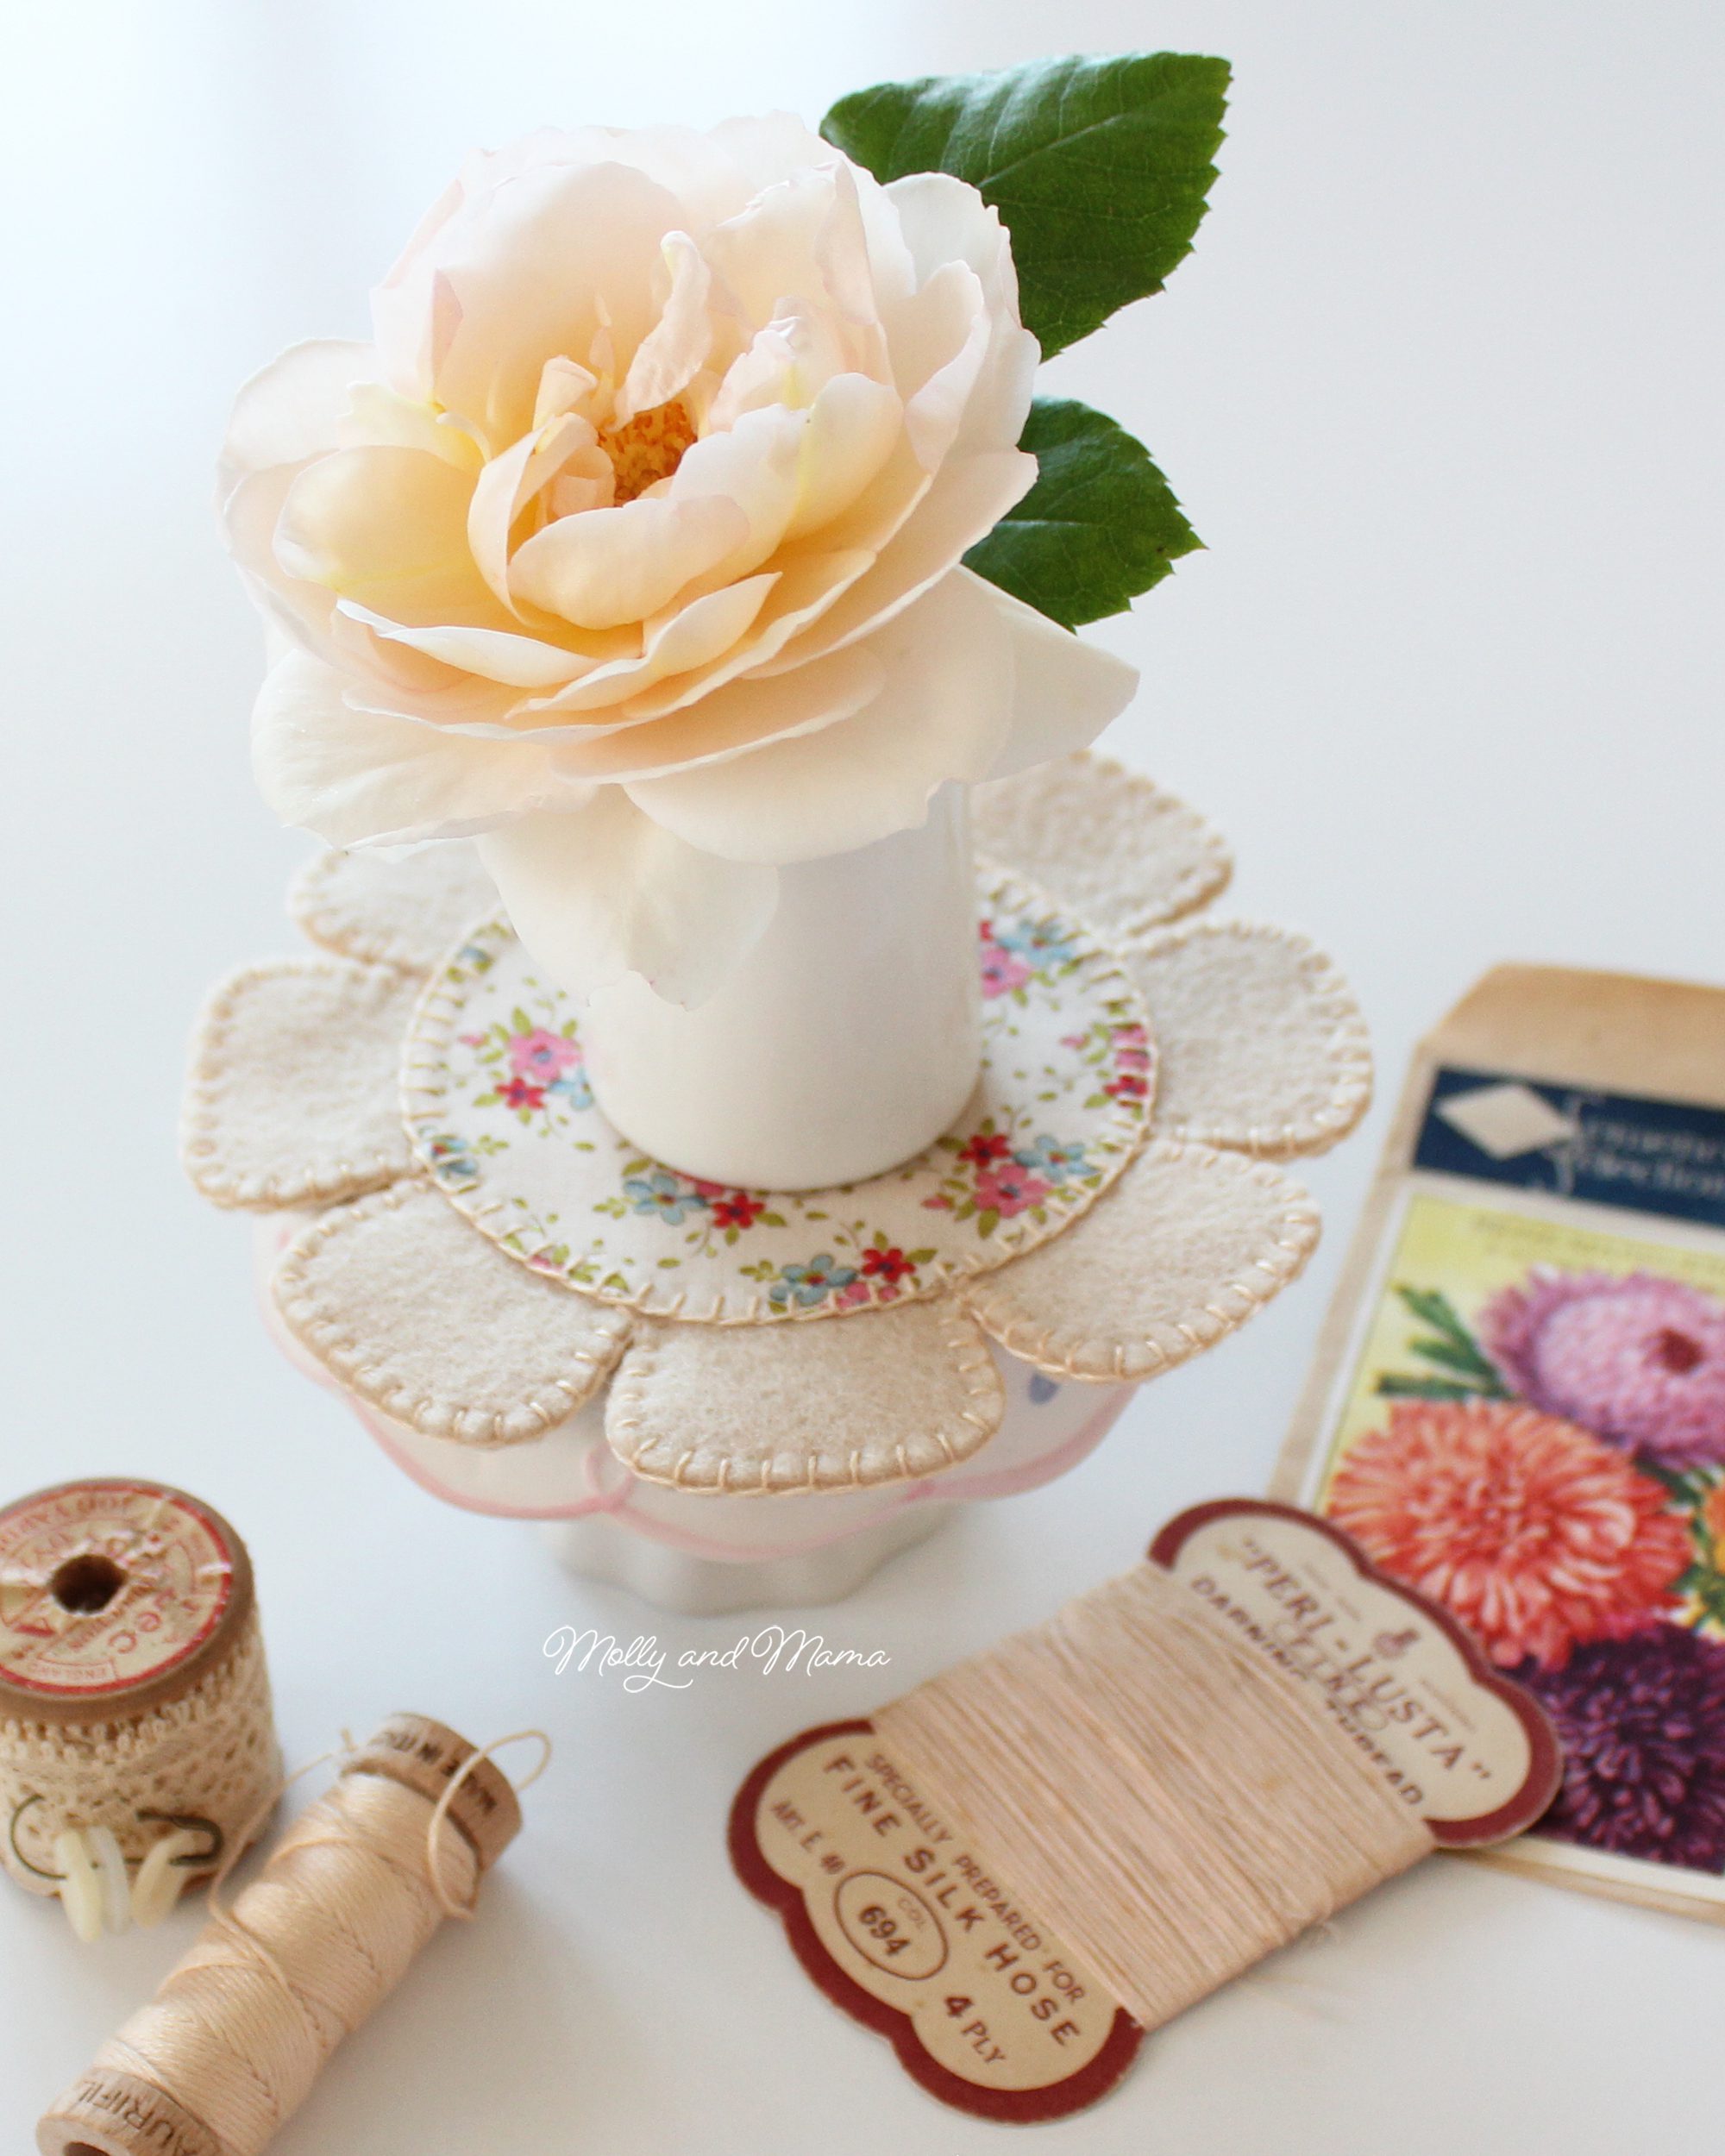
I use these under my vases of flowers. So they’re practical as well as pretty.
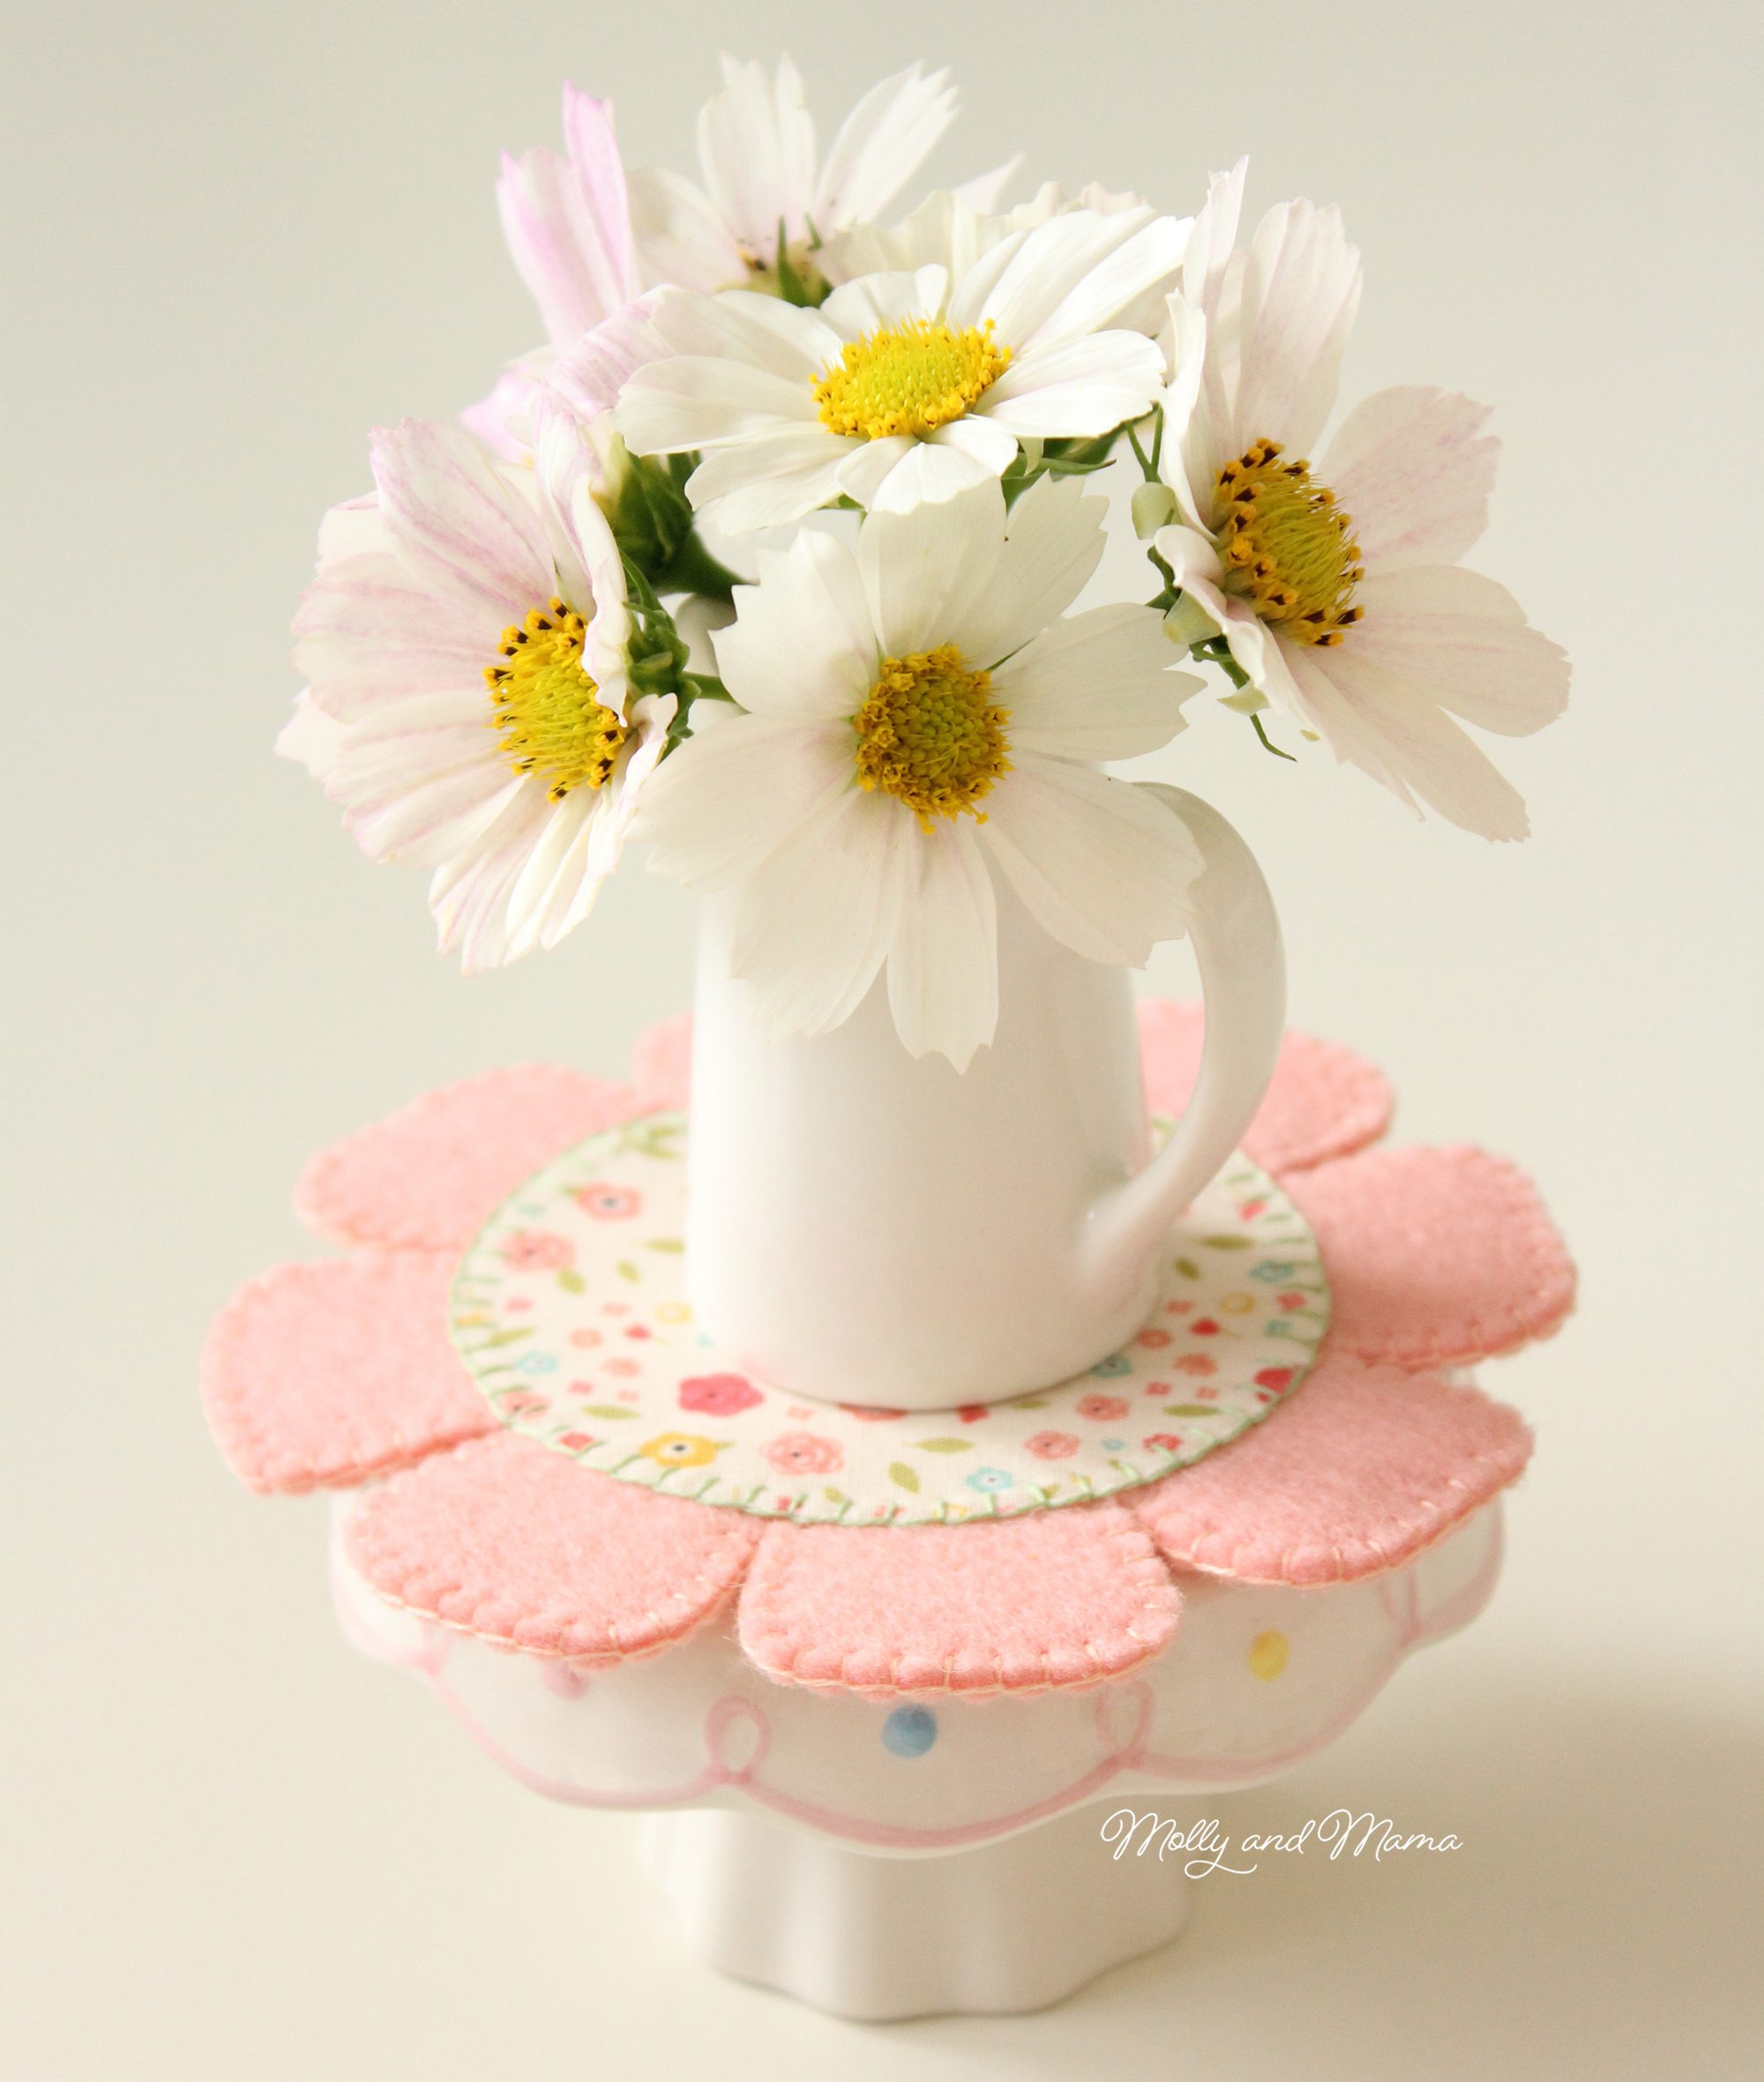
You could also use them under your tea cups and mugs. What a lovely addition to your table setting. I have hand washed these before with great success too!
I really hope you enjoy sewing them. Please be sure to share if you do.

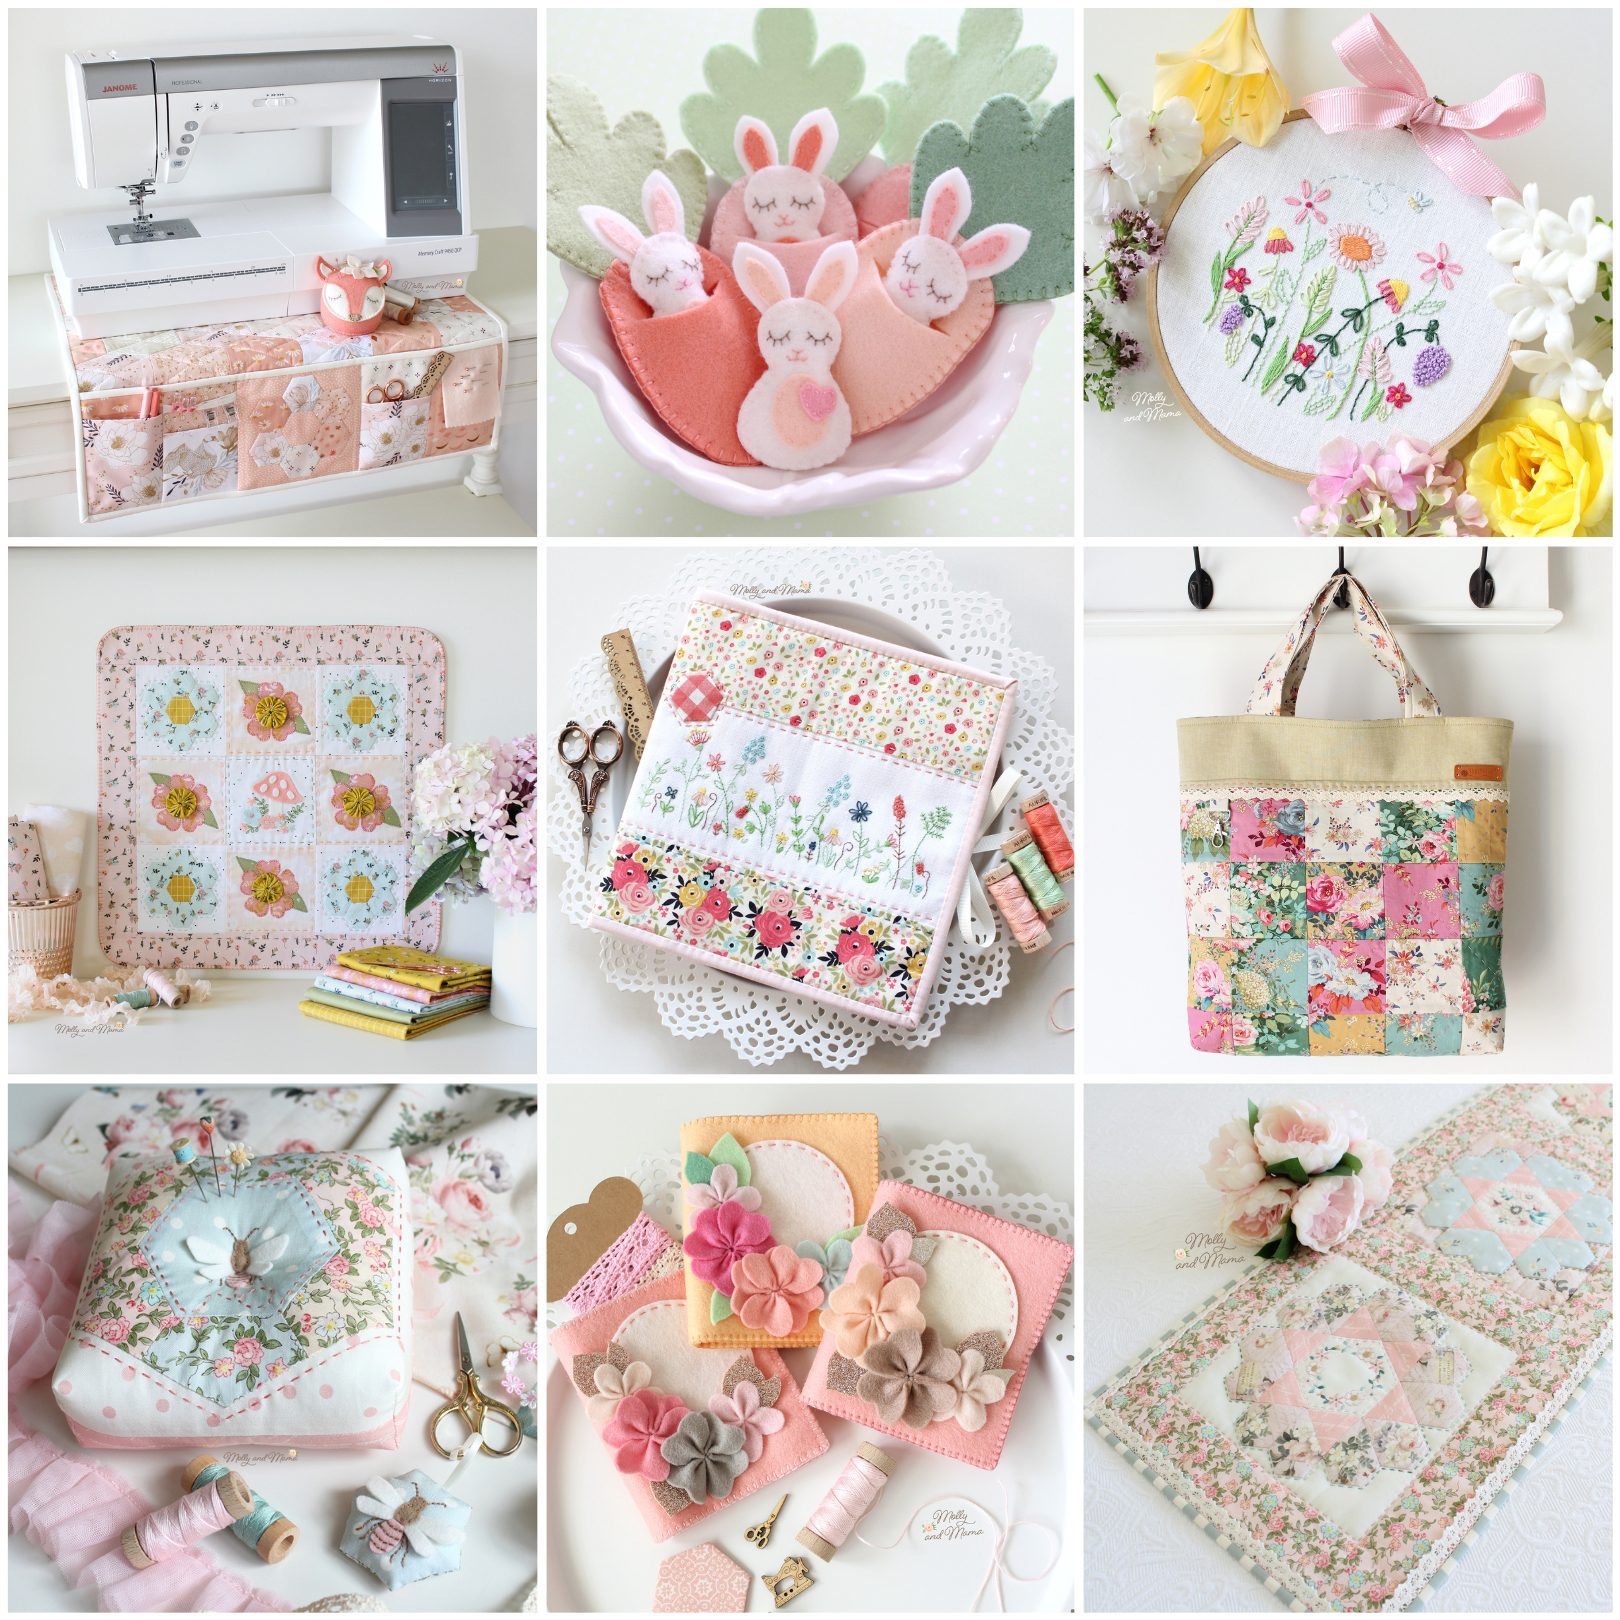
If you’d like to try your hand at other felt projects, I have some cute patterns in the Molly and Mama store. Some are made entirely of wool felt, but many incorporate felt into appliqué and more.
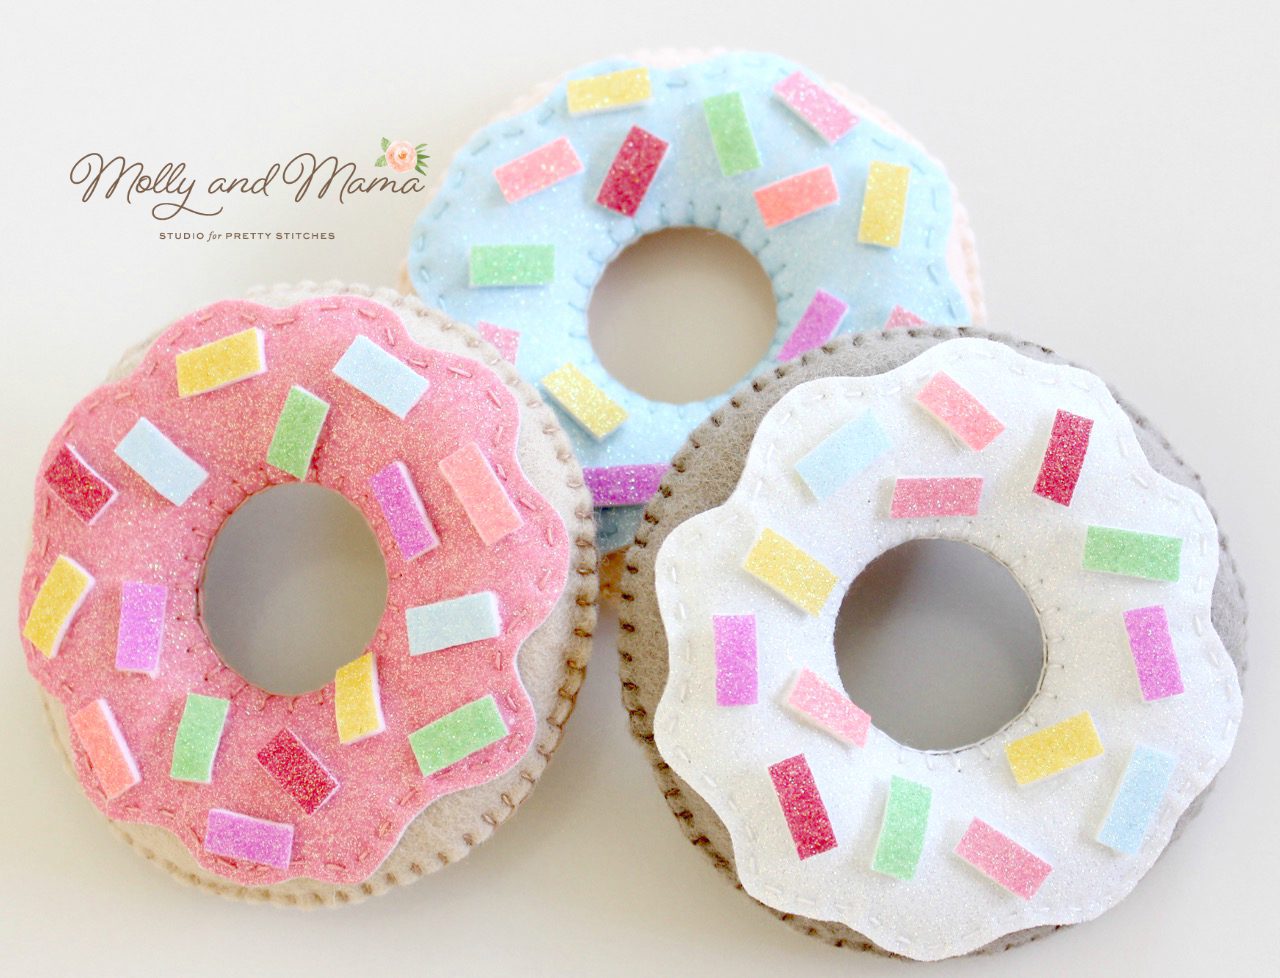
And there’s also some easy tutorials on the blog too, like these yummy felt donuts!
Happy felt sewing! Lauren x


Sew cute, thank you for sharing !
This is a quick and fun project (great for hostess gifts). Thanks Lauren.
Thank you for your kind comment Janet! Happy sewing x
Thank you for sharing. I love this pattern and will make the perfect Christmas gift for some friends.
Thank you! I’m glad you like it Judy!
I love these coasters, so pretty and delicate! Thanks for sharing the tutorial, I have just spotted the felt doughnuts think I might be here a while!
Hi, I love this tutorial and would love to try it. But can’t find where to download the pattern.
Hi Jessica, you can click on the word TEMPLATE to download the template for the coasters. I have also added a template button for your convenience. Happy stitching!
These are so cute! Thanks for sharing them. Have you ever tried making them with a sewing machine? My poor arthritic hands struggle with hand sewing so I might give it a try.
Thanks for your feedback Sharon. I haven’t machine stitched these but you could definitely give it it try. My suggestion would be to appliqué the fabric circle to the centre of the square of felt first (using buttonhole or straight stitch). Then trace the flower shape onto the felt (around the appliqué circle). Place the second piece of felt behind the first. With both pieces of felt together, sew just inside the outline of the flower shape with a straight stitch, before cutting the felt flower shape out. I hope that helps. Happy stitching, Lauren.
Thank you for sharing this pattern. Will make a cute housewarming gift.
You’re so welcome Charlene. Enjoy!
This Tilda line stitched up beautifully with your designs. I love them both! Thank you for sharing! ????❤
Thank you for your lovely feedback Barbara!
So pretty! I’ve included your coaster tutorial in a new floral sewing roundup on Crafts on Display today. https://craftsondisplay.com/sewing/free-flower-sewing-patterns-231247/
I appreciate the support. Thank you, from Lauren.