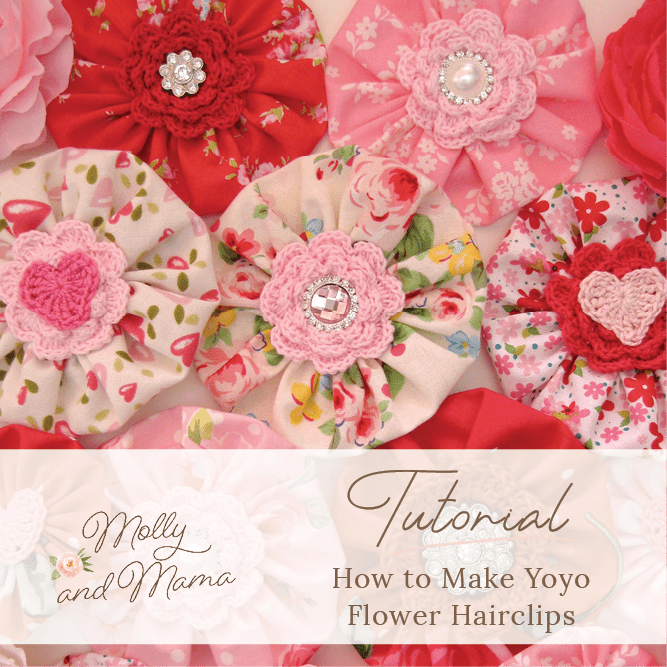
Make a Shamrock Clip for St Patrick’s Day
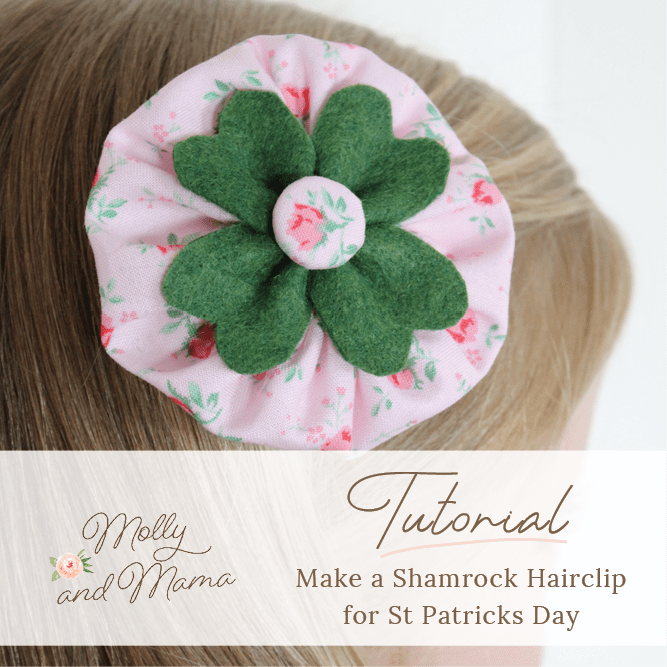
This little project is perfect if you’re looking for a little nod to Saint Patrick’s day. All you need to do is make a felt four leaf clover for luck (or a three leaf shamrock if you prefer), sew a yoyo to sit it on, and add a hair clip to the back. This sweet clip really is the most simple craft project! You could also turn it into a brooch… a garland… the options are endless.
And if you’re after something similar, but a little more adventurous, you can sew the lucky pin cushion using the tutorial HERE.
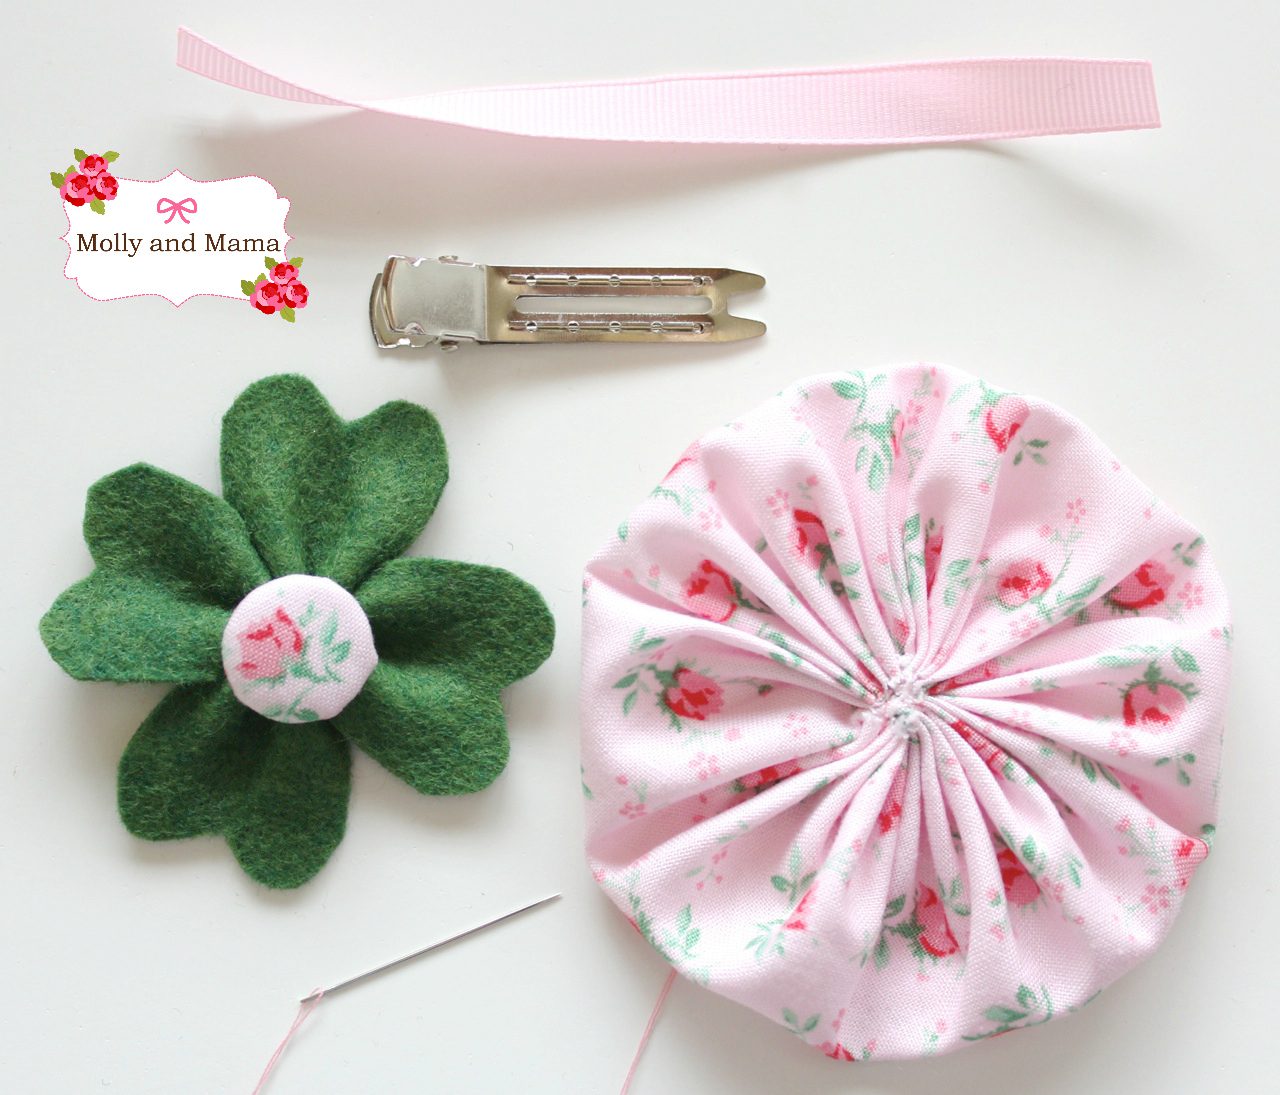
You Will Need
- 48mm double-pronged alligator clip
- 4 .75″ (12cm) of 3/8″ (1cm) wide grosgrain ribbon (with heat sealed ends)
- a hot glue gun
- 6.5″ (16.5cm) diameter circle of print fabric
- a needle and thread
- scissors
- green 100% wool felt – at least 3″ (7.5cm) square
- freezer paper (optional)
- button, bow or other embellishment for the top of your felt – I used a button that I covered with the same fabric as my yo yo
- print out of the four leaf clover template
Make A Felt Four Leaf Clover or Shamrock
There are three stages to making these gorgeous hair accessories. First you need to create the four leaf clover or a three leaf shamrock (depending on your preference).
To make a clover, simply use this template and follow the detailed instructions at this tutorial. You can also sign up to download my free Felt Flower Pattern which uses the same instructions and template for the flowers that we use for the clover leaf. Follow this link.
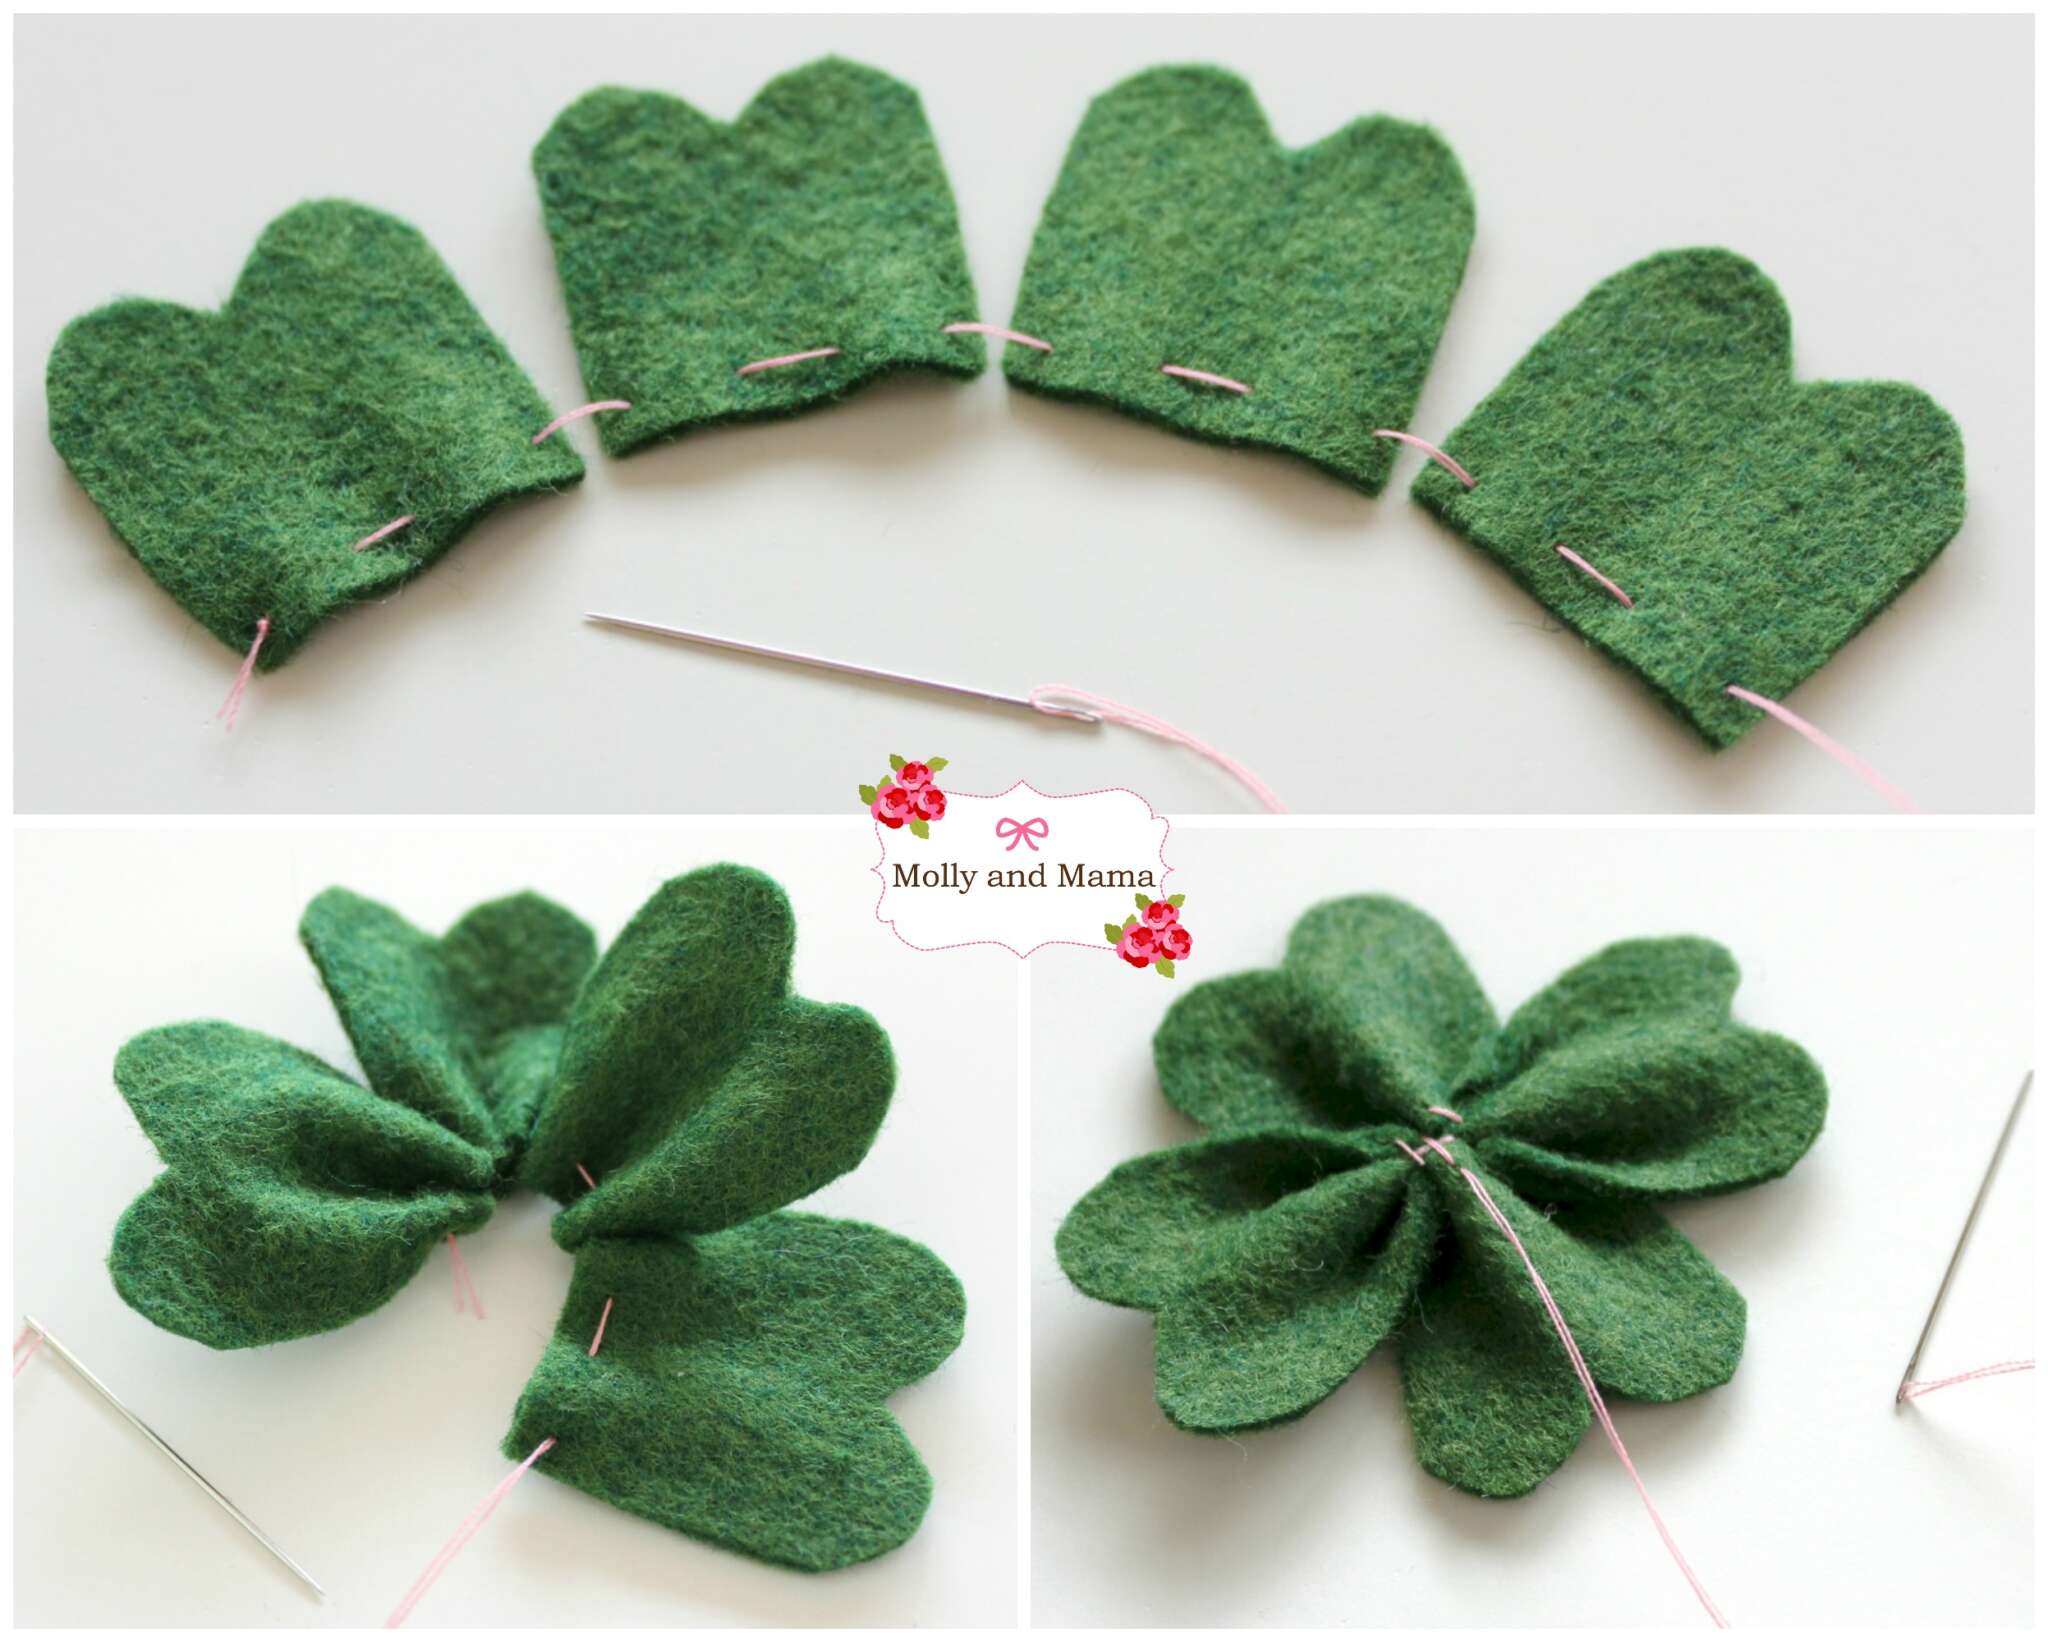
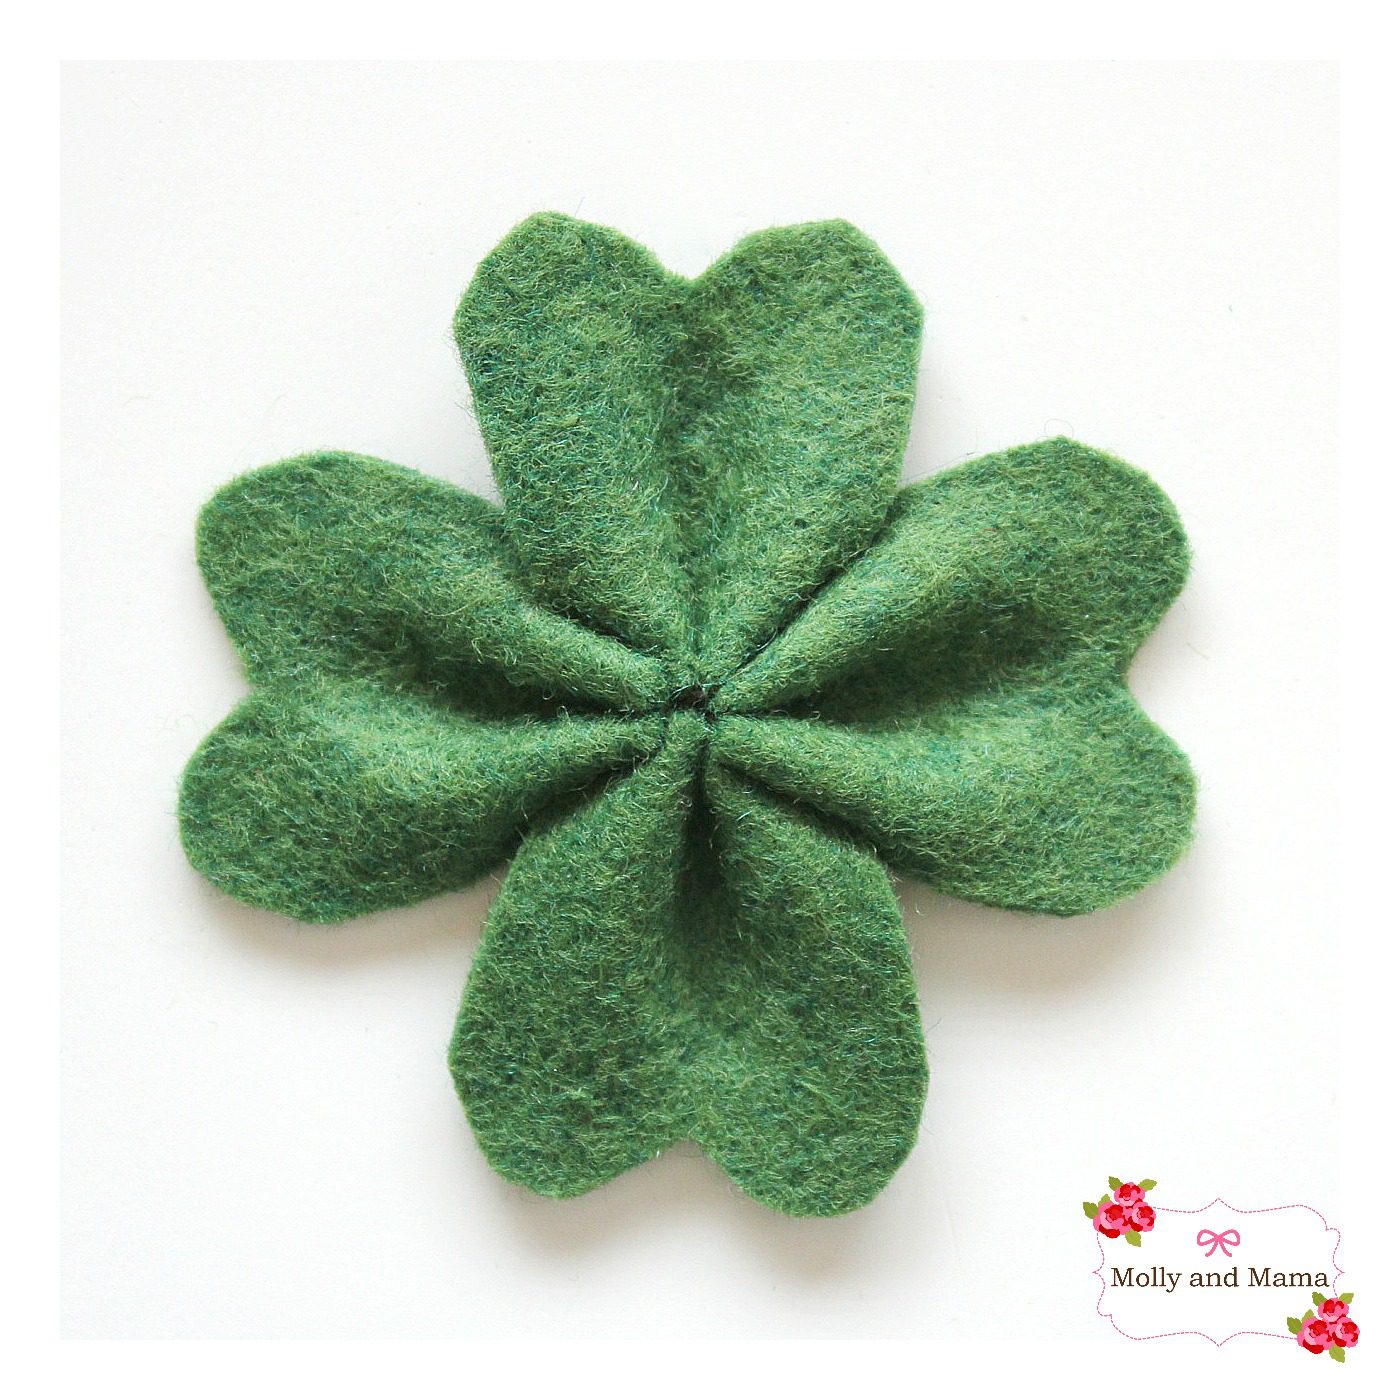
Put simply, trace the clover leaf shapes from your printed template onto the freezer paper (3 for a shamrock, 4 for a four leaf clover). Roughly cut out the shapes, but don’t cut on the line. Carefully iron the templates onto the wool felt (this only works for 100% wool felt. Learn more HERE). Cut out each shape on the line and peel off the freezer paper.
Arrange the shapes in a row. Stitch three small running stitches across the base of each piece of felt (as seen in the image below). Make sure the stitches enter and exit the same side of each felt piece (this ensures they’ll gather together nicely). Pull the thread to gather the felt into a clover or flower shape. Secure with some extra stitches.
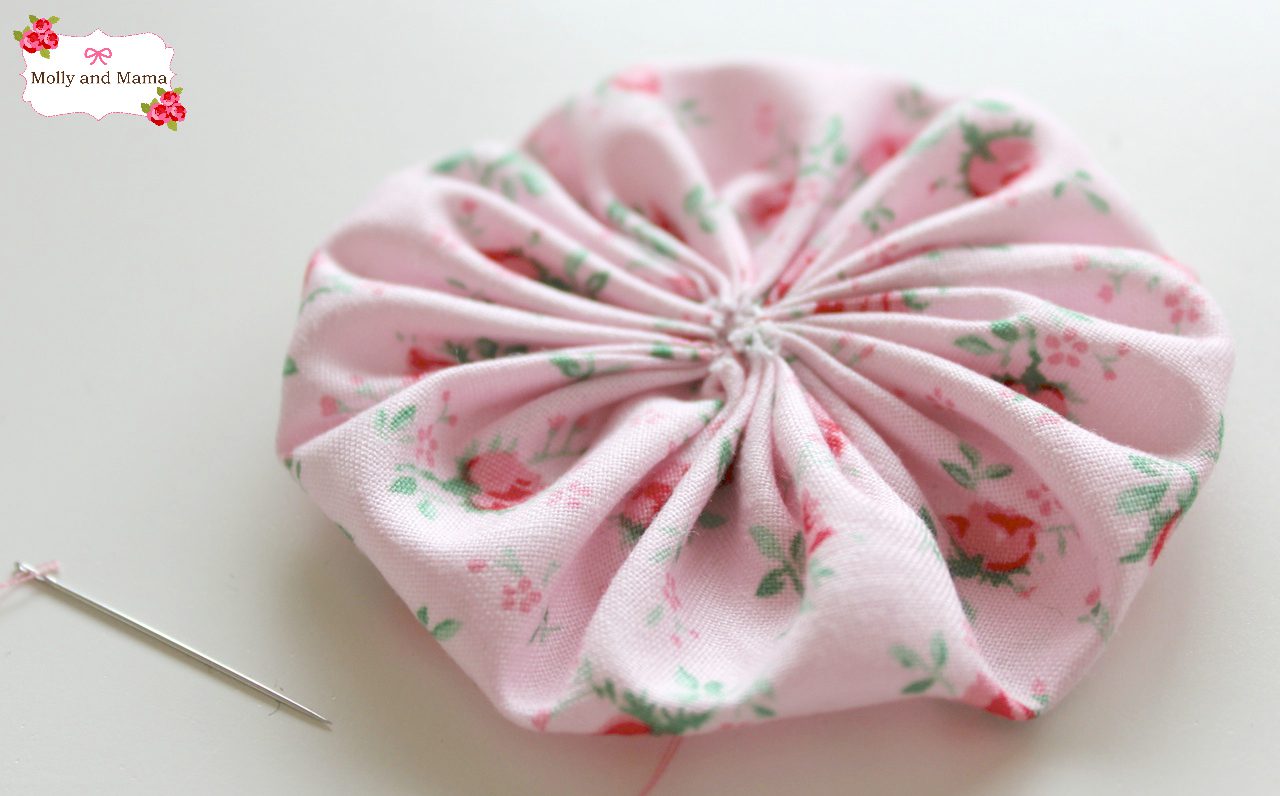
Sew A Yoyo
Now let’s stitch a pretty yoyo (you may also know it as a Suffolk puff). If you haven’t made these before, they are super simple. And I have very conveniently included a link HERE to a tutorial that explains exactly how to make them.
To make the yo yo used for this project, I used a 6.5″ (16.5cm) fabric circle. This made a yo yo with a 3″ (8cm) diameter. But you can play around and choose a yo yo size that works best for you. You simply stitch a running stitch around the outside edge of the fabric, and then pull the thread to gather the fabric into a puff. Flatten it out and secure the stitches. (You won’t need to turn the outside edges under with a hem, as you do with traditional yoyo’s, because the centre of the yoyo will be covered with a button).
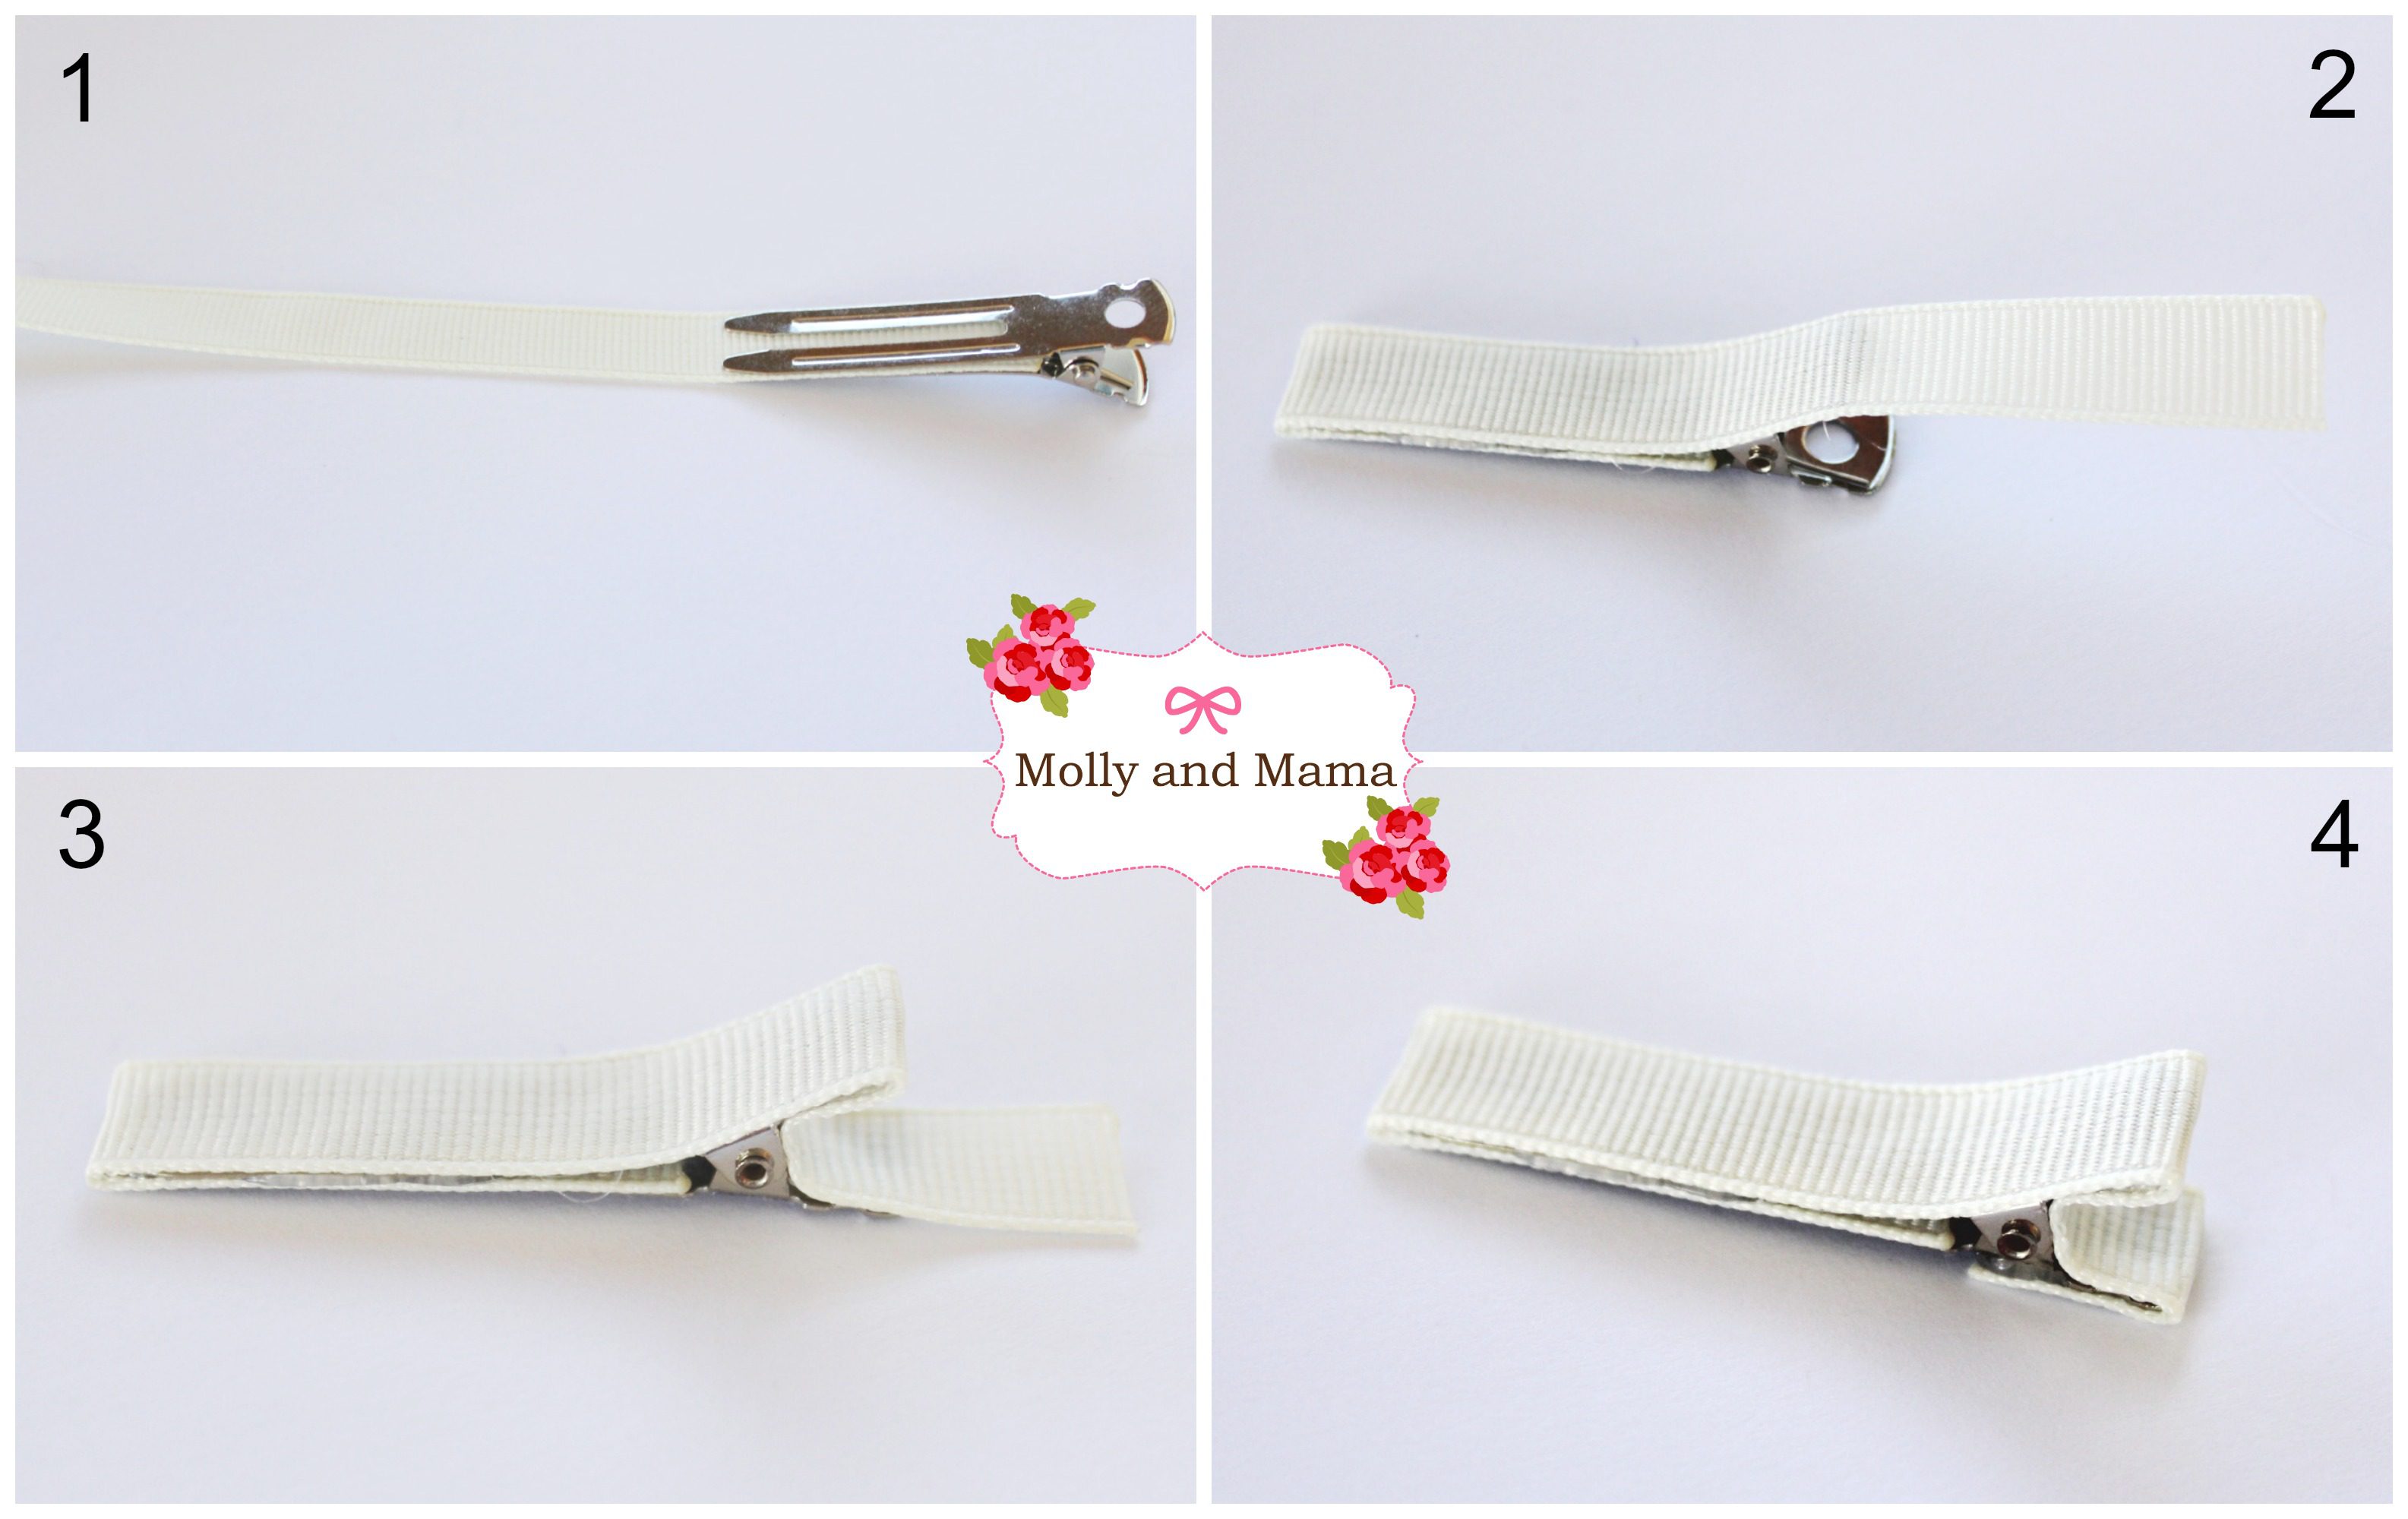
Line An Alligator Clip
You’ll need to have a lined alligator clip ready to attach to the back of your yoyo. And guess what? I’ve got a tutorial for that too! You can head over HERE to find out how to make a simple bow, and cover an alligator clip at the same time.
But here’s the short version; Take your 4.75″ (12cm) length of heat sealed ribbon and attach it to the 48mm double-pronged alligator clip using a hot glue gun. The numbered pictures below really demonstrate how I do this stage. Just remember to work quickly but carefully with hot glue!
Put It All Together
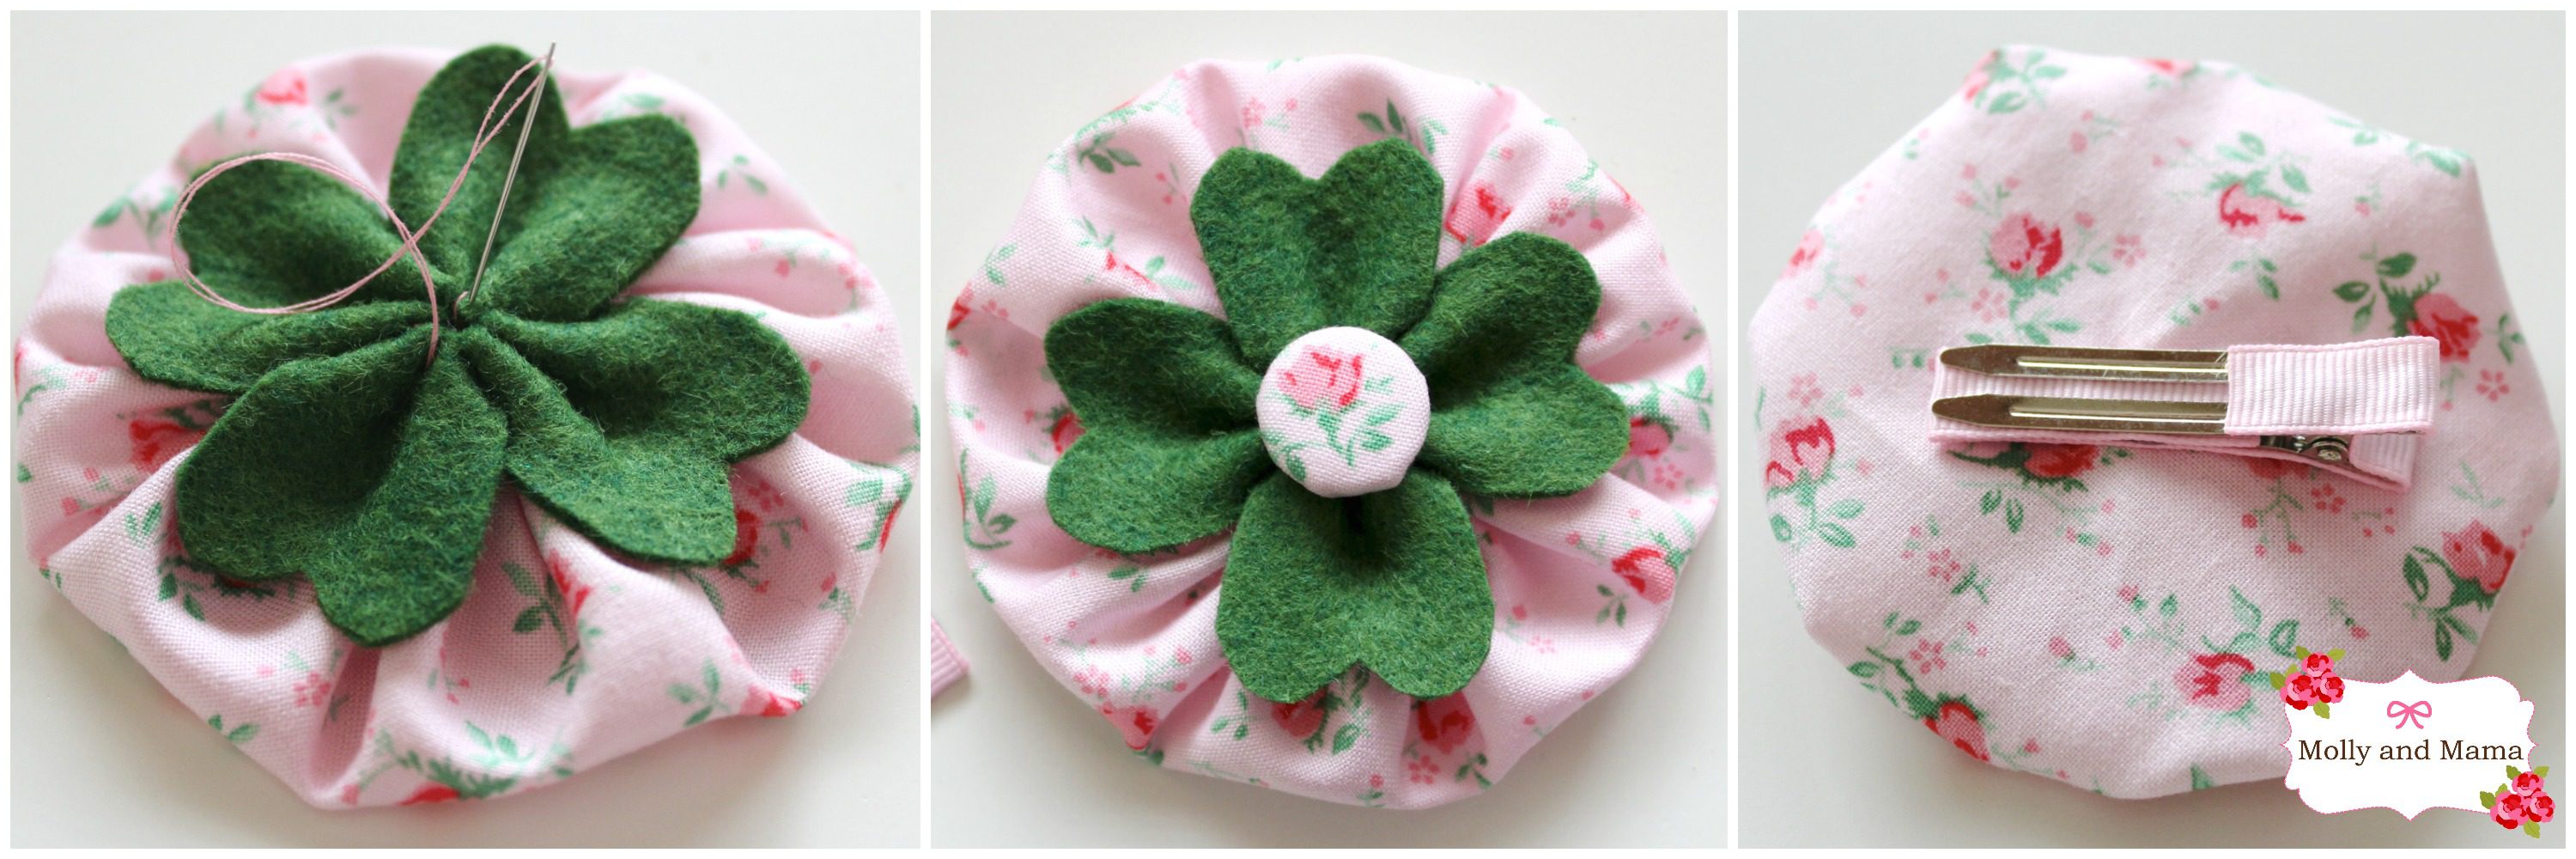
First, stitch your felt clover securely onto the centre of the top of the yoyo. Glue on a fabric covered button (any any other adornment you choose) using a small dab of hot glue. To attach your clip to the back of the yoyo, press a line of hot glue onto the top of the clip. Turn it over and gently press it into place on the yoyo back.
You’re all done! You could wear this as a hair accessory or add a brooch clasp instead.
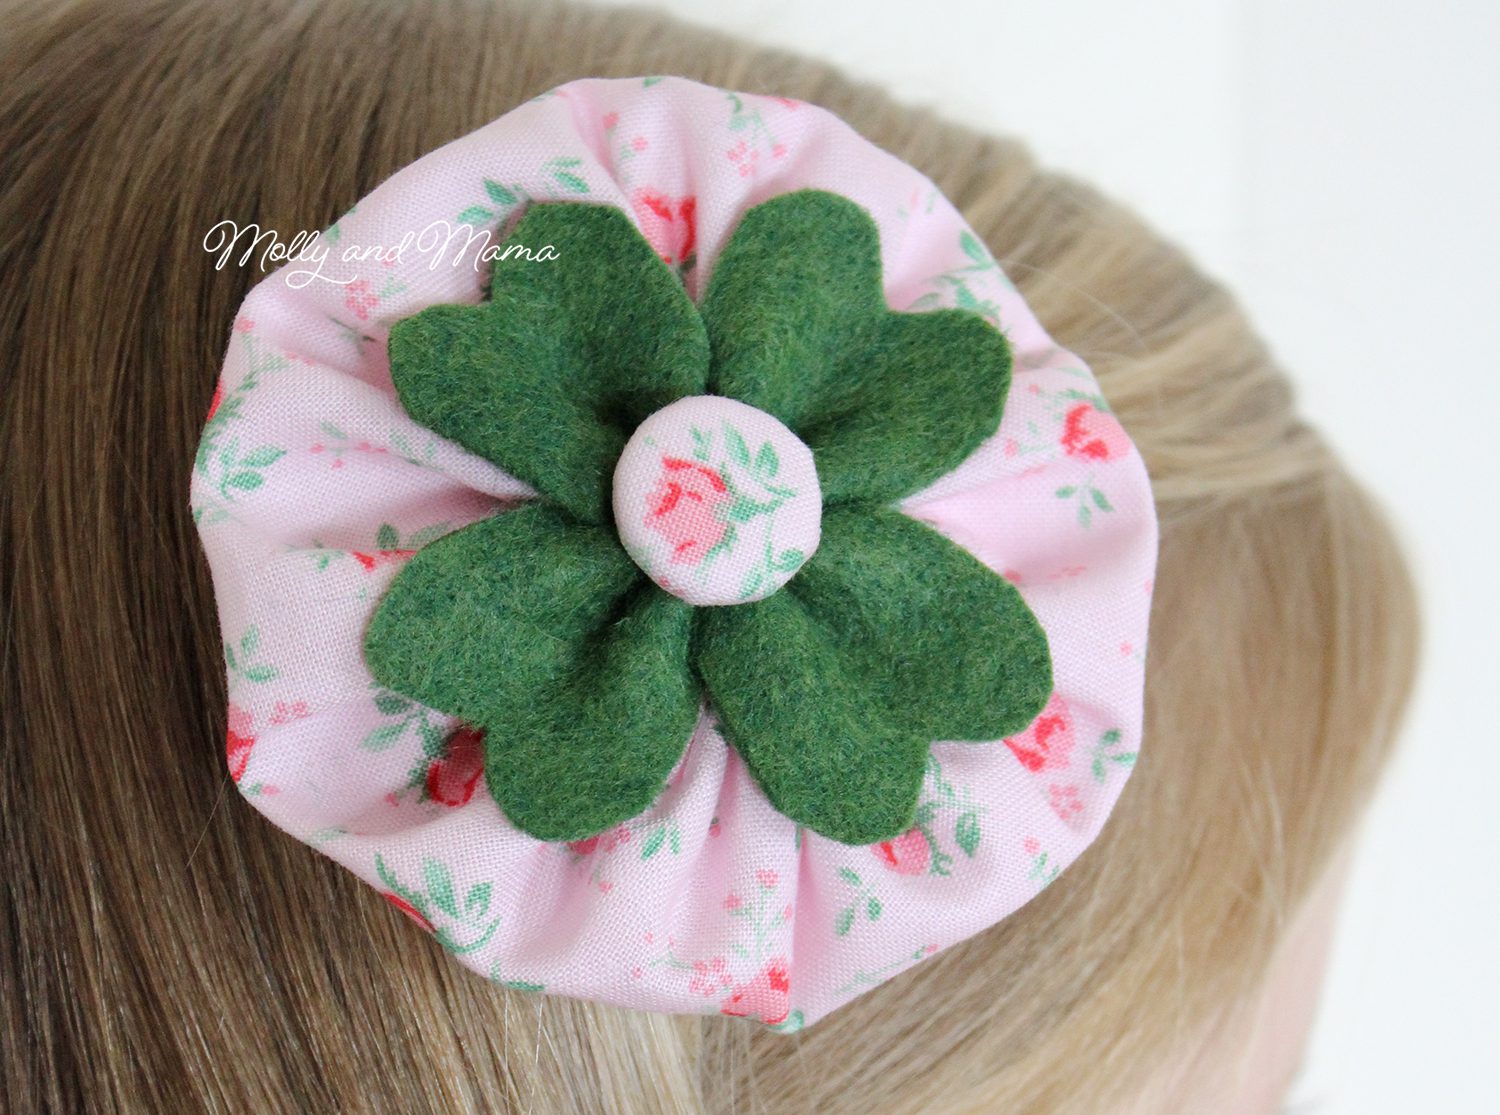
The beauty of this piece is that it can be worn all year round! But it has an added touch of luck for Saint Paddy’s day!
For more St Patrick’s inspired craft, you can visit the tutorials for this pin cushion HERE.

Wishing you all the luck in the world on the 17th March!
Enjoy, Lauren x
This post was written by Lauren Wright and appeared first on Molly and Mama http://www.MollyandMama.com.au
Cute!
Thanks Jessie
So cute!! I’ve got a Craft Gossip post that links to your tutorial here:
http://sewing.craftgossip.com/tutorial-shamrock-hair-clip/2015/03/02/
–Anne
Thanks for sharing Anne. I really appreciate the support!
Hi,
Absolutely love this pin cushion!
What fabric did you use for the yoyo? That rosebud print is wonderful!!! I hope it’s still available somewhere!
I love the different versions you made! All so pretty!
My wonderful sister gifted me the book and I’d like to make some for Christmas gifts!
Thanks ~ G
Thank you Gayle. I’m not sure of the fabric name sorry. I hope you enjoy sewing projects from my book! Thanks, Lauren.
SUPER CUTE! Thank you for sharing! I am using it to fill my Hallmark Truck for March 🙂 Hope you don’t mind I’m linking back to you and your easy peasy shamrocks!