Make Felt Donuts
Let’s Sew Felt Donuts!
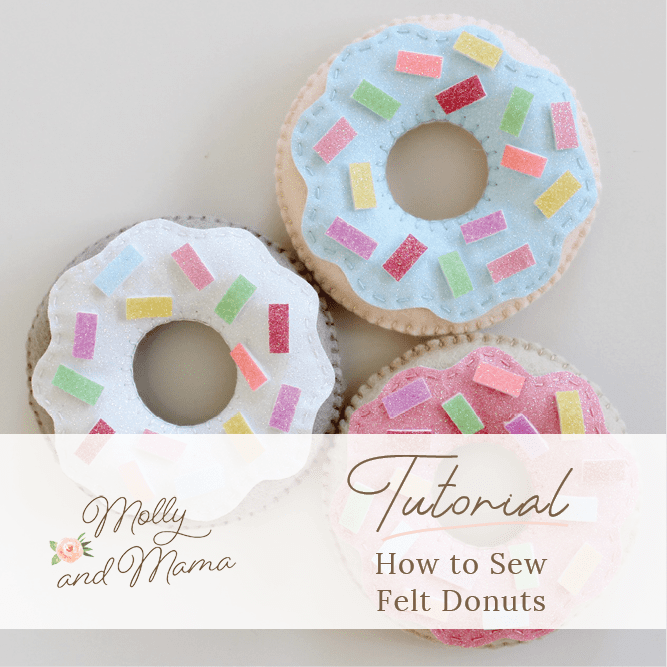
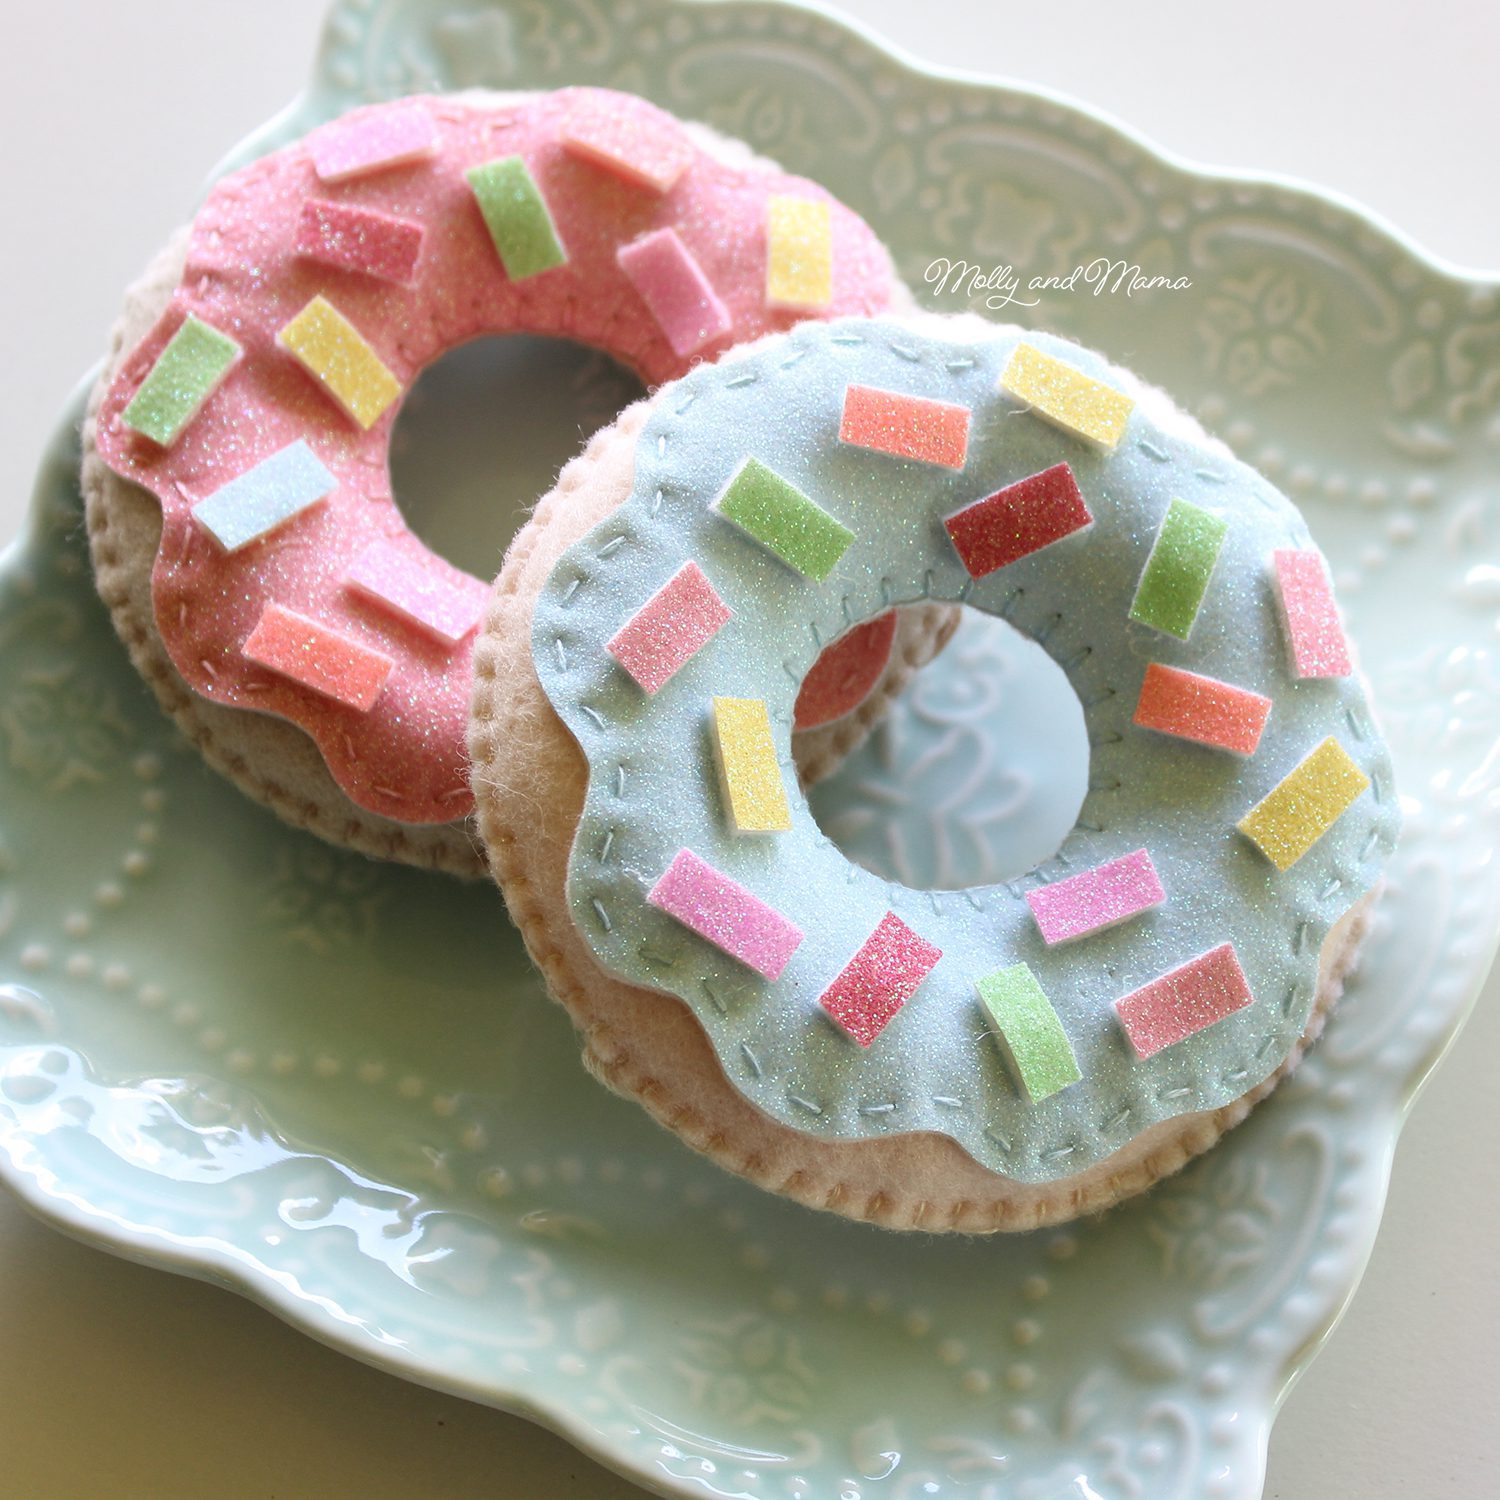
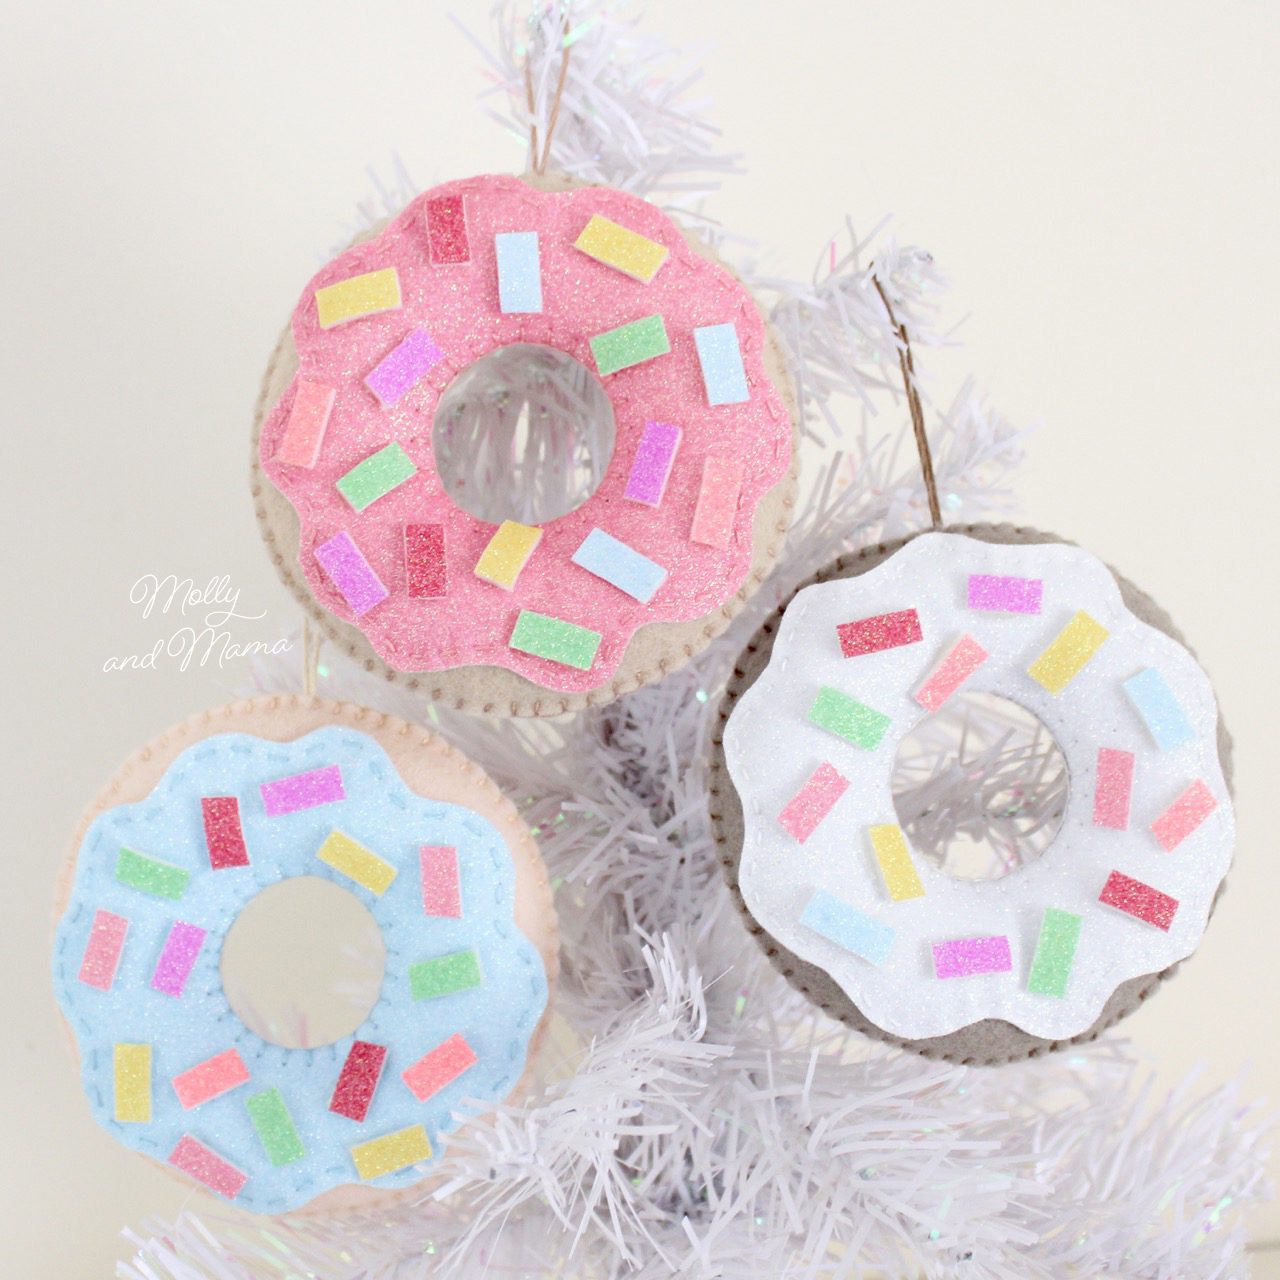
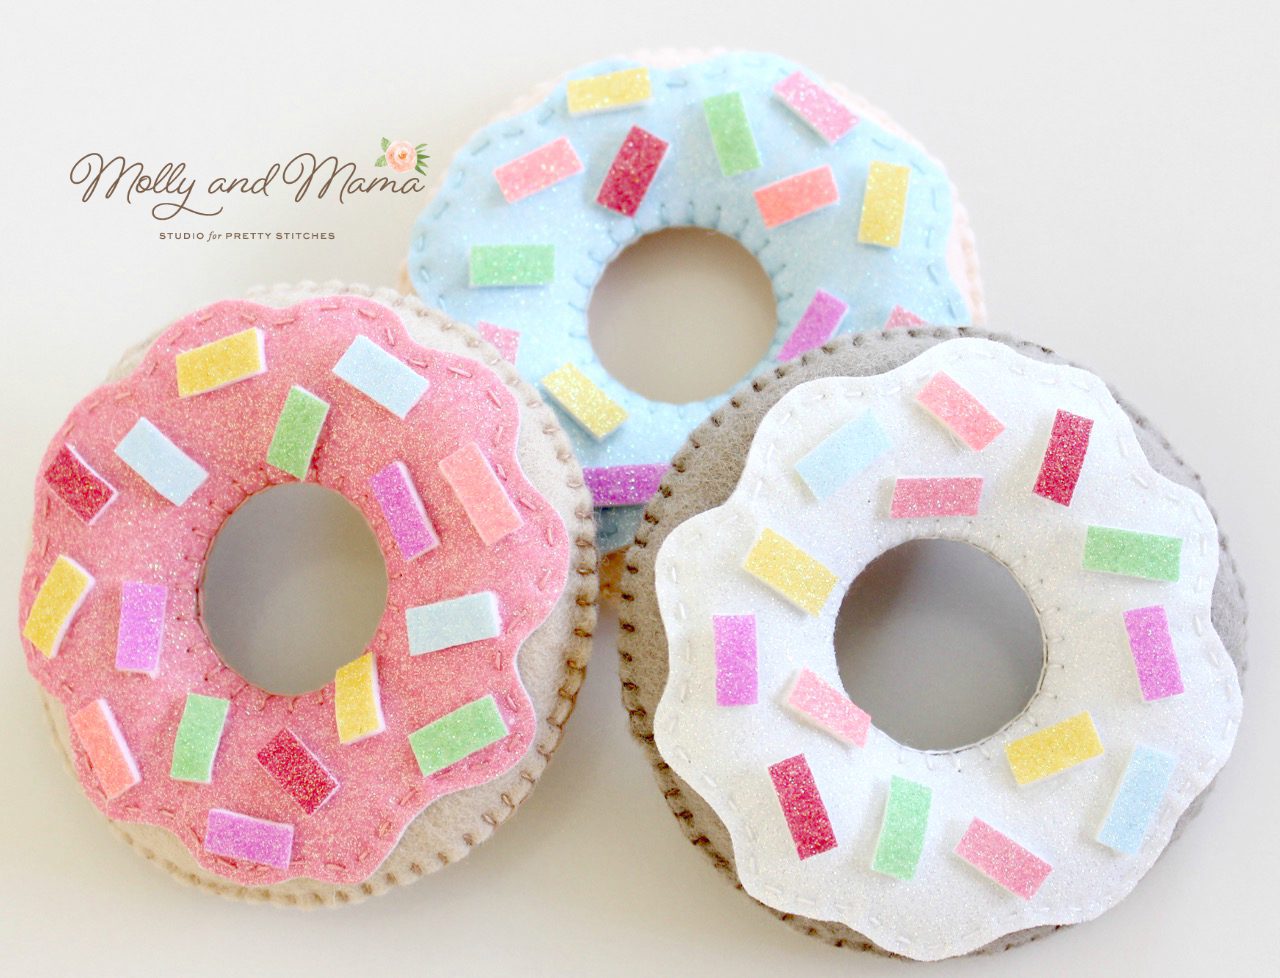
How delicious do these cute felt donuts look? And they’re so quick to make. I’m so happy to bring you this simple tutorial to sew these donuts for fun food play or unique Christmas decorations. All you need is some felt, floss, filling and a hot glue gun. Easy!
*This post includes Affiliate or Ad Links. If you make a purchase using an affiliate link, I will earn a small commission that doesn’t change your purchase price, but helps me to continue to bring you this content. Thanks for your support!
You will need
When gathering your supplies, be sure to use only 100% wool felt (if you can) or blended wool felt. To learn more about why, head to my Tips for Working with Wool Felt. I source all my plain and glitter wool felt from my favourite local supplier My Felt Lady, here in Australia. Candice has a huge range and her service is excellent!
- Two 4” (10cm) squares of 100% wool felt for the donut
- One 4” (10cm) square of glitter felt for the icing (or frosting)
- One 4” (10cm) square of freezer paper (optional – to transfer the donut template to the felt)
- One 4” (10cm) square of fusible bonding web for appliqué (like HeatnBond or Vliesofix)
- Embroidery needle
- Large eyed long needle for doll making
- DMC embroidery floss to match the donut and icing felt colours
- 10” (25cm) of embroidery floss for a hanging loop (optional)
- Hot glue gun
- Small scissors for felt cutting
- Polyester hobby fill
- Chop stick or similar turning tool for adding hobby fill
- Print Out of the TEMPLATE
PLEASE NOTE: These felt donuts are for decoration only and are not a toy.
Let’s Get Sewing
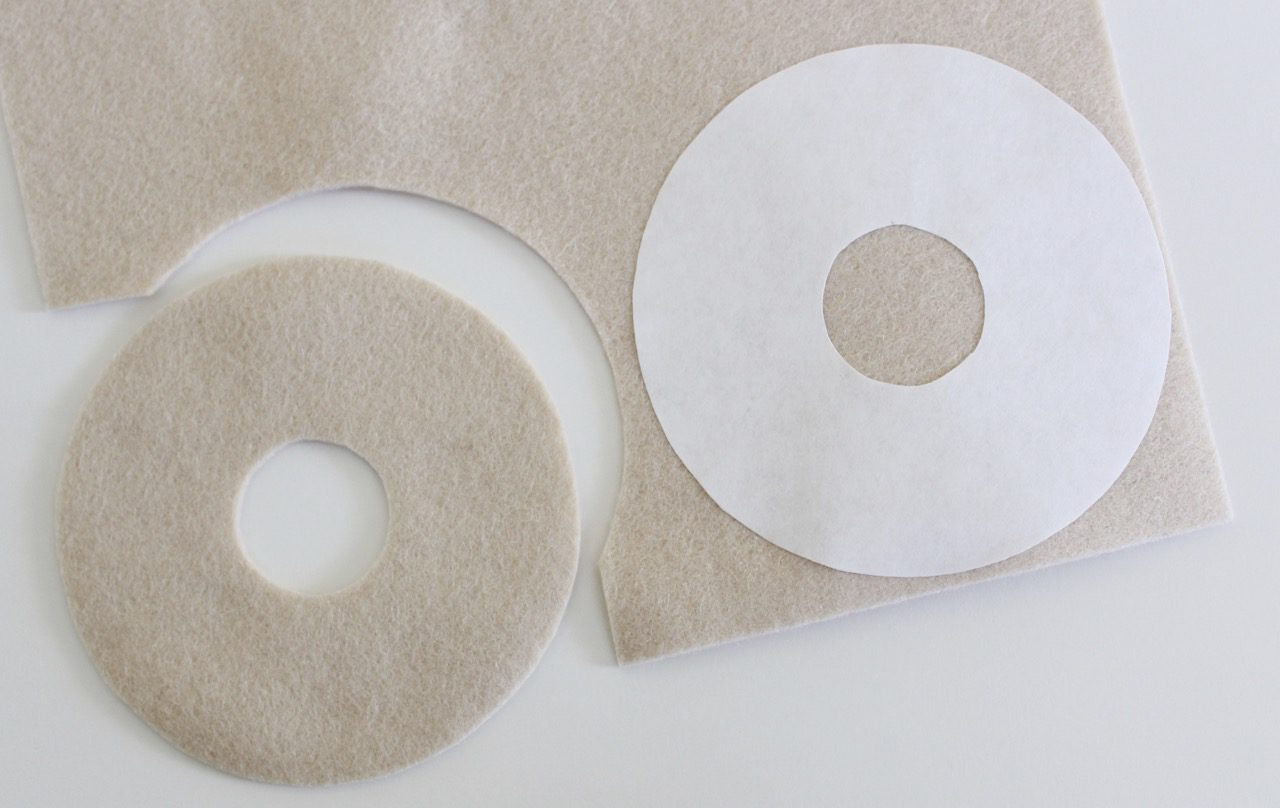
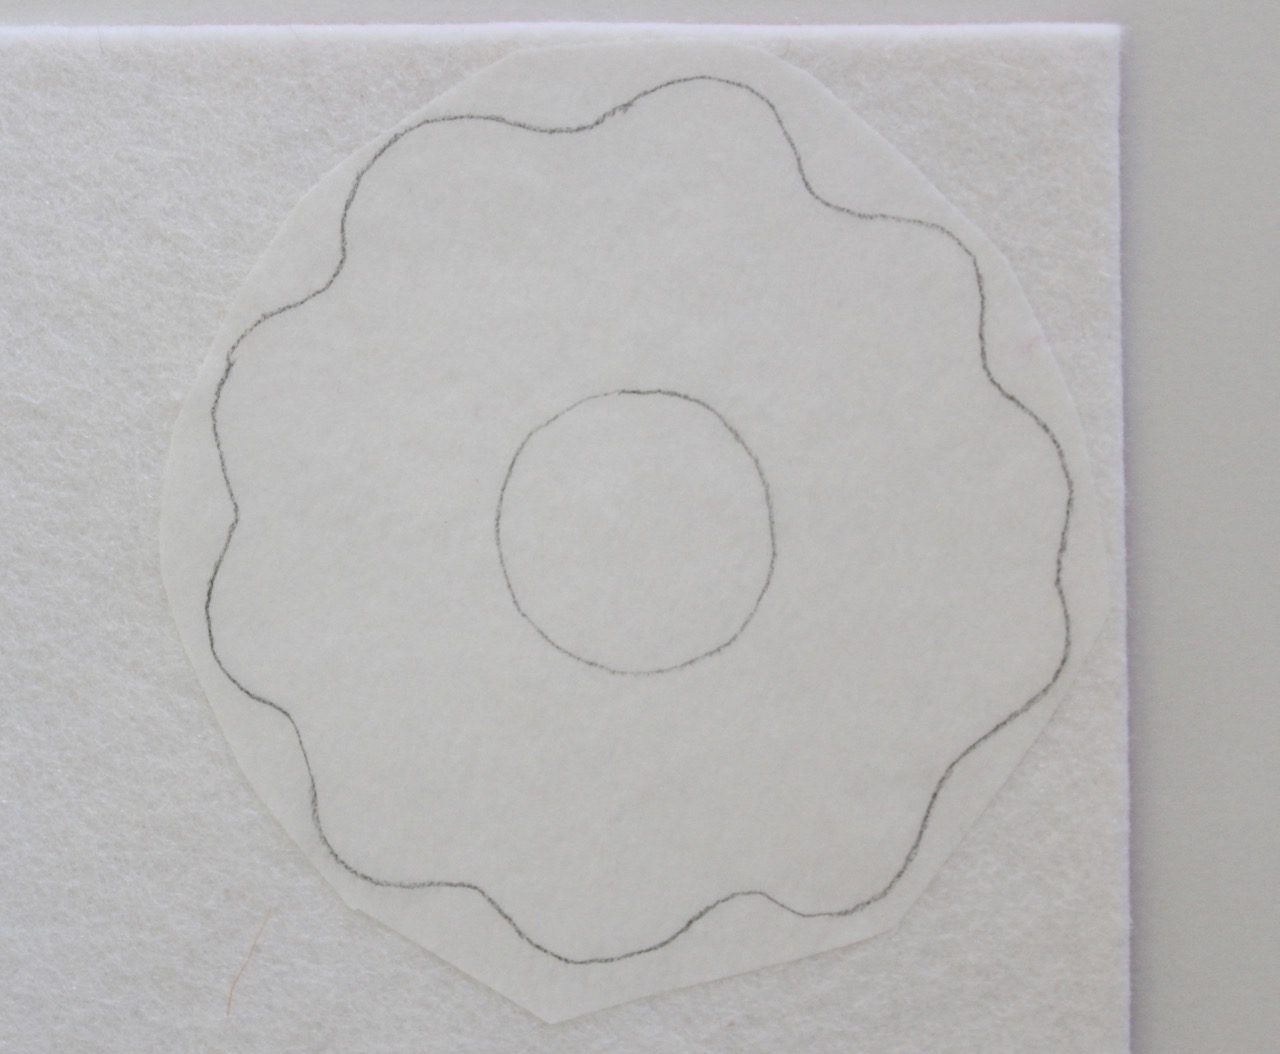
Print the Donut template onto paper, at actual size (100%) with no scaling or cropping (unless you’d like to change the size of the finished donut, then you can enlarge or decrease the template size).
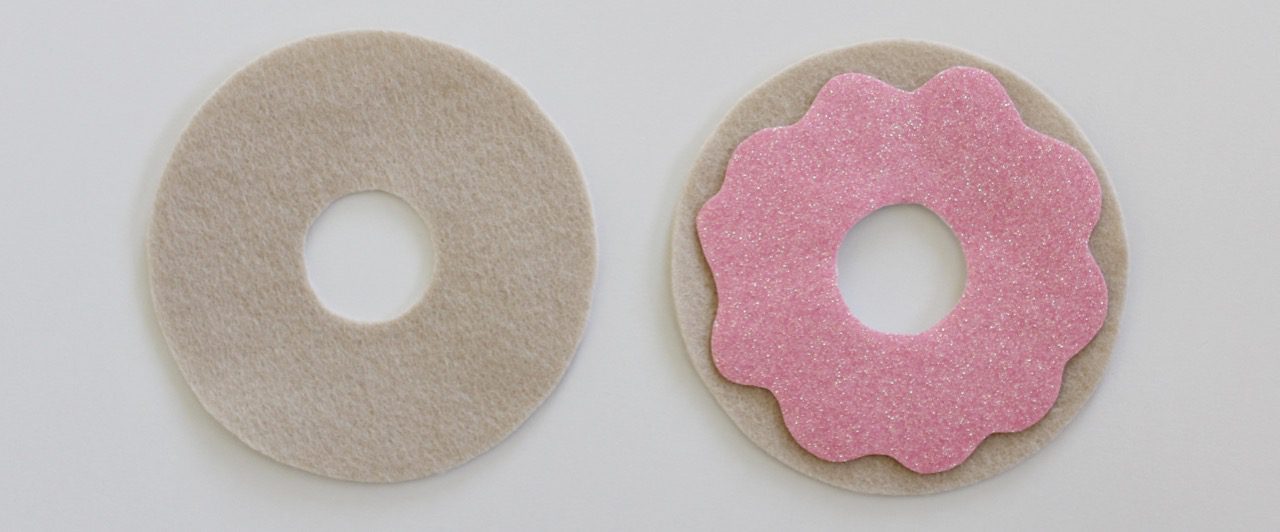
Trace the Donut Shape from the template onto the paper side of the freezer paper and roughly cut around the outside of the shape. Iron the freezer paper onto the donut felt (be sure to cover the felt with a press cloth or scrap of cotton fabric). The shiny side of the paper will stick to the felt. Carefully cut out the donut shape including the hole in the centre, then peel off the freezer paper. Reuse the paper to cut a second donut shape from the felt.
For more tips on using this method for cutting out felt shapes (and for other alternatives) please visit this tutorial HERE.
Trace the donut icing (frosting) shape onto the paper side of the fusible bonding web and roughly cut out around the outside of the shape. Place it onto the back of the piece of glitter felt so that the paper side of the web is facing you. Cover the felt and web with a press cloth and then iron the web onto the felt.
*NOTE: Ironing felt only works with 100% wool felt, or wool blended felt on a lower heat setting. Please perform tests with your felt and freezer paper or heat bonding web, before using it for this project.
Cut out the icing (frostong) shape and peel off the backing paper. Place the icing over one of the donut circles. Cover with a press cloth and press the glitter felt to secure it to the donut shape.
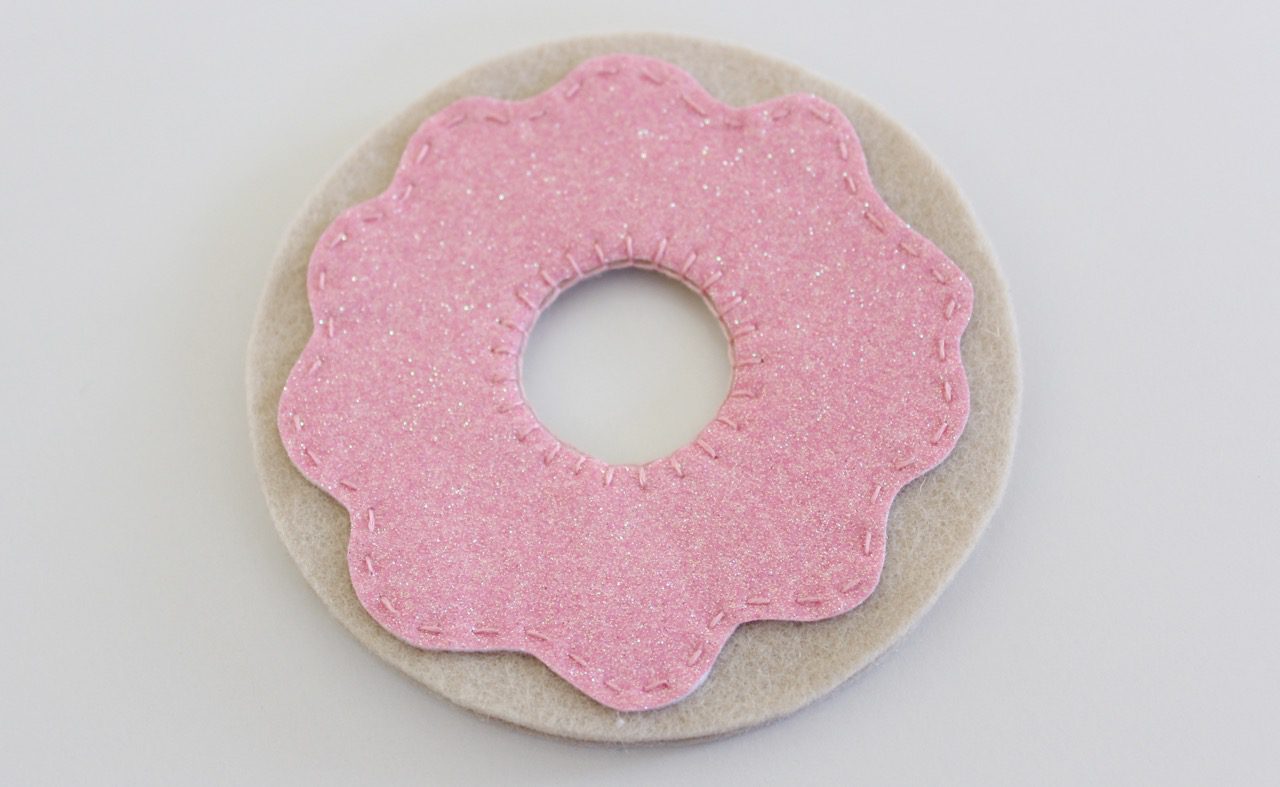
Thread your embroidery needle with two strands of floss to match your glitter icing (frosting) colour. Sew the outside curved edge of the icing to the donut shape using a small fine running stitch.
Place the donut top and bottom together and use pins or quilting clips to hold them in place. Blanket stitch around the inside centre ring of the donut, stitching the top and bottom together.
For help with the different stitch types, please be sure to see my Stitch Library.
Thread your needle with two strands of floss to match your donut felt colour. Blanket stitch the outside edge of the donut, stopping when you’re halfway around (but keeping the floss intact). Roll small balls of polyester hobby fill and gently manoeuvre them into the donut using a chop stick or similar tool.
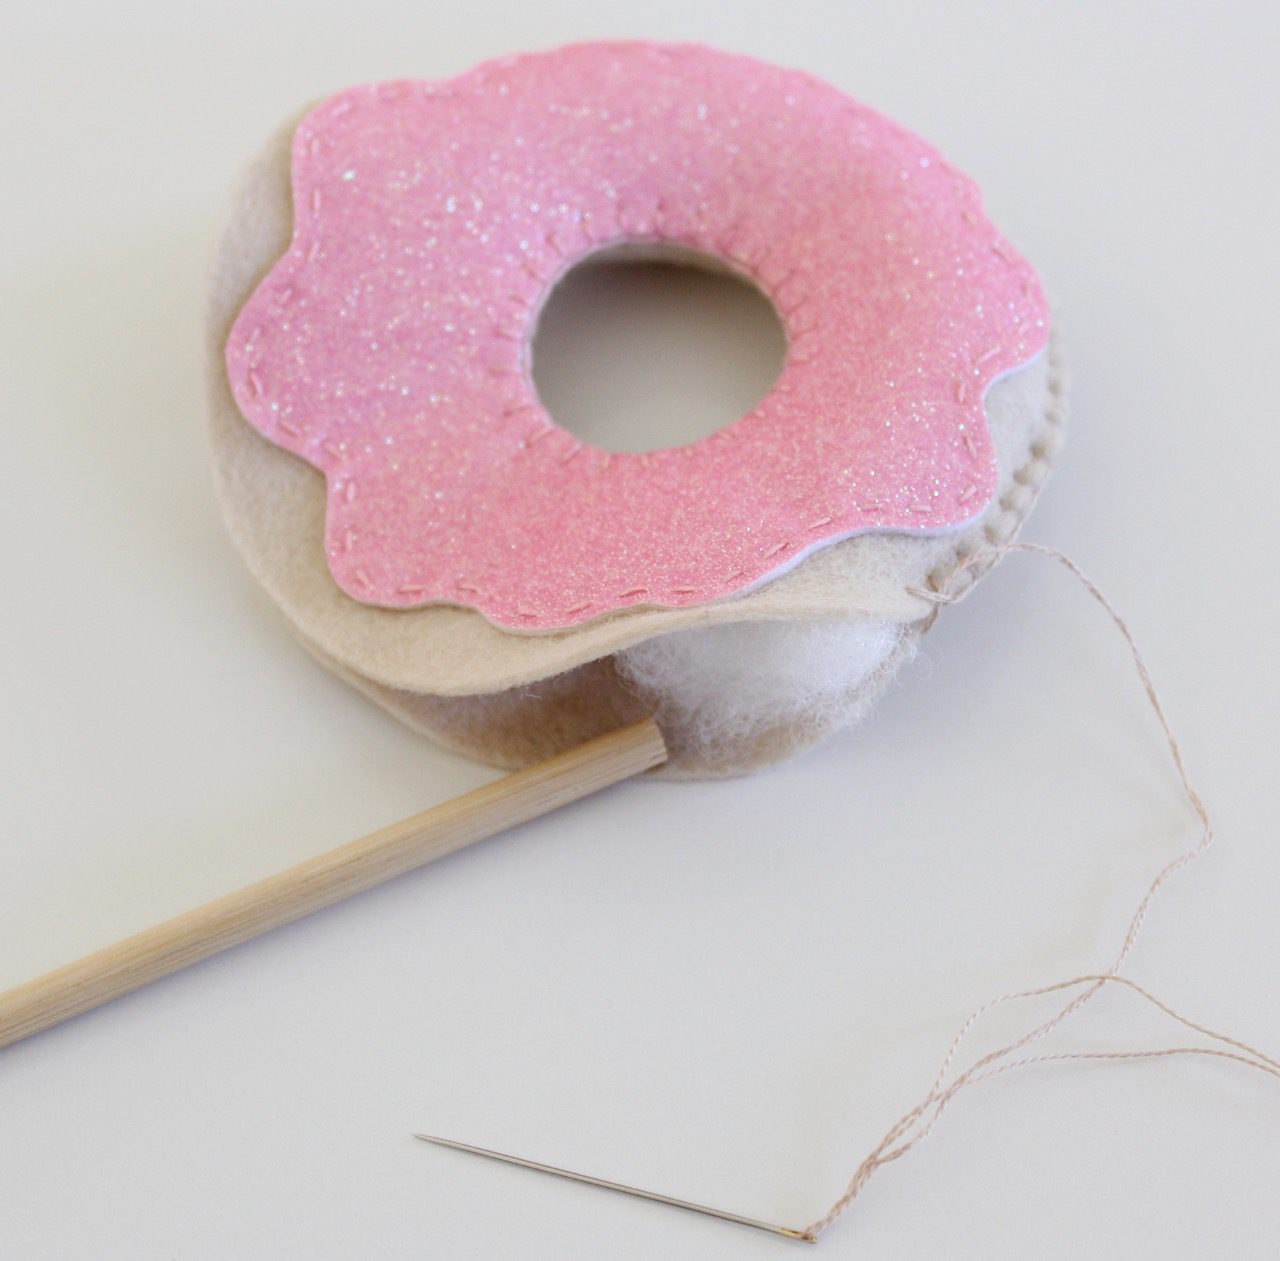
Continue to sew and stuff the donut until it is firmly filled and completely stitched.

Using the template as a guide, cut out about 14 ‘sprinkles’ in various shades of glitter felt.
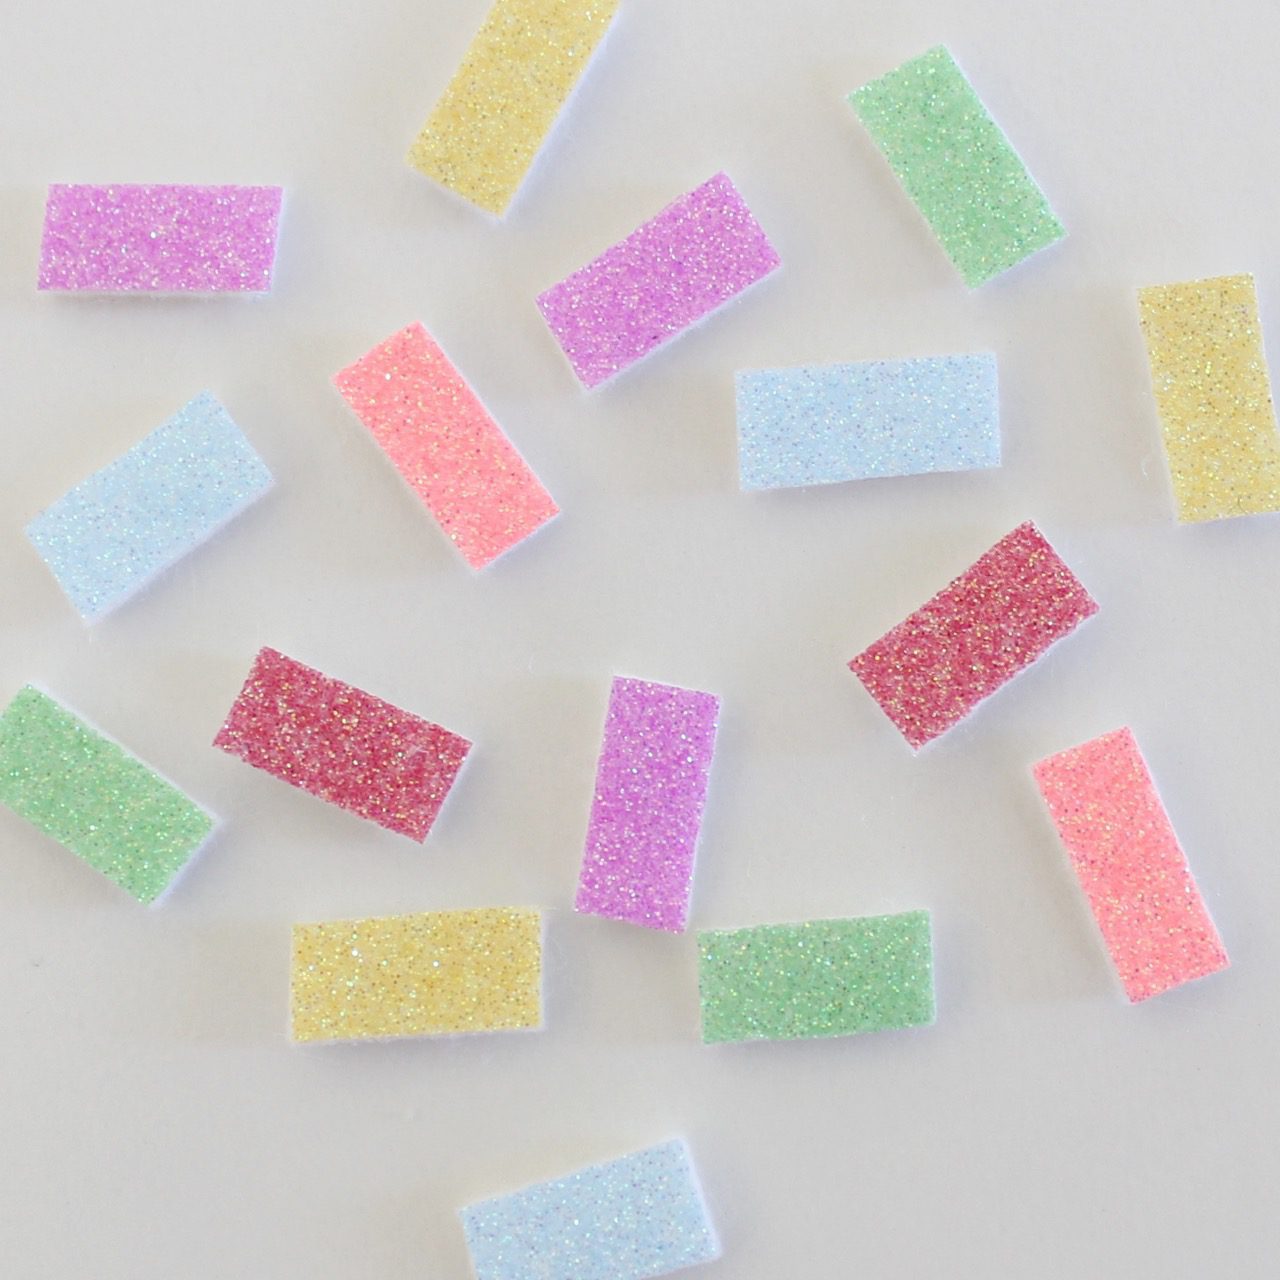
Arrange the sprinkles onto the donut and then secure them in place with the hot glue gun or with firm stitches.
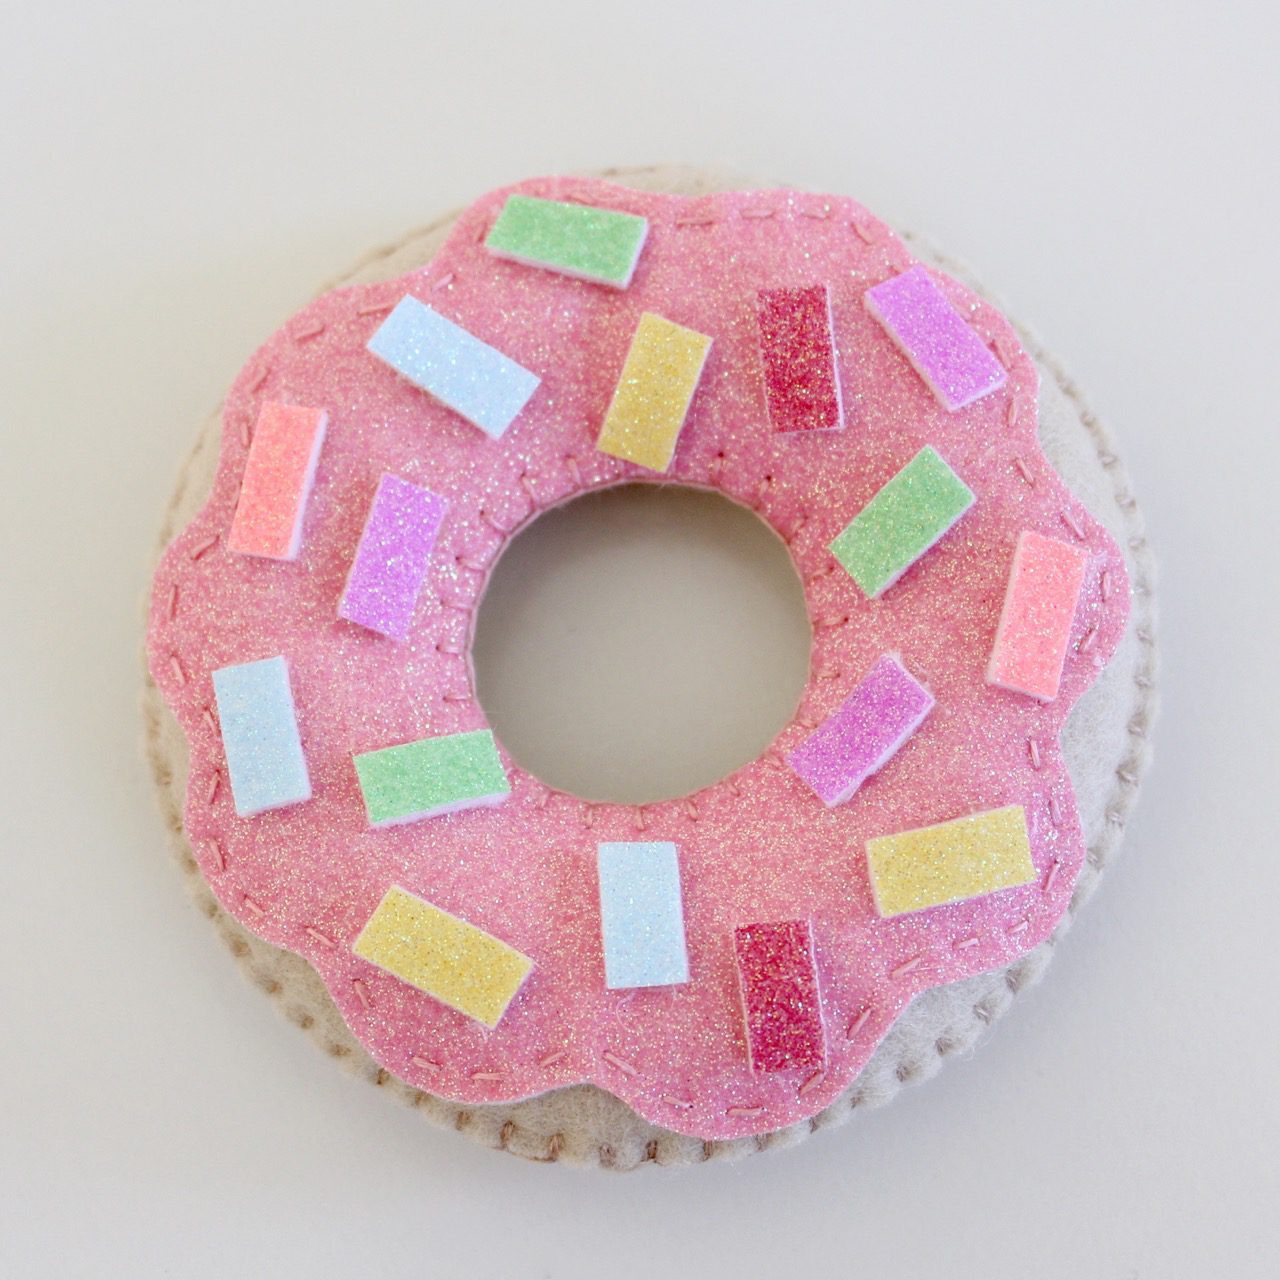
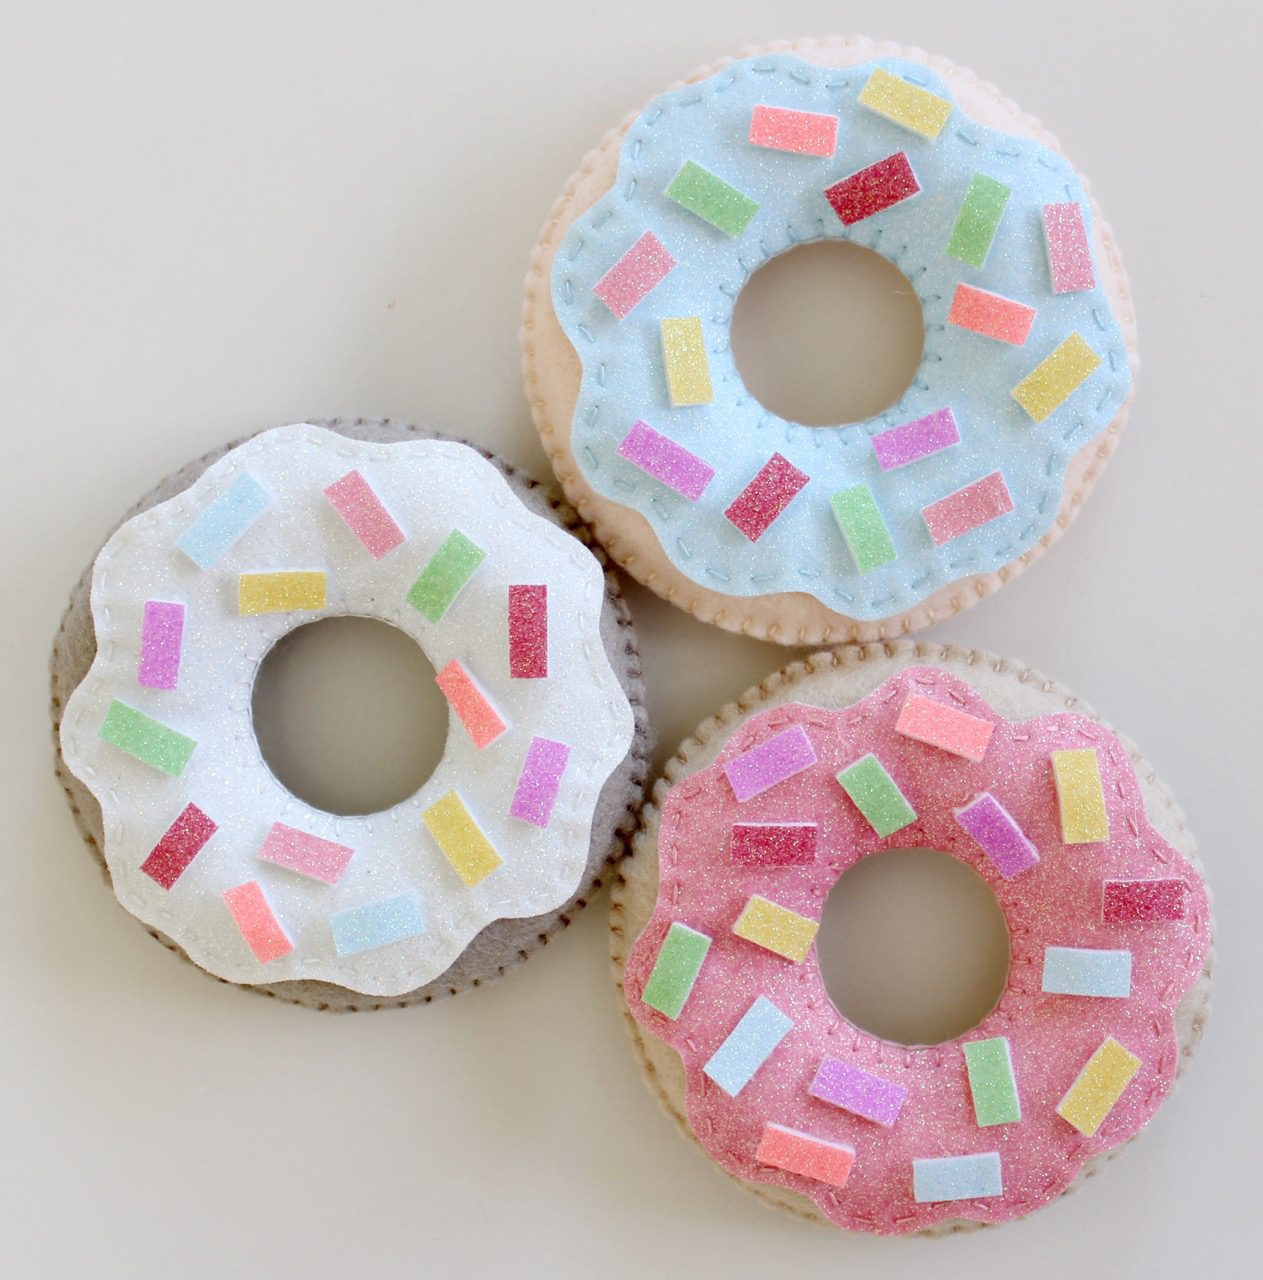
Create a number of different coloured donuts for some pretend play!
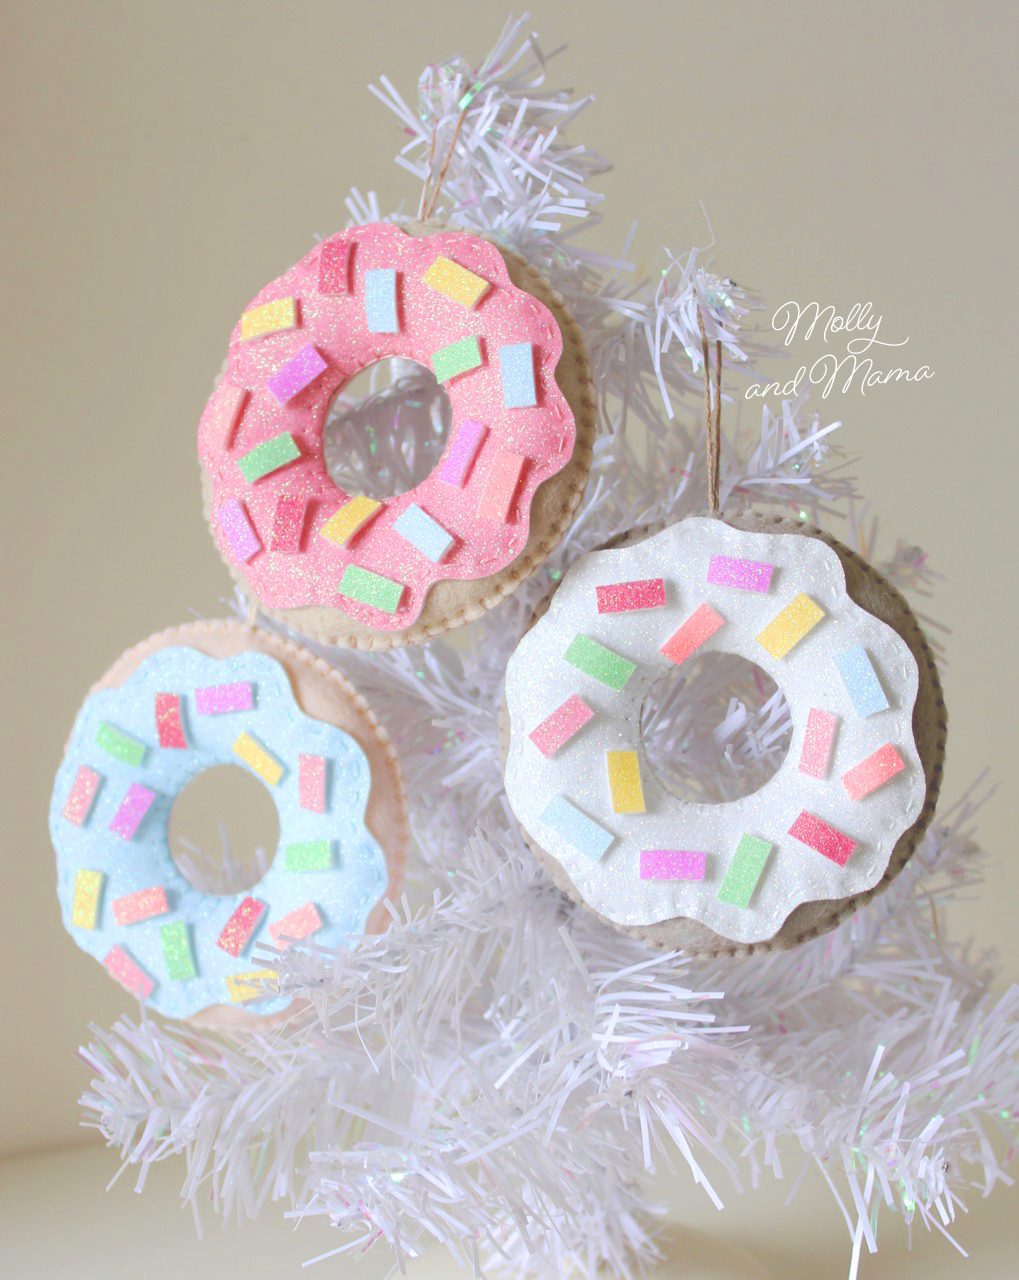
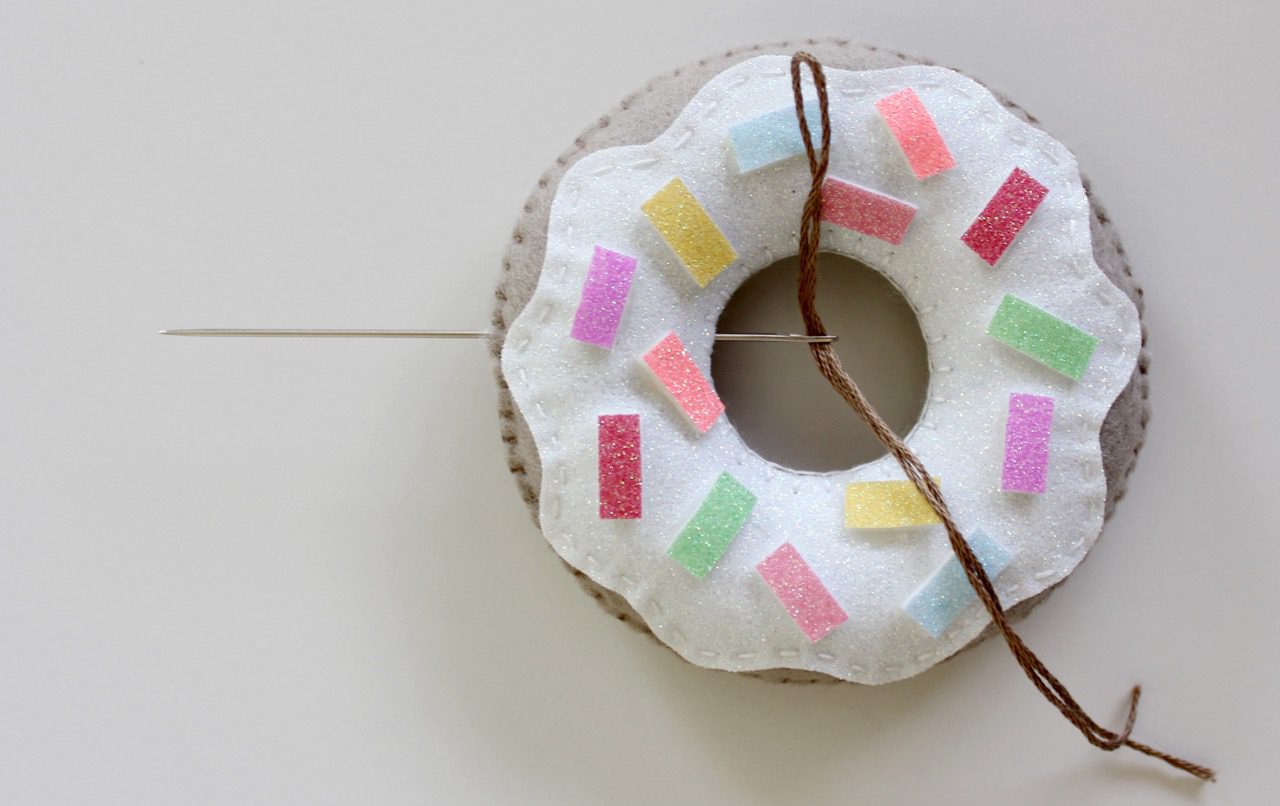
If you’d like to make the donuts into hanging ornaments, it’s super simple too. Fold a 10” (25cm) six strand length of embroidery floss in half and thread the loop through the eye of your large needle.
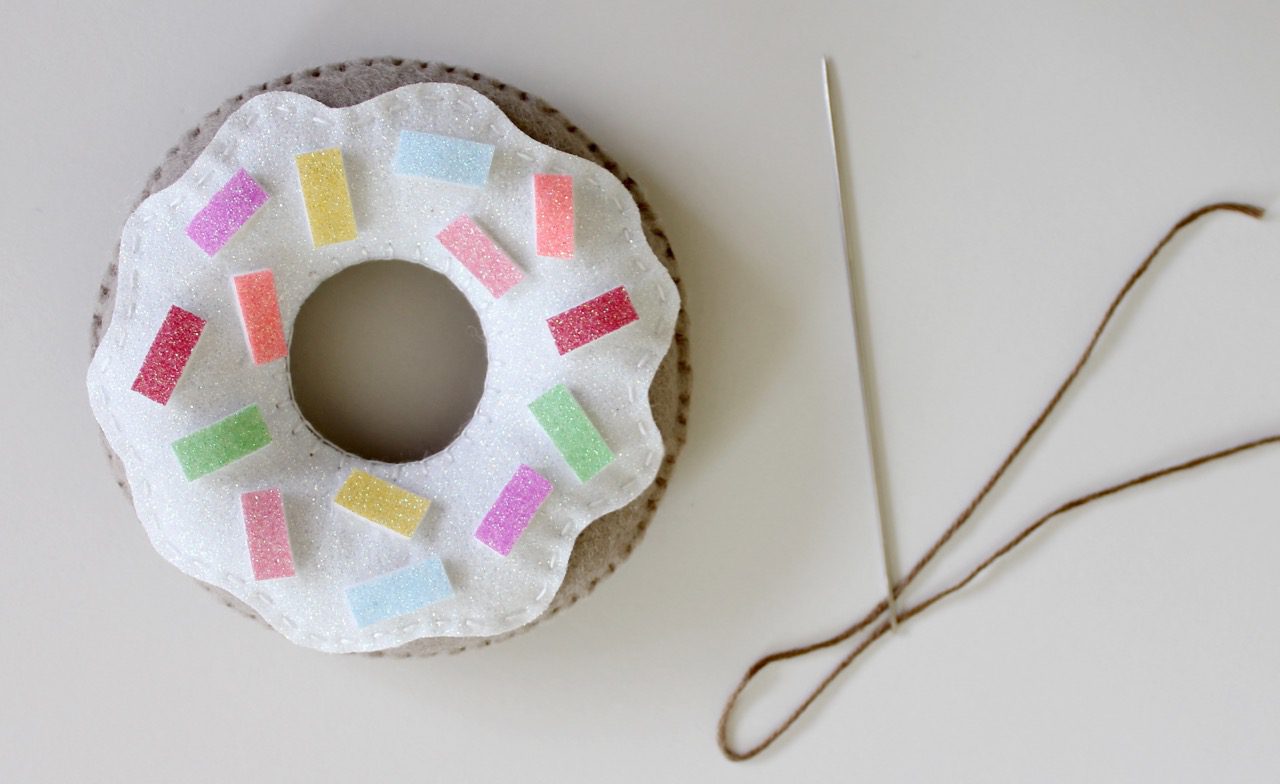
Push the needle in through the inside of the donut hole (through the seam) and out through the top seam.
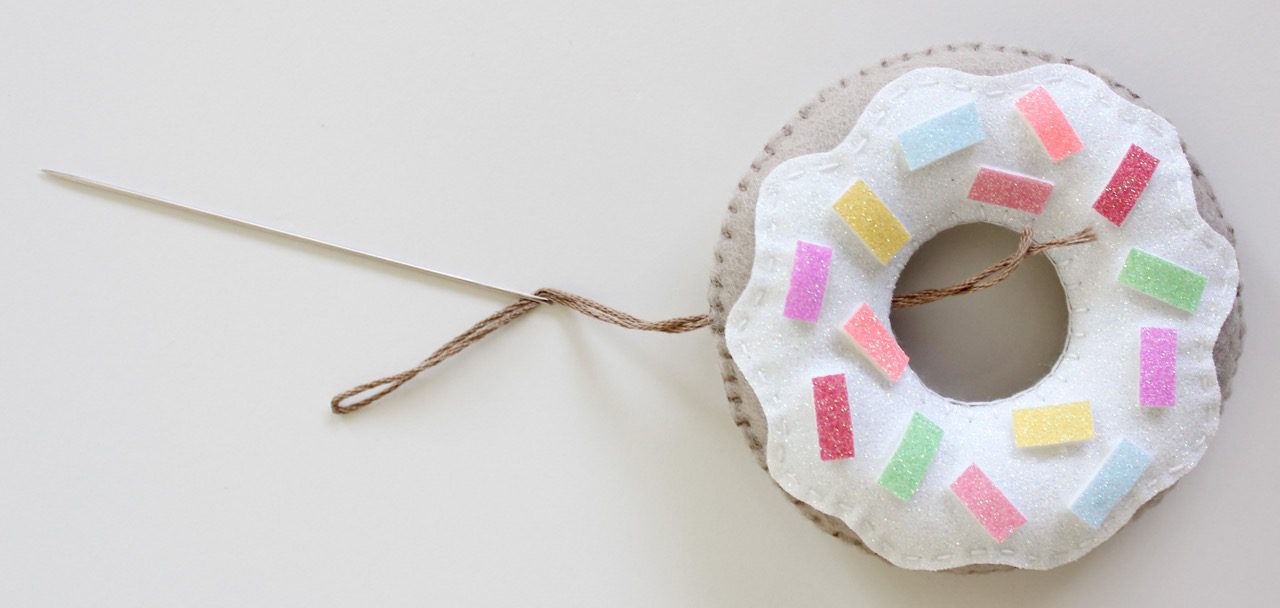
Slide the needle off the top of the floss. Then pull the tails of the floss to make a loop on the outside of the donut that is approximately 1” (2.5cm) long. Tie a knot in the end of the floss (near the donut hole seam).
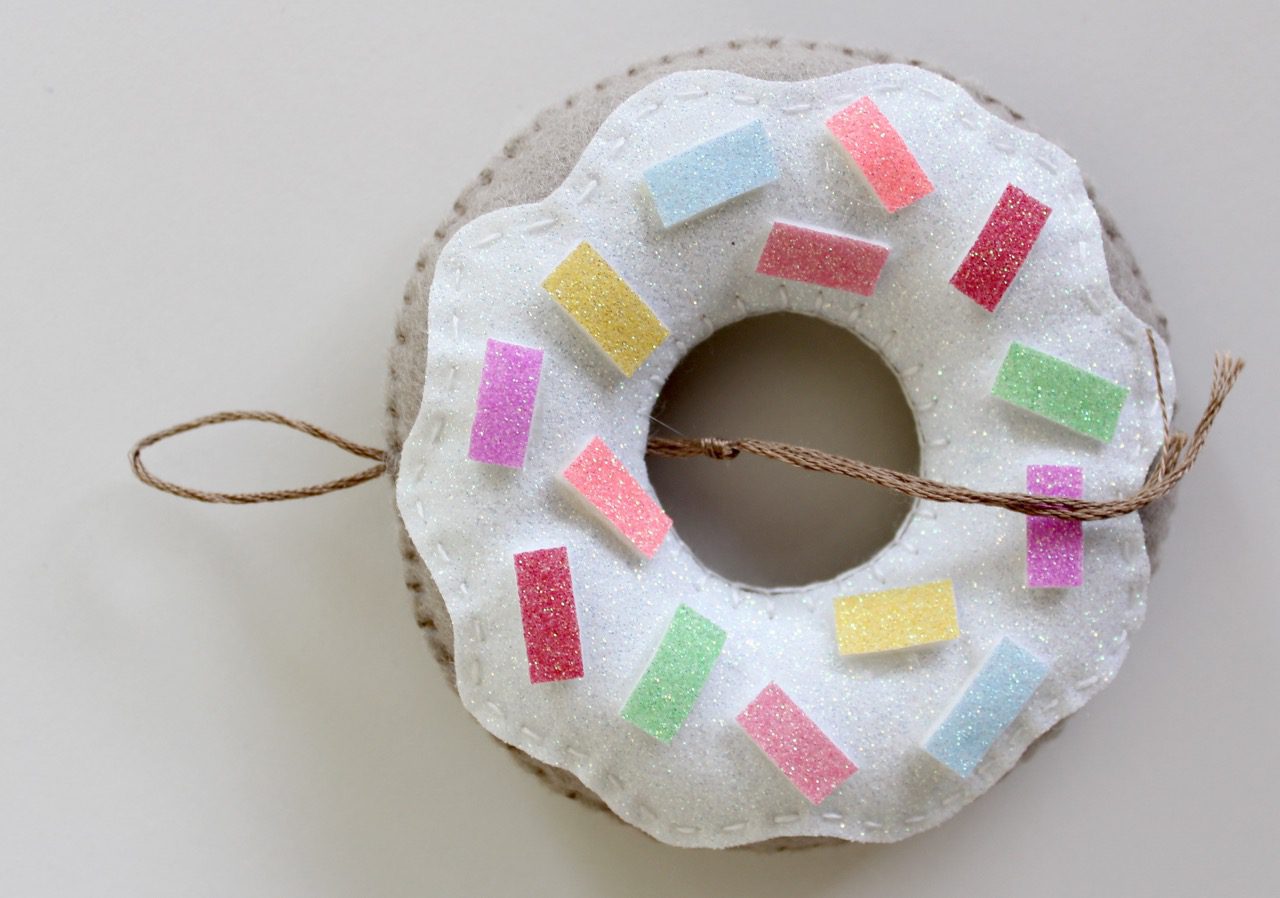
Pull the loop so that the knot pops up into the seam and is hidden inside the donut.

Trim the ends of the floss close to the seam, so they can’t be seen.
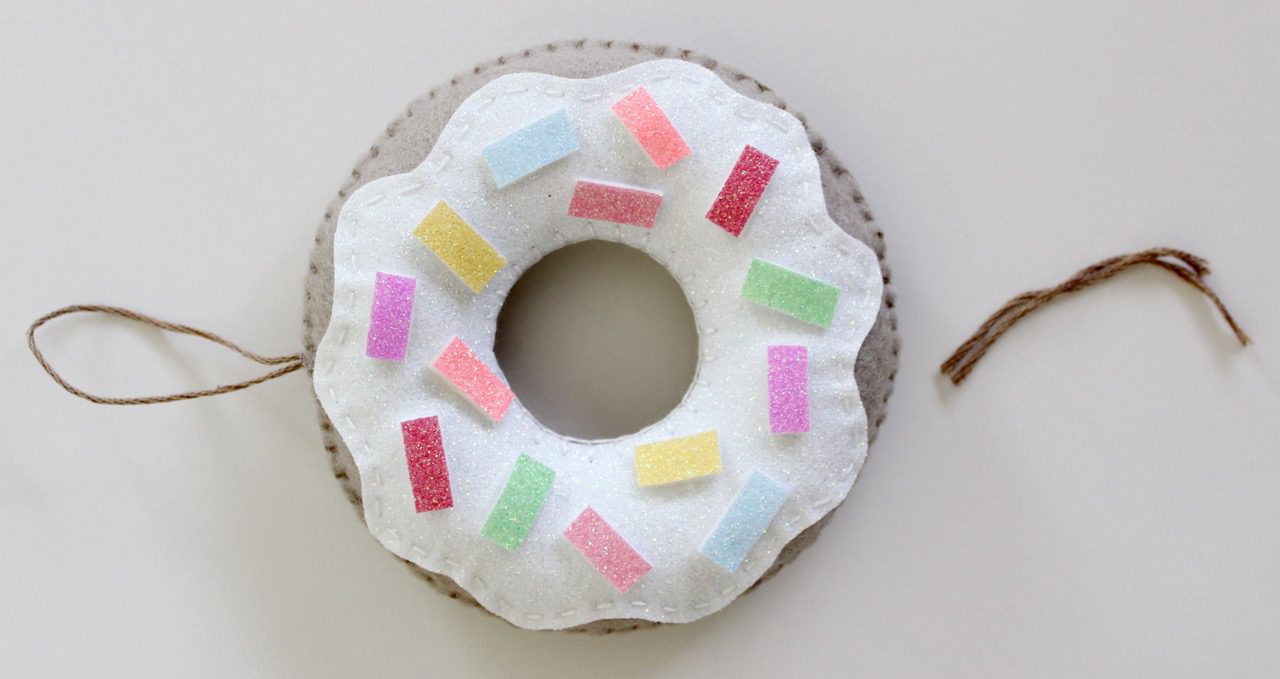
Your donut is all set to decorate the Christmas tree!
Extra Tips
Make smaller or larger felt donuts by simply reducing or enlarging the donut template on your printer.
You could replace the long sprinkles with embroidered lines in different colours of floss, or lots of differently coloured seed beads.
Novice sewists (or children who are just learning) might like to replace the blanket stitching with whip stitch or running stitch to make this project a little easier.
You can personalise your felt donuts with embroidery. Create a keepsake for Christmas by adding a name, initials, or the year.
Thanks for sewing along. I hope you found this tutorial fun! Be sure to share your makes with me. Tag me on facebook at Molly and Mama or on instagram – #mollyandmama.
Head to the pattern store if you’d like to see my range of instant download patterns.
This hexagon Christmas stocking is really popular during the holidays!
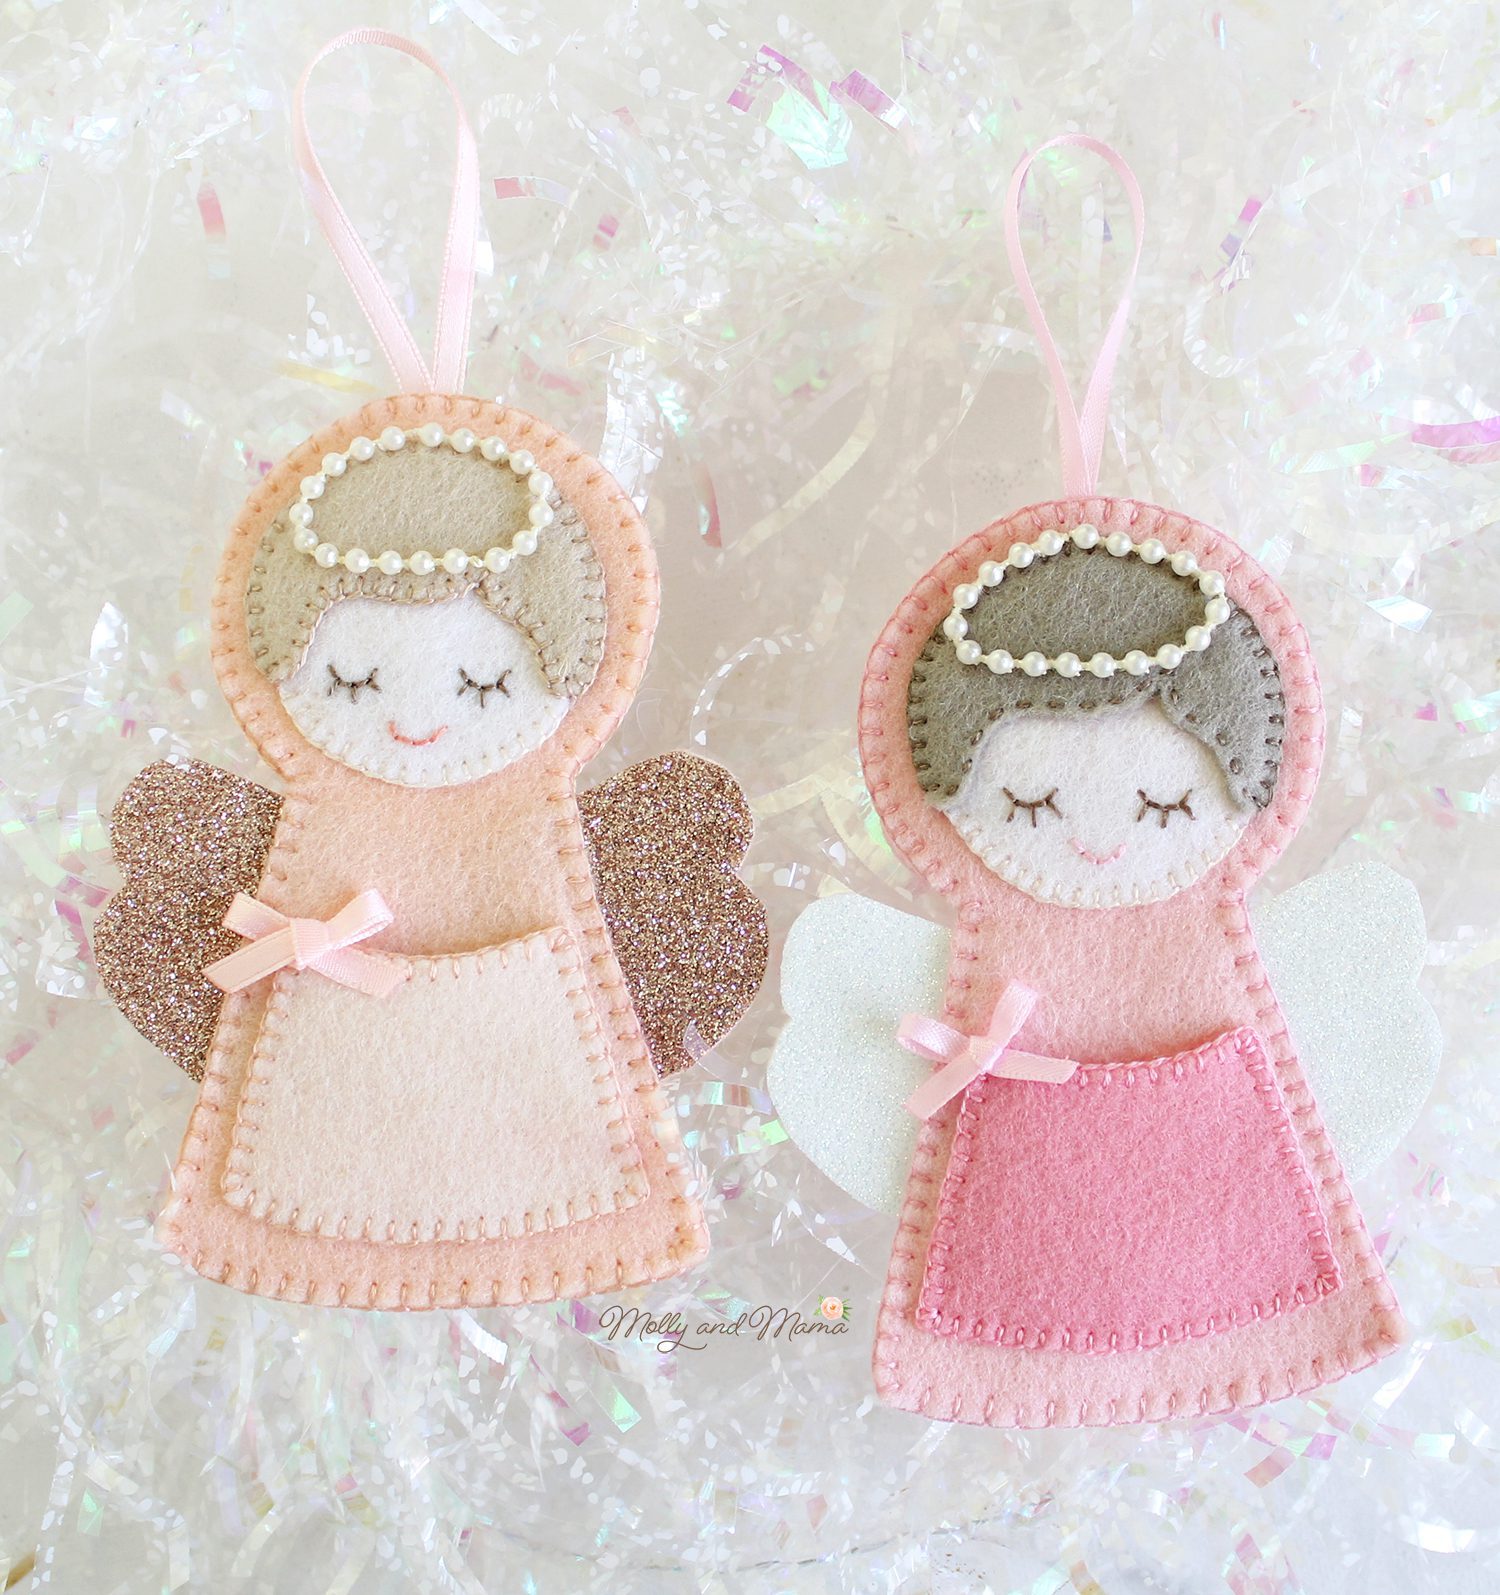
And check out the tutorials tab for more fun felt and fabric projects. You might like to sew these Christmas Angels.
Happy stitching, Lauren x
This post was written by Lauren Wright and appeared first on Molly and Mama http://www.MollyandMama.com.au
This is so cute! Thanks for the free tutorial! 😉
You are so welcome Sarlilla!
These are so cute! My granddaughters would love these for their play kitchen.
I would appreciate it if you would tell me where you found the glitter felt. All I can find are foam sheets with glitter. Thanks!
Hi, the glitter felt came from http://www.myfeltlady.com. It’s such fun to work with!
Hi Lauren!
These are super cute! I’d love to make some for my littles for their play kitchen (despite you saying they were not toys ????). Which colour did you use for the donut? It looks like almond, but I’m not sure! Thanks in advance 🙂
Hi Rebecca, Colour names for felt aren’t universal, so the names will depend on where you purchase the felt. Each of the donuts I made were a different colour and used different coloured icing. As the tutorial was written in 2016, I am not 100% sure on the felt colours I used at the time. But the felt was purchased from http://www.myfeltlady.com. These donut decorations are not listed as toys for legal reasons. Thanks for understanding. Happy stitching, Lauren.