Molly and Mama

Studio for Pretty Stitches - Inspiring ideas for Felt, Stitchery and Patchwork

  • Home
  • Start Here!
  • PATTERNS
    • PDF Pattern Shop
    • Paper Pattern Stockists
    • Pattern Corrections
  • TUTORIALS
  • Classes
  • BOOK
  • Contact

Make A Hair Clip Holder using an Art Canvas

July 16, 2015 By Lauren at Molly and Mama 6 Comments

Make a Hair Clip Holder - by Molly and Mama

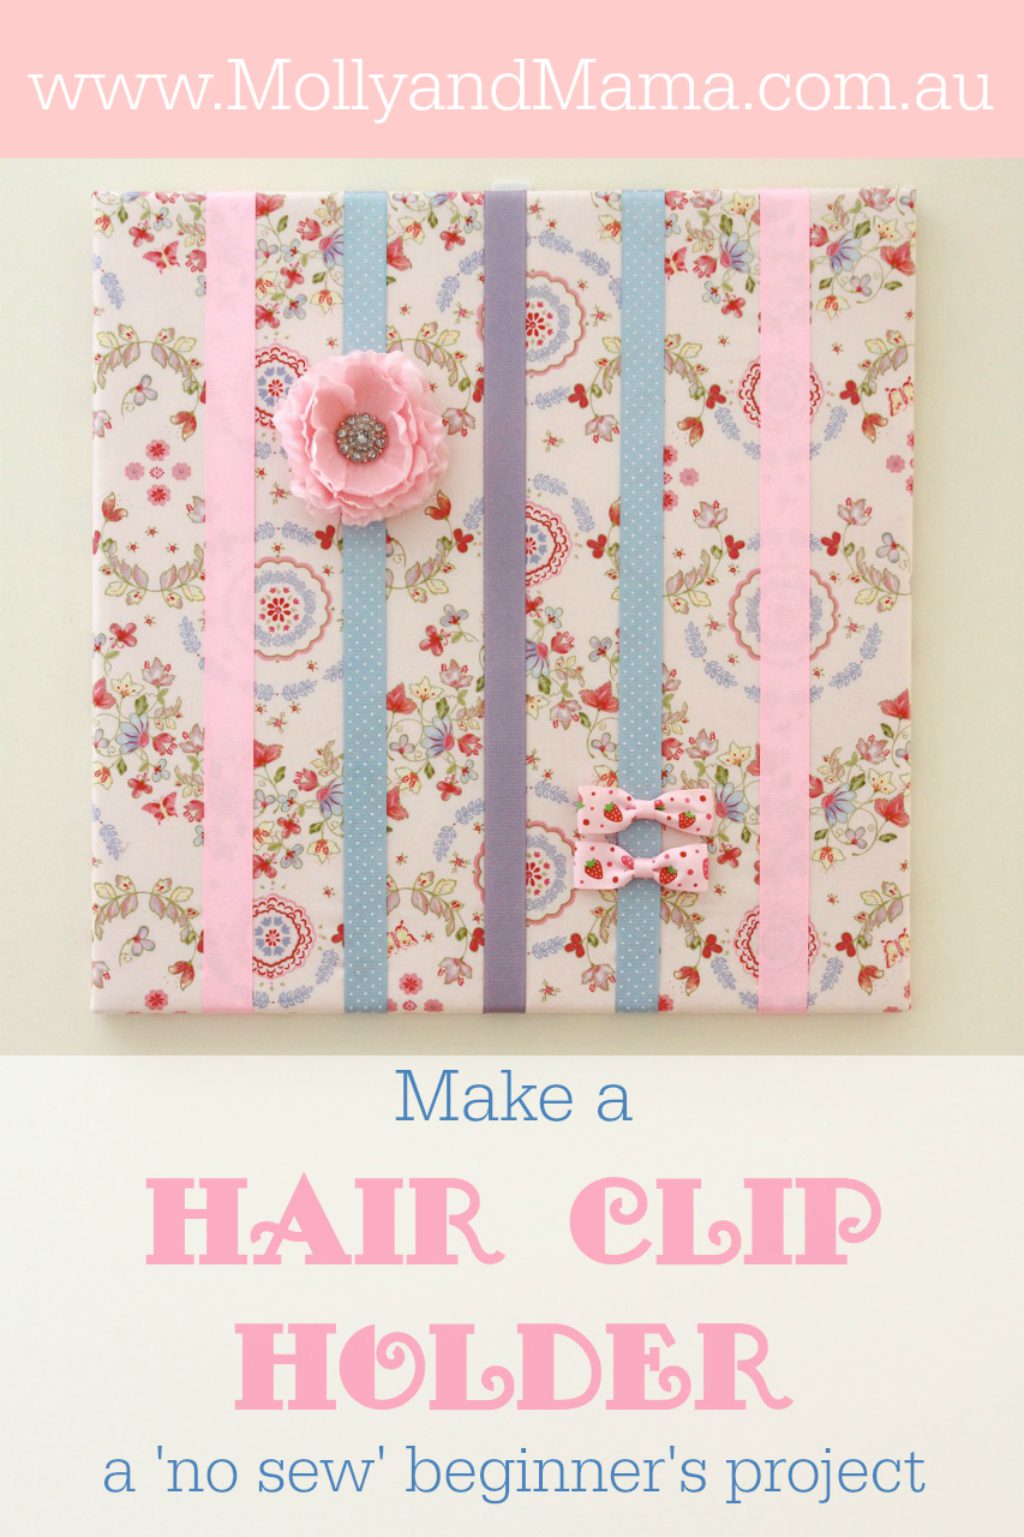
Would you like to make a simple Hair Clip Holder? If you’re like me, there’s an over abundance of hair bows and clips in your house! I created this clip holder to organise and store my daughter’s hair accessories. This tutorial is a great beginners project that is quick, simple and requires no stitching or sewing. We’ll be using an artist’s canvas, some fabric, wadding and ribbon (and a few extra tools) to make a fabric covered canvas. You can then use it as fabric wall art, or add ribbons to create a hair clip holder. Use paper clips and tiny pegs on the ribbon to change the project into a practical noticeboard for displaying invitations, memos, photos and more. Versatile, simple – what could be better?

YOU WILL NEED

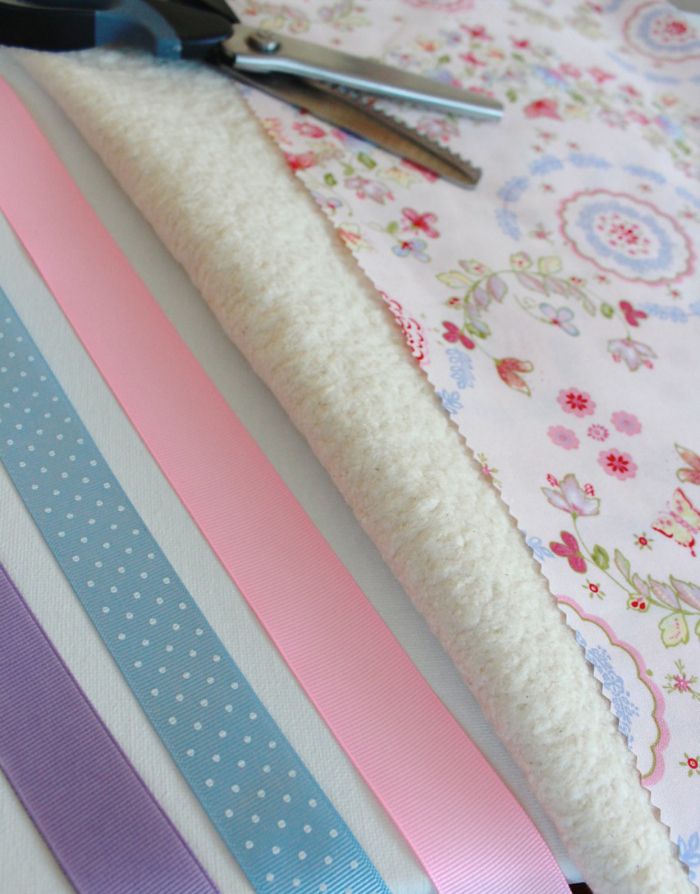
  • a white artist’s canvas. I used a 45cm square (approximately 17 ¾”) that had sides that were 1.8cm deep. For wider canvas sides, be sure to add extra fabric
  • a 55cm square (21 ½” square) of quilter’s weight cotton
  • a 45cm square (17 ¾ ” square) of thin cotton quilter’s wadding
  • five 53cm (21”) lengths of 1” wide or ¾” wide grosgrain ribbon
  • a staple gun (used for upholstery)
  • a heat sealer or cigarette lighter
  • pinking shears (zig zag scissors)
  • spray adhesive
  • ruler or measuring tape
  • iron, ironing board and press cloth or fabric scrap
  • marking pen
  • two small removable wall hooks

LET’S GET STARTED

Select your Fabric and Ribbons

I chose a pretty pink floral cotton fabric for this project. Cotton fabric works well because it doesn’t stretch out of shape as you pull it over the canvas.

Before cutting your fabric, be sure to think about the pattern placement. Is the pattern directional? Consider whether you’ll need to centre your design too.

I also selected some co-ordinating grosgrain ribbon in pale pink, pale blue, and lilac. You could also use satin ribbon, cotton sewing tape, or other types of trims on the board. However, I like the ridges in grosgrain ribbon because they help stop your clips and bows from sliding down the ribbon length.

Hair clip holder materials - Molly and Mama

Attach the Wadding

Your cotton quilting wadding should be exactly the same size as your canvas. Carefully iron your wadding (covering it with a press cloth) to remove any creases if necessary. Spray the top of your canvas with the spray adhesive using the directions on the can. This step is best done outside or using an old fabric drop cloth on the floor. Place your wadding carefully over the canvas and smooth it with your hands to secure it. Trim off any excess wadding.

Secure the wadding to the canvas - Molly and Mama

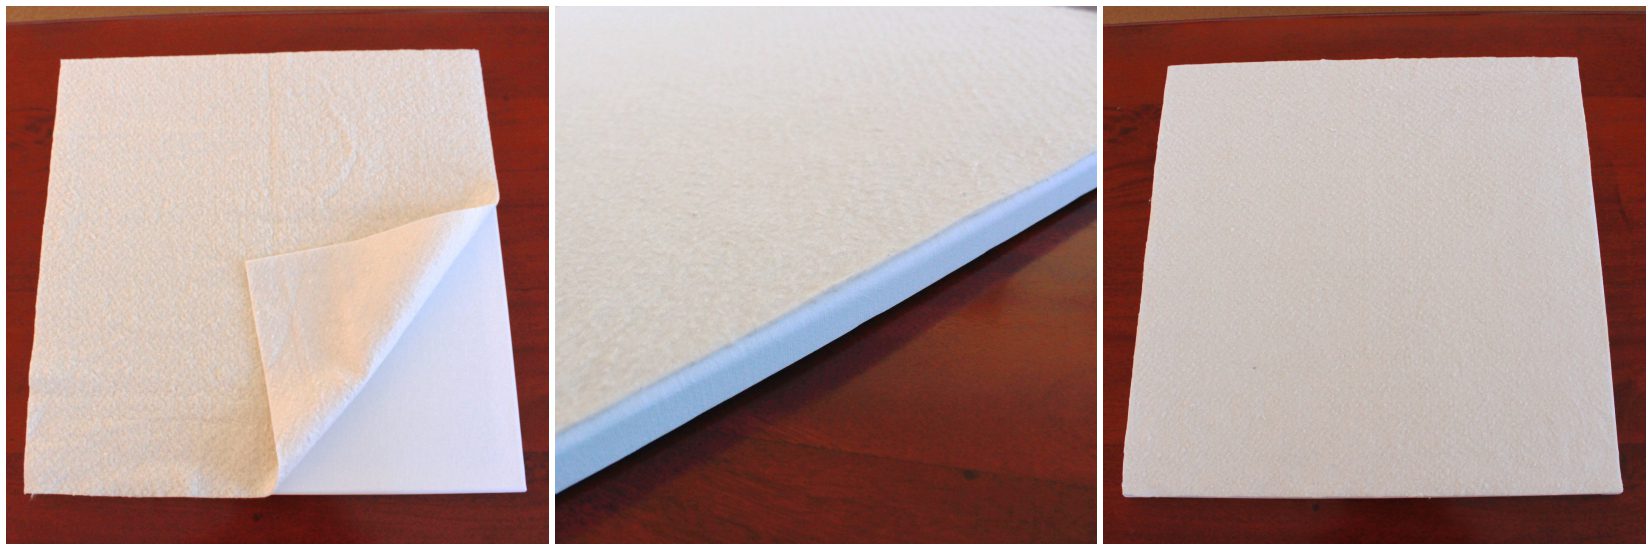
If you don’t have spray adhesive, you can use a larger piece of wadding and staple the overhang onto the back of the canvas (use the same instructions as displayed for ‘Attach your Fabric’). However, I feel it adds a lot of bulk. You can also use an iron-on interfacing or pellon instead of wadding. You can iron it to your cotton fabric. I have found though, that sometimes the cotton fabric isn’t as forgiving when you need to stretch and pull it over the canvas. Go with what works for you best.

Prepare your fabric

Your fabric square should be a 55cm (21 ½”) square. If using a different sized canvas, the fabric should be 10cm (4”) larger than your canvas size. Use your pinking shears (zig zag scissors) to trim all fabric edges. Trim no more than a ½ cm or ¼” from the edge. This helps to stop the fabric edges fraying on the back of the canvas.
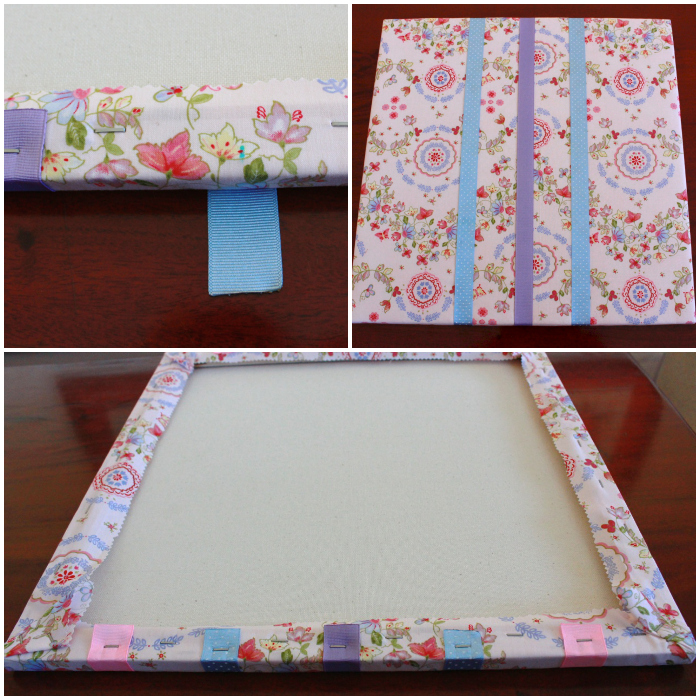
Attach your Fabric

Press the fabric with a hot iron to remove any creases. Place the fabric right side down on a flat surface. Centre your canvas over the fabric square, with the right side also facing down.

Starting on the top side, fold your overhang back so that it covers the back of the canvas frame. Start at one end and secure your fabric by pressing a row of staples into the centre of the wooden frame. Make each staple about 8cm (3”) apart.

Secure your fabric on canvas - Molly and Mama

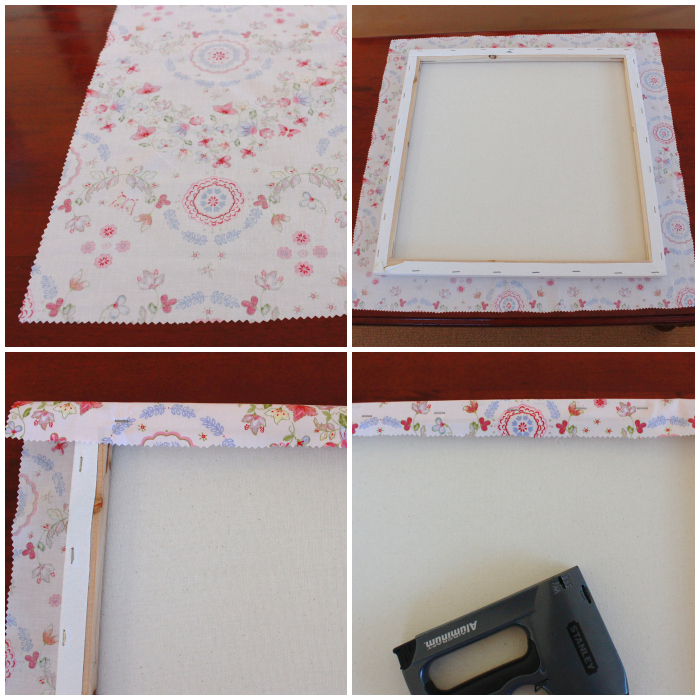
If you haven’t used your staple gun before, I recommend getting in some practise! Be sure you know how to use it and store it correctly and safely. Don’t forget to keep your fingers out of the way too!

When the top is attached, flip your canvas around so that the bottom is now at the top (I find it’s easier to always staple from the top). Fold the overhang of the fabric up over the canvas frame. Pull it gently to ensure the fabric is taut. Place one staple in the centre of the frame. Continue to add staples one at a time, one on each side of the centre. Be sure to gently pull the fabric taut as you go (but be gentle enough to avoid stretches and pulls).

Secure the fabric to the canvas - Molly and Mama

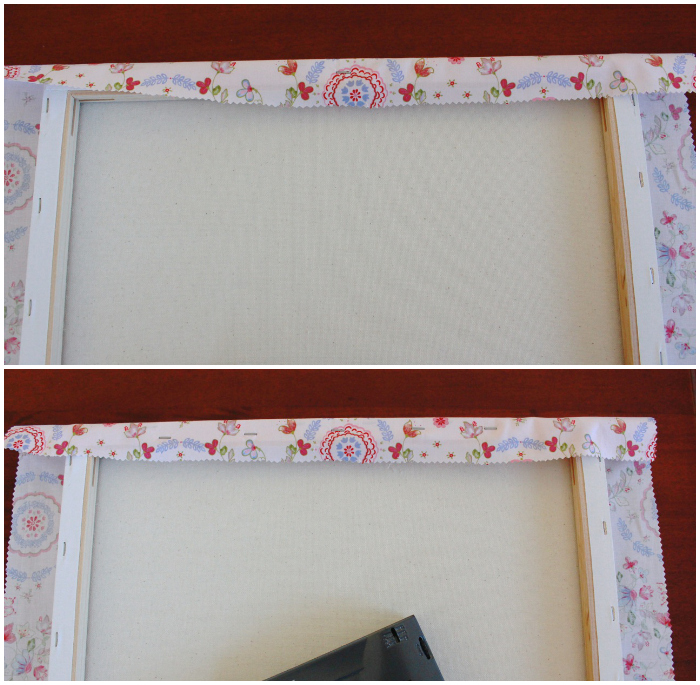
Continue as before until both top and bottom are complete.

Secure the fabric to the canvas - Molly and Mama

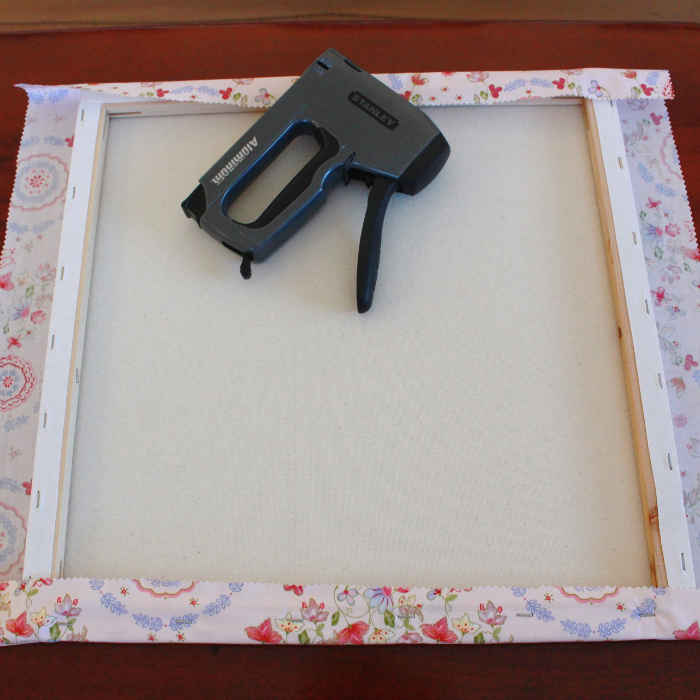
With the top and bottom secure, it’s now time to secure the sides. Choose a side to complete next and rotate the canvas so it’s at the top. Start again with a centre staple, then continue to add one staple on either side of the centre.

Before you secure the corners, you’ll need to mitre the fabric or pull the corner fabric, so that the folds don’t show or pucker at the front. I try to bring both corner pieces of fabric together. I fold them to one side, then back the other way, and then pull them down tightly and secure them with the staple gun (the picture below will demonstrate this more clearly). You may need to add a few staples to really secure the corner. Do this for both corners on the third side, before repeating the whole process to complete the last side.

Mitre the fabric corners - Molly and Mama

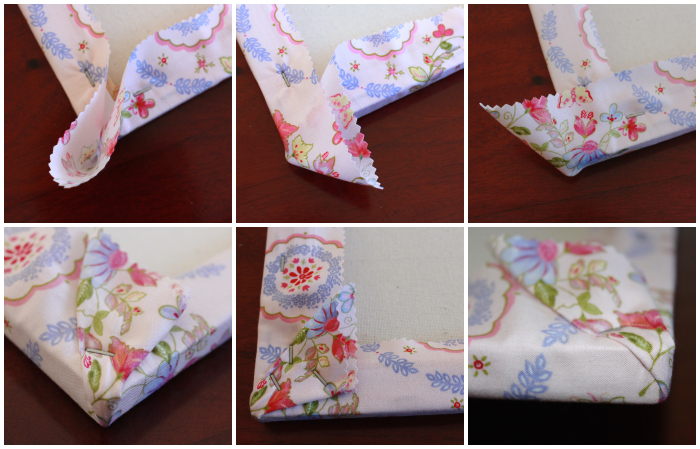
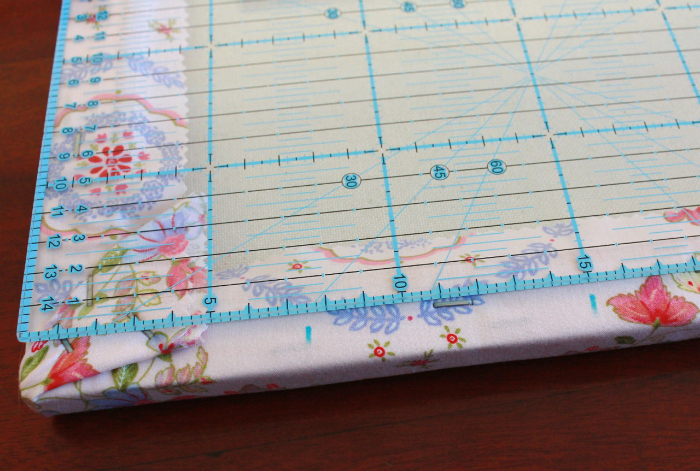
Trim off any excess fabric on the corners with your pinking shears.

Once complete, you should have a smoothly covered canvas. You can hang canvasses like this if you want to make an artwork of the fabric or print you use.

Cover the Canvas - Molly and Mama

But we’ll add some ribbon so it will become a hair clip holder!

Add the Ribbon

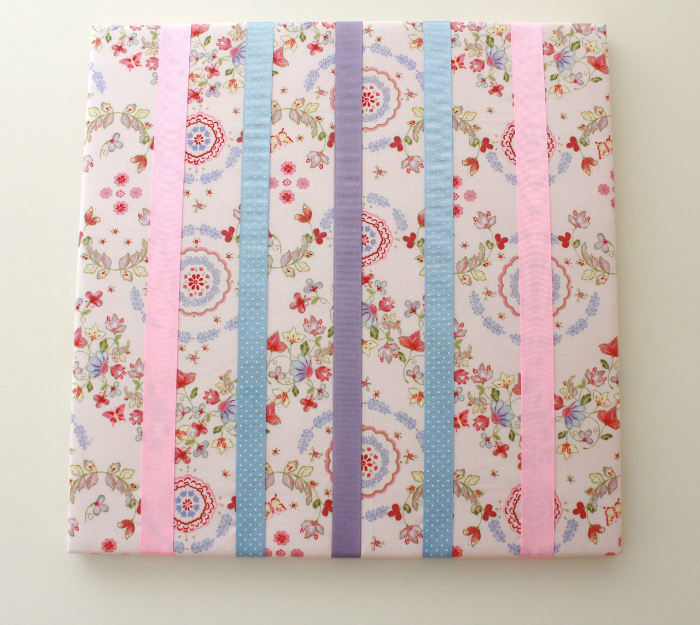
Each piece of ribbon needs to be 53cm (21”) long or a few inches longer than the edges of your chosen canvas size. I have chosen to add five lengths of ribbon to the canvas.

Each piece of cut ribbon needs to be heat sealed at each end. Use your heat sealer. Or run the ribbon quickly back and forth along the flame of a lighter. This melts the ribbon’s fibres together to prevent fraying.

Measure the canvas and use your marking pen to indicate where you are going to place your ribbons. If you’re using five ribbons, your canvas needs to be divided into 6 equal sections 7.5cm (3”) apart. For example, as my canvas is 45cm wide, I’ll place ribbon marks on the back of the canvas at 7.5cm, 15cm, 22.5cm, 30cm and 37.5cm. You can see them here in blue pen.

Mark the place for your ribbon - Molly and Mama

Lay your centre piece of ribbon face down on a flat surface. Lay your canvas face down over it, lining up your markings. Pull the centre ribbon overhang back over the canvas frame. Make sure you have an equal amount of overhang at each end. Secure the ribbon to the back with a staple. Pull the ribbon quite taut and secure the other end.

Add the ribbon to the canvas - Molly and Mama

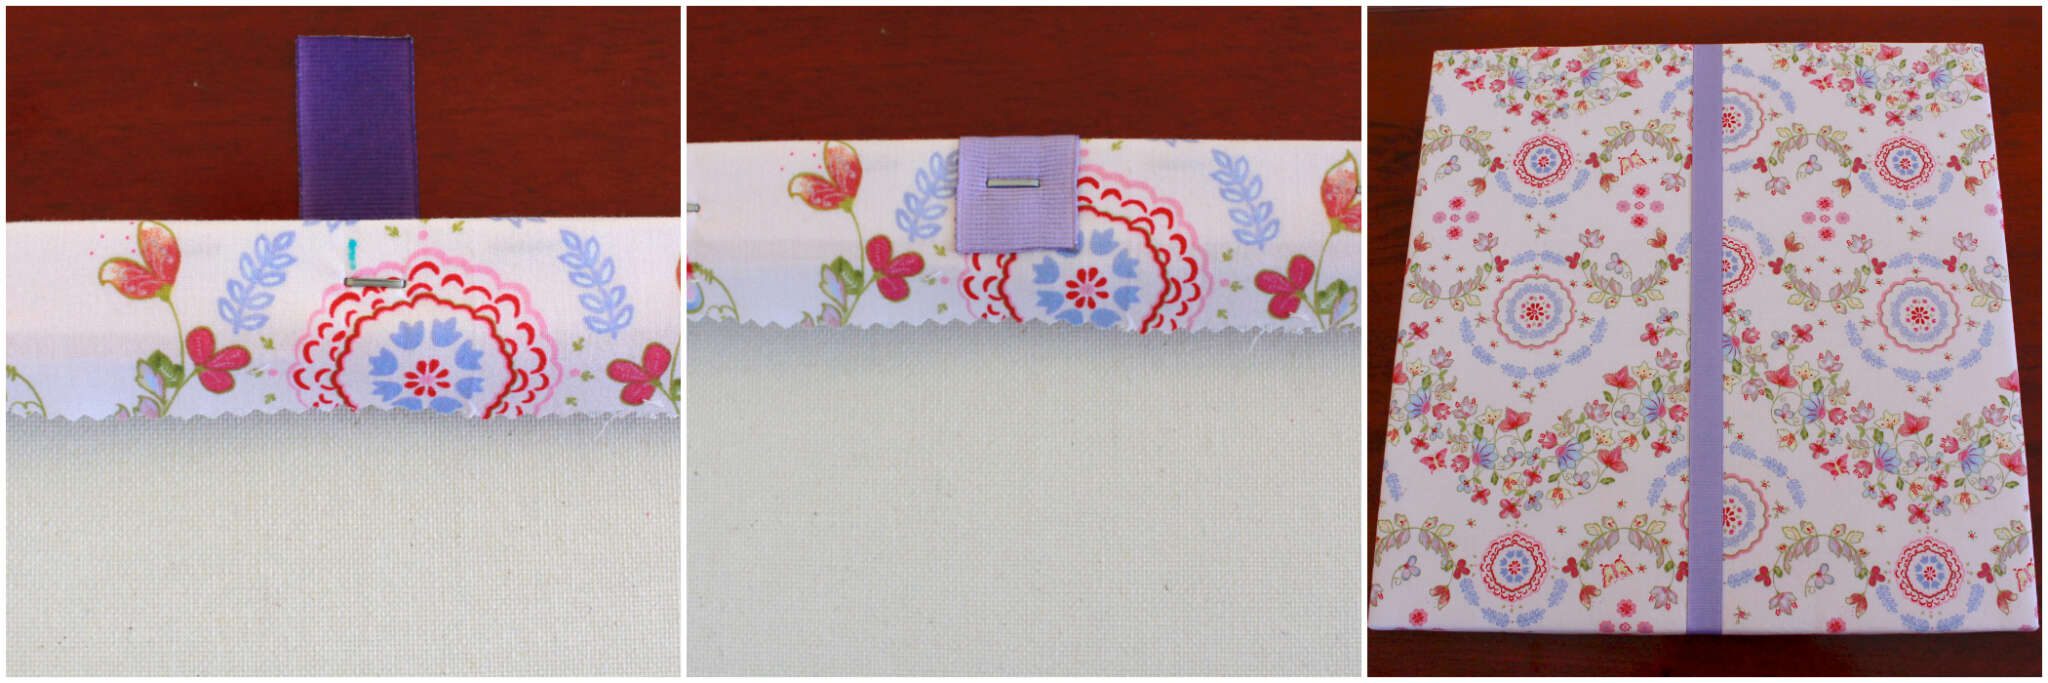
Repeat this process for the other ribbons.
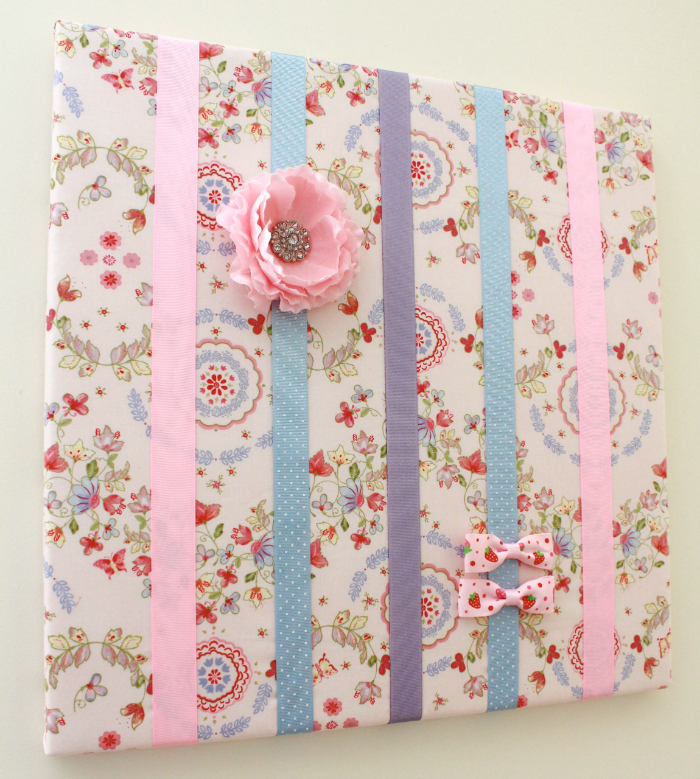
Add the ribbon to the canvas - Molly and Mama

Finish your Project

Flip your canvas over and admire your beautiful work! If the canvas is a gift, you can cover the back with a piece of felt secured carefully with a glue gun. Use the pinking shears to zig zag the felt edges before attaching it to the back if you wish.

Hair clip holder by Molly and Mama

Now all you need to do is prepare your hair clip holder for the wall. I have found that hanging the canvas with picture framing wire and a hook isn’t very practical. The canvas slides around on the wall every time you remove or add a clip! Instead, I use two removable plastic hooks and secure them to the wall, making sure they’re lined up to tuck neatly under the far top edges of the canvas. That way it stays securely on the wall without tilting.

Hair Bow Tutorial by Molly and Mama

Change It Up

You can make additions to your project like adding extra ribbons to hang from the bottom for extra clips. You can also screw half hooks into the base of the frame to hang fabric head bands and hair elastics.

You could also personalise your project by appliquéing a pretty design or the child’s name. You can use the tips outlined in my Head Band Holder Tutorial.

You can even make a noticeboard instead. Arrange the ribbons horizontally so that you can attach some paper clips and mini pegs. Then your canvas becomes a wonderful way to store invitations, cards, and more.

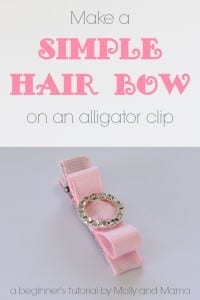
I really hope you enjoyed this tutorial.  If by some strange chance, you need to fill your hair clip holder, I have a couple of hair bow tutorials you may really enjoy. Here’s how to make a simple hair bow on an alligator clip.

Make a Simple Hair Bow on an Alligator Clip - a beginner's tutorial by Molly and Mama

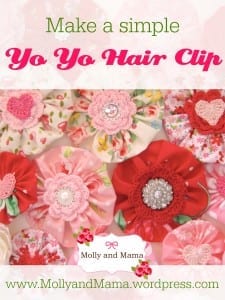
You can add fabric yo yo’s to really jazz them up!

Make a Simple Yo Yo Hair Clip - a beginner's tutorial from Molly and Mama

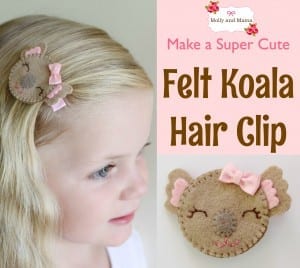
Or use some felt to create this adorable koala!

Make a Felt Koala Hair Clip - a Molly and Mama tutorial

Happy creating, Lauren x

This post was written by Lauren Wright of Molly and Mama and appeared first on Sew McCool

It was later added to the Molly and Mama blog with permission http://www.MollyandMama.com.au

Filed Under: Projects Tagged With: art canvas, hair accessory, hair accessory holder, hair bow, hair bow holder, hair clip holder, ribbons

Comments

  1. Renee says

    March 9, 2017 at 7:50 am

    You copied this article from this website

    http://www.sewmccool.com/make-hair-bow-holder-canvas/

    You should credit them for that.

    Reply
    • Lauren at Molly and Mama says

      March 9, 2017 at 9:04 am

      Hi Renee, Thanks for your comment. As clearly stated in the first paragraph of the tutorial on the Sew McCool website, I personally wrote this content for Deanna’s blog as a tutorial contributor in 2014. Deanna also mentions this in the final paragraph and the tutorial provides at least two links to this Molly and Mama website. As per my personal arrangement with Deanna, I also later added this content to my own blog as it’s my own work. Thanks for your concern, but rest assured that no copying has occurred here, just a reciprocal arrangement between bloggers. I value all the hard work of bloggers, makers, and designers, because I am one myself and I know how much effort goes into creating content. I’ll always give credit where credit is due, and would never take anyone else’s work. I hope that you found the tutorial useful and have enjoyed the content on both Sew McCool and the Molly and Mama blog. Kindest regards, Lauren (owner of Molly and Mama).

      Reply

Trackbacks

  1. Little Girl's Bedroom Makeover - Tutorial Series - Molly and Mama says:
    July 16, 2015 at 11:04 am

    […] It seems that every little girl has a LOT of hair clips, hair bows and accessories. Here’s a very simple no-sew project that helps you create a beautiful piece of wall art that’s very practical too; the Molly and Mama Hair Clip Holder. […]

    Reply
  2. Line an Alligator Clip and Make a Simple Hair Bow - Molly and Mama says:
    March 9, 2017 at 11:16 am

    […] then you can create a Hair Clip holder to store them on! I’ve created a tutorial for this too, so make sure you head over and have a look. […]

    Reply
  3. Make a Hair Bow Holder and Matching Clips - Molly and Mama says:
    March 10, 2017 at 11:27 am

    […] of the items due for an update in her bedroom was the hair bow holder I made her a few years back using this tutorial. I purchased a new long artist’s canvas and some gorgeous glitzy fabric, peach ribbon and […]

    Reply
  4. Girls Hair Bow Boards – Dabbling in Domesticity says:
    June 2, 2018 at 2:28 am

    […] out to find an easy bow board to make and hang. The obvious first stop was Pinterest. I found this great tutorial, which was so easy to follow and […]

    Reply

Leave a Reply Cancel reply

Your email address will not be published. Required fields are marked *

Categories

  • Christmas (37)
  • Christmas Stocking Sew Along (6)
  • Easter (10)
  • Embroidery For Beginners (6)
  • English Paper Piecing (9)
  • Felt Fun (12)
  • Forest Family Quilt Along (10)
  • Holidays (11)
  • Molly and Mama Patterns (54)
  • Pattern and Book Reviews (38)
  • Projects (40)
  • Quilting Help (3)
  • This and That (52)
  • Tutorials (49)

Cart

mollyandmama

Studio For Pretty Stitches
🧵🪡 Our fourth week of the #seworderly challe 🧵🪡 Our fourth week of the #seworderly challenge that I am cohosting with Ali from  @arabesquescissors has already begun! For our final week we’re discussing how you organise your projects for SEWING ON THE GO! This might look a little different for you at the moment (depending on where you live) but how and what do you pack to maximise sewing whilst travelling or out-and-about? 

Travel sewing kits are especially applicable for hand sewing projects like English paper piecing and embroidery (even if you’re moving from the sewing room to the couch🤣). But you may also have tips for traveling with your machine and quilt WIPs too, particularly if you have enjoyed sewing on holidays or attending retreats. 

To join the challenge, simply share a public photo showing us how you plan for sewing on the go. Tag us and use the #seworderly hashtag so others can find you. We’re thrilled to see the generosity with which you’re sharing ideas, tips and more! 

Your post will put you in the running to win this gorgeous bundle of three PDF ‘Cathedral Window’ patterns from @arabesquescissors. So cute, right? Please see Ali’s prize post for more information. And don’t forget that we’ll also be selecting a Grand Prize Winner at the end of the month. Good luck everyone! 💗
🧵🪡 Week 3 of the #SewOrderly challenge with 🧵🪡 Week 3 of the #SewOrderly challenge with me and Ali from @arabesquescissors has come to an end. For the past week you’ve been sharing your tips and tricks for storing and organising your Work In Progress (WIP) projects and we’ve been loving reading all the suggestions and seeing all of your photos. 

We’ve selected @kirsty_sews and @mtnlaurel96 as our winners of the Molly and Mama Pattern pack including the #SimpleSewingFolder, #SummerRosePouch and #MissMollyandFriends. Congratulations ladies! 

I’m looking forward to putting together a blog post with some of the fantastic ideas that have been shared this week. Here’s a couple of my favourites. 

-	Small square pastry or cake containers work well for storing WIPs, as do scrapbooking shelves and containers. 
-	If a WIP is something you’d like to work on more, put it somewhere that you’re likely to see, so you’re more likely to pick it up and get some stitching done! 
-	Label each box or tub with the name of the project, the date it was started, the fabrics used, and any other relevant information you want to keep at hand. 
-	@amandalovestocreate shared a terrific tip of adding an adhesive photo of the project to the label! I love that idea!
-	Make a note in your diary or set an alarm on your phone to remind you to check in with your WIPs and their progress. This might give you a much needed push to get stuck into a project you may have otherwise forgotten about.
-	Find a likeminded maker and ask them to become your Accountability Partner so you can periodically check in with each other and give yourselves a gentle nudge to make some progress on your WIPS! 

If you have more ideas, we’d still love to hear them. Ali has put together a great round up of ideas on her blog too. 

Stay tuned as we now share more information about our fourth and final week, with Sewing on the go! 

#mollyandmama #arabesquescissors #seworderly #sewsorted #seworganised #seworganized #sewingroom #craftroom  #craftroomorganization #quiltstorage #quilting #sewingwips
Did you see my posts over at @aurifilthread this w Did you see my posts over at @aurifilthread this weekend? I did an Instagram takeover which was heaps of fun! Pop over to see what I shared. One of the posts included my Top 5 Tips for Embroidery Success, and I thought it was silly of me not to share those tips here too! But really, these tips apply to all sewing. They’re simple but true! 

1.	Choose the right tool for the job. You don’t need to spend a lot of money, but using a needle you can easily thread with the right type of thread for the job, can make all the difference to your experience. 

2.	Start simple. As a beginner, starting a large and intricate design might become overwhelming if only because of the amount of time it will take to complete. Start with a smaller design and move on to more detailed projects as your skills progress. 

3.	Get help from the experts. Watch You Tube videos, read blog posts, enrol in online courses. Over time you’ll develop a whole new skill set that you’ll be able to pass on to someone one day too. 

4.	Don’t rush. It’s not a race, and embroidery is all about slow stitching. 

5.	Leave out your embroidery so you’re more likely to pick it up and continue stitching when you have a spare moment. The more you stitch, the better you’ll become. And it’s a wonderful mindfulness activity! 

#mollyandmama #mollyandmamastitchlibrary #prettystitchesclub #aurifil #aurifilfloss #aurifilthread #embroideryfloss #embroidery #embroiderythread #embroiderytips #embroiderersofinstagram #sewingtips #stitching #handstitching #handsewing #stitchingtips #slowsewing #slowstitching
One of the sewing patterns up for grabs in this we One of the sewing patterns up for grabs in this week’s prize pack for the #SewOrderly challenge is my Simple Sewing Folder. So I just wanted to show you a little more about this pattern in my store. 

Featuring a hand embroidered front panel, little hexie details, and simple patchwork, the cover is all about showcasing the ‘pretty’. 

Open it up (swipe to see) and it’s all about the practical! There’s a lace zipper pocket, tabs for tools, a wool felt needle and pin minder, a thread holder and spaces for hoop storage. 

This folder is perfect for storing ‘work in progress’ projects - the focus of this week’s theme for our sewing room organisation challenge, hosted by me and @arabesquescissors. 

If you’d like to know more, there are links in my profile to my store and my blog. I’d love you to get involved! 

#mollyandmama #seworderly #simplesewingfolder #embroidery #embroiderydesign #sewingfolder #projectfolder #sewingroomstorage #sewingspace #notionstorage #sewingonthego #hexies #hexagons #quilting #quiltedpouch #sewingpouch #tildateatowel
I don’t show my face on here anywhere near as of I don’t show my face on here anywhere near as often as I should. And it’s funny because you’ll have a picture of someone in your head and they often don’t look anything like what you imagine. So for what it is worth, this is me, Lauren. I wanted to say hi and share a bit more about me, as there’s so many new faces here lately. Thank you so much for joining us! 

Here’s 5 facts about me;

1️⃣ My first degree was in Behavioural Science, but I used my second degree in Education to become a primary school teacher. 

2️⃣ After having our two kids, we decided I’d work from home and I’ve been sewing, blogging and designing ever since! 

3️⃣ My maternal grandmother’s name was Molly and my kids call my mum ‘Mama’. I named my business after Molly and Mama in honour of the skills, lessons and traits they passed down to me. I’m so blessed to be able to  share that love of creative expression with all of you! 

4️⃣ My favourite colour is pink. Big surprise there 😂! And I have a love for all things pretty and sweet. 

5️⃣ I love drawing and illustrating and hope to bring more of that to my work in the future! 

I’d love to meet more of you and hear where you are from. Feel free to leave me a reply.  Thanks for your support and encouragement of my little biz. It means the world to me! Lauren 💗
🌼🌸🪡There’s something new and very excit 🌼🌸🪡There’s something new and very exciting coming to Molly and Mama soon! Are you subscribed to the newsletter? Find a link to join in my profile, so you can stay tuned for the release of the ‘Pretty Stitches Club’. It’s all about sharing my love of embroidery, slow sewing and beautiful stitchery🪡🌸🌼

#mollyandmama #prettystitchesclub #studioforprettystitches #embroidery #embroideryclub #stitcheryclub #sewingclub #sewingsubscription #embroiderypatterns #monthlyembroideryclub #handstitching #slowsewing #aurifilthread #aurifilfloss #aurifilartisan #aurifloss #tinystitches #floralembroidery #embroiderywreath
Our Week Three prize pack for the #seworderly chal Our Week Three prize pack for the #seworderly challenge with @arabesquescissors includes three of my @mollyandmama  PDF sewing patterns; the #SimpleSewingFolder, the #SummerRosePouch and the #MissMollyAndFriends pin cushion pattern. 

 Ali and I will each select a winner on Monday, 22nd February, 2021.

To enter, post a photo or video on your public profile showcasing how you store your projects and quilts as you’re working on them or even when they are completed. Tag @mollyandmama and @arabesquescissors and use the #seworderly hashtag so others can find you. 

T&Cs
- the giveaway is open worldwide to participants 18 years and over, with a public Instagram profile, and who post in alignment with the guidelines outlined above. 
- Entries will close at 11.59pm AEST on Sunday, 21th Feb 2021. 
- The two winners will be announced here on Monday, 22nd Feb, 2021 and will need to provide an email address to receive their prize. 
- This giveaway is in no way associated with, sponsored by or endorsed by Instagram. 

Thanks so much for sharing the #seworderly love! And you can find out more about these patterns in the store - there’s a link in my profile. The Simple Sewing Folder is a fantastic project folder for embroidery or EPP storage, perfect for WIPs. How do you store your ‘work in progress’ projects and quilts?
Have you been participating in the #seworderly cha Have you been participating in the #seworderly challenge with me and Ali from @arabesquescissors? We’re sorting our sewing rooms for the month of February and have already tackled NOTIONS and FABRIC. 

This week we’re exploring how to store and organise our completed QUILTS AND PROJECTS and those we’re still working on (WIPs). Would you like to join us? There’ll be a sweet @mollyandmama prize pack up for grabs, but more importantly, you’ll be having fun sorting your sewing space knowing that there are likeminded friends joining you! 

Share a photo of your quilt and project storage, tag @mollyandmama and @arabesquescissors, use the hashtag #seworderly, ask questions or share tips and advice. We’d love you to join us! 

#mollyandmama #arabesquescissors #sewsorted #seworganised #seworganized #fabricbundle #sewingroom #craftroom #quilts #craftroomorganization #quiltstorage #quilting #quiltfolding #serioussewistsset #beeapplique #libertyfabric #libertytanalawn #epp #englishpaperpiecing #libertywiltshire
Ali from @arabesquescissors and I are wrapping up Ali from @arabesquescissors and I are wrapping up week 2 of our #seworderly challenge. This week has been a HUGE one, where we’ve focussed on FABRIC STORAGE. We’ve been overwhelmed by the number of you who have wholeheartedly jumped onboard and unreservedly shared your sewing spaces and craft rooms. So thank you and congratulations on the success you have achieved this week; from tidying just a small stash, a basket or a drawer, to refolding and sorting all the fabrics in your entire room! 

So many of you have tackled your yardage, pre-cuts, scraps, fusibles, interfacings, batting and more! And you’ve been so generous with your tips and ideas. So thank you! I’m sure those of you who are yet to tackle your stash will get a lot of inspiration from heading to the #seworderly hashtag! 

We can’t always keep our fabrics in pretty little arrangements like my first photo of Liberty here. So swipe to see my second photo – a more realistic view, taken from the inside of one of my newly organised Billy bookshelves from Ikea. I like to keep my fabrics folded, in plastic tubs, behind solid cupboard doors, so I can avoid sun damage and reduce the effects of dust, pests and moisture. They’re organised by type and size (so yardage, fat quarters, smaller pre-cuts and scraps are generally all separated), then by colour or their use. How do you organise yours? 

I’ll be compiling all the tips and tricks I learned from my own experiences and from reading all of your posts, into a blog post really soon. So stay tuned for that. 

And Ali and I have both chosen a winner for the @arabesquescissors pattern prize pack for this week. Please see Ali’s post to see if it’s you! Thank you so much to all who participated. We’re looking forward to kicking off Week 3 shortly. Let’s explore PROJECTS & QUILTS. Please join us (find out more about the #seworderly challenge on the blog, using the link in my profile). 

Happy sorting, Lauren x 

#mollyandmama #arabesquescissors #sewsorted #seworganised #seworganized #stashbusting #stashstorage #fabricstorage #fabricsorting #fabricstash #libertytanalawn #libertyfabrics #libertybundle #fabricbundle #fabriccontainers #sewingroom #craftroom
Load More… Follow on Instagram
© Copyright 2020 - Molly and Mama