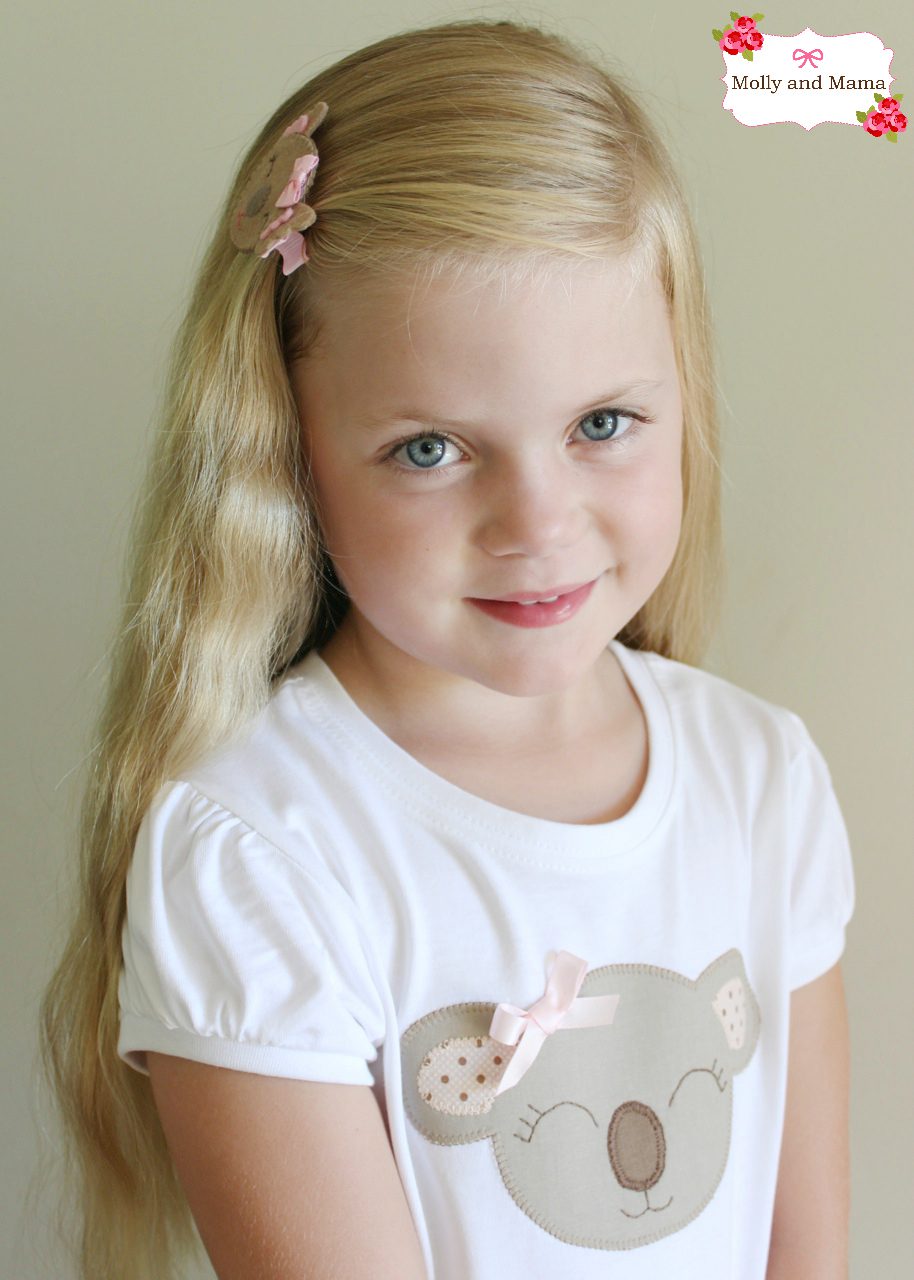
Make a Koala Hair Clip
In honour of our national day, Australia Day, I’ve created a gorgeous little felt koala. My daughter wanted a hair clip to match her outfit so I whipped up this cute little clip and thought I’d share how I put it together!

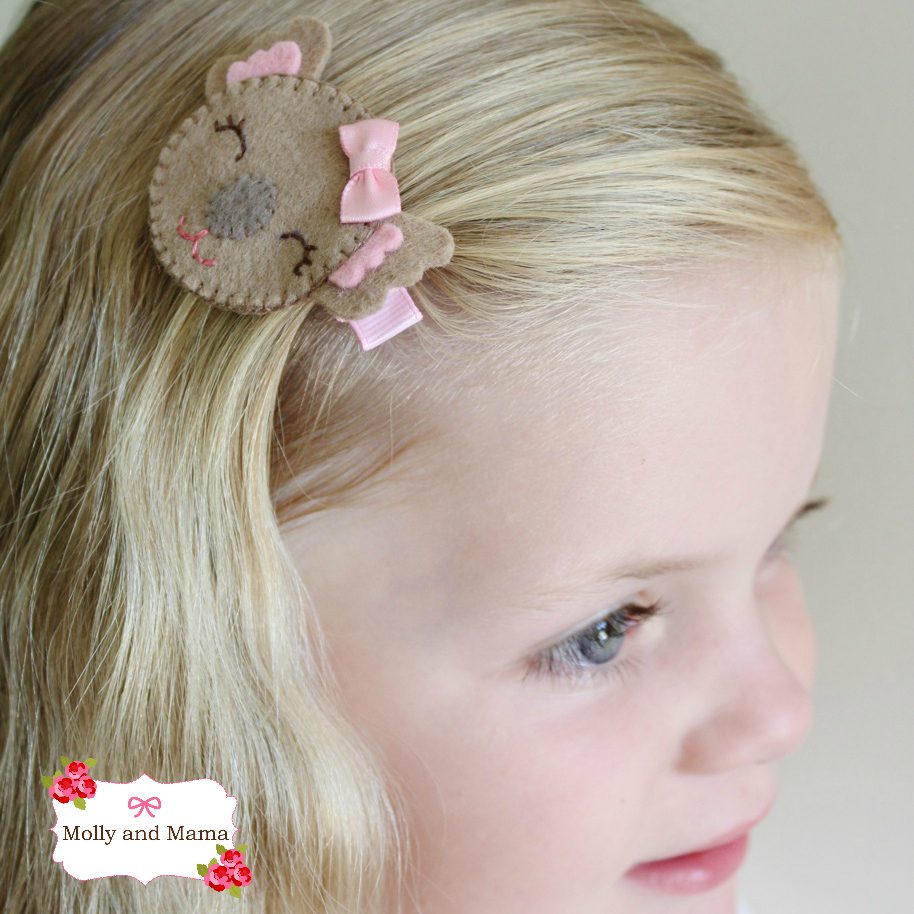
The finished koala only measures 6cm (or 2.5″) across and fits neatly on a 48mm ribbon-lined alligator clip. She’s made from wool felt. If you haven’t already guessed it, I’m obsessed with this medium! You can see more tips for using wool felt HERE.
NOTE: This project is for PERSONAL USE ONLY for sewing at home and/or teaching another person or child to sew FOR FREE. Reusing or repurposing free Molly and Mama tutorial instructions, templates and images for paid classes, or distributing the materials in classes, to groups, or for commercial purposes, without permission, is strictly prohibited. For clarification, or to seek a commercial arrangement, please contact Molly and Mama.
YOU WILL NEED
- wool felt scraps in your chosen colours. I selected taupe, light brown and pale pink.
- matching embroidery floss
- embroidery needle
- fine embroidery scissors with sharp blades
- an optional mini bow (or similar) for embellishment
- a 48mm alligator style hair clip
- 12cm of coordinating grosgrain ribbon (10mm wide)
- a hot glue gun
- erasable marking pen
- a print out of the template from HERE
LETS GET STARTED
Download and save the koala template, then print a copy at 100% size (with no scaling or cropping).
Cut out your felt pieces as listed on the template. Use small embroidery scissors. As most of the pieces are too small to pin to the felt, I just held the paper template in place while cutting. If you prefer a more accurate way to cut out the felt shapes, you may prefer to use my Freezer Paper Method which you can read all about HERE.
You will need:
- two face shapes in taupe, beige or grey
- two ear shapes in taupe, beige or grey
- two ear inners shapes in pale pink
- one nose shape in pale pink or light brown

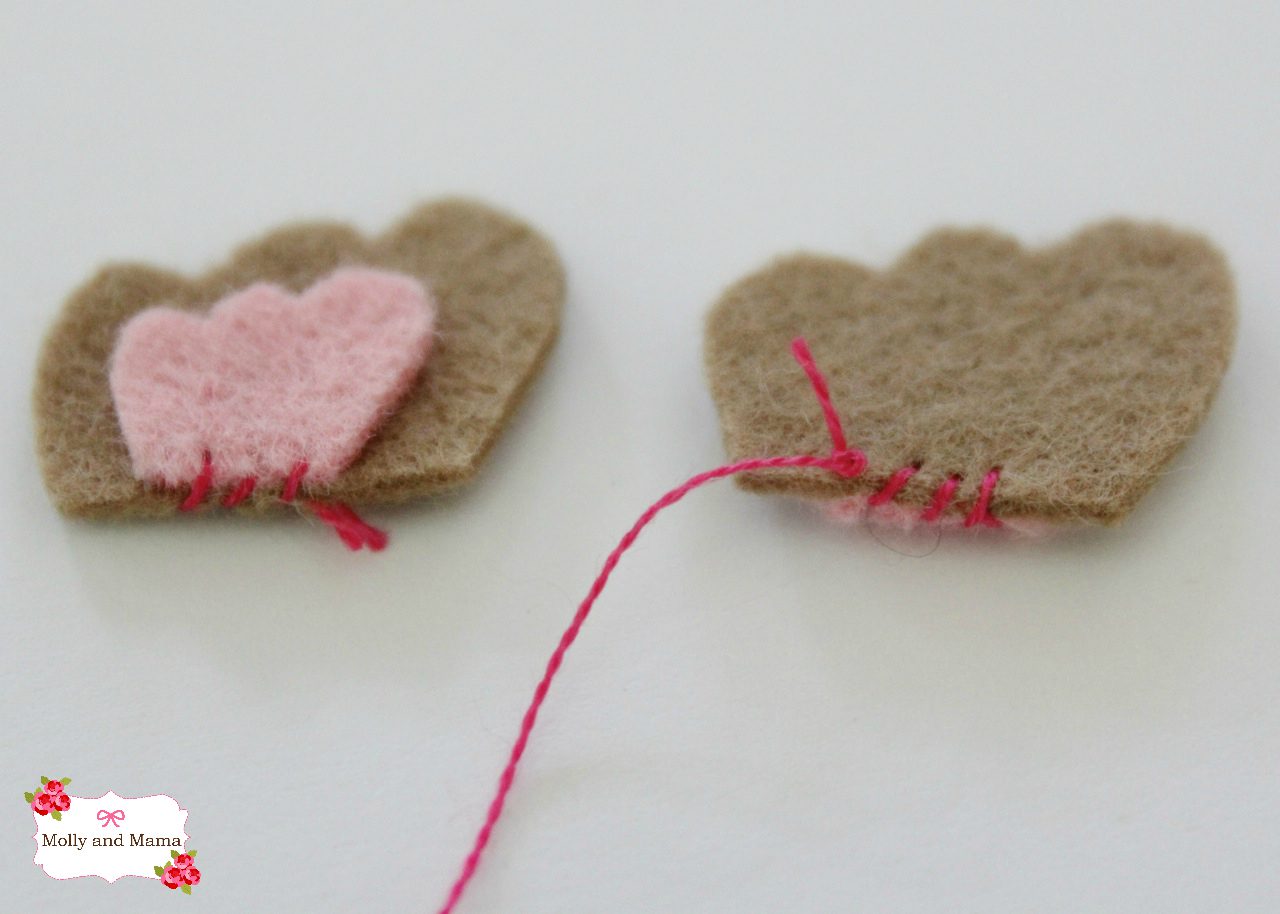
Place an inner ear shape over each felt ear so that the straight edges align (and so that you have a left ear and a right ear. You can see this in the image above).
Use whip stitch to attach the inner ears to the ears so that it’s easier to attach them to the head later. I used a single strand of bright thread to help you see this step. Trim the excess thread away.
SEW THE KOALA FACE
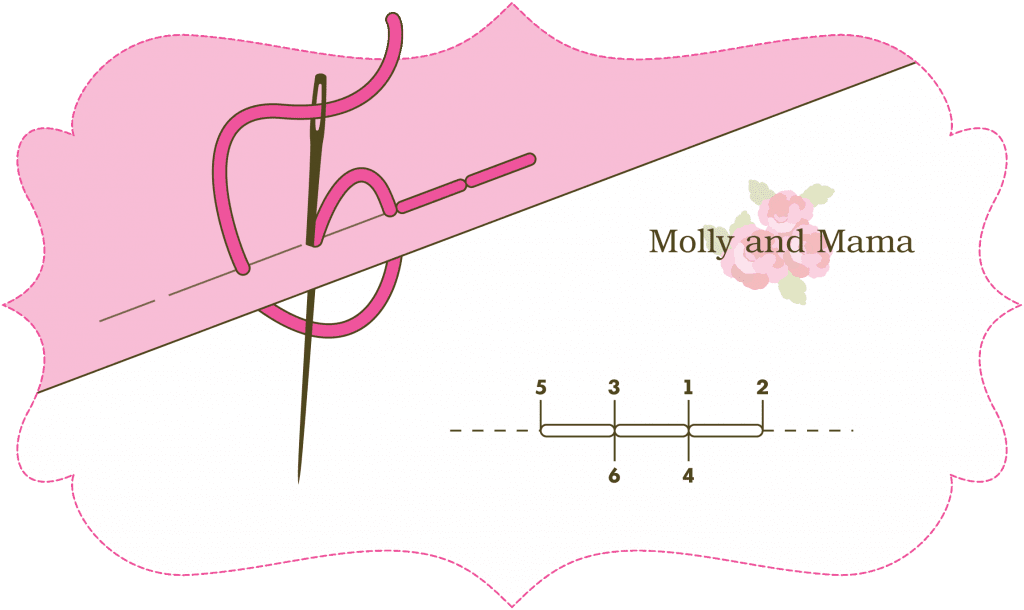
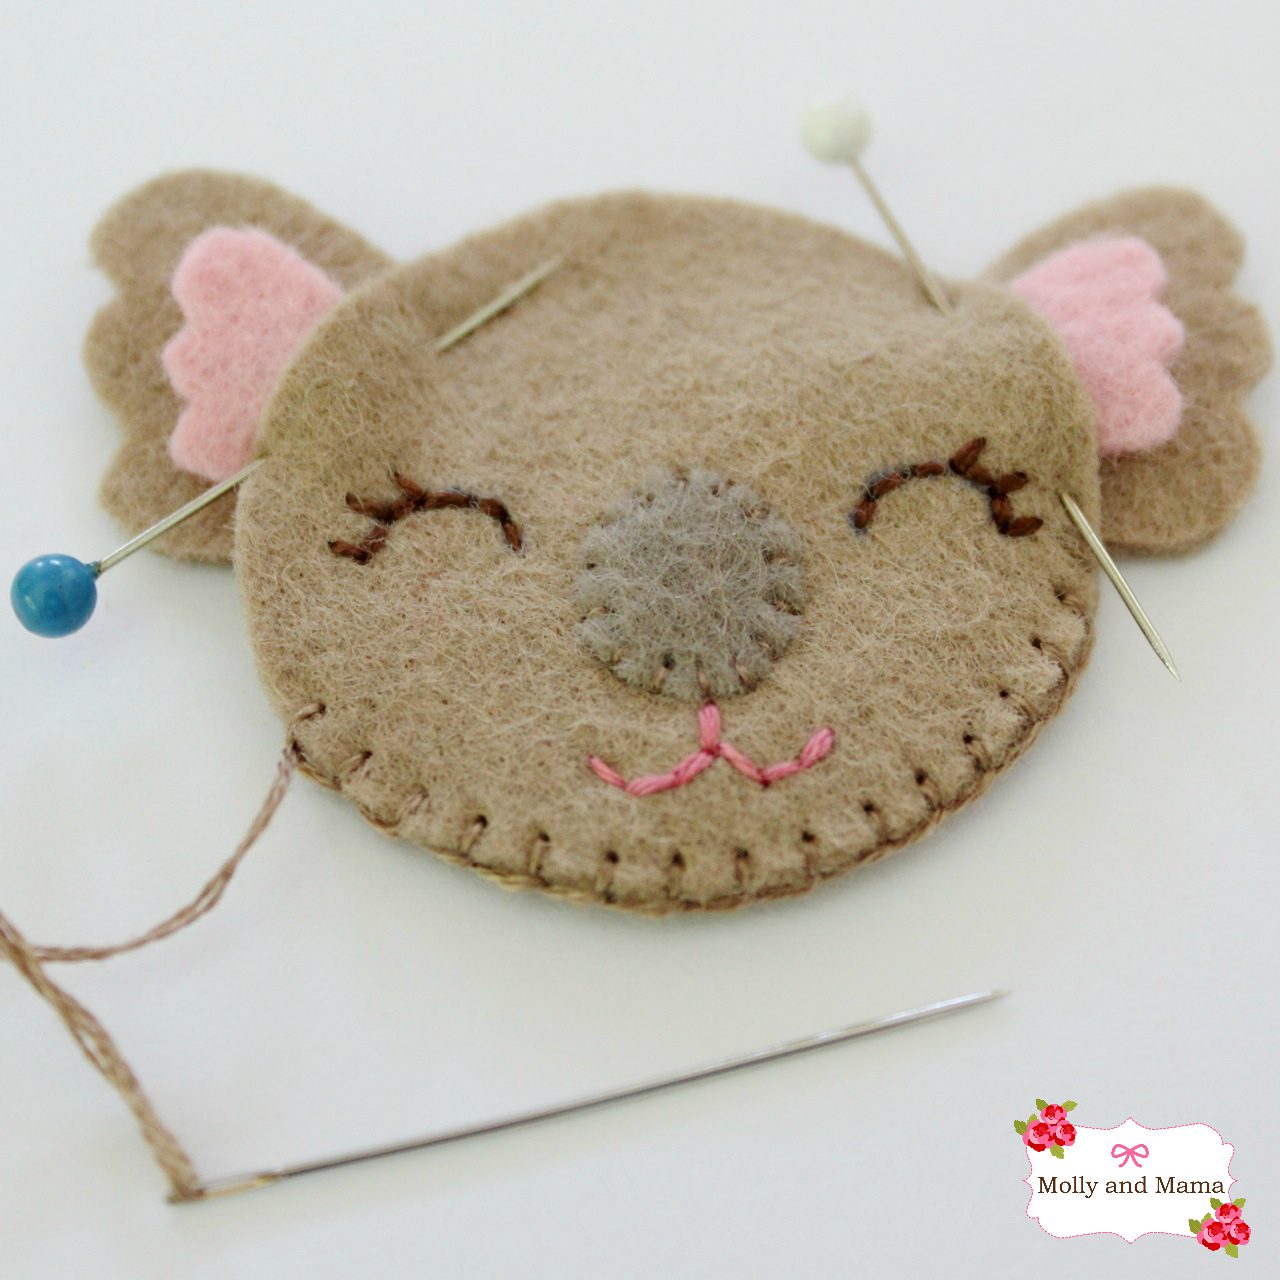
Now let’s create the koala face. Thread your embroidery needle with a single strand of matching embroidery floss. Using the template as a guide, position the nose piece on one piece of the face felt. While holding it in place, carefully whip stitch the nose in place around the outside edge. I started stitching at the base of the nose, where my embroidery will begin.
Next, we’ll embroider the facial features using back stitch. For more tips on Back Stitch head over to this tutorial HERE. This image is a great refresher too!
Using the template as a guide, outline the mouth and eyes using an erasable marking pen. Alternatively, you may wish to use the Tissue Paper Method to transfer your mouth and eyes to the felt. You can read more about it HERE.
Thread your needle with two strands of pink embroidery floss (or whichever colour you choose). Start stitching at the base of the nose and make one straight stitch down, then you can branch off on either side to stitch the smile.
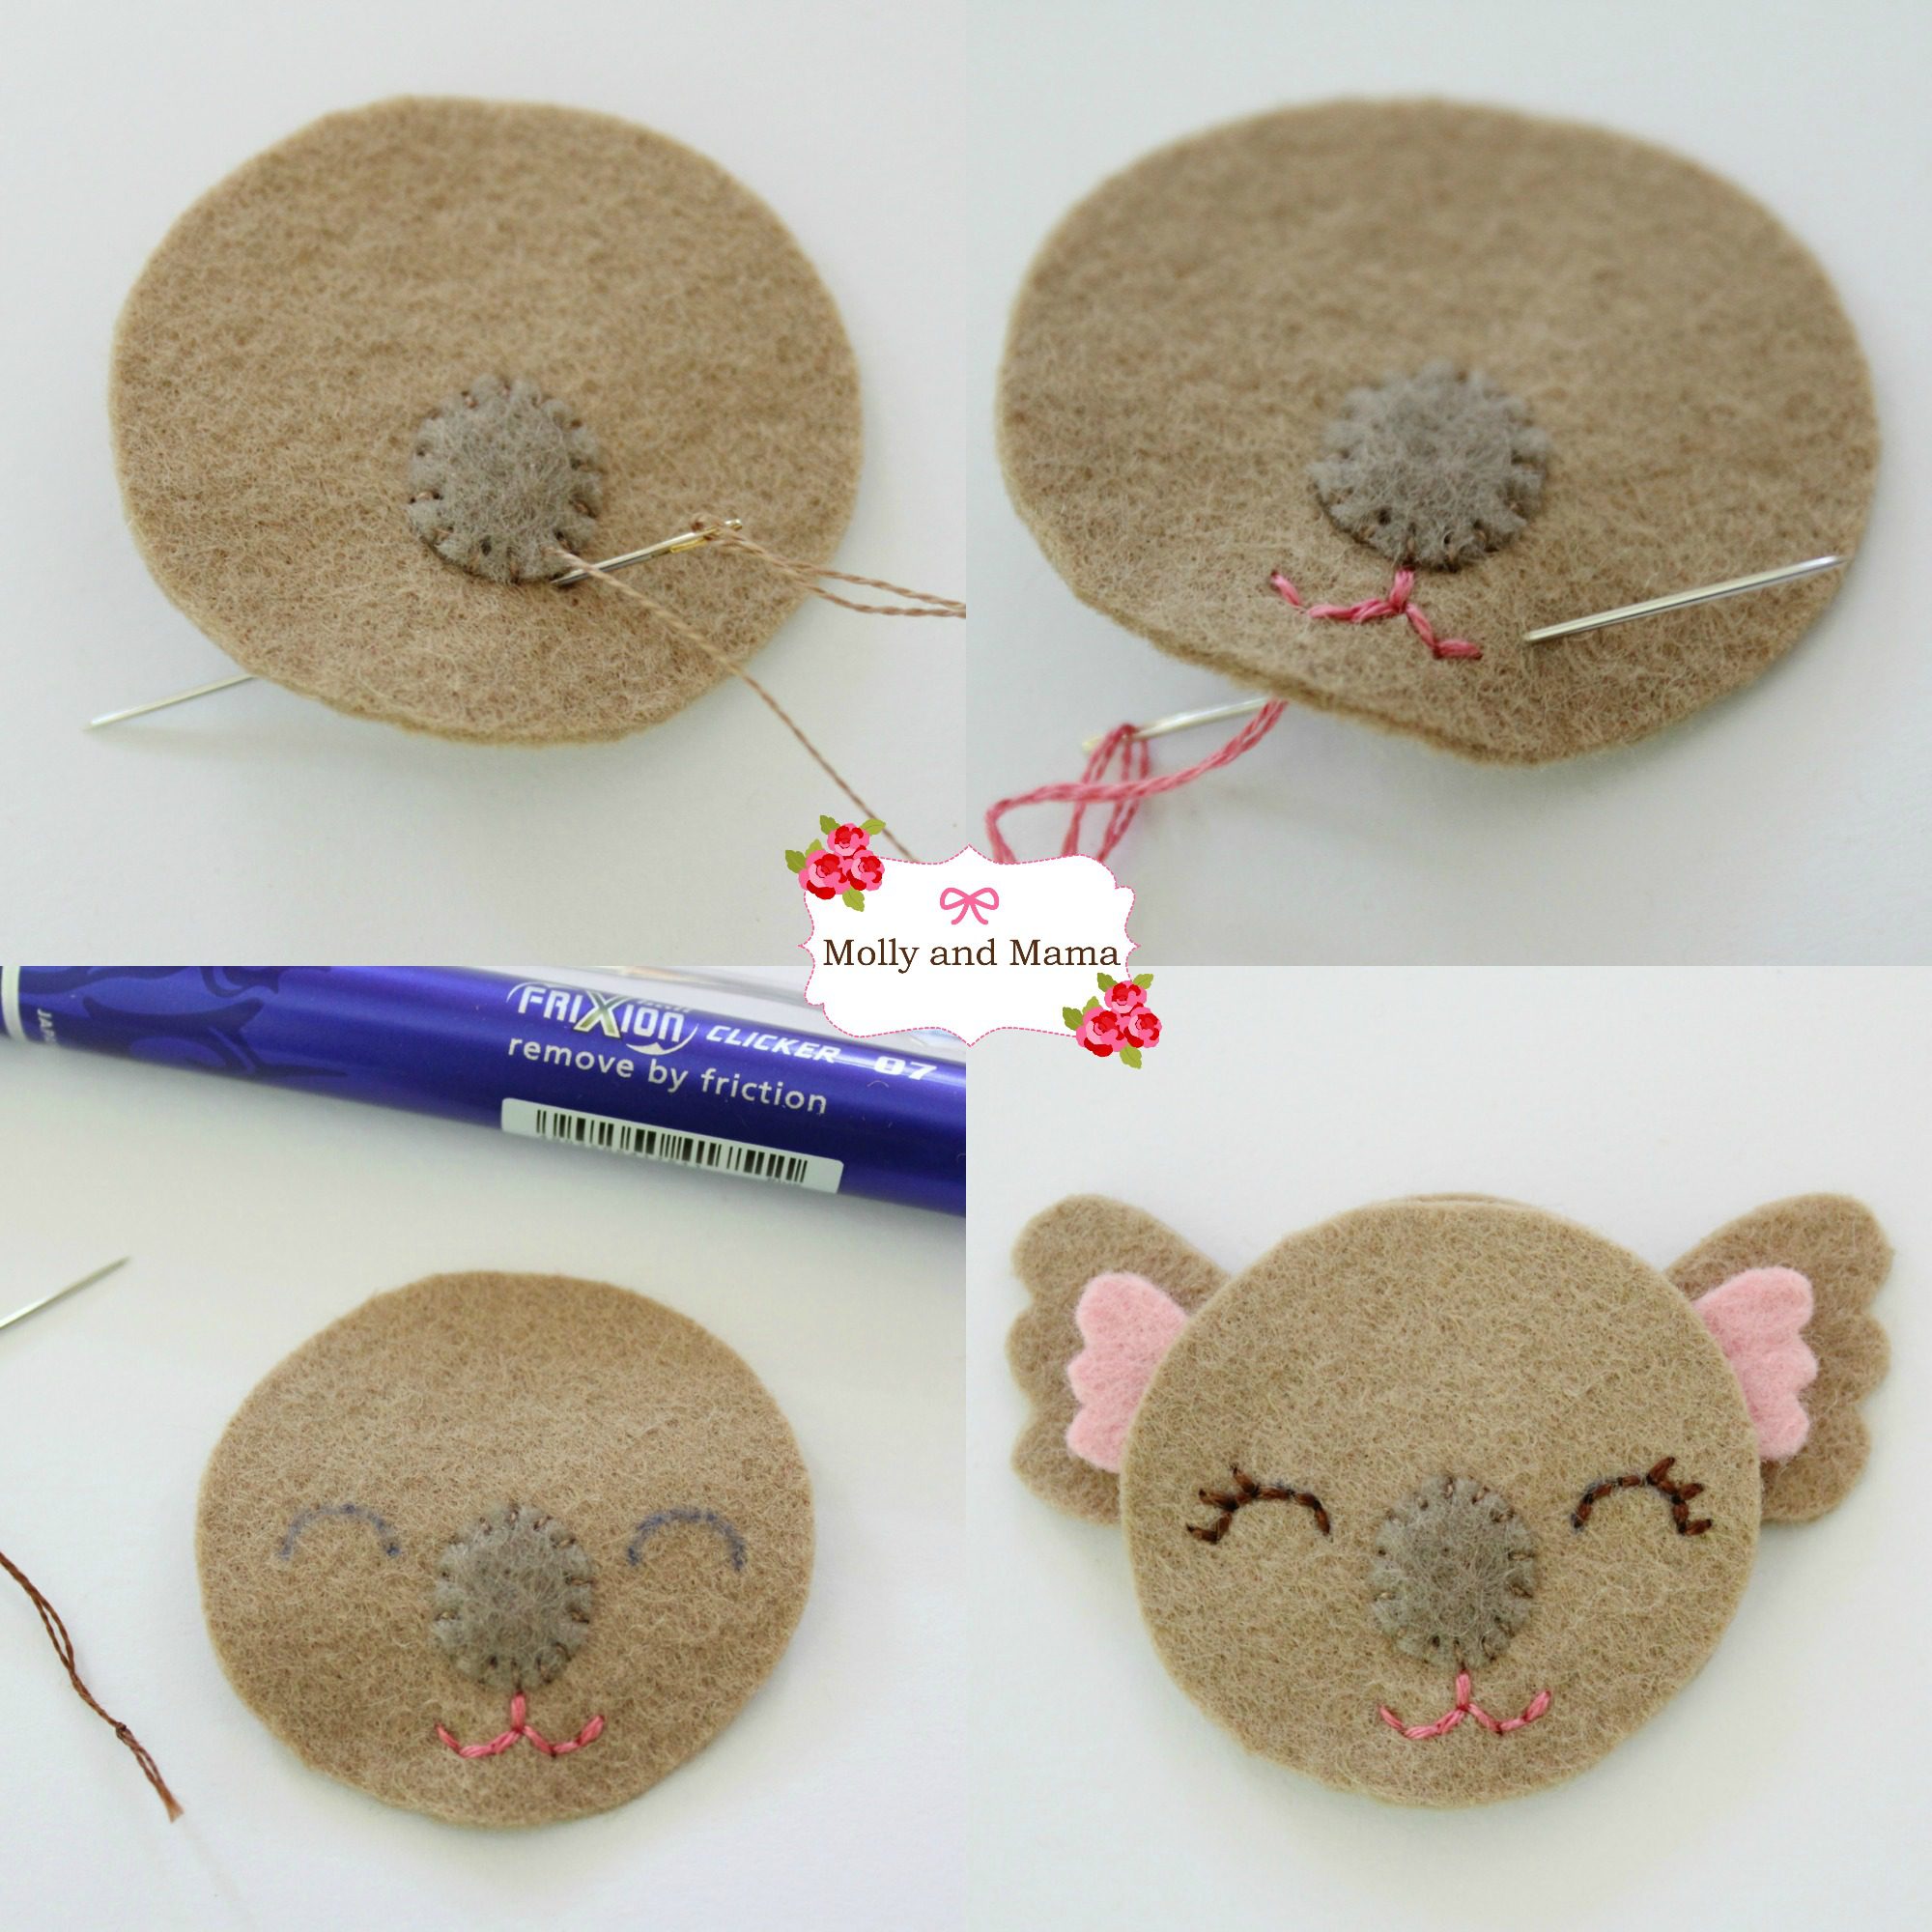
Now it’s time to stitch the eyes using two strands of embroidery floss. Use the same method we used for the mouth. You can see above where I marked my eye outline with the pen to help. You can also use the paper template as a guide.
Start stitching each eye at the end closest to the nose, then stitch out. Add the eye lashes last. Once complete, remove any erasable marking pen lines if required.
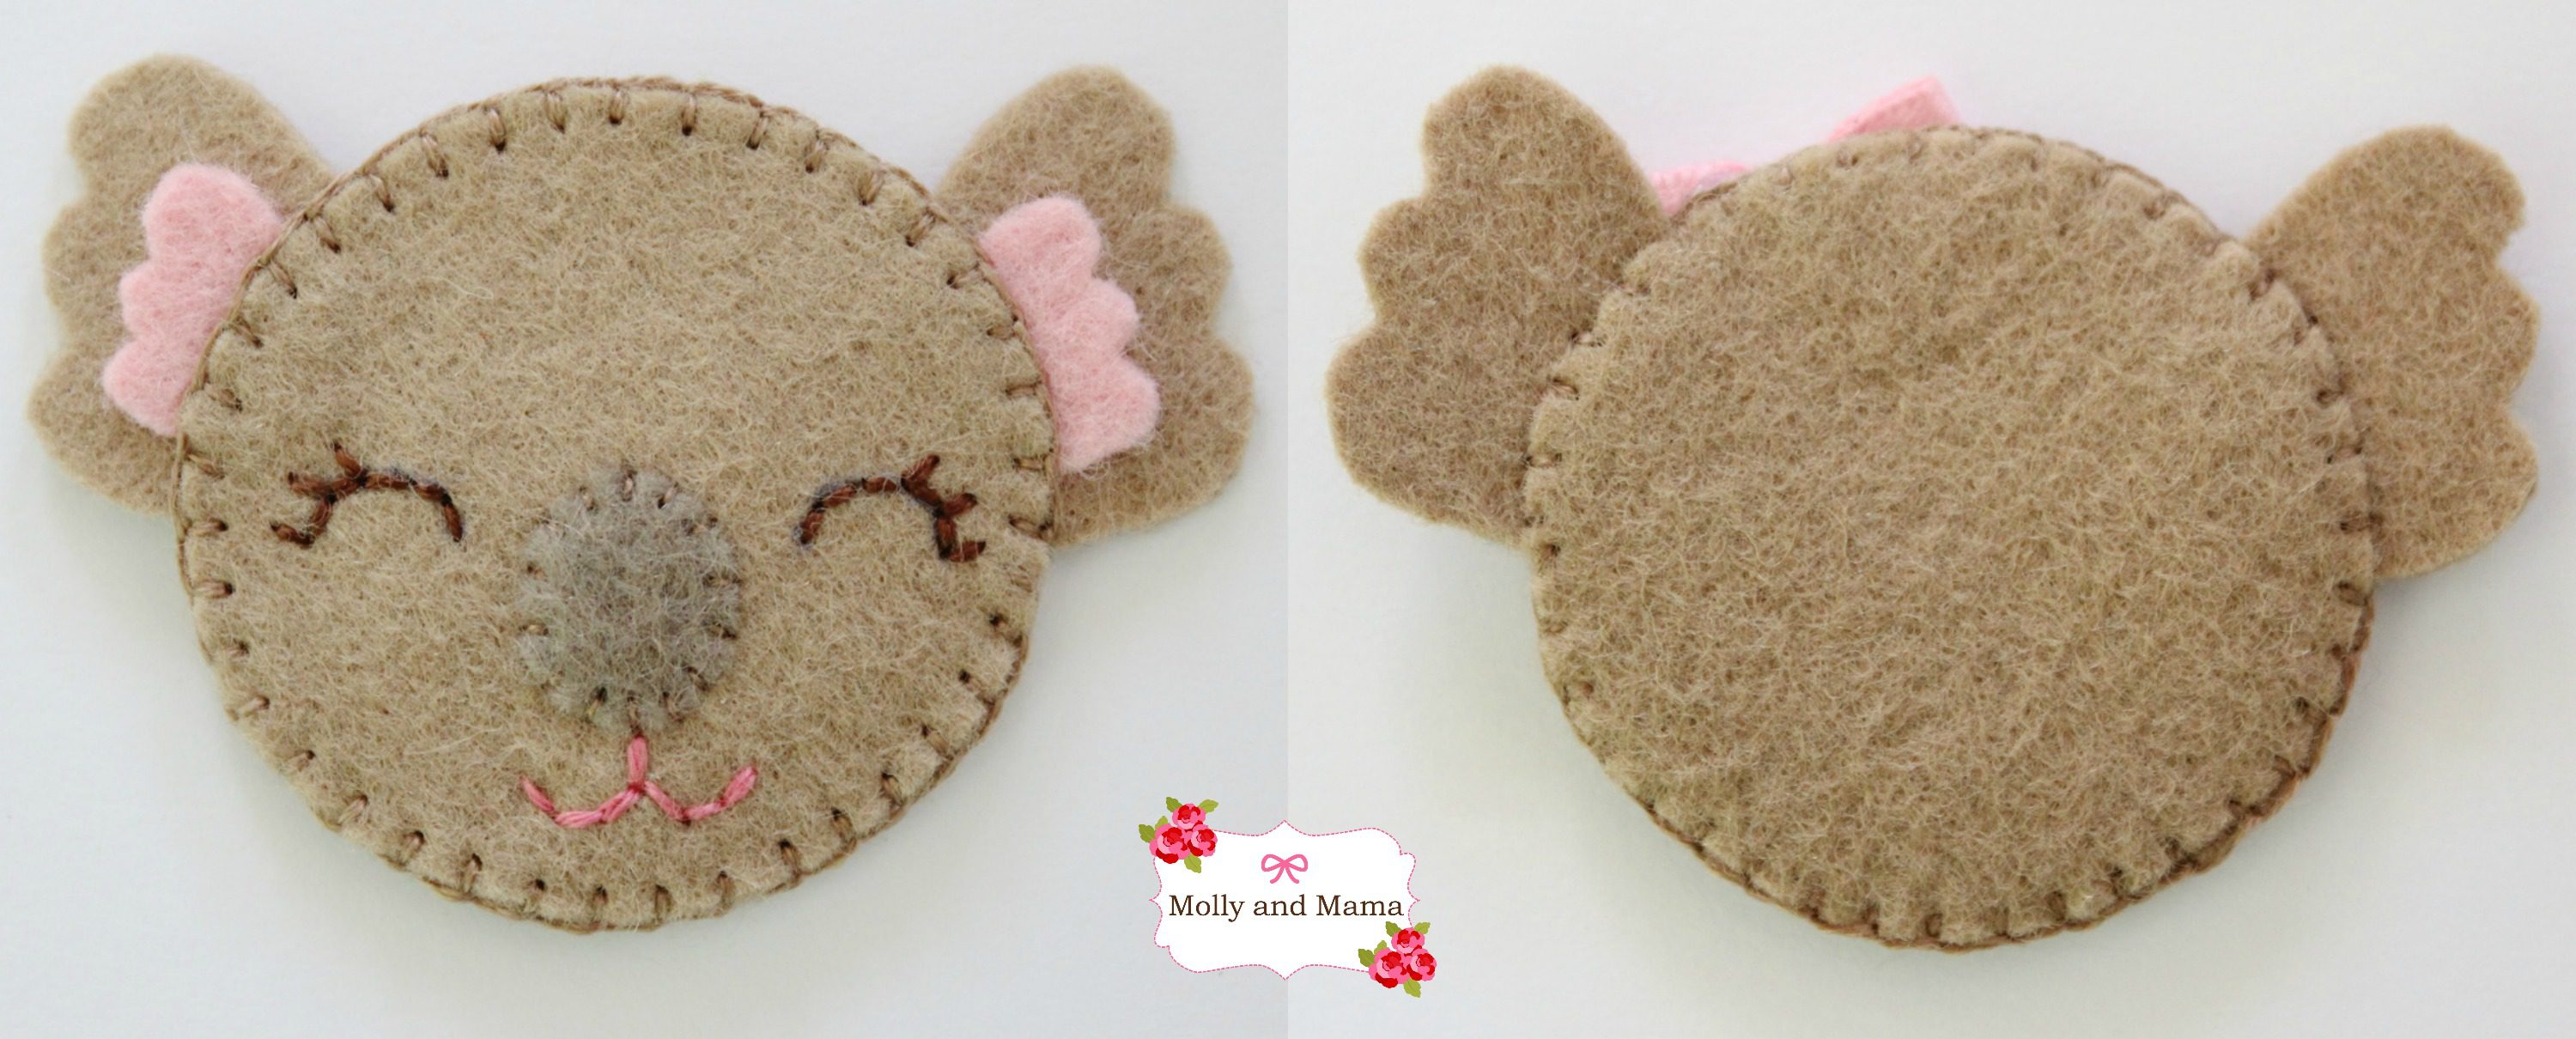
ASSEMBLE THE KOALA
When putting it all together, lay your other head piece on a flat surface. Lay the ears down next so that they slightly overlap inside the head piece (and you can’t see your whip stitching). Place your embroidered face piece on top.
Pin the layers together carefully through the ears. Thread your needle with two strands of floss to match the koala’s head colour. We’re going to blanket stitch the two head pieces together. Here’s a quick stitch refresher.
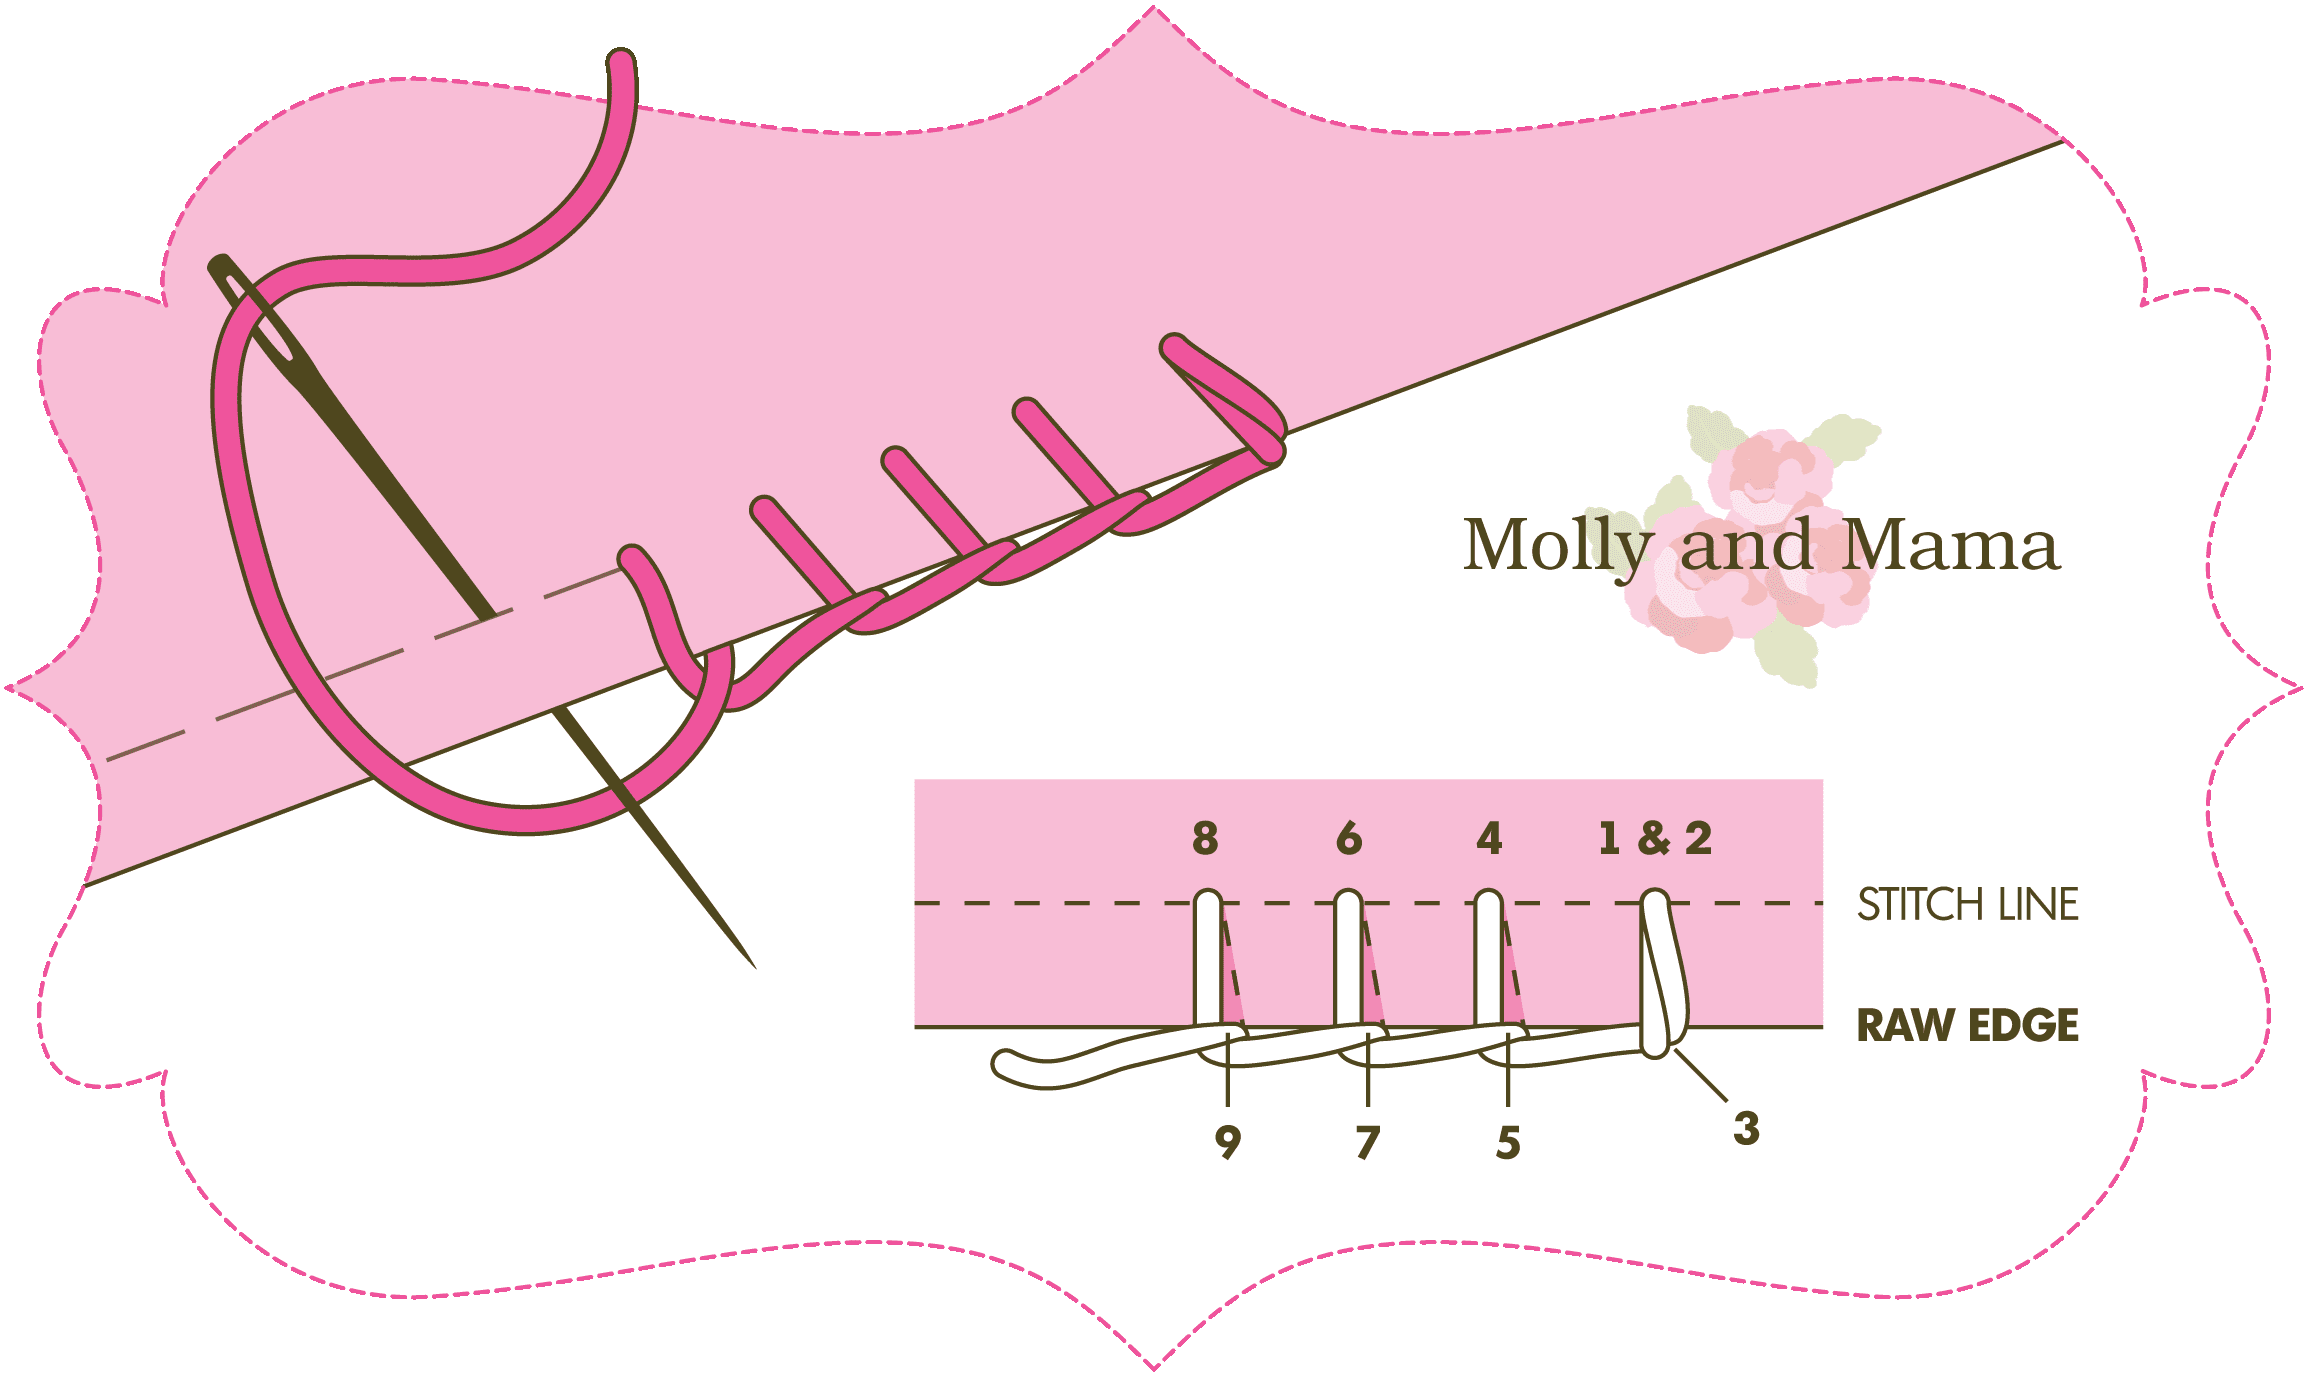
Begin your stitching below the right ear and then down and around the base up to the other ear. Take some time when stitching though the ears to be sure you catch both layers of the head felt and make sure the ear felt is in between.
Secure your stitching well when you return to the starting point. Your koala is all complete! Here’s how she’ll look from the front and the back.
Now all that’s needed is to add a teeny tiny bow. I had one already made up, and I just hot glued it on. But if you’re making this for a little child, then hand stitching will make it more secure.
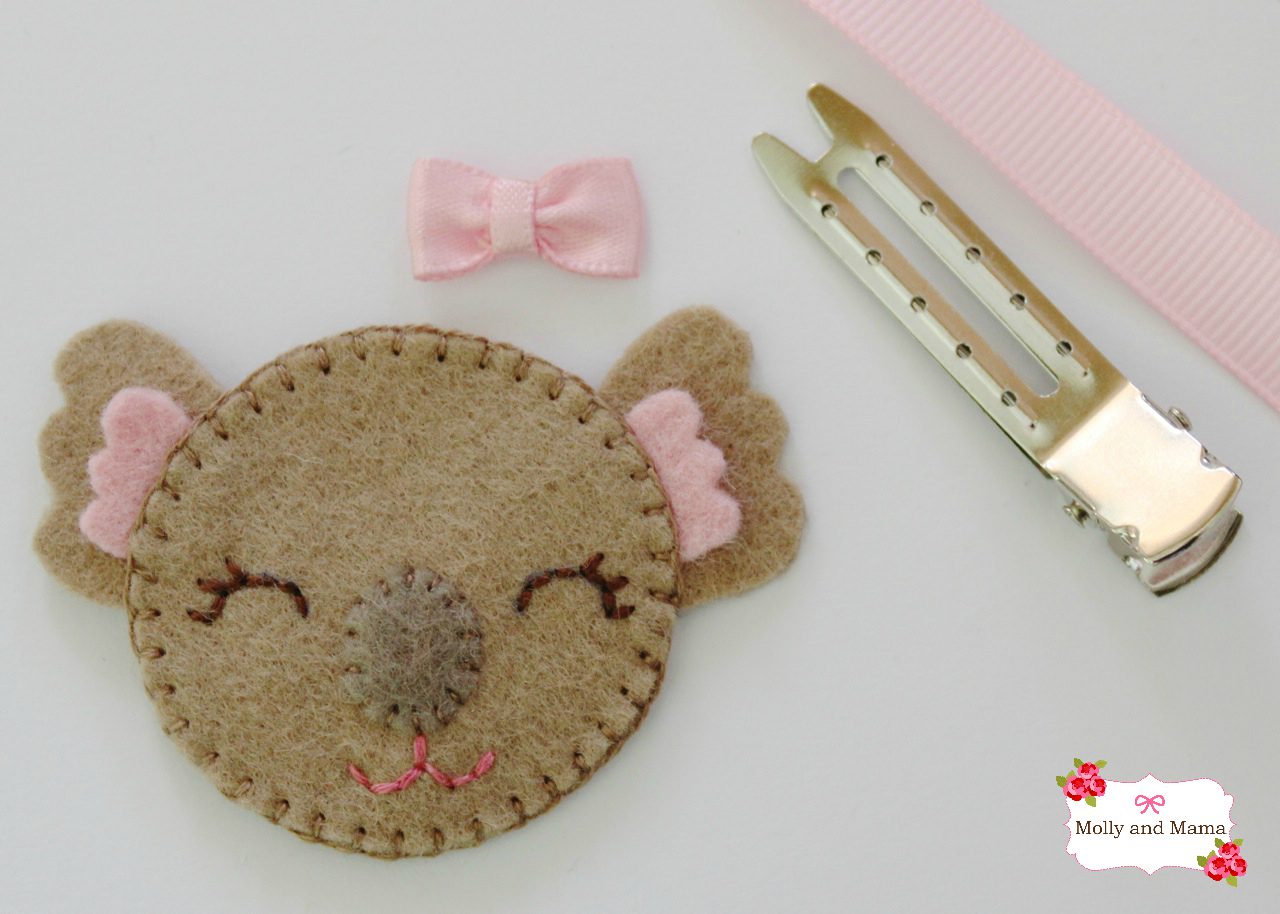
ASSEMBLE THE HAIR CLIP
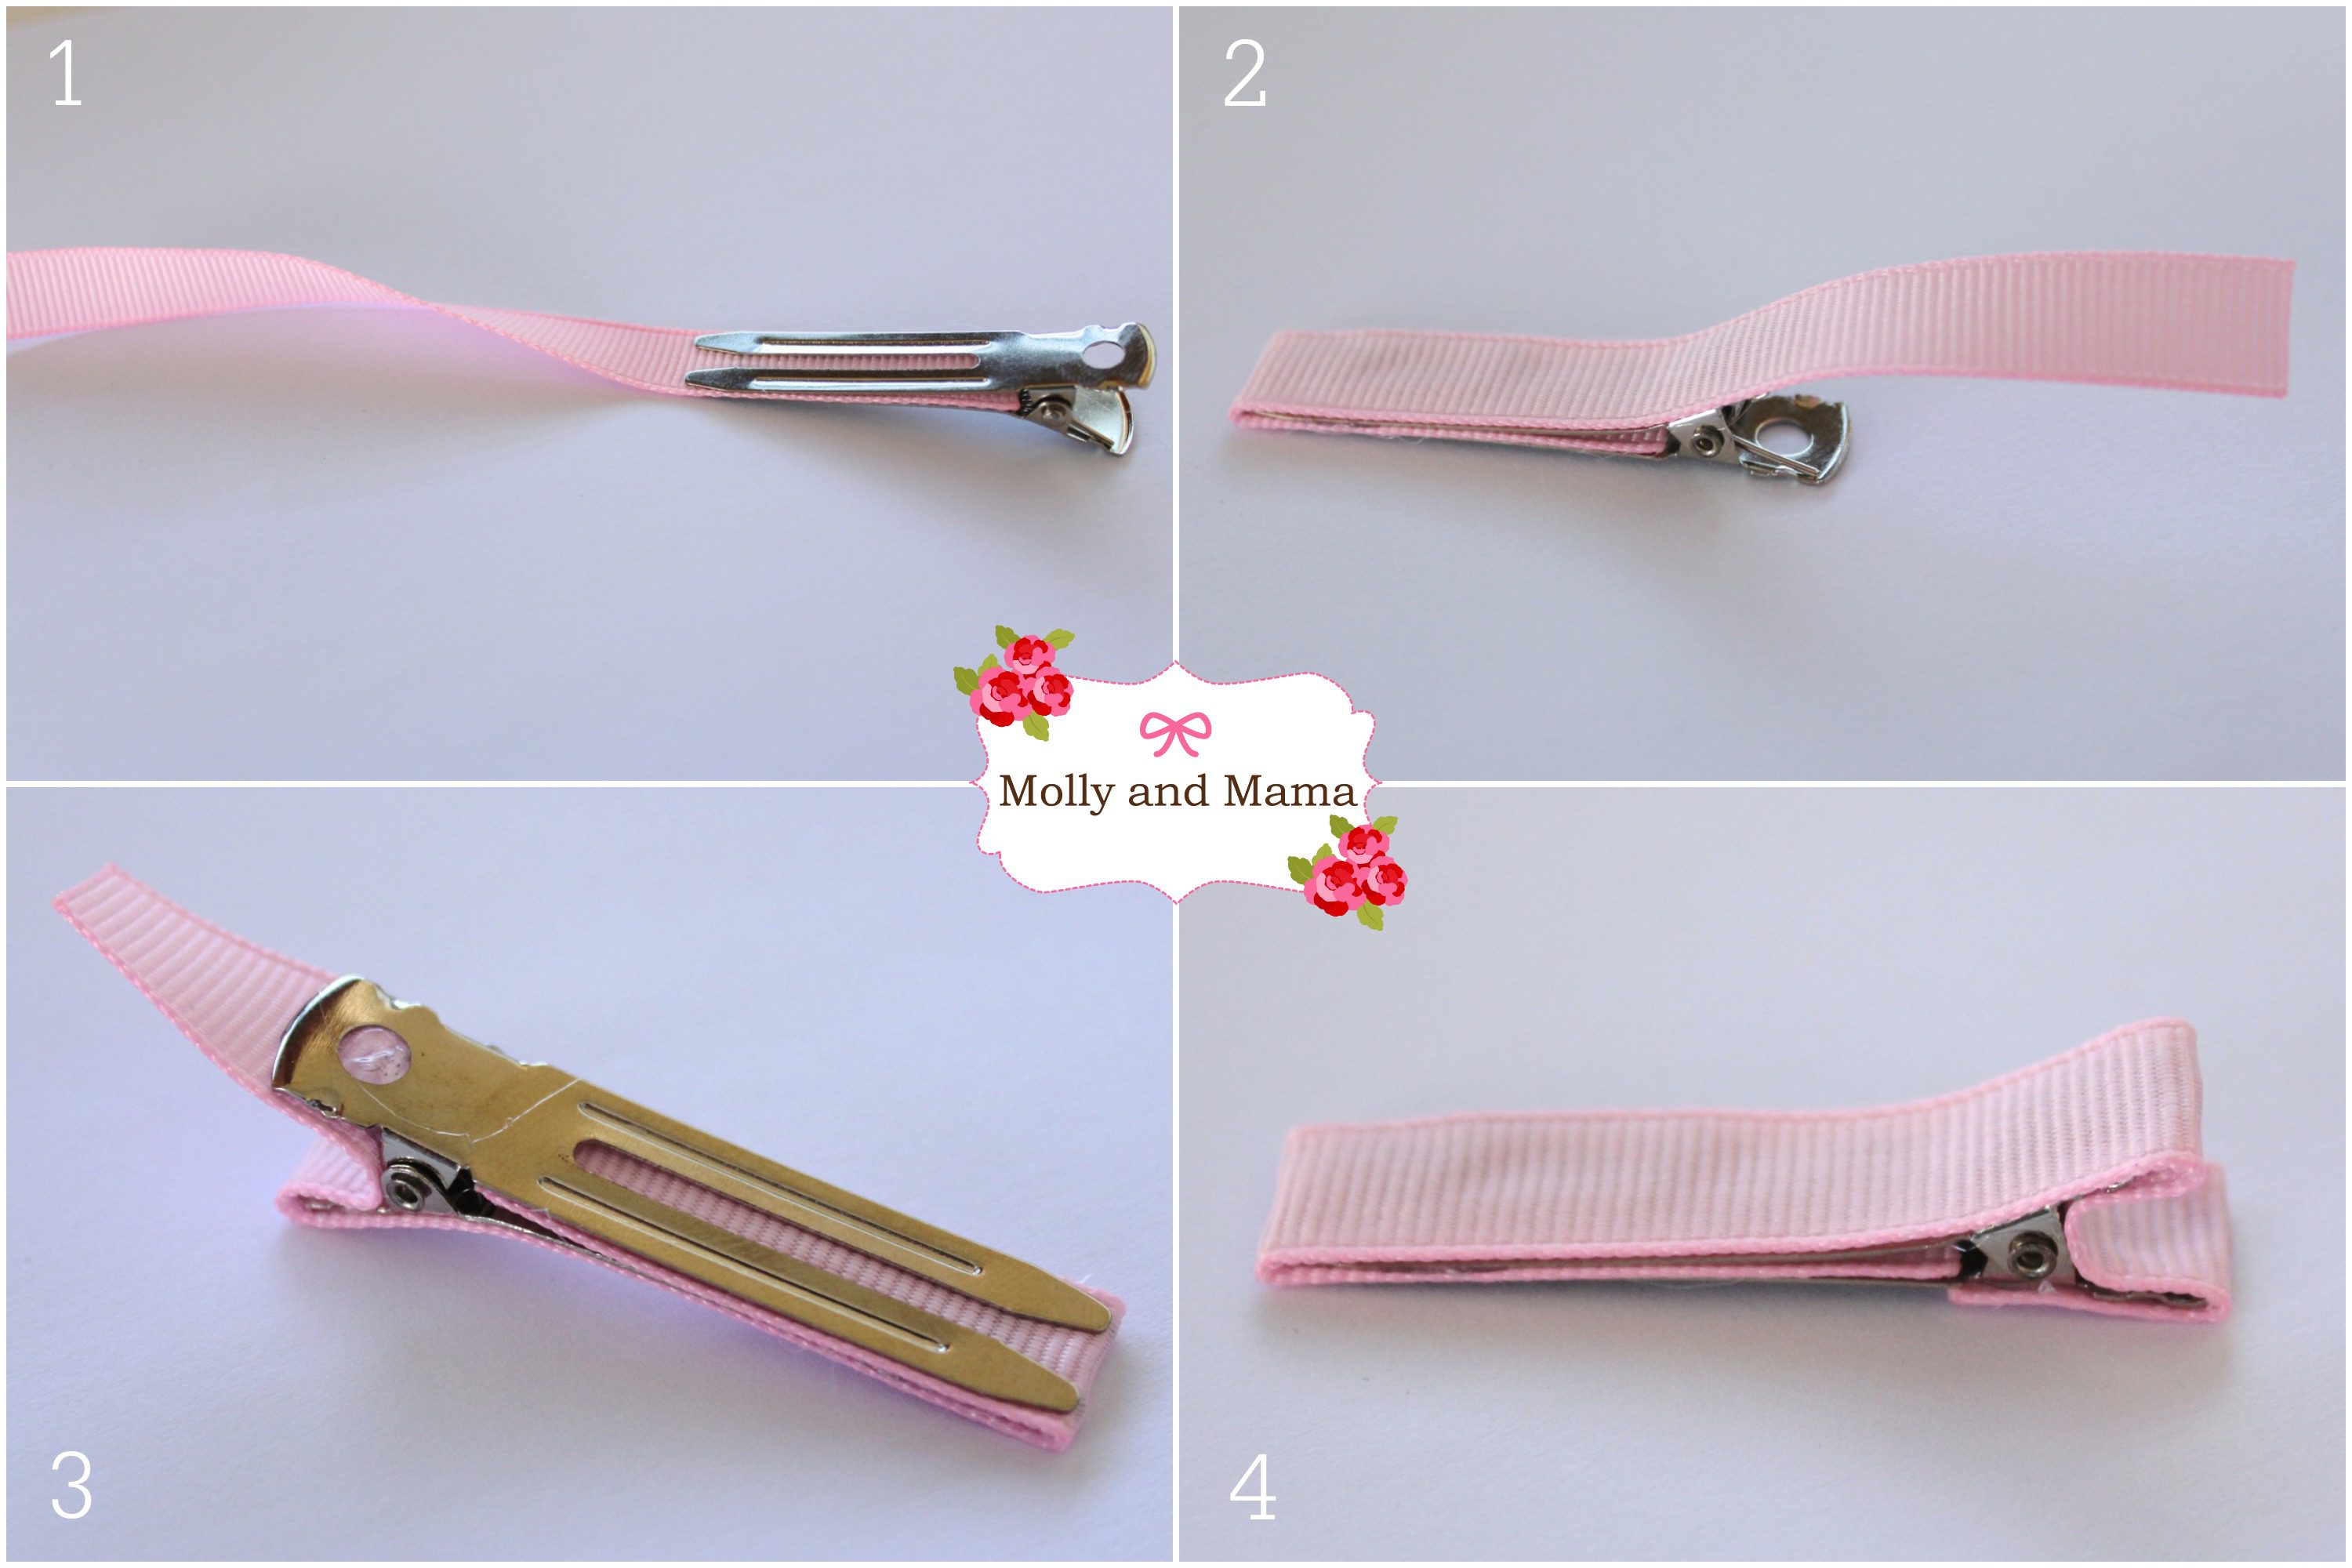
Now we just need to hot glue our felt koala to a ribbon covered clip. Covering clips is really straightforward, and I have a great tutorial about it HERE. But this image shows the basics of attaching a heat sealed strip of grosgrain ribbon to an alligator clip using a hot glue gun.
Once you’ve covered the clip, just add a line of hot glue to the top and carefully attach your koala. If the clip is for your own child, consider which side her hair is parted, and attach the koala so that she won’t be upside down when worn. My little miss wears her clips on the right of her head, so the alligator opens to the left as pictured above.
I hope you’ve enjoyed this sweet little tutorial. My daughter LOVES this clip! So it’s sure to be a favourite!
If you create one (or two or three!) be sure to email me to show me your creations, or share them on social media or in our Molly and Mama Makers Facebook Group. We’d love to see you there.
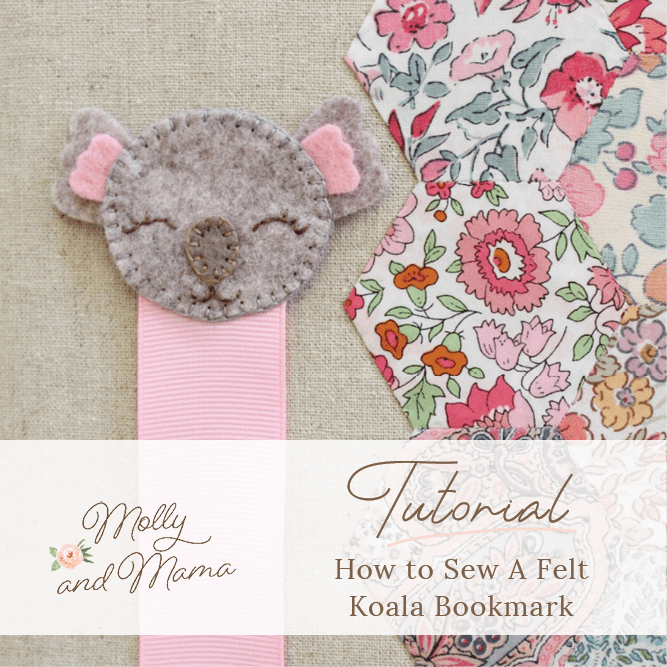
I hope you’ve enjoyed this easy-to-follow tutorial. If you’d like to turn this felt koala into a book mark, visit the matching tutorial HERE.
Happy stitching, Lauren x

The hair clip is darling as is your model!
Thank you so much! I’m glad you like it.
what a cute little treasure. i love the hair clip and top. I will give it a try. so sweet
Thank you Pinky!
It is adorable. Will be sharing with my likers on FB.