Molly and Mama

Studio for Pretty Stitches - Inspiring ideas for Felt, Stitchery and Patchwork

  • Home
  • Start Here!
  • PATTERNS
    • PDF Pattern Shop
    • Paper Pattern Stockists
    • Pattern Corrections
  • TUTORIALS
  • Classes
  • BOOK
  • Contact

Make a Hair Bow Holder and Matching Clips

March 10, 2017 By Lauren at Molly and Mama 2 Comments

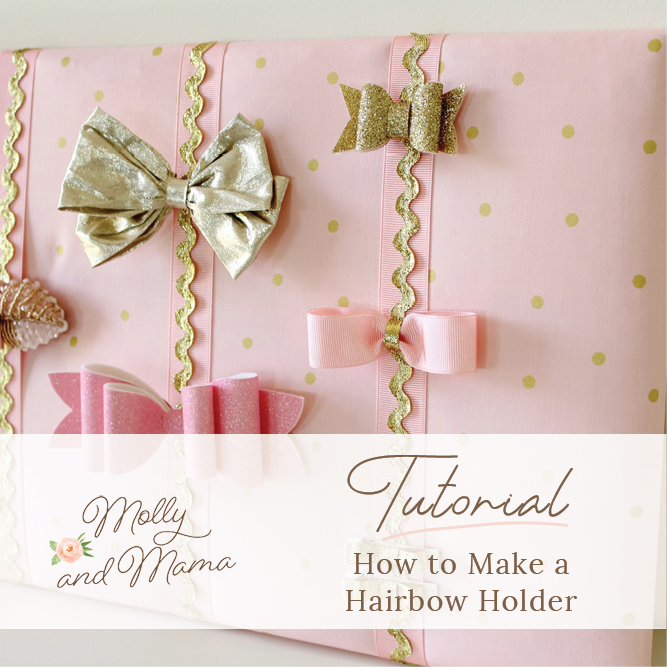
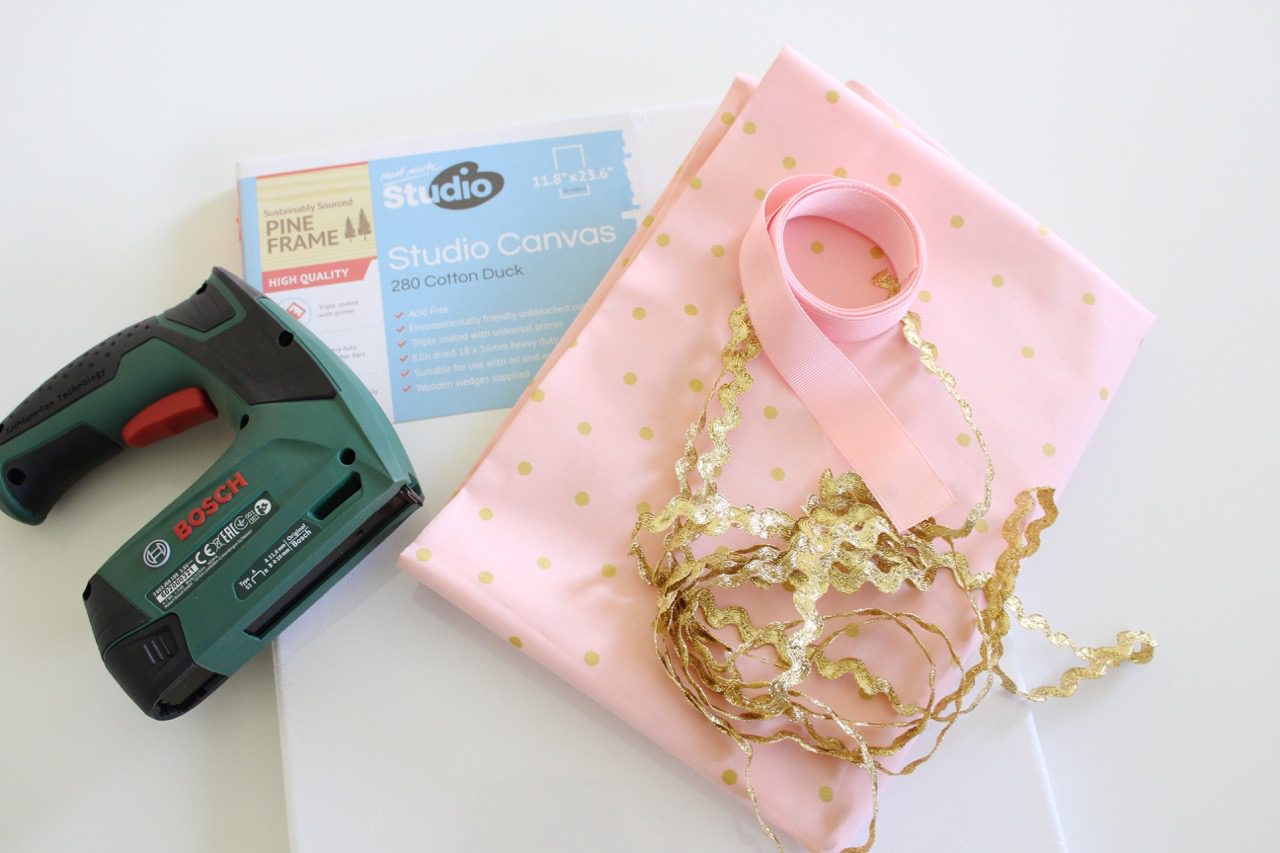
My seven year old daughter is obsessed with gold and peach right now! So her bedroom has had a recent makeover, with all things sparkly and bright. One of the items due for an update in her bedroom was the hair bow holder I made her a few years back using this tutorial. I purchased a new long artist’s canvas and some gorgeous glitzy fabric, peach ribbon and gold ric rac. I just needed the tools to complete the job.

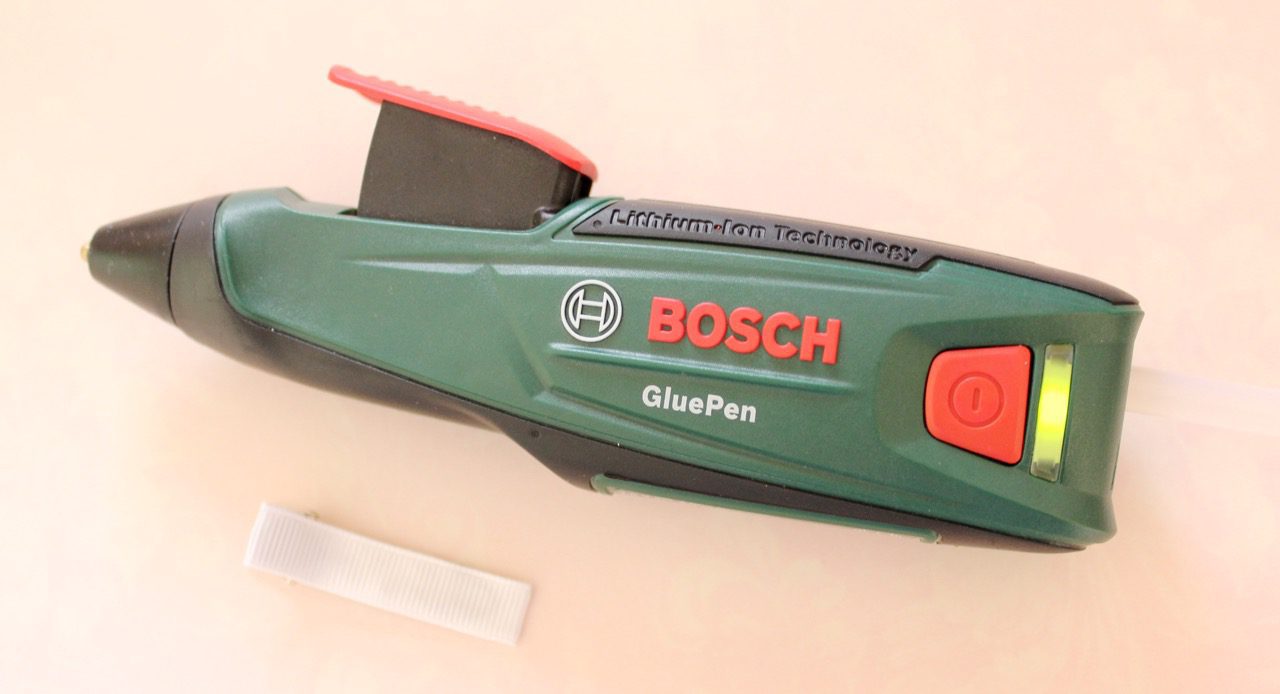
Bosch contacted me recently, asking if I would like to try out some of the DIY products in their range. And I have to admit that the timing was serendipitous! They agreed to send me their Tacker, which is a cordless staple gun. And I also asked to try their cordless Glue Pen to see how it compares to the traditional glue gun I’ve been using for years.

I think the results speak for themselves. Read on to find out how I made both the hair accessories holder and some of the hair clips too!

To Make The Hair Accessories Holder

This hair accessories holder was made using the same techniques outlined in the tutorial Make a Hair Clip Holder using an Art Canvas.  If you’d like to make your own, you can follow the steps outlined below and visit the linked tutorial for extra details.

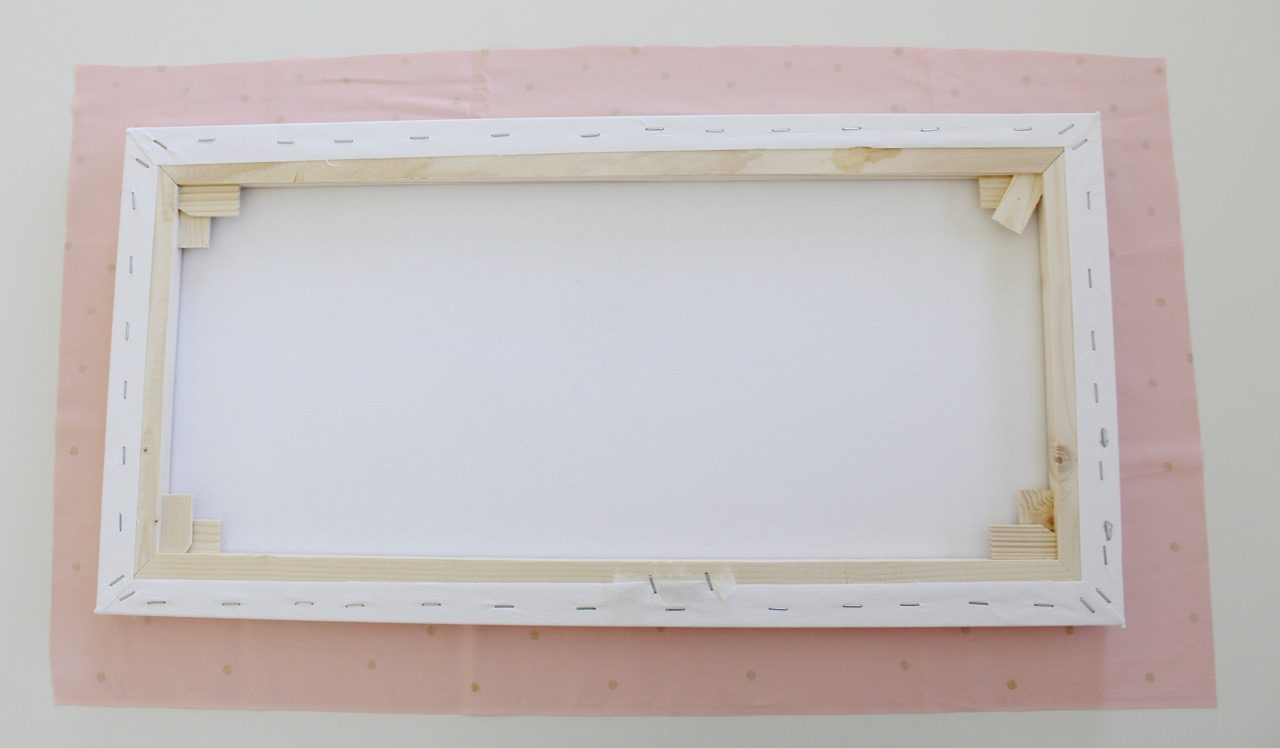
I purchased a 11.8″ (30cm) x 23.6″ (60cm) artist’s canvas but you can choose any sized canvas that suits your needs.

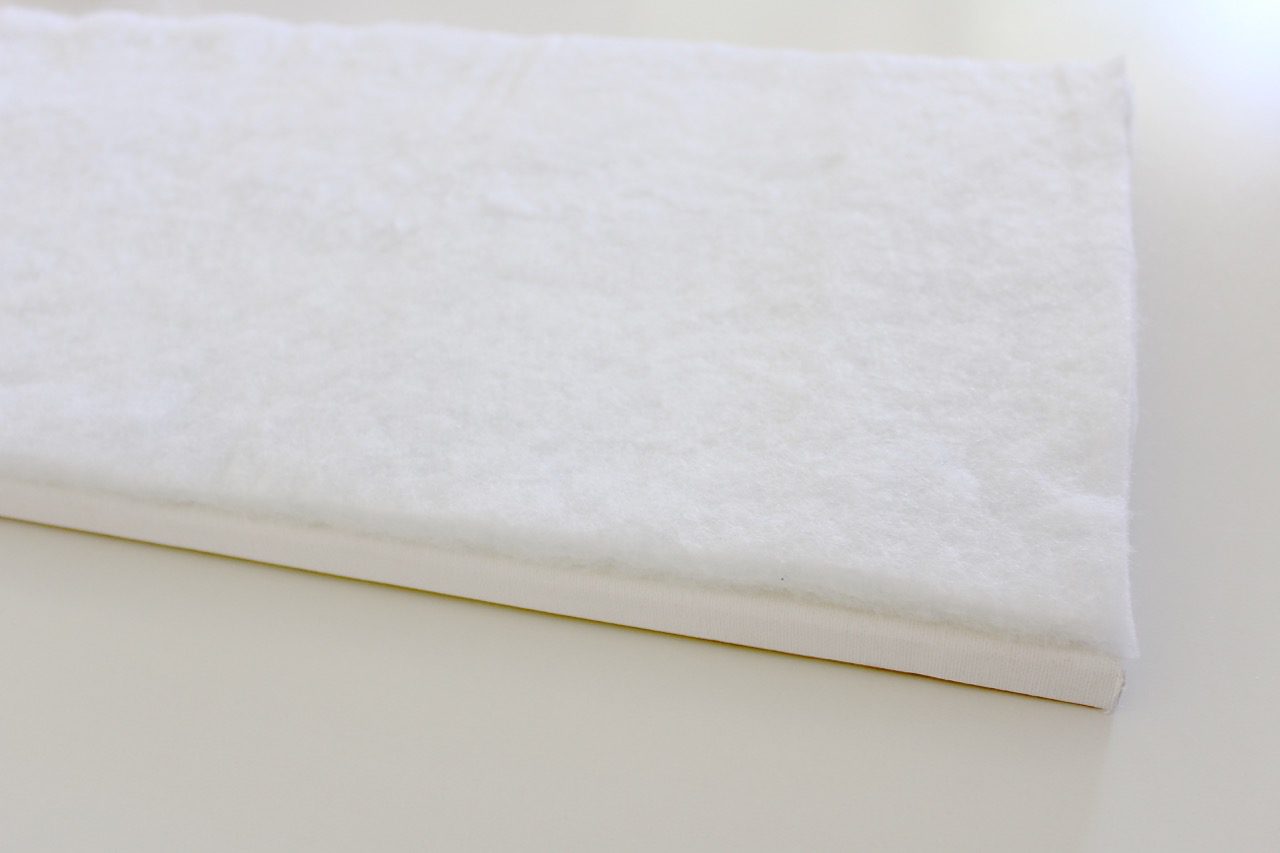
I used adhesive spray to attach a piece of polyester quilt wadding (the same size as the canvas), to the top of the canvas.

After pressing my fabric, I placed it right side down on a flat surface and the placed the canvas right side down on top of it. I cut the fabric, being sure to leave at least 2″ (5cm) allowance from the edge of the canvas. (The fabric for this project was 16″ (40.6cm) x 28″ (71cm) but yours will depend on the size of your canvas.) 

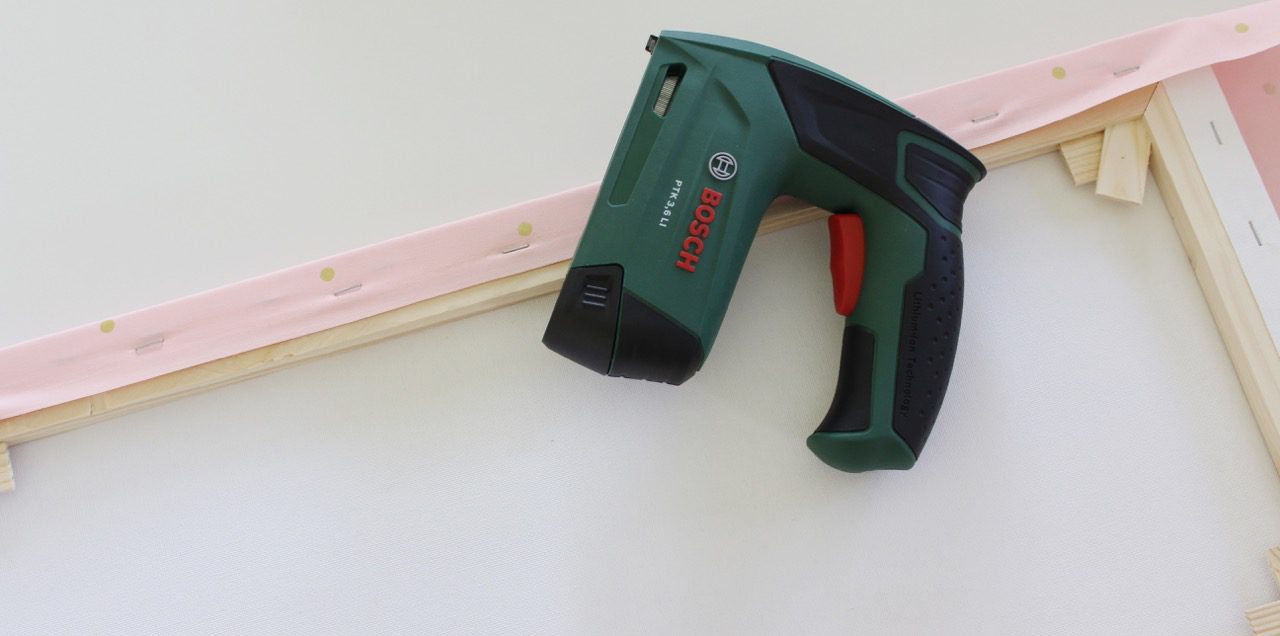
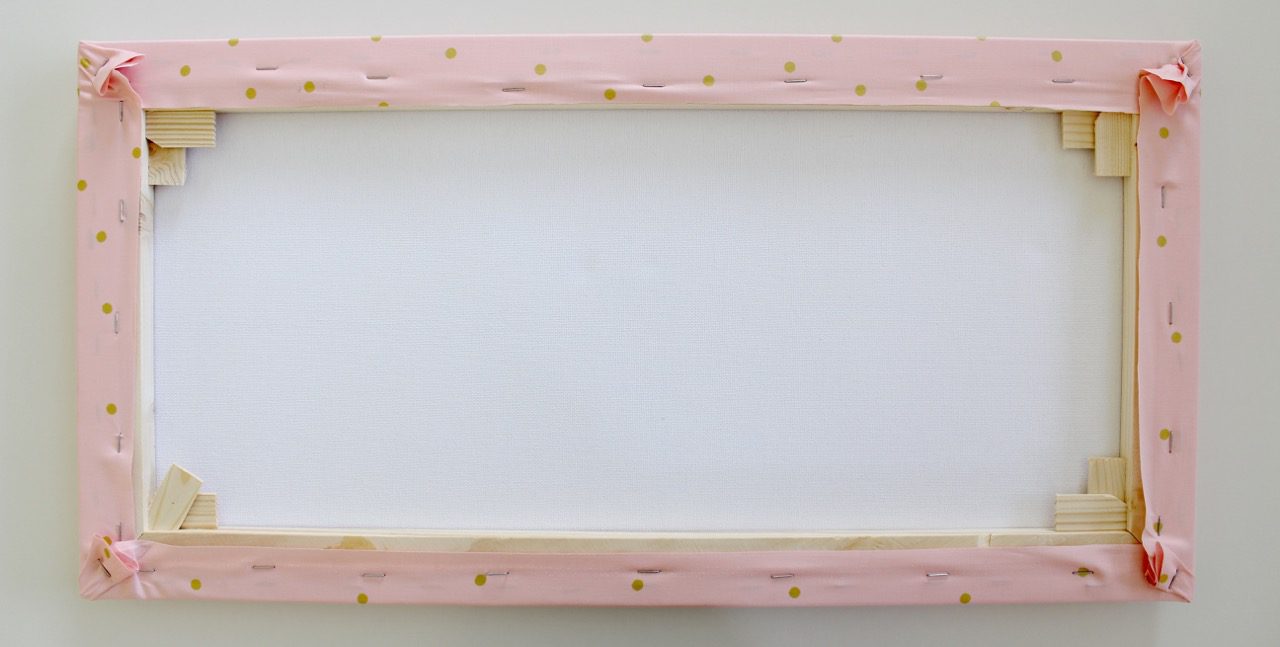
Using the Bosch Tacker, I folded the fabric from the top side of the canvas onto the back and then stapled it in place. I started at the centre and then added staples at even intervals, until the top side was secured. I then secured the bottom side of the canvas fabric using the same method. I pulled the fabric tautly to avoid any puckers and pulls in the fabric.

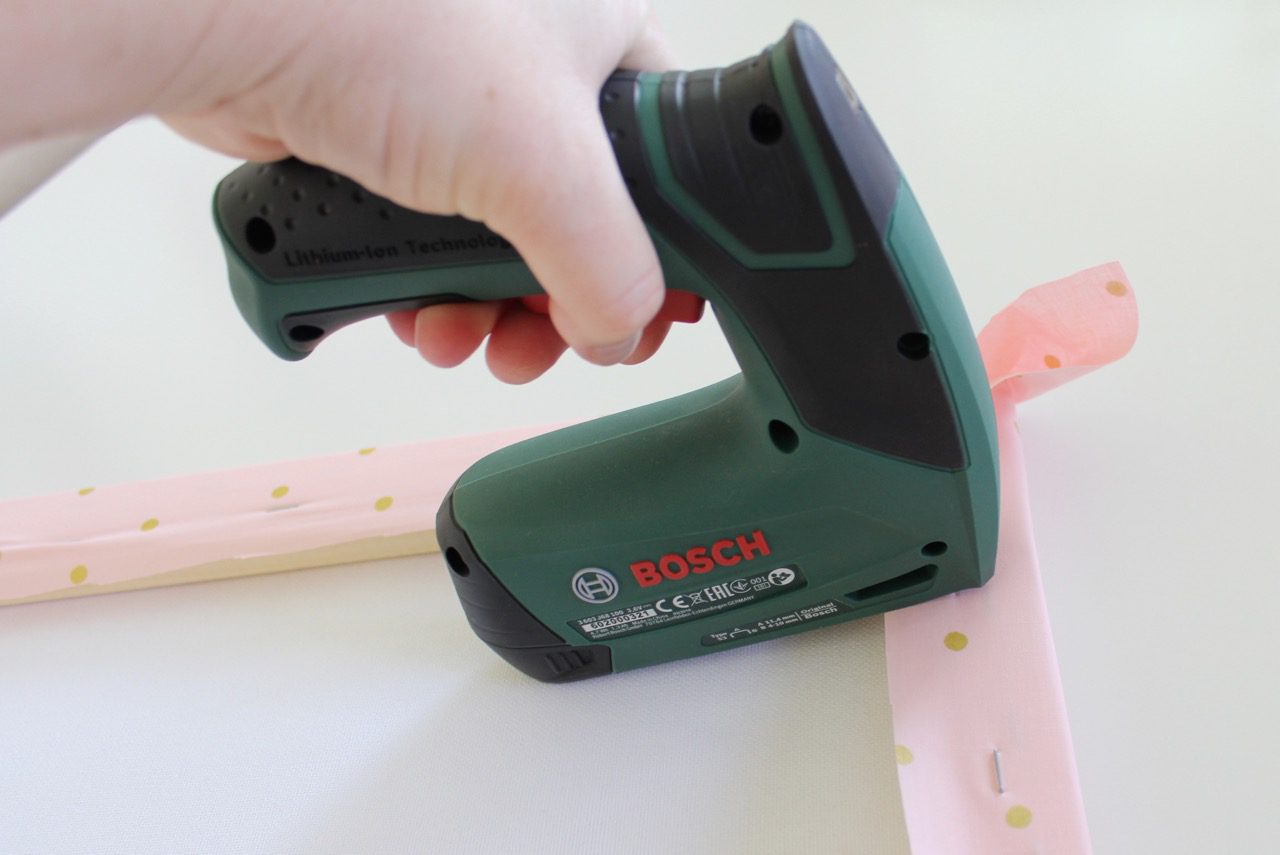
Next, I secured the left and right sides in the same way.

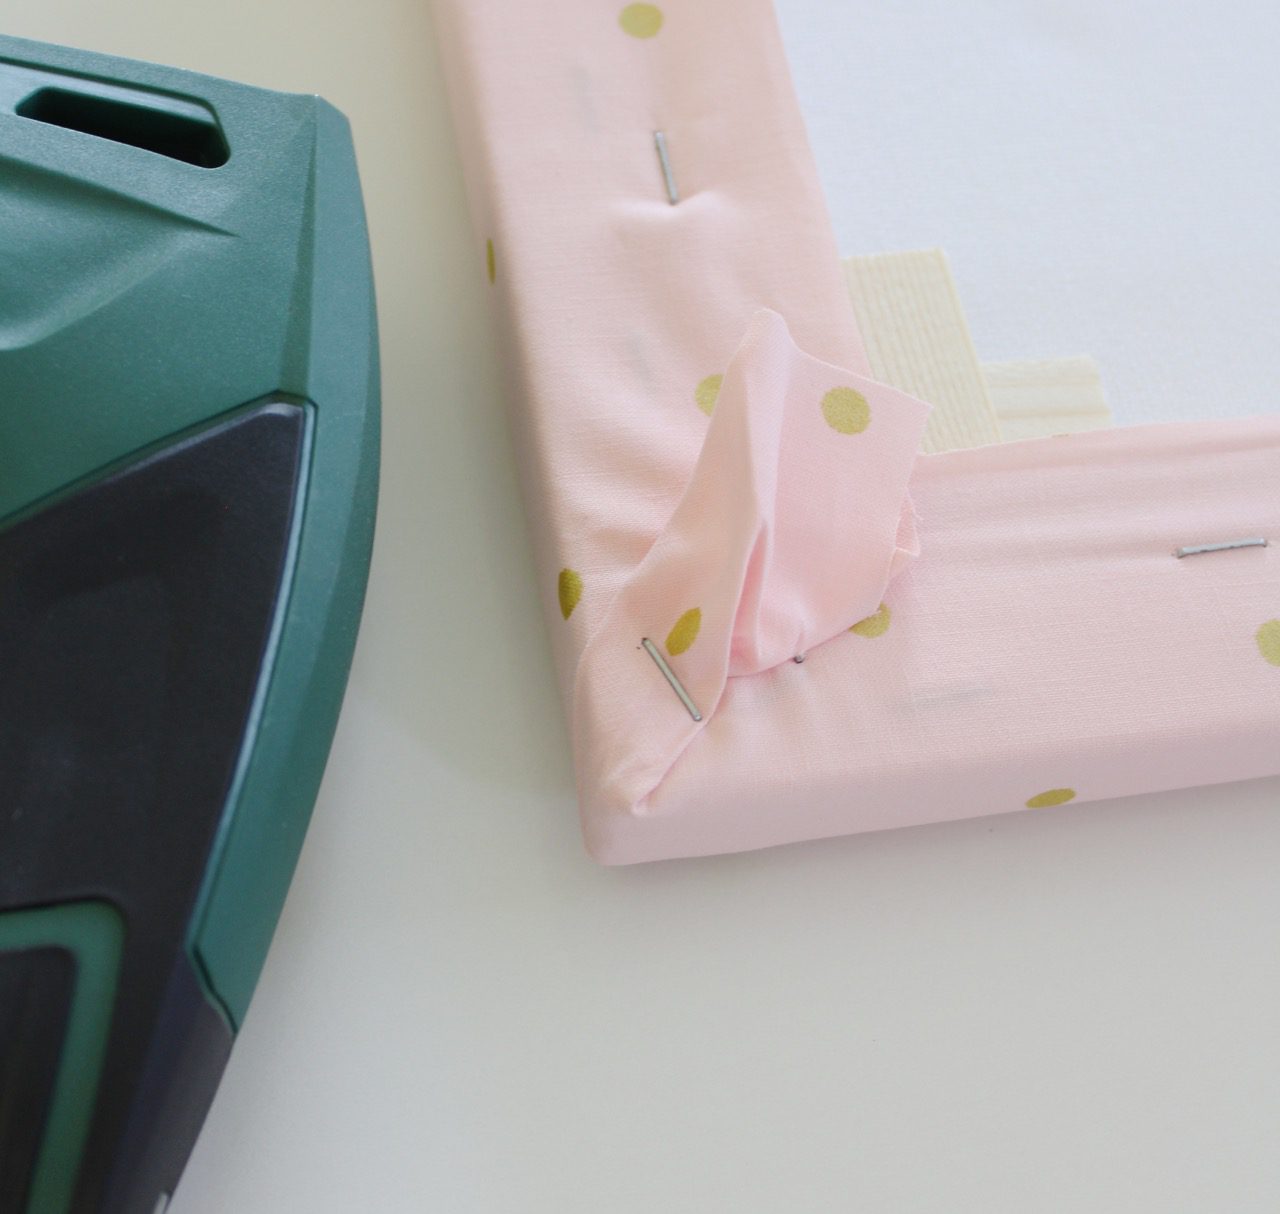
The trickiest part was folding the mitres on the corners. But if pulled tightly and secured firmly, they’ll sit quite flat and neat. You can also then trim away any excess fabric if necessary.

I loved the Tacker for this job because it has a nifty push and release system which makes it easy to use, and simple to determine where to position the staples. And despite it being a power tool, I found it safe and comfortable to use.

After covering the canvas, I measured and marked even intervals along the back of the canvas, so that I could add four ribbons.

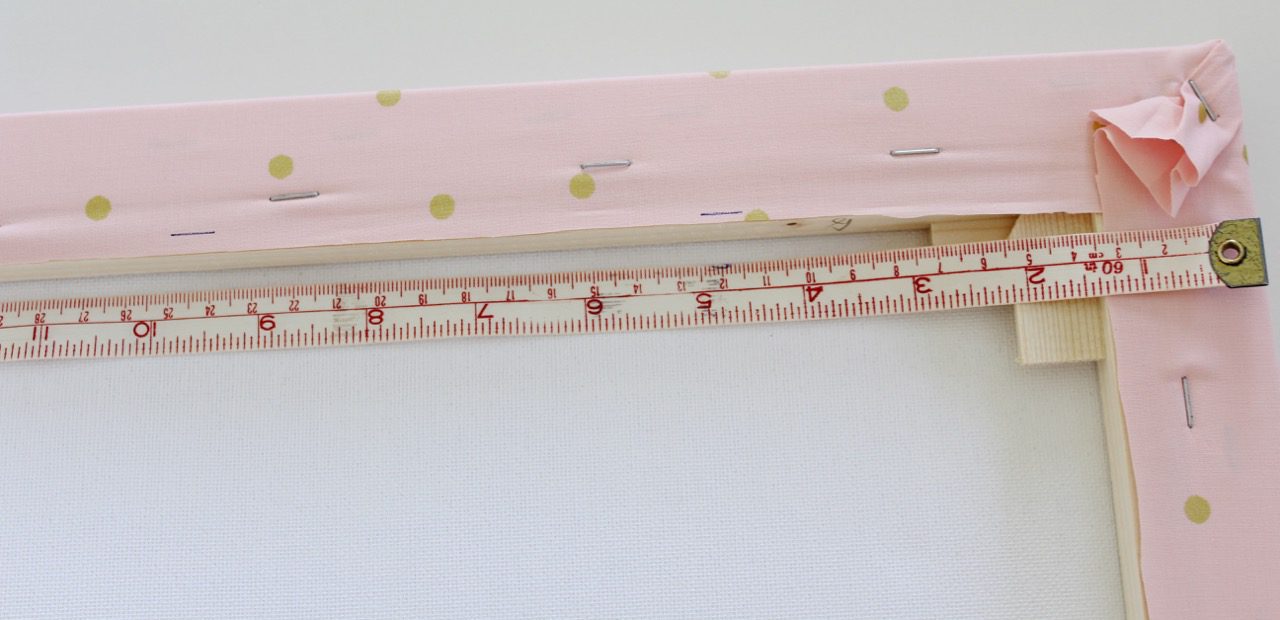
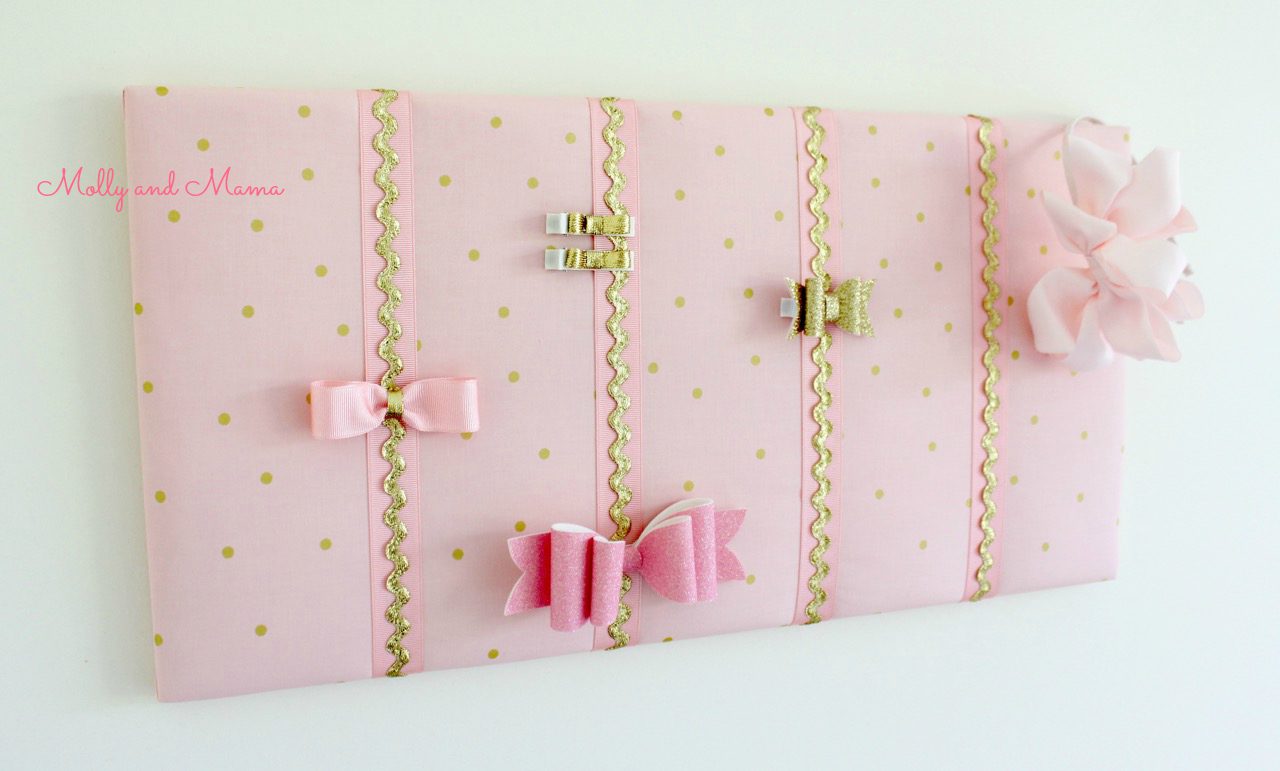
Each ribbon measured 16″ (40.6cm) long and I added four ribbons onto the front of the canvas first, and then four lengths of gold ric rac over the top.

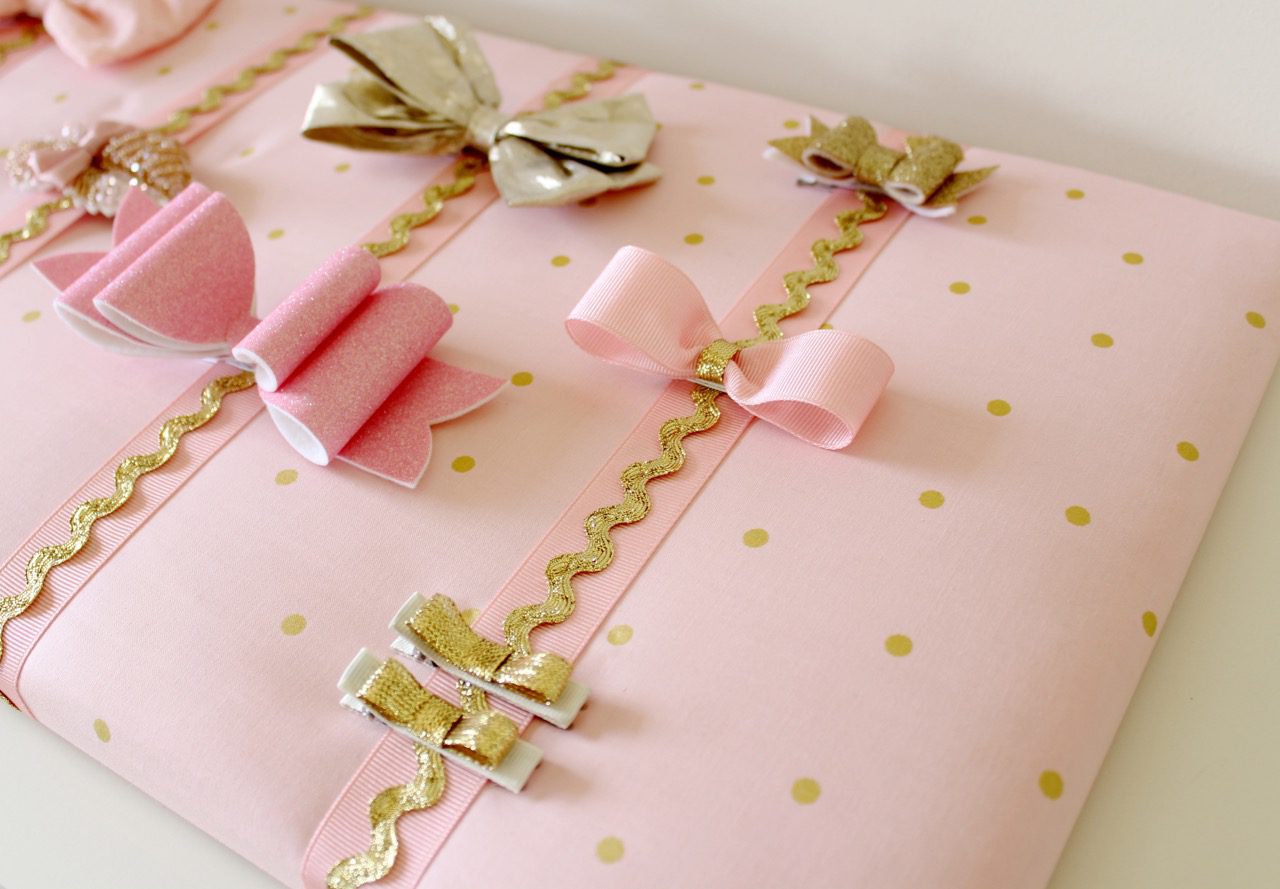
The results were so pretty. I hung this straight on the wall using removable wall hooks positioned at each corner of the top of the canvas. Then I needed to make some pretty new bows to add to the hair accessories my daughter already had to match.

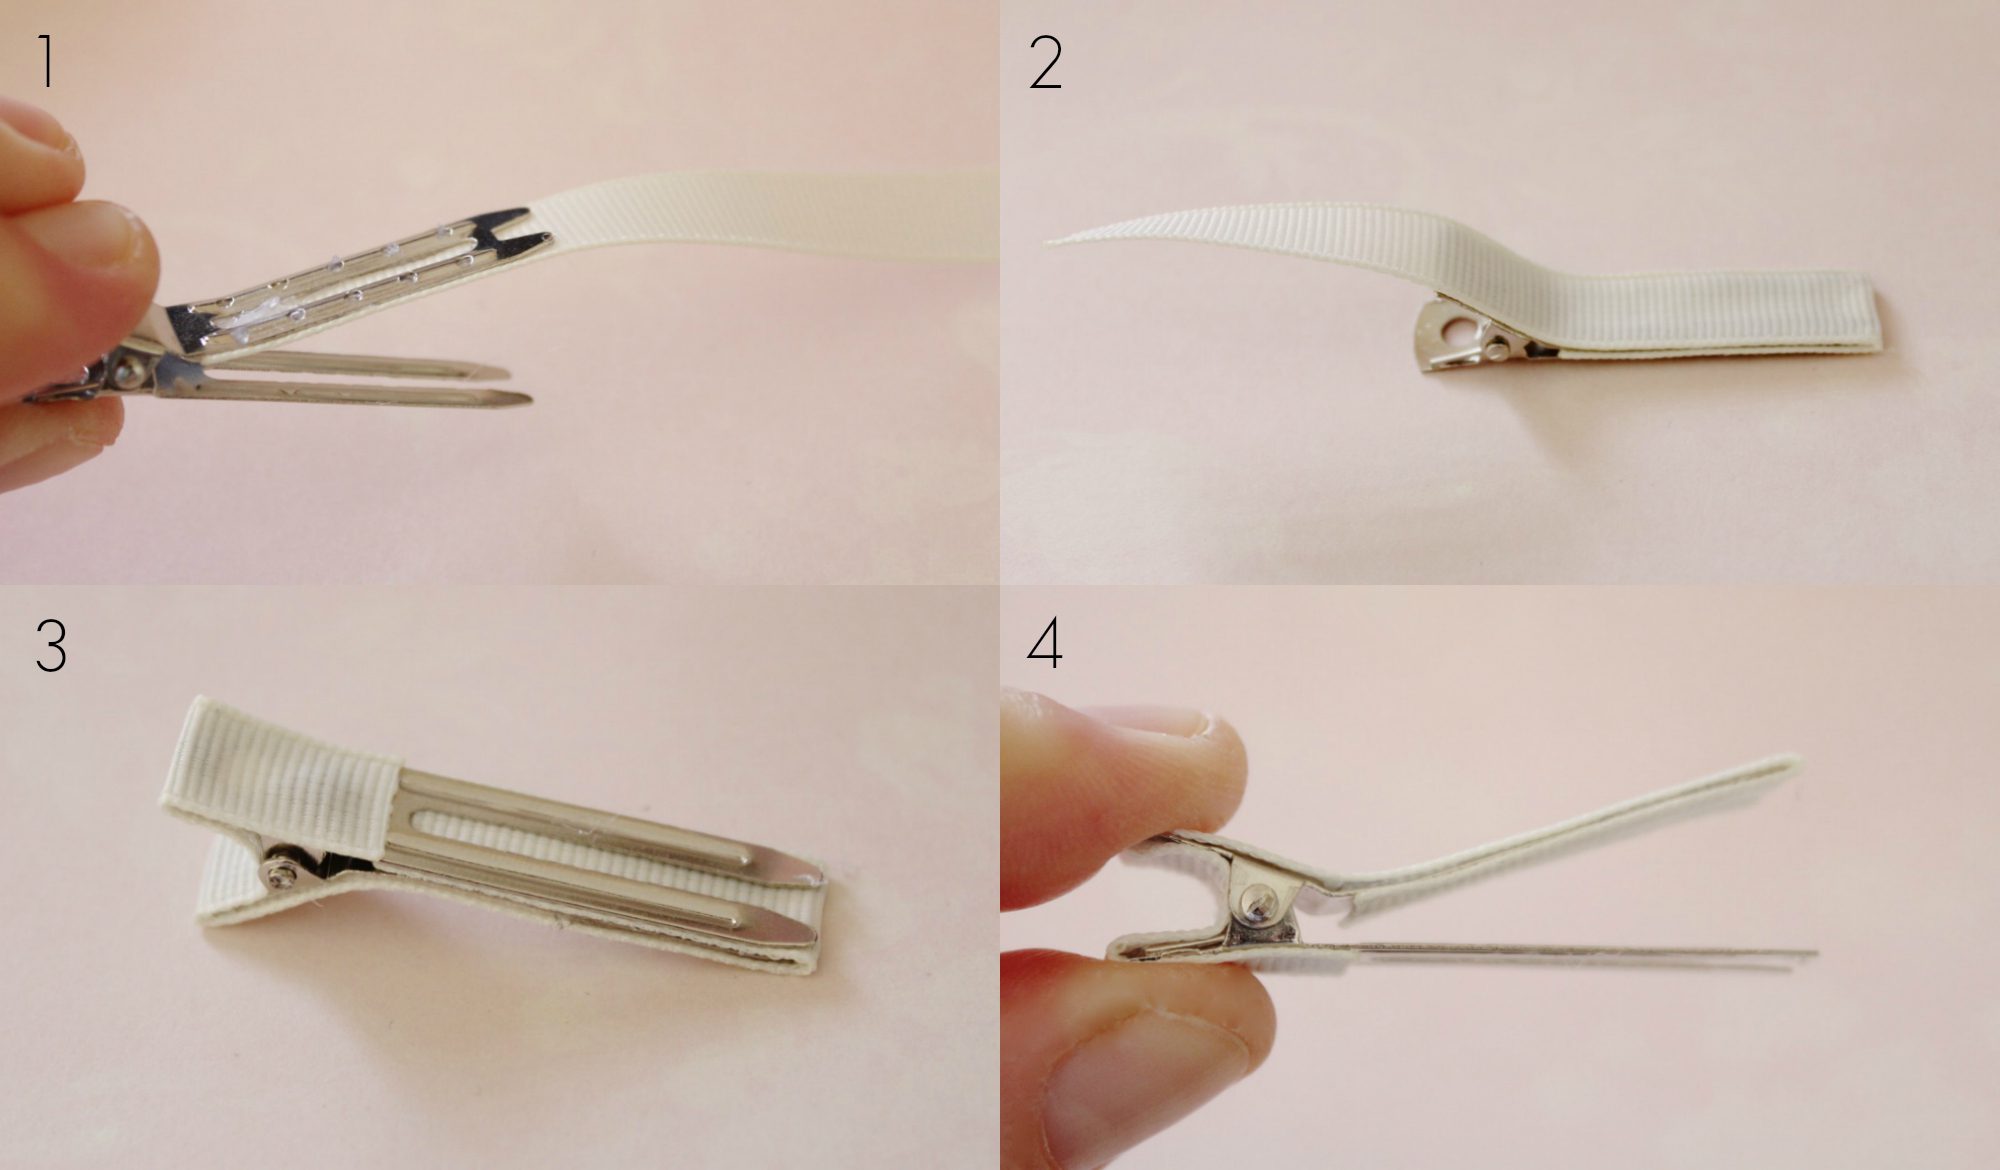
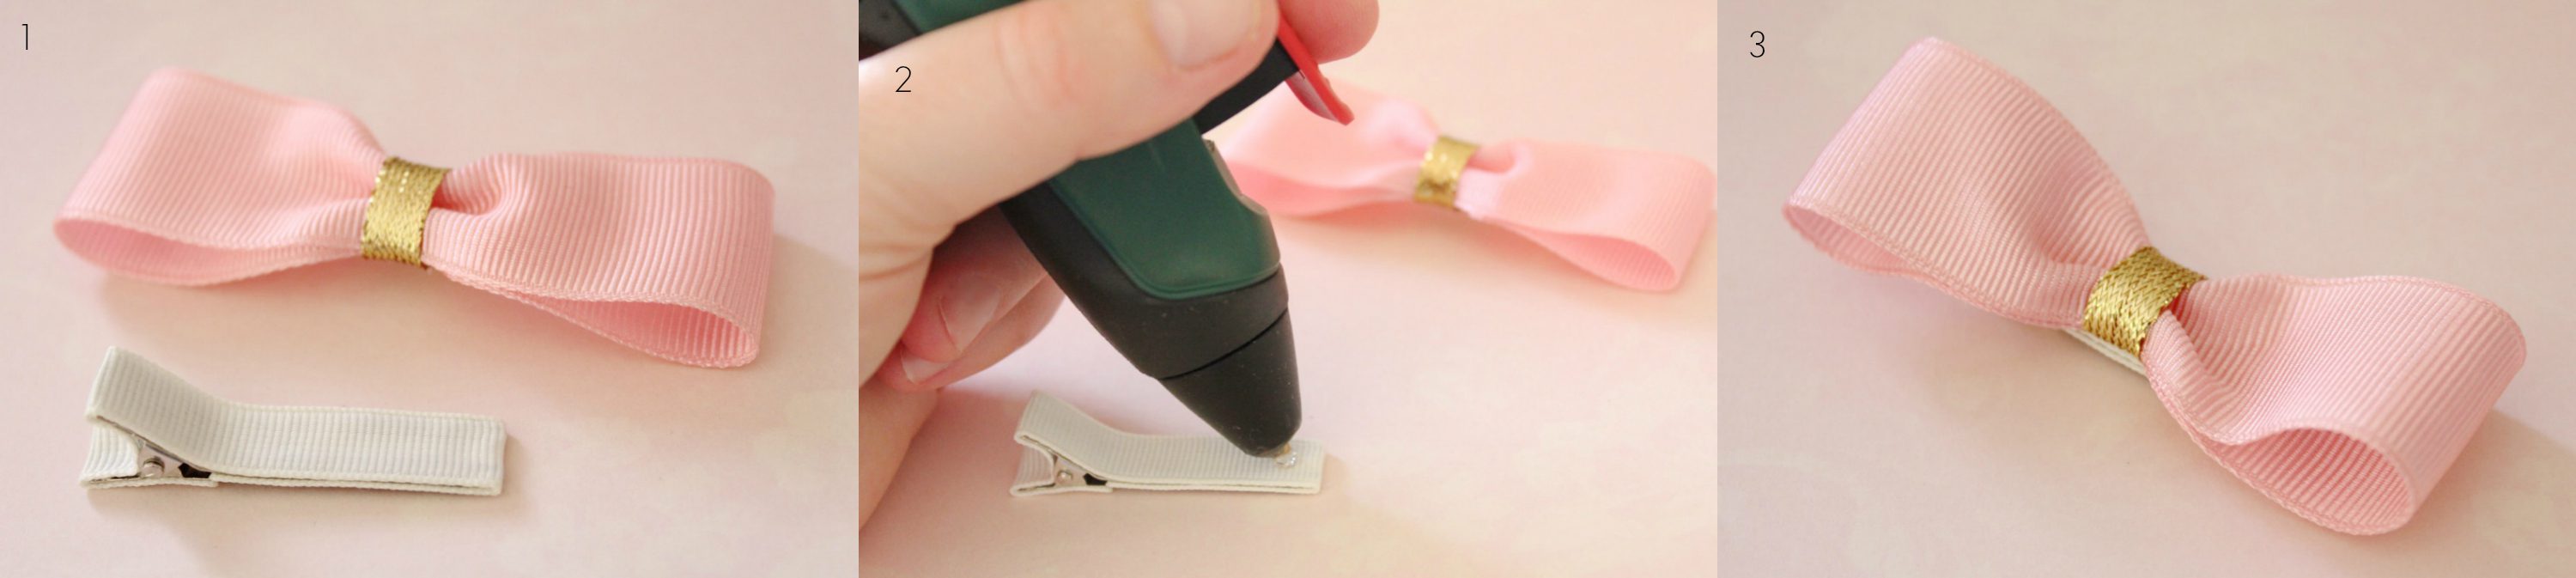
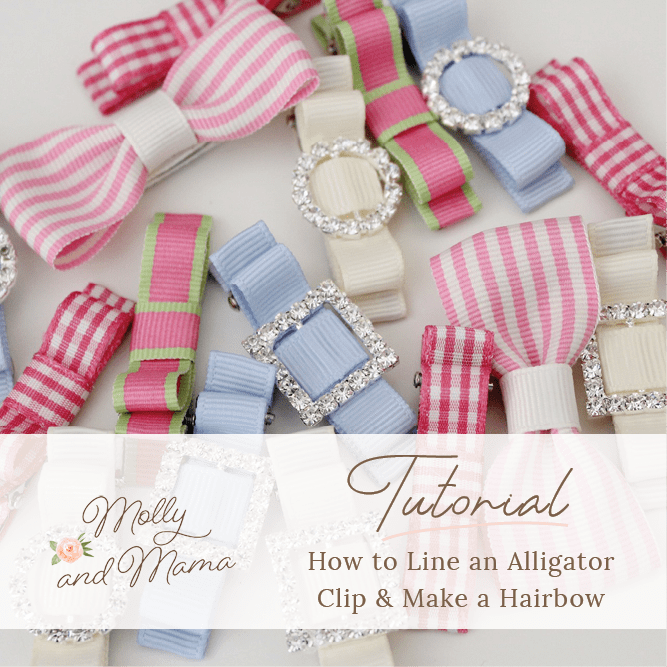
Using the steps outlined in my alligator clip tutorial (and in the image below), I covered a number of clips with grosgrain ribbon using the Bosch Glue Pen.

I loved that the glue pen was cordless. It made it so easy to use! I also loved the presser which allowed me to regulate the flow of glue carefully. That’s especially good for fiddly projects like making hair clips! And it fit nicely in my hand too.

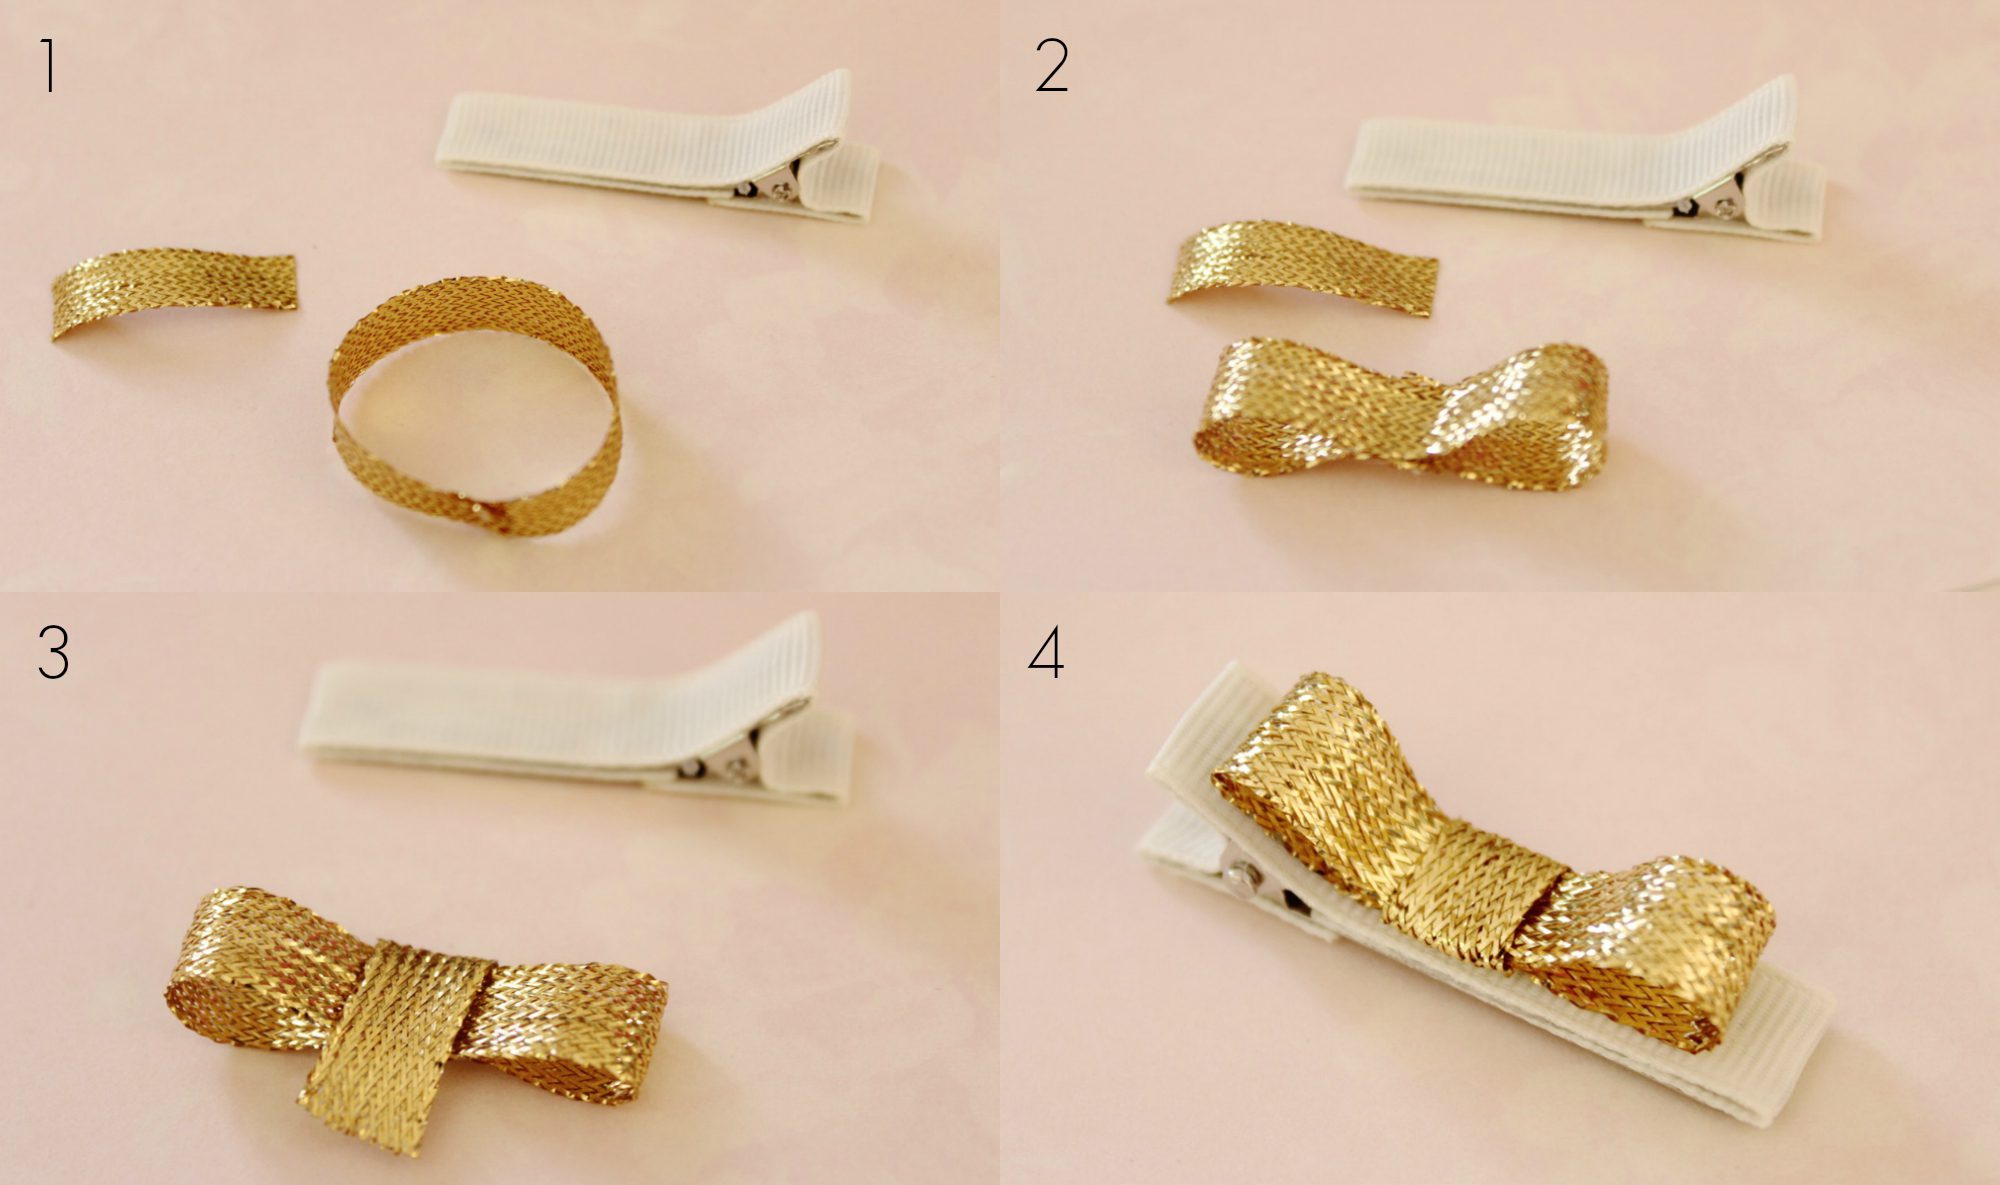
After covering a number of clips, I created some different bows which I attached to the top of them. To make these gold clips I joined the ends of a 3.5″ (9cm) length of ribbon (1).  I added a small amount of glue over the join in the ribbon ends and pressed it together to make two loops at each end (2). I wrapped a short piece of 1″ (2.5cm) ribbon around the loop to create a simple bow (3). And then attached the bow to the clip with a thin line of glue (4). The glue pen made this process really easy!

I also used the same method to make some longer and larger bows too.

All that was left was to add them to the Hair Clip Holder. How sweet do they look?

I hope you’ve found this tutorial helpful! Leave a comment and let me know.

Happy crafting, Lauren x

This post was written by Lauren Wright and appeared first on Molly and Mama http://www.MollyandMama.com.au 

Filed Under: Tutorials Tagged With: hair accessories, hair accessories holder, hair clips, power tools

Comments

  1. Dianne Smith says

    May 2, 2017 at 12:13 am

    Hard to pick a favourite, I am impressed with all the helpful
    tips, I particularly enjoyed learning about the Hair Bow Holder and Matching Clips. Thanks Lauren, and Molly and Mama.

    Reply
    • Lauren at Molly and Mama says

      May 3, 2017 at 10:02 am

      Thanks for your lovely feedback Dianne. I appreciate it!

      Reply

Leave a Reply Cancel reply

Your email address will not be published. Required fields are marked *

Categories

  • Christmas (37)
  • Christmas Stocking Sew Along (6)
  • Easter (10)
  • Embroidery For Beginners (6)
  • English Paper Piecing (10)
  • Felt Fun (12)
  • Forest Family Quilt Along (10)
  • Holidays (11)
  • Molly and Mama Patterns (56)
  • Pattern and Book Reviews (38)
  • Projects (40)
  • Quilting Help (3)
  • This and That (53)
  • Tutorials (49)

mollyandmama

Lauren Wright
🐰💙 Easter will be here before we know it. Pl 🐰💙 Easter will be here before we know it. Please enjoy 20% OFF my Easter instant download patterns in my store. Use the link in my profile or head to mollyandmama.etsy.com. 

T&C’s: The offer is only available until Easter Sunday for PDF patterns. No coupon code required. 

#mollyandmama #rosierabbitornament #feltbunnies #easterbunny #feltsewing #feltbunny #felt #woolfelt #merinowoolfelt #myfeltlady #easter #eastersewing #eastercraft #handmadeeaster #embroidery #handembriodery #handstitched #handmade #easterbunny #eastergifts #eastertree #eastertreedecorations #easterdecor #easterdecoration
🐰💕 This free felt Easter tutorial is a hit e 🐰💕 This free felt Easter tutorial is a hit every year! These simple to sew bunnies are the perfect beginner project. Find the tutorial and all the details on the blog (link in bio). There’s also a direct link in my stories today. 

@myfeltlady has felt packs that work perfectly with this project. 

Visit @aspoonfulsugar for the fabric basket tutorial too 😍.

#mollyandmama #feltbunnytutorial #felt #woolfelt #myfeltlady #feltbunny #feltrabbit #rabbitsewing #bunnysewing #eastersewing #eastertutorial
🐇🌸🐇 I have only a few of these bunny fram 🐇🌸🐇 I have only a few of these bunny frame and embroidery kits on hand, so I have listed them in the store (link in bio- swipe to see more). There’s the big Beatrice Bunny frame or the twin pack of Baby Beatrice Minis which includes a necklace and a brooch option. 

Both kits come with the preprinted linen so all you need to do is embroider the design with your favourite floss and add a wool felt crown. If you leave me a comment when you purchase, I’ll even throw in some felt for you 😍. Australian postage only sorry. Express post upgrades are available too! 

#mollyandmama #creativeabundance #beatricebunnyframe #babybeatriceminis #bambooframe #embroideryframe #embroideryhoop #animalframe #felt #feltflowers #merinowoolfelt #woolfelt #flowercrown #feltflowercrown #handstitched #embroidery #embroiderersofinstagram #feltersofinstagram #eastersewing #eastercraft #chocolatefreeeaster #eastergift #glitterfelt #embroideryfloss
Tilly’s Tea Party Table Runner is almost due for Tilly’s Tea Party Table Runner is almost due for release! I’m really pleased with how this design turned out 💐🤍

Sign up for the newsletter now (link in bio) to receive the 20% off discount code only for subscribers. 

#mollyandmama #tillysteapartytablerunner #epp #englishpaperpiecing #tablerunner #tablerunnerpattern #hexagons #hexies #jewel #equilateraltriangle #aurifil #aurifilthread #aurifilartisan #aurifilartisanchallenge #stitchersofinstagram #slowstitching #slowsewing #handstitching  #roseandvioletsgardenfabric #roseandvioletsgarden #missrosesisterviolet #rileyblakedesigns #iloverileyblake #embroidery #embroiderersofinstagram #stitchersofinstagram #floralembroidery #flowerembroidery #embroideredhexies
🎀❤️ There’s a new post on the blog, shari 🎀❤️ There’s a new post on the blog, sharing a brand new design made with the Strawberry Honey fabric range from @burlapandblossompatterns for @rileyblakedesigns. It was lots of fun learning more about my new @janomeaustralia machine too. I see lots more appliqué projects in my future! 

Check the blog link in my bio or head to mollyandmama.com.au to see more photos of this bow quilt. Sign up to the newsletter to be notified when the pattern releases too ❤️. 

#mollyandmama #bowquilt #bowapplique #rawedgeapplique #appliquequilt #bowappliquequilt #burlapandblossompatterns #rileyblakedesigns #iloverileyblake #janome #janomeaustralia #memorycraft9450qcp  #janomememorycraft9450 #strawberryhoneyfabric #fatquarterbundle #fabricpull #fabriccollection
🎀🧡 I’ve been playing with the appliqué fu 🎀🧡 I’ve been playing with the appliqué function on my new @janomeaustralia Memory Craft 9450 QCP. There’s been lots of learning and trying different stitch types and lengths, but I’ve settled on my favourite settings now 😁. 

🍓🐝 This Strawberry Honey fabric collection from @burlapandblossompatterns for @rileyblakedesigns is perfect for this sweet bow quilt. I can’t wait to show you more! 😍

#mollyandmama #bowquilt #bowapplique #bowappliquequilt #burlapandblossompatterns #rileyblakedesigns #iloverileyblake #janome #janomeaustralia #memorycraft9450qcp  #janomememorycraft9450 #strawberryhoneyfabric #fatquarterbundle #fabricpull #fabriccollection
🐰🥕 It’s not too late to start your Easter 🐰🥕 It’s not too late to start your Easter sewing! These Bitty Bunnies are teeny tiny and make a super cute chocolate-free treat! I use mine as tree decorations. Sweet, right? And @myfeltlady has felt kits!!! Find the pattern in my store (link in bio) or ask for it at your favourite shop. This project is always so popular at this time of year 😍 

#mollyandmama #bittybunnies #bittybunniespattern #feltbunnies #easterbunny #feltsewing #feltbunny #felt #woolfelt #merinowoolfelt #myfeltlady #easter #eastersewing #eastercraft #handmadeeaster #embroidery #handembriodery #handstitched #handmade #easterbunny #eastergifts #easterdecor #easterdecoration
🐰💗 The Easter Dilly Bag is perfect for hidin 🐰💗 The Easter Dilly Bag is perfect for hiding tiny treats in those sweet front pockets, or holding all the Easter eggs inside the drawstring pouch. Such a sweet accessory for egg hunts and gift giving! Have you made one of these cute pouches? 

Be sure to use the hashtag #EasterDillyBag so that I can check out your gorgeous sewing! You can find a link to my pattern shop in my profile, or ask for the printed pattern at your favourite Quilting Store. @creative_abundance can help with wholesale shop orders. 

#mollyandmama #easterdillybag #creativeabundance #eastersewing #bunnyembroidery #rabbitembroidery #easterbag #easteregghunt #eastergift #embroidery #easterembroidery #yoyos #suffolkpuffs #drawstringbag #quiltedbag #bagpattern #bagsewing #tildafabrics #tildahappycampers #tildaaustralia
I loved sewing up these cute projects last year us I loved sewing up these cute projects last year using the Boho Blooms collection from @nancyarcherillustration, designed for @studio_e_fabrics. The drawstring pouch uses my Easter Dilly Bag pattern! You can read about it on the blog (head to the blog via the link in my bio and use the search tab to look for Boho Blooms). 

#mollyandmama #bohobloomsfabric #studioefabrics  #easterdillybag #eastersewing #nancyarcherillustration
Load More… Follow on Instagram
© Copyright 2020 - Molly and Mama