Introducing the Clara Tote Bag
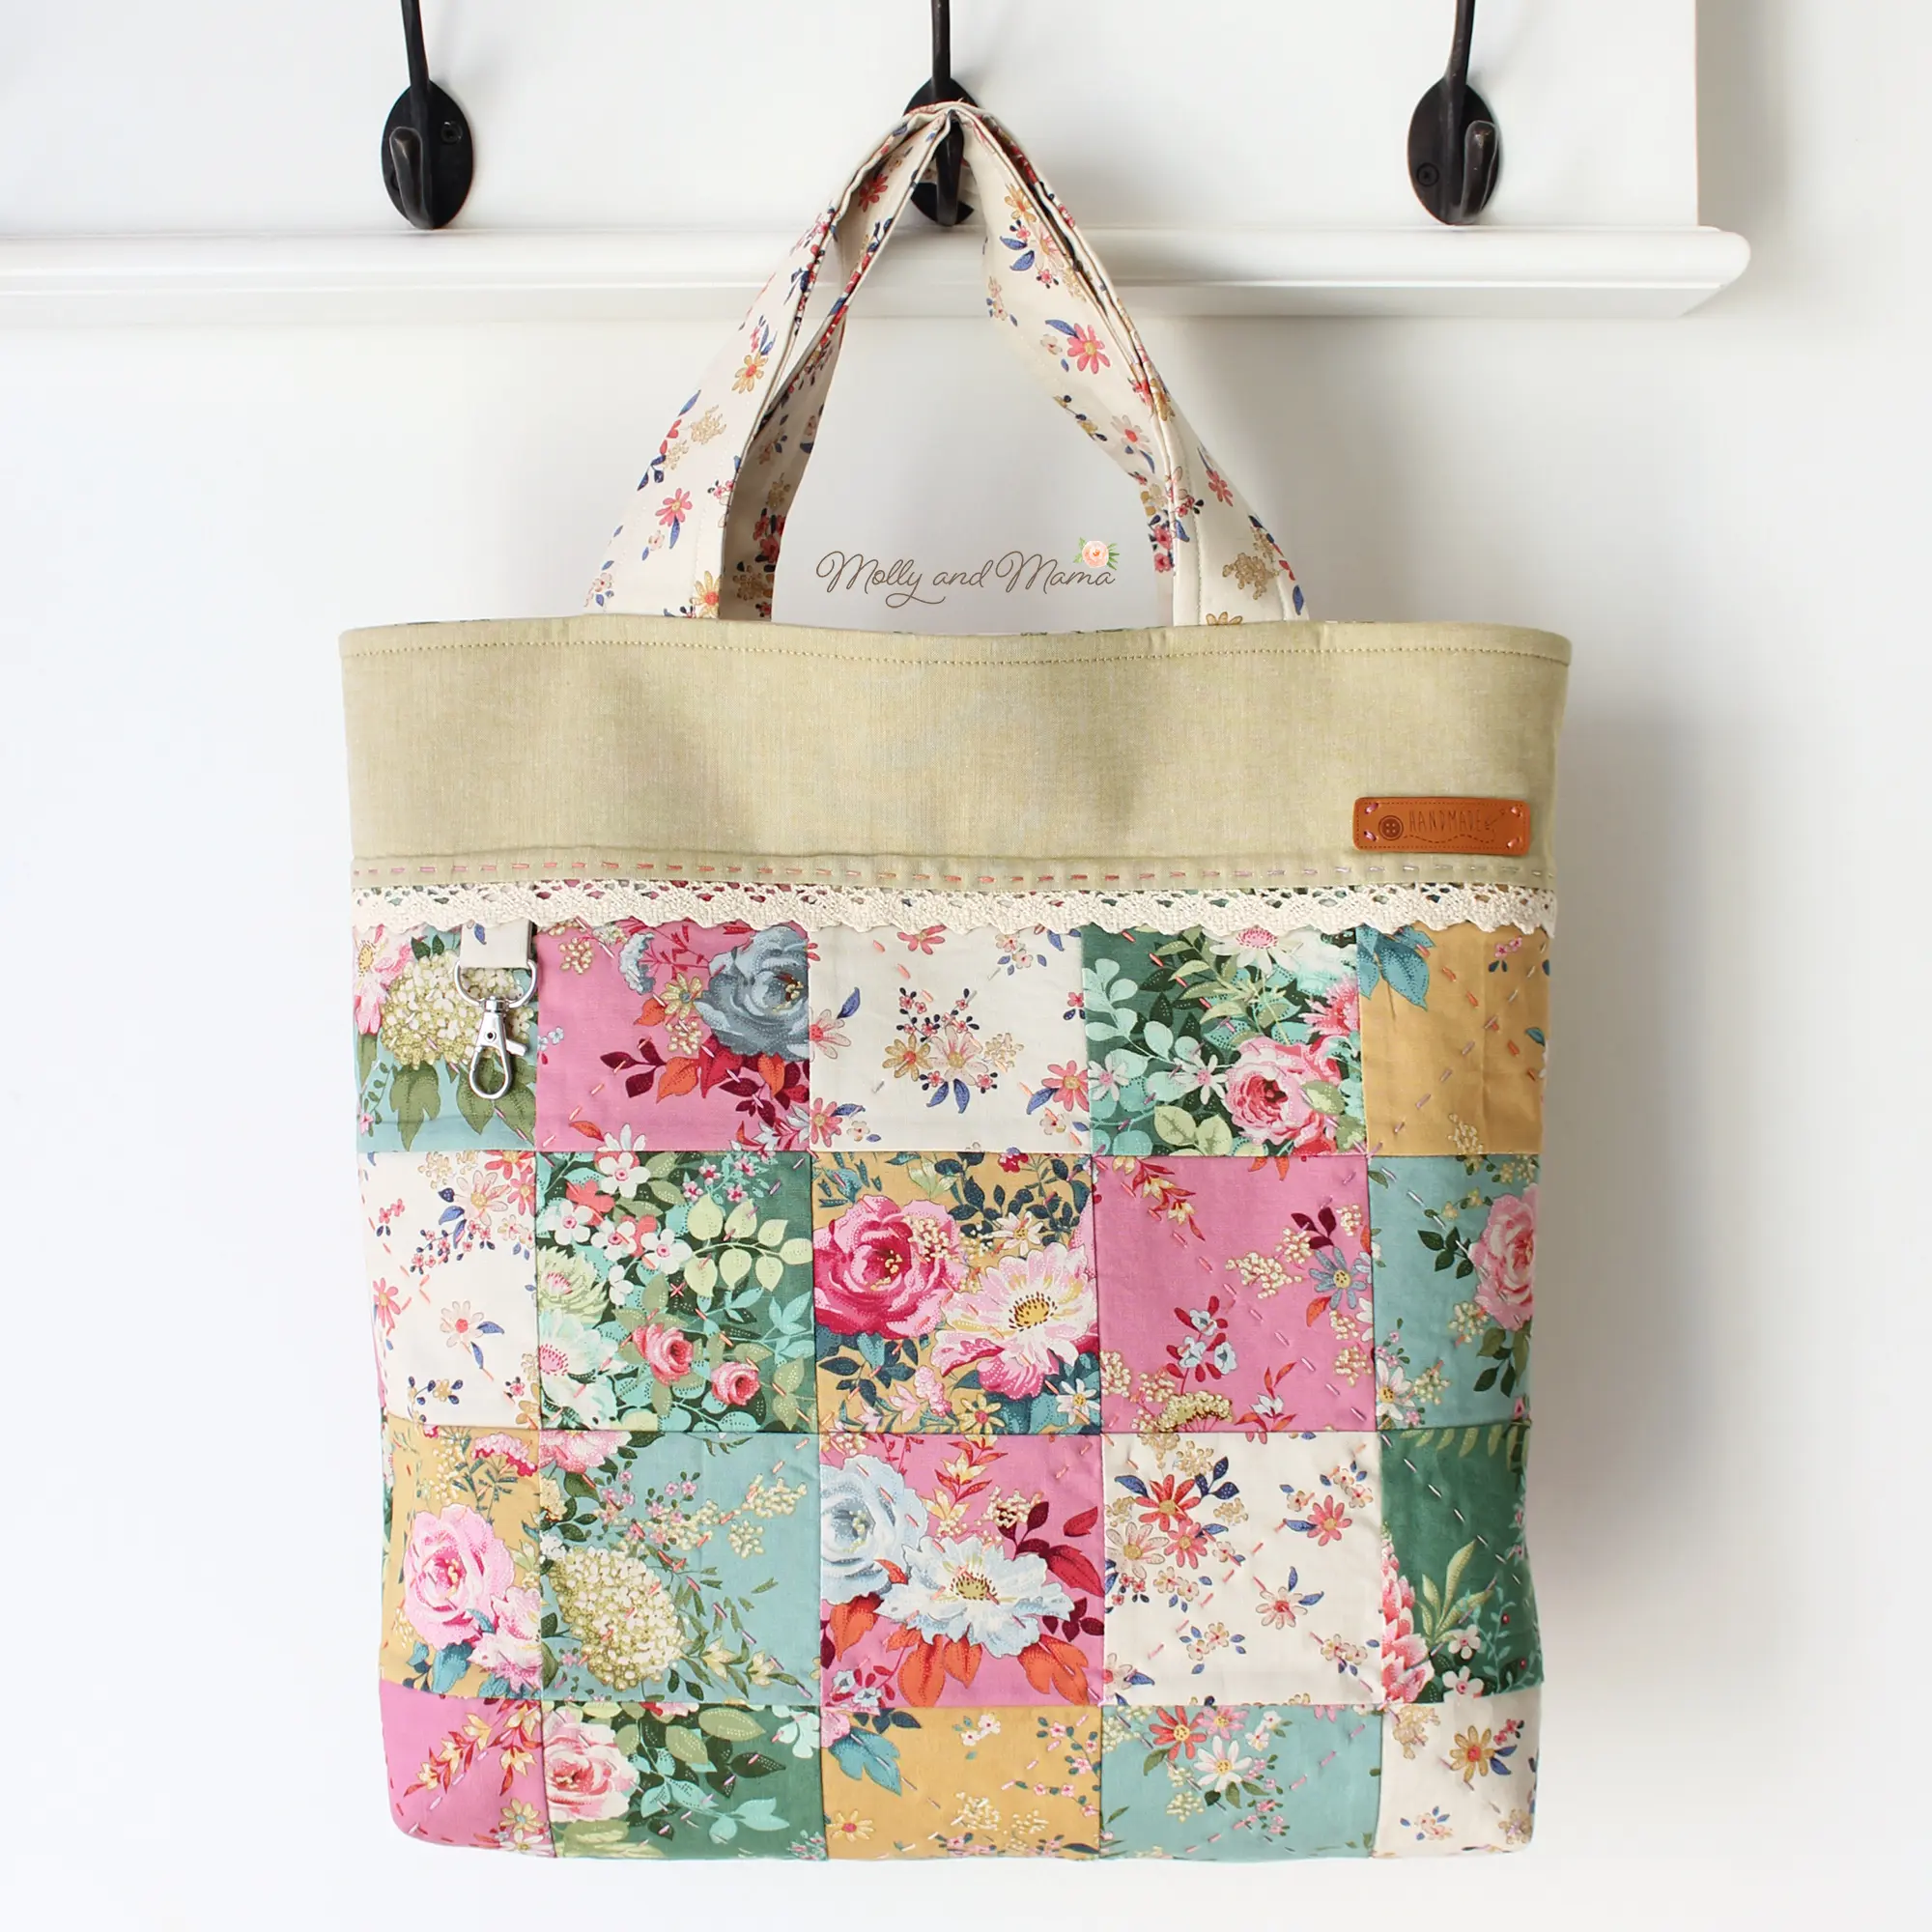
Welcome to Molly and Mama, where I design easy-to-sew projects that are perfect for beginners. It’s always fun to share new designs with you all and I’m really excited about this one. Introducing the Clara Tote Bag!
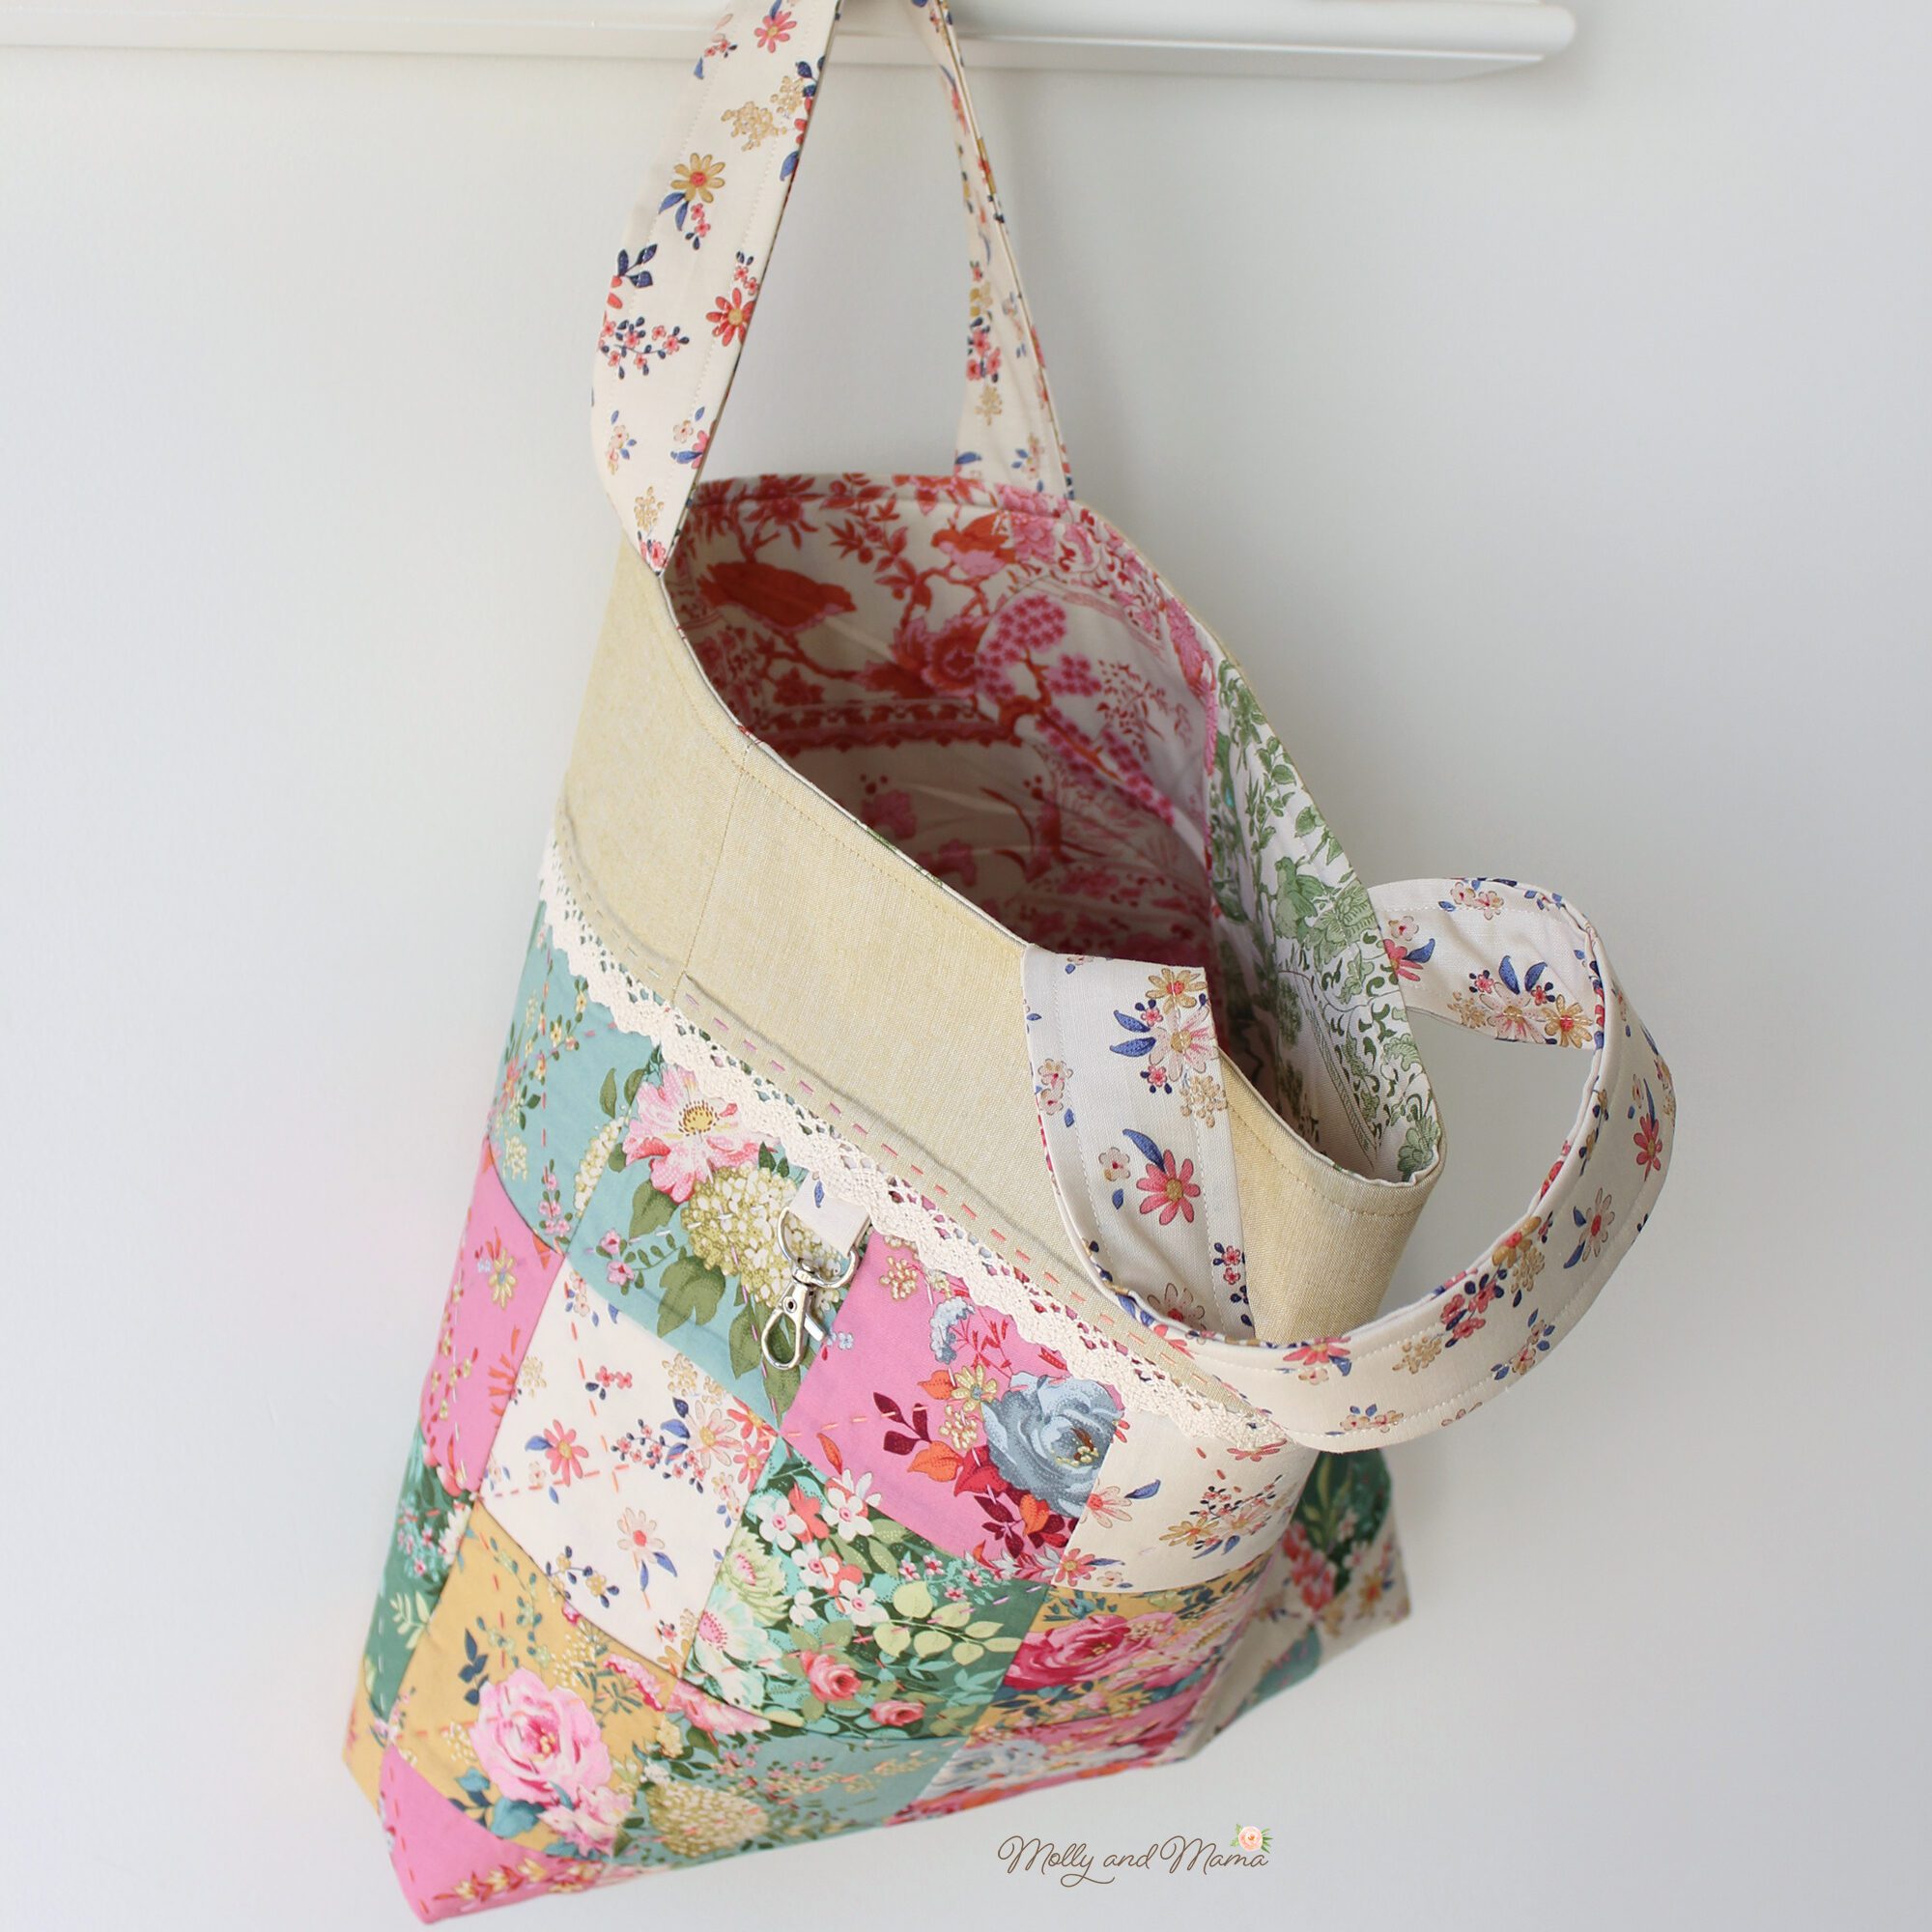
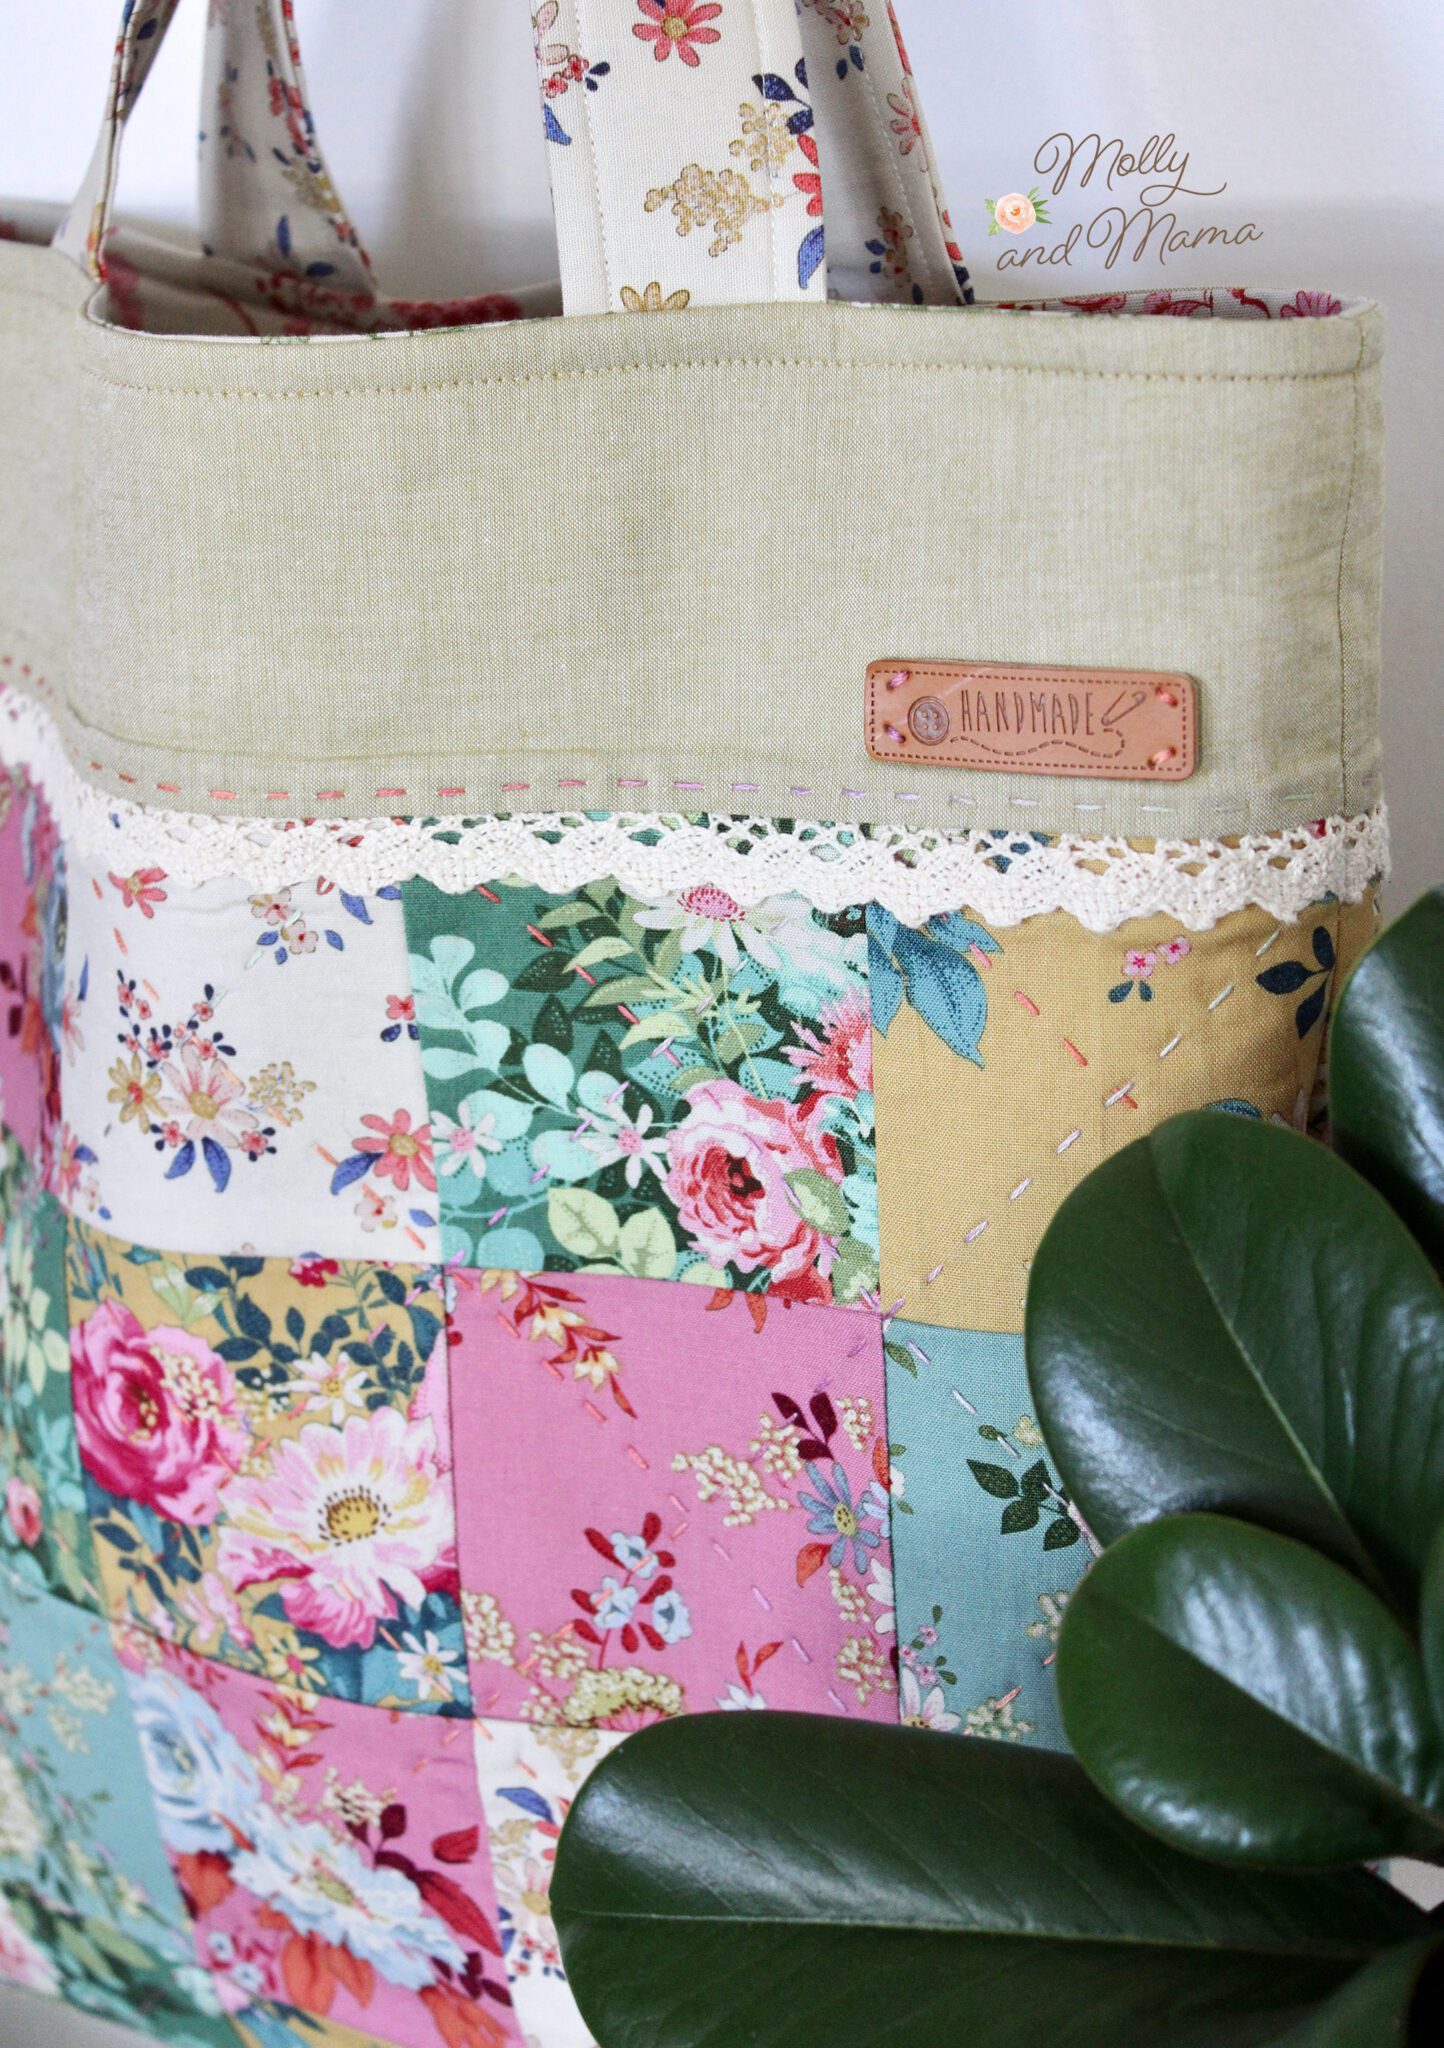
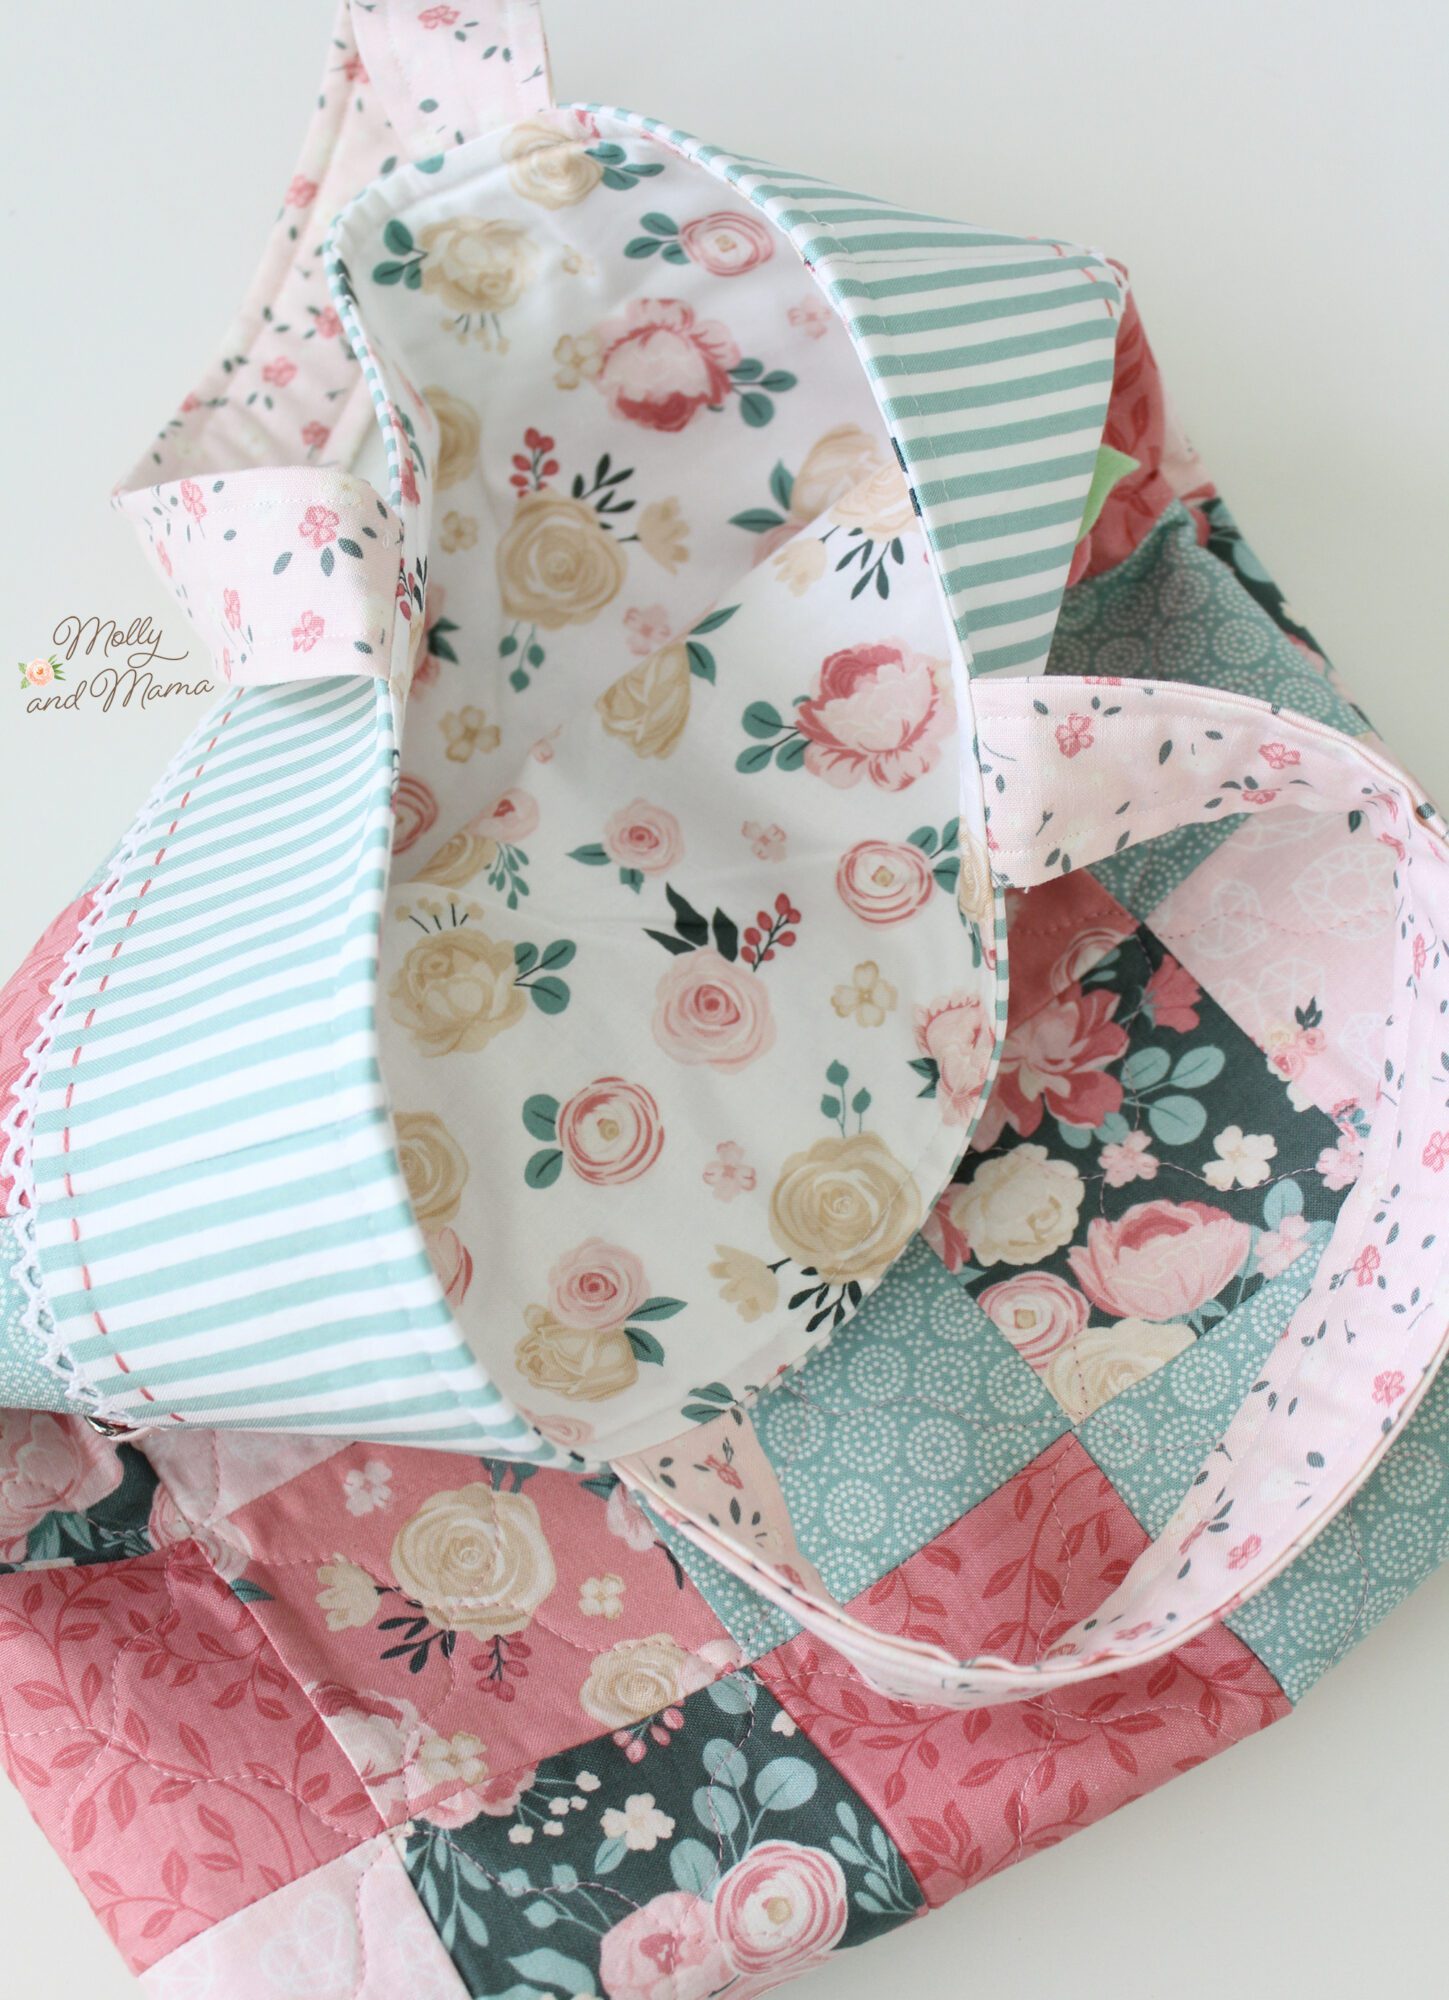
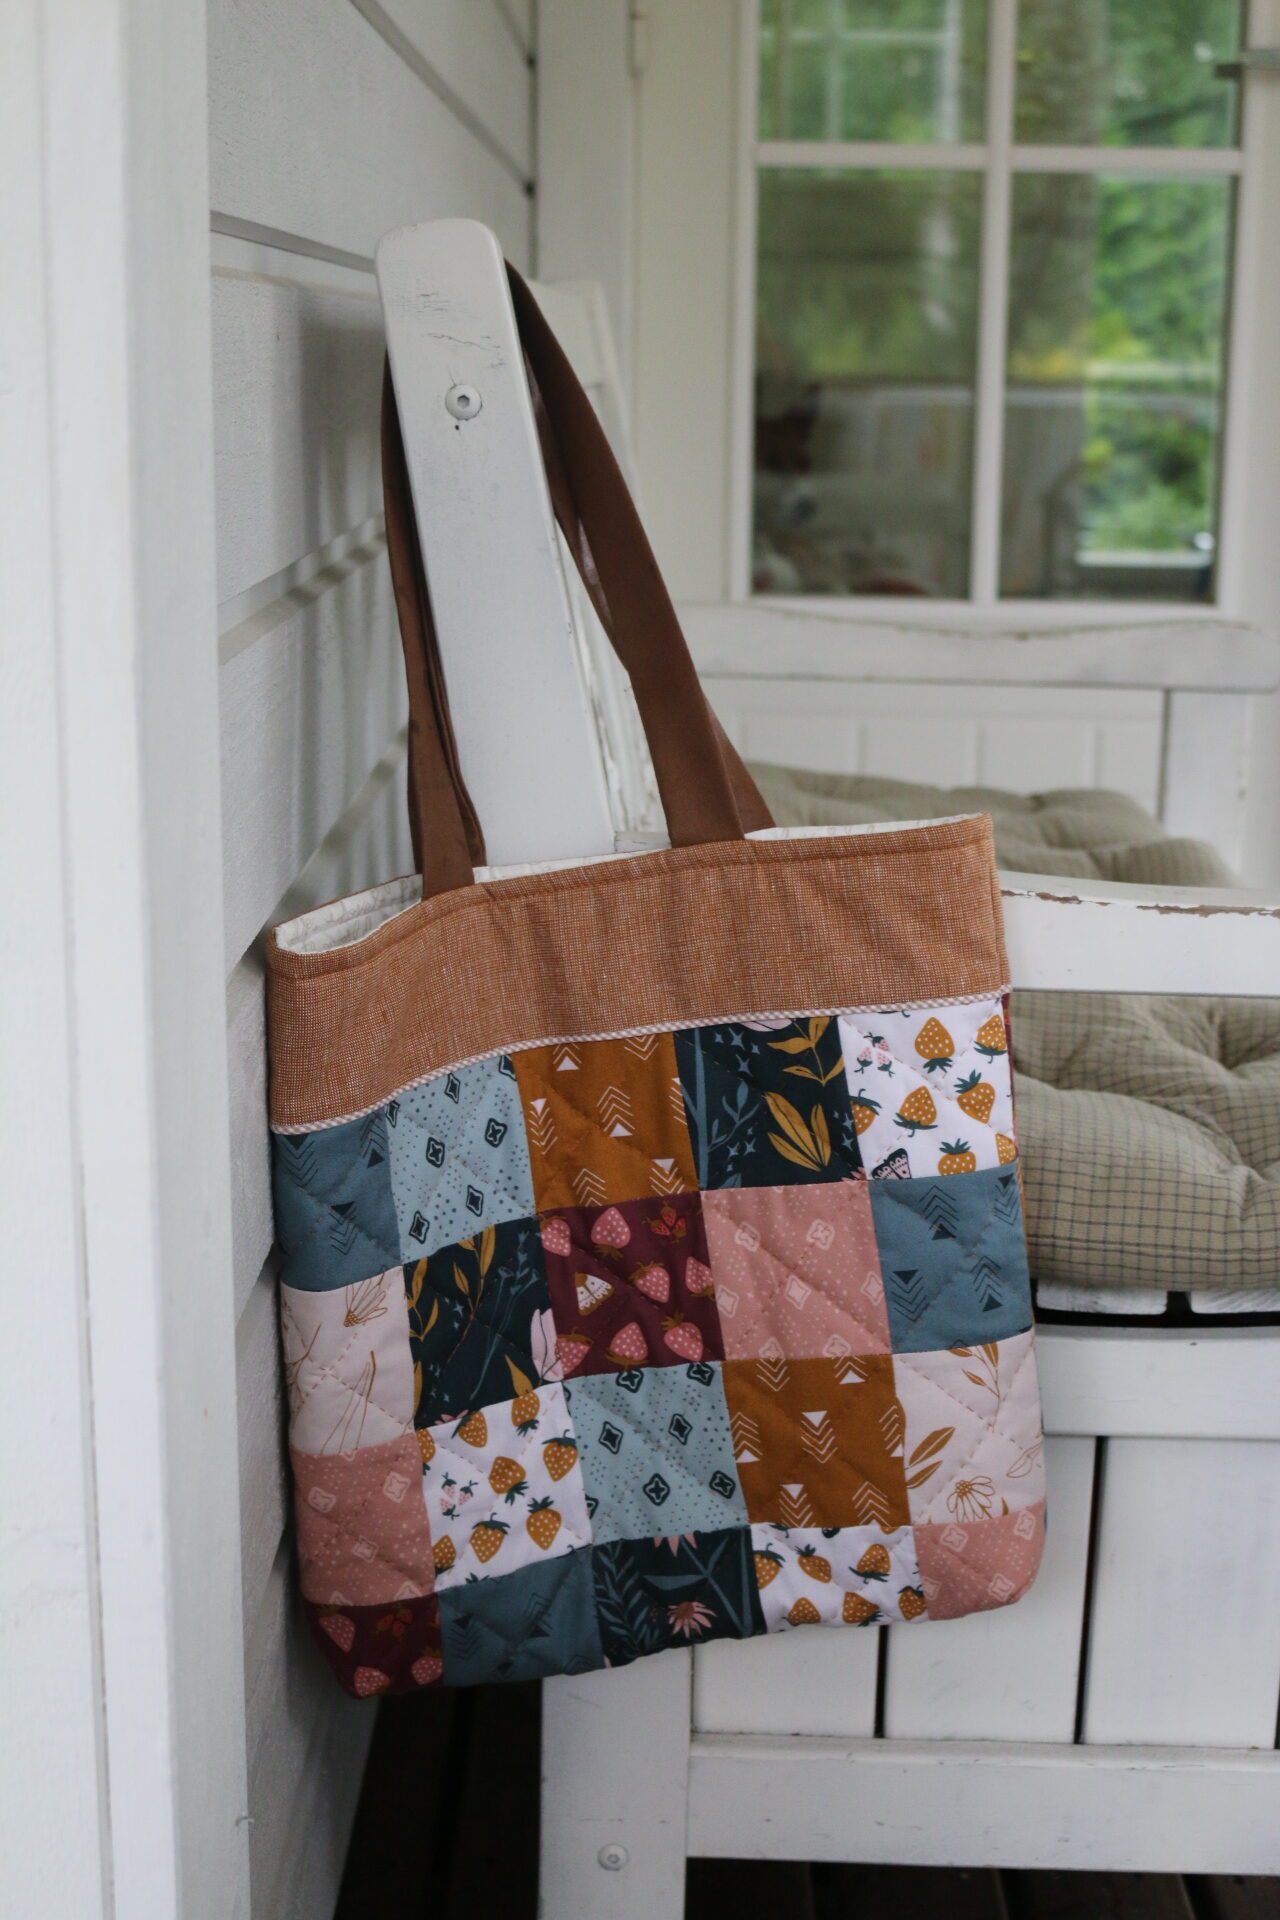
The Clara Tote is perfect for beginners or for those wanting to start their bag making journey. With step-by-step photos, and clear and easy-to-follow instructions, I walk you through each stage of assembly. We create a front and back panel of simple nested patchwork squares, add a border to the top, some hand quilting and extra details, handles, lining and more. We learn how to box the bag corners too.
Once you’ve made one, you won’t be able to stop. And you’ll be making your own changes and additions in no time. It’s such a practical project! Use it for your farmer’s market shopping trips, at the local library for books, or for carrying your art supplies.
How Did The Tote Bag Come About?
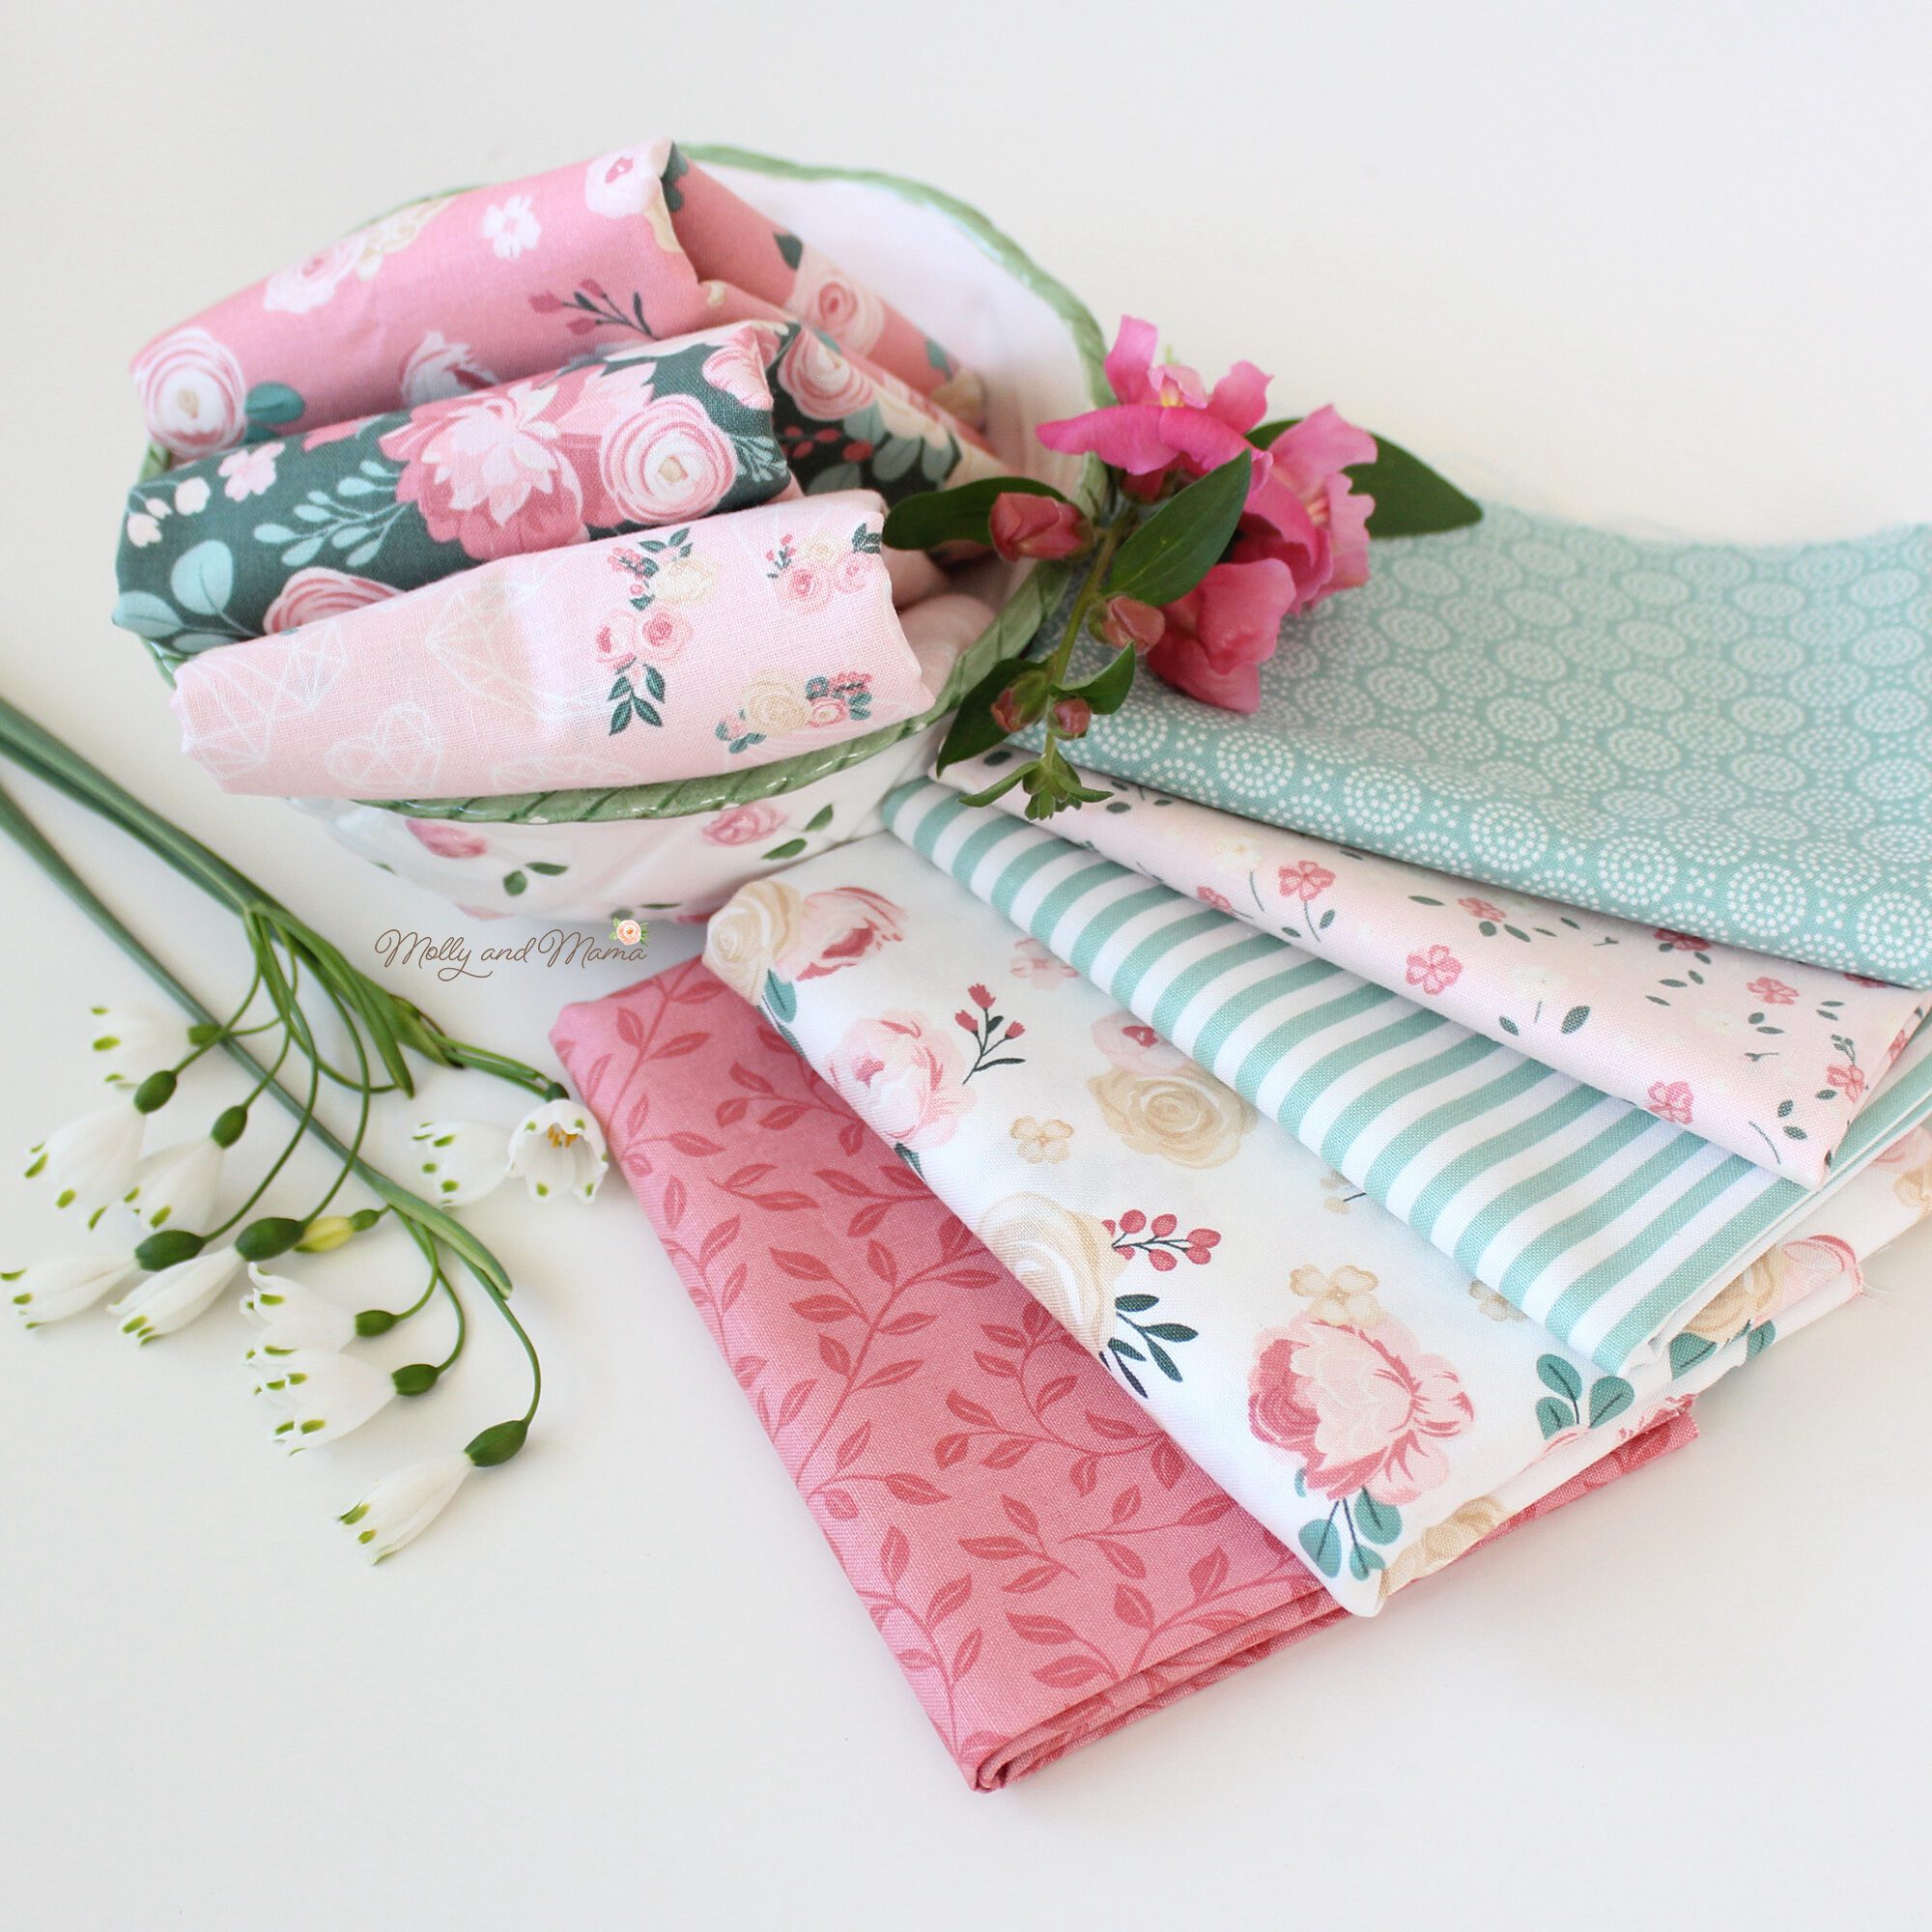
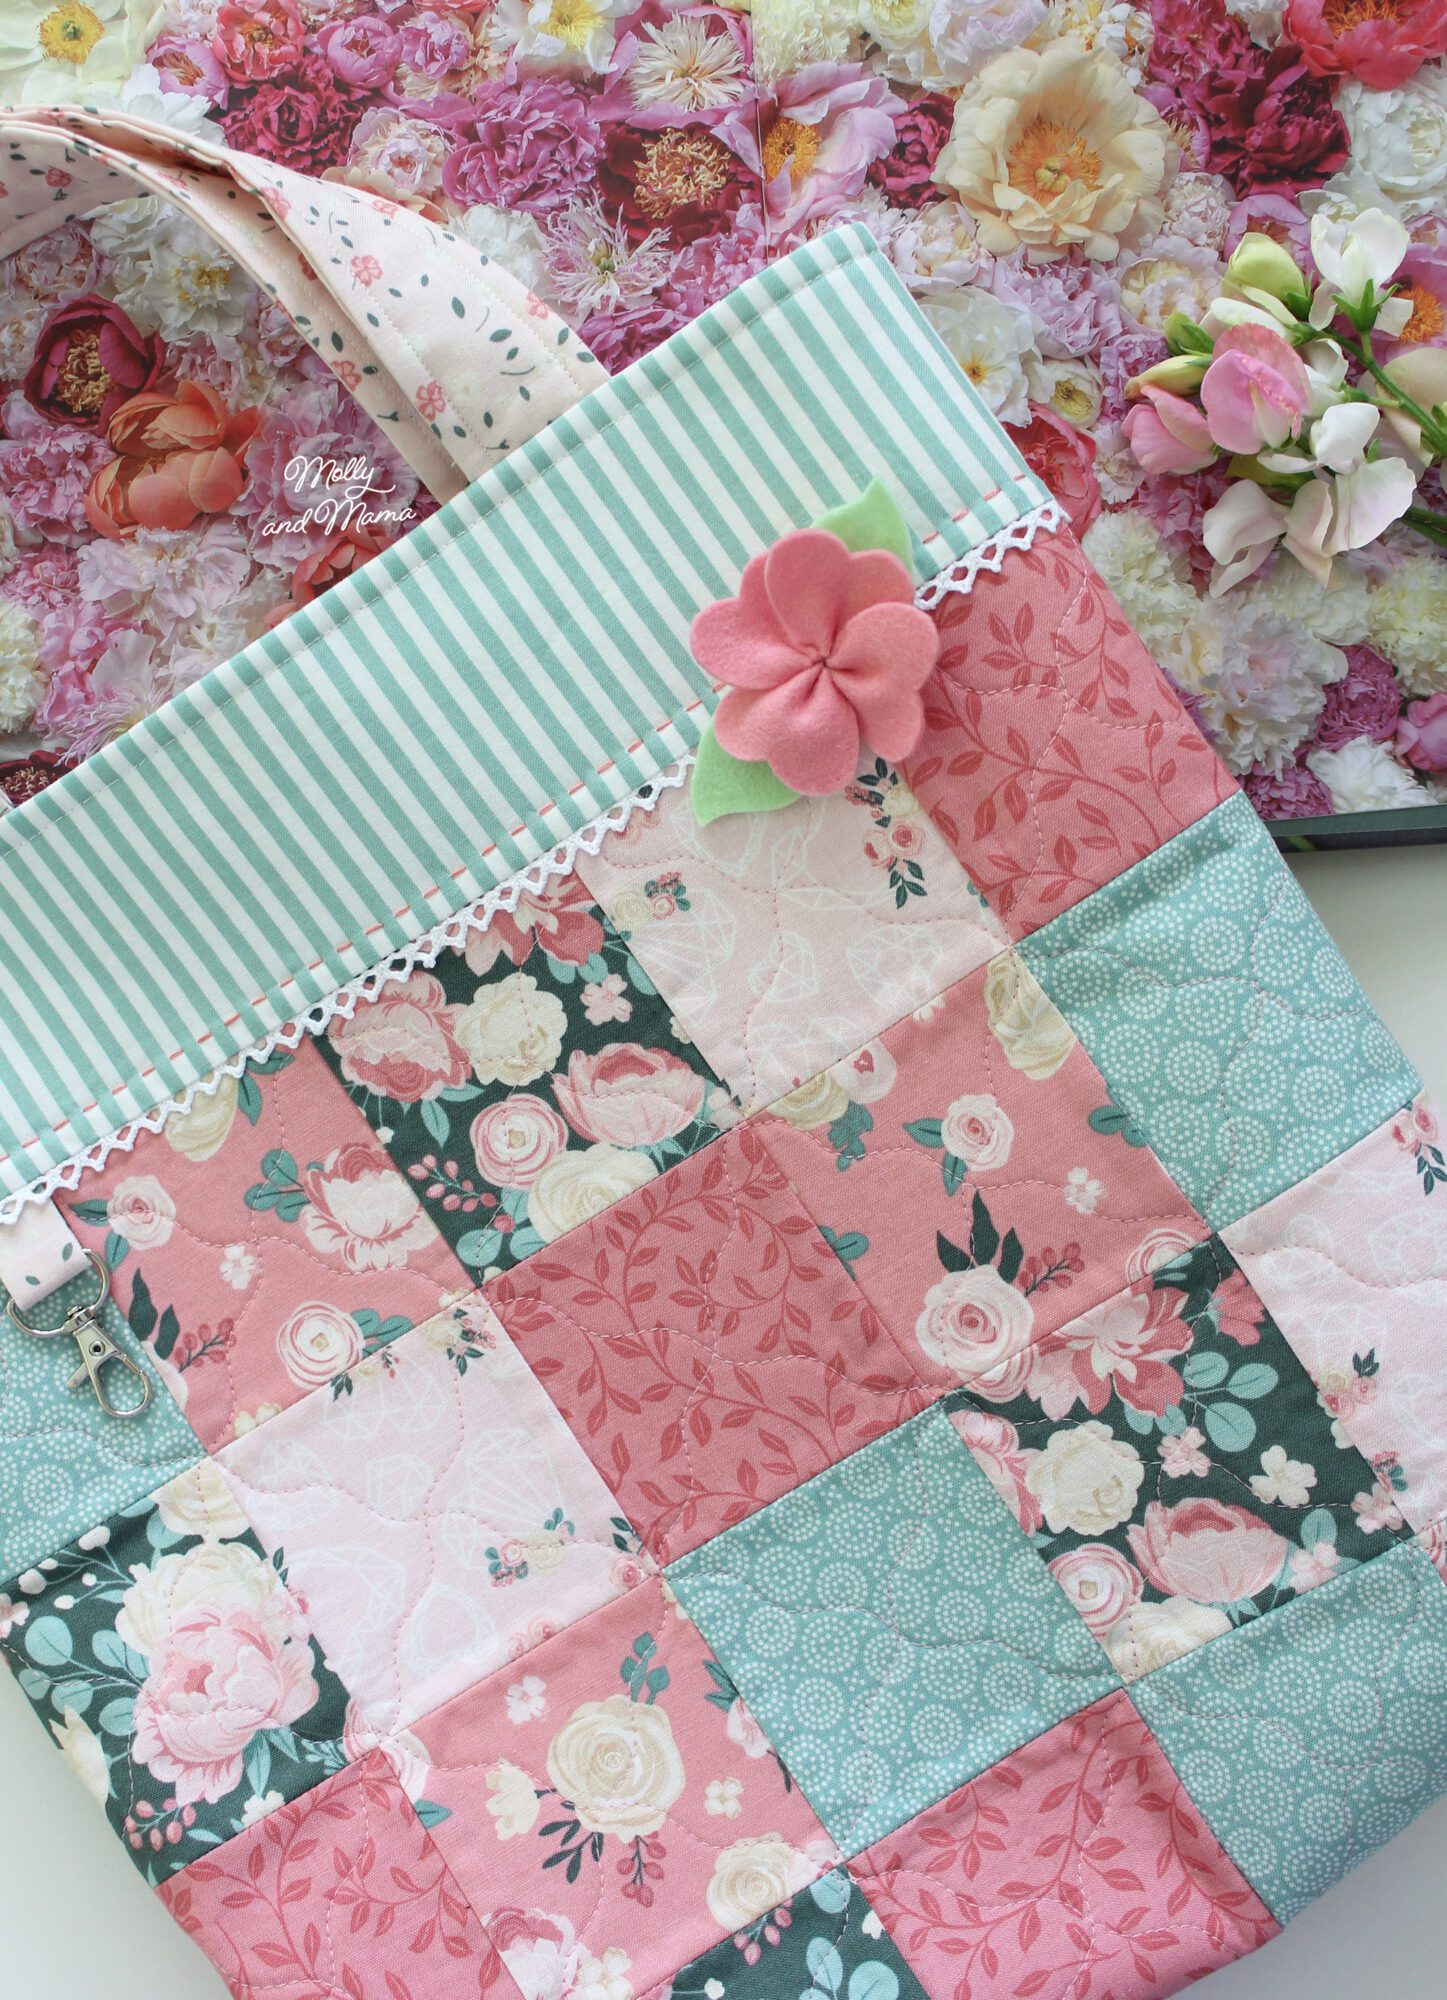
The lovely folks at Two Green Zebras recently sent me the Tilda fabric collection called ‘Chic Escape‘ to play with. I loved the jewel tones, the different florals and patterns, and even the prints in the co-ordinating collection ‘Daisyfield’. I couldn’t decide which fabrics I wanted to feature because they were all so beautiful!
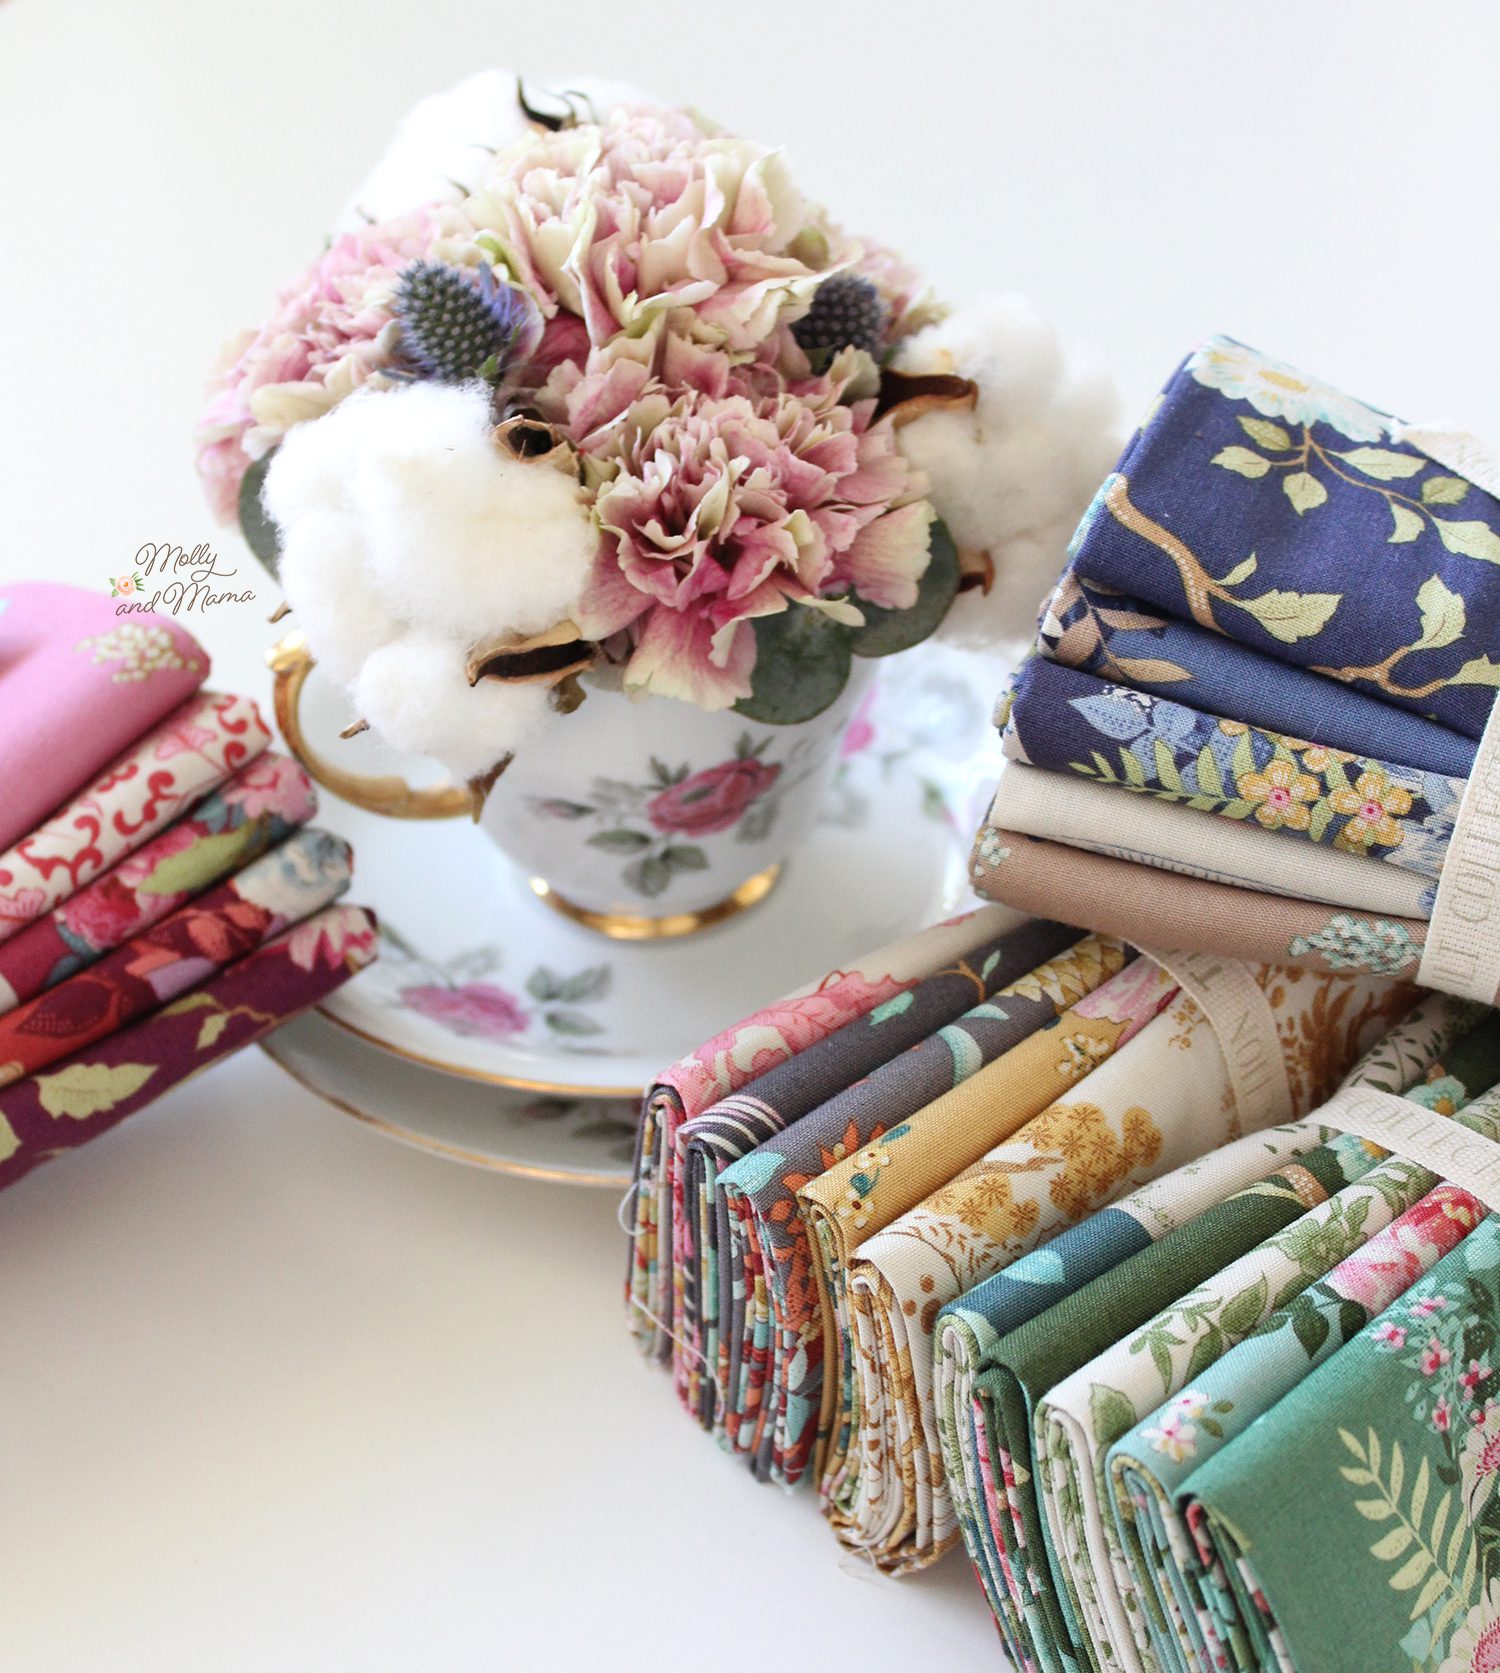
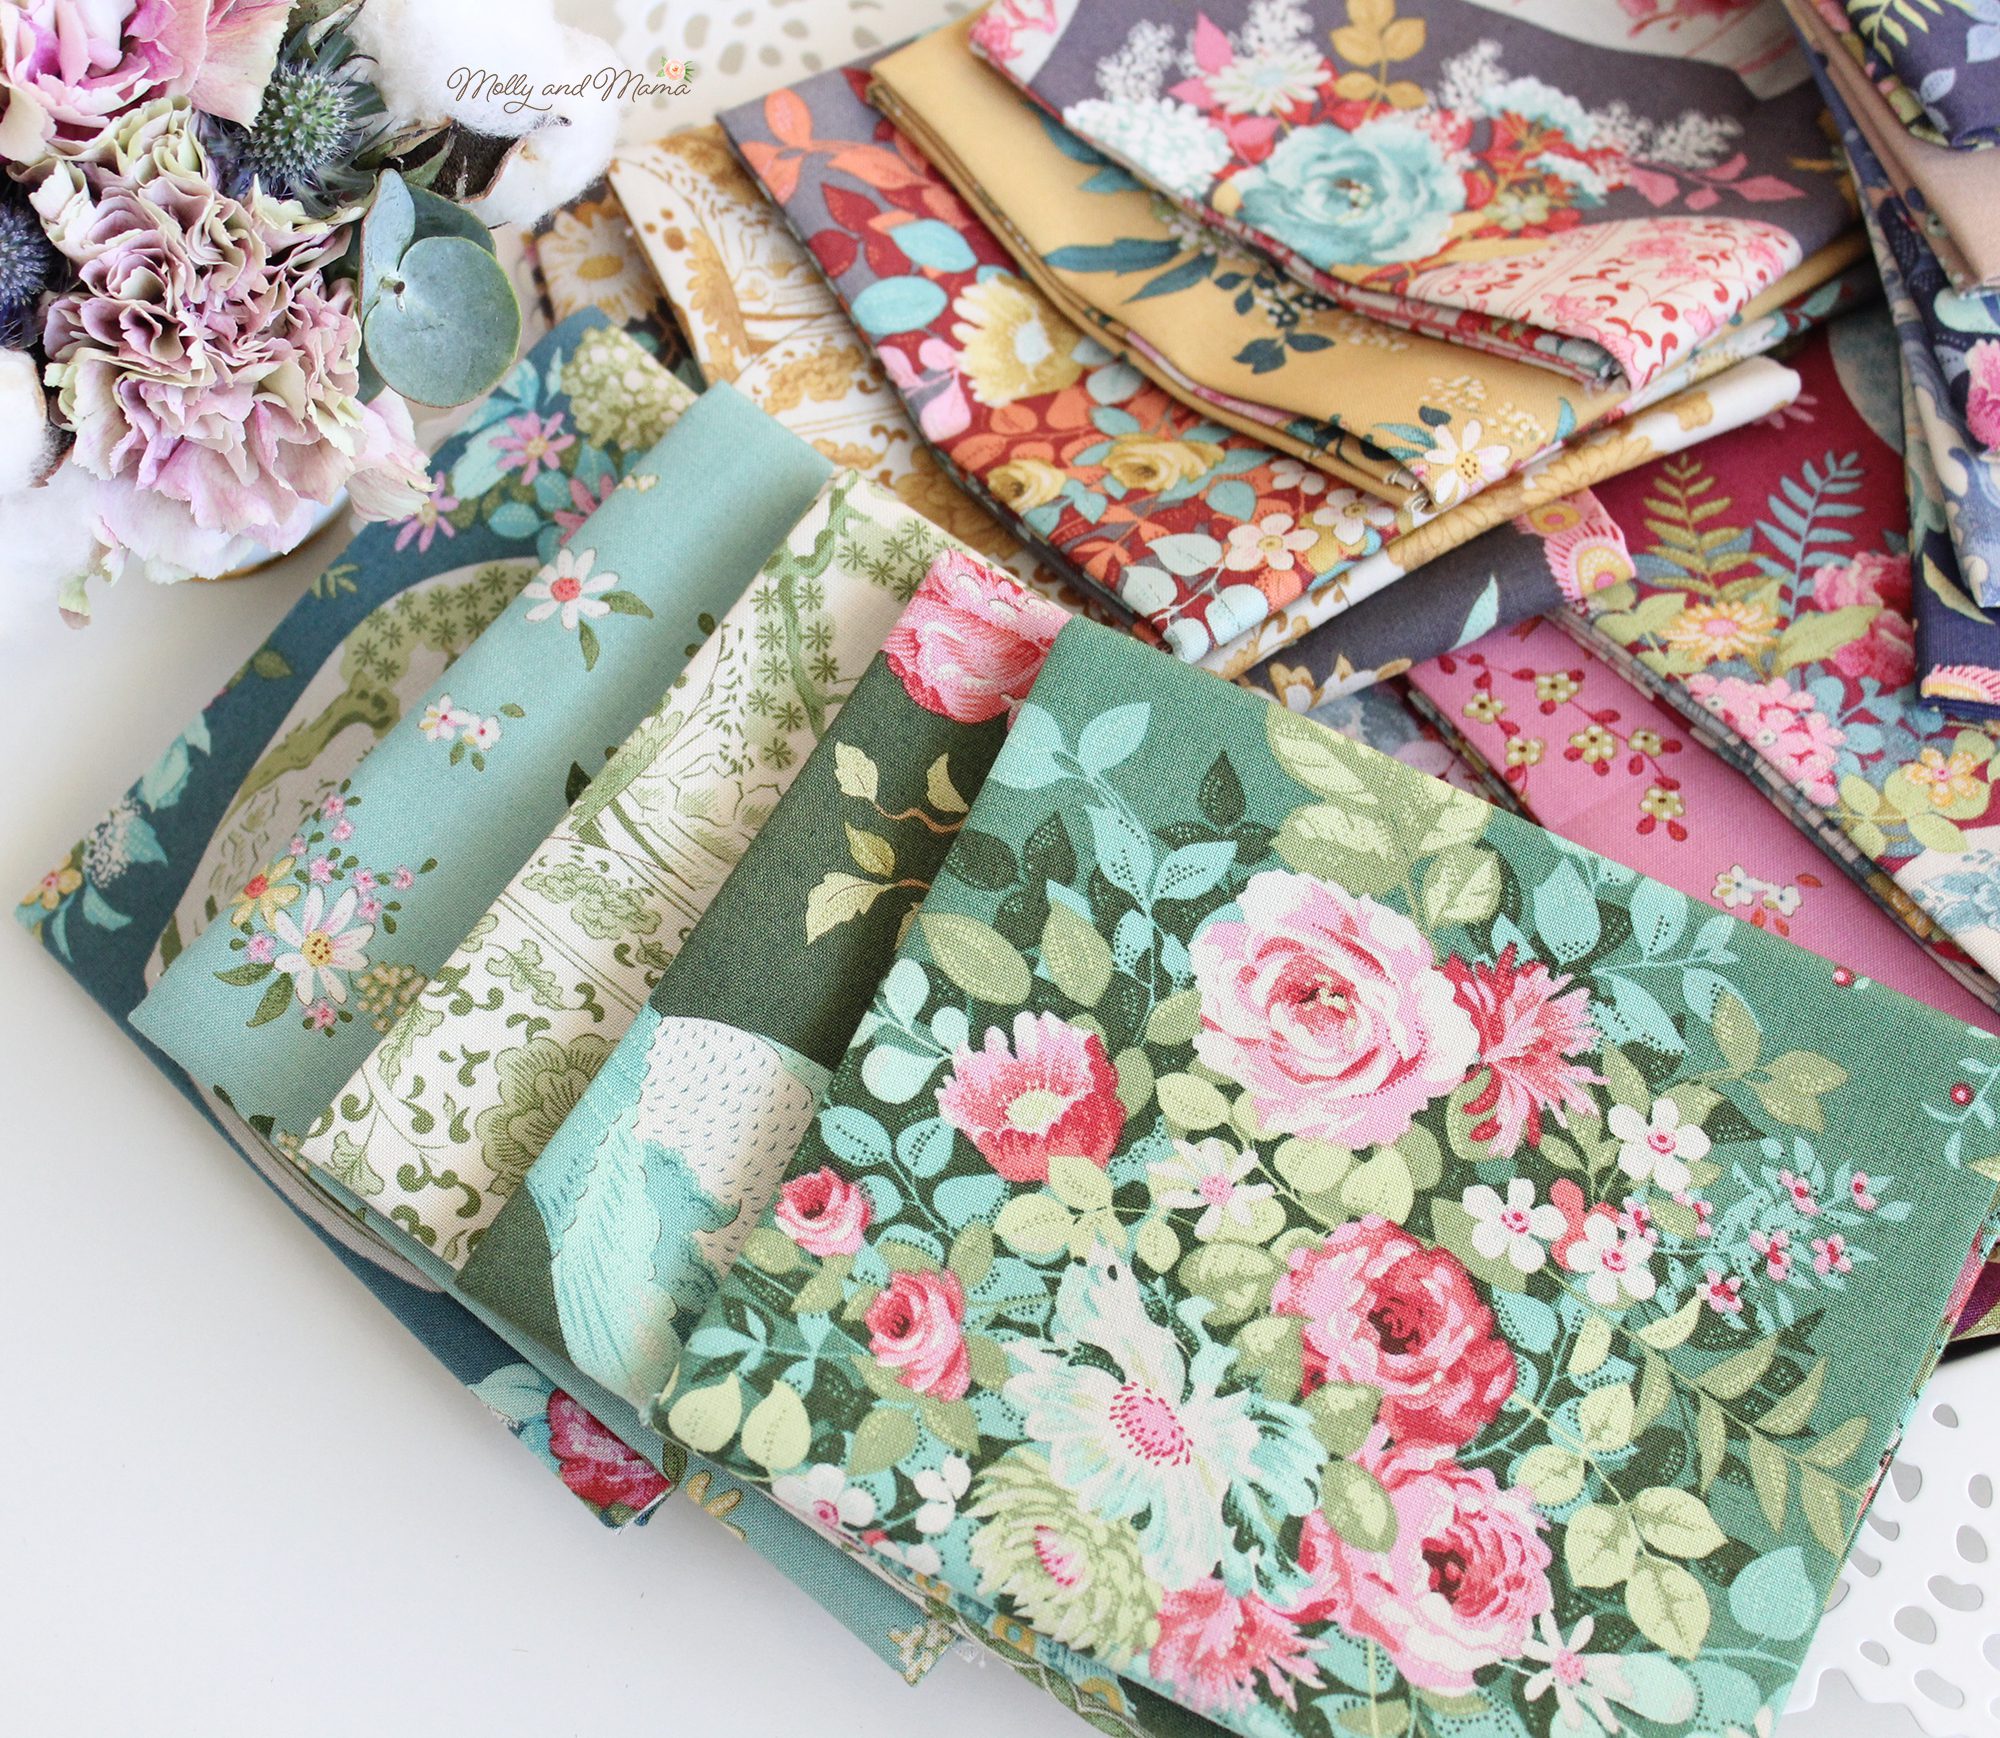
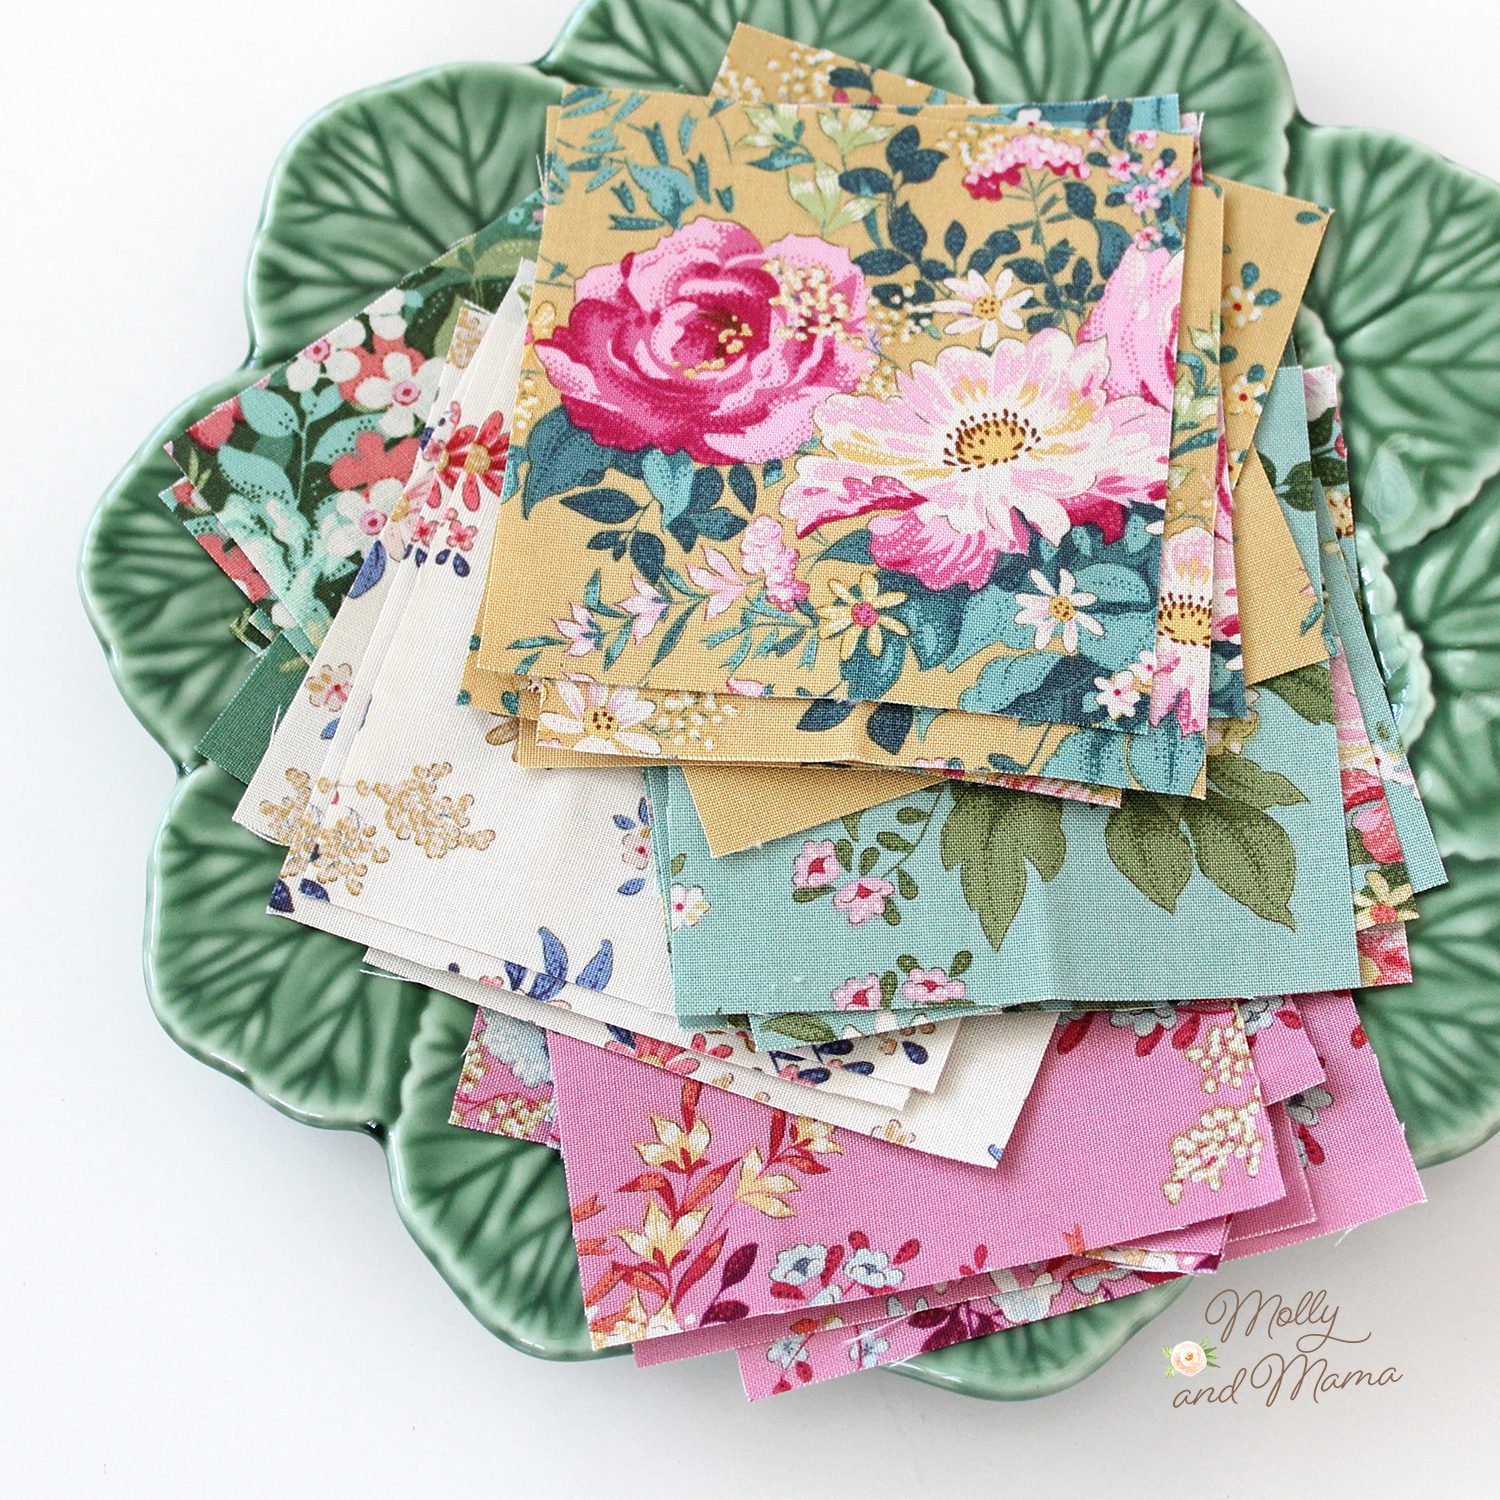
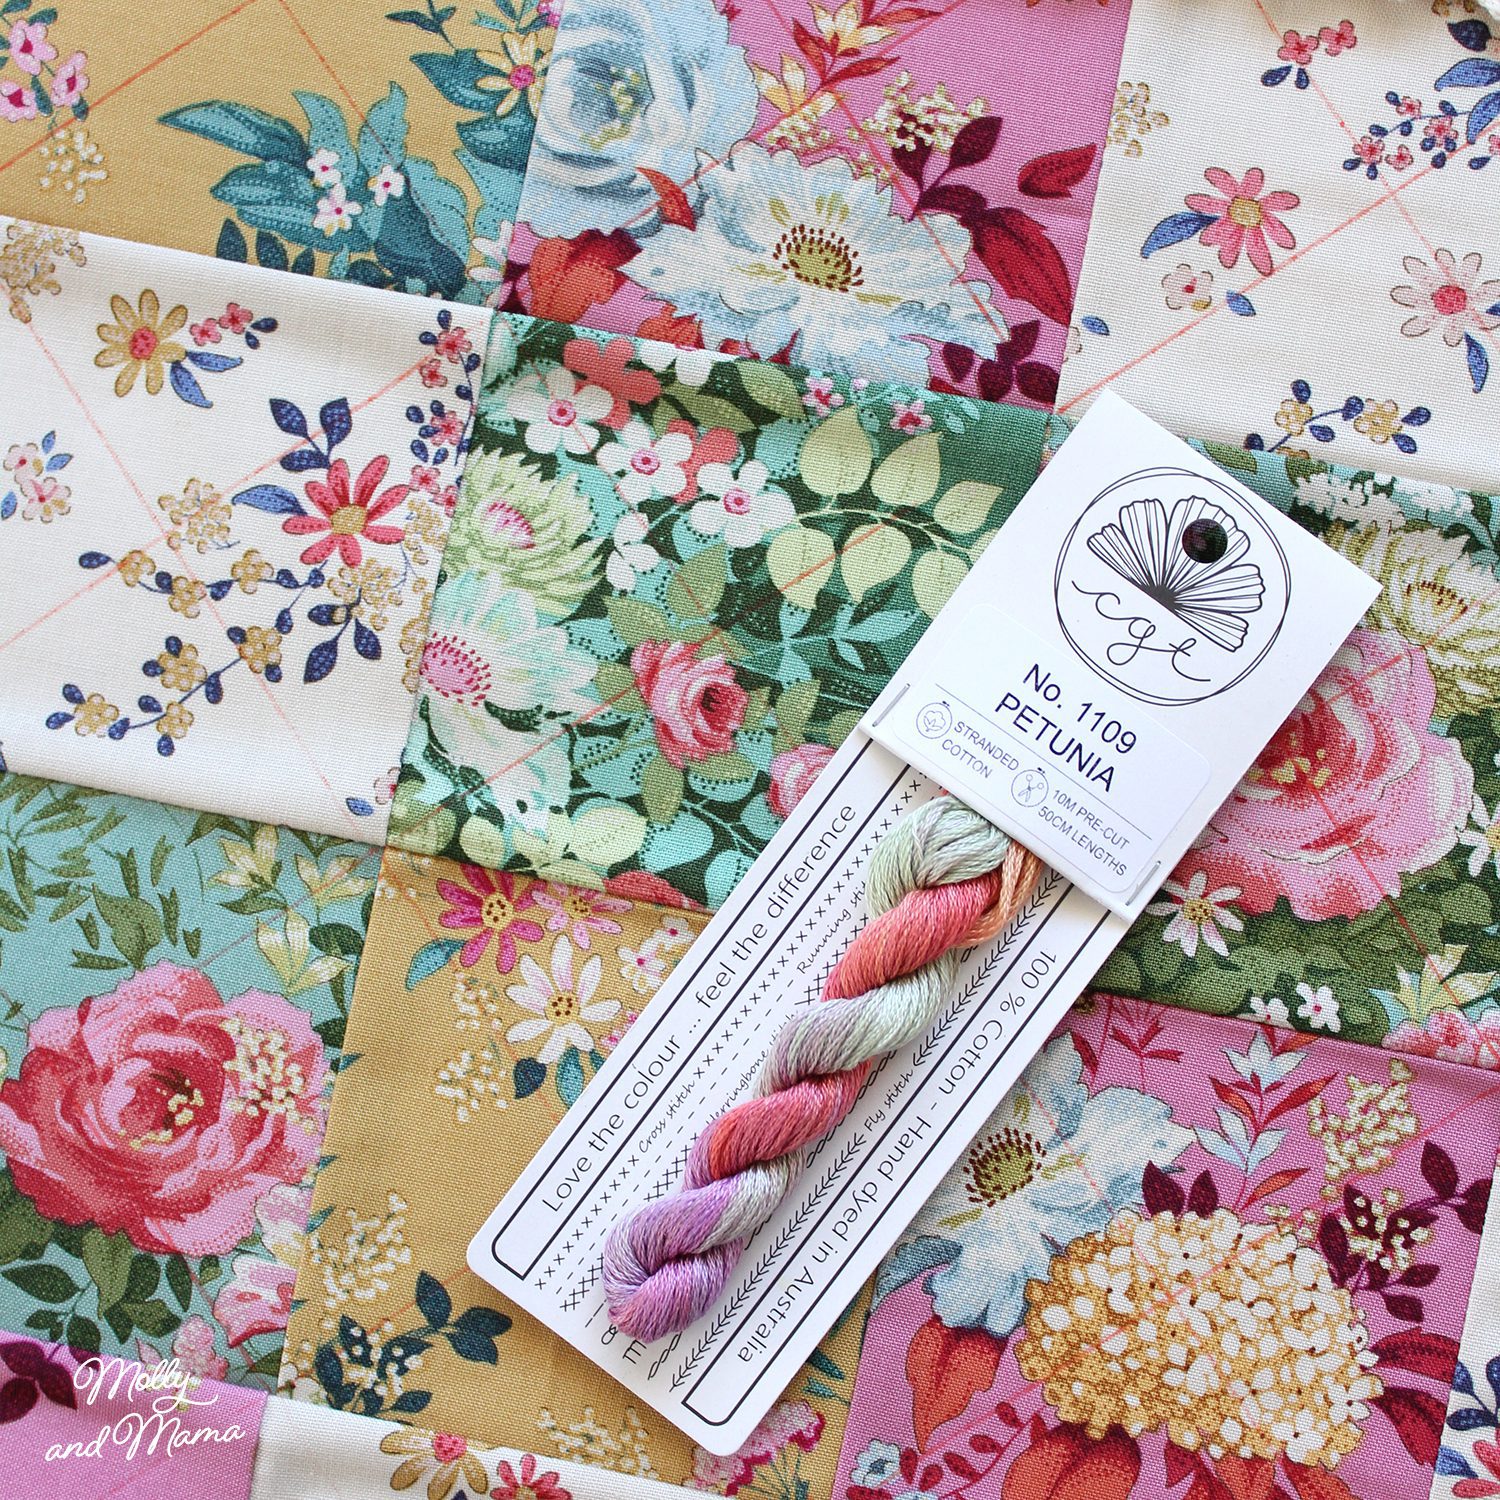
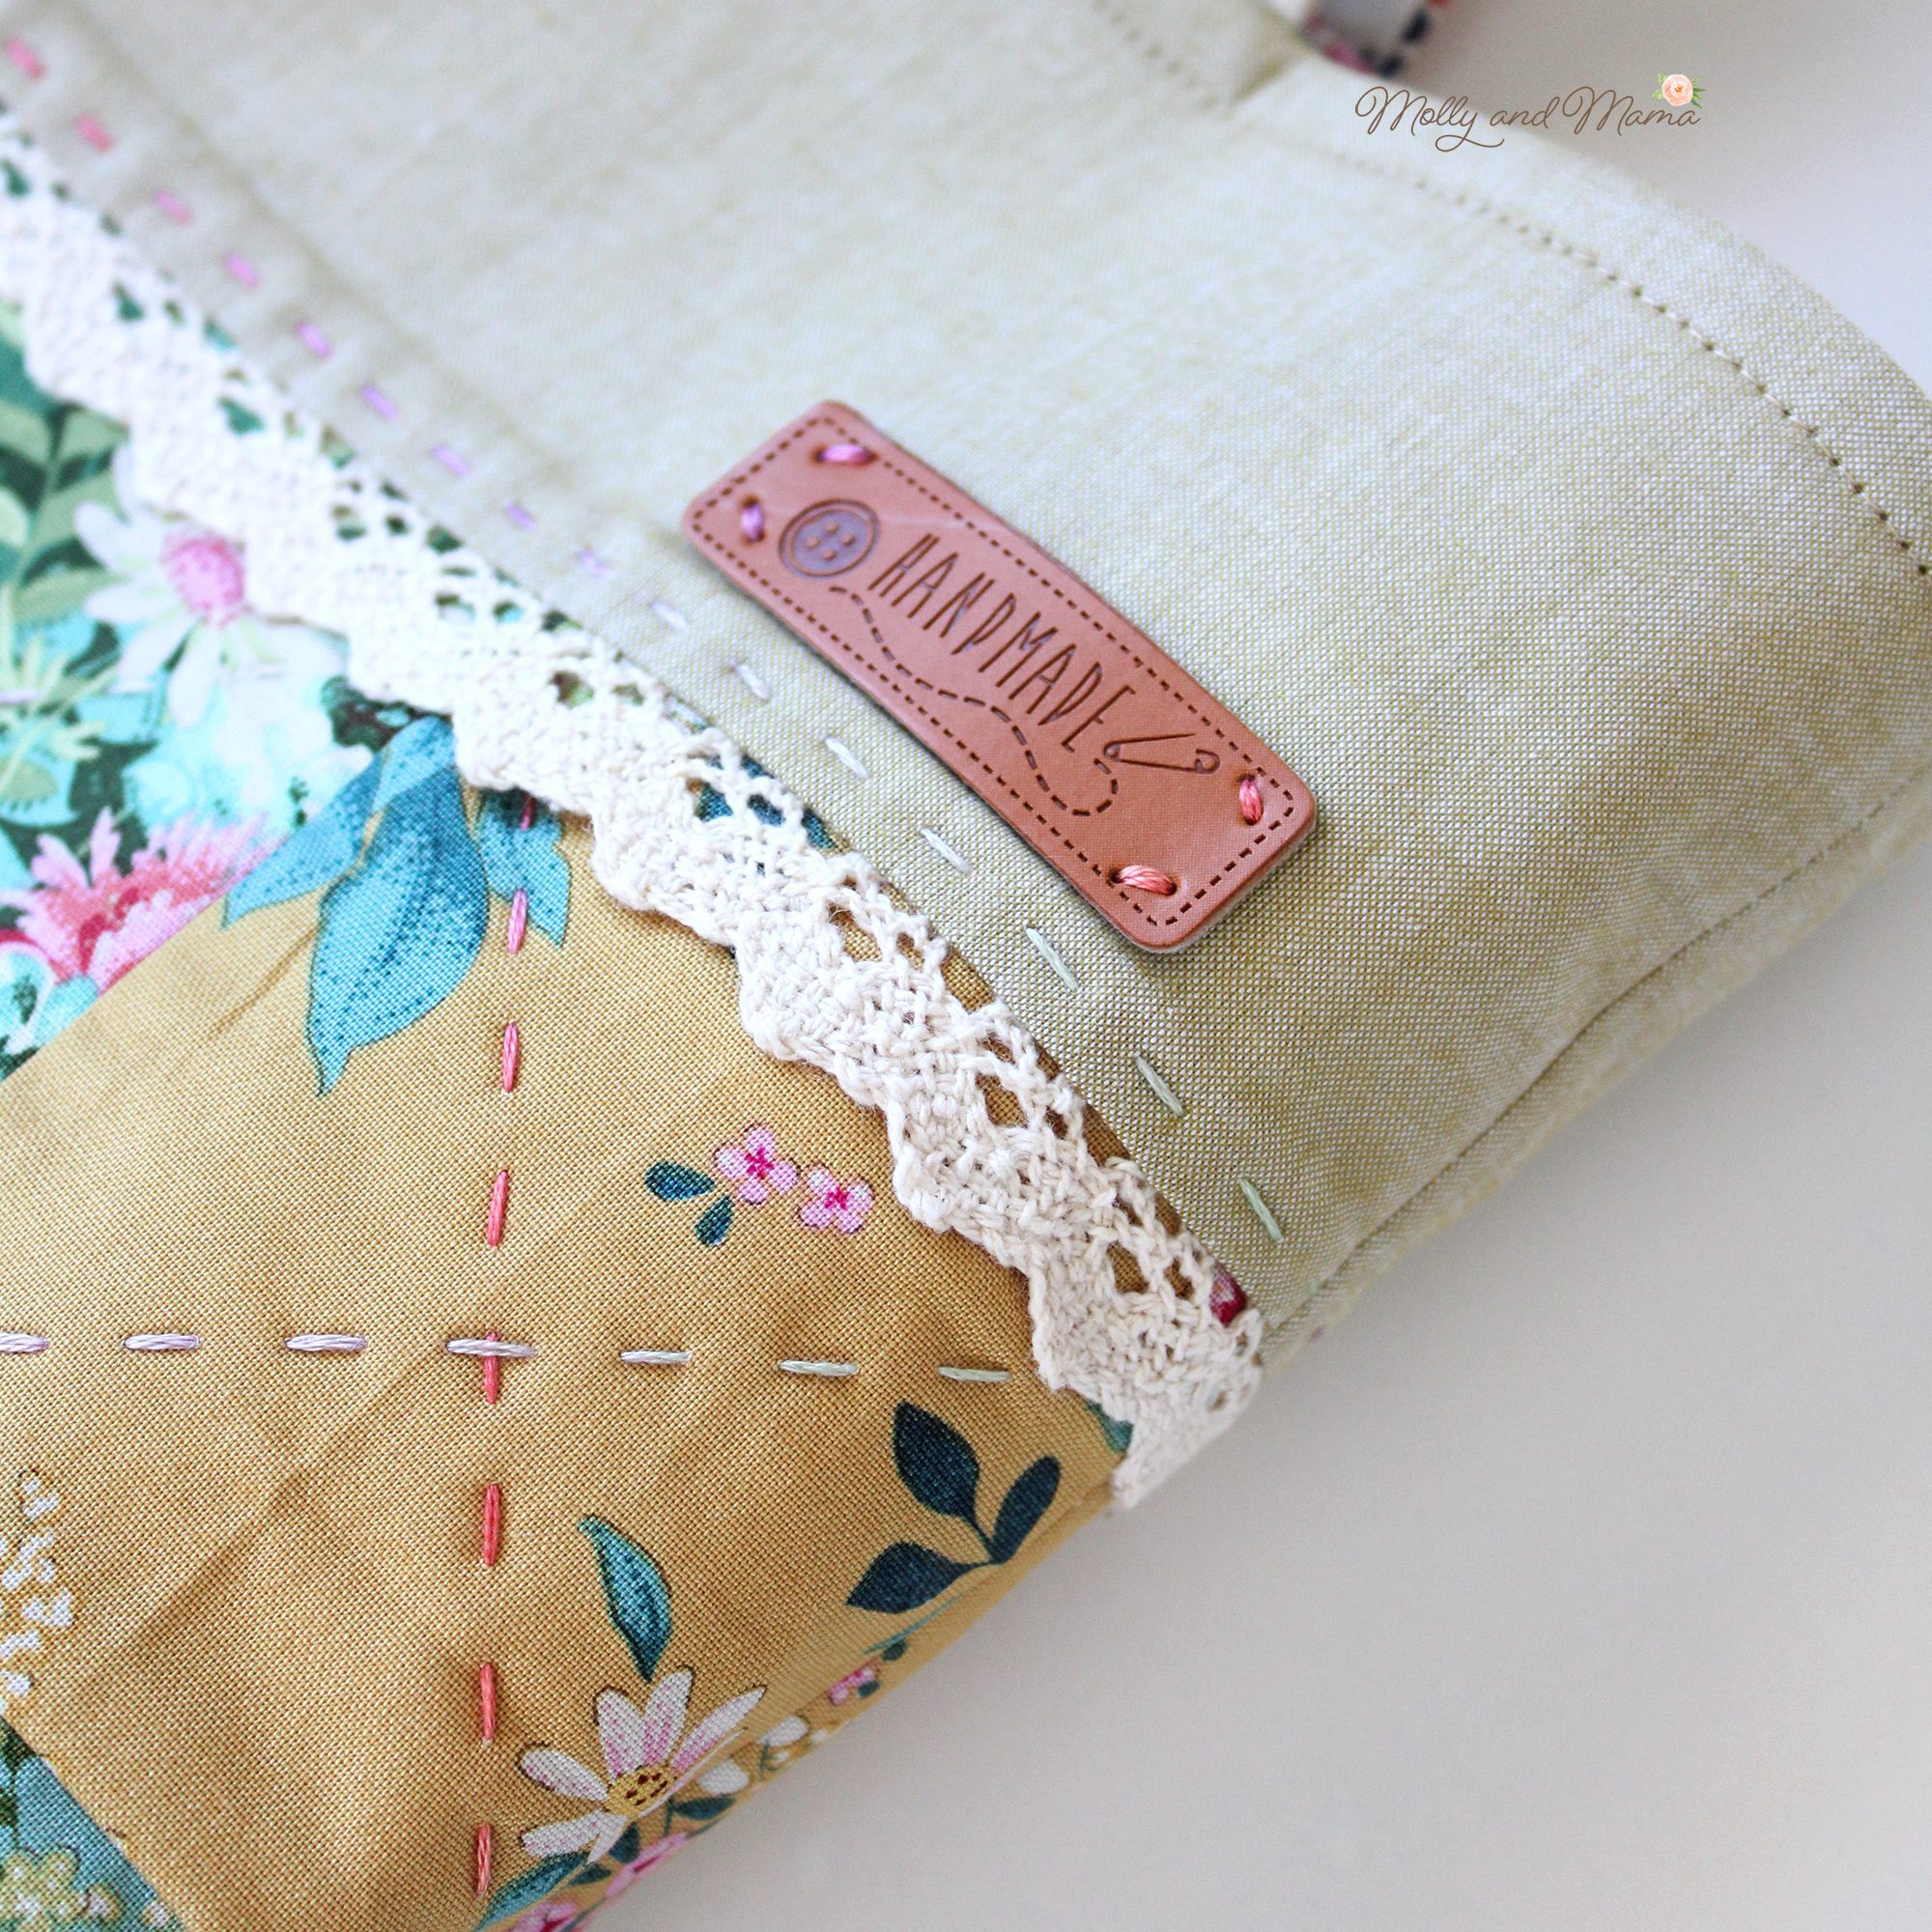
So it seemed like a sensible idea to design something that could show off all of those lovely prints! Because I love designing for beginners, I liked the idea of creating a simple, patchwork tote. After sewing the squares together for the front and back panels, and adding a Tilda Olive Chambray border, I found the perfect floss in my stash for some hand quilted details. Cottage Garden Threads had recently sent me a small selection of their beautiful variegated embroidery floss and the shade ‘Petunia‘ was a perfect match.
I think the hand quilted details really added that special touch! I also attached a swivel clip tab, for keys or a bag charm. It’s a simple addition, but using easy techniques like this can really elevate a project.
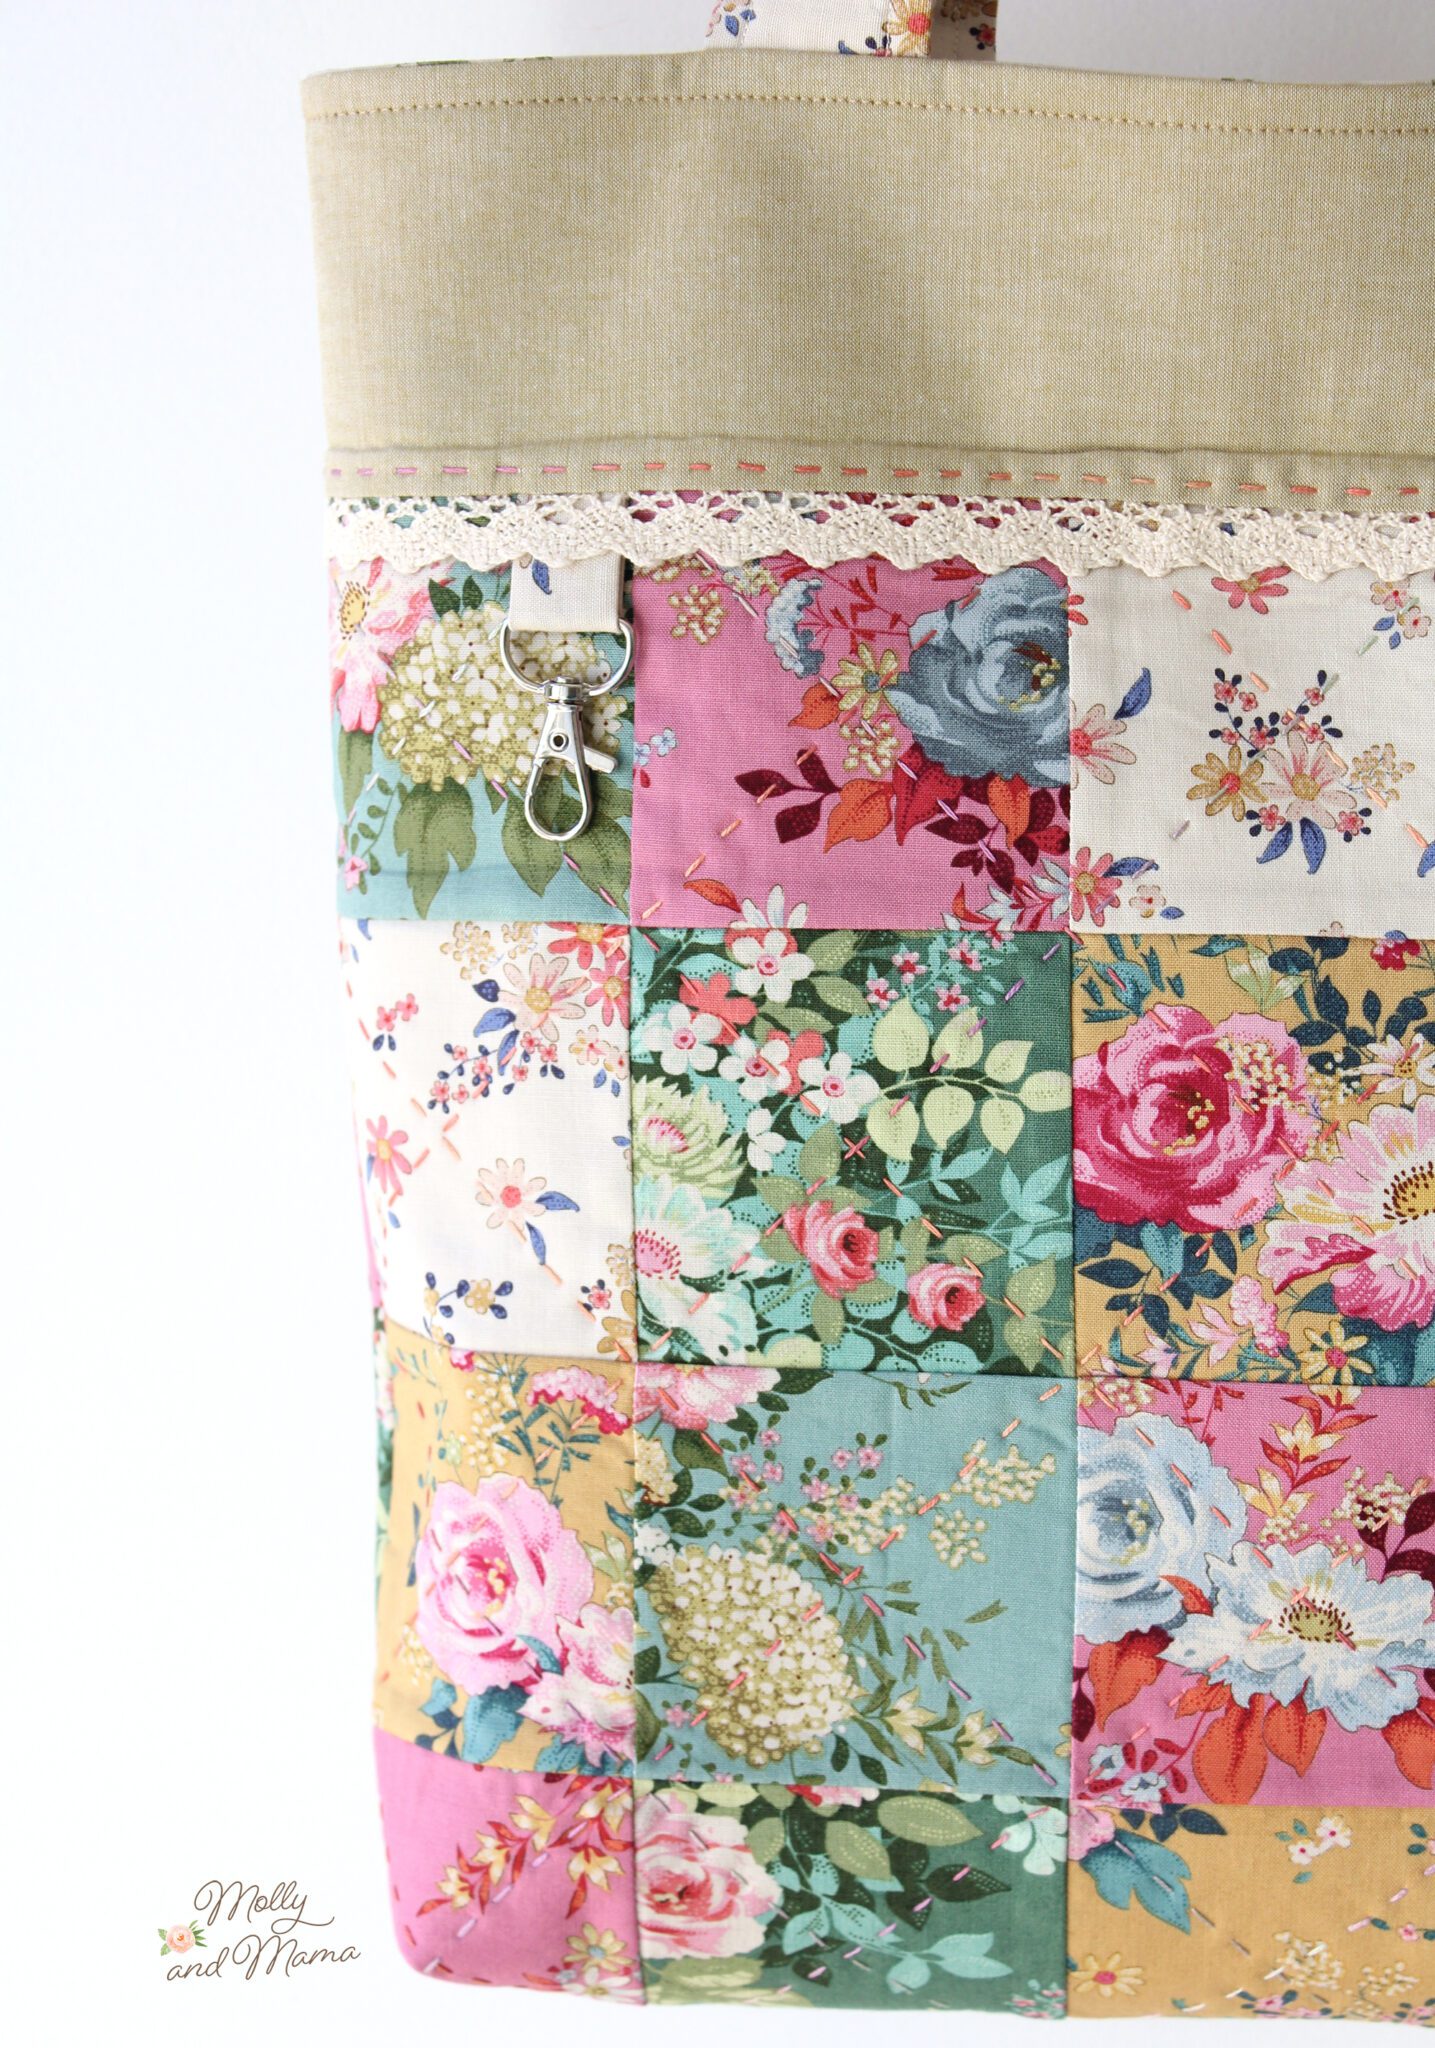
Adding simple trims like cotton lace and labels can also help make your bag personalised just for you.
Where Can I Find The Pattern?
Members of the Molly and Mama Pretty Stitches Club received this pattern for the July project. But if you’re not a member, it’s now available as a stand alone sewing pattern in the store.
Another Clara Tote Bag
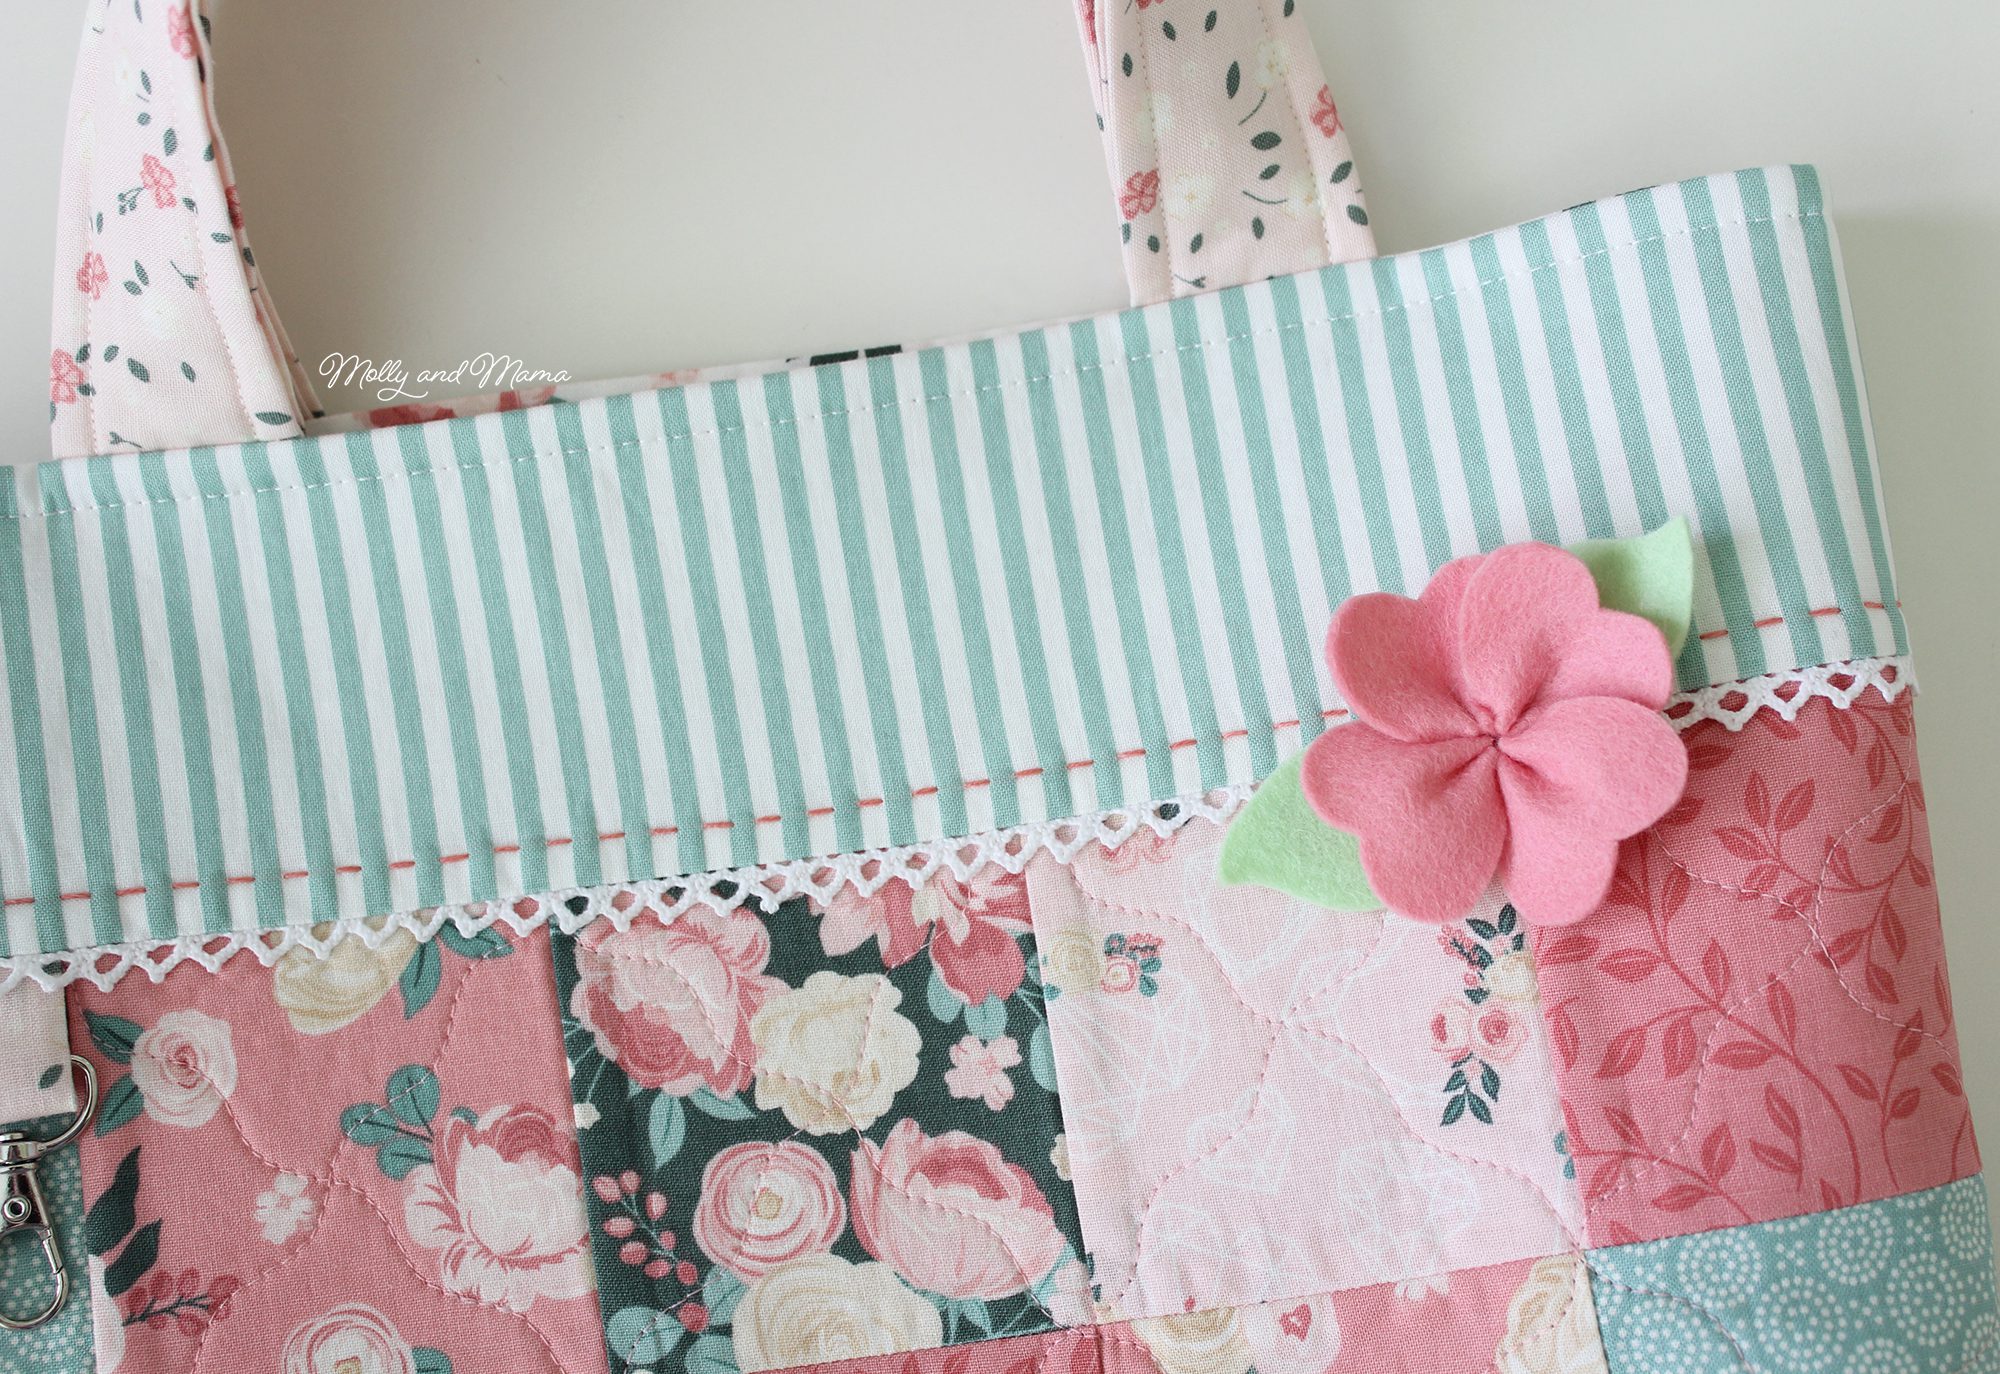
Here’s another beautiful version of the tote bag, sewn especially for the Riley Blake Designs Blog. As a fabric blogger for Riley Blake, I am lucky to get the opportunity to play with gorgeous pre-release fabrics. When this bundle of fabrics from the ‘At First Sight’ collection by Dani Mogstad arrived, I knew they’d also be perfect for another tote. You can read more about the bag and the faric on their blog HERE.

In this version I used a lovely wavy quilting stitch on my sewing machine, instead of the hand quilted stitches.
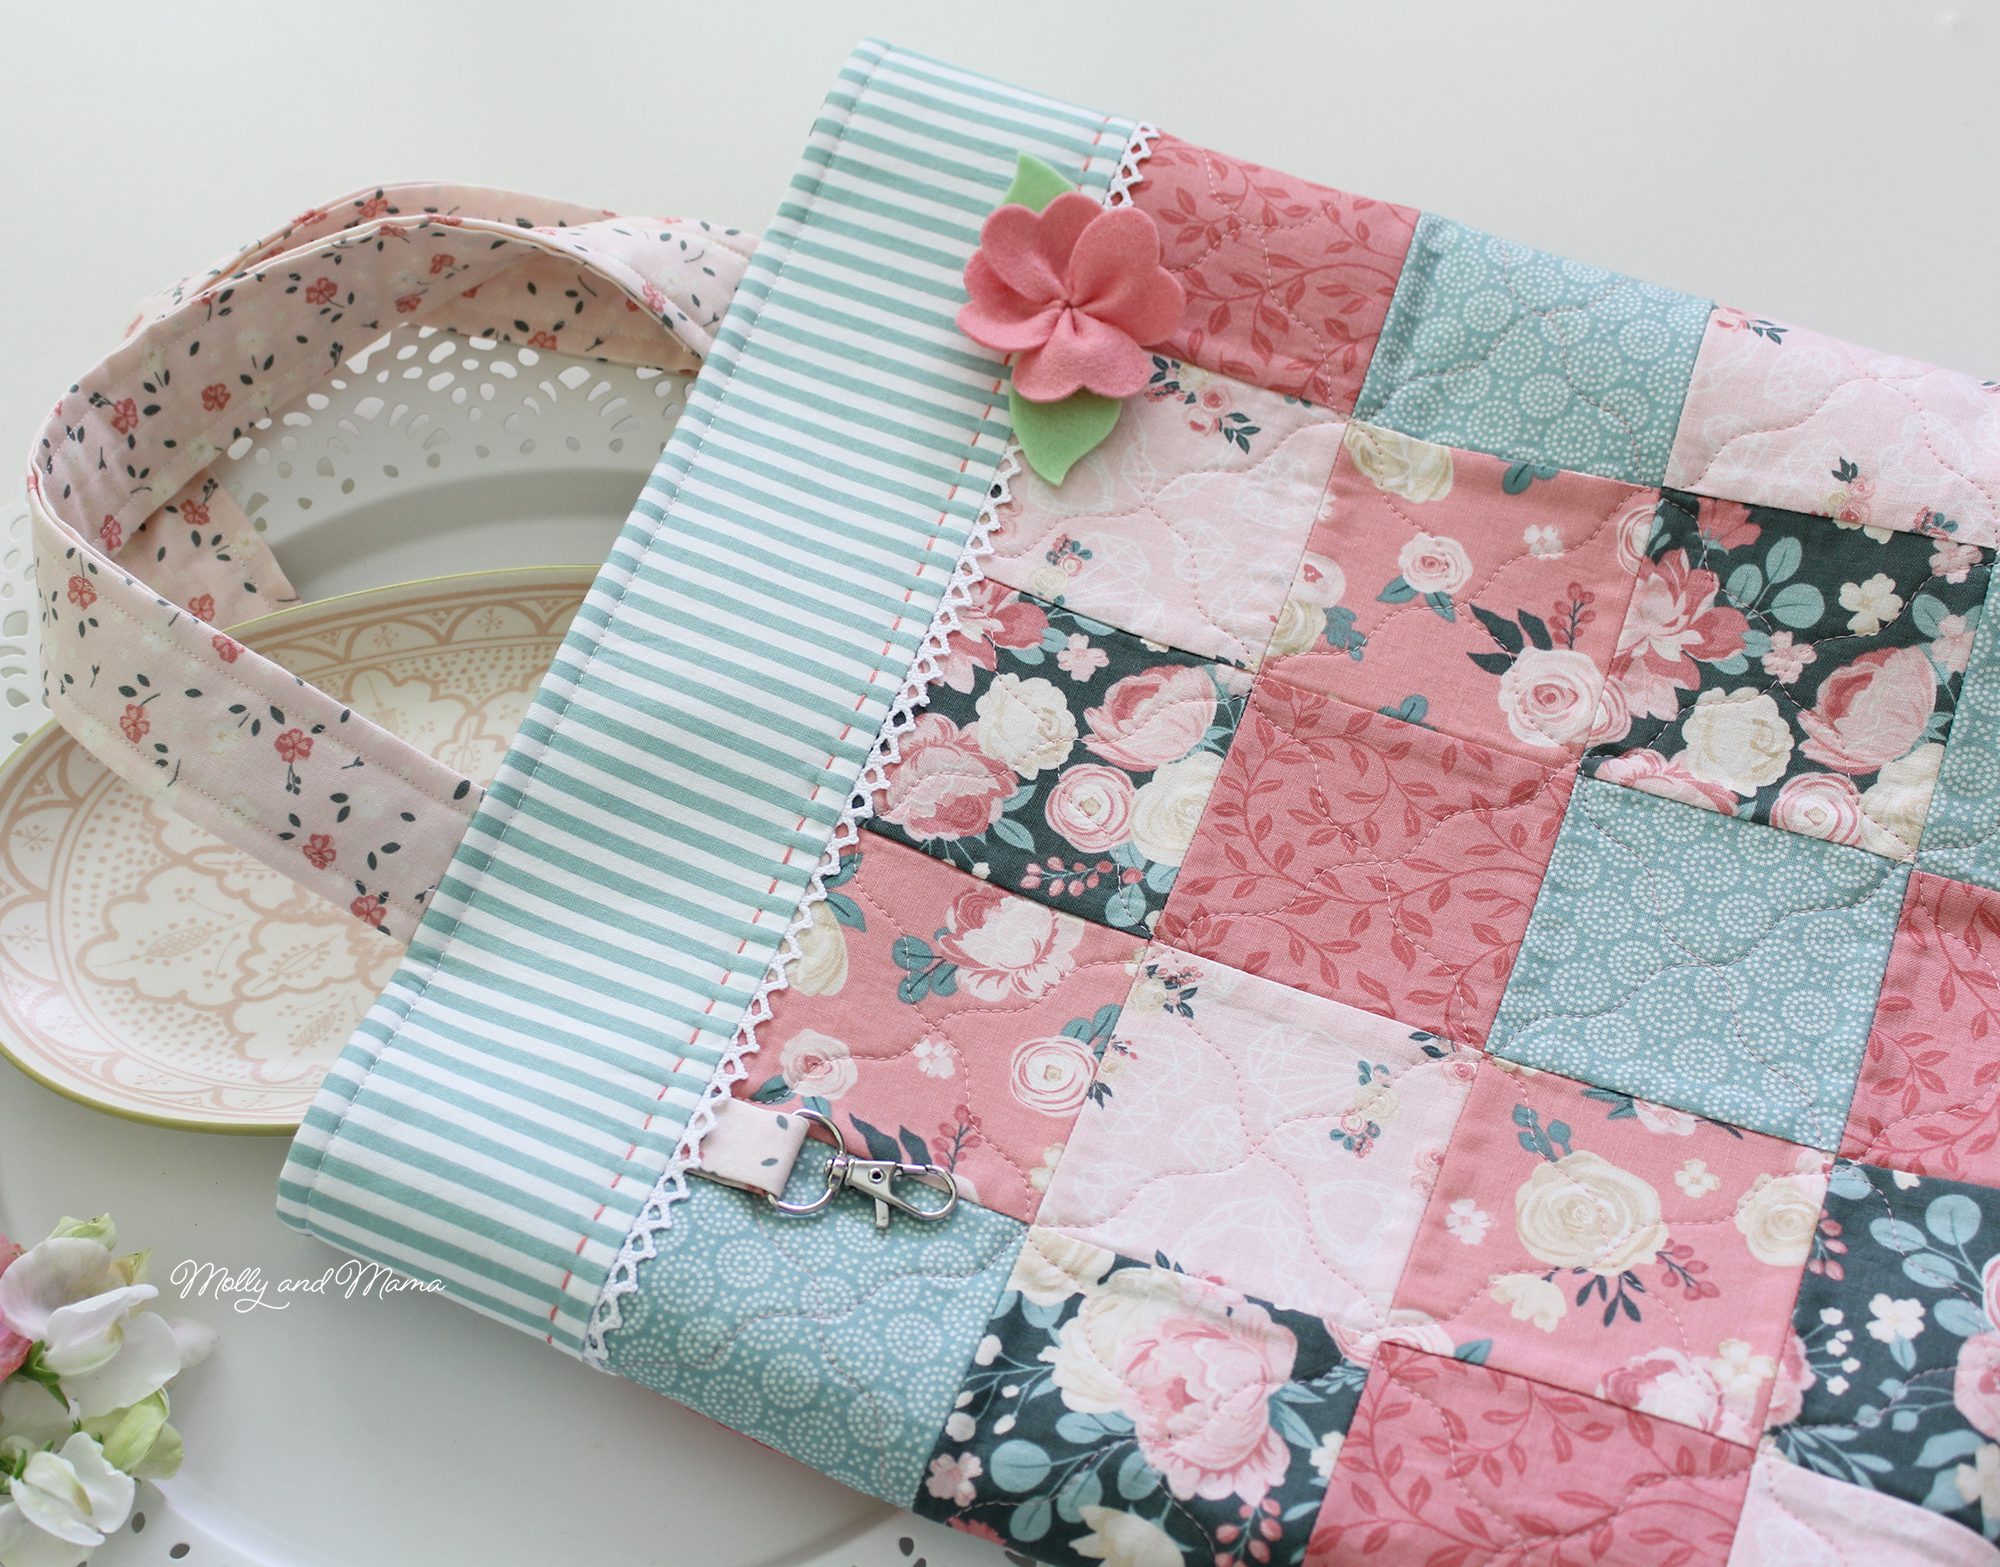
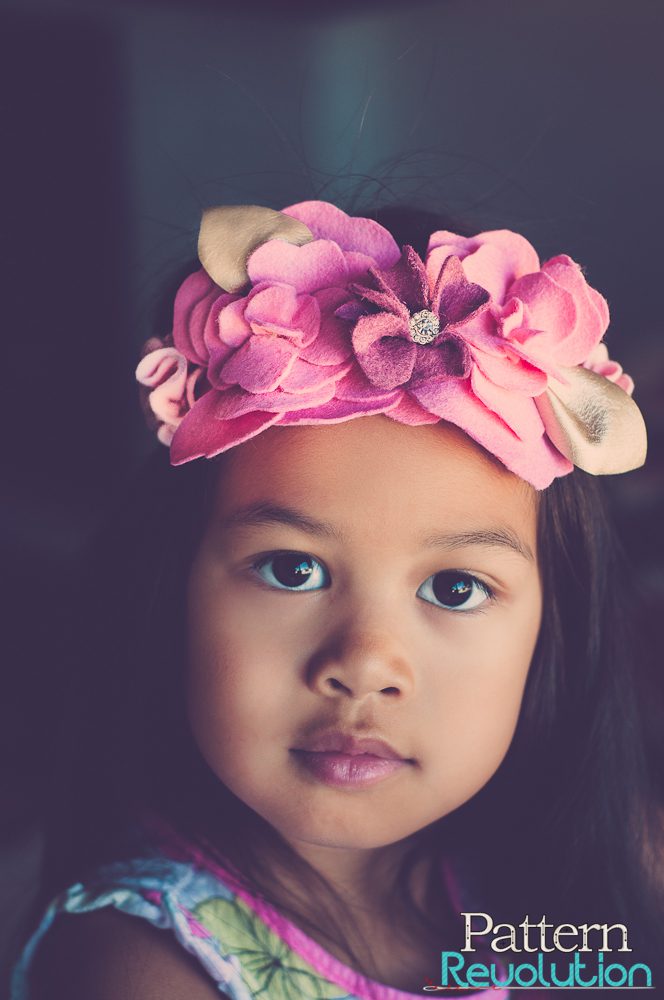
And I adorned the top of the bag with a pretty felt flower I made using my free pattern and tutorial. If you’d like to make your own felt flowers for your sewing projects, please sign up to get access to the pattern.
Other Versions Of The Clara Tote
I’ve been very lucky to have some amazing ambassadors for the Pretty Stitches Club who have sewn their own lovely versions of the tote too. It’s been so special seeing the way they have made the project their own.
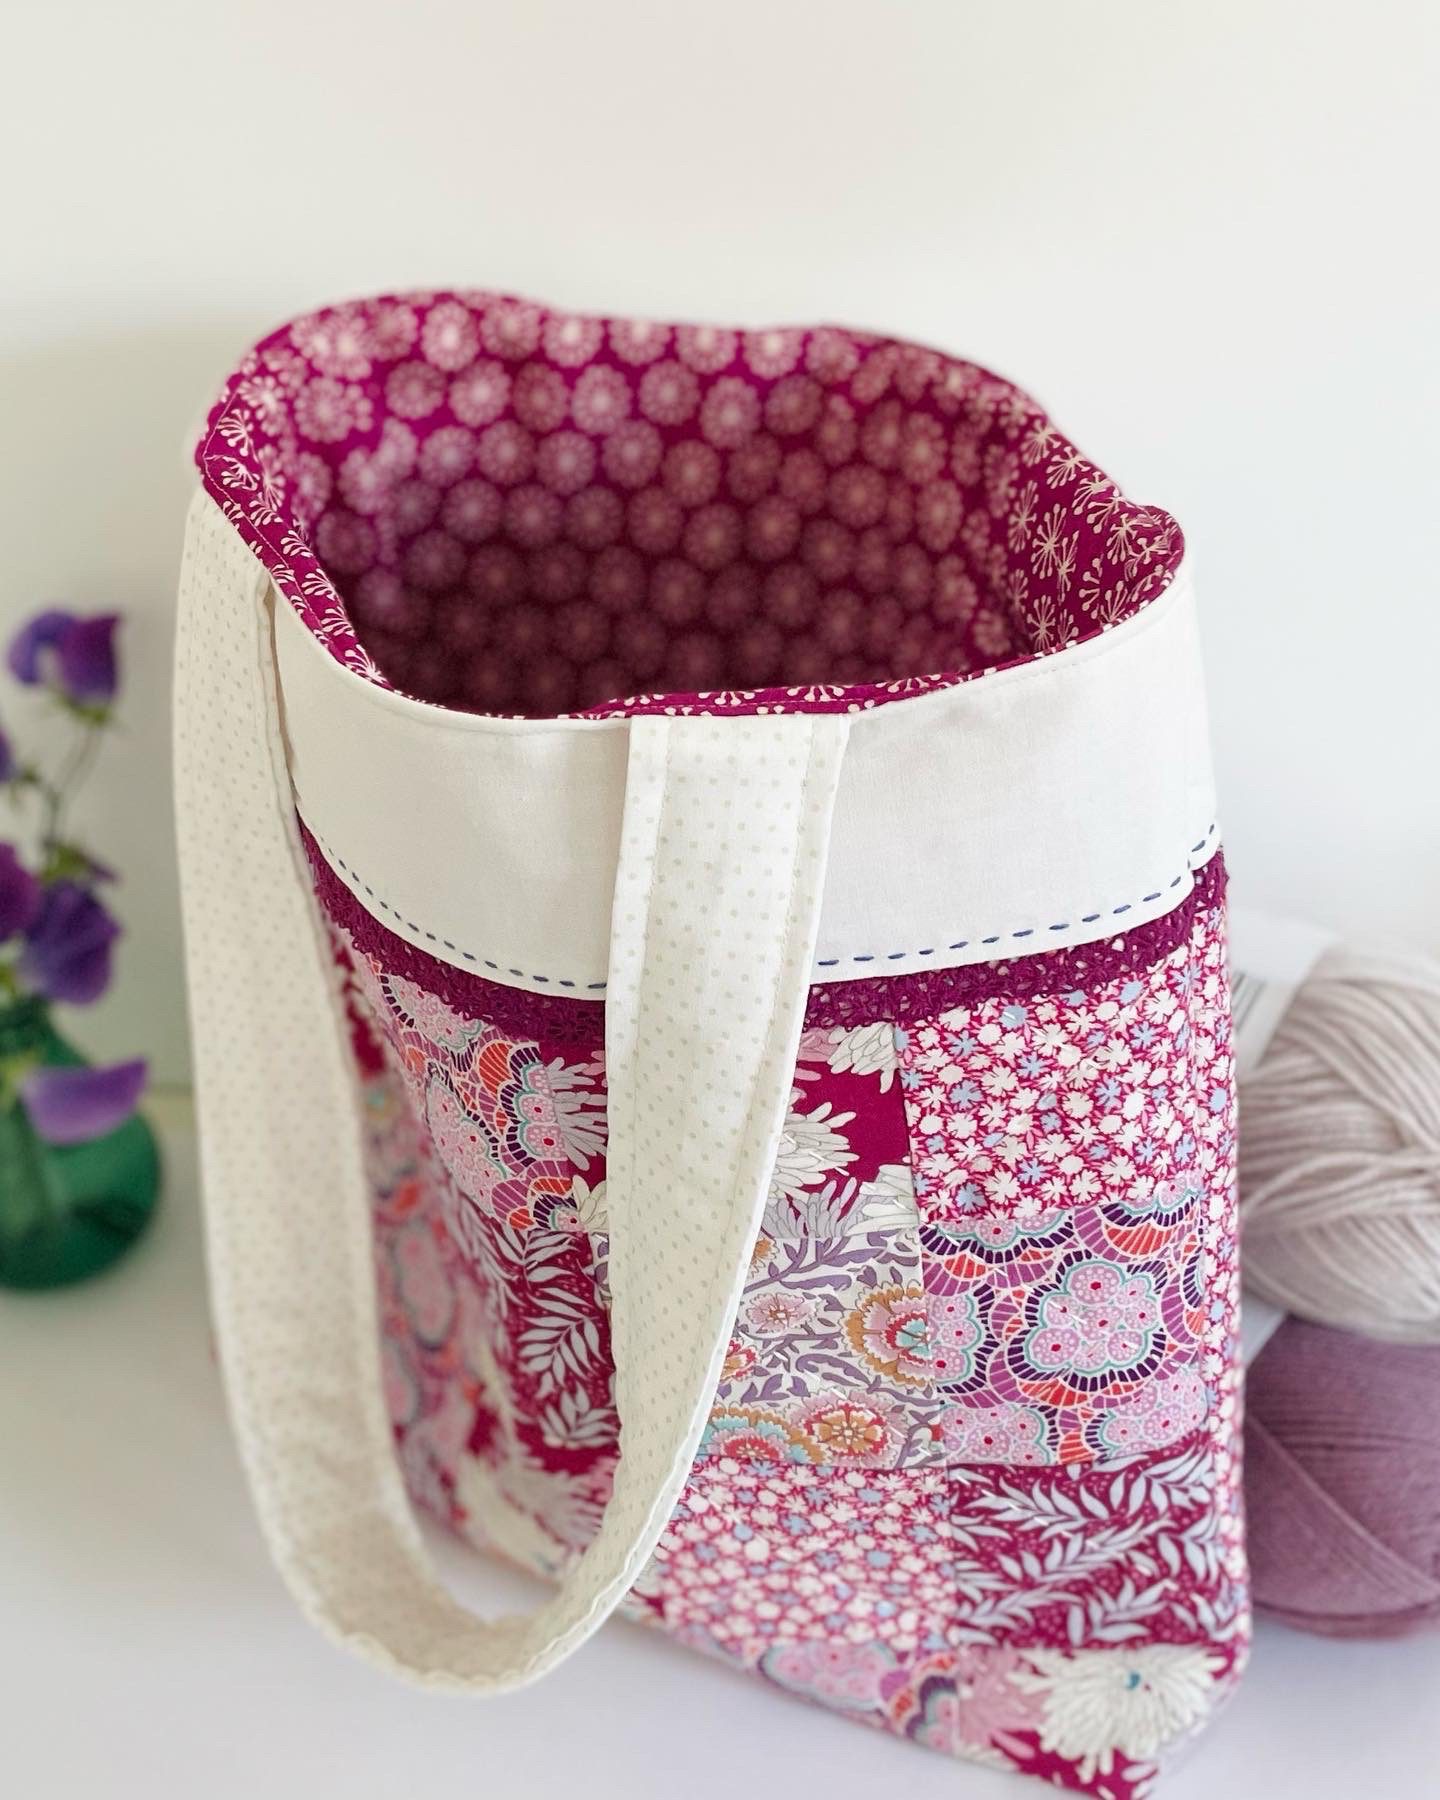
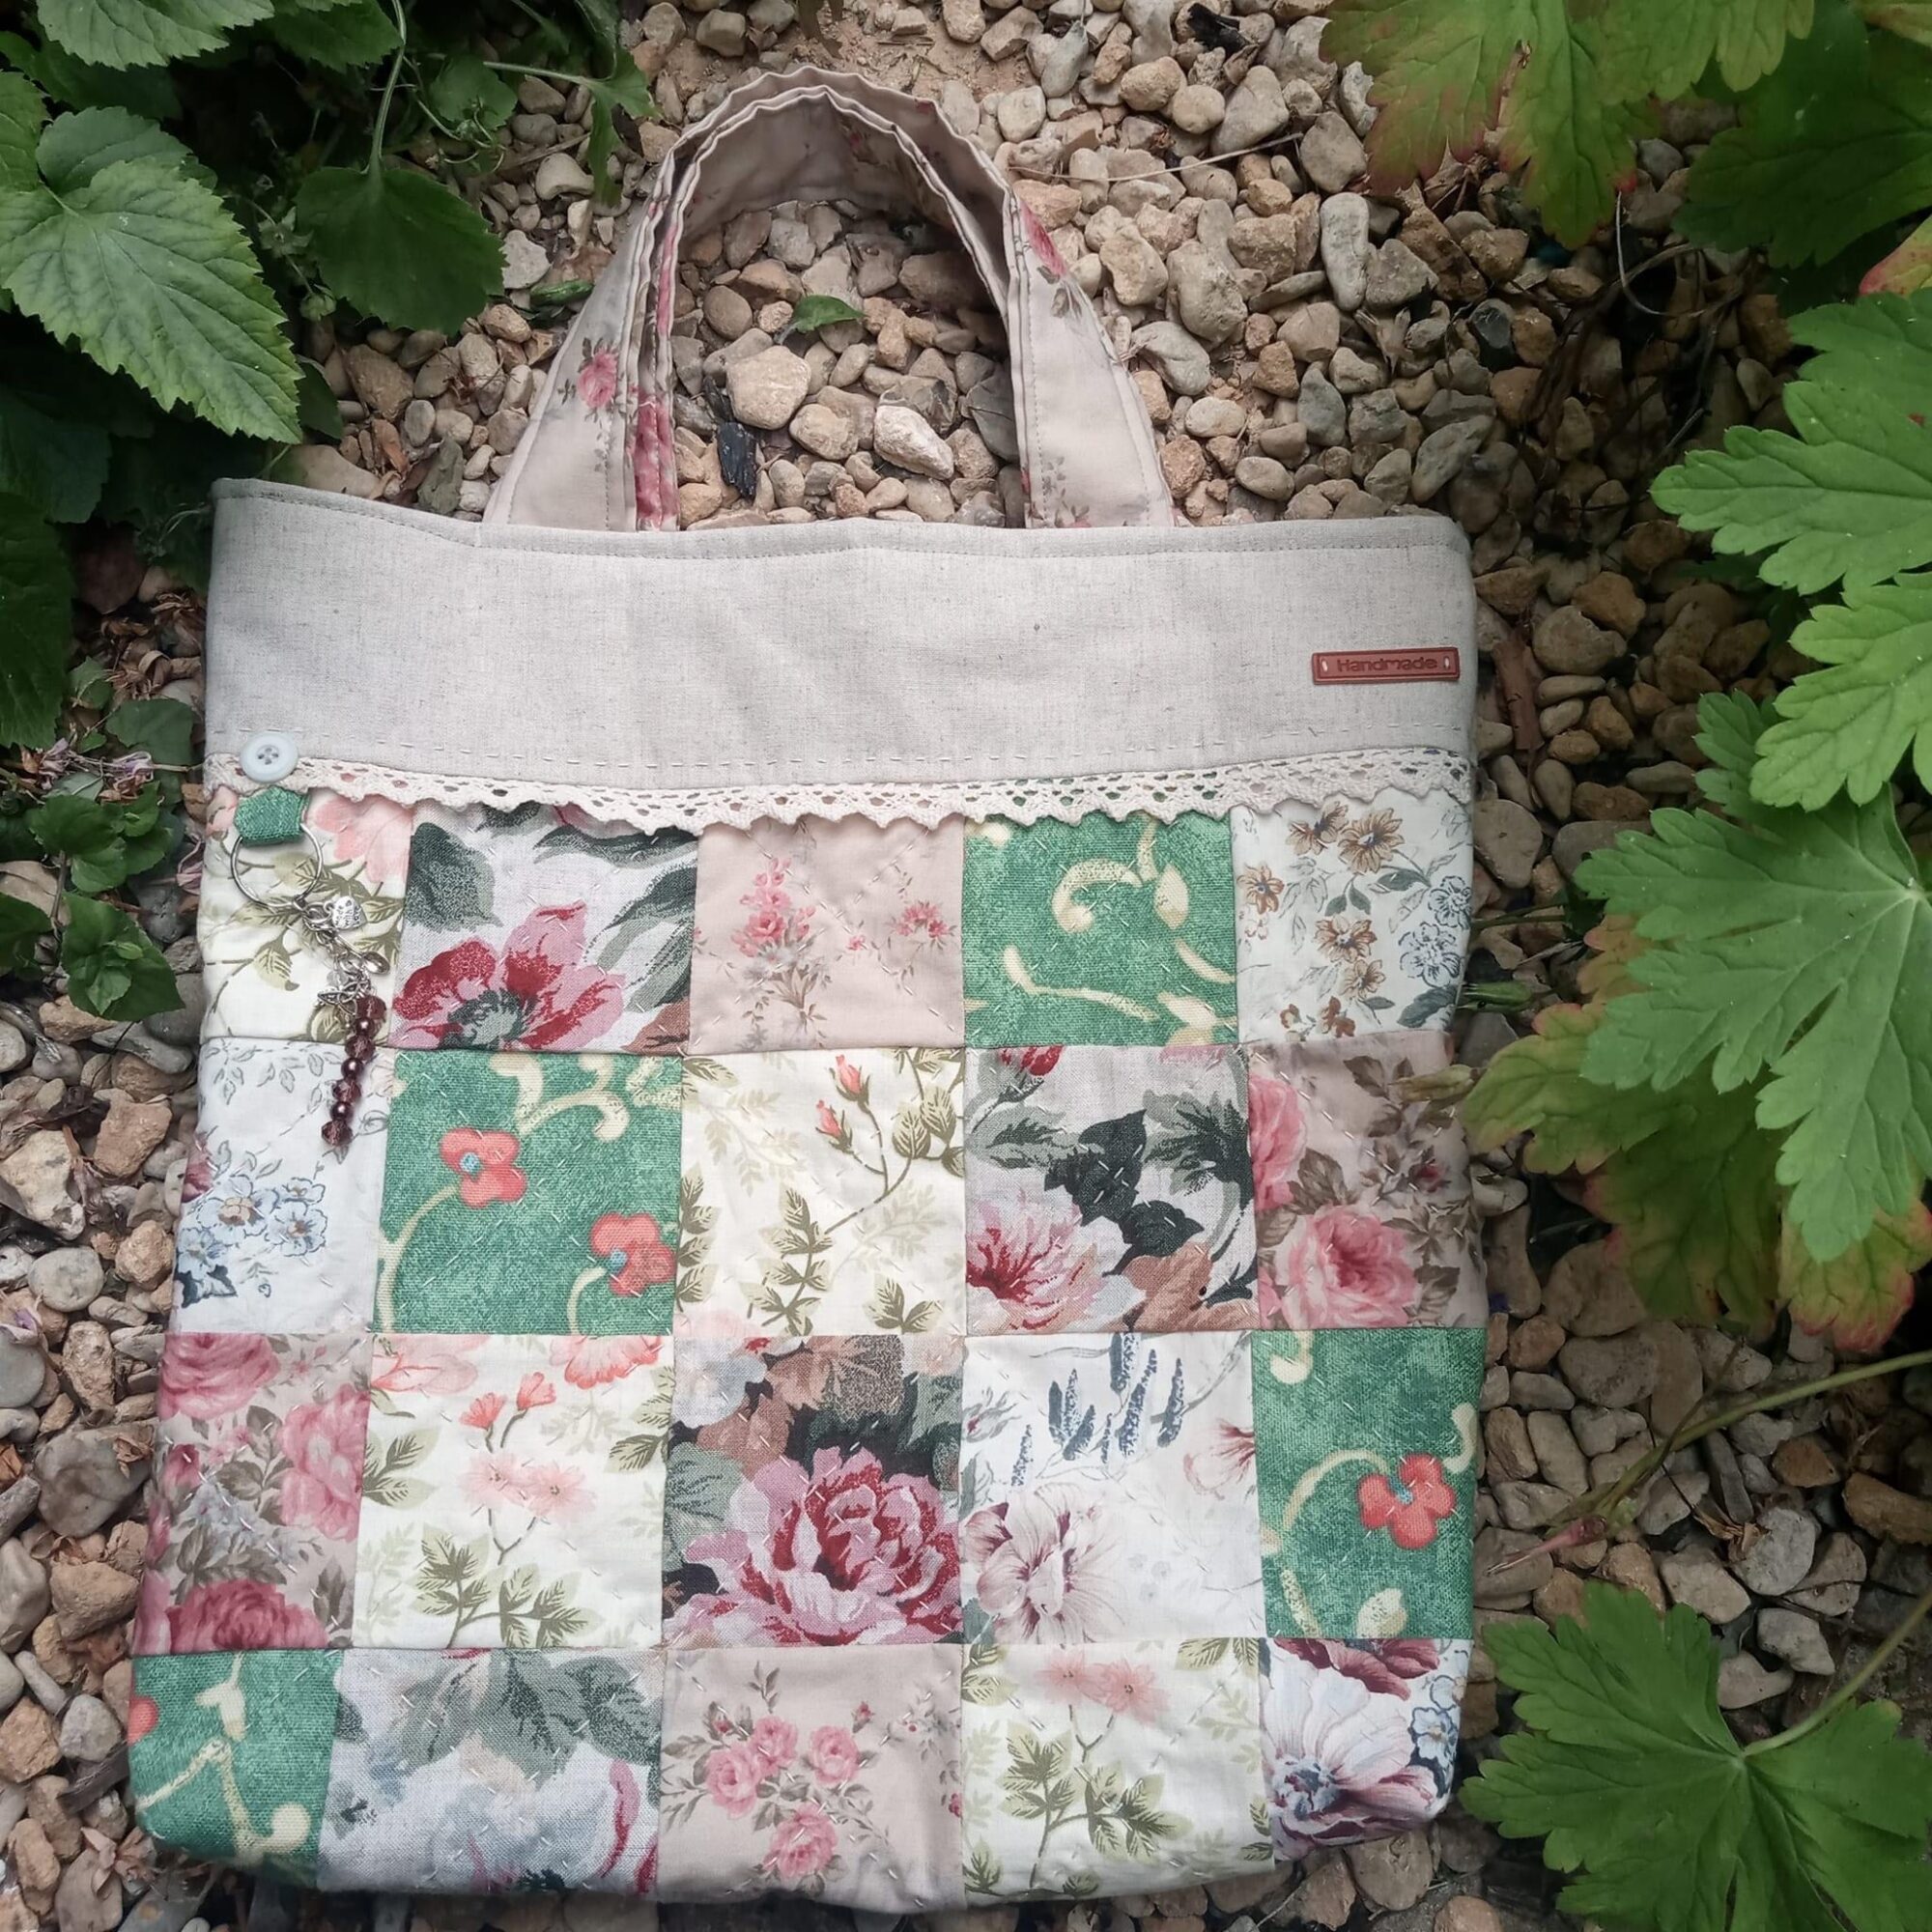
Ambassador Claire from Love Learn Craft on Instagram made her version as a special gift, using prints from the Tilda Birdpond collection. That deep maroon lace matches perfectly! I love that Claire created longer bag handles too.
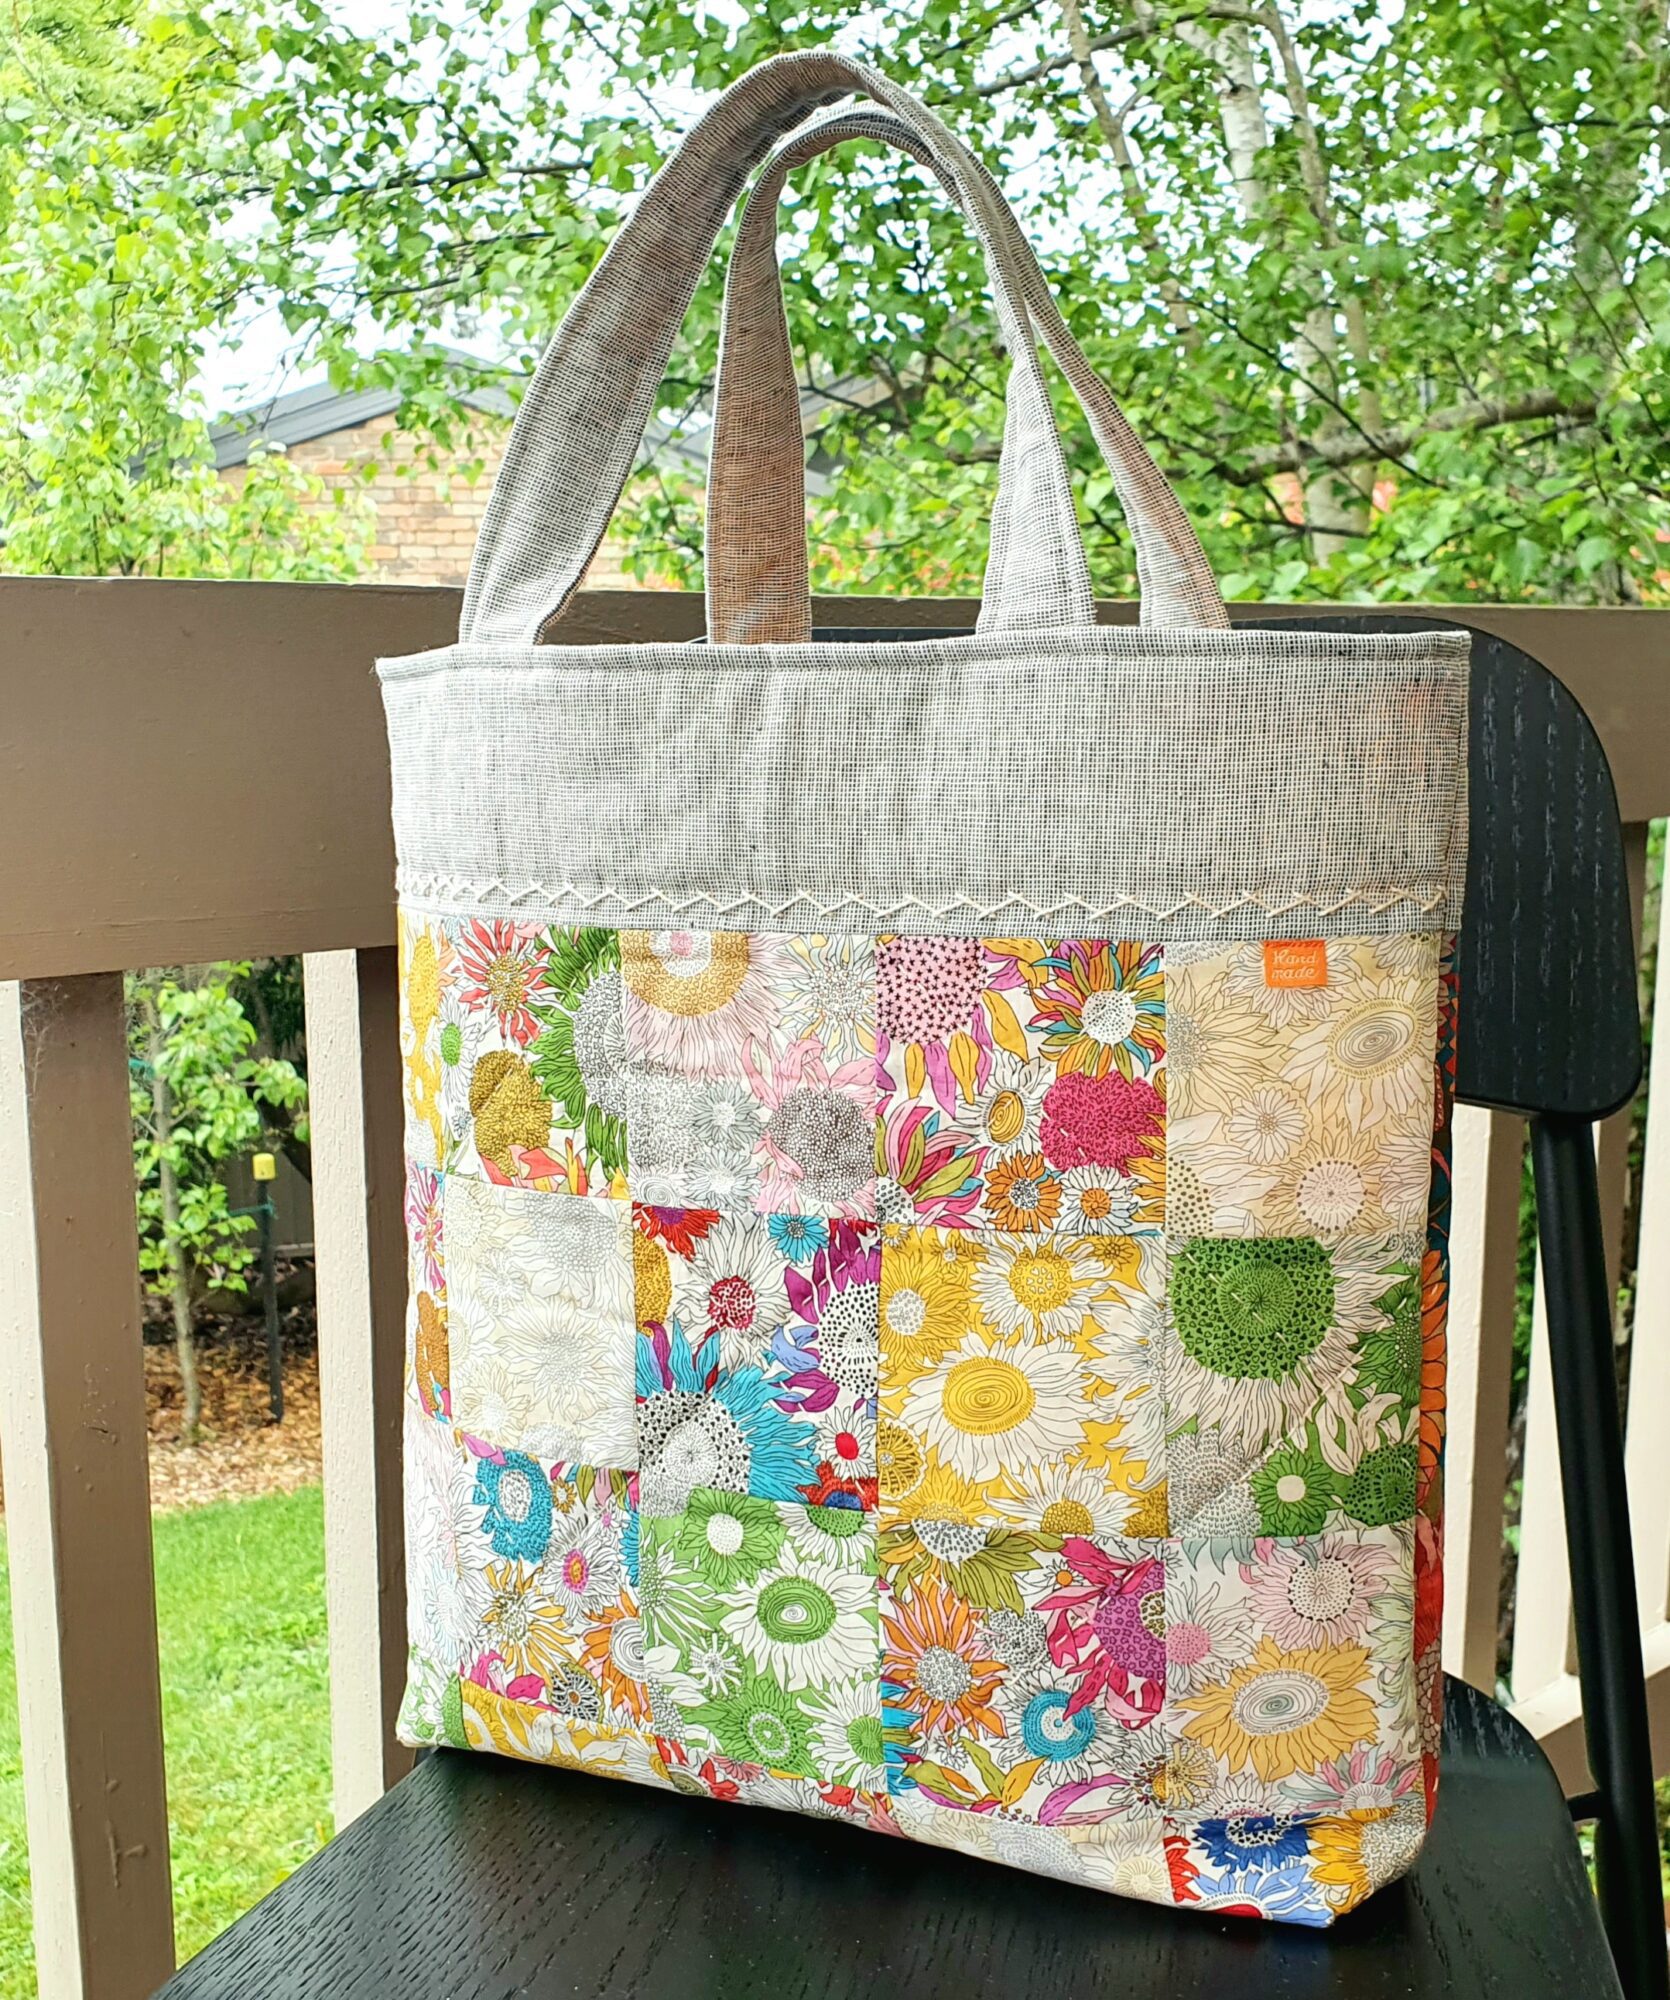
Amanda Loves To Create made a fresh and fun Clara Tote using sunny Liberty prints. The beauty of this simple design is that you can change it to suit your needs. Amanda’s herringbone embroidery on the border adds a lovely effect and also replaces the need for lace trim. So practical! Head to her instagram post to see the cute fabric stamp she added on the other side too.
Ambassador Krista from Surrur Sunday on Instagram made a gorgeous tote in earthy tones. I love that she added longer handles and a strip of piping below the border instead of using lace. Again, there’s so many ways to make this project your own.
Here’s another sweet version made by Pretty Stitches Club Member, Diane O. I love the delicate floral fabric prints and colours. I also love the little button over the ring tab!
If you’d like to keep up to date with the new release patterns coming to Molly and Mama, don’t forget to sign up to the newsletter list and you’ll never miss an update!
Happy stitching, Lauren x
Wonderful
Hello there,
I cannot find the leather embellishment on the Clara Tote bag nor the lace and was wondering whether you sold both.
Regards,
Angela
Hello Angela, I don’t sell these sorts of supplies. But the best place to start is always your local patchwork or quilting store first, then online if you need to. You can use the search terms ‘PU sewing labels’ and ‘decorative cotton lace’. I hope that helps, Lauren.