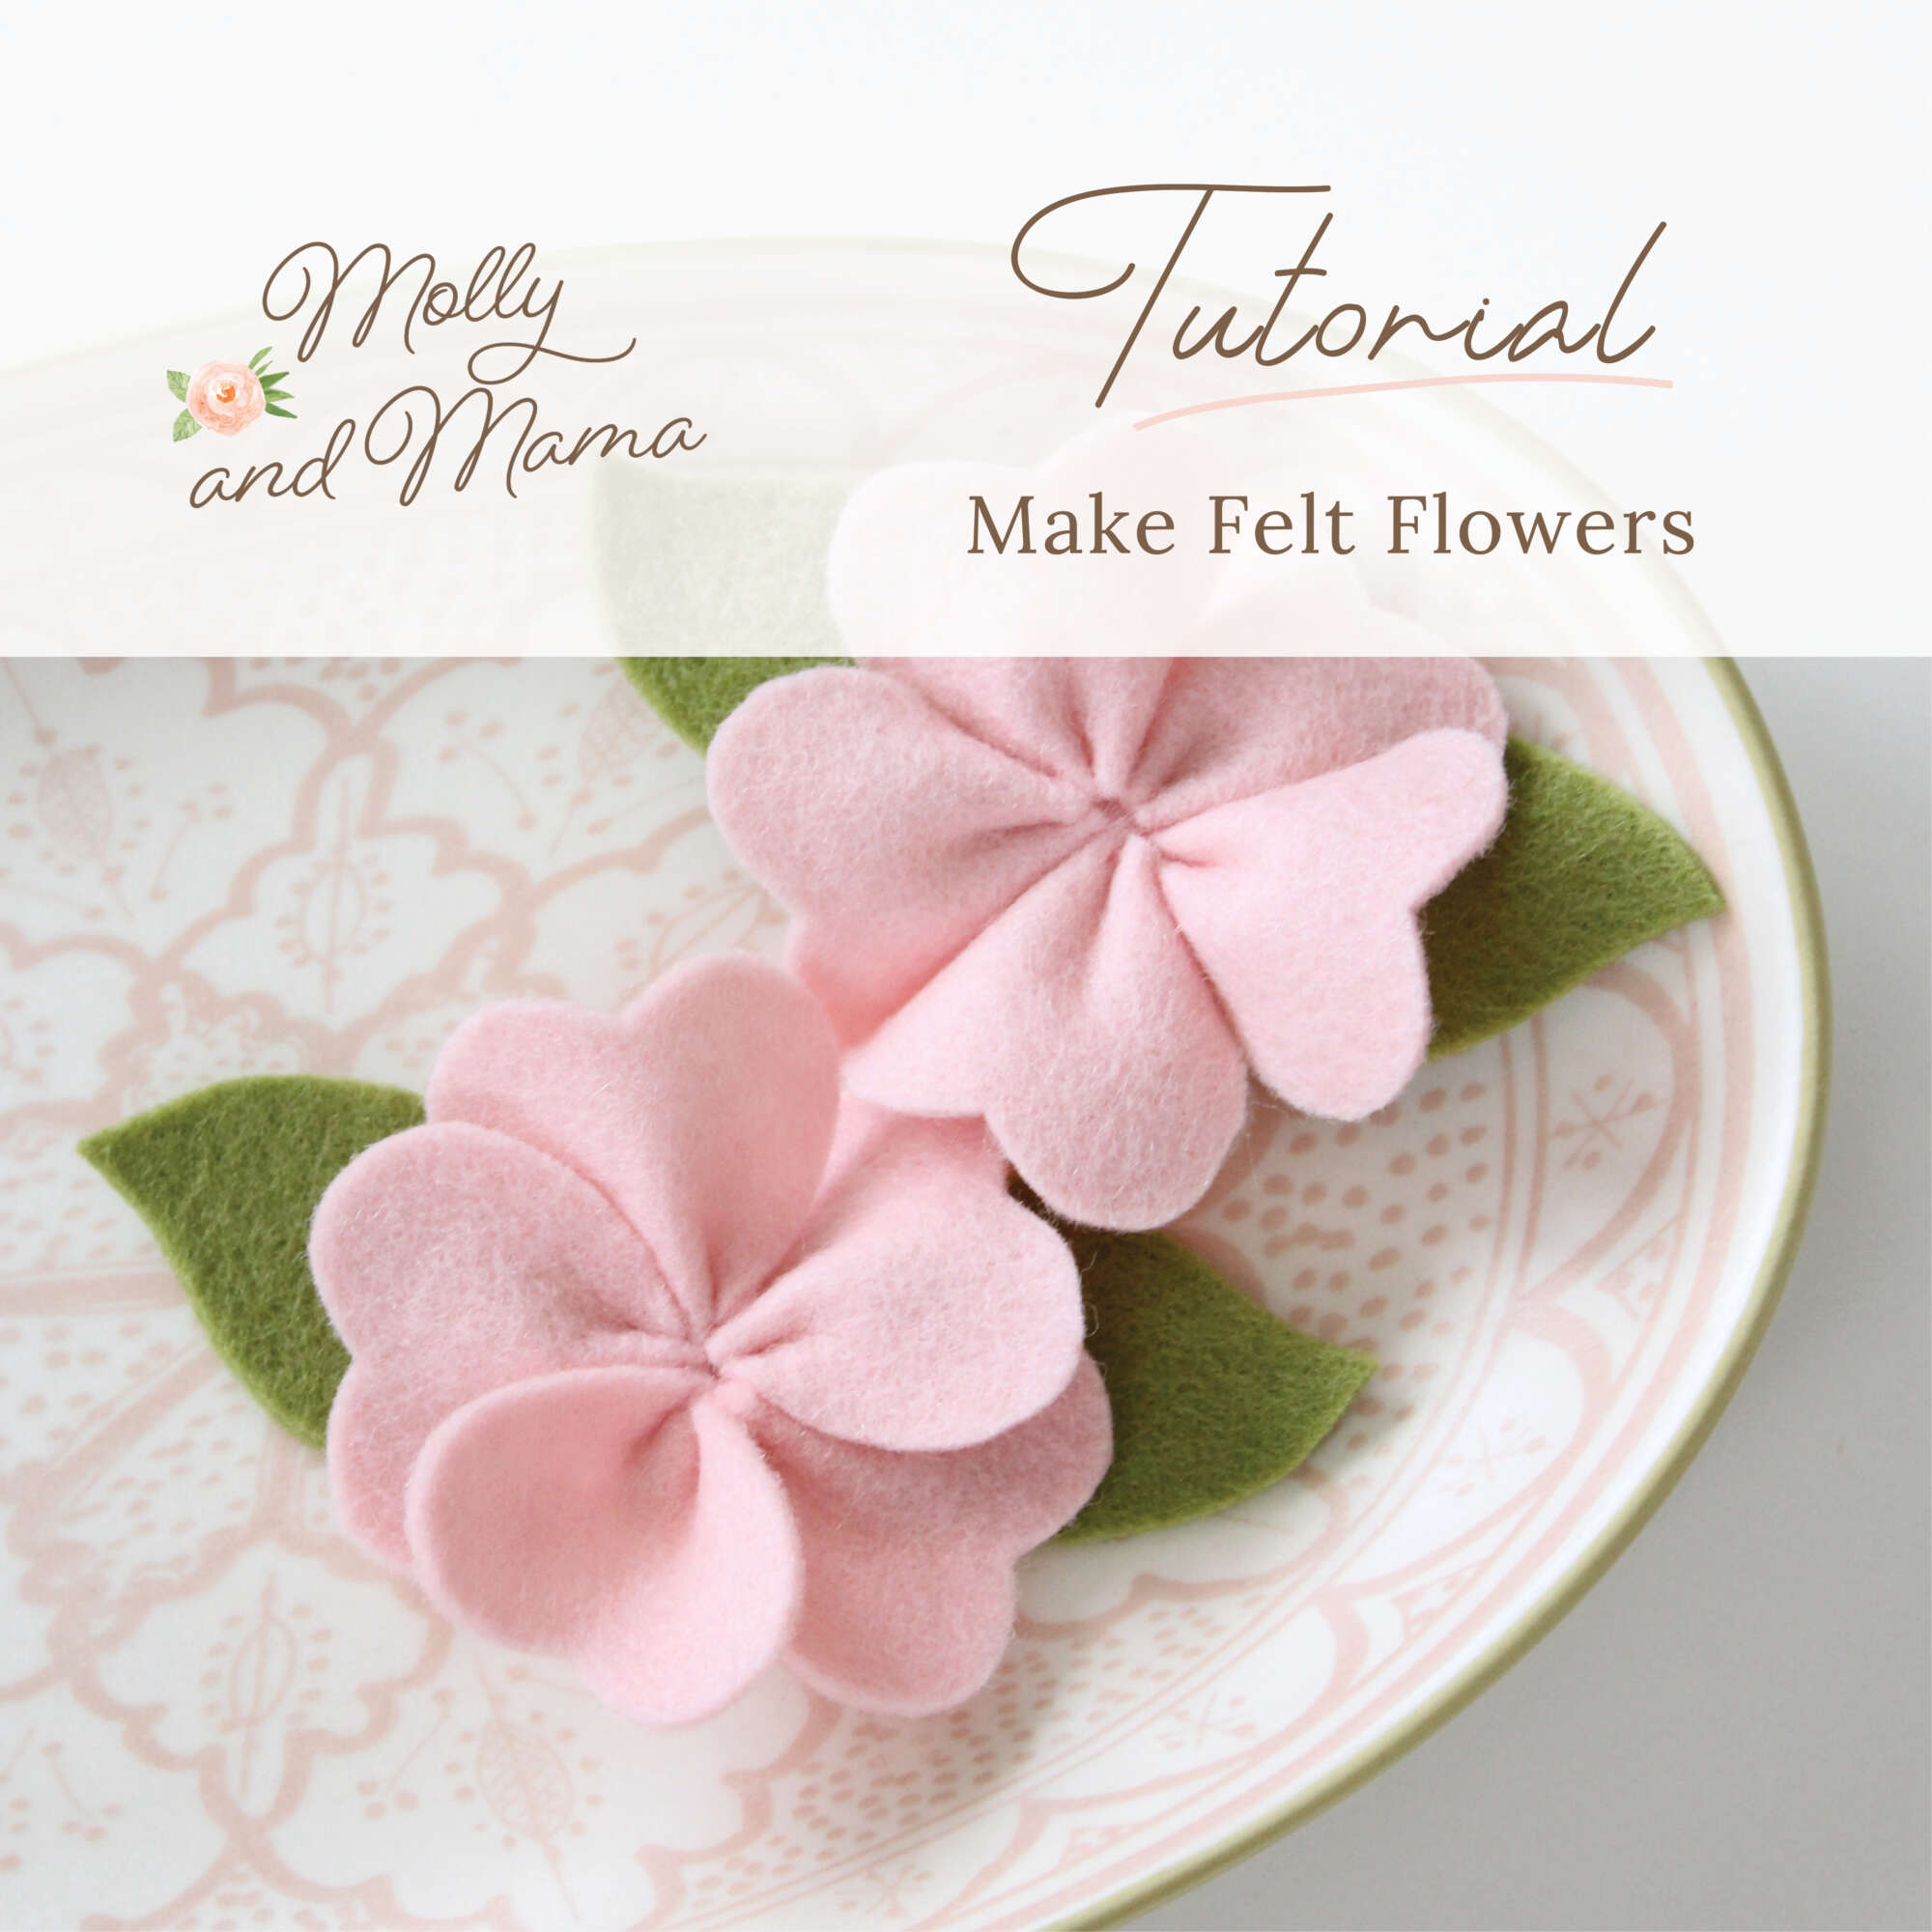
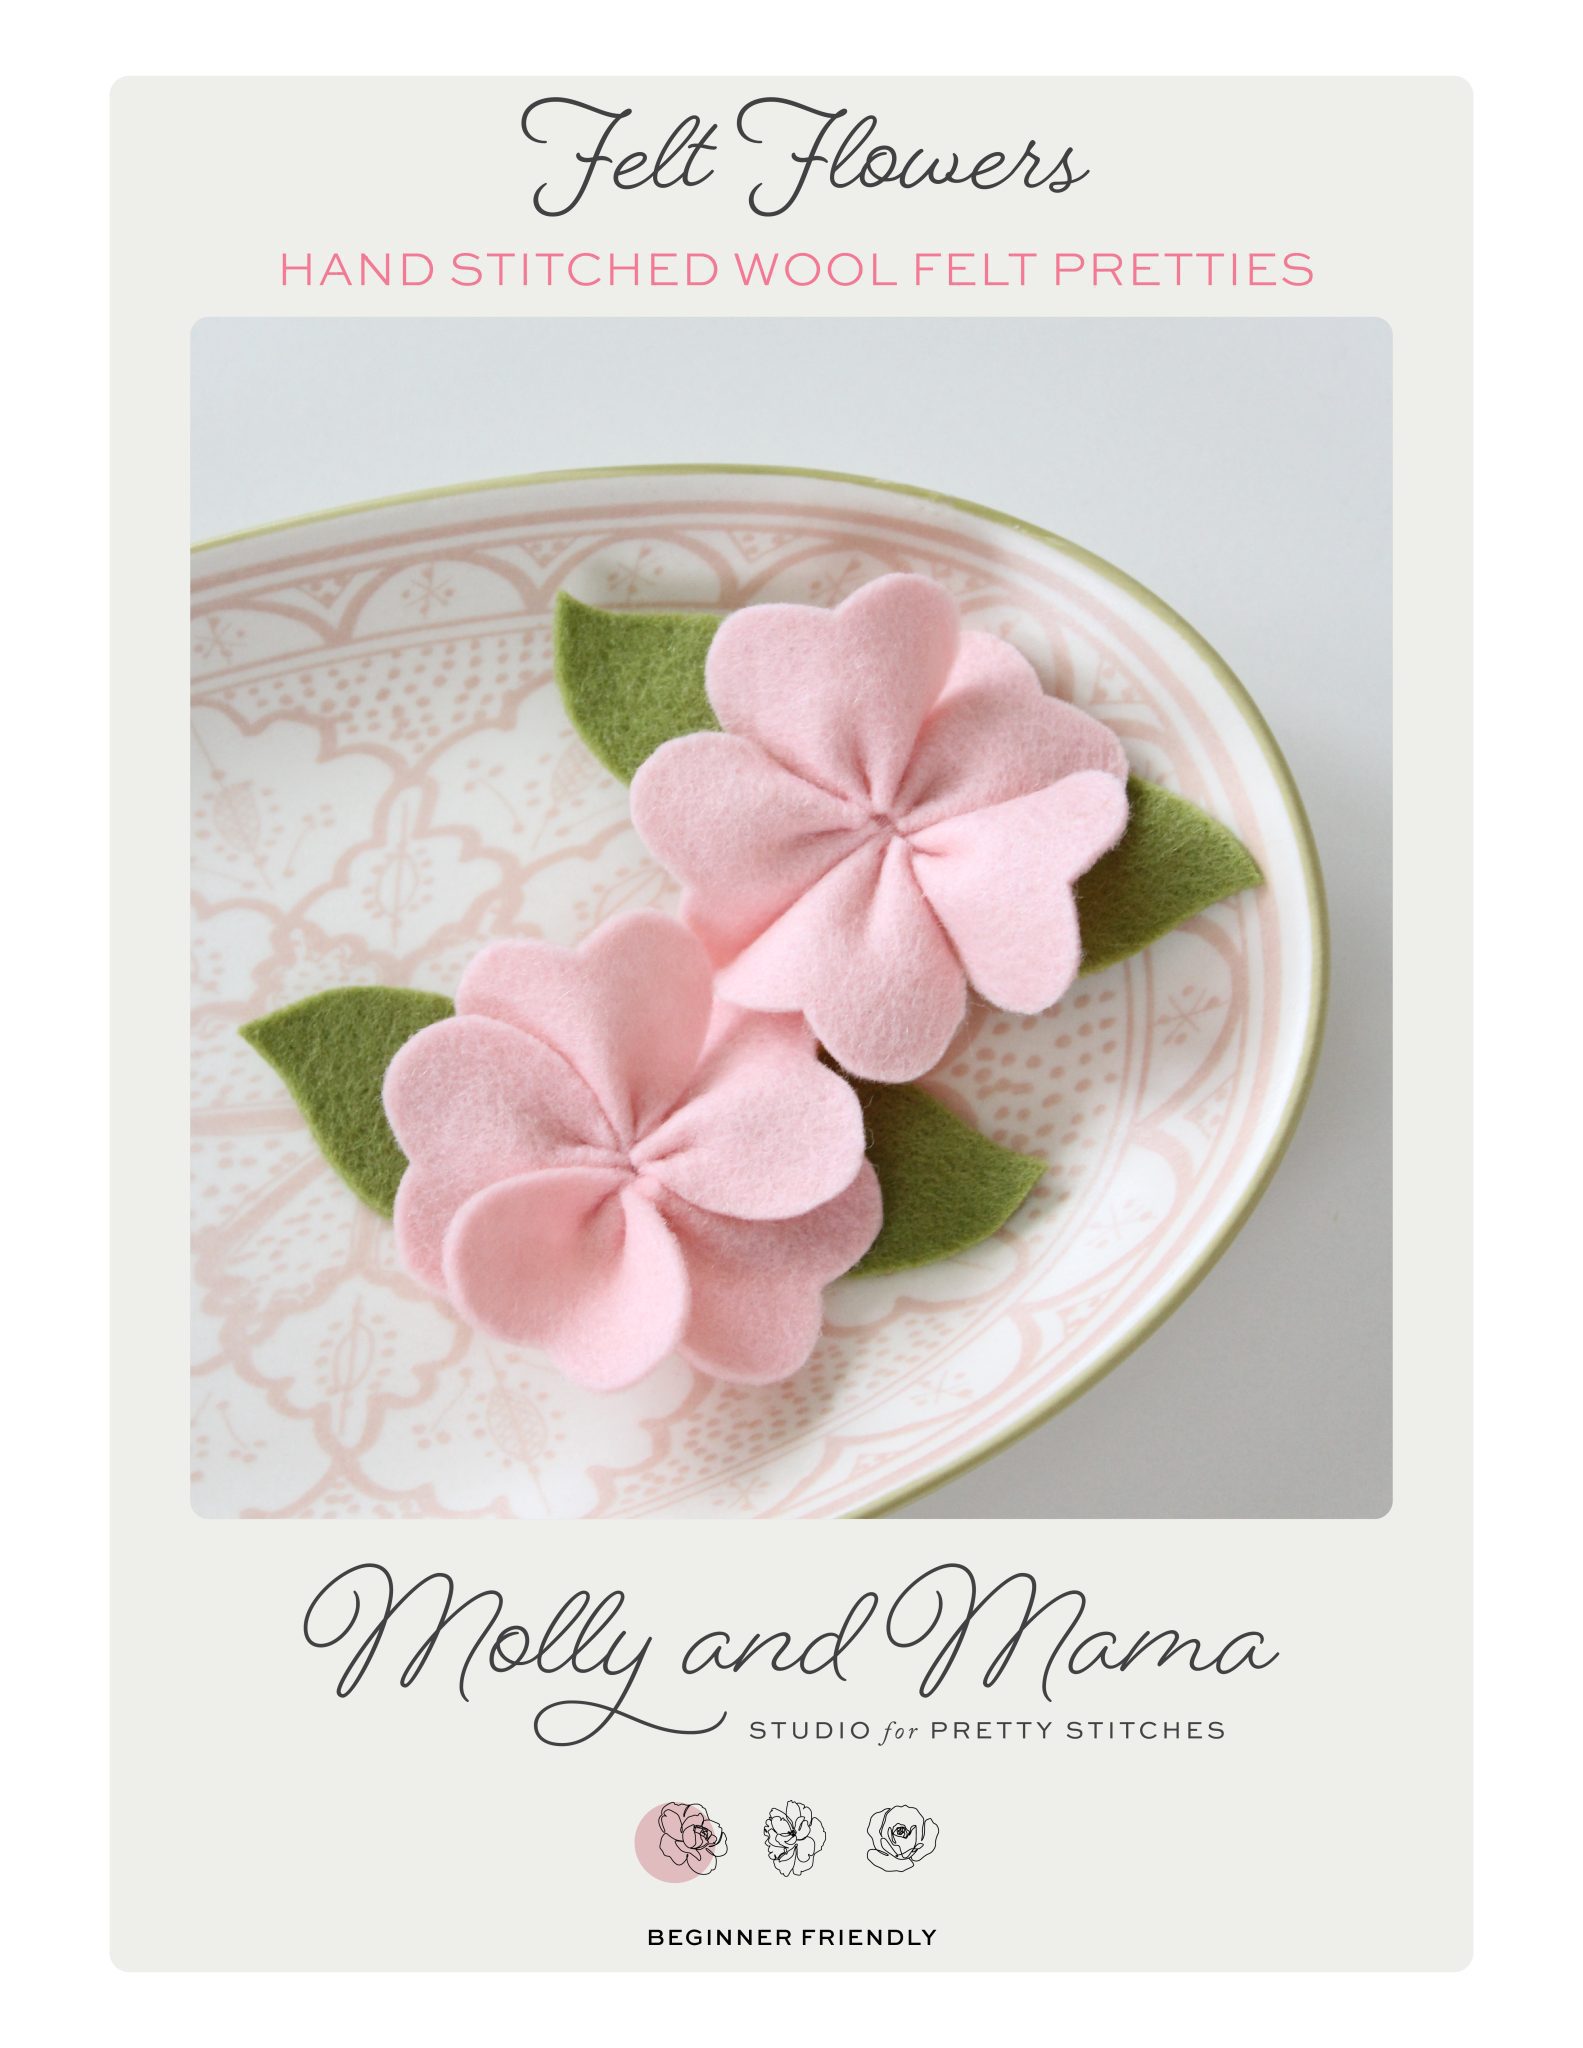
How To Make Felt Flowers
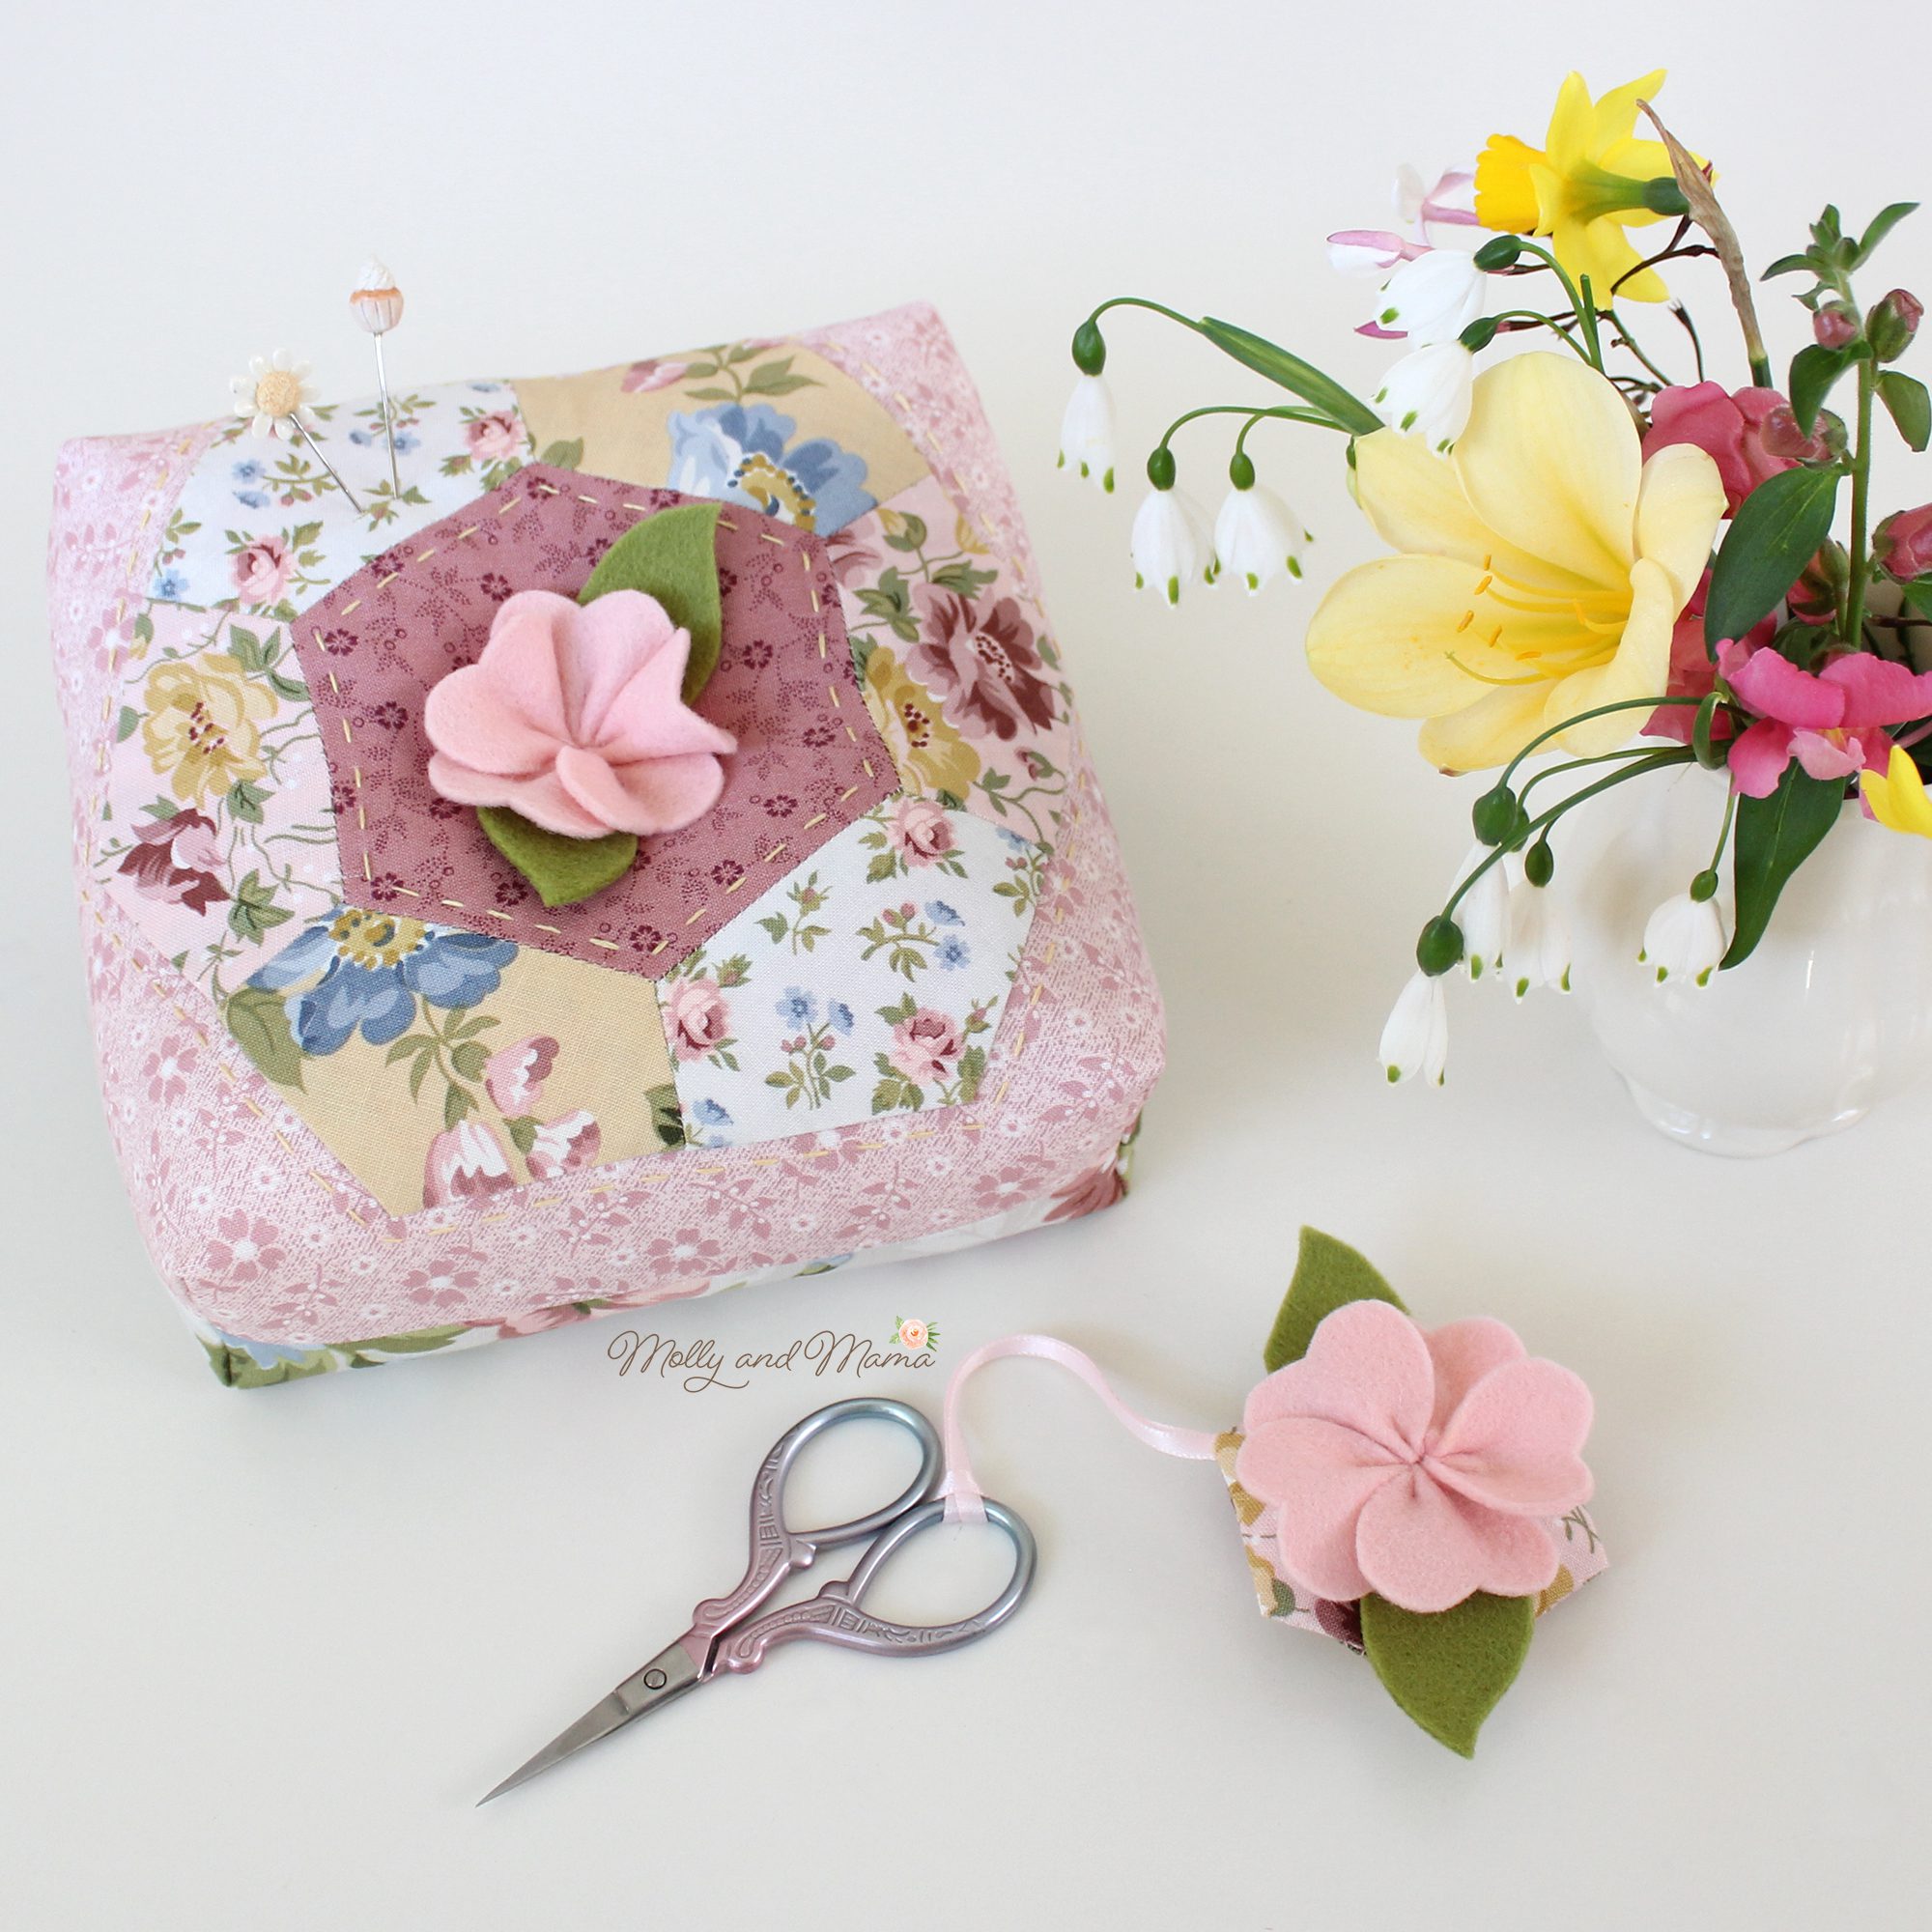
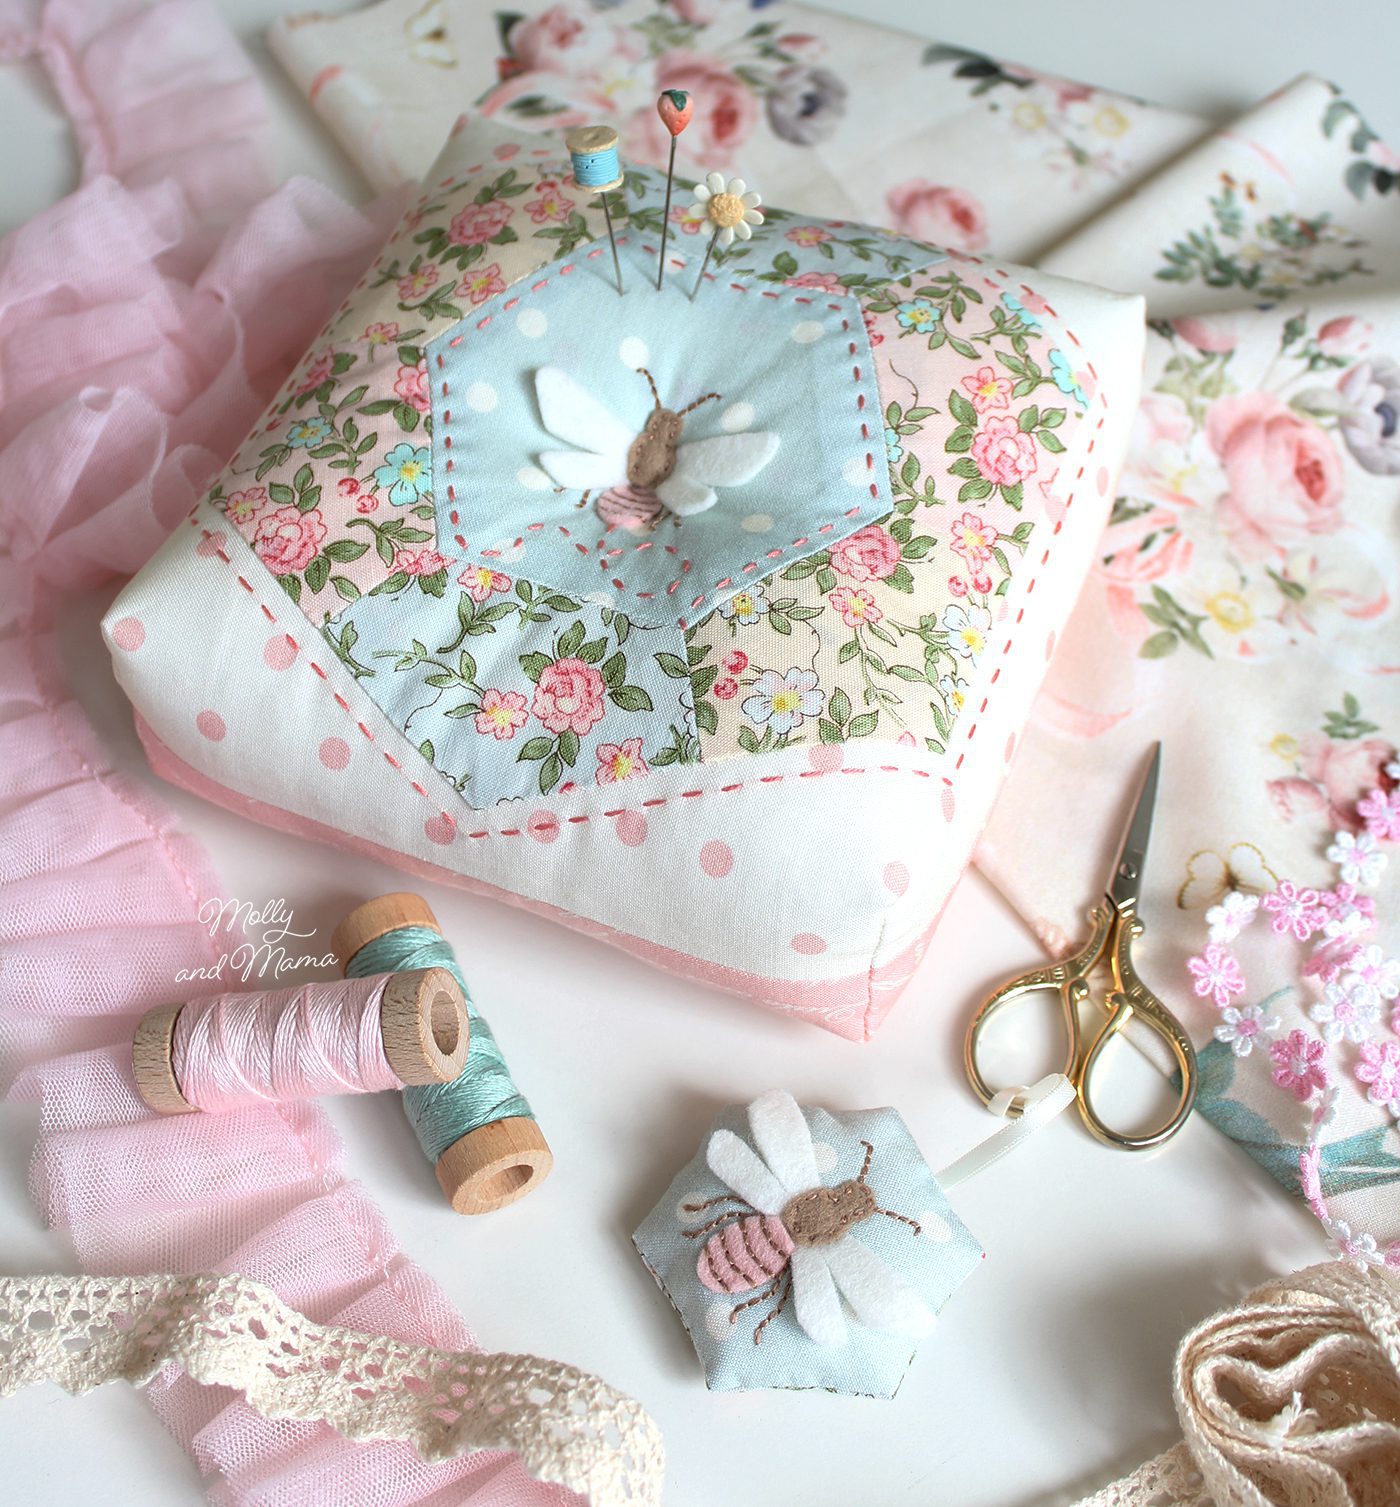
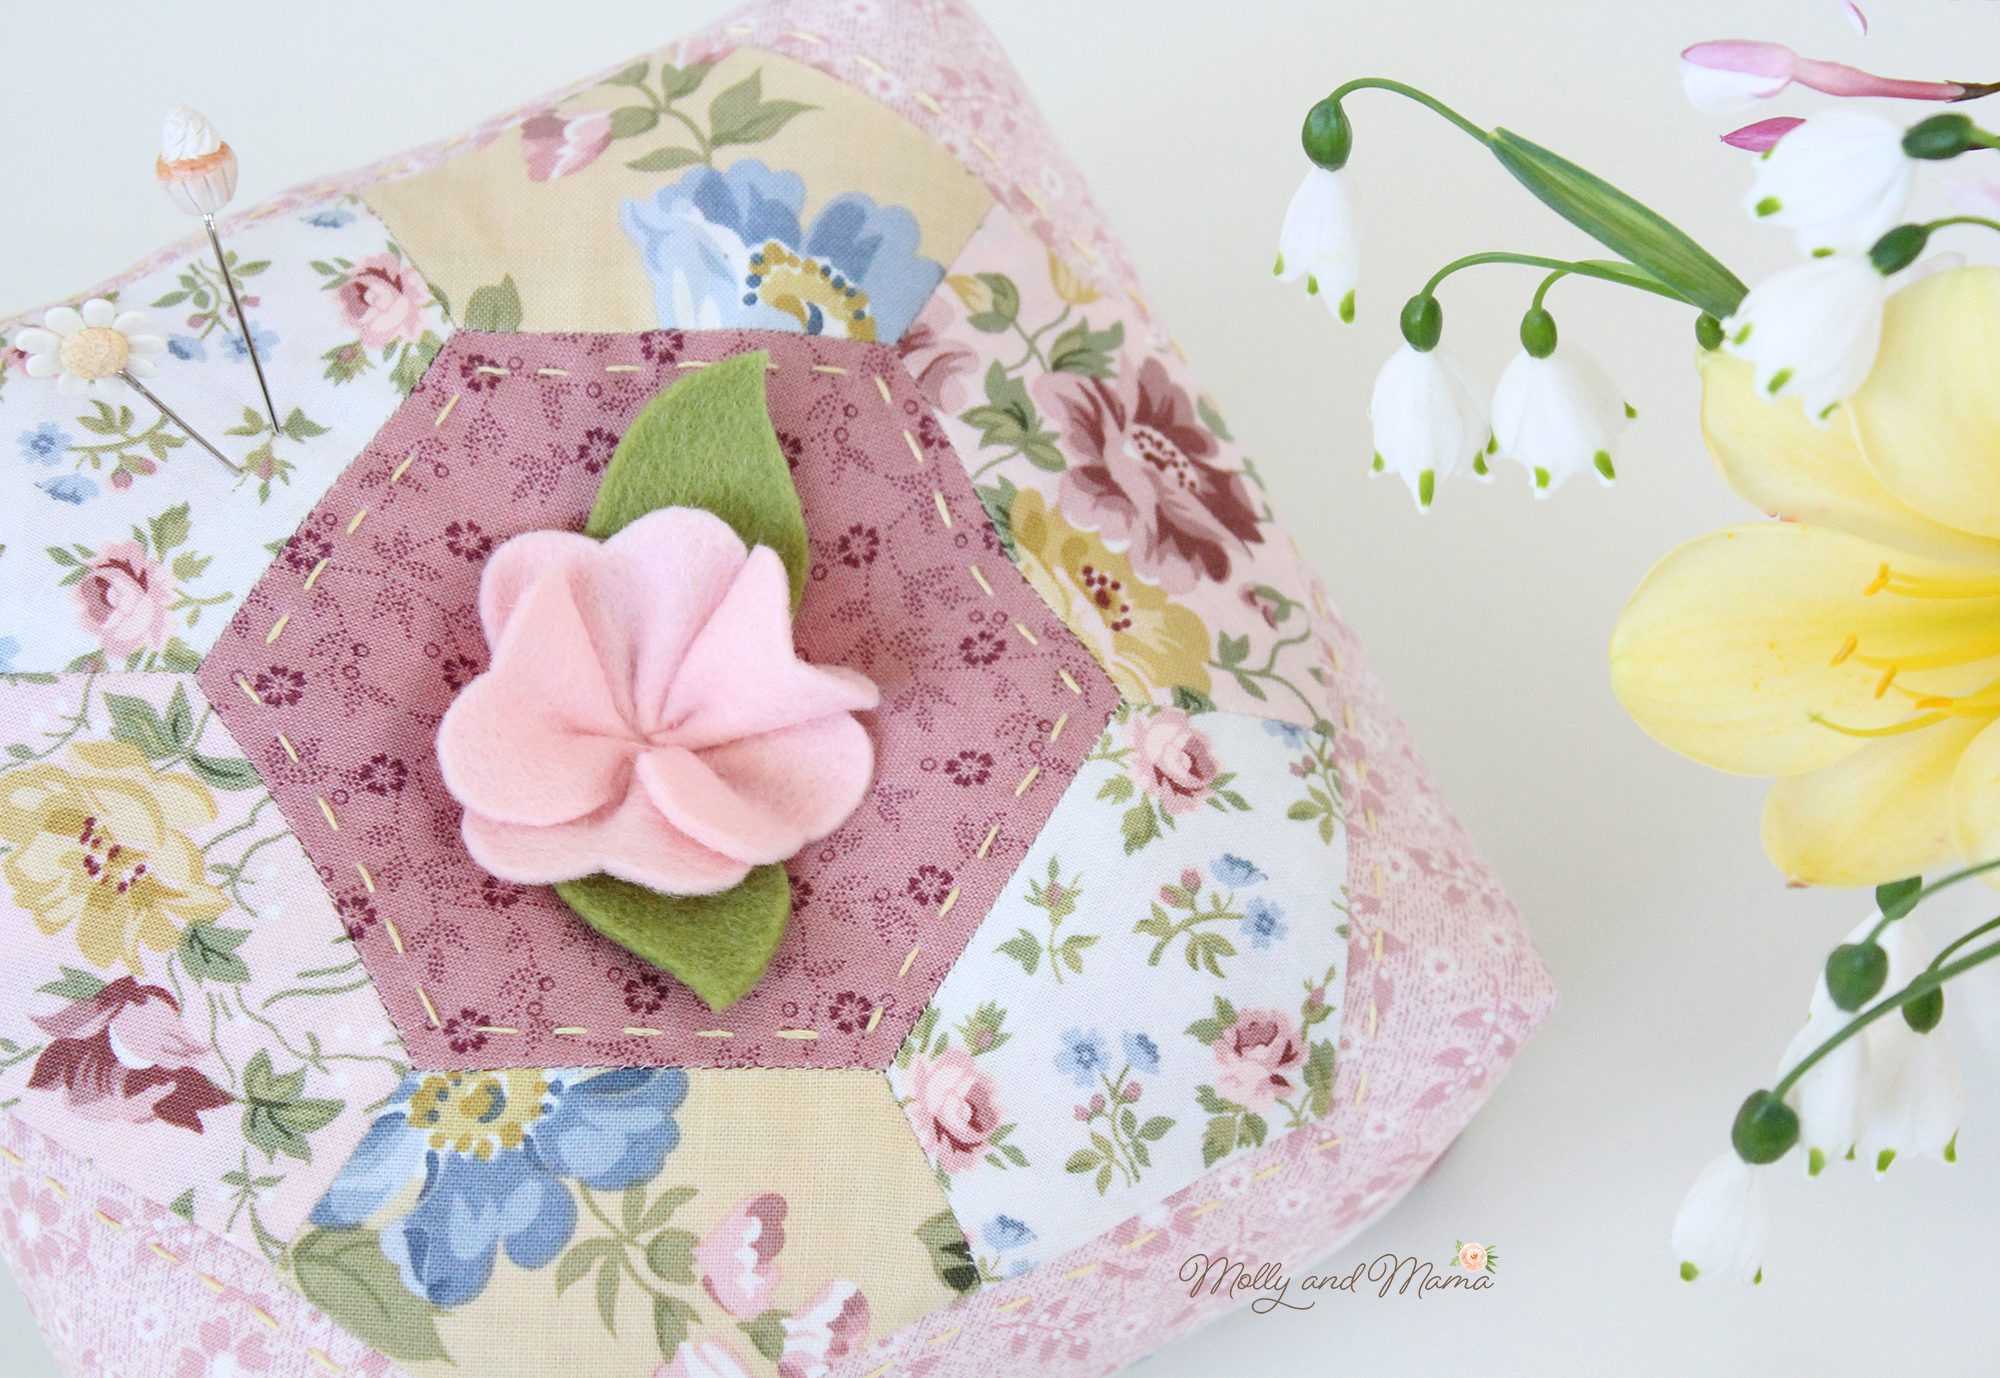
I recently made this beautiful version of my Serious Sewist’s Set when writing a blog post for Riley Blake Designs. I was inspired by the floral motifs in this Midnight Garden fabric to make a change to the original design. Instead of adding the bee design that is included in the pattern, I decided to add some sweet felt flowers to the centre of the pin cushion and the matching scissor charm too.
The Felt Flowers are so easy to make and give the project such a pretty look. So I have included a free tutorial here, showing you exactly how I sew them. But if you’d prefer to save a PDF copy of the instructions, just fill out your details here and I’ll email you a link!
Before we make the felt flowers, you’ll need the pattern for the Serious Sewist’s Set which includes the full instructions to make the pin cushion and scissor charm with the felt bees (shown below). You can buy the pattern in the store.
You can read on for the basic instructions to make the felt flowers which are perfectly sized for the pin cushion and scissor charm. But to make things easier, I have also created a PDF download of the instructions that you can save to your computer and print at home. If you’d prefer the printable instructions, please add your details below to sign up for the newsletter and have them sent directly to your inbox.

NOTE: This project is for PERSONAL USE ONLY for sewing at home and/or teaching another person or child to sew FOR FREE. Reusing or repurposing free Molly and Mama tutorial instructions, templates and images for paid classes, or distributing the materials in classes, to groups, or for commercial purposes, without permission, is strictly prohibited. For clarification, or to seek a commercial arrangement, please contact Molly and Mama.
You Will Need
- Scraps of 100% wool felt for the flower petals and the leaves. You can find out why I prefer using wool felt HERE.
- freezer paper
- pen
- scissors for cutting felt
- iron
- needle and thread in colours to match felt
- print out of the Felt Flower Template
Let’s Get Making
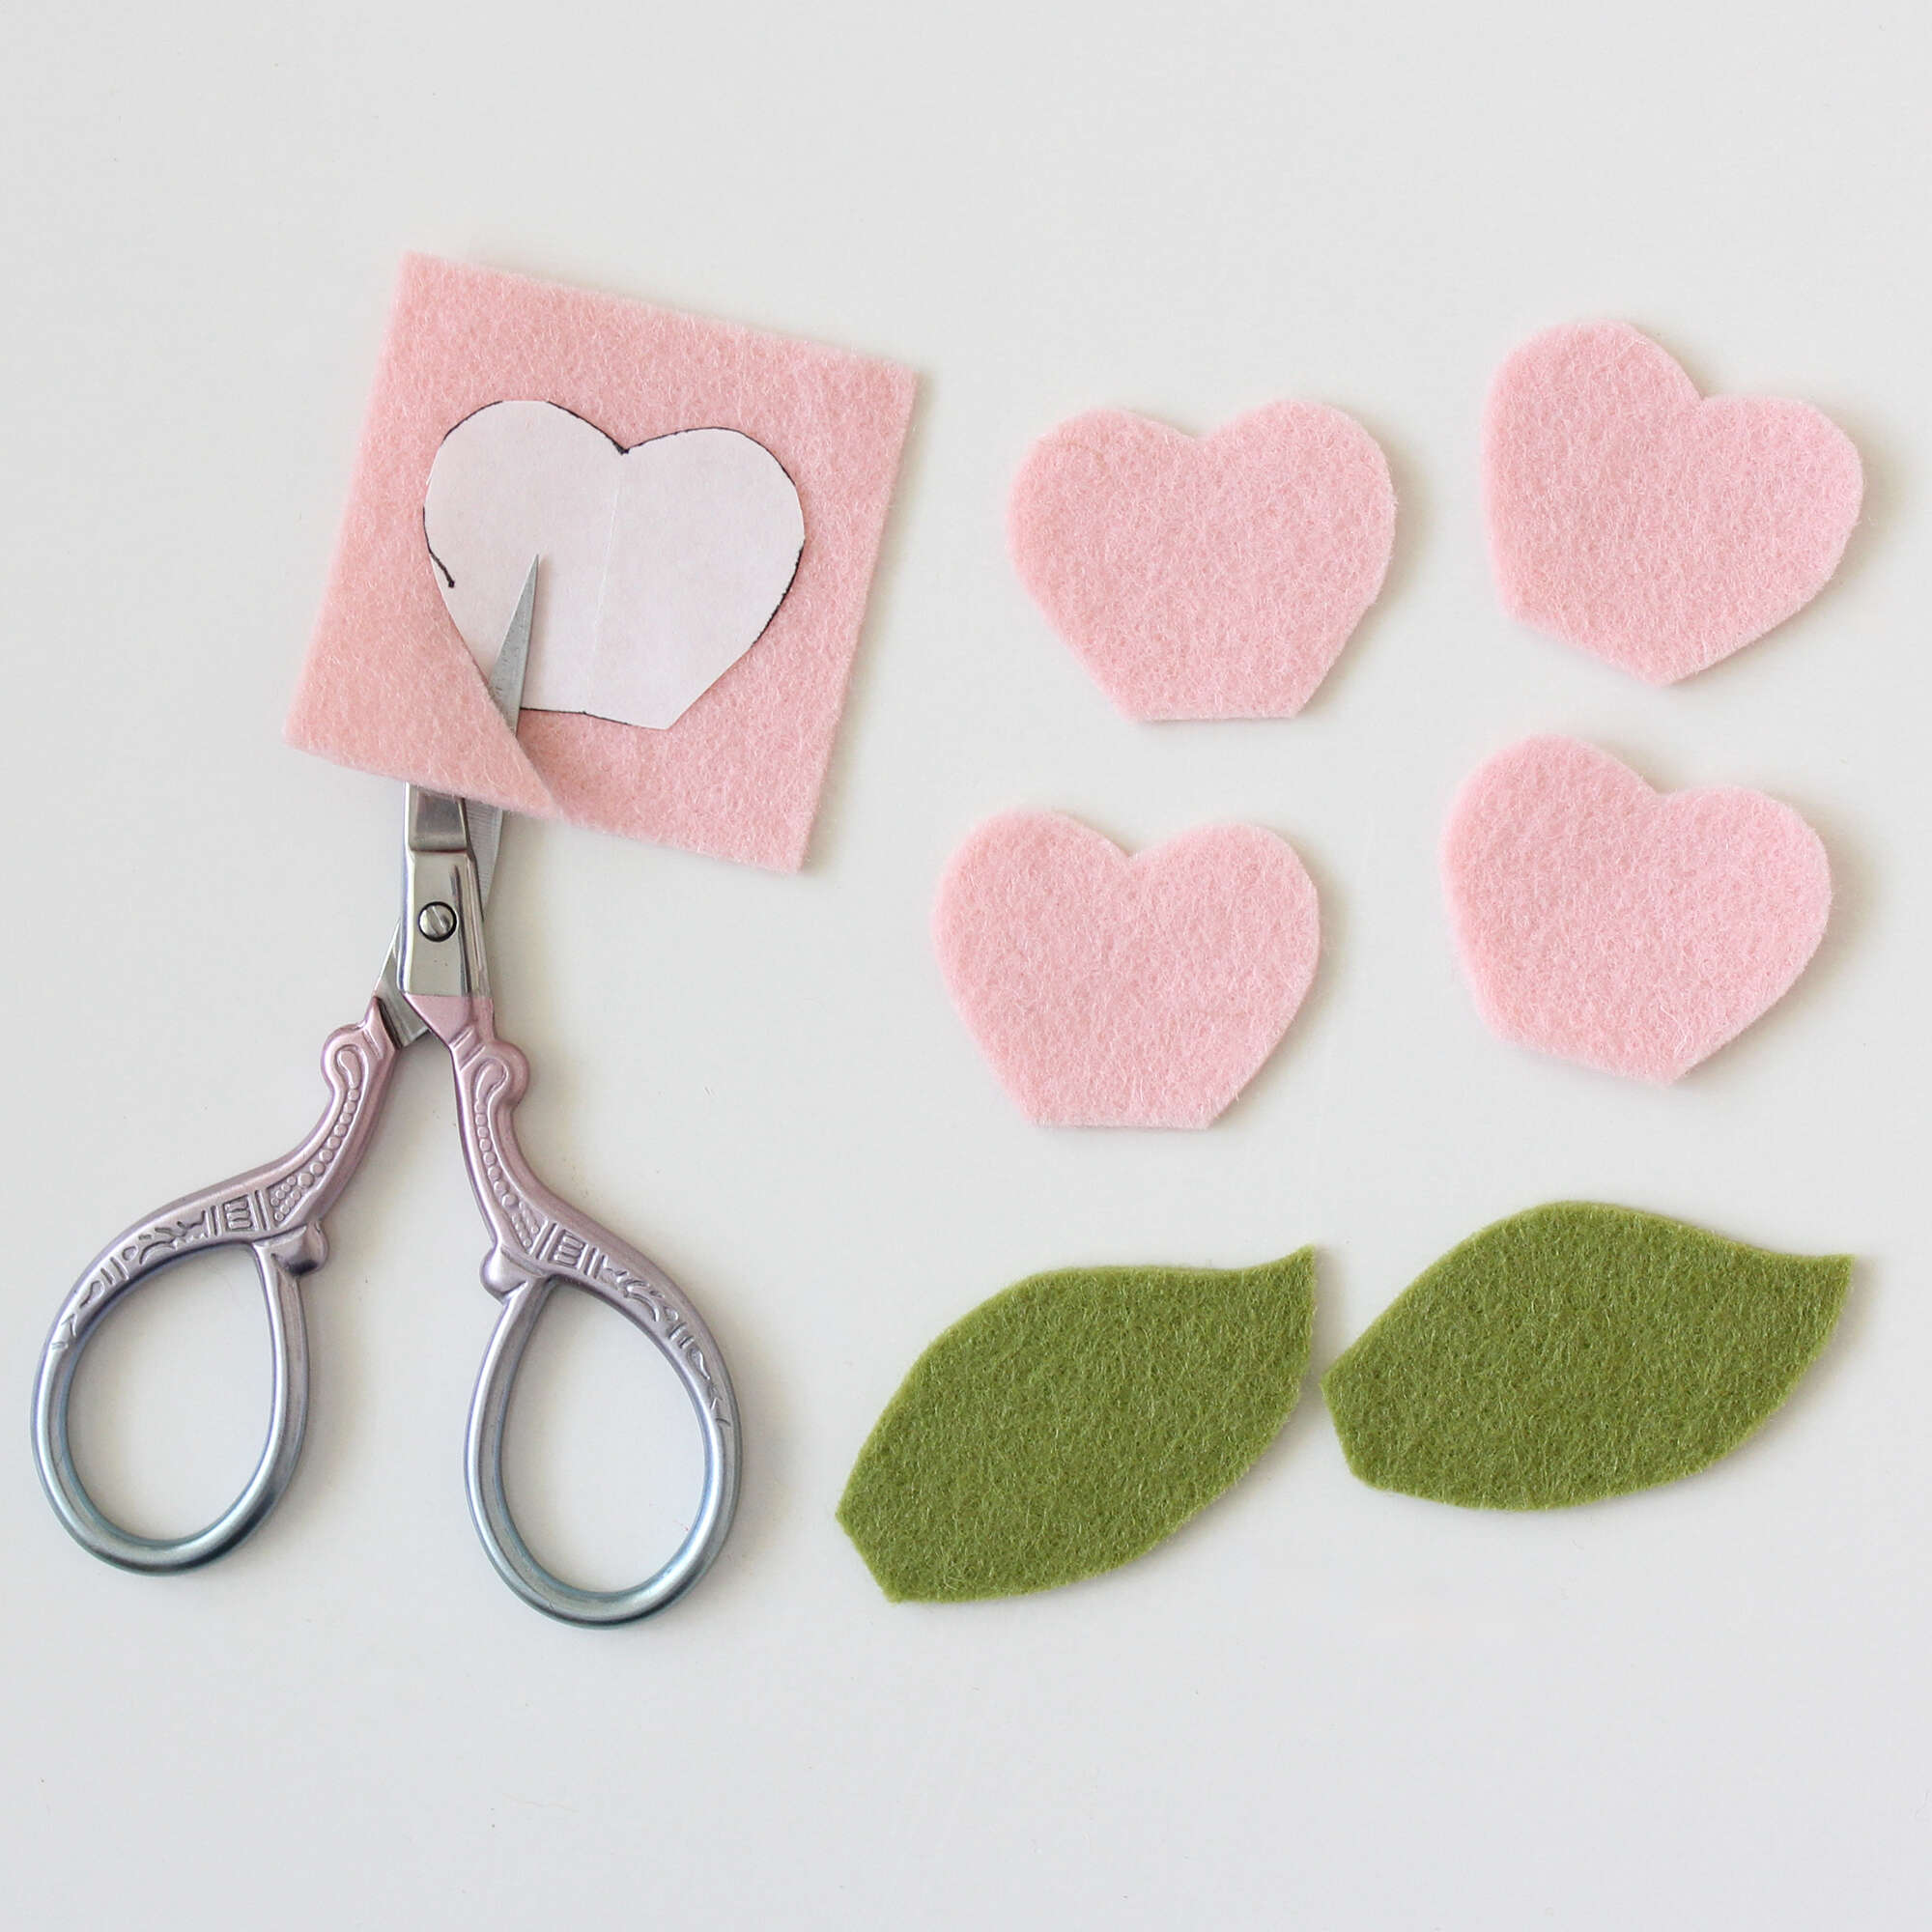
Print out a copy of the template at full size (100%) with no scaling or cropping. Measure the 1 inch test square to ensure the template printed at the correct size.
Trace one leaf shape and one petal shape onto the paper side of the freezer paper (you’ll only need one of each as the templates are reusable). Roughly cut around each template piece (not on the line) leaving a small 1/8” (3mm) gap.
Lay the leaf shape on the green felt. Using a warm, dry iron, run it over the paper side of the template*. The heat will help the plastic underside of the freezer paper to adhere to the felt.
*NOTE: This process is best suited to wool felt. Test a small area of your felt with the iron and paper before commencing. Please be sure to cover your felt with a press cloth (or scrap piece of cotton fabric) so as not to damage it (if the felt is not 100% wool).
Cut out the leaf shape on the line, and then simply peel the paper away. It comes away easily and leaves no residue. Use the same template to create a second leaf shape. Use the same method to also cut out five flower petal shapes.
Thread your needle with a doubled over strand of thread (in a colour that matches the petals) and knot it several times at the end.
Arrange the petals in a straight line as shown in the image below. Sew a couple of stitches along the base of the first petal, making sure the needle enters the felt and exits the felt on the same side. Continue to sew across the base of all five petals.
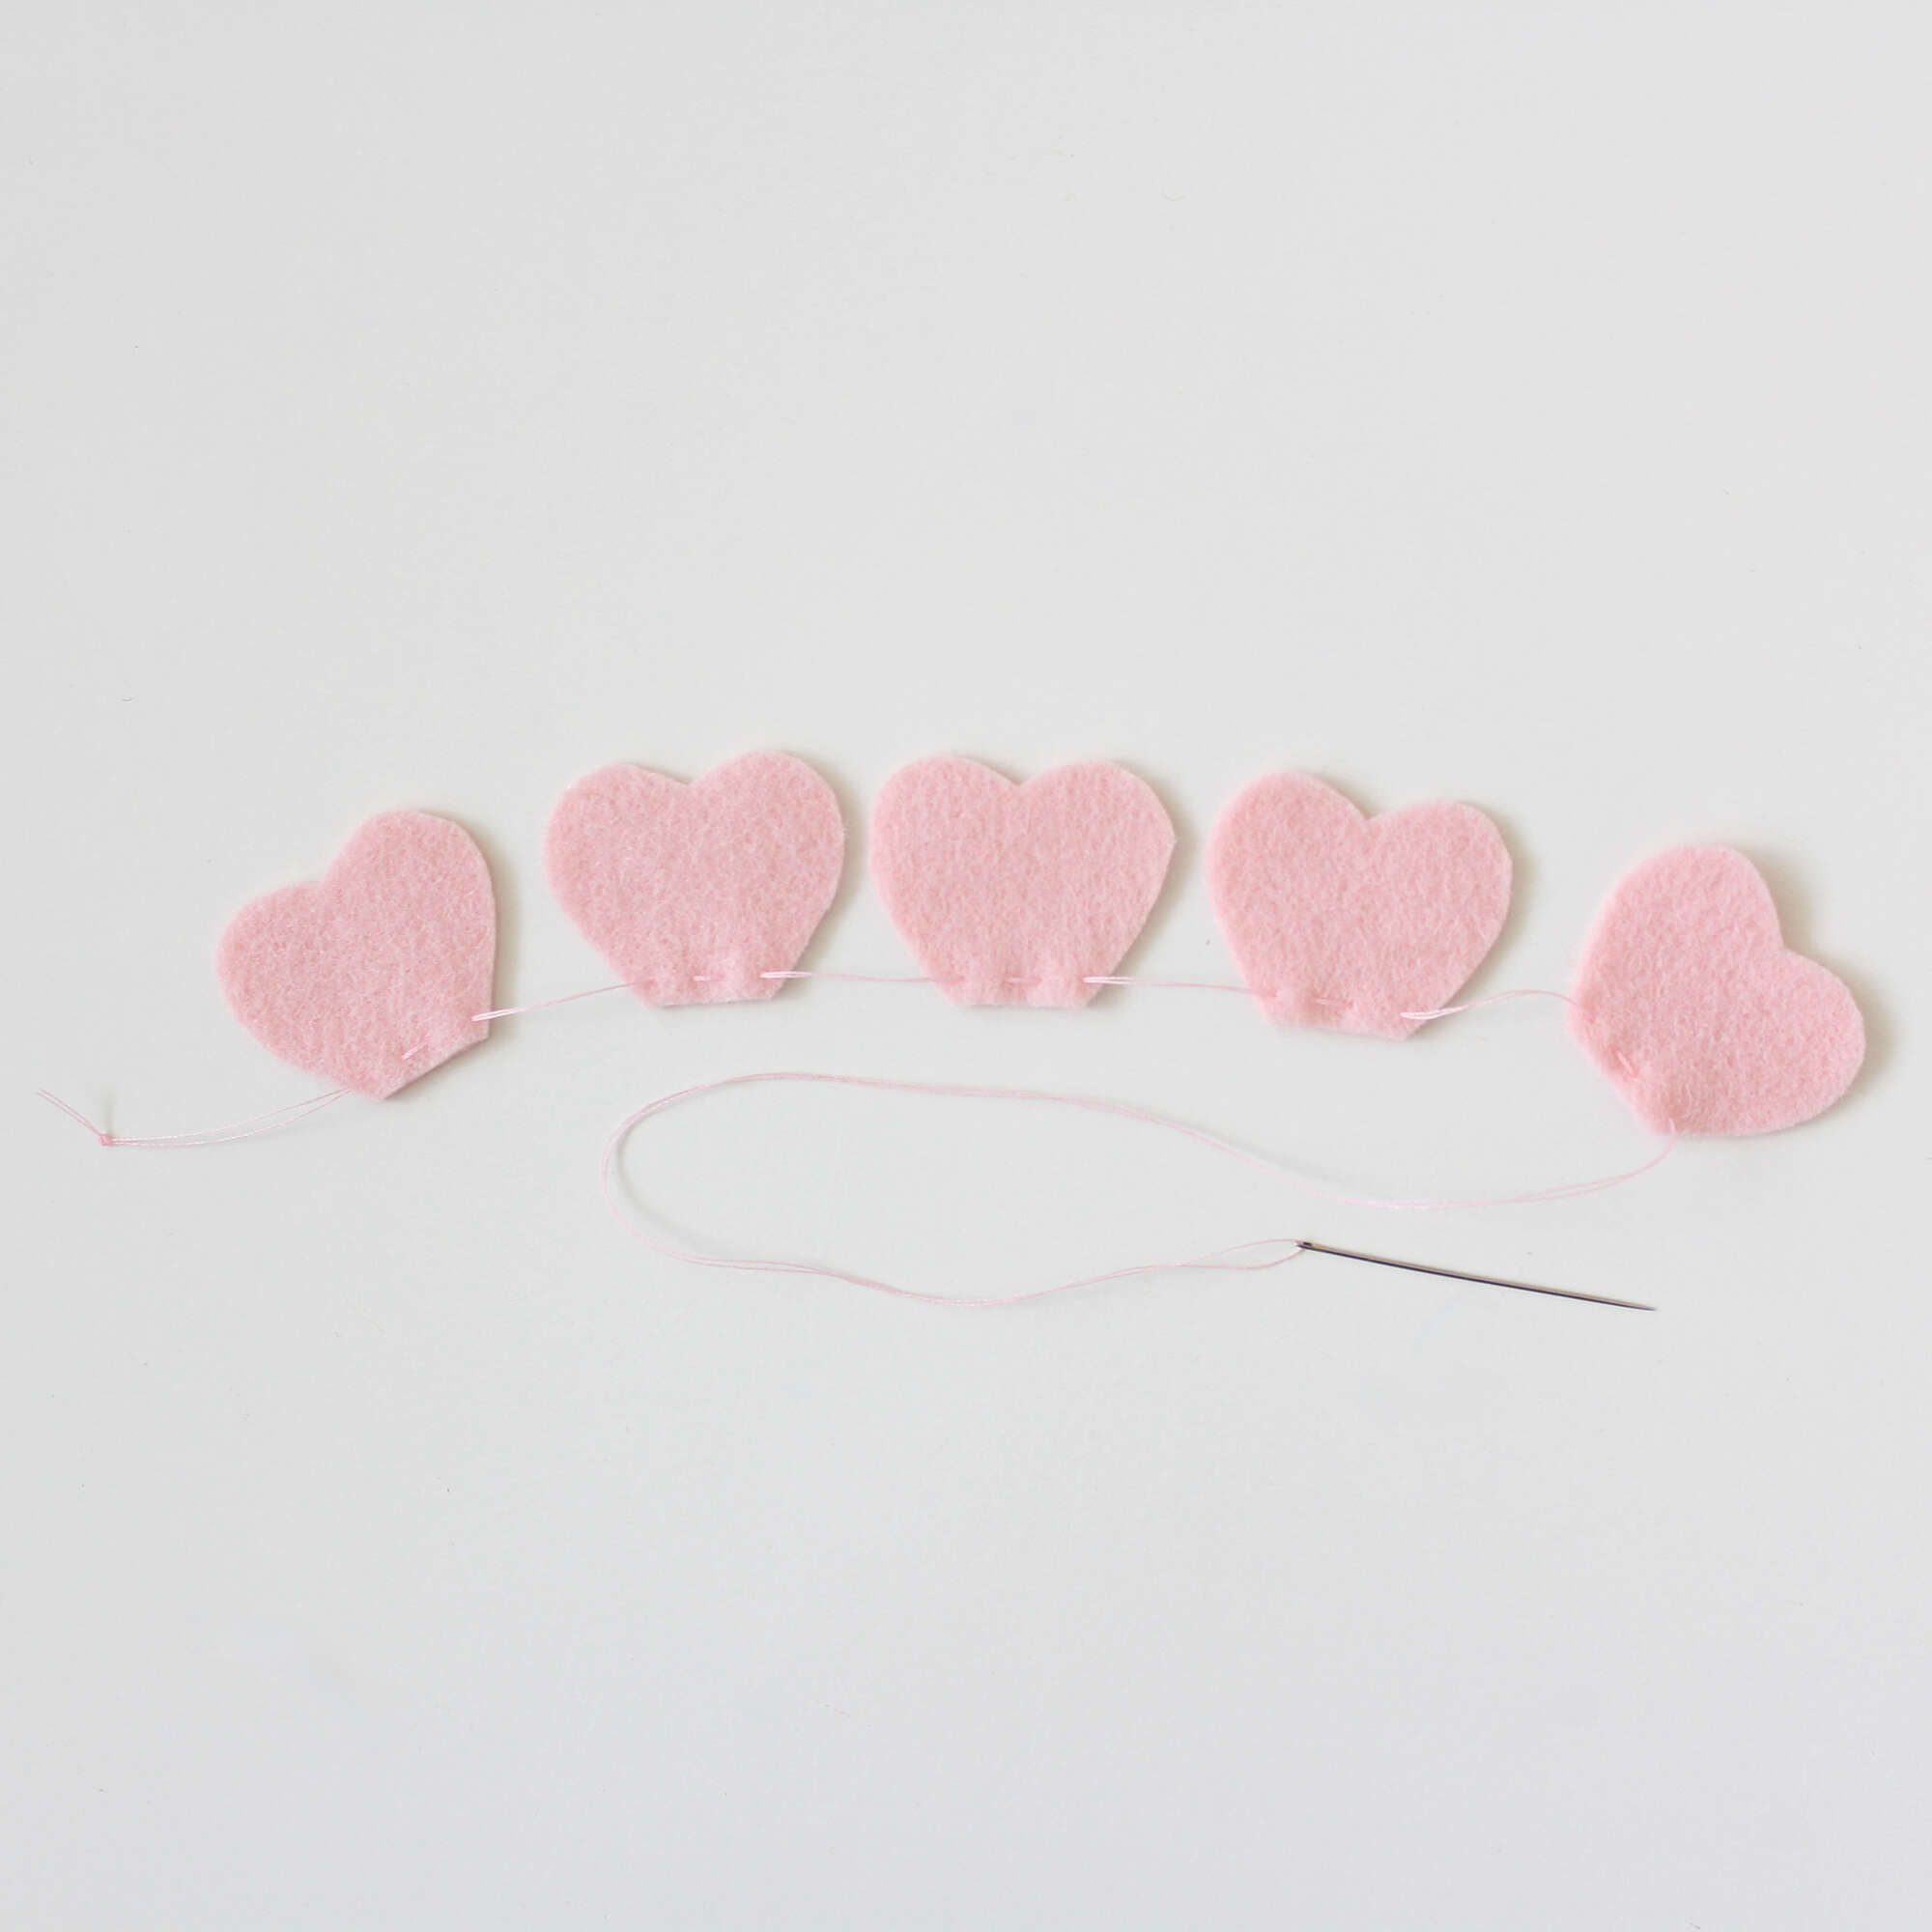
Pull the thread carefully to gather the petals together.

Continue to firmly pull the thread to form the flower shape.
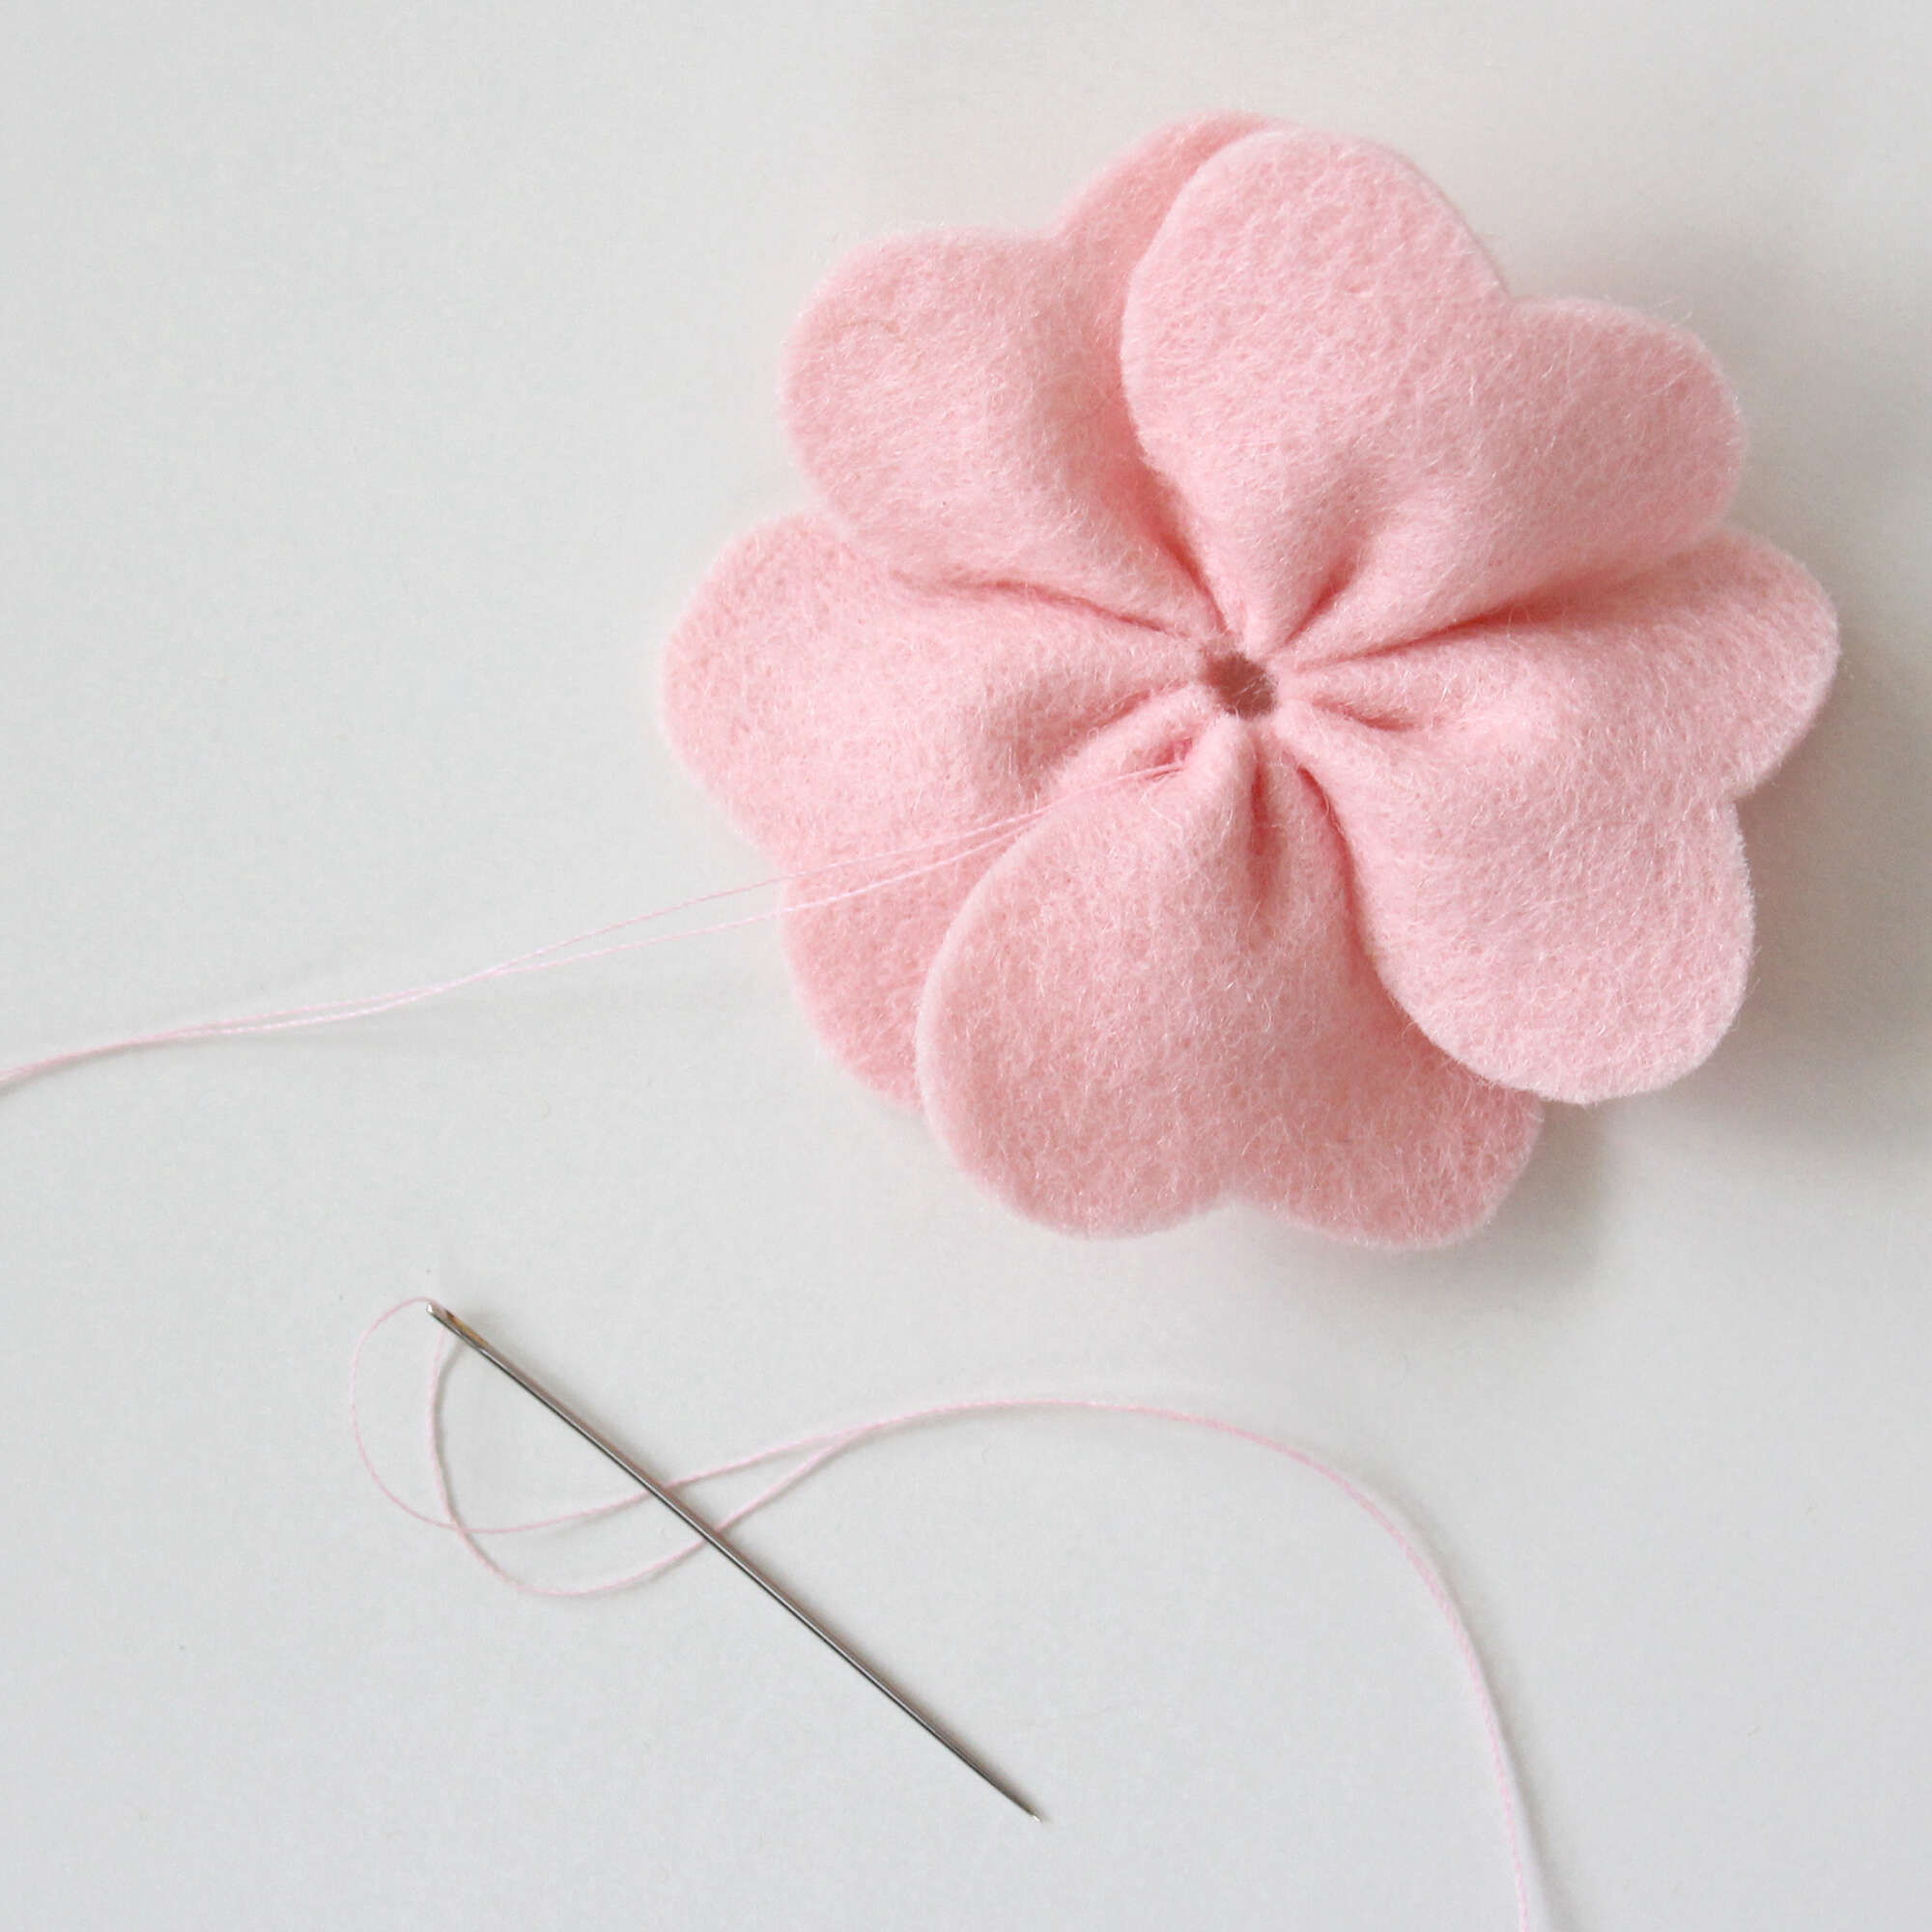
Add some extra stitches in the felt gathers and through the centre of the flower to help it retain its shape. Try and keep the stitches hidden on the back of the flower. Keep the thread intact.
Position the two green leaves behind the flower. Use small fine stitches to sew the leaves in place, hiding the thread in the folds and gathers of the felt petals. Finish off with a couple of back stitches to secure the thread, then trim away the excess.
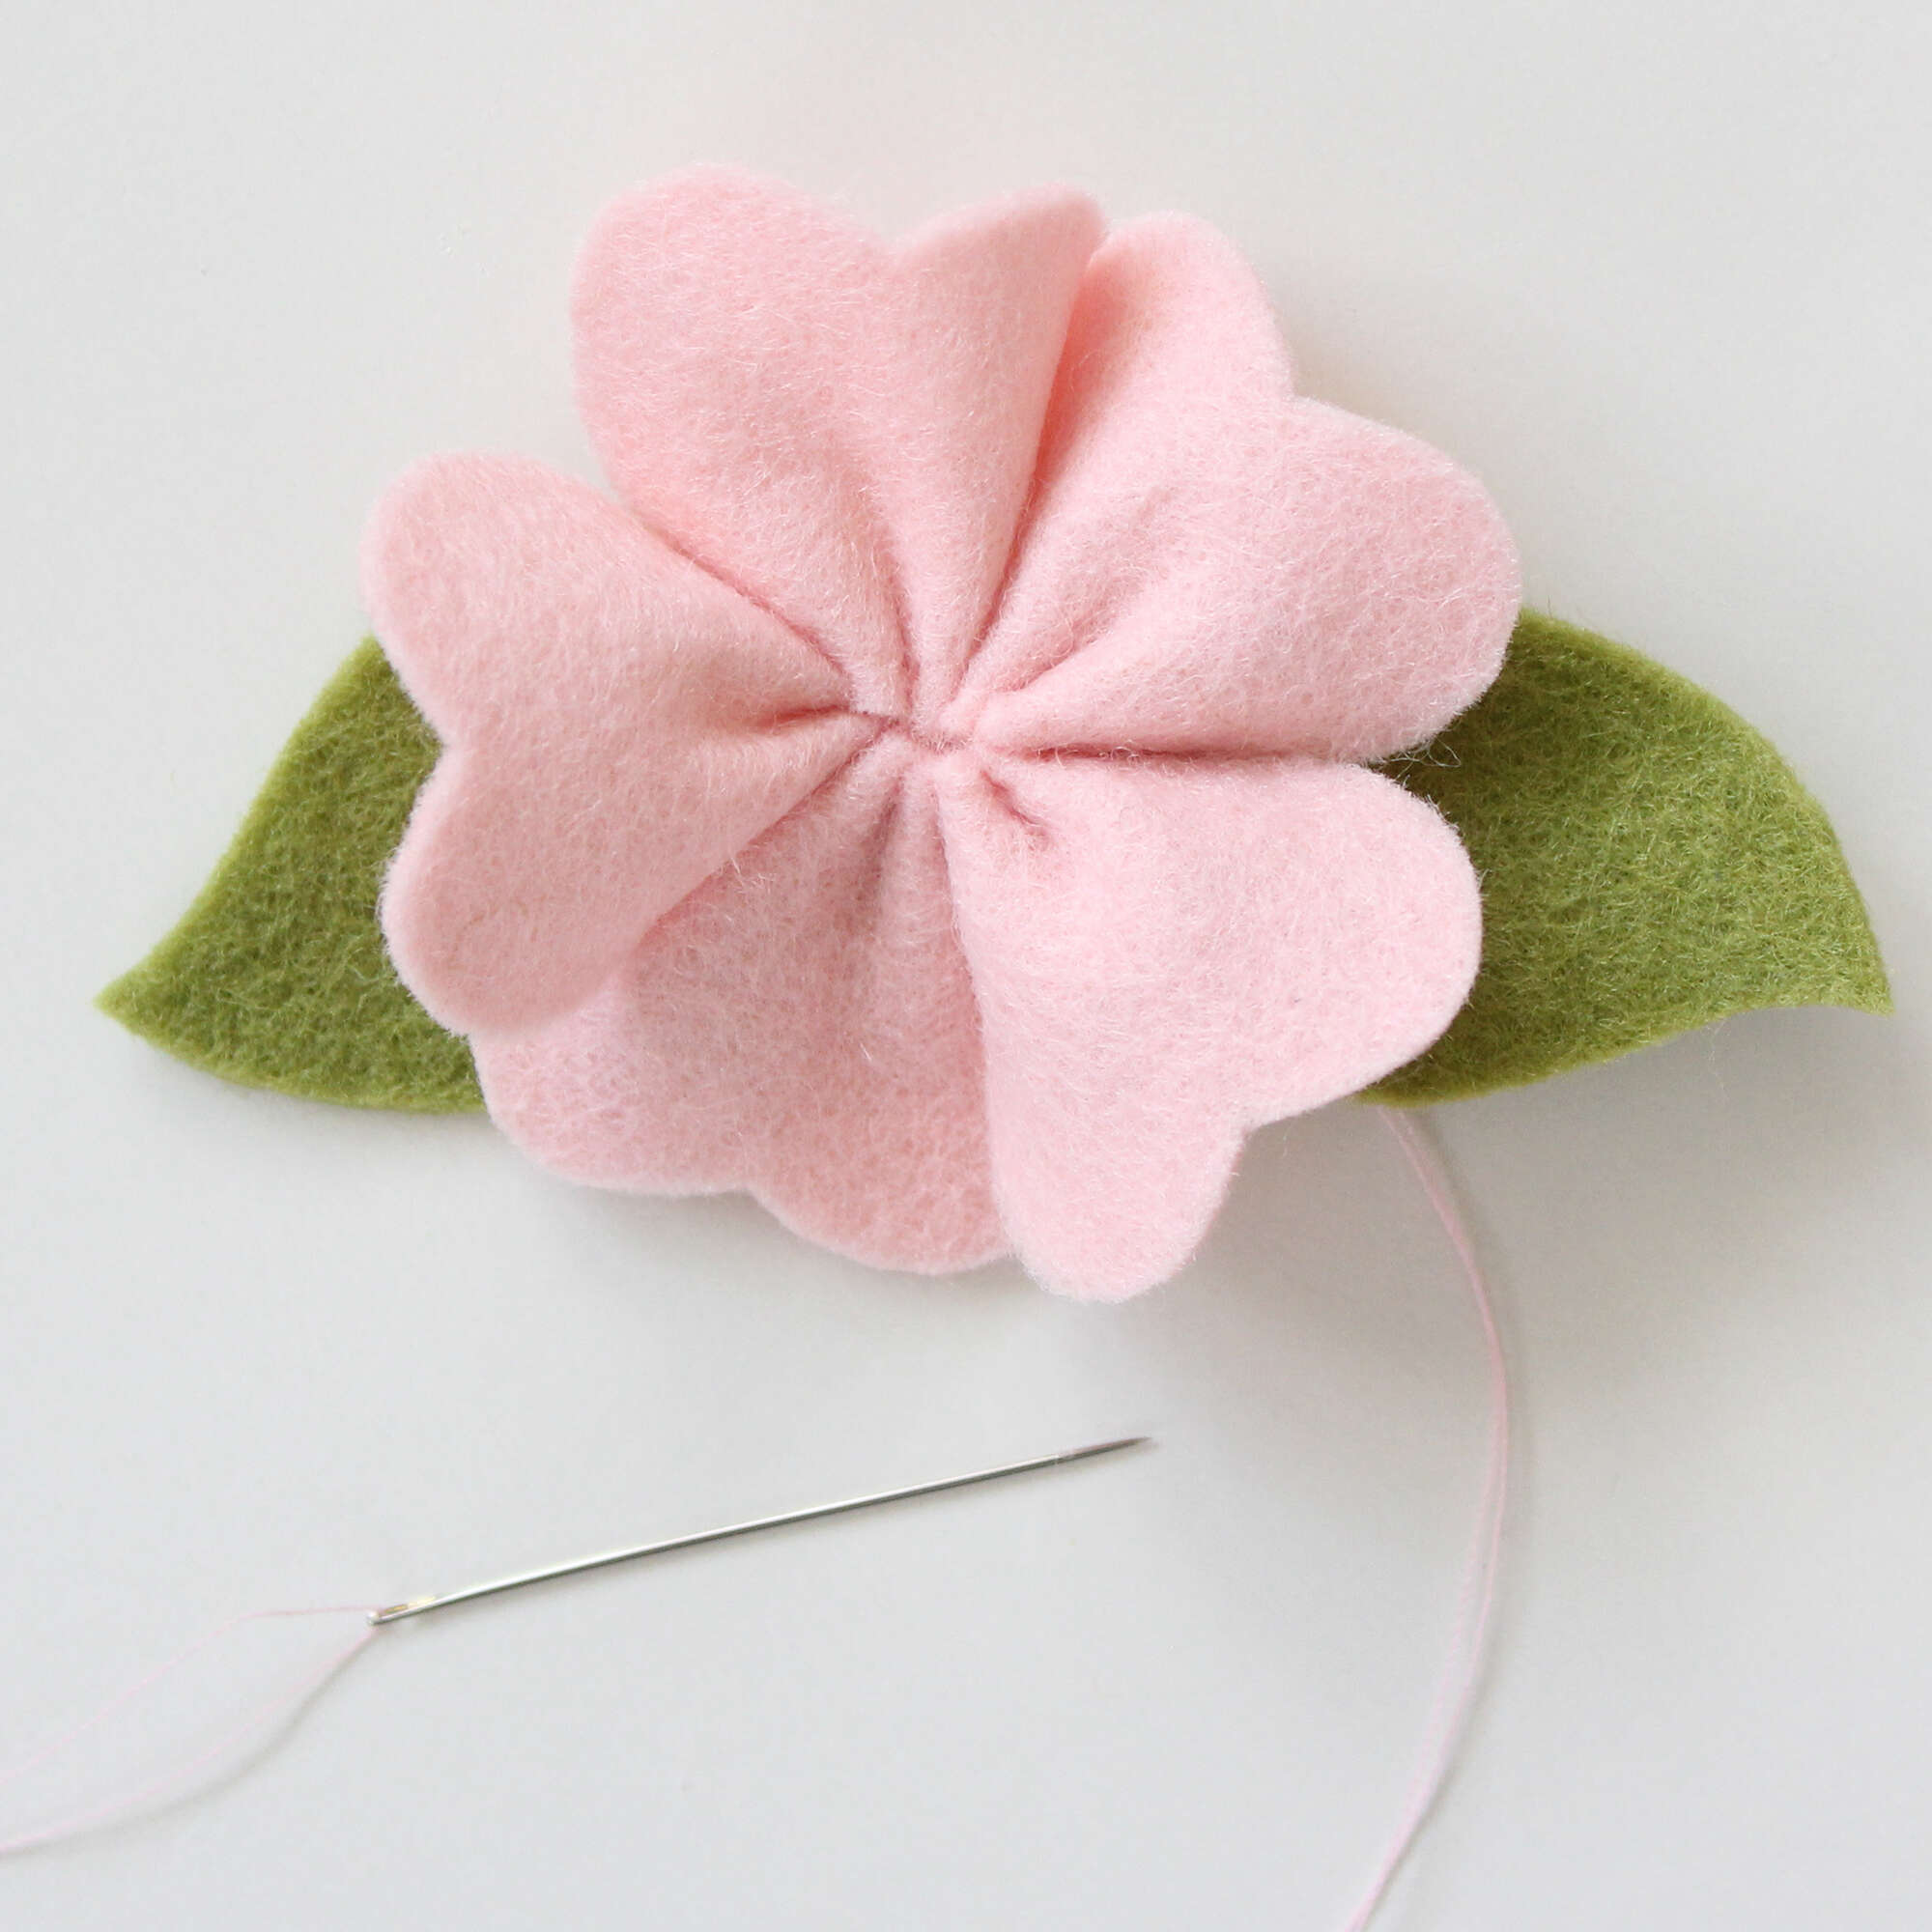
Your felt flower is all ready for use!
I love the way these felt flowers look in place of the felt bees that come with the Serious Sewist’s Set pattern.
Find out more about the pattern HERE.
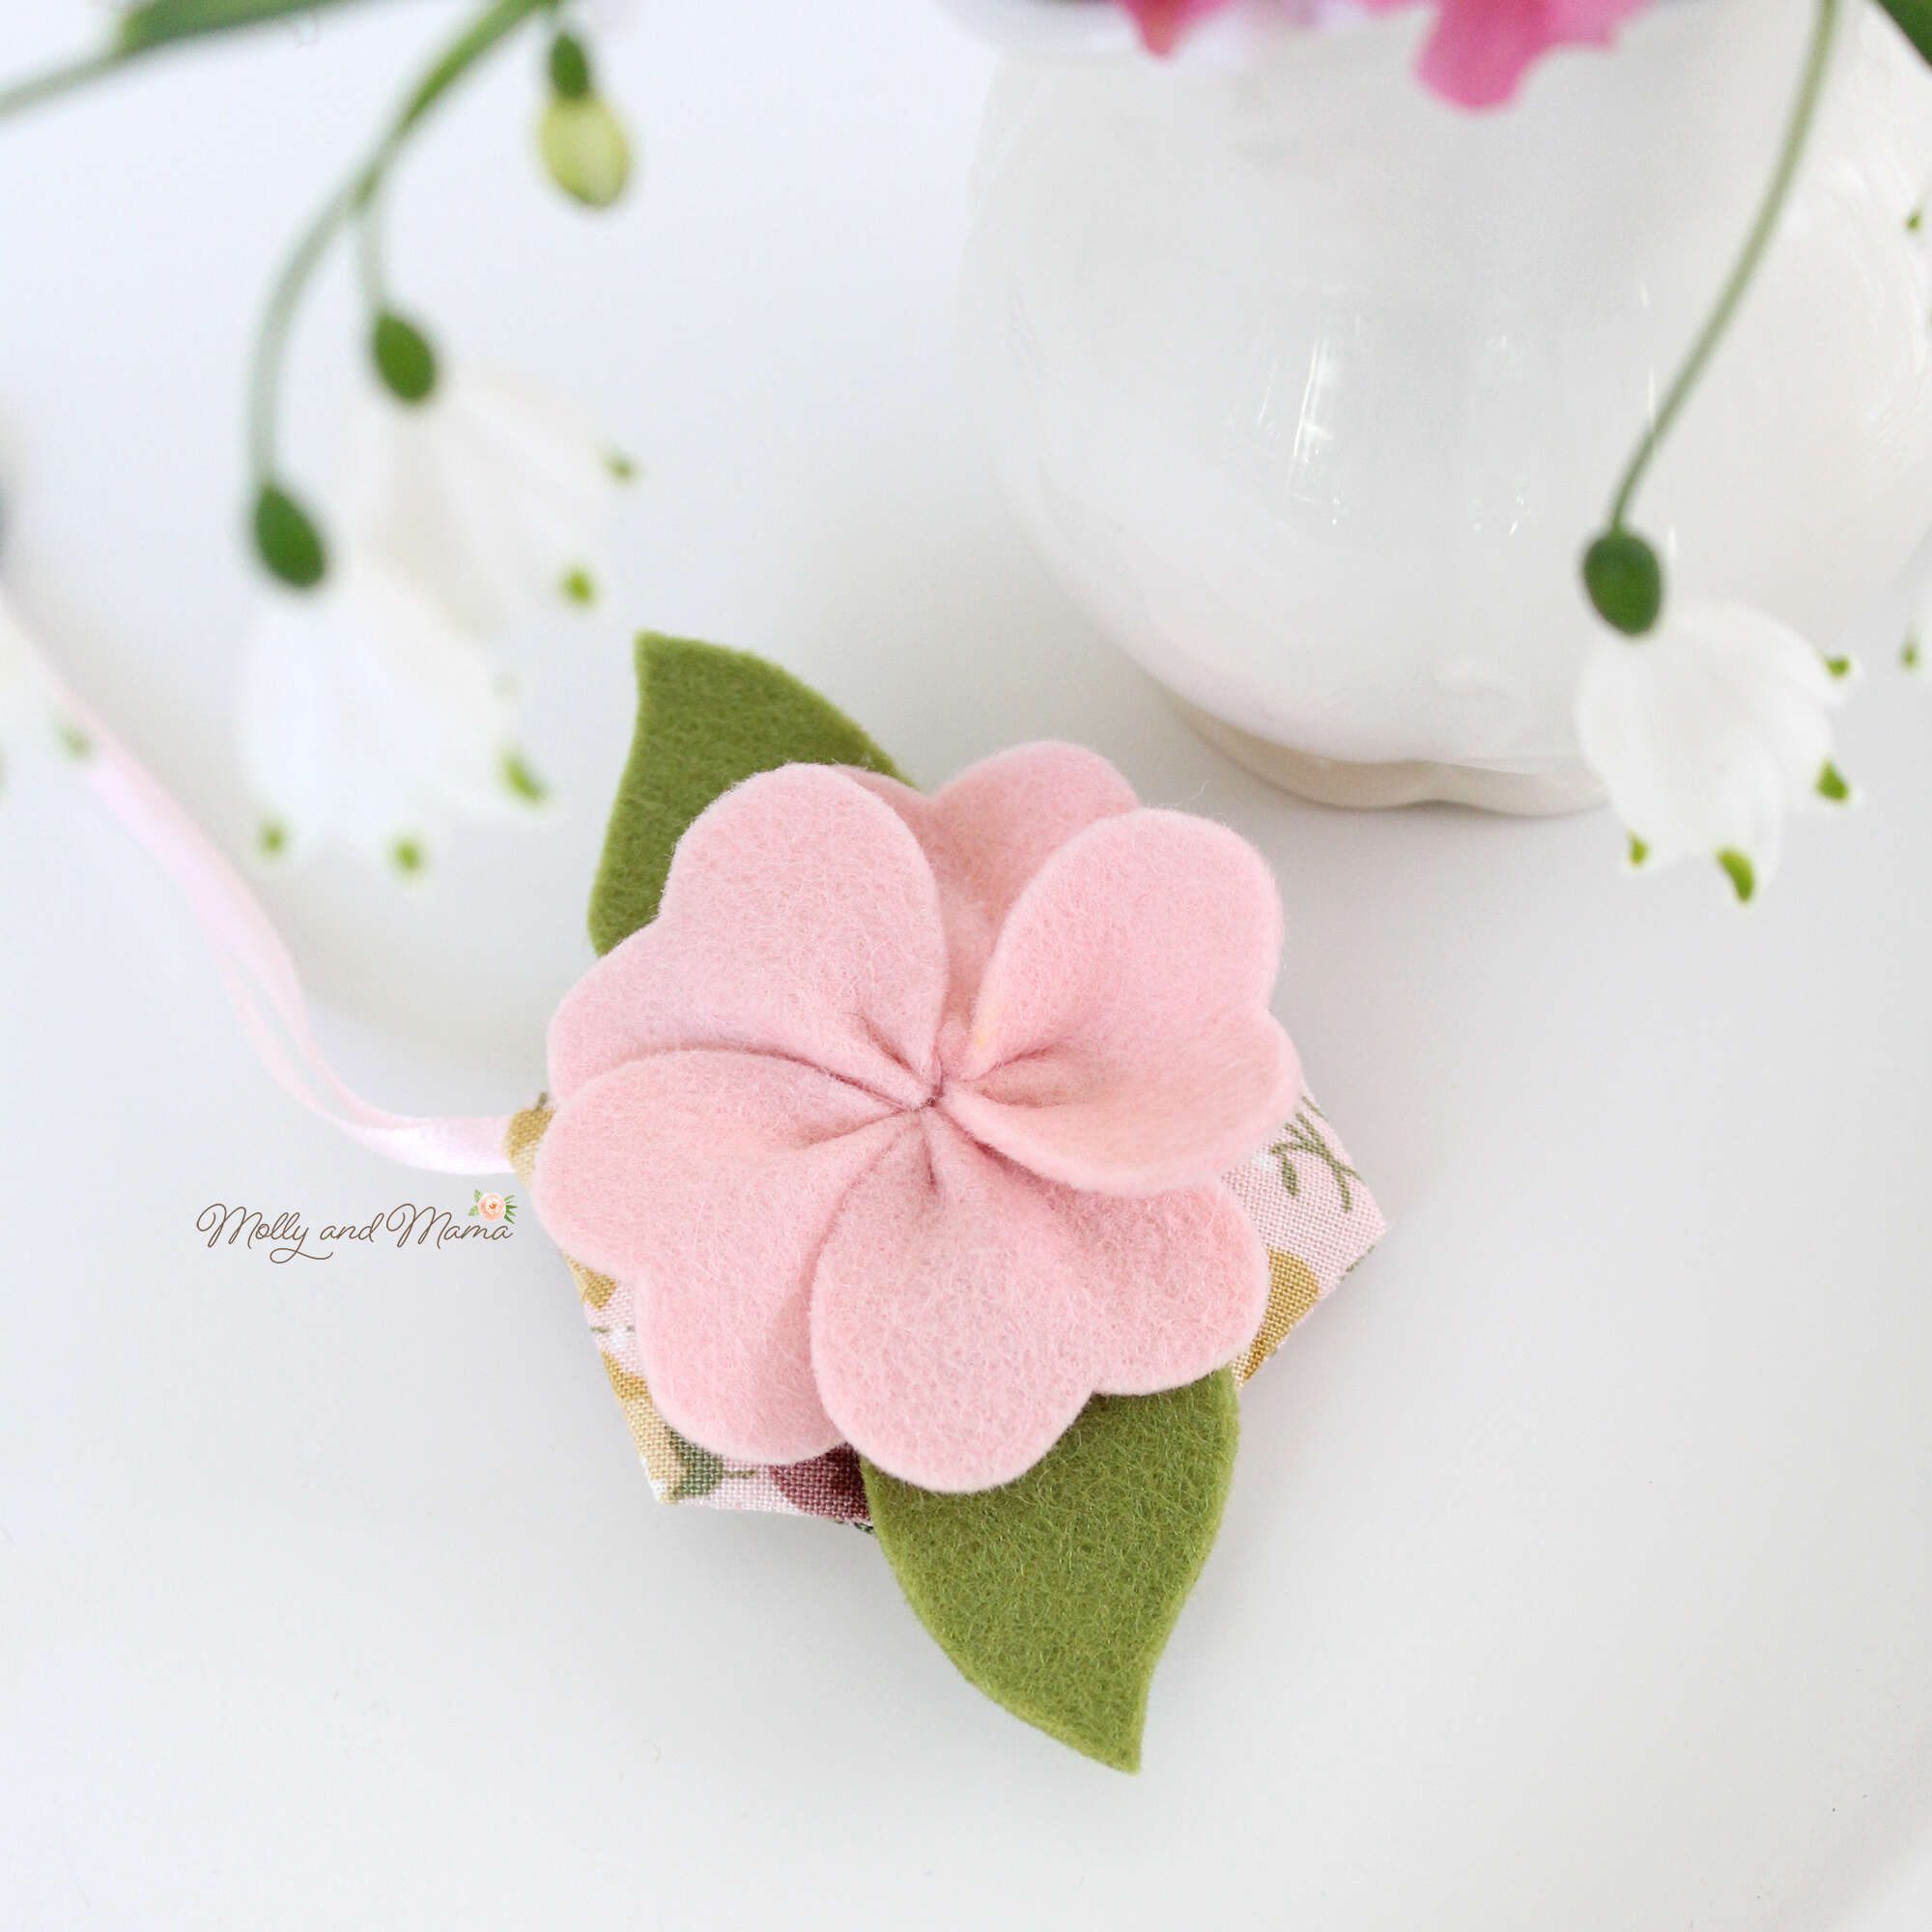
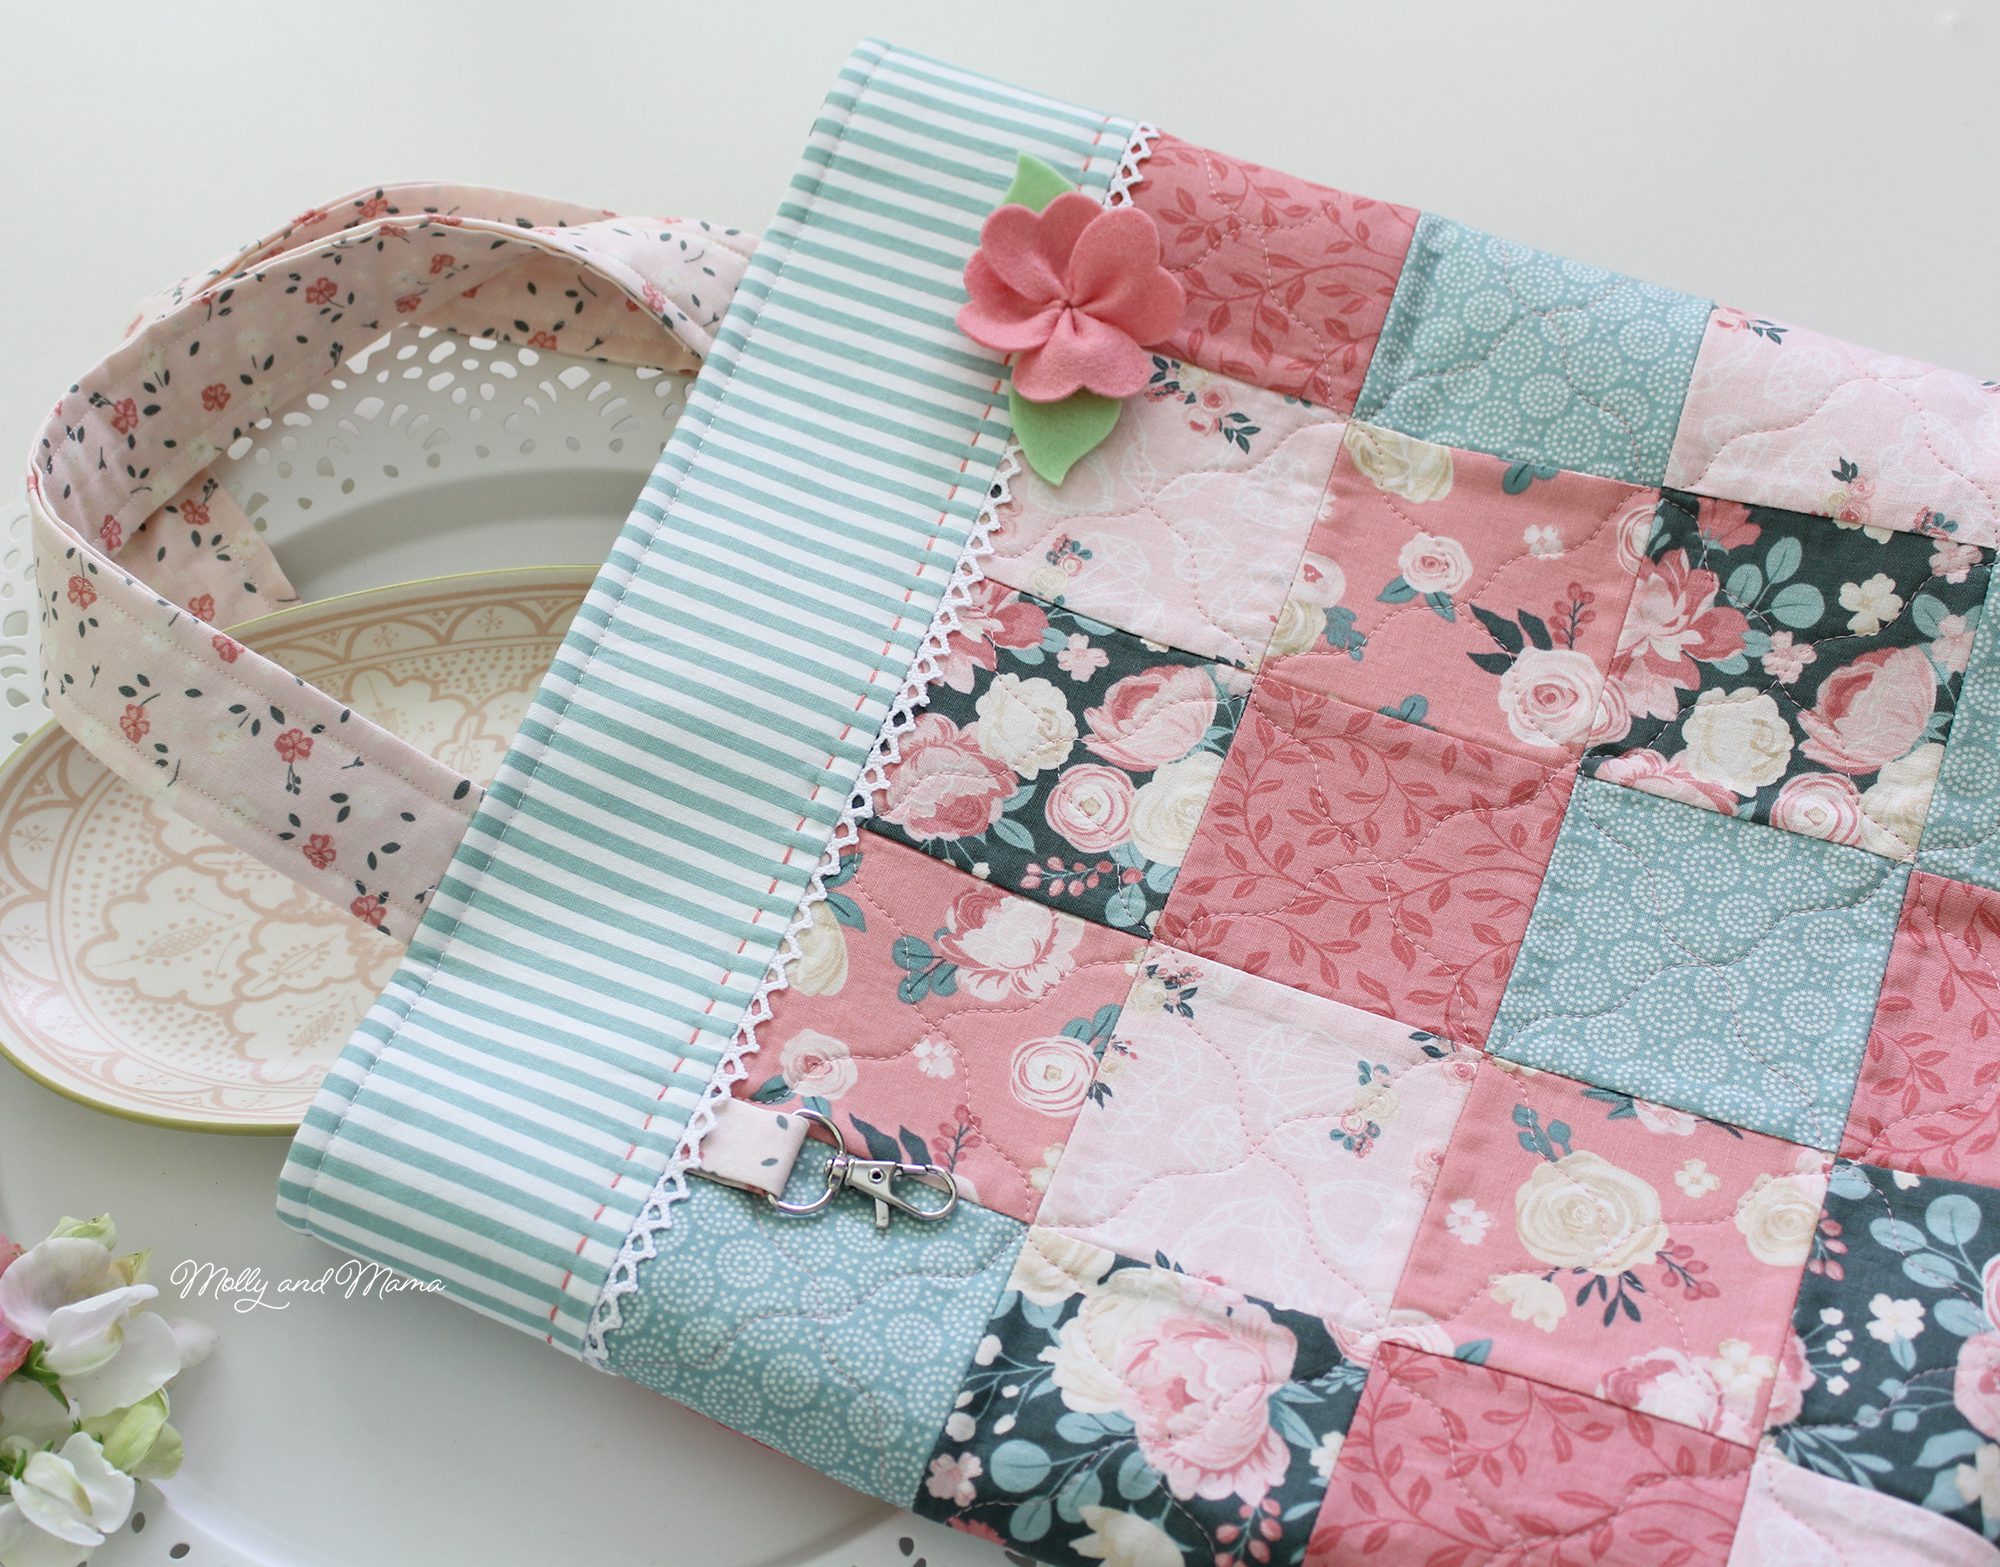
I also used one of these felt flowers to adorn my Clara Tote Bag (instead of the suggested leather tab). I love how it looks! Find the tote bag pattern in my store.
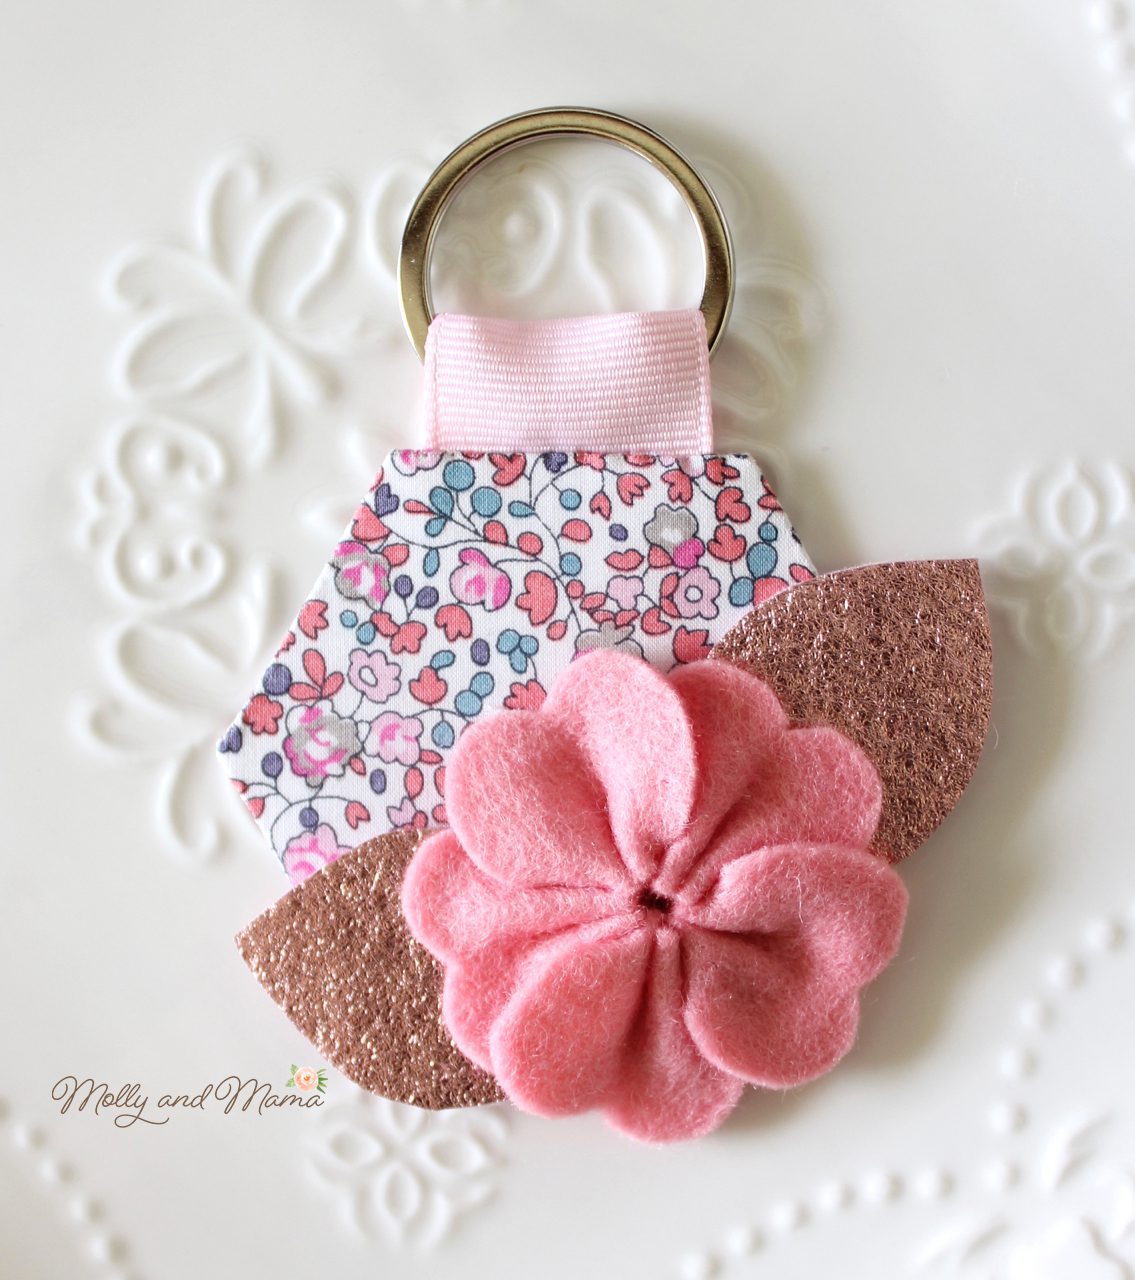
The same method was also used the create a felt flower for this easy hexagon key ring. You can find the free tutorial HERE.
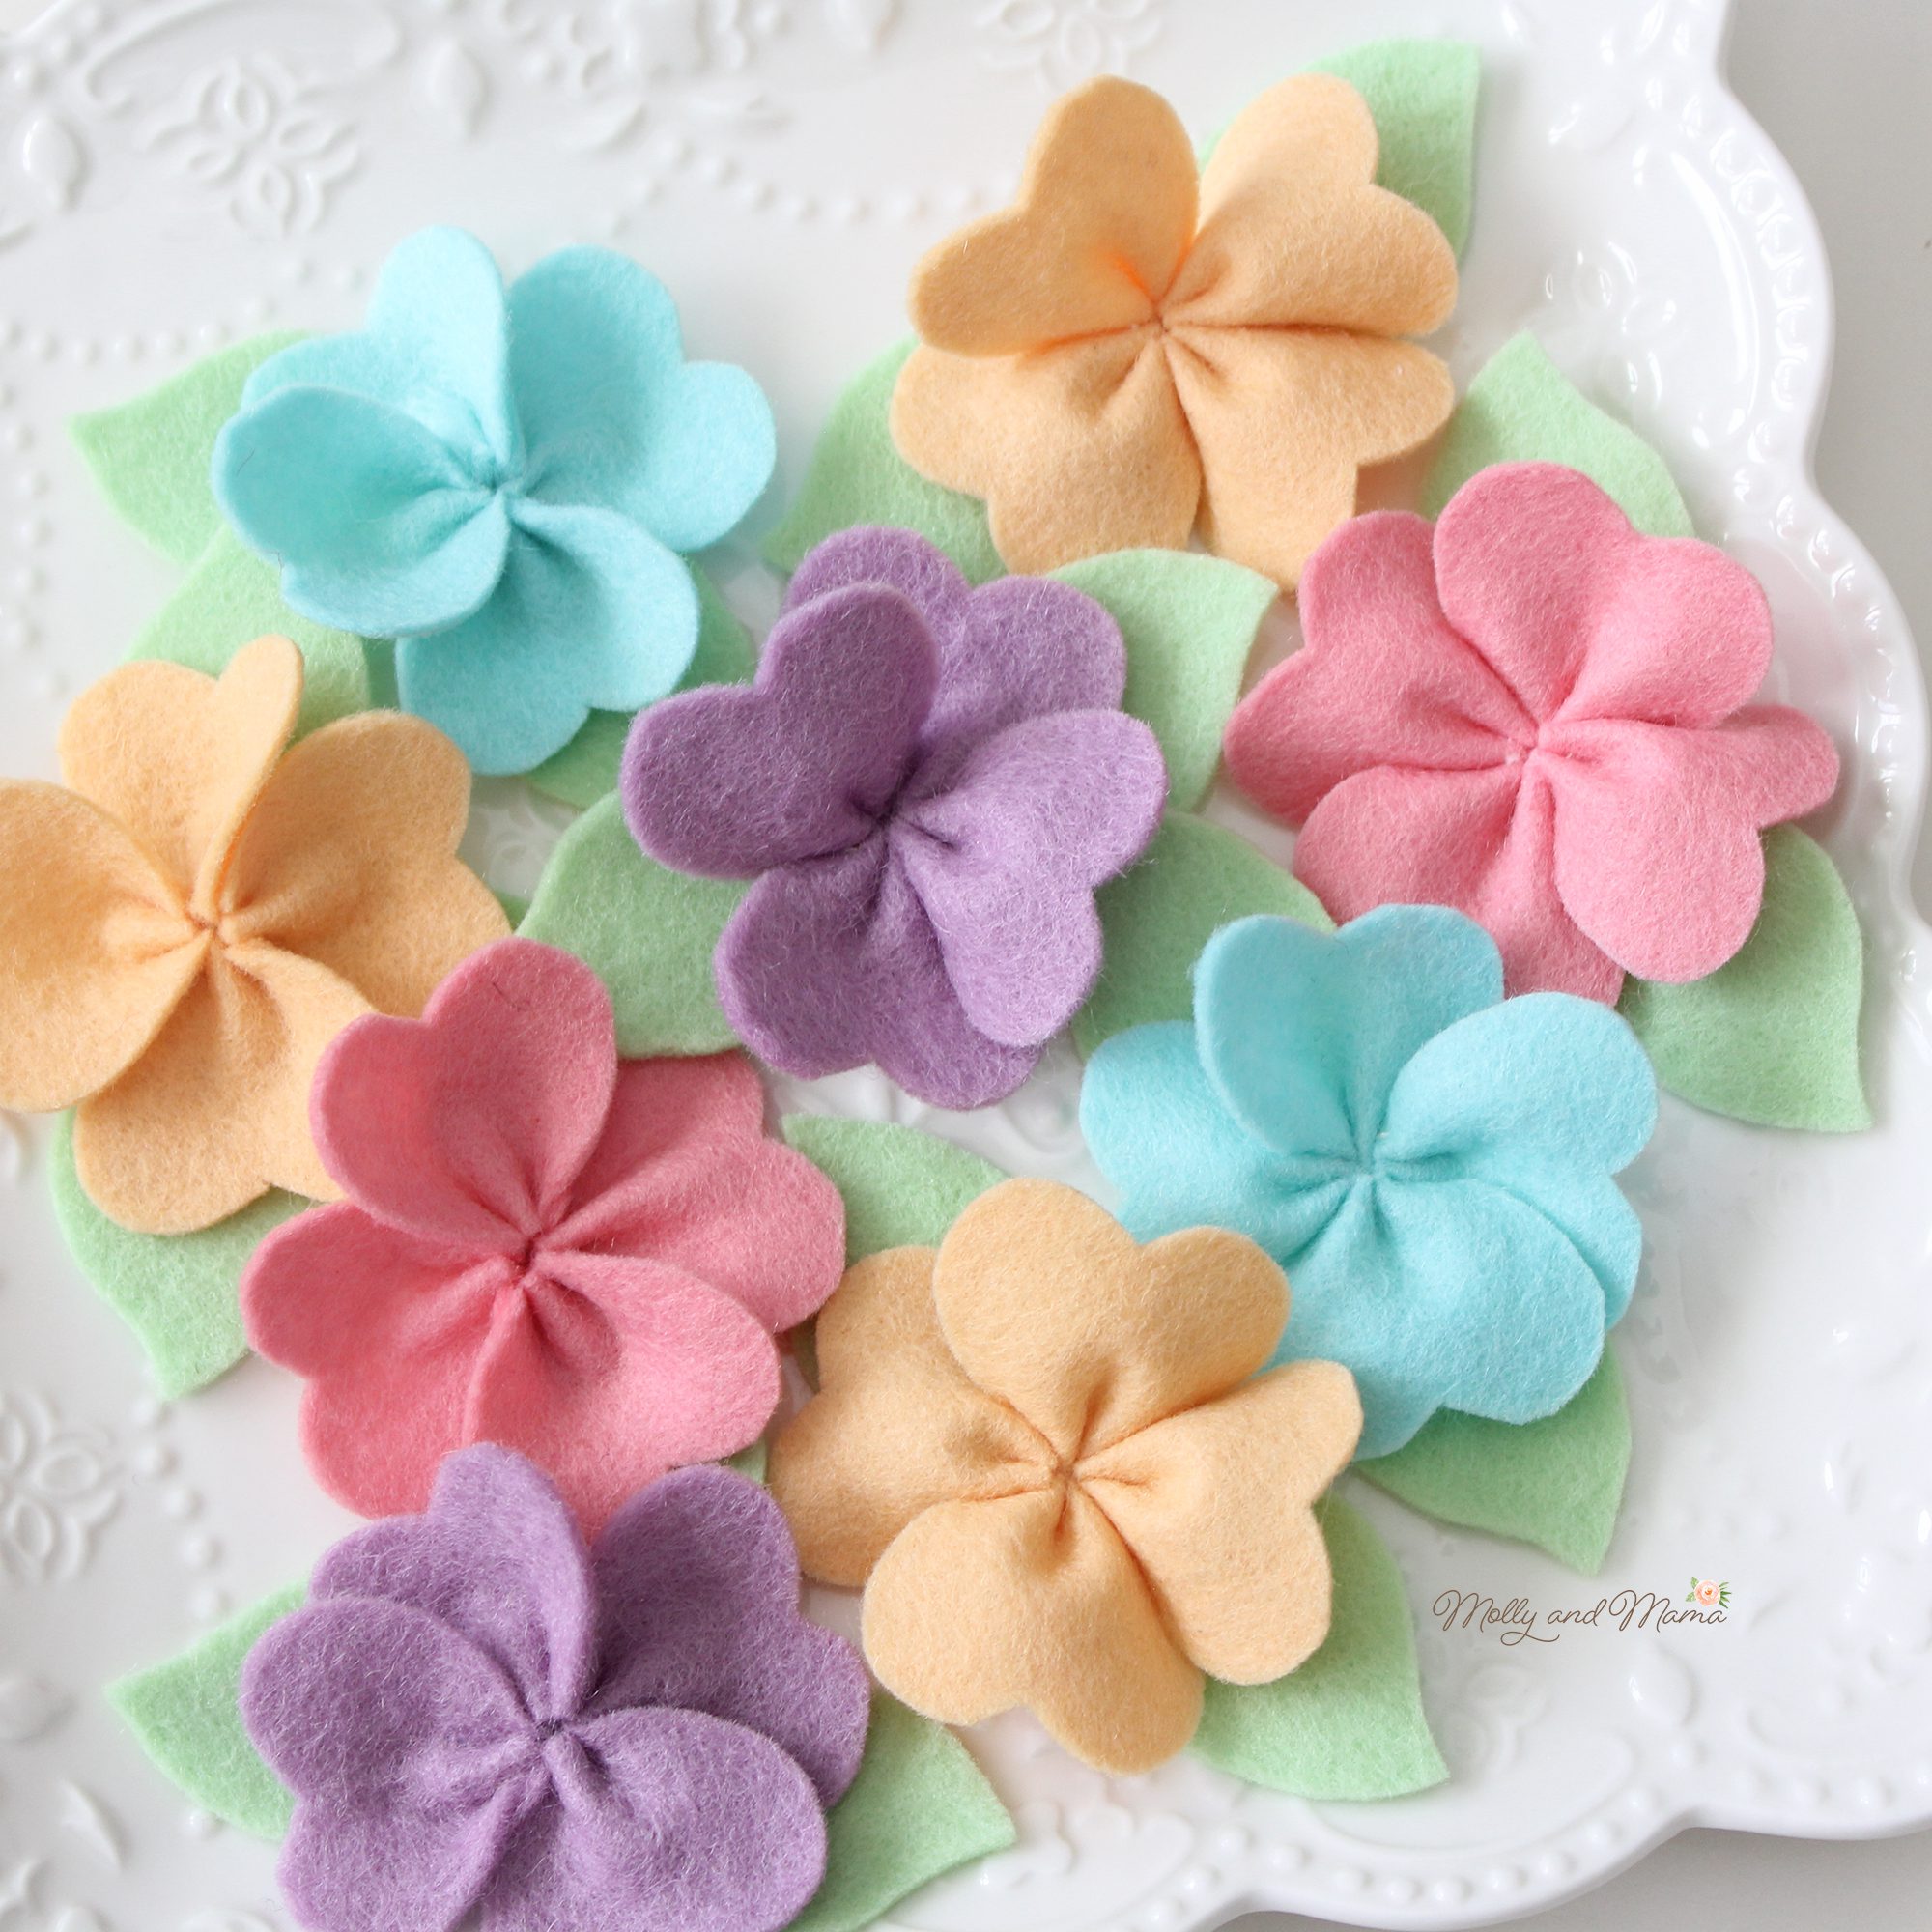
You can create smaller or larger flowers just by changing your printer settings and reducing or enlarging the template before you print it.
I hope you’ve enjoyed this free project. Happy stitching, Lauren x

May I ask where you purchase your wool felt? I love the colors in the photograph and would love to purchase a similar “bundle.”
Thank you!
Janet
Thanks for your question Janet. All of my 100% wool felt comes from My Felt Lady – https://myfeltlady.com/
Happy felting! Lauren x
When I click on the Download Instructions, it takes me back to sign up for the Newsletter?? Can you help me get the instructions? I also have not gotten them by way of an email. Thanks, Nancy
Hi Nancy, please enter your email details so that the instructions link can be sent to you to download the pattern. Many thanks, Lauren.
May I get the pattern? Also, I don’t like to sew. Can this be constructed with a glue gun?
Hi Elaine, please click on the Download Instructions button to get the pattern emailed to you. You could definitely try making the flowers with a glue gun, though I haven’t attempted it so couldn’t say how well it would work. Let us know how it works for you! Thanks, Lauren.
Those little flowers are just beautiful…I just recently took a class in Slow Stitching and the Instructor was so nice and had so much to show us that my mind was blown! Now I find myself looking at stuff like this in a whole new way and I want to do it all!
Isn’t it exciting to feel inspired and energised by our hobbies? I want to do it all too. Thanks for sharing! Lauren.
So beautiful flowers 💐 😍 l Loveland