Simple Stitch Sampler
Last week I was lucky enough to receive a Janome Memory Craft 9450QCP from Janome Australia to play with. They’re letting me try out the machine for a while so I can showcase some of its features. Having only ever owned a basic mechanical Janome, unboxing this new beauty was so exciting! I couldn’t wait to get sewing right away.
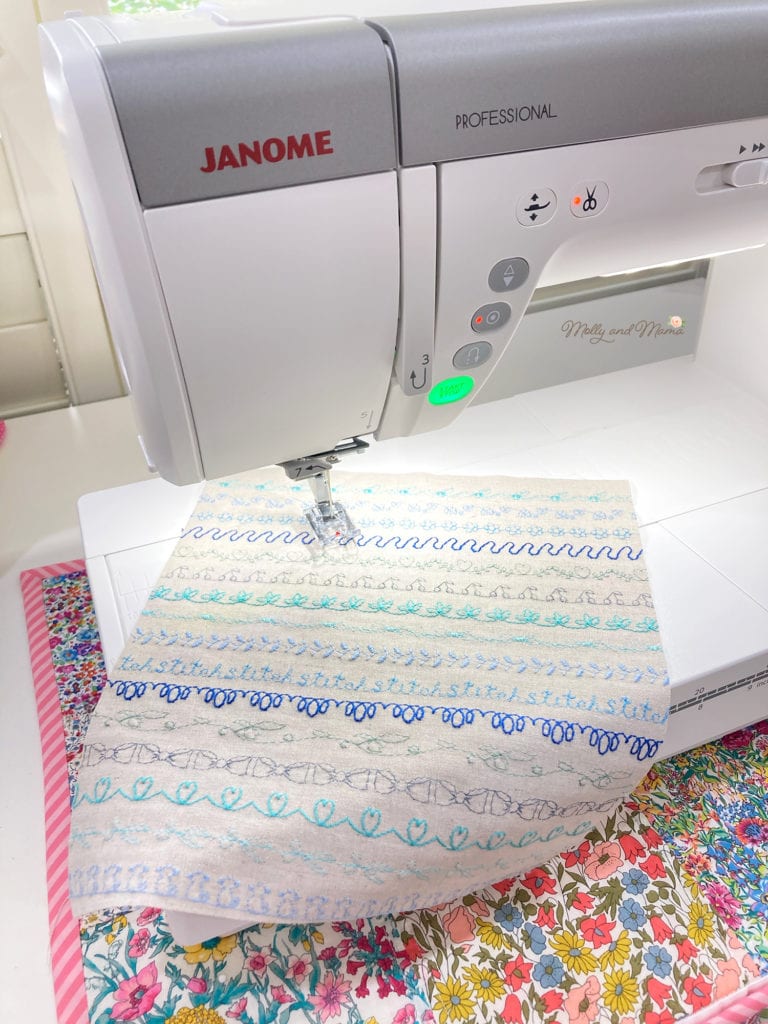
One of the features of the machine is a huge variety of decorative stitch types – 350 built in stitches to be precise. And seven alphabets! So after trying out all the basic functions first, I started working on sewing just a handful of those stitches using white Aurifil thread on denim. Then I wondered how the stitches would look using different coloured threads of different weight.
Then the light bulb moment happened!
As an Aurifil artisan, we’re invited to participate in monthly challenges that showcase the use of beautiful Aurifil threads. This month the brief was to create a project using three different thread weights. So many of my sewing patterns use embroidery floss (Aurifil cotton floss), fine thread for English paper piecing (80 weight cotton) and everyday thread for piecing (50 weight). So I’m used to combining thread weights in the construction of my quilts, bags and other small sewing projects.
But this was a completely different challenge for me because the different thread weights were all used to sew different stitches. And I managed to use five different thread weights in completing this project which really gave me a better idea of how they all behave and look when sewn!

I chose a selection of blue shades to sew on a scrap of natural coloured linen. The threads ranged from 12 weight (the royal blue and aqua on the large red spools), 28 weight (the pale blue on the grey spool) and 50 weight (the smaller orange spools). Trialling the different threads gave me a real sense of how the machine sewed and what it could do. I loved the look of my sampler so much that I made it into a small mug rug. The top stitching was completed using 40 weight thread (on the green spool) and I ladder stitched the turning gap using the 80 weight thread (on the timber spool).
To make your own, sew rows of decorative stitches onto a plain fabric scrap using a variety of thread colours and weights. Trim down the fabric to a uniform size (mine measured 9 inches x 10 inches). Cut a second piece of fabric the same size and line it with fusible fleece or interfacing. Put both pieces of fabric together with right sides facing, then sew around the outside with a 1/4″ seam allowance leaving a 3″ gap in one side for turning the project right way out.
To achieve the curved corners, I simply traced the curved edge of the base of a mug onto each corner and used this as a stitch guide as I sewed the fabric together. Then I clipped the corners (notches would have been better), turned the mug rug right way out and pressed it. I used a single strand of fine 80 weight thread to hand stitch that gap closed. And my last task was to top stitch the sampler around the edges.
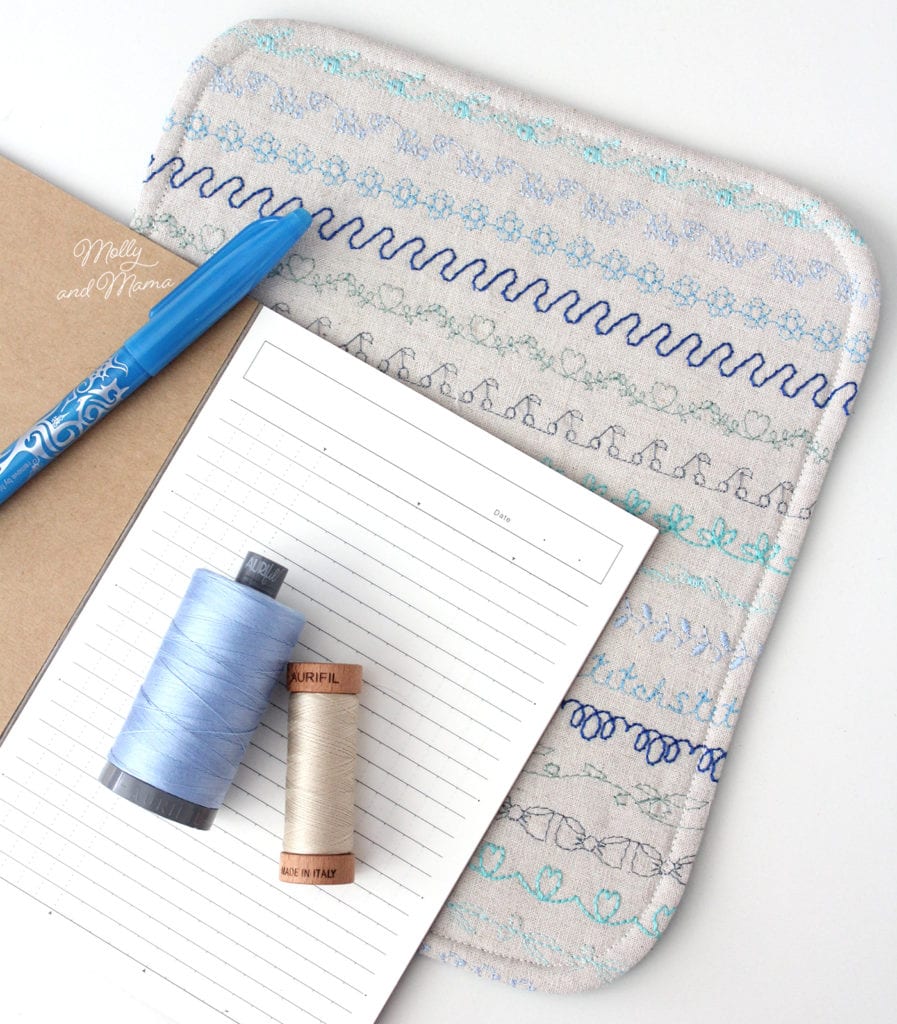
This was such a quick and easy project. It was a great way to play, but it was also lovely to use my sampler to make something practical. And now I can see how all those stitches look next time I want to create something with a decorative finish. Though with 350 built-in stitches I think I will need to make a lot more samplers!
Happy stitching, Lauren x