Make a Pretty Felt Flower Crown
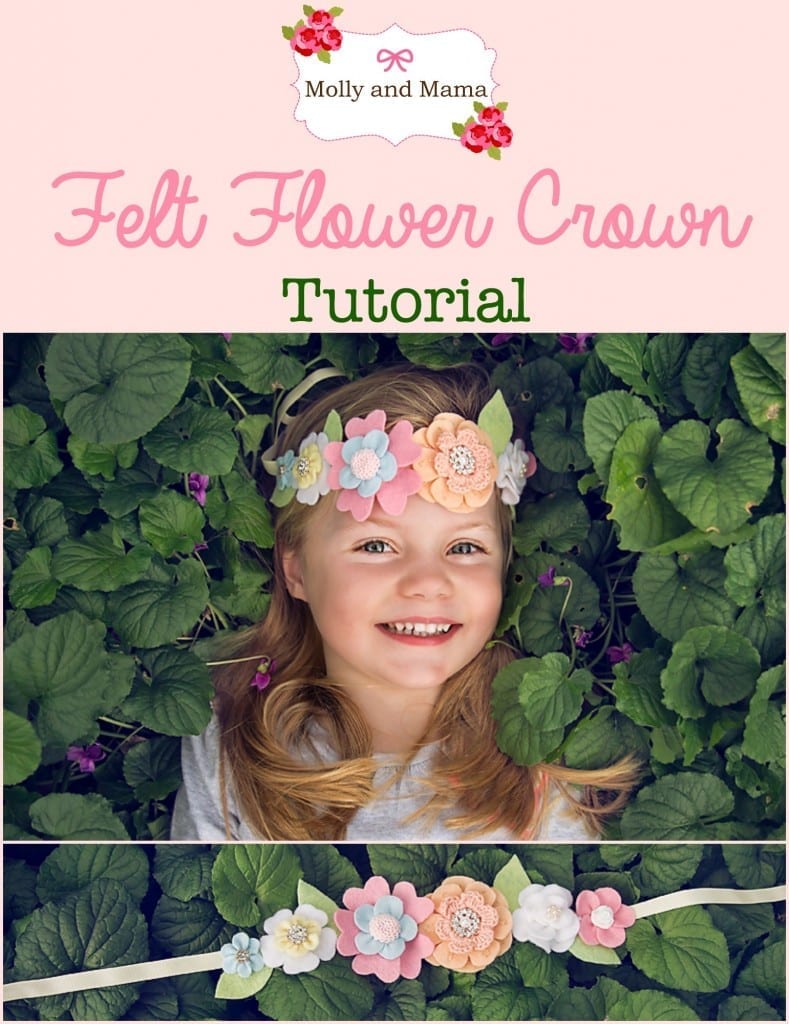
Spring is well and truly here and I’ve been so inspired by our lovely blossoms and gardens this season. I decided to have a play around with my gorgeous stash of 100% wool felt and here’s what I came up with! Follow this tutorial to make this lovely felt flower crown or hair wreath. Perfect for lazy summer days, festivals and fun!
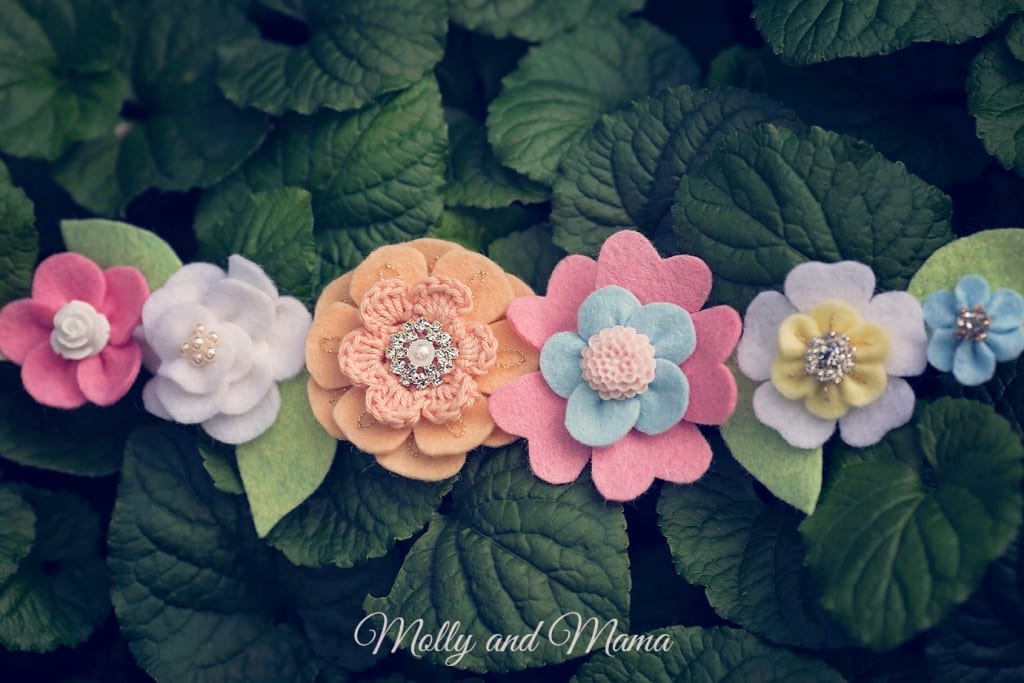
This gorgeous collection of felt flowers was so easy to make. And then I just attached them to a pretty ribbon to make them into a precious flower crown. Here’s how to make your own.
YOU WILL NEED
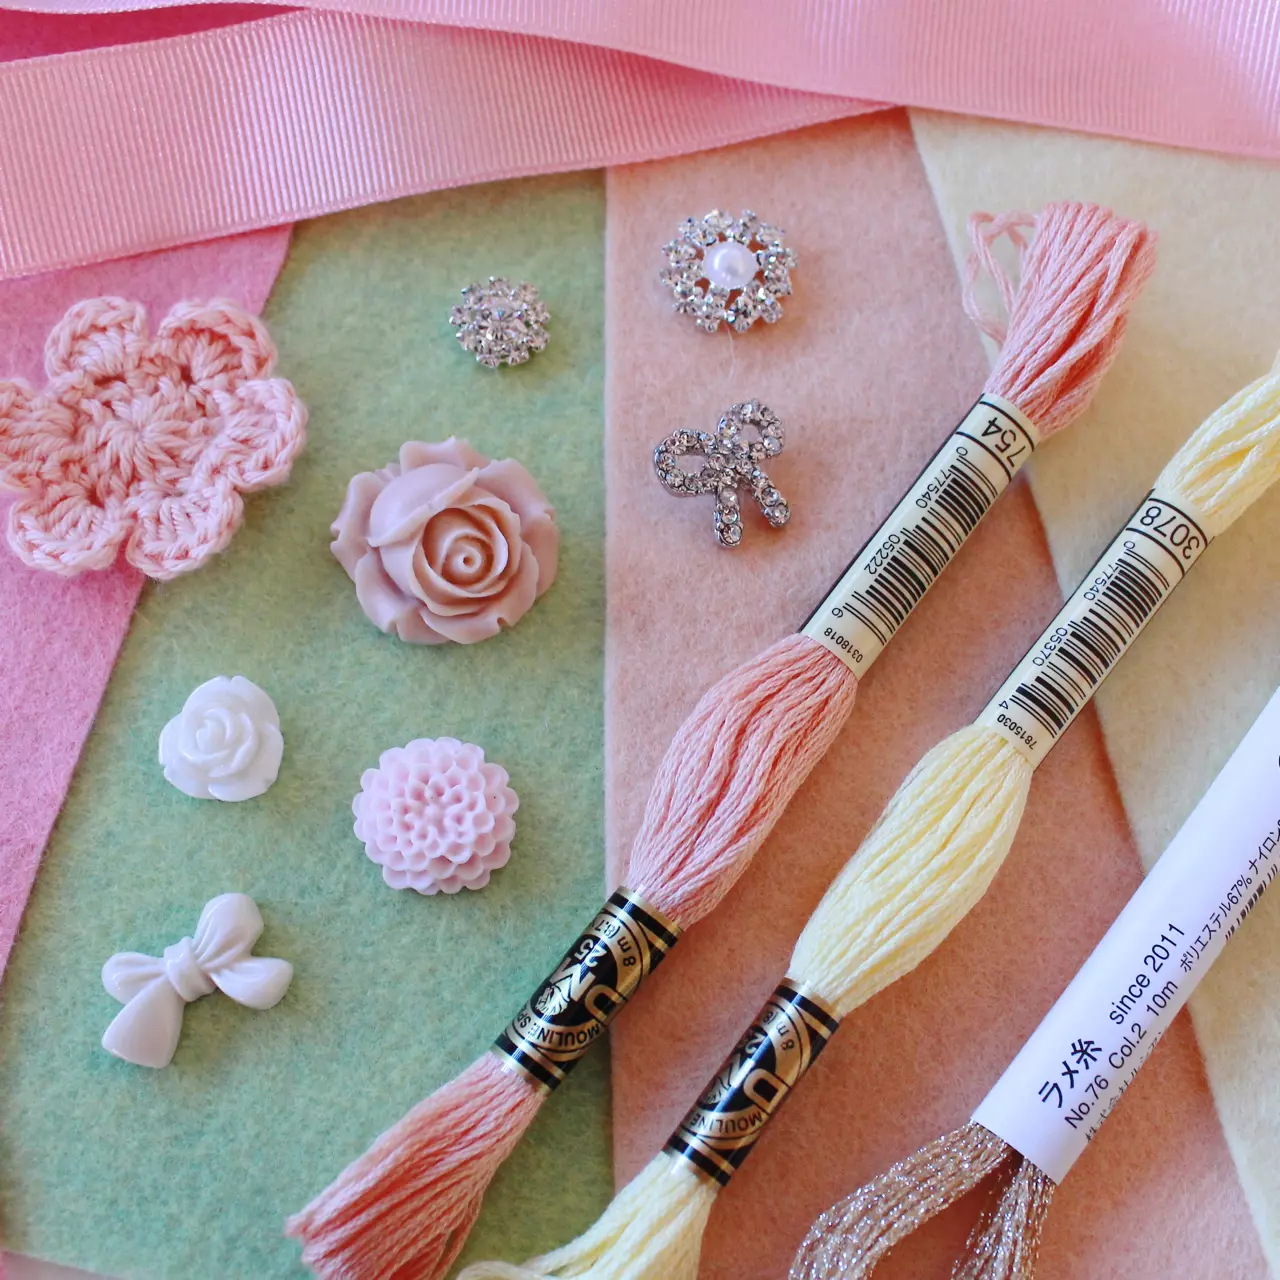
- 100% wool felt in varying shades. The flowers use a combination of white, lemon, apricot, pastel pink, baby blue and pale green felt pieces. The largest piece you’ll need is a white 10cm (4”) square for the magnolia.
- co-ordinating embroidery floss or thread (six stranded embroidery cotton).
- sparkly metallic quilting thread.
- fine, small scissors for cutting the felt shapes.
- scissors.
- embroidery needle and fine eyed needle for stitching beads.
- needle and thread.
- embellishments like crochet flowers, beads, sparkly rhinestone buttons, resin cabochons or other pretty pieces.
- hot glue gun.
- heat sealer or lighter.
- length of co-ordinating ribbon. I used cream grosgrain ribbon.
- template print out.
DIRECTIONS
Make the Flowers
It’s time to get creative. You’ll need a combination of flowers to create your crown. Perhaps you’d like to make just one statement flower for the centre, or a whole lot of tiny blooms to decorate a longer length of ribbon. You’re only limited by your imagination!
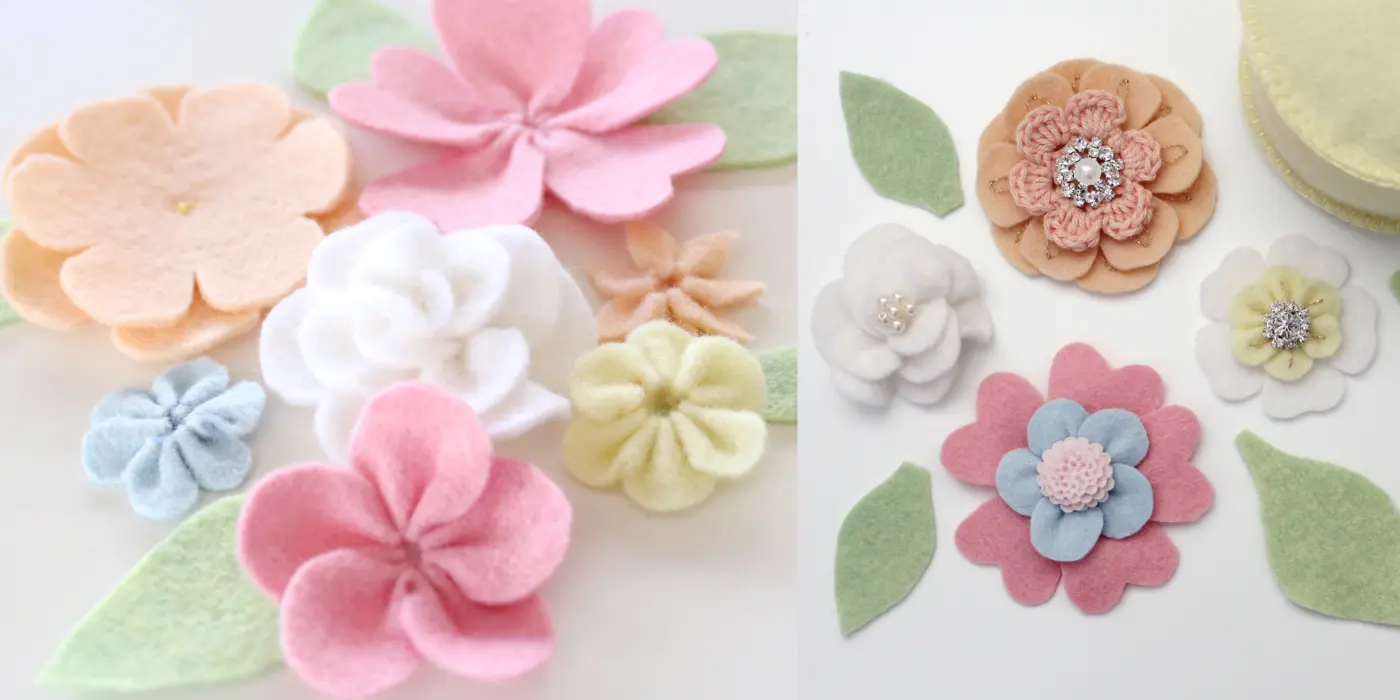
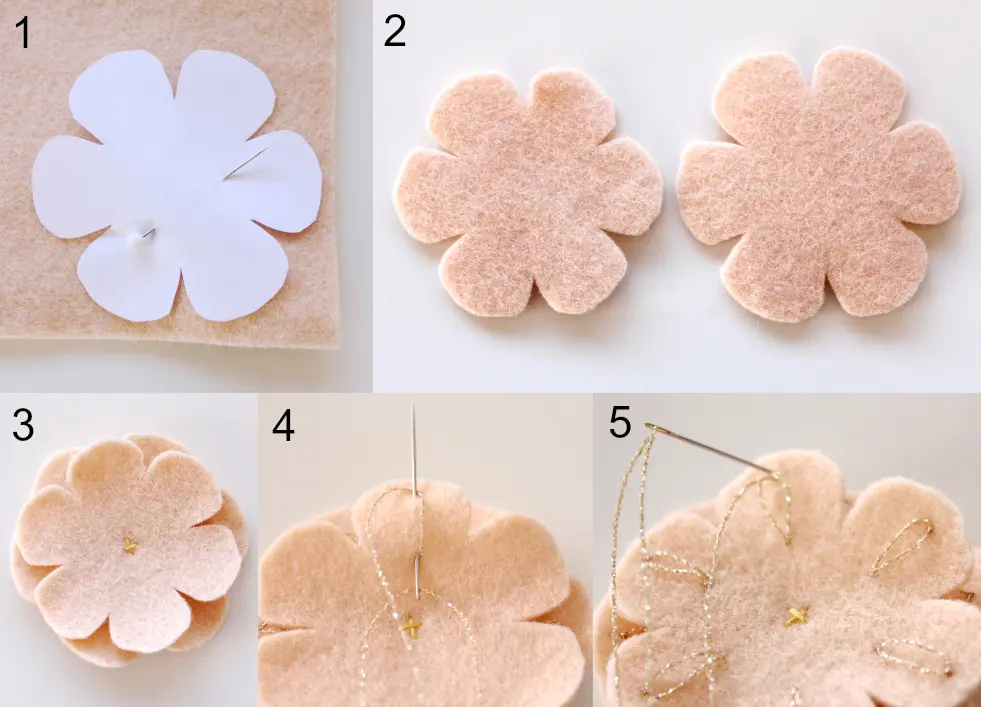
I selected a number of colours and materials to create my crown of pretty blooms. Here’s a quick description on how to piece together a few of the flowers. You can create your own too. Use the provided TEMPLATE or cut your felt shapes freehand. Use small sharp scissors to get a clean and neat cut.
Apricot Blossom
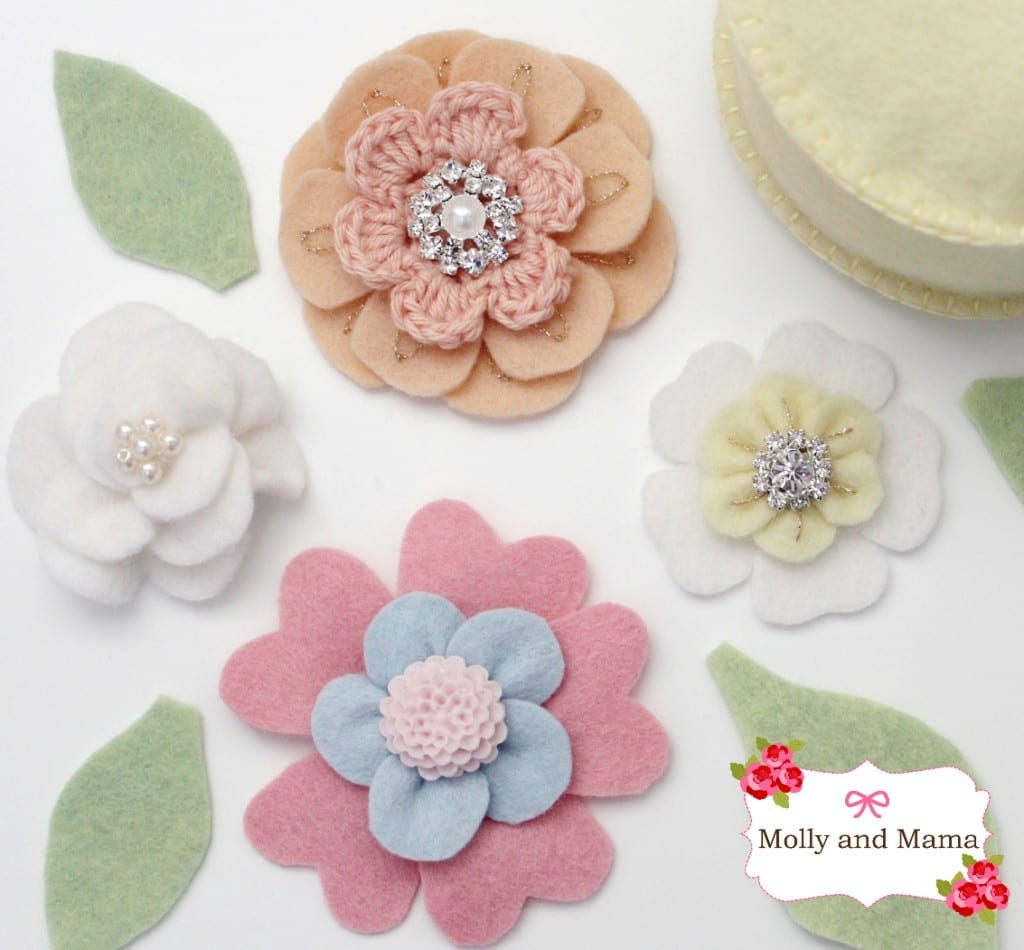
Cut the two blossom flowers from the template. Place the smaller flower over the larger one and secure together with a couple of stitches. Add a lazy daisy stitch to the centre of each petal using the metallic thread. Stitch a crochet flower to the centre and use hot glue to secure a sparkly rhinestone button on top.
Lemon and White Daisy
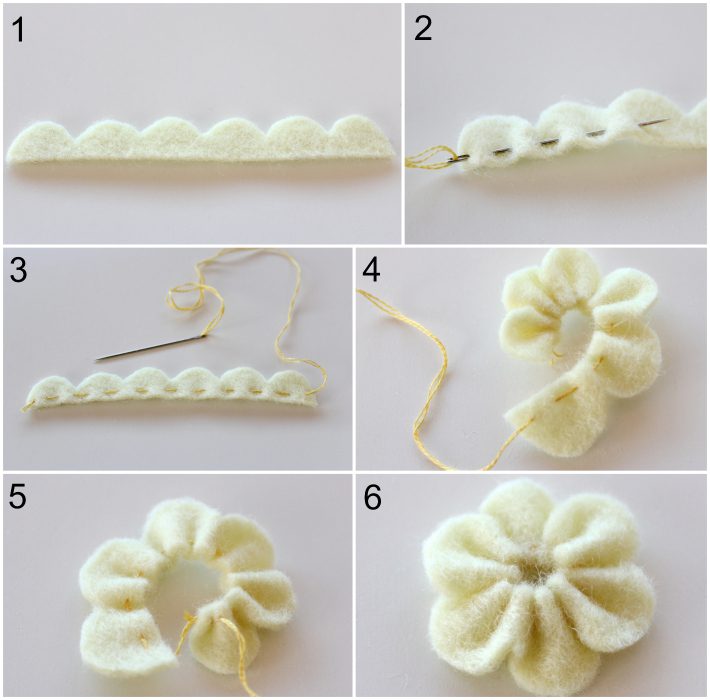
Cut a white daisy base from the template provided. Using the lemon felt, cut six small scallops in a strip 6cm long and 1cm high. Use a running stitch across the straight base to gather the felt. Pull gently to gather the flower, and secure. Use a straight stitch of metallic thread to add a centre vein to each petal. Stitch the lemon daisy to the centre of the white daisy base. Hot glue is great for adding a bit of sparkle with a blingy button!
White Magnolia
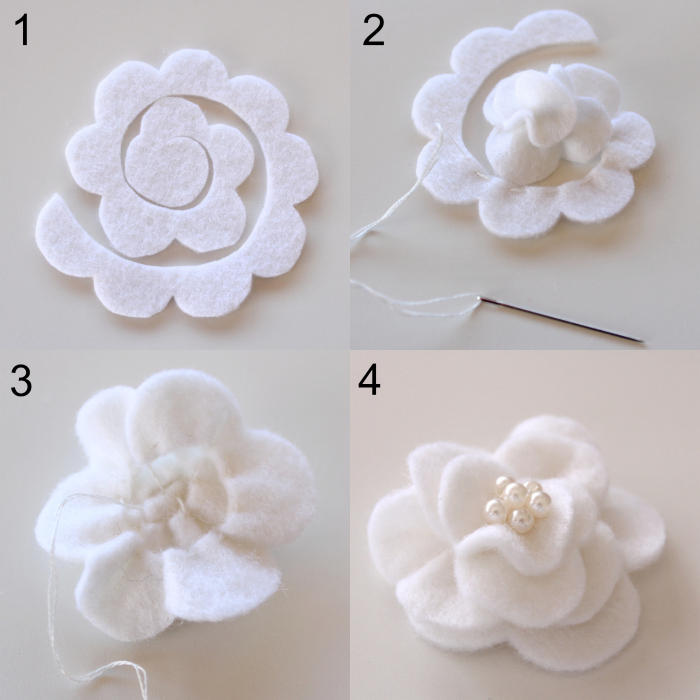
Using the template provided, cut one white scalloped felt piece. Starting at the centre of the spiral, sew a running stitch close to the straight edge of the felt. Gently gather the stitching as you go. When you’re happy with the final shape, secure the flower’s layers with a number of well-placed stitches at the back. Add some pretty pearl beads if you wish.
Pink Flower
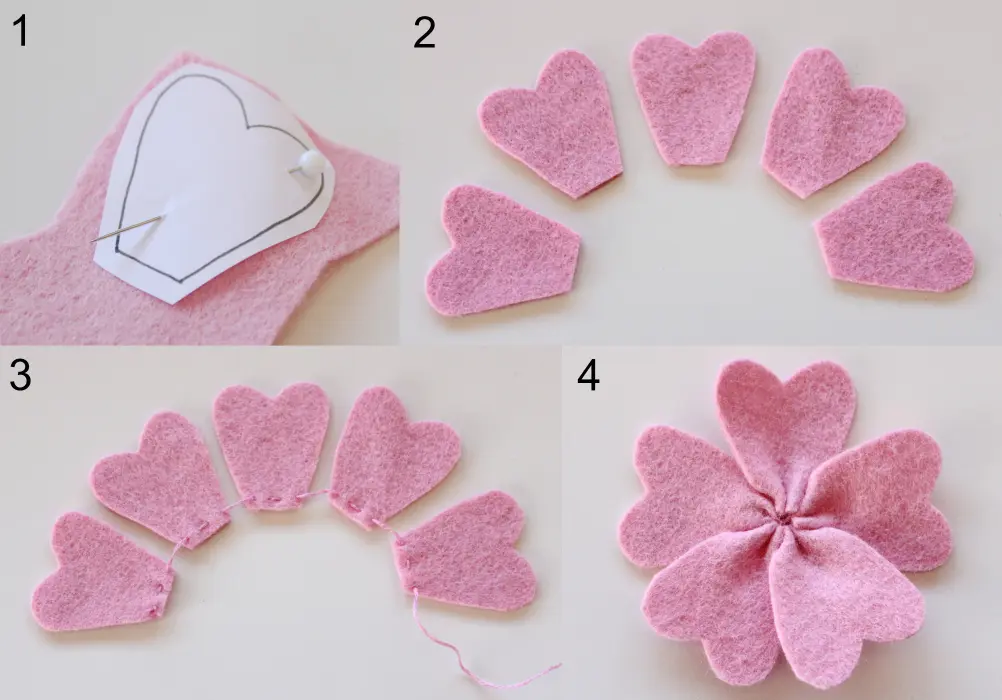
The pink flower was made by cutting and stitching together five petal pieces. Cut them out using the template. Line up the pieces in a row. Starting at one end, sew running stitches across the base of each petal, being sure the thread enters and exits each petal on the top side of the felt. Gently pull the thread to gather the felt pieces together. Secure the flower with some extra stitches.
Add another layer to the pink flower with a blue blossom. Use the same method as for the pink flower above. Lay the blue flower over the centre of the pink flower and stitch together. Add a resin cabochon with hot glue if desired.
More Flowers
Create more flowers with your own variations of colour and shape using the methods described above. Add metallic stitching, beads and buttons!
Arrange your Crown and Put it all Together
Now it’s time to decide how to arrange your blooms on the ribbon. I made a number of different flowers and also cut a variety of freehand leaves. I’ve included a leaf pattern on the template if you wish to use it.
Lay the blooms out in a line until you are happy with their order, and arrangement. Take your desired length of ribbon and heat seal the ends so they don’t fray. Use a heat sealer, or a run the flame of a lighter quickly along the raw ribbon edge, to melt the fibres together. Your ribbon should be long enough to fit around the wearer, and have extra length for a bow.
Find the centre of the ribbon, and attach your centre flower to the ribbon using small stitches that are invisible at the front. Add leaves and flowers on either side of the centre one, and then continue to arrange and sew as you go. Alternatively, you could also hot glue the flowers and leaves in place.
Once completed, you’ll have an adorable felt flower crown that is perfect for Spring!
If you enjoy working with wool felt, you may like the tips I’ve posted HERE. For more free hair accessory ideas, you can visit my other TUTORIALS too.
Happy felting, Lauren x
This tutorial was brought to you by Lauren Wright and appeared first on Molly and Mama http://www.MollyandMama.com.au
Happy stitching, Lauren

This is absolutely gorgeous! I love the colors you chose and the different flower techniques! I want to make both of my daughters these crowns, but I also want to make a wreath!
Thanks Rebecca, I really appreciate the lovely feedback. I’d love to see your creations!
Beautiful!! I’ve got a Craft Gossip post scheduled for later this morning that links to your tutorial:
http://sewing.craftgossip.com/tutorial-felt-flower-crown/2015/02/09/
–Anne
Thank you Anne. I hope your readers really enjoy it!
Soooo pretty Lauren!
Cheers Stephanie!
A really pretty flower crown and easy to follow. That’s so nice to share it.