Simple Hexie Keyring Tutorial
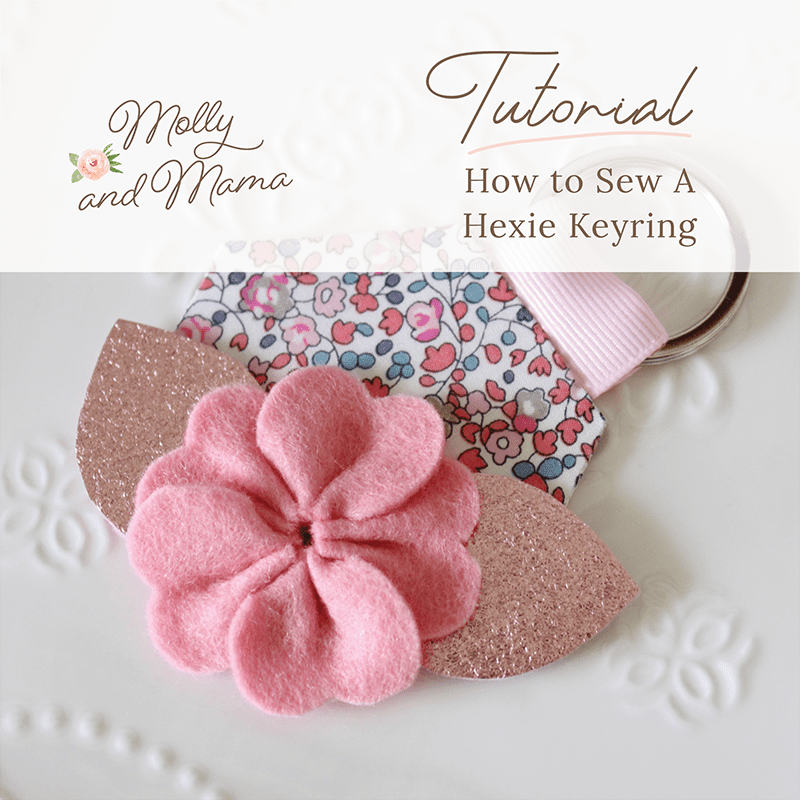
How sweet is this simple hexie keyring project? It would make a lovely gift for ‘quilty’ friends and is a great way to use up small felt and fabric scraps. With very little sewing and easy assembly, this project comes together very quickly. Here’s how to make it!
Finished Size – 4 ¾ inches (12 cm) tall (including hanging loop)
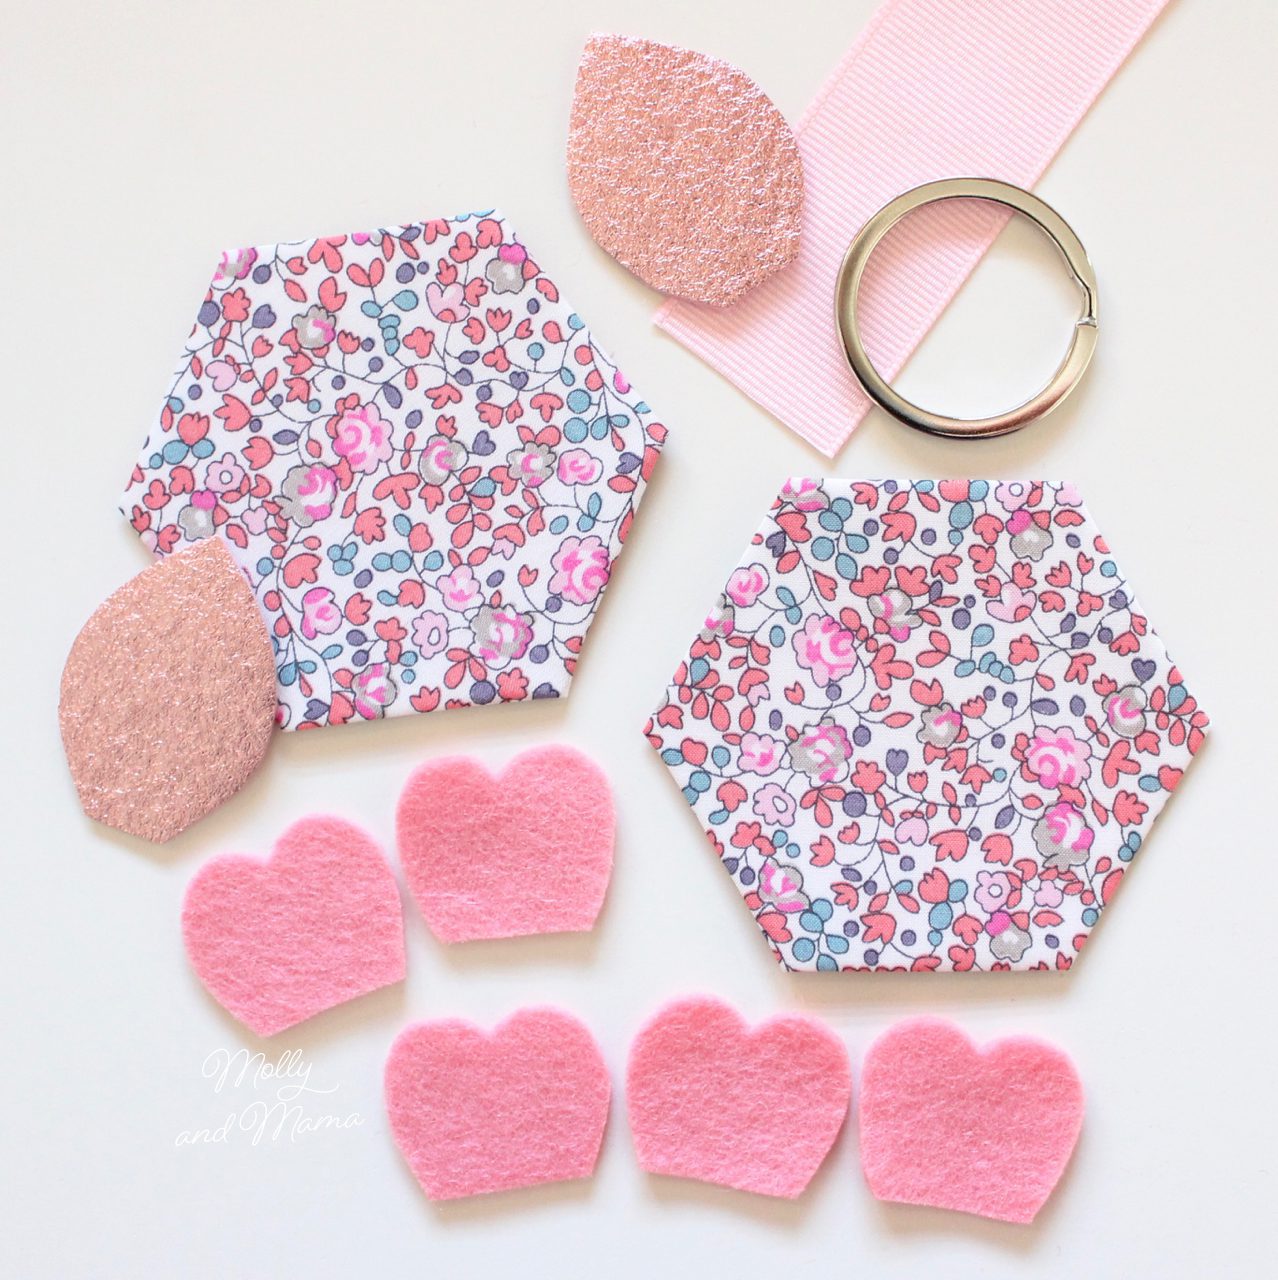
MATERIALS REQUIRED
- Two 4 inch (10cm) squares of print fabric
- Scraps of wool Felt in pink and metallic rose gold
- 2 inches (5cm) of 1 inch (2.5cm) wide pale pink ribbon
- Metal Clip Ring 1 3/8 inch (3cm) wide
- Embroidery needle
- Fine sewing thread like 60 weight bobbin thread
- 2 x 1 ¼ inch hexagon paper templates, or light card to trace and cut out your own from the template provided
- Freezer paper (optional)
- Glue stick or English paper piecing glue basting pen
- Hot glue Gun (optional)
- General sewing supplies
- Print out of the template
NOTE: This tutorial is for personal use only, for sewing at home and/or teaching another person or child to sew FOR FREE. Reusing or repurposing free Molly and Mama tutorial instructions, templates and images for paid classes, or distributing the materials in classes, to groups, or for commercial purposes, is strictly prohibited. For clarification, or to seek a commercial arrangement, please contact Molly and Mama.
LET’S GET MAKING!
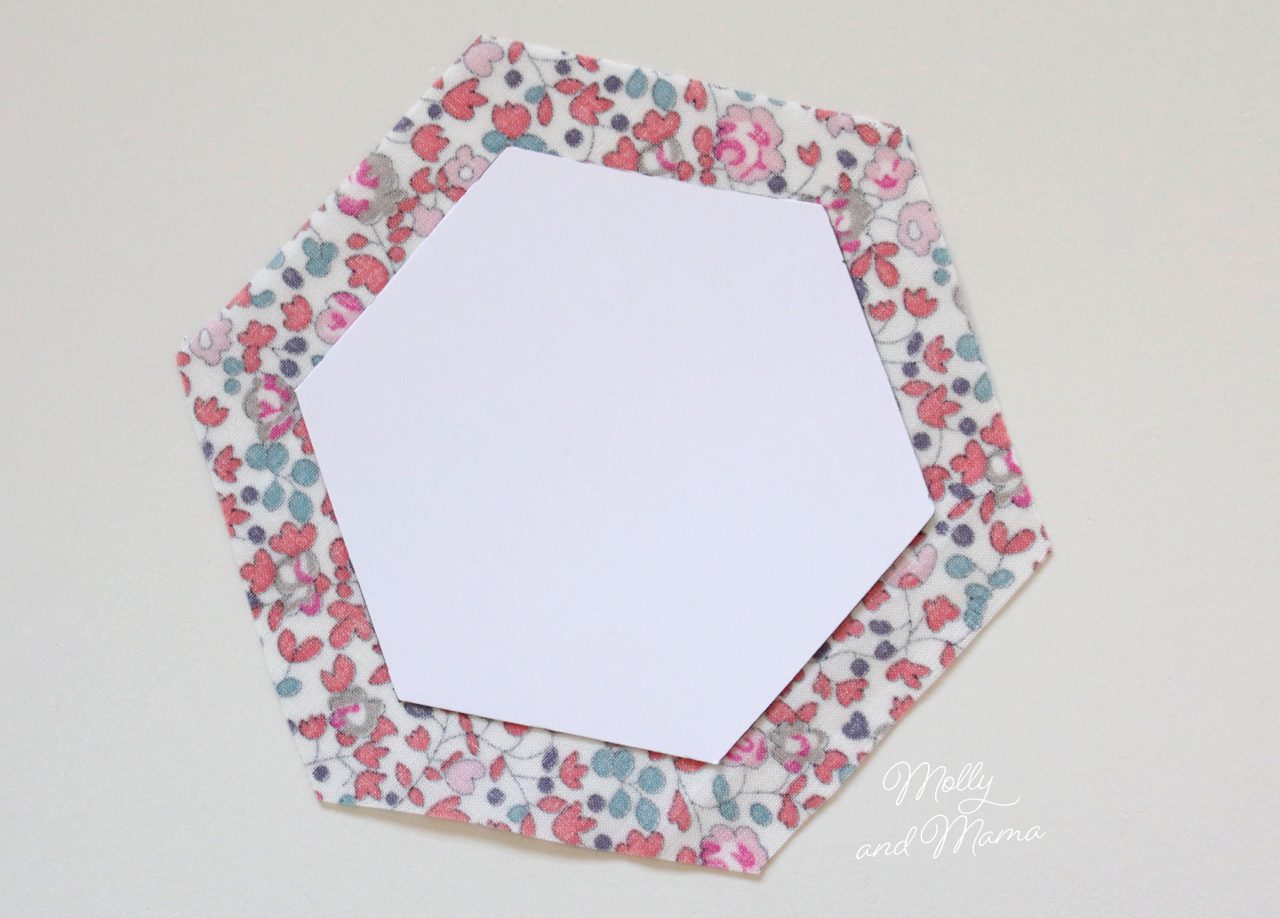
1. Print the provided template in full size with no scaling or cropping. Trace and cut 2 identical 1 ¼ inch hexagon shapes from light card. Alternatively, use pre-packaged laser cut hexagon papers.
2. Place a hexagon paper on the wrong side of a fabric square and hold in place. Roughly cut around the hexagon shape leaving at least a ¼” (6mm) seam allowance.
3. Using a glue pen, run a small amount of glue along the edge of one side of the hexagon paper. Fold the fabric over firmly and secure.

4. Glue the second side and then fold it over, including the edge of the first side. Fold the third side next, continuing in a clockwise direction.
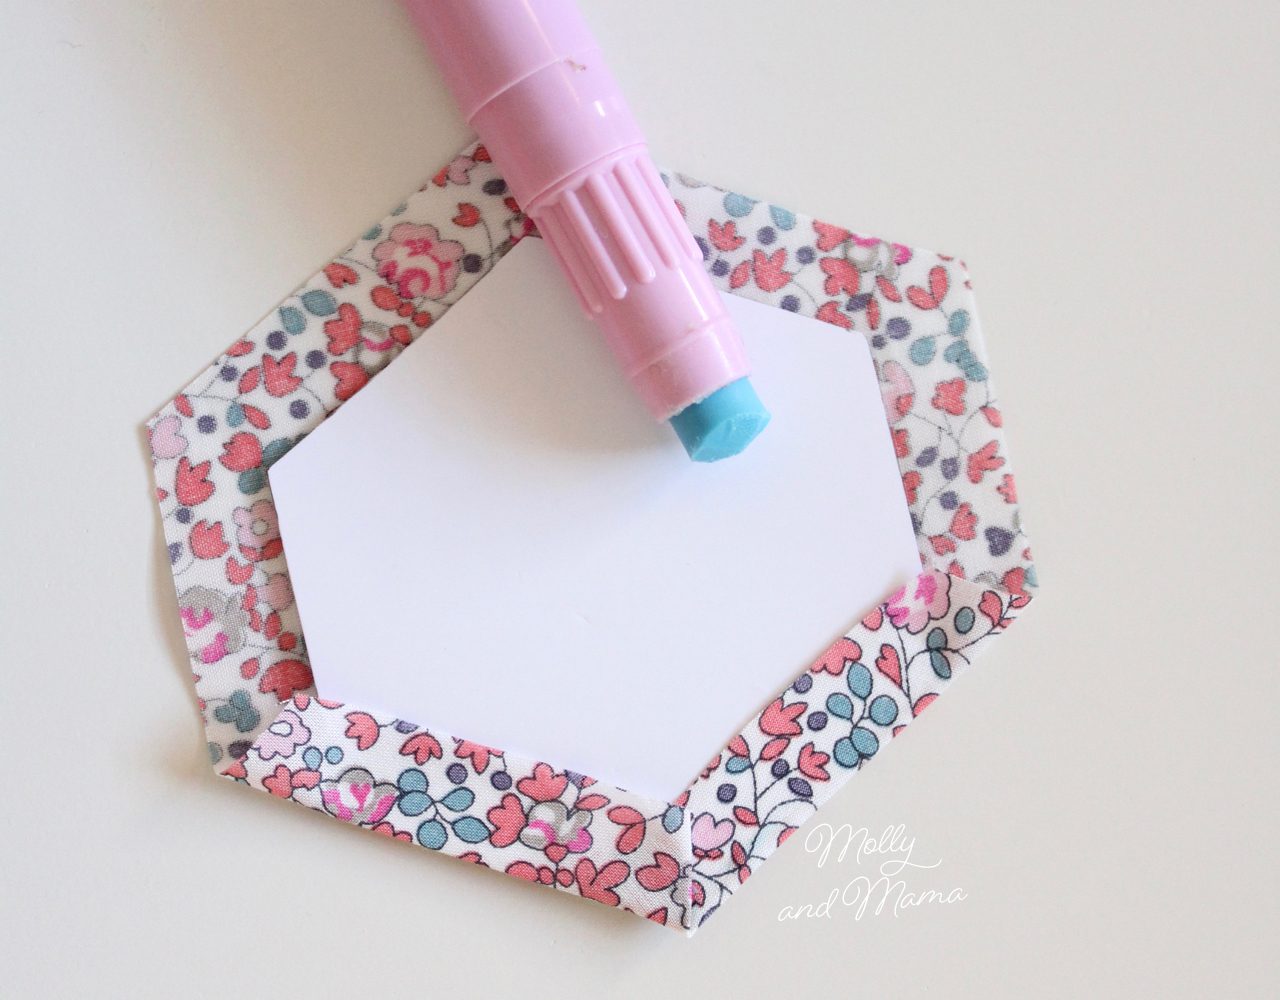
5. Repeat this process to fold over all six sides of the fabric. Be especially careful to keep the fabric folded firmly near the points or corners.

6. Create a second fabric covered hexagon using the same process.
For more information about English paper piecing and sewing hexagons, you might like my beginners tutorial.
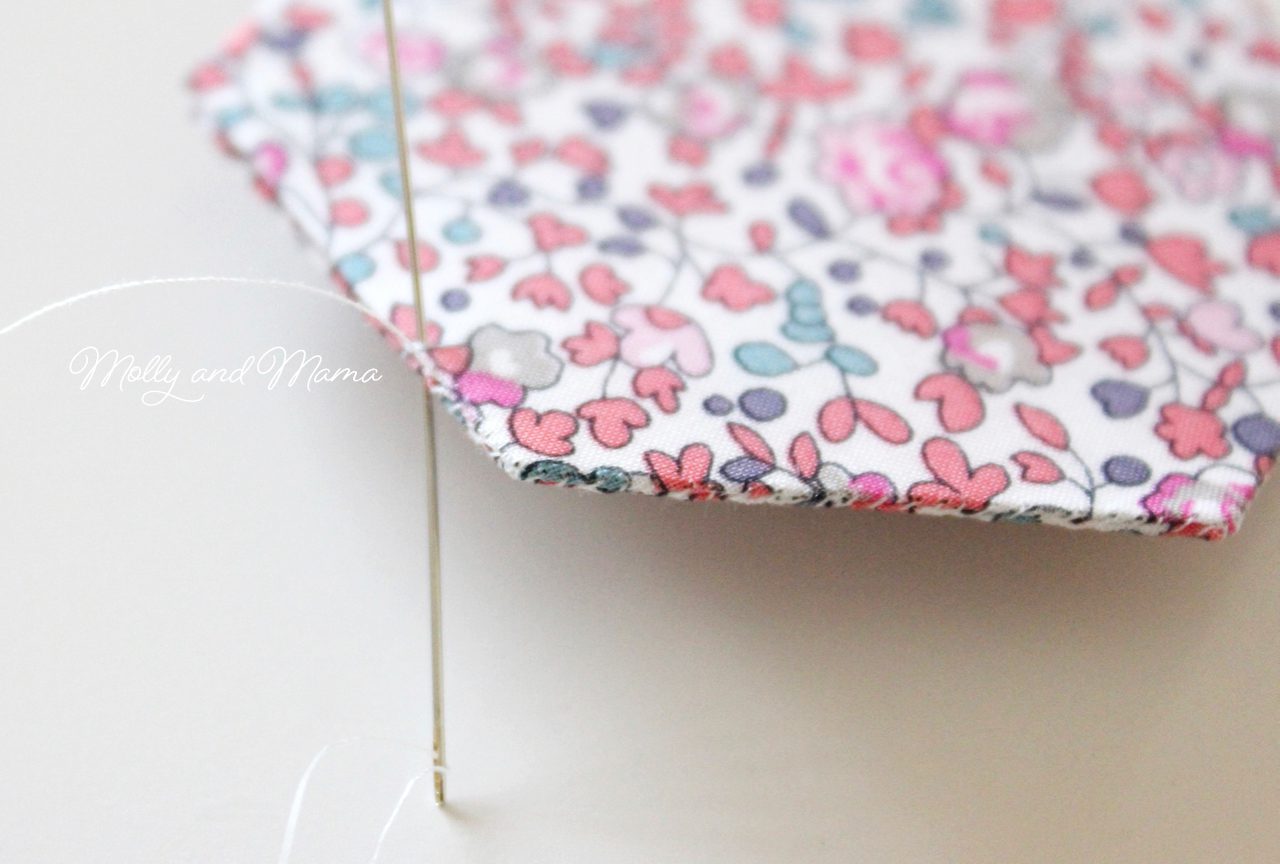
7. Place the two hexagons together with wrong sides facing, being sure to line up the edges and corners. The papers will stay in the hexies to add strength to the project.
8. Thread your needle with a single strand of bobbin thread and knot one end. Use very fine and small whip stitches to sew the two sides of the hexagons together. Start at one corner and stitch along the edge to the next corner. As you stitch, catch 2 – 3 threads from the folded edge of both pieces of fabric. Small, closely spaced stitches are best.
9. Repeat the method described above to sew together five sides of your hexagons. Fold the piece of ribbon in half with the metal clip ring inside the fold. Insert the raw ends of the ribbon into the opening of the last side.
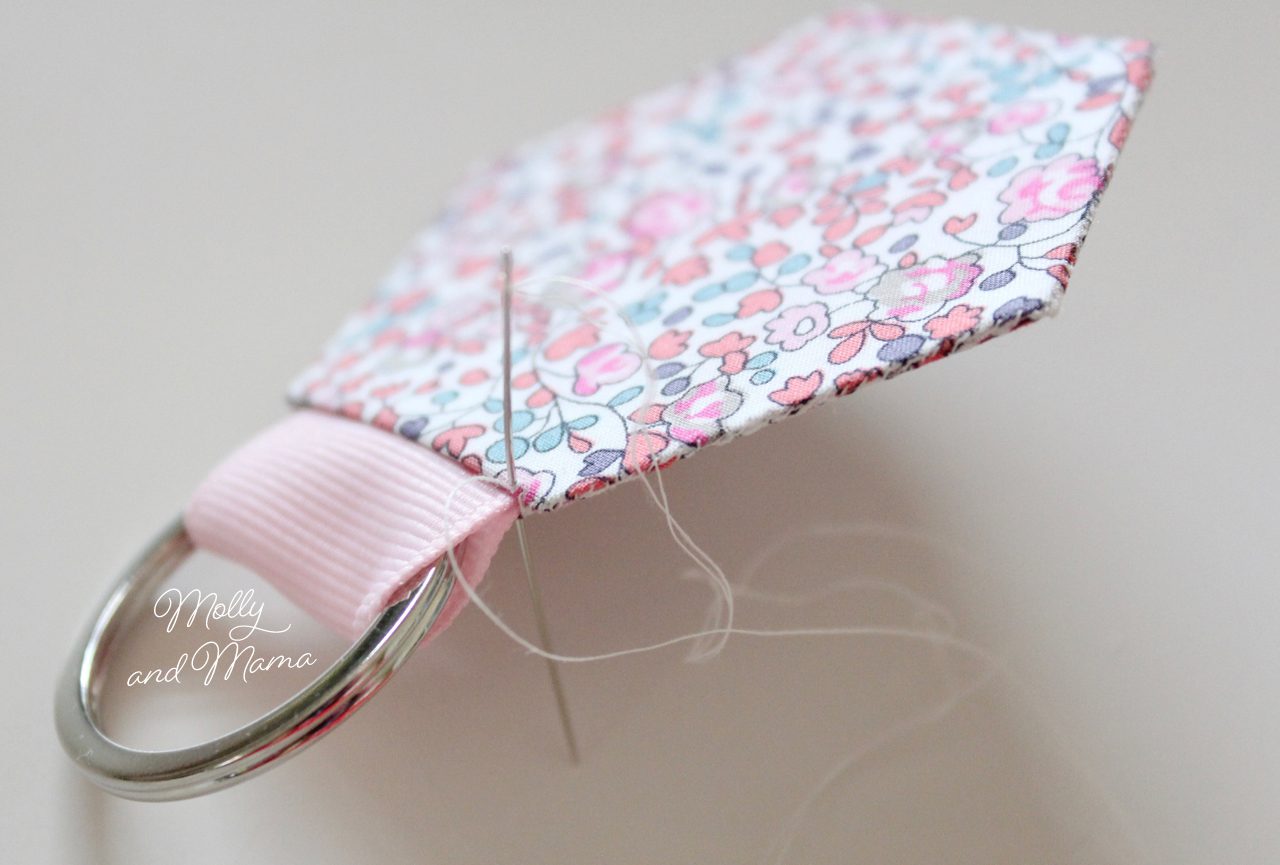
10. Stitch the last side, catching the ribbon within the stitches to secure it in place.

11. Use the template to create two leaves from rose gold metallic felt and five flower petals from pale pink felt. There are a couple of ways you can transfer your pattern template to your felt, in preparation for cutting.
When cutting your felt, use small and sharp scissors that have short blades (like embroidery scissors). This will give your felt a neater edge, and you’ll also find your shapes are more accurate.
Pinning the Template: Roughly cut around the outside of your template leaving a small margin between the paper edge and the template lines. Lay your paper template over your felt and pin it in place. Carefully cut out the template by precisely following the template lines. This method won’t be suitable for cutting out small pieces of felt though. You can stick the template pieces in place with low adhesive sticky tape, and peel off the tape after cutting out each shape. Alternatively, you can also use freezer paper to help with this process. It’s a much easier method to use!
Using Freezer Paper: Freezer paper can be purchased online, or often at your local Quilting Store. It comes in a pack of pre-cut sheets (suitable for your printer) or is sold by the metre from a large roll.
Print (or trace) your template onto the paper side of the freezer paper. Roughly cut around each template piece and lay it on the felt. Using a warm iron, run it over the paper side of the template*. The heat will help the plastic underside of the freezer paper to adhere to your felt. Cut out the template pieces on the line, and then simply peel the paper away. It comes away easily and leaves no residue. Keep the freezer paper templates as these can be reused a number of times.
*This process is best suited to wool felt. Test a small area of your felt with the iron and paper before commencing. Please be sure to cover your felt with a press cloth (or scrap piece of cotton fabric) so as not to damage it (especially if the felt is not 100% wool).
For more tips and tricks for working with wool felt, please see my tutorial HERE.
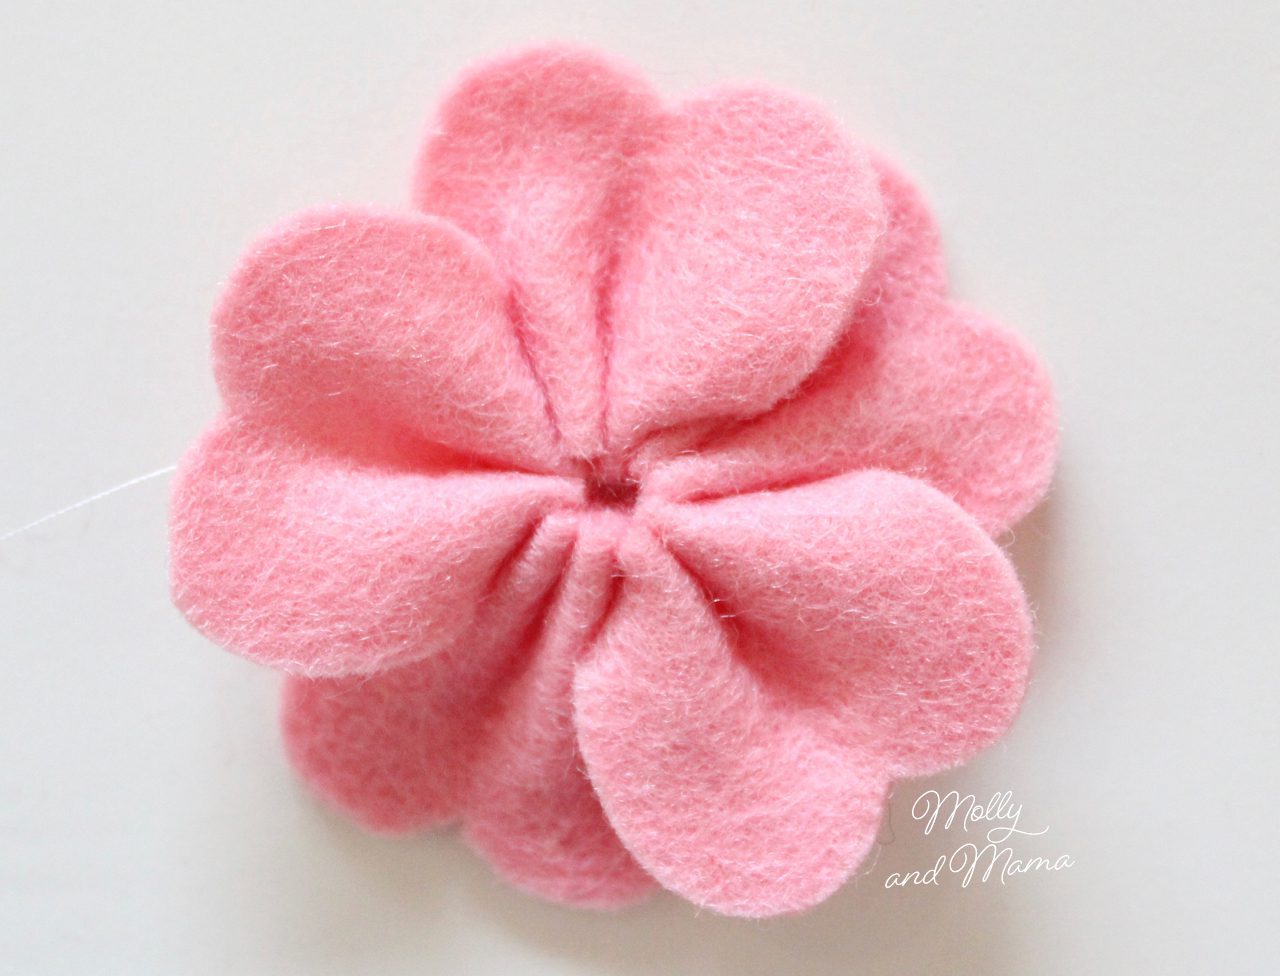
12. Assemble the felt flower. Thread your needle with a single strand of bobbin thread. Sew a couple of stitches along the base of the first petal, making sure the needle enters the felt (at the beginning) and exits the felt (at the end) on the same side.
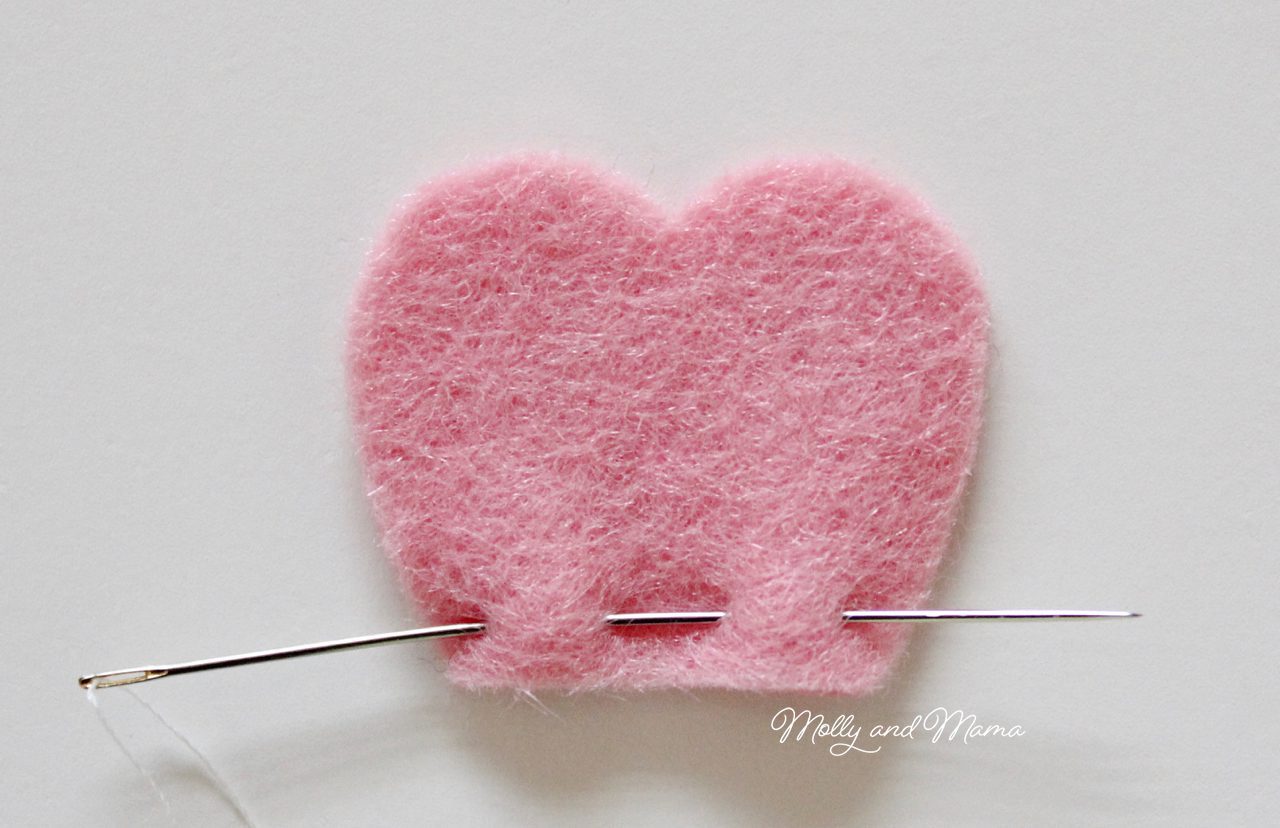
Sew across the base of all five petals.
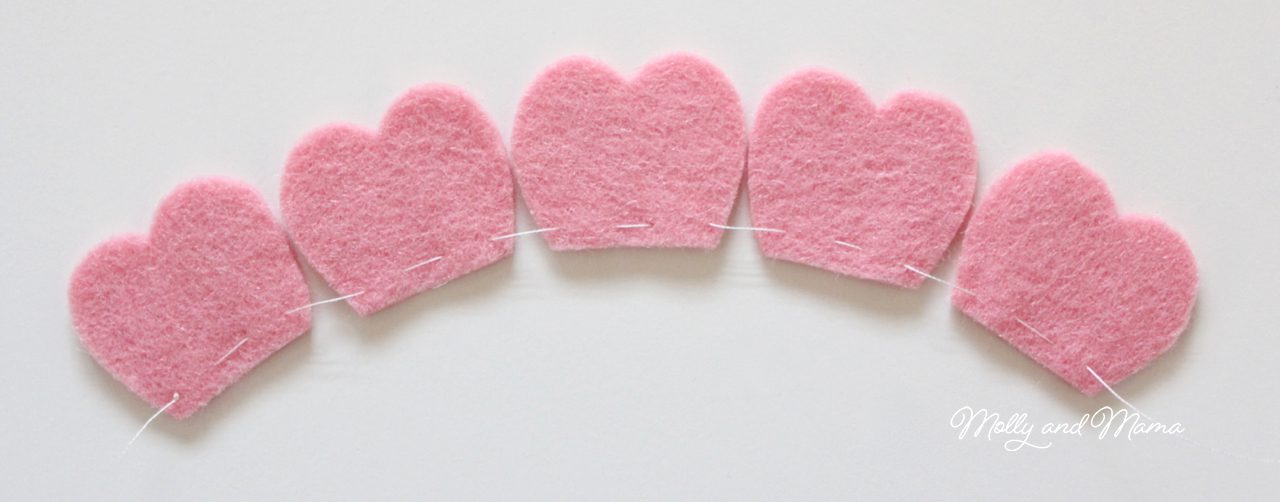
13. Pull the thread carefully but firmly to gather the petals together and to form a flower. Add some extra stitches in the centre of the flower to help it retain its shape.
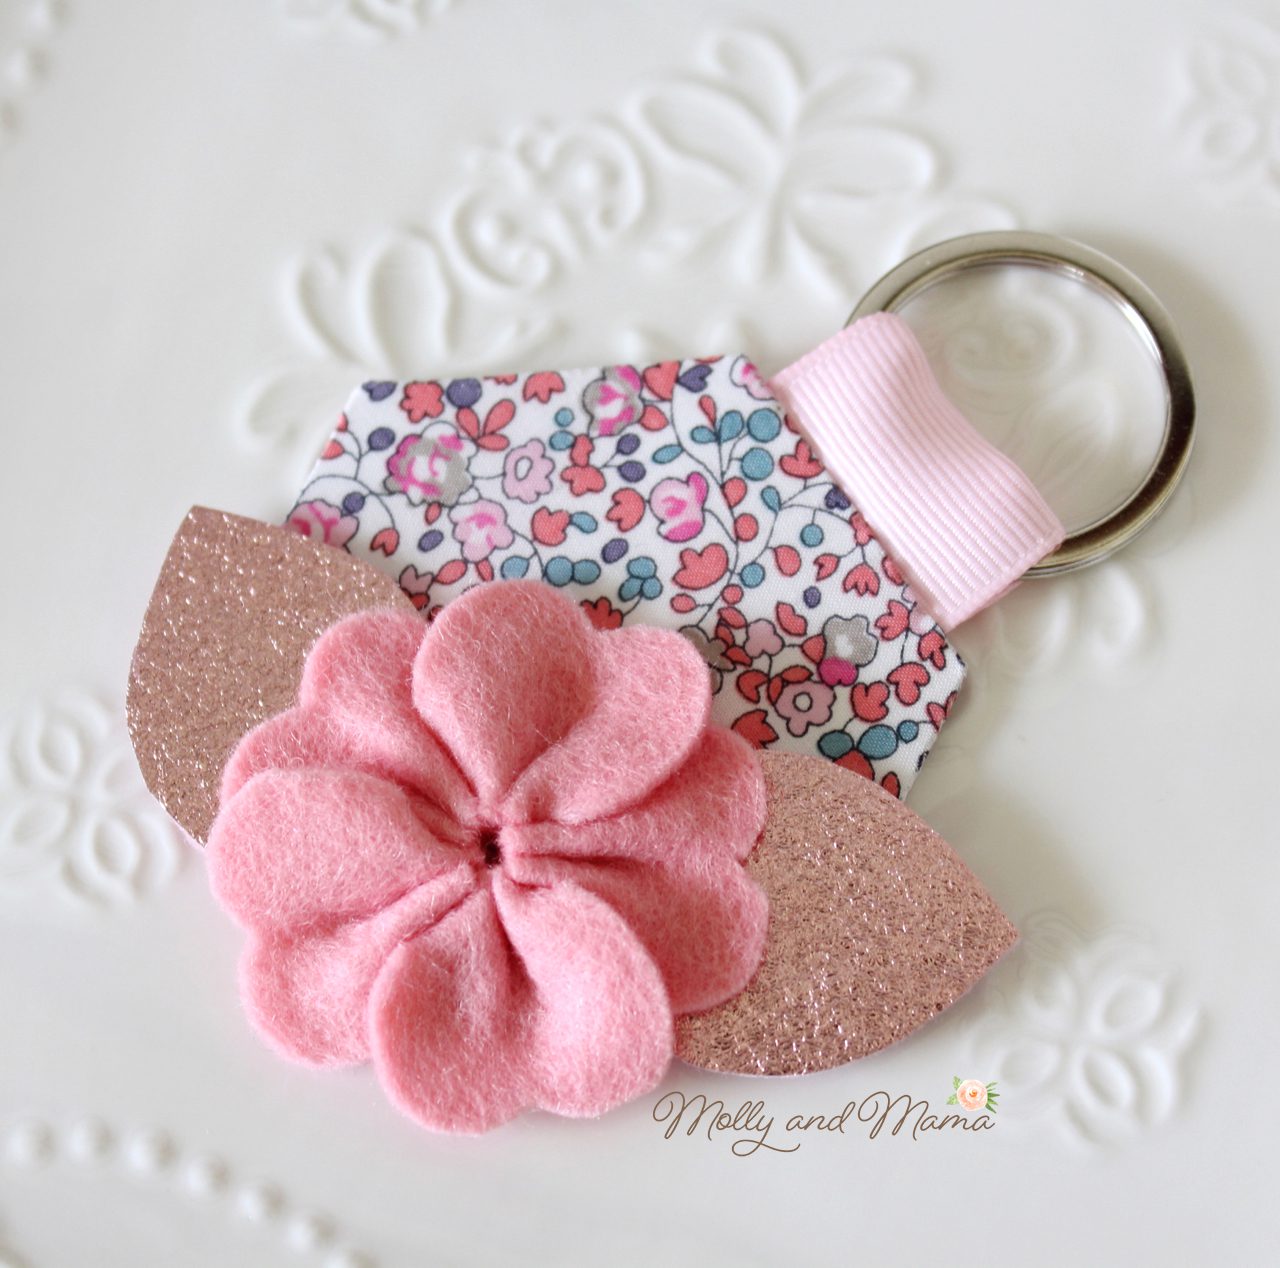
14. Secure the leaves on the front of one hexagon using some small fine stitches at the base of each leaf, or using a hot glue gun. Stitch or glue the flower in place over the leaves. Your cute little key ring is all ready for use!
Wasn’t that a sweet and easy tutorial?
Here’s some similar options.
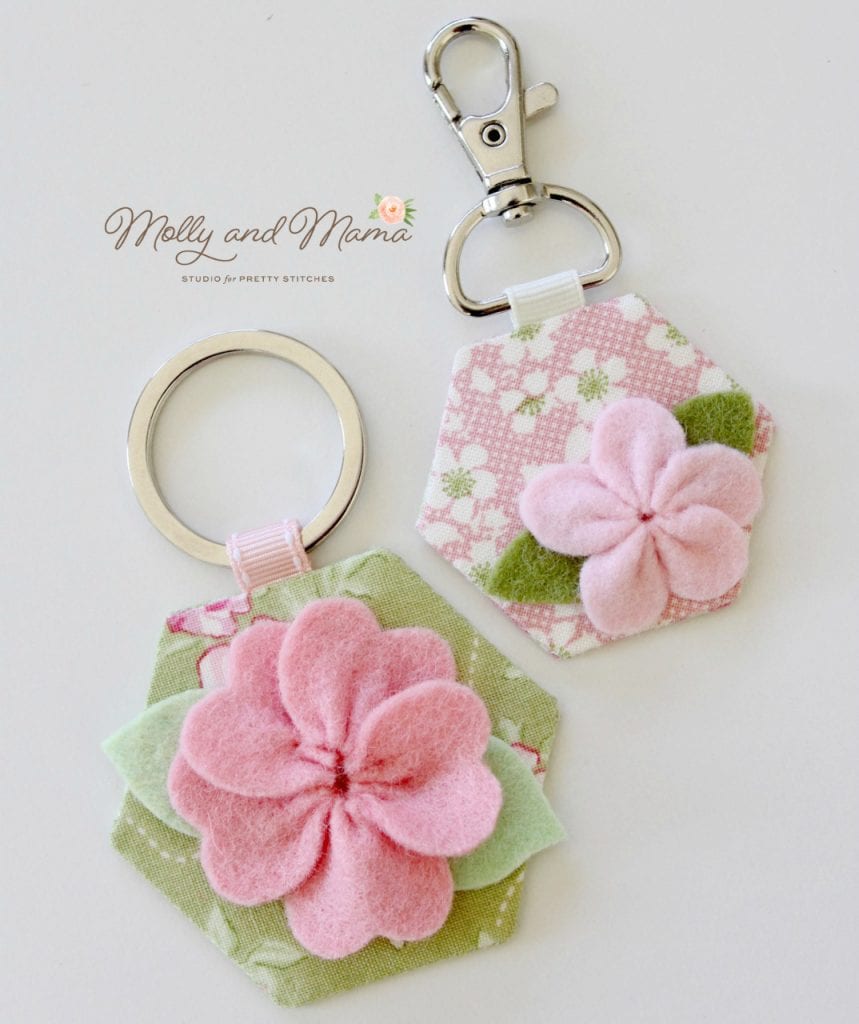
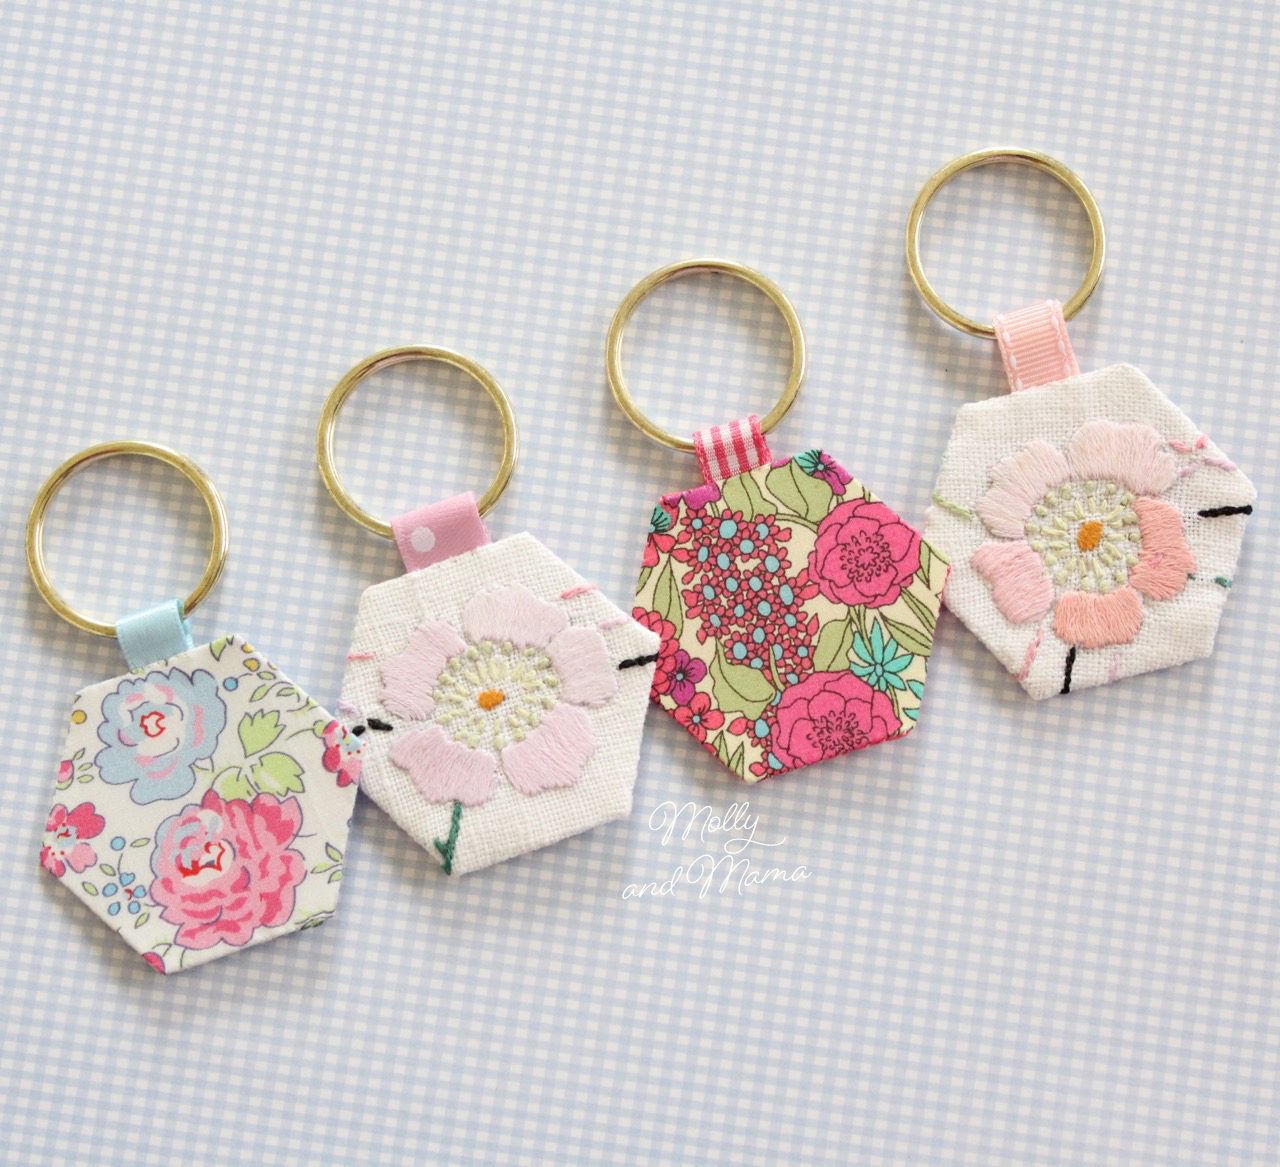
You can use scraps of your favourite prints and old vintage linens and doilies to create simple hexagons too!
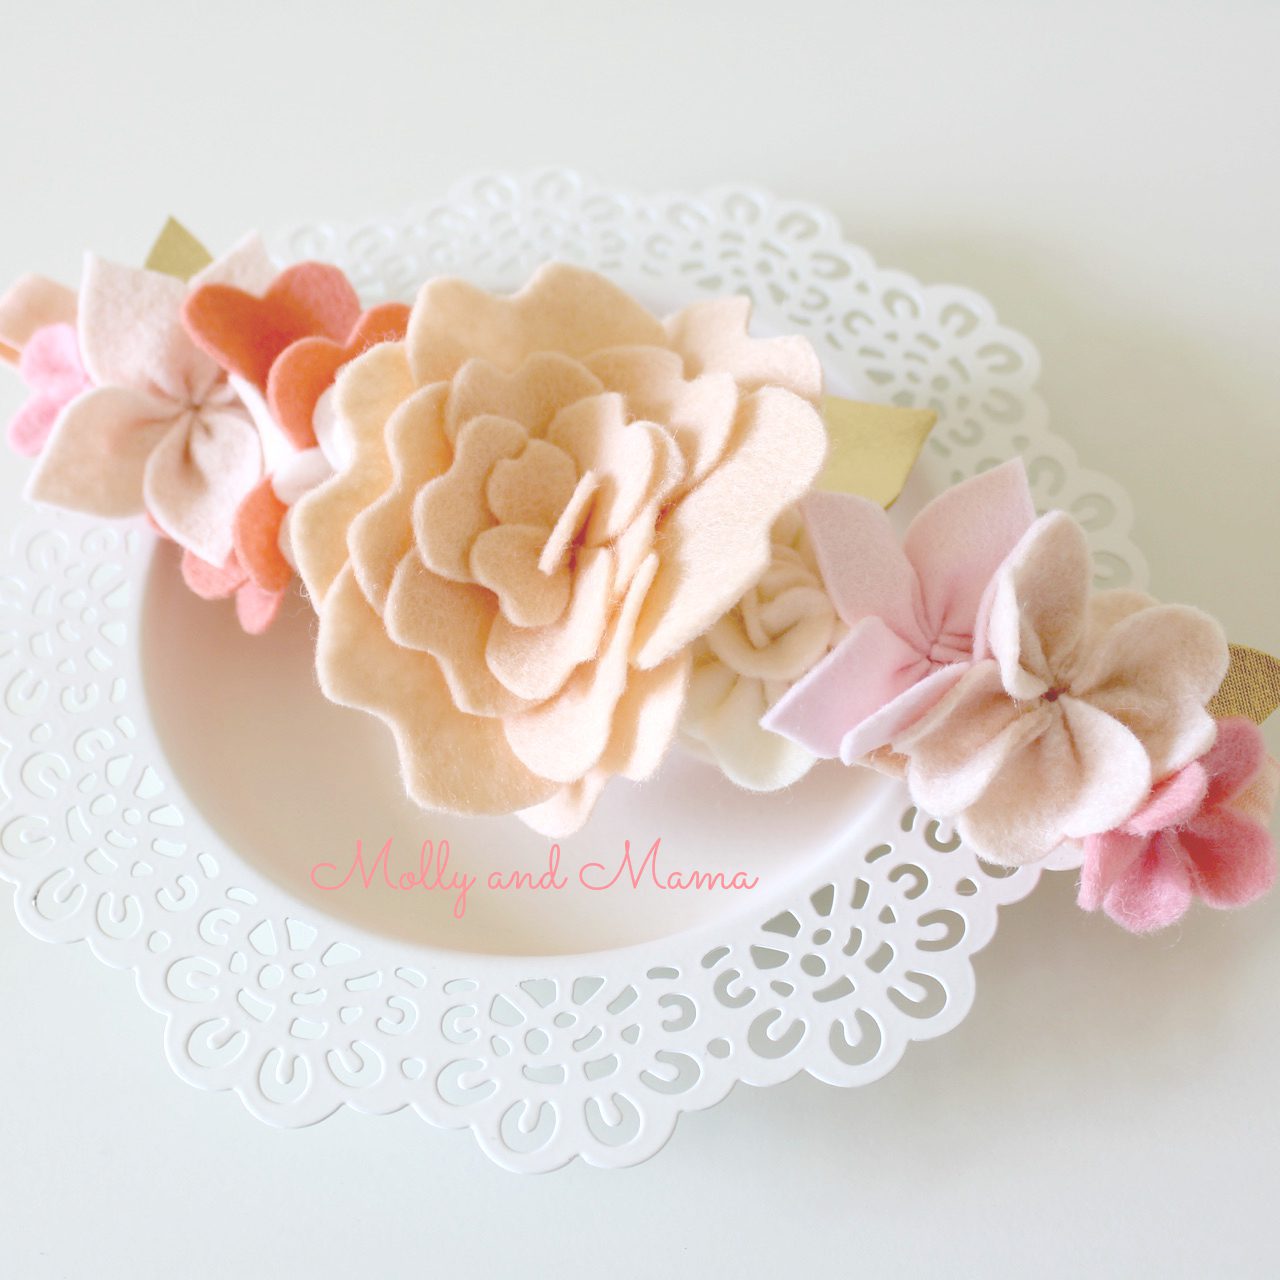
If you liked making the felt flowers, you might enjoy my Coco Flower Crown pattern that shows you how to make a range of different felt flowers and succulents.
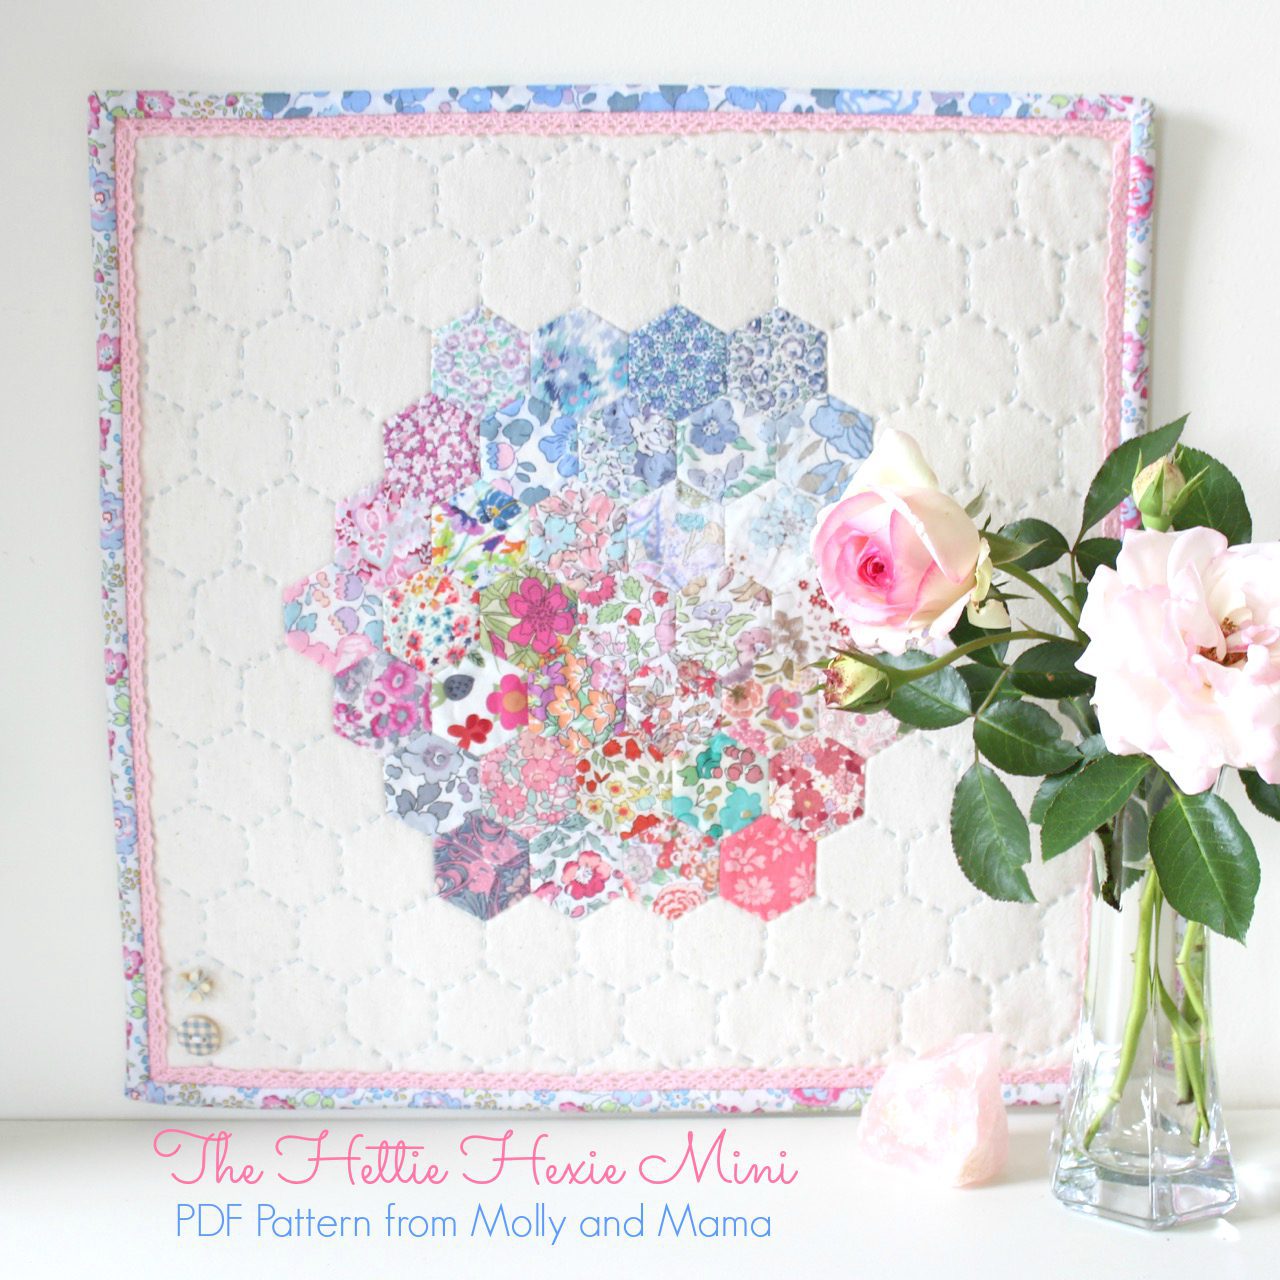
And if you’re interested in knowing more about hexagons, the Hettie Hexie Mini Quilt is a great beginner’s pattern for English paper piecing, hand quilting and quilt binding. You can find it in my store.
If you enjoy this little tutorial, be sure to share it with friends and show me your makes on Facebook or Instagram. Use the hashtag #hexieflowerkeyring
Happy stitching, Lauren x
This post was written by Lauren Wright and appeared first on Molly and Mama http://www.MollyandMama.com.au
Wonderful explanation!
Thank you for your lovely feedback Bonita!
Beautiful i loved them ??
Thanks Mariam. I’m glad you like them!
Hello from France. I haven’t time enough for big stitches project 🙁 I’m thankful for the free patterns from those lovely’s ideas. Merci and enjoy your day. Elisabeth G.
Hello from Australia Elisabeth, and thank you for leaving your comment. I’m so pleased you are enjoying the free tutorials! Lauren x