Sew Felt Frogs – Sew A Softie 2021
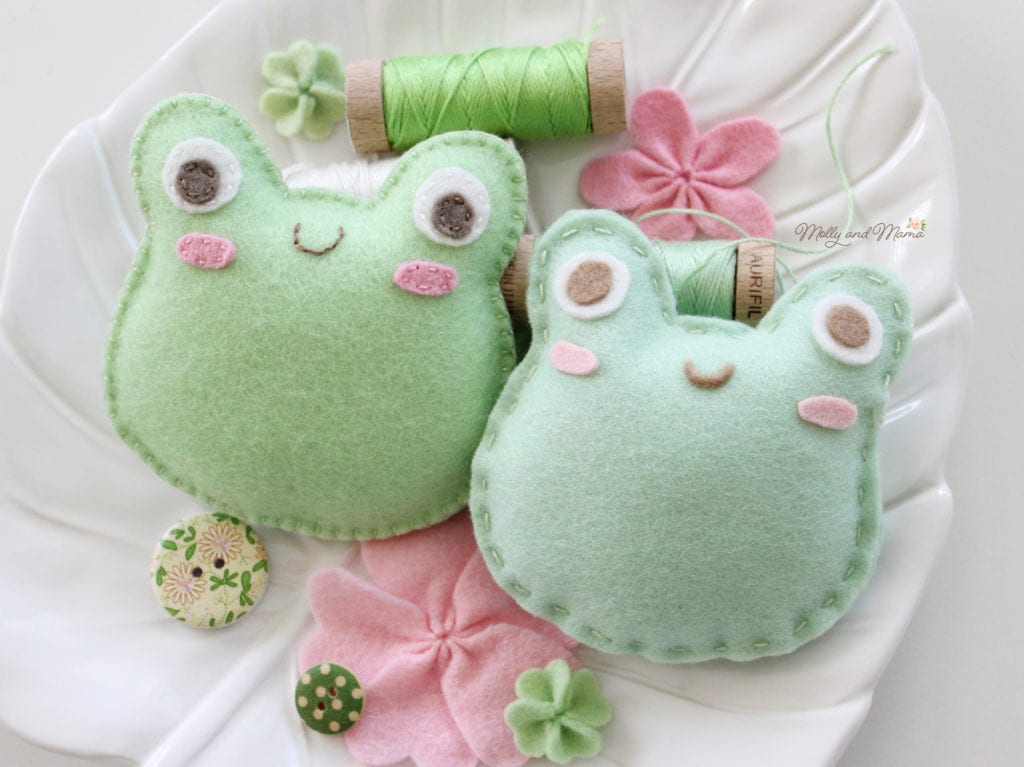
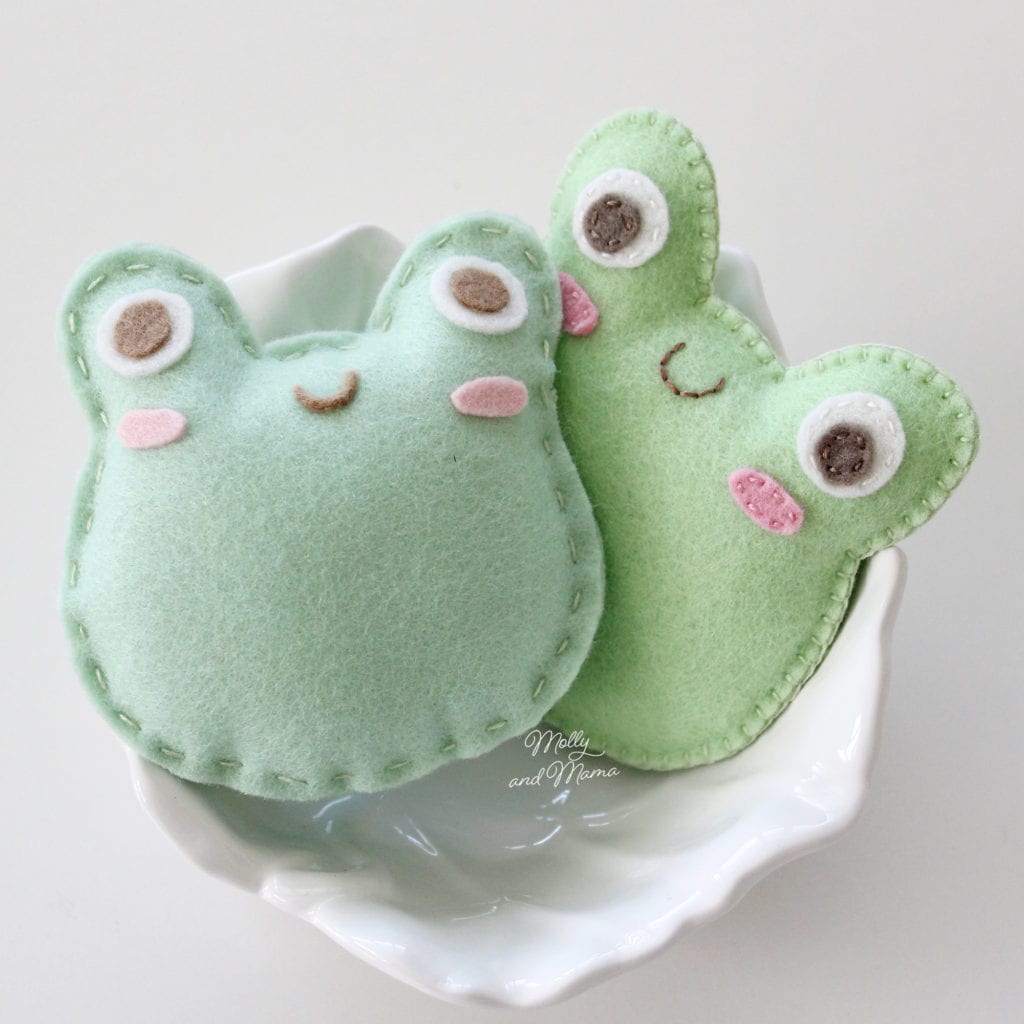
It’s Sew A Softie month and today is my turn to share a free tutorial designed especially for you by my 11 year old daughter. We’re making the cutest little felt frogs! It’s her first project and she’s so excited to share it with you. This is the sweet froggy that she made!
And here’s the little frog I put together using her template.
But back to Sew A Softie! If you’re wondering what Sew A Softie is, Trixi (the founder) explains that it is ‘an initiative that aims to ignite a love of hand sewing in a new generation’. That’s exactly the reason for my own blog, so this is the fourth year I have joined Trixi’s month-long celebration of sewing with kids. If you’d like to see more Sew A Softie tutorials from other makers, head to Instagram, or join the Facebook group for daily updates and links for the entire month of July.
Now let’s get sewing these cute froggies! Please note that this tutorial is for personal use only.
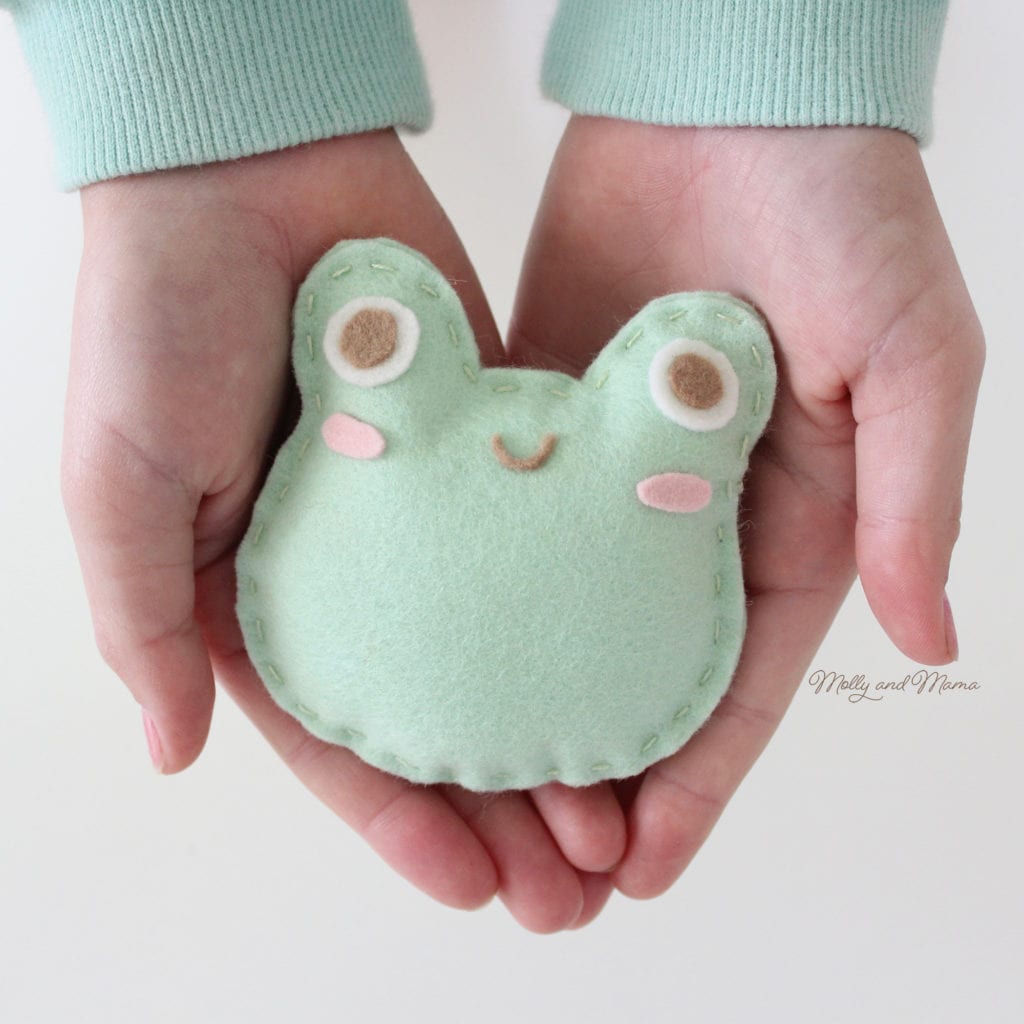
FINISHED SIZE: Approximately 3.5 inches
You Will Need;
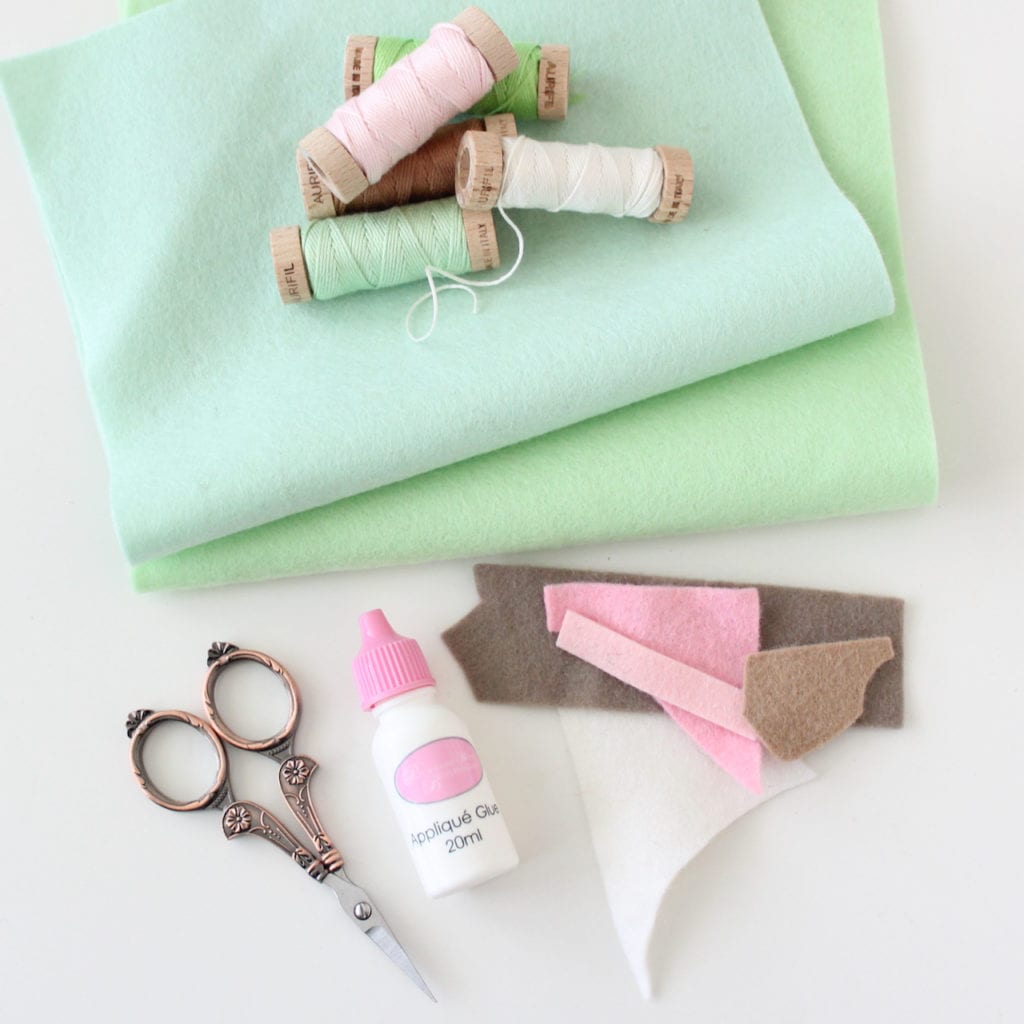
- 4″ (10cm) x 8″ (20cm) rectangle of green wool felt (here’s why I recommend WOOL FELT)
- Pink, white and brown wool felt scraps
- Embroidery needle
- Six stranded embroidery floss (separated into two strands) to match the colours of your felt
- Small, short blade scissors for cutting felt
- Hobby fill or polyester stuffing
- 4″ (10cm) x 6″ (15cm) rectangle of freezer paper (to transfer the template to the felt)
- Appliqué or craft glue
- 4″ (10cm) square of fine paper like tissue paper
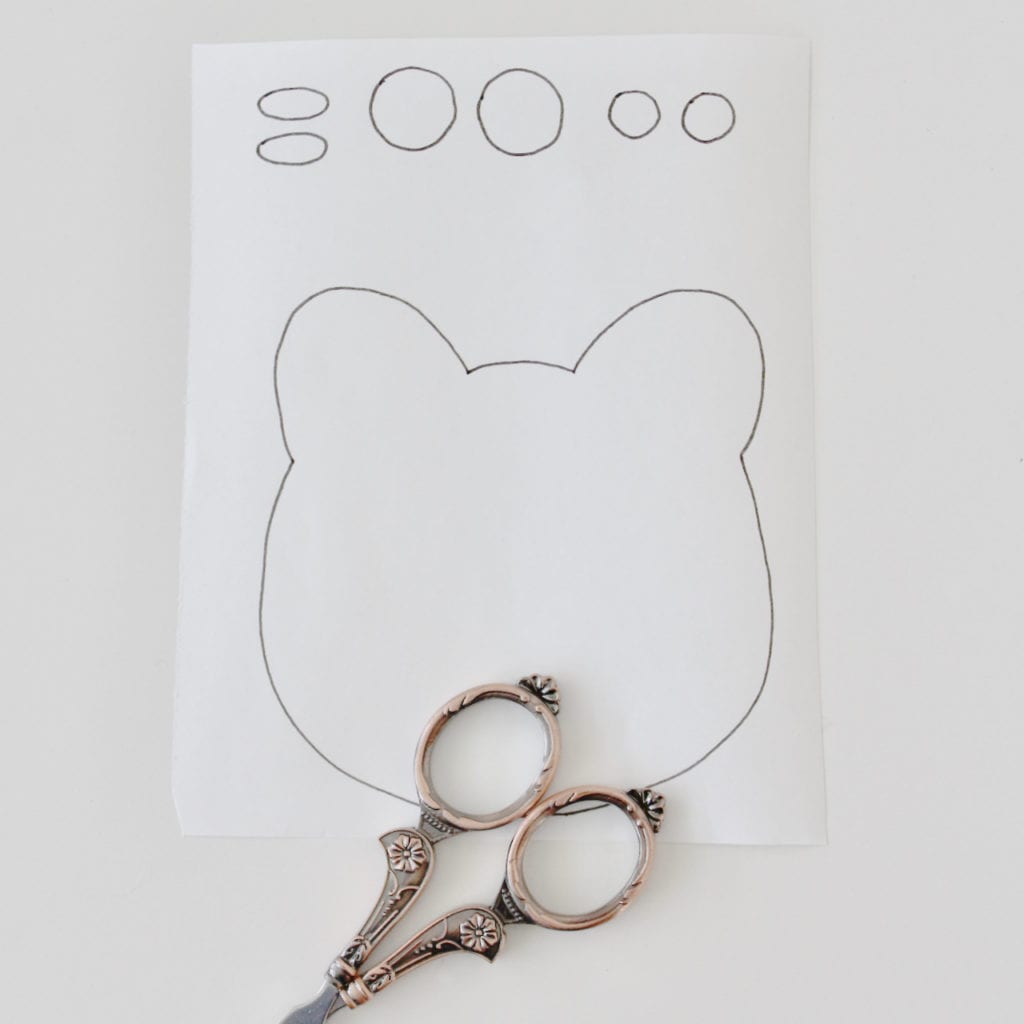
- Print out of the TEMPLATE
Let’s Get Making A Frog Softie
Print the Pattern
Save a copy of the pattern template PDF to your computer and then print it in full size without any scaling or cropping.
Cut Out The Felt Pieces
Cut out the required felt pieces using your favourite method. Visit my beginner’s tutorial for a more detailed description on the different methods you can use, including my easy but accurate Freezer Paper method.
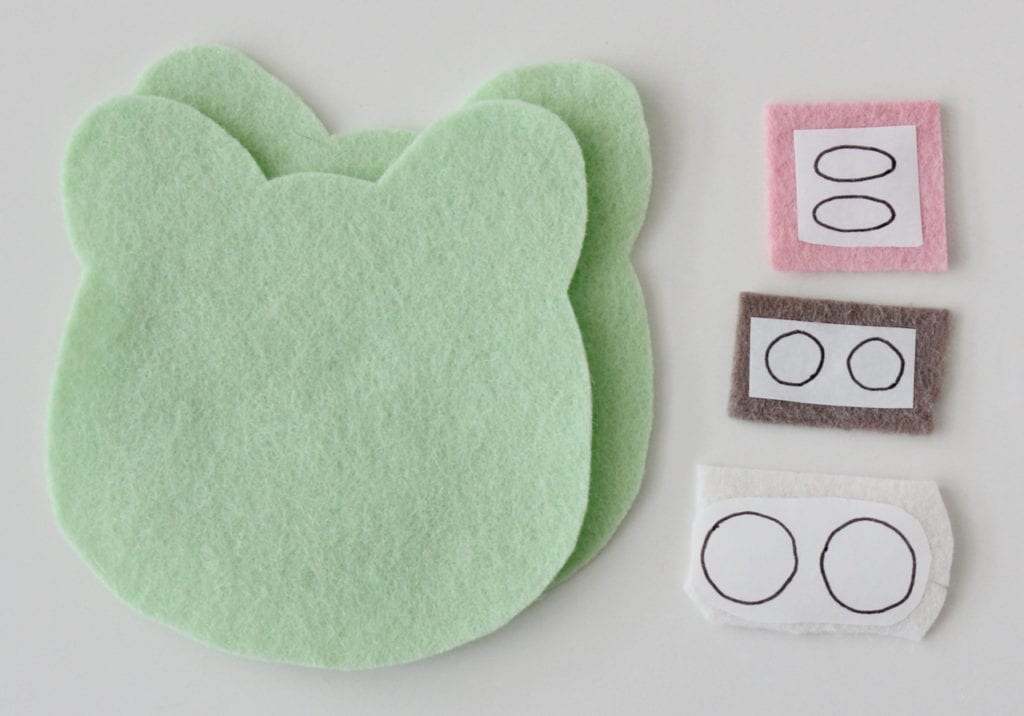
For each frog you will need to cut;
- Two body shapes in green felt
- Two eye shapes in white felt
- Two eye spots in brown felt
- Two cheek shapes in pink felt

Let’s Sew The Frog
Let’s make the mouth on the frog first. Miss 11 made her mouth with a tiny scrap of brown felt and glued it in place (as she did with the other facial features). This is a great method for older kids making their own softie. If the project is going to be used by younger children, the facial features will need to be stitched securely in place. Read on to find out how.
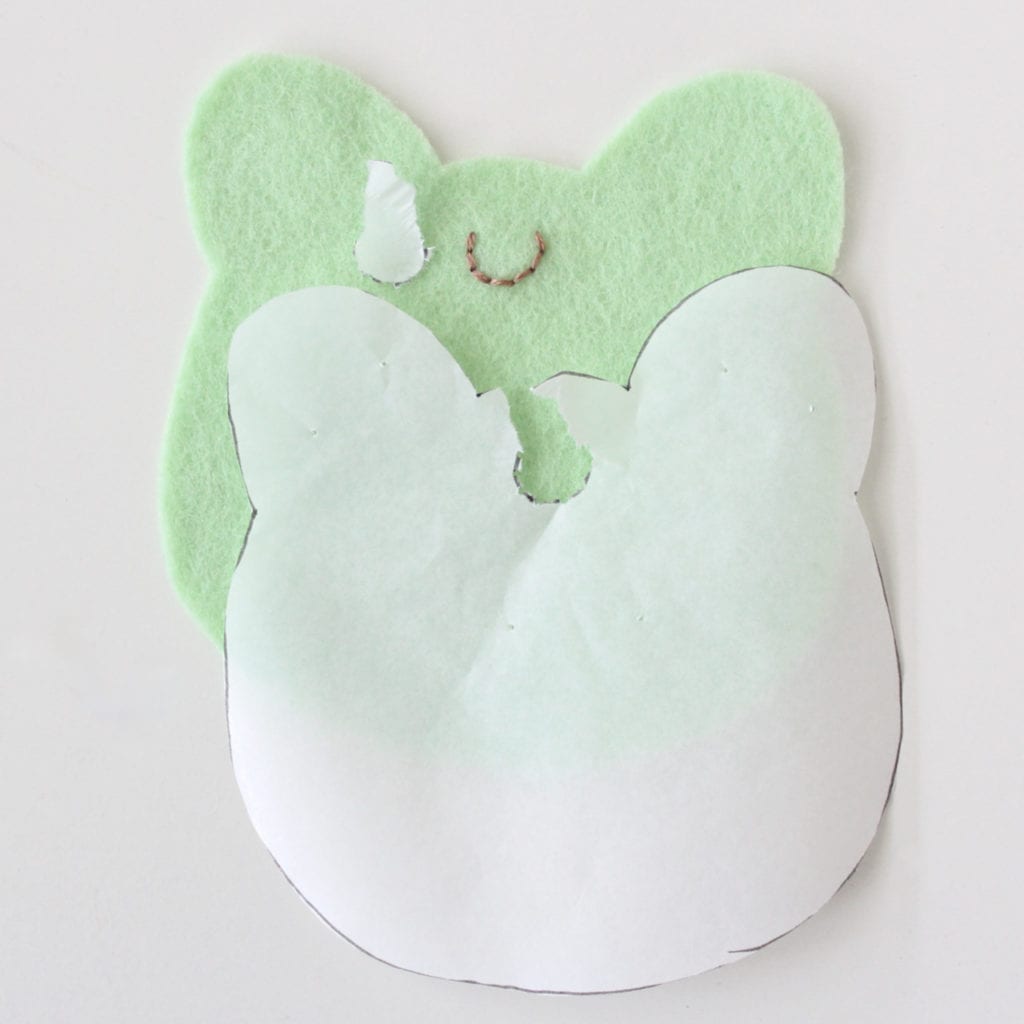
I used the tissue paper transfer method I describe in this beginner’s tutorial.
Trace the frog shape and mouth details onto a small piece of thin paper lunch wrap or tissue paper. Cut around the outside edge of the paper using paper scissors.
Pin the paper over one piece of frog felt.

Using three strands of brown embroidery floss, sew the mouth with back stitch by stitching directly through the paper. To learn more about back stitch and the other stitches used in this project, visit the Stitch Library Post.
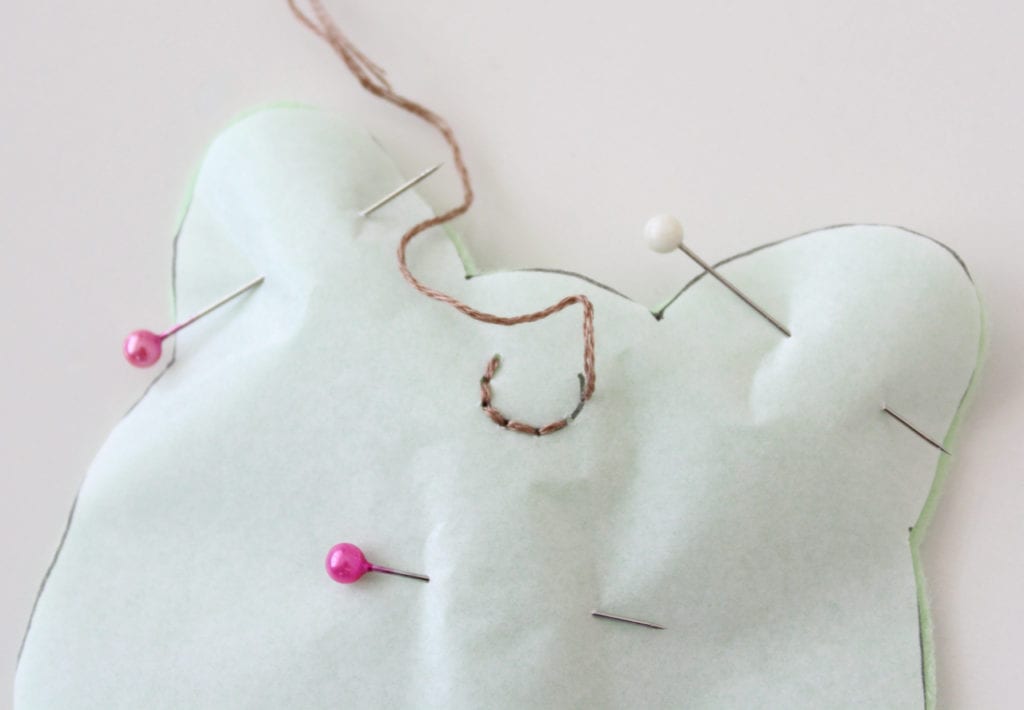
When you’ve finished sewing, hold the stitches with one hand as you gently tear away the paper with the other. Use your needle to help tease any stray bits of paper out from under the stitches (if necessary).
Next, use a small amount of craft glue to secure the eyes and cheeks in place, using the template as a placement guide. Then use two strands of matching embroidery floss to secure the shapes with running stitch.
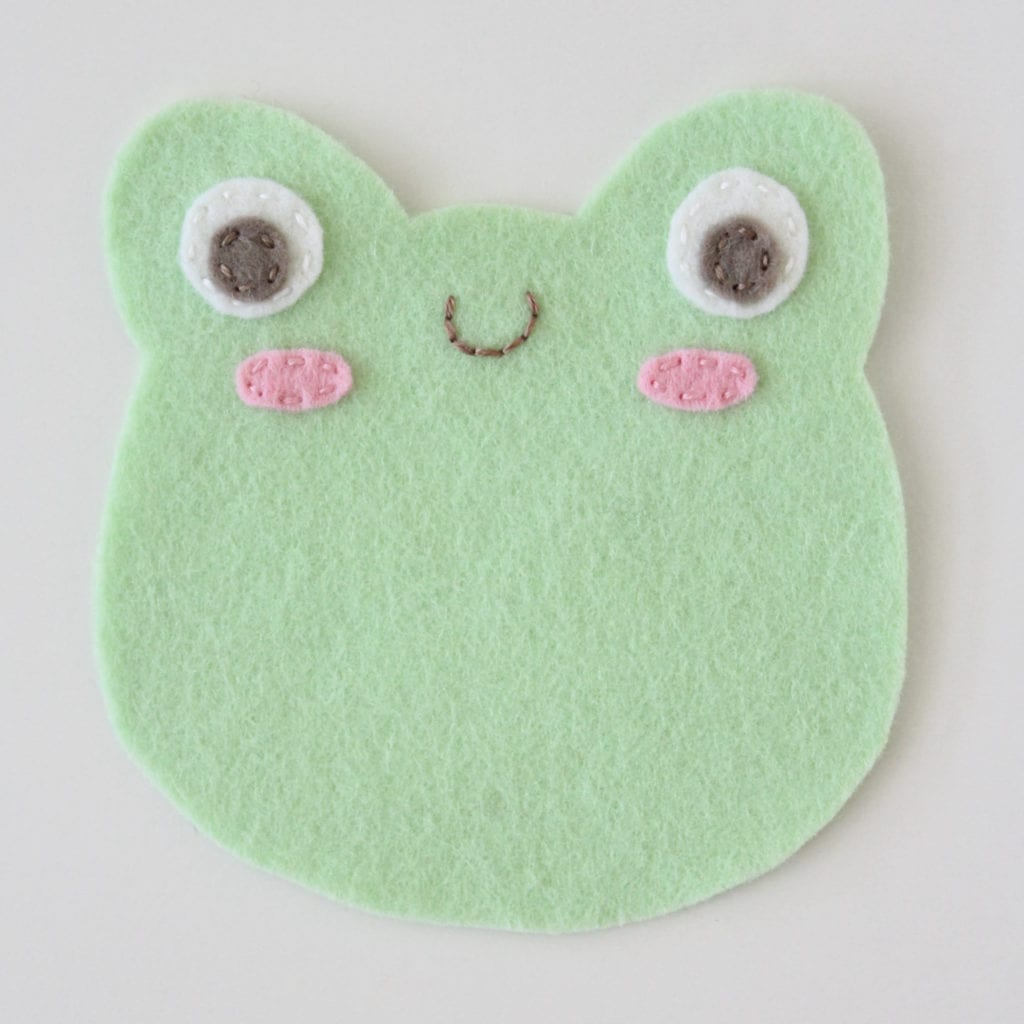
Place the remaining piece of frog shaped felt behind the frog front and pin or clip together. Using two strands of green floss, sew the two shapes together starting below one ear, stitching up across the ears and head and down around the body.
I used blanket stitch for my frog and Miss 11 used running stitch for hers.
Leave a gap at the side of the frog, but keep your floss intact.

Manoeuvre small balls of polyester stuffing into the side gap, using a chopstick or stuffing tool.
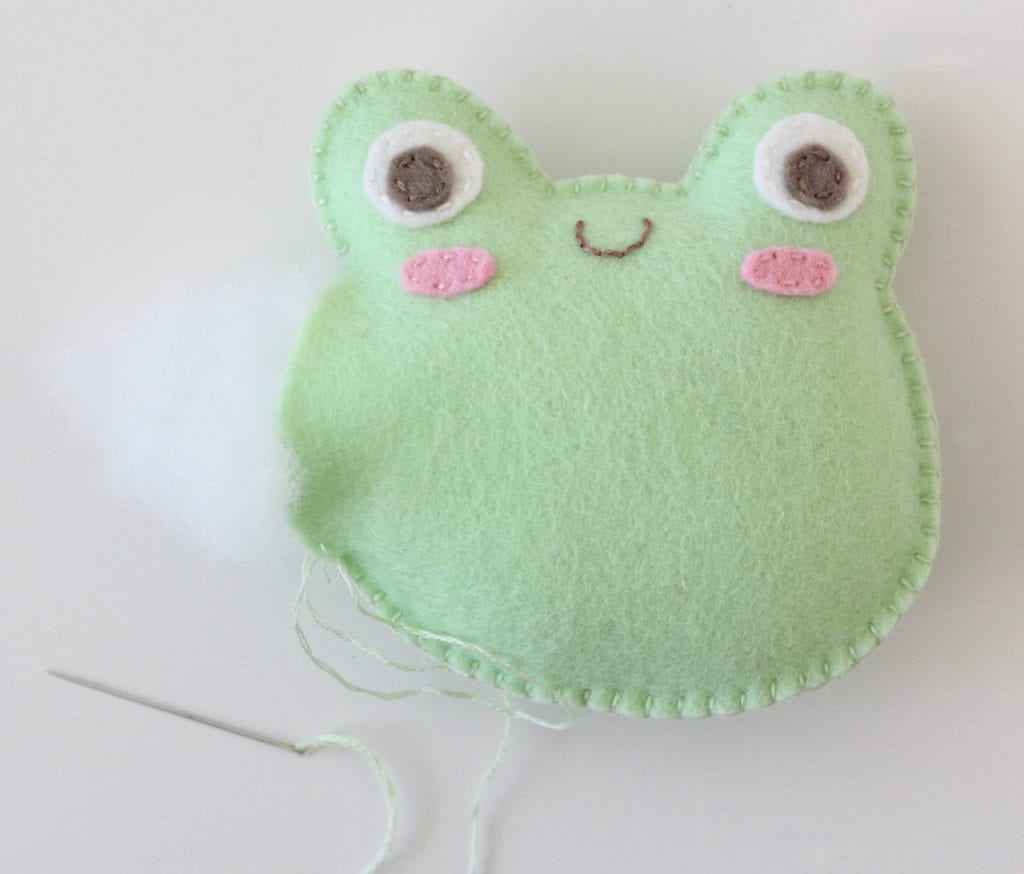
Finish the side stitching to close the gap. Be sure to start and end all stitching on the wrong side (or underside) of the felt, so that the knots and thread ends can’t be seen.
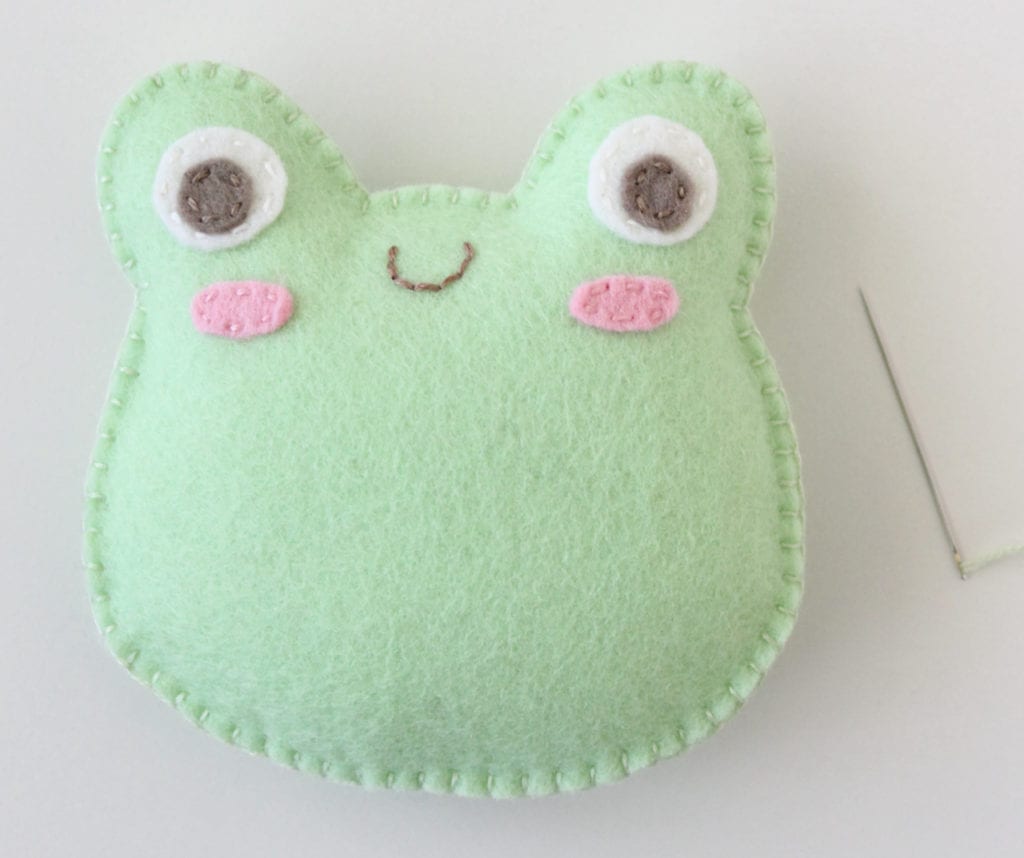
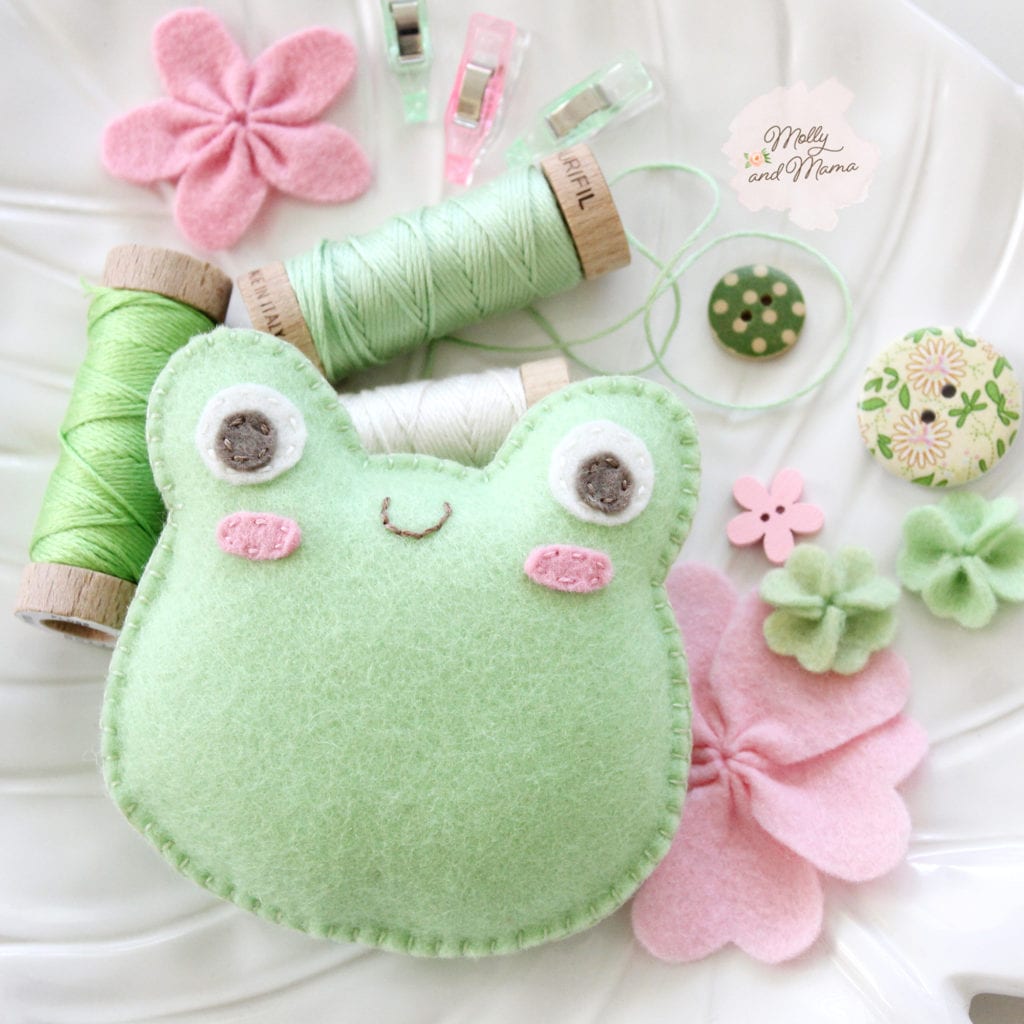
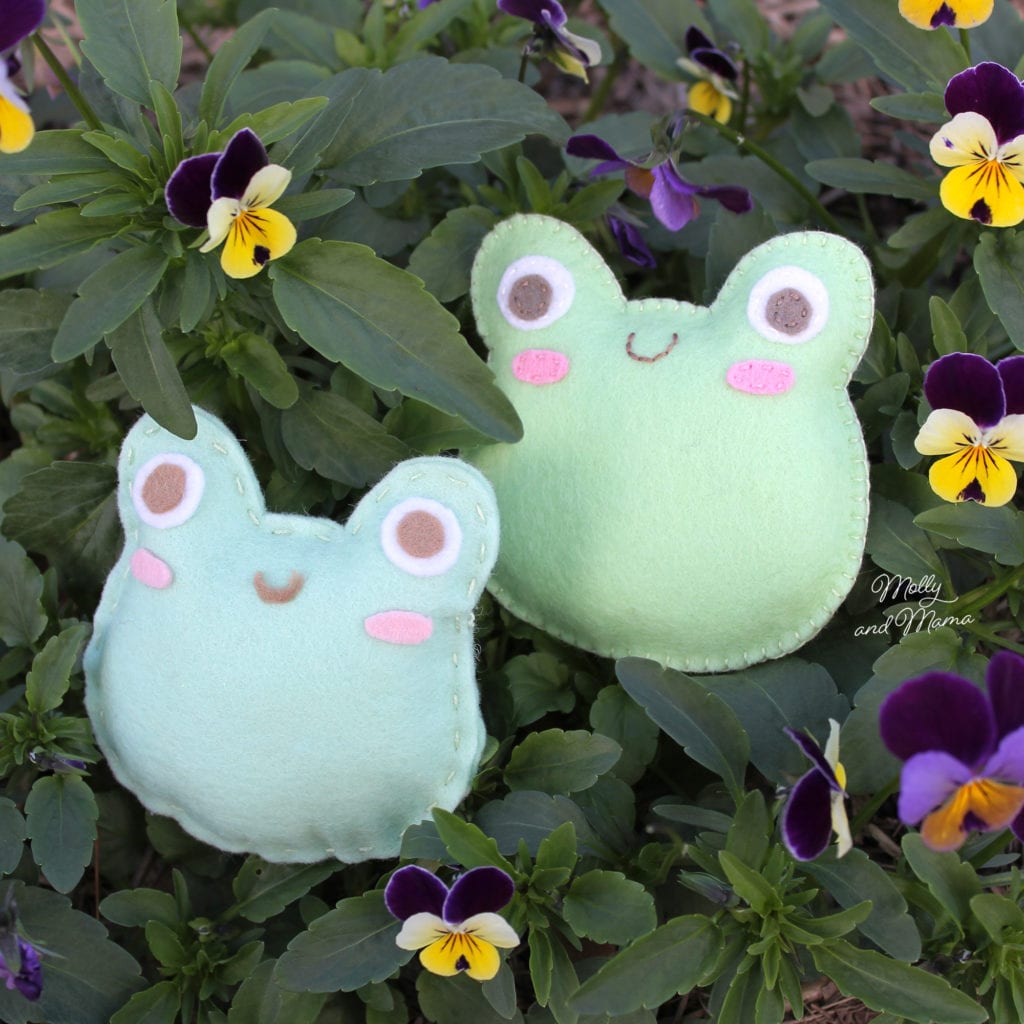
Your cute little felt frog is all finished. Be sure to make more than one so they can hang out together. These two have become fast friends and enjoy spending time together in the garden!
I hope you’ve enjoyed this tutorial and that it’s given you an opportunity to sew with (or for) a loved one.
NOTE: This tutorial is for personal use only, for sewing felt frogs at home and/or teaching another person or child to sew FOR FREE. Reusing or repurposing free Molly and Mama tutorial instructions, templates and images for paid classes, or distributing the materials in classes, to groups, or for commercial purposes, without permission, is strictly prohibited. For clarification, or to seek a commercial arrangement, please contact Molly and Mama.
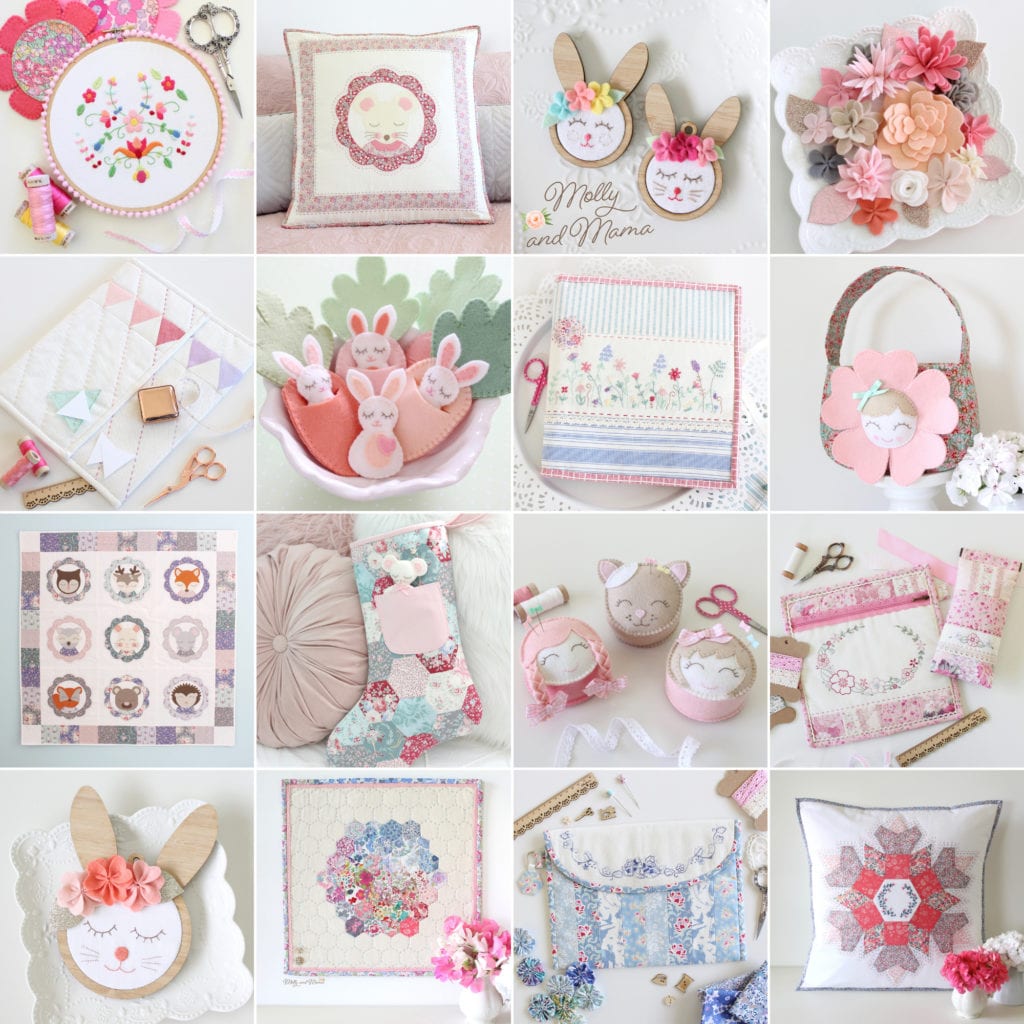
If you’re new here, take some time to look around. Head to the Tutorials tab too, because I have some really sweet projects you might like to make after this one, especially my previous Sew A Softie tutorials!
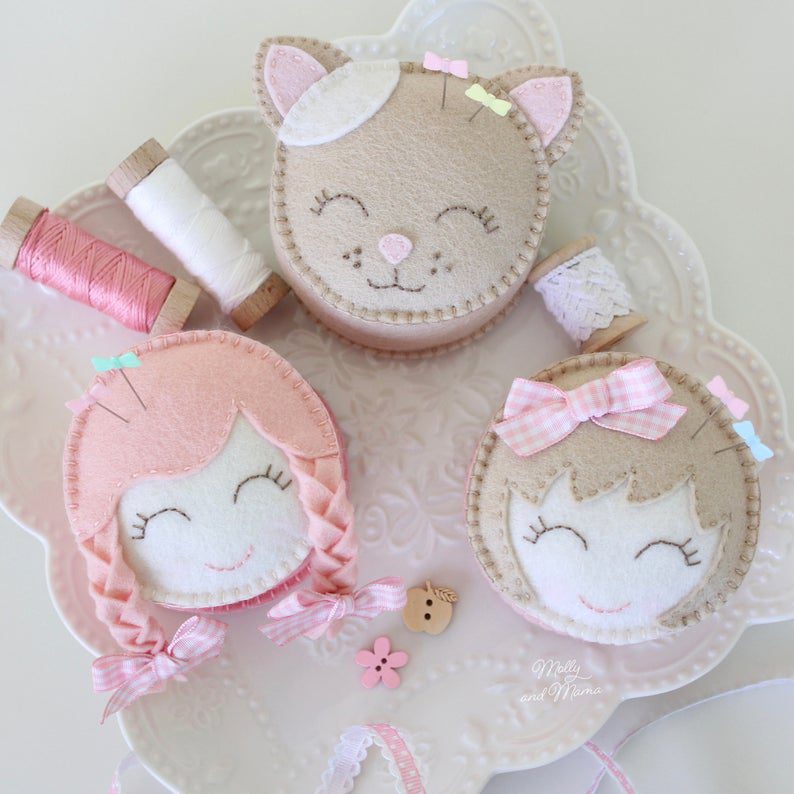
You might like these felt projects too. Click on the photos to learn more.


Or head to the Molly and Mama Pattern Store to see more of my quilty projects.
Happy stitching, Lauren x


Your 11 year old is amazing 🙂 …I just LOVE her frog!
What a neat idea! Sewing with kids, especially during this pandemic lockdown. A great way to bond and share some love.
Thanks for your kind words Judy.
What a cute project! I mentor a 9 yr. old I’m getting involved with sewing with her. She will enjoy this. Thanks so much!
Hi Melanie, that sounds lovely. Enjoy sewing with her, Lauren.