Make a Yo Yo Hair Clip
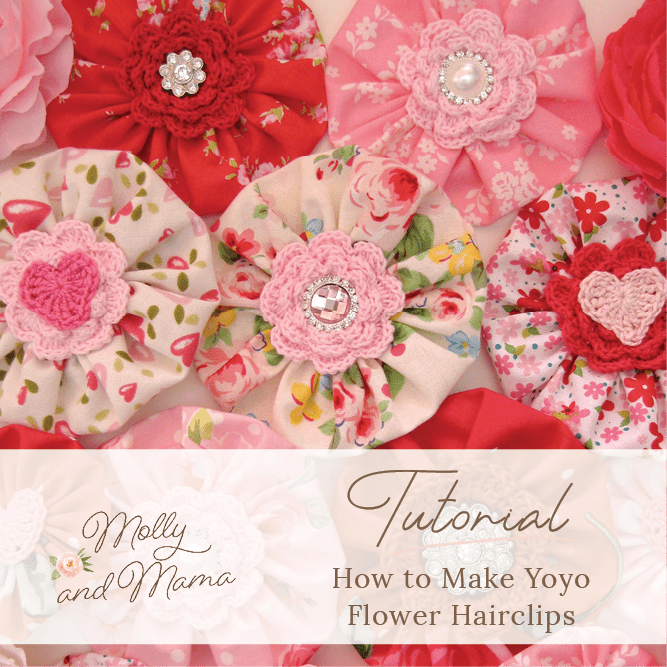
These pretty yo yo hair clips have been some of my most popular sellers. They are very easy to put together, but can really make a statement! You can create a matching hair piece for a special outfit by using just a small scrap of left over fabric. And you can dress these up however you’d like! I love rummaging through my scrap stash and button box to find the perfect combinations for a clip!
I’m going to show you the basics here and then you can go crazy! We’ll work on this design below. So lets get started making a yo yo hair clip.
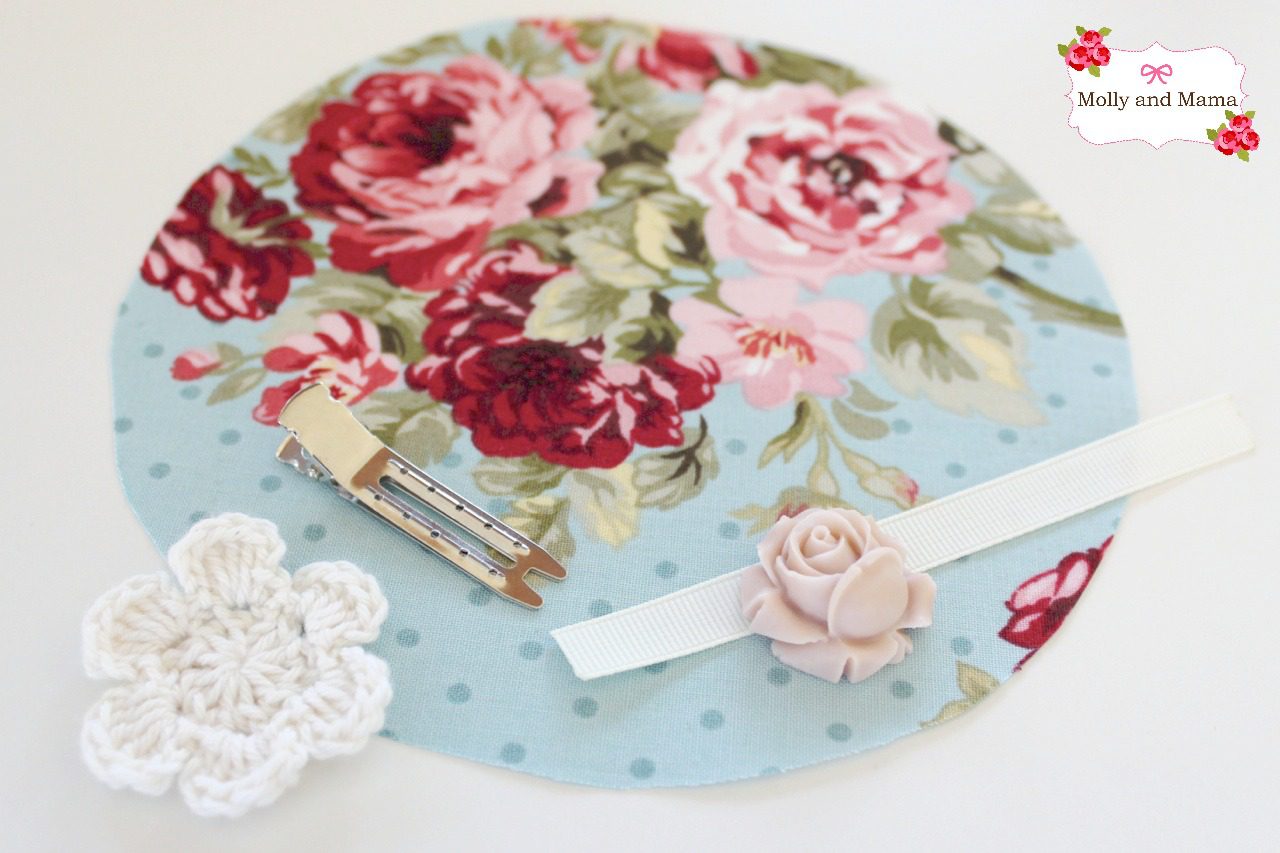
GATHER YOUR MATERIALS
- 48mm double-pronged alligator clip
- 12cm of 10mm wide grosgrain ribbon (with heat sealed ends)
- a hot glue gun
- a pressed fabric circle with a 16.5cm (6.5″) diameter
- a needle and thread
- scissors
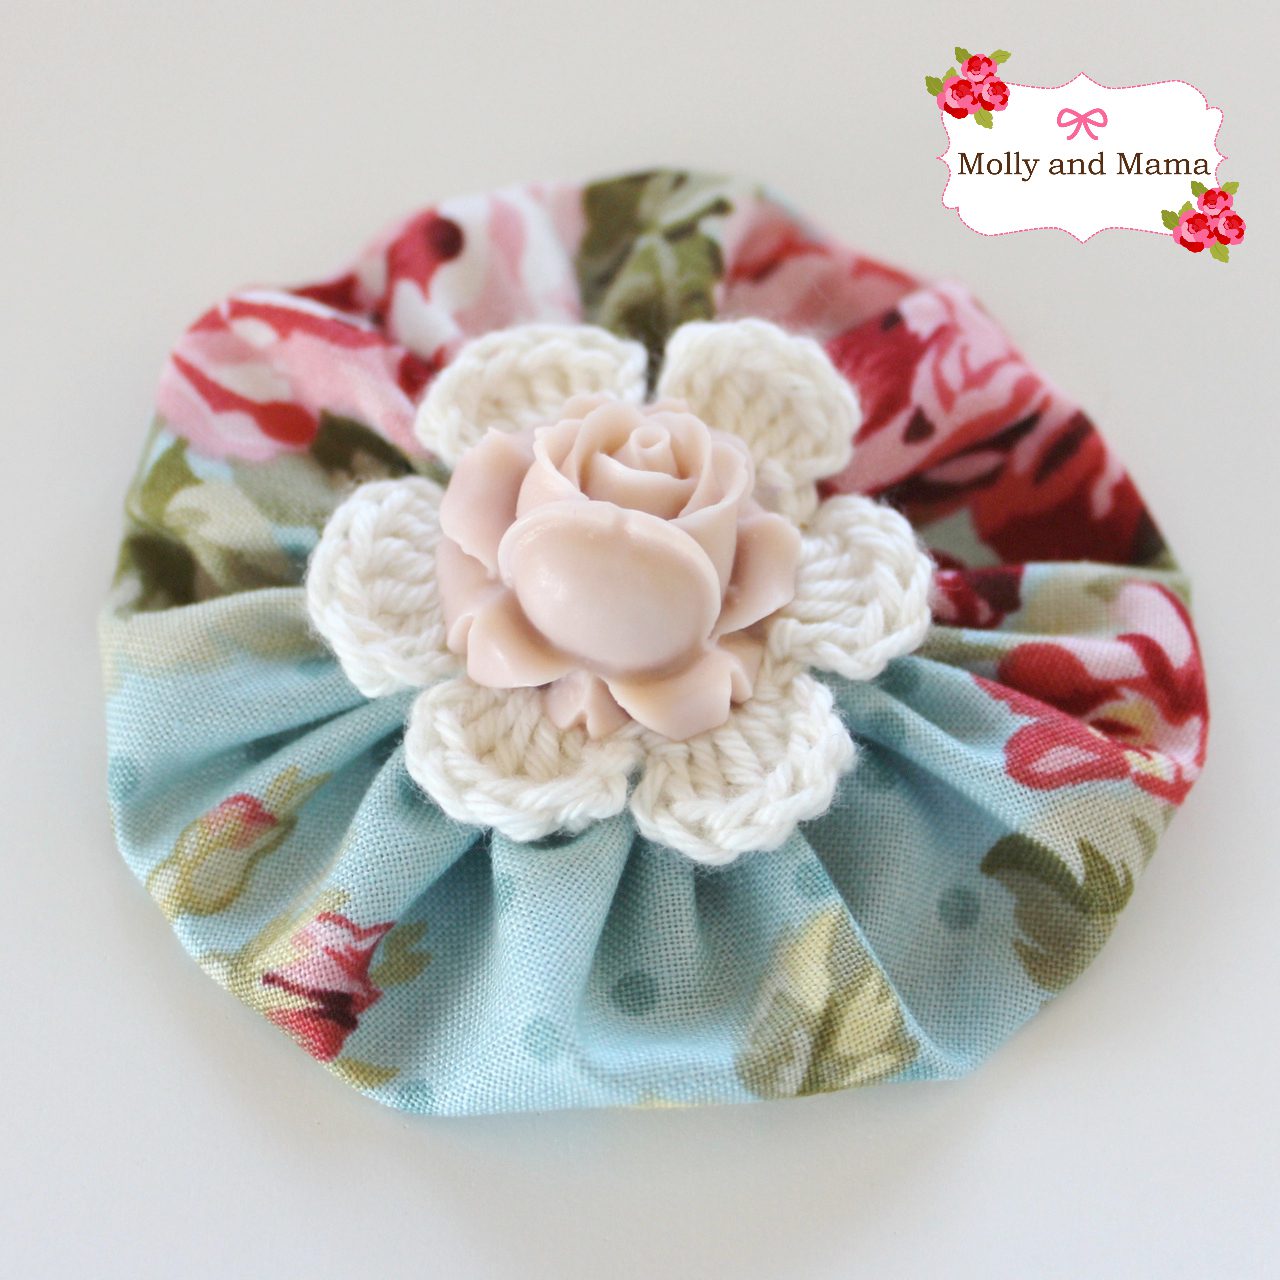
- embellishments (I used a crocheted flower and resin rose, but you can add whatever you like)
LETS MAKE A YO YO
There are two stages to making these gorgeous clips. First you need to stitch a pretty yo yo (you may also know it as a suffolk puff). If you haven’t made these before, they are super simple. And I have very conveniently included a link HERE to a previous tutorial that explains exactly how to make them!
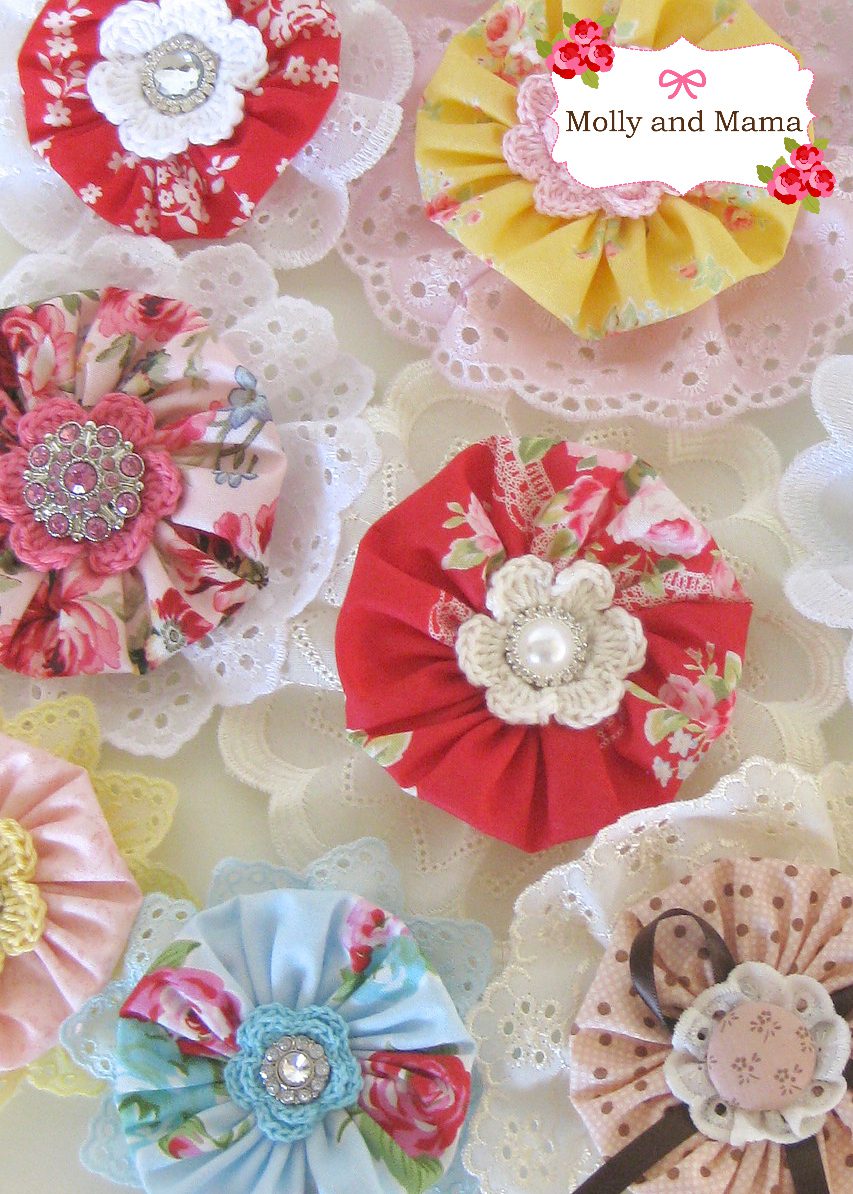
Here’s a whole bunch of them. Aren’t they so pretty en masse?
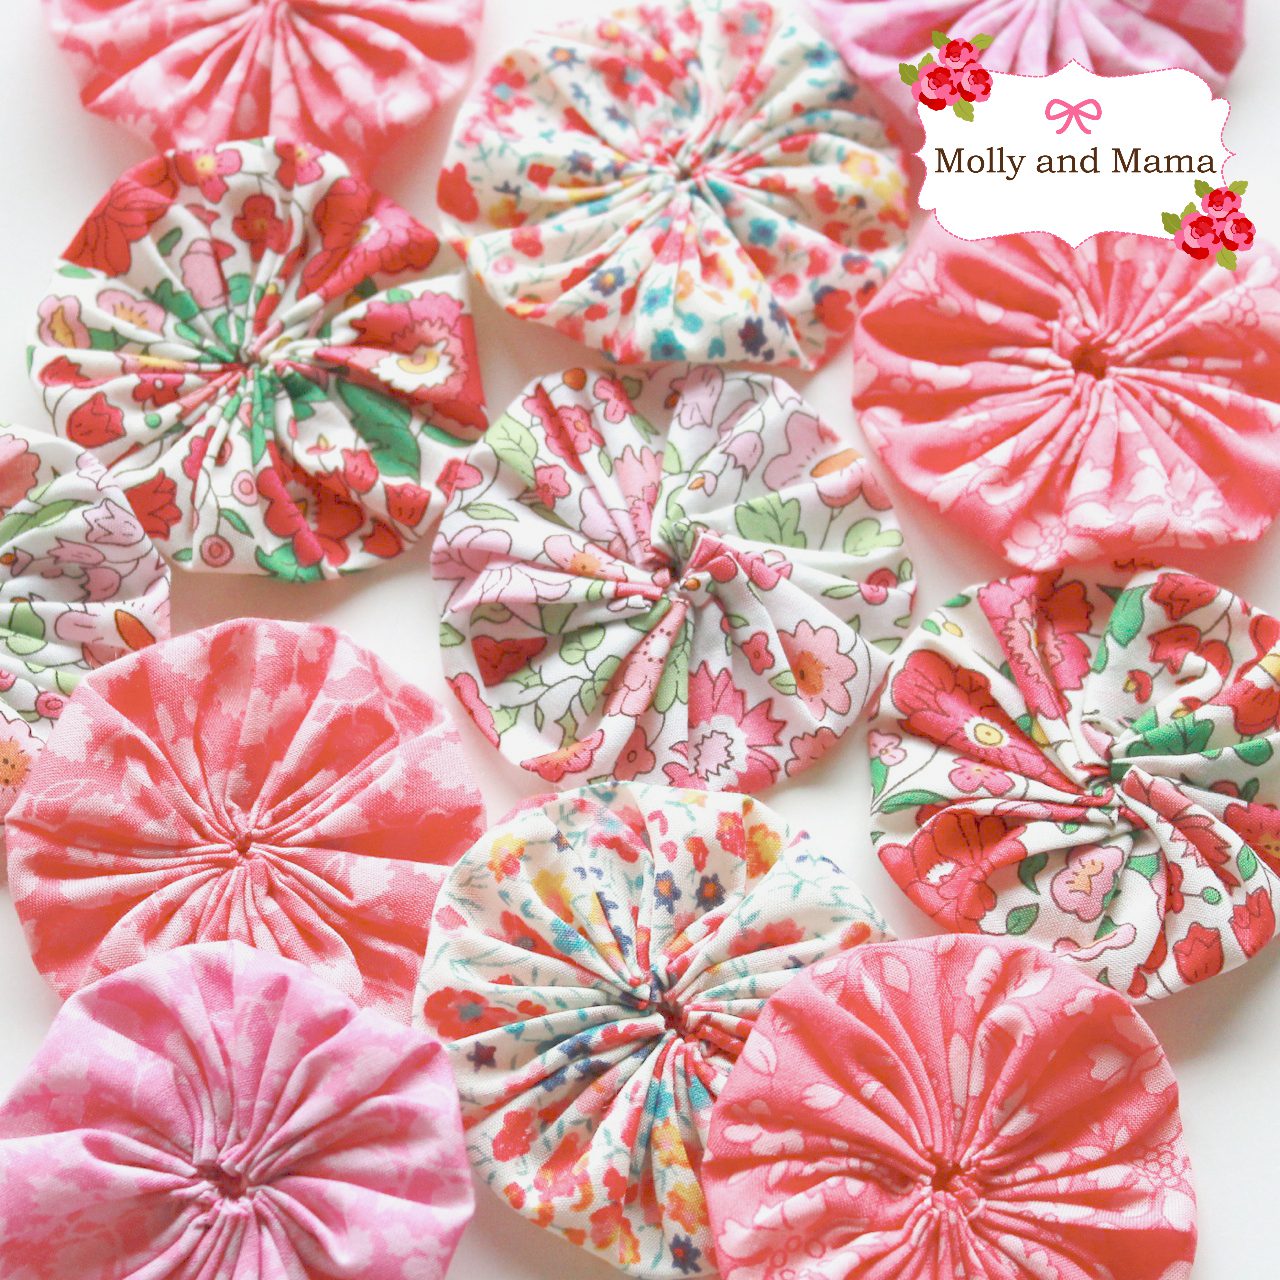
To make the yo yo used for this project, I used a 16.5cm fabric circle. This created a yo yo with an 8cm diameter. But you can play around and choose a yo yo size that works best for your project.
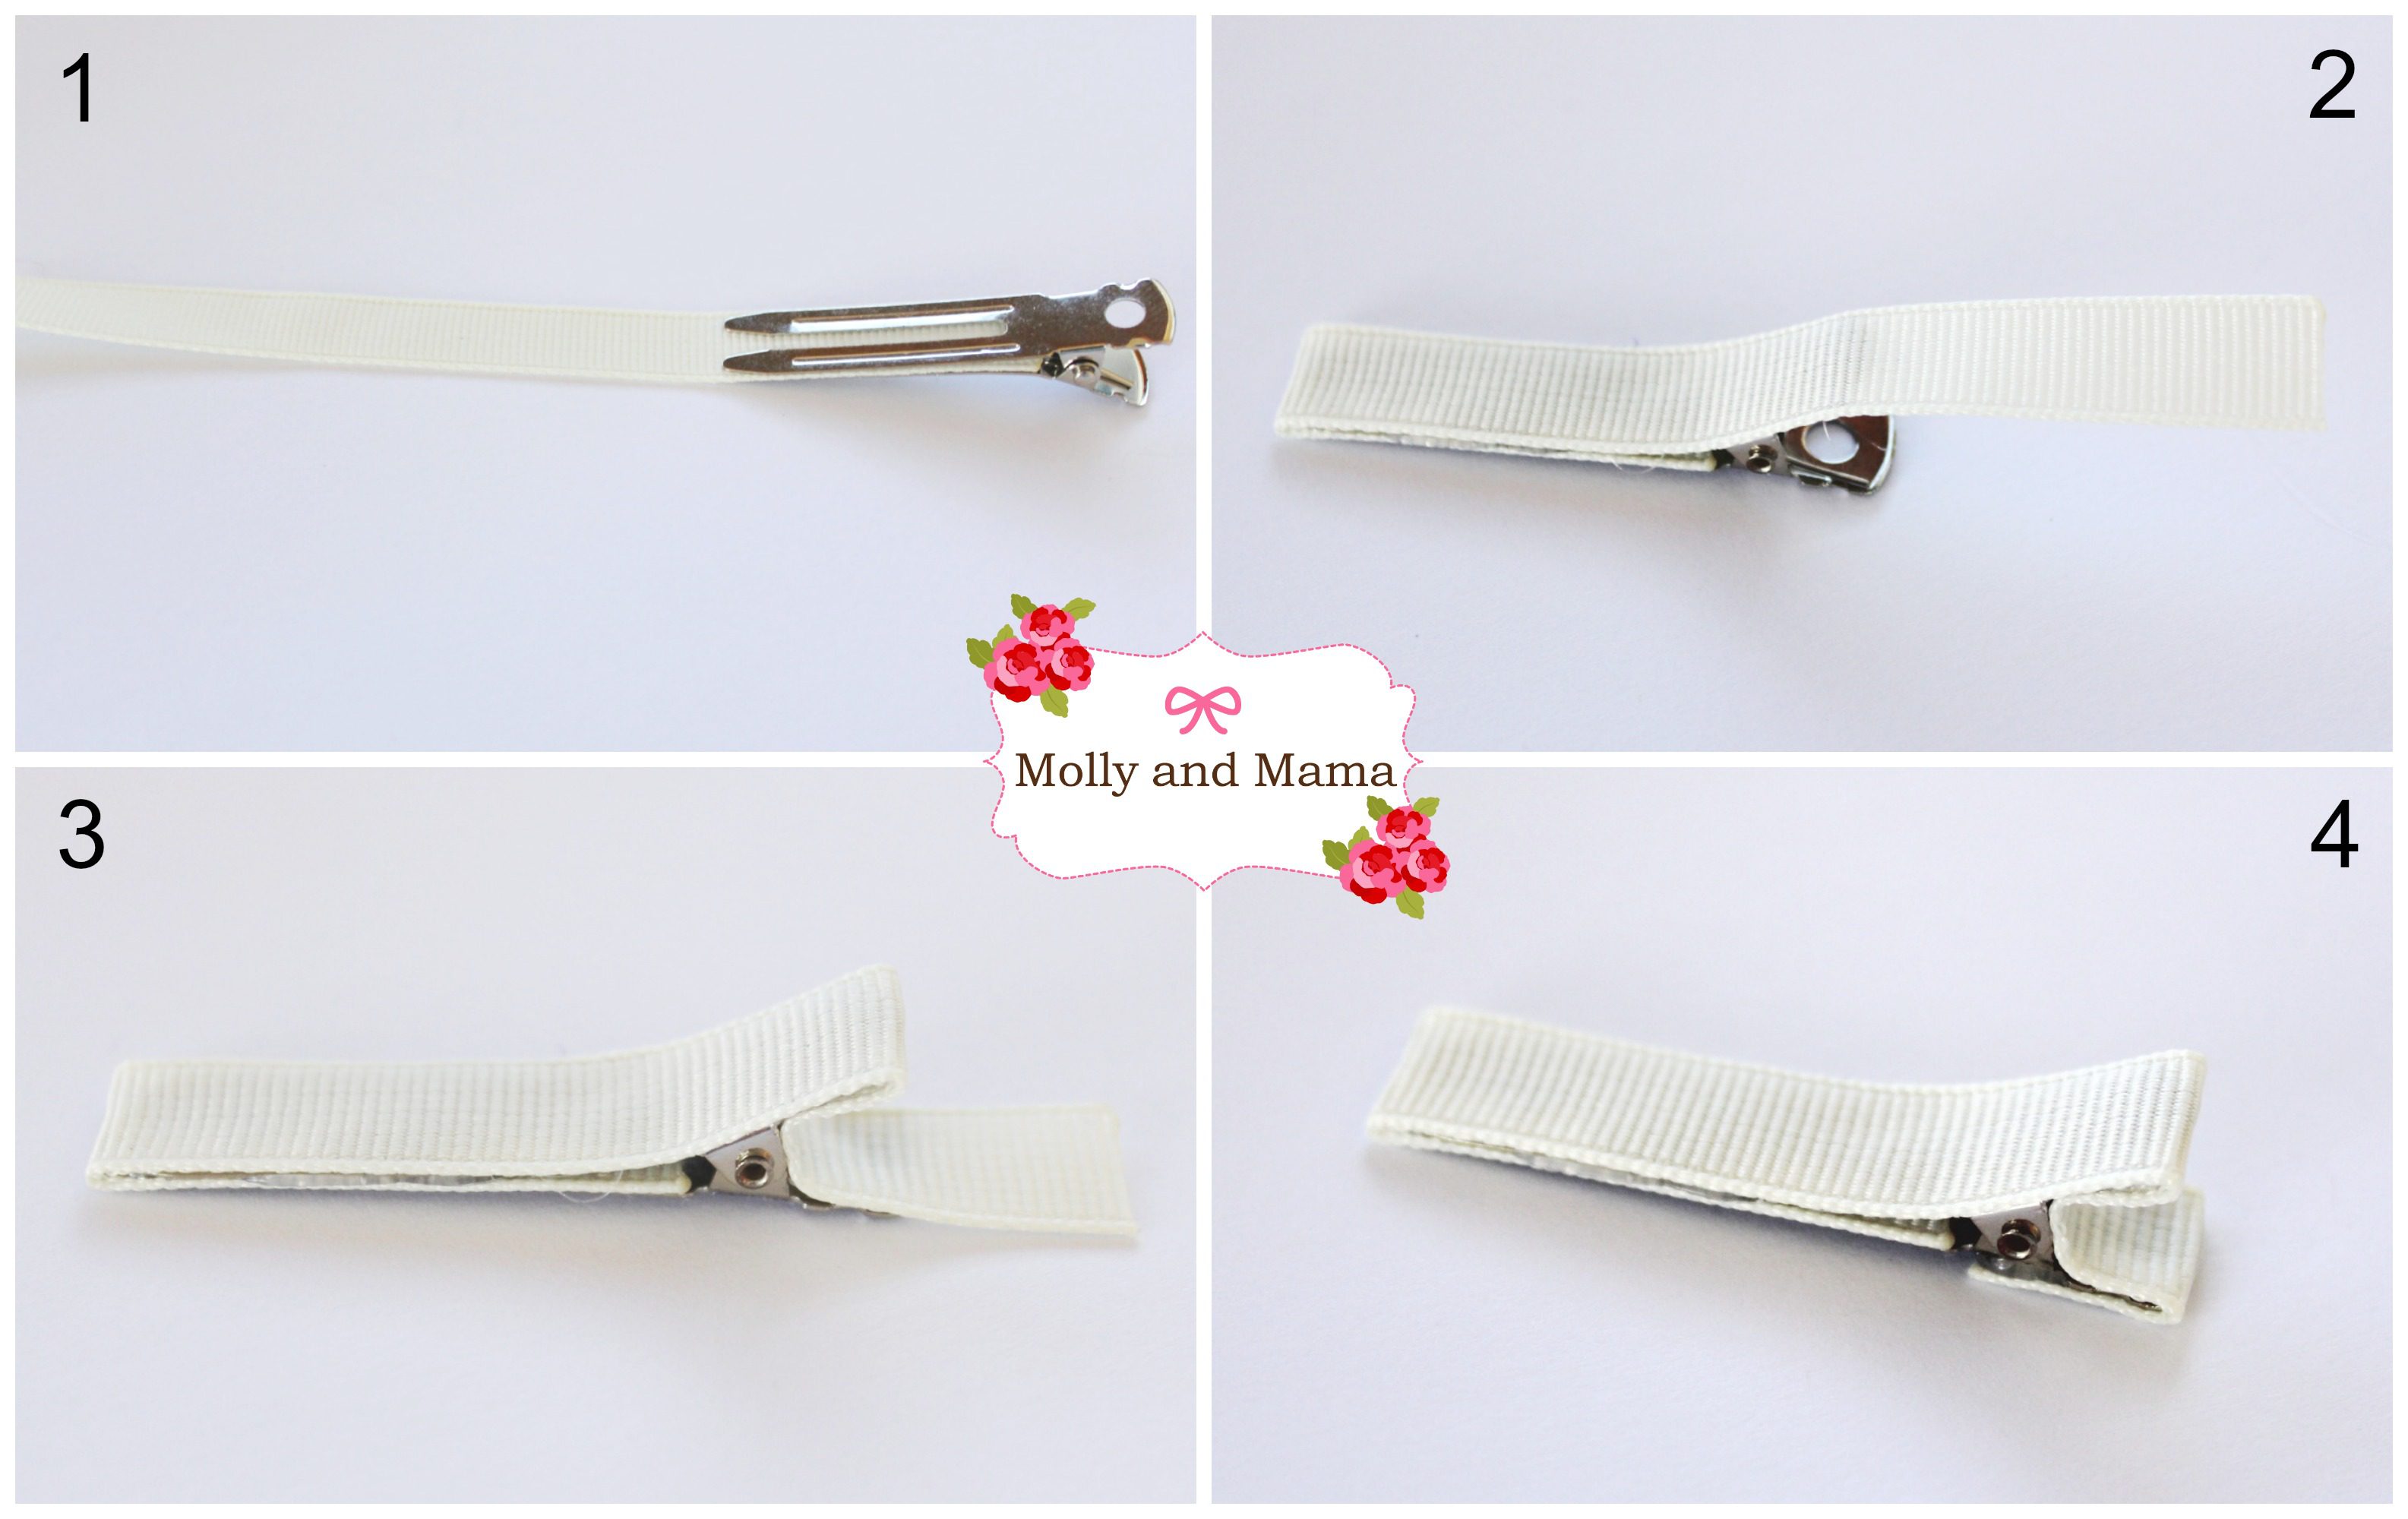
LINE AN ALLIGATOR CLIP
You’ll need to have a lined alligator clip ready to attach to the back of your yo yo. And guess what? I’ve got a tutorial for that too! You can head over HERE to find out how to make a simple bow and cover an alligator clip at the same time.
But here’s the short version; Take your 12cm length of heat sealed ribbon and attach it to the 48mm double-pronged alligator clip using a hot glue gun. The numbered pictures below really demonstrate how I do this stage. Just remember to work quickly but carefully with hot glue!
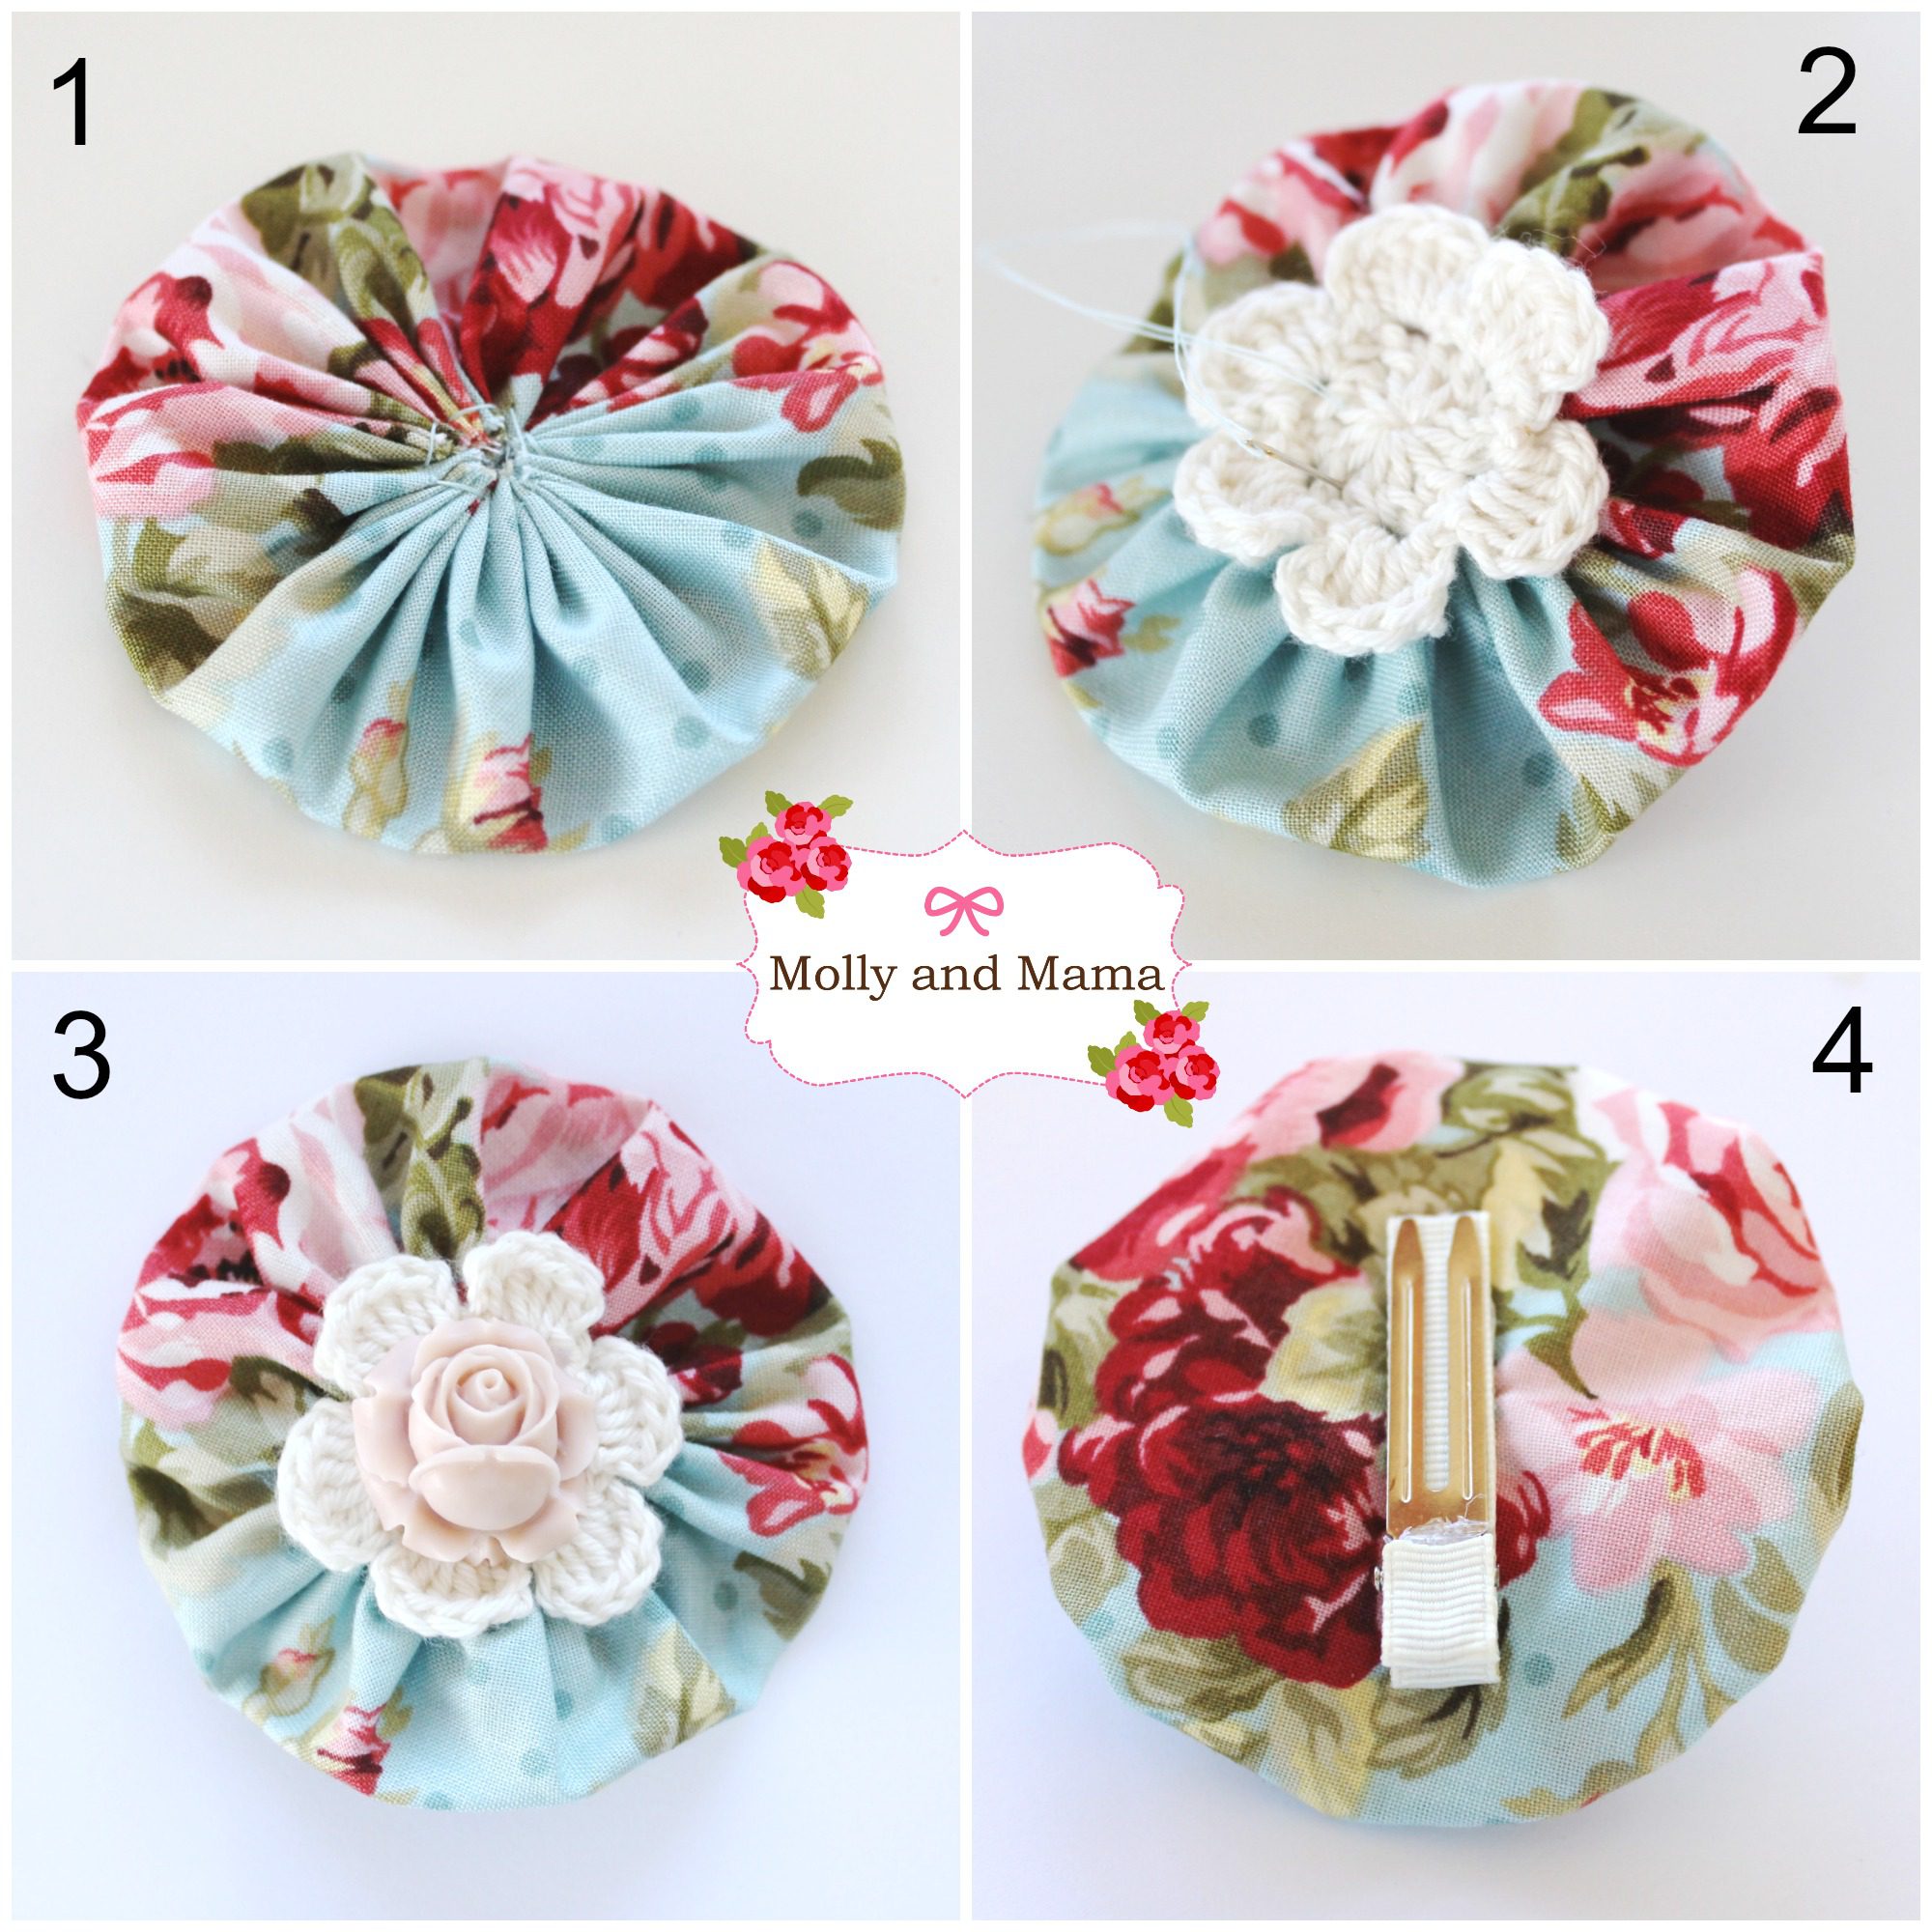
PUT IT ALL TOGETHER
Once you’ve stitched your yo yo and covered your clip, it’s time to put it all together. The steps match the numbers in the image below.
- Take your completed yo yo.
- Attach any soft or fabric embellishments, or buttons, with hand stitching. I added a pretty cream hand-crocheted flower.
- Use hot glue to secure any resin shapes, cabochons, rhinestones, or other pretty pieces. This pale peach resin rose complemented my fabric yo yo perfectly.
- Attach your clip to the back of the yo yo. Press a line of hot glue onto the top of the clip. Turn it over and gently press it into place on the yo yo back. At this stage it’s important to consider which direction you’re placing the clip on the back. Does the design on your yo yo have to face a certain way? I wanted my resin rose to be upright. So I carefully positioned the clip so that the rose faced the correct way when worn.
Wasn’t that simple?
Once you’ve mastered the basics, you can start to play around with your designs. You can add bows, fabric covered buttons, crochet embellishments and lots of sparkle. It’s up to you!
These designs also have a lace rosette attached to the back. Simply gather a length of lace with a straight stitch to make a rosette. Hand stitch a seam to join the two ends. Stitch your rosette and yo yo together before adding more embellishments.
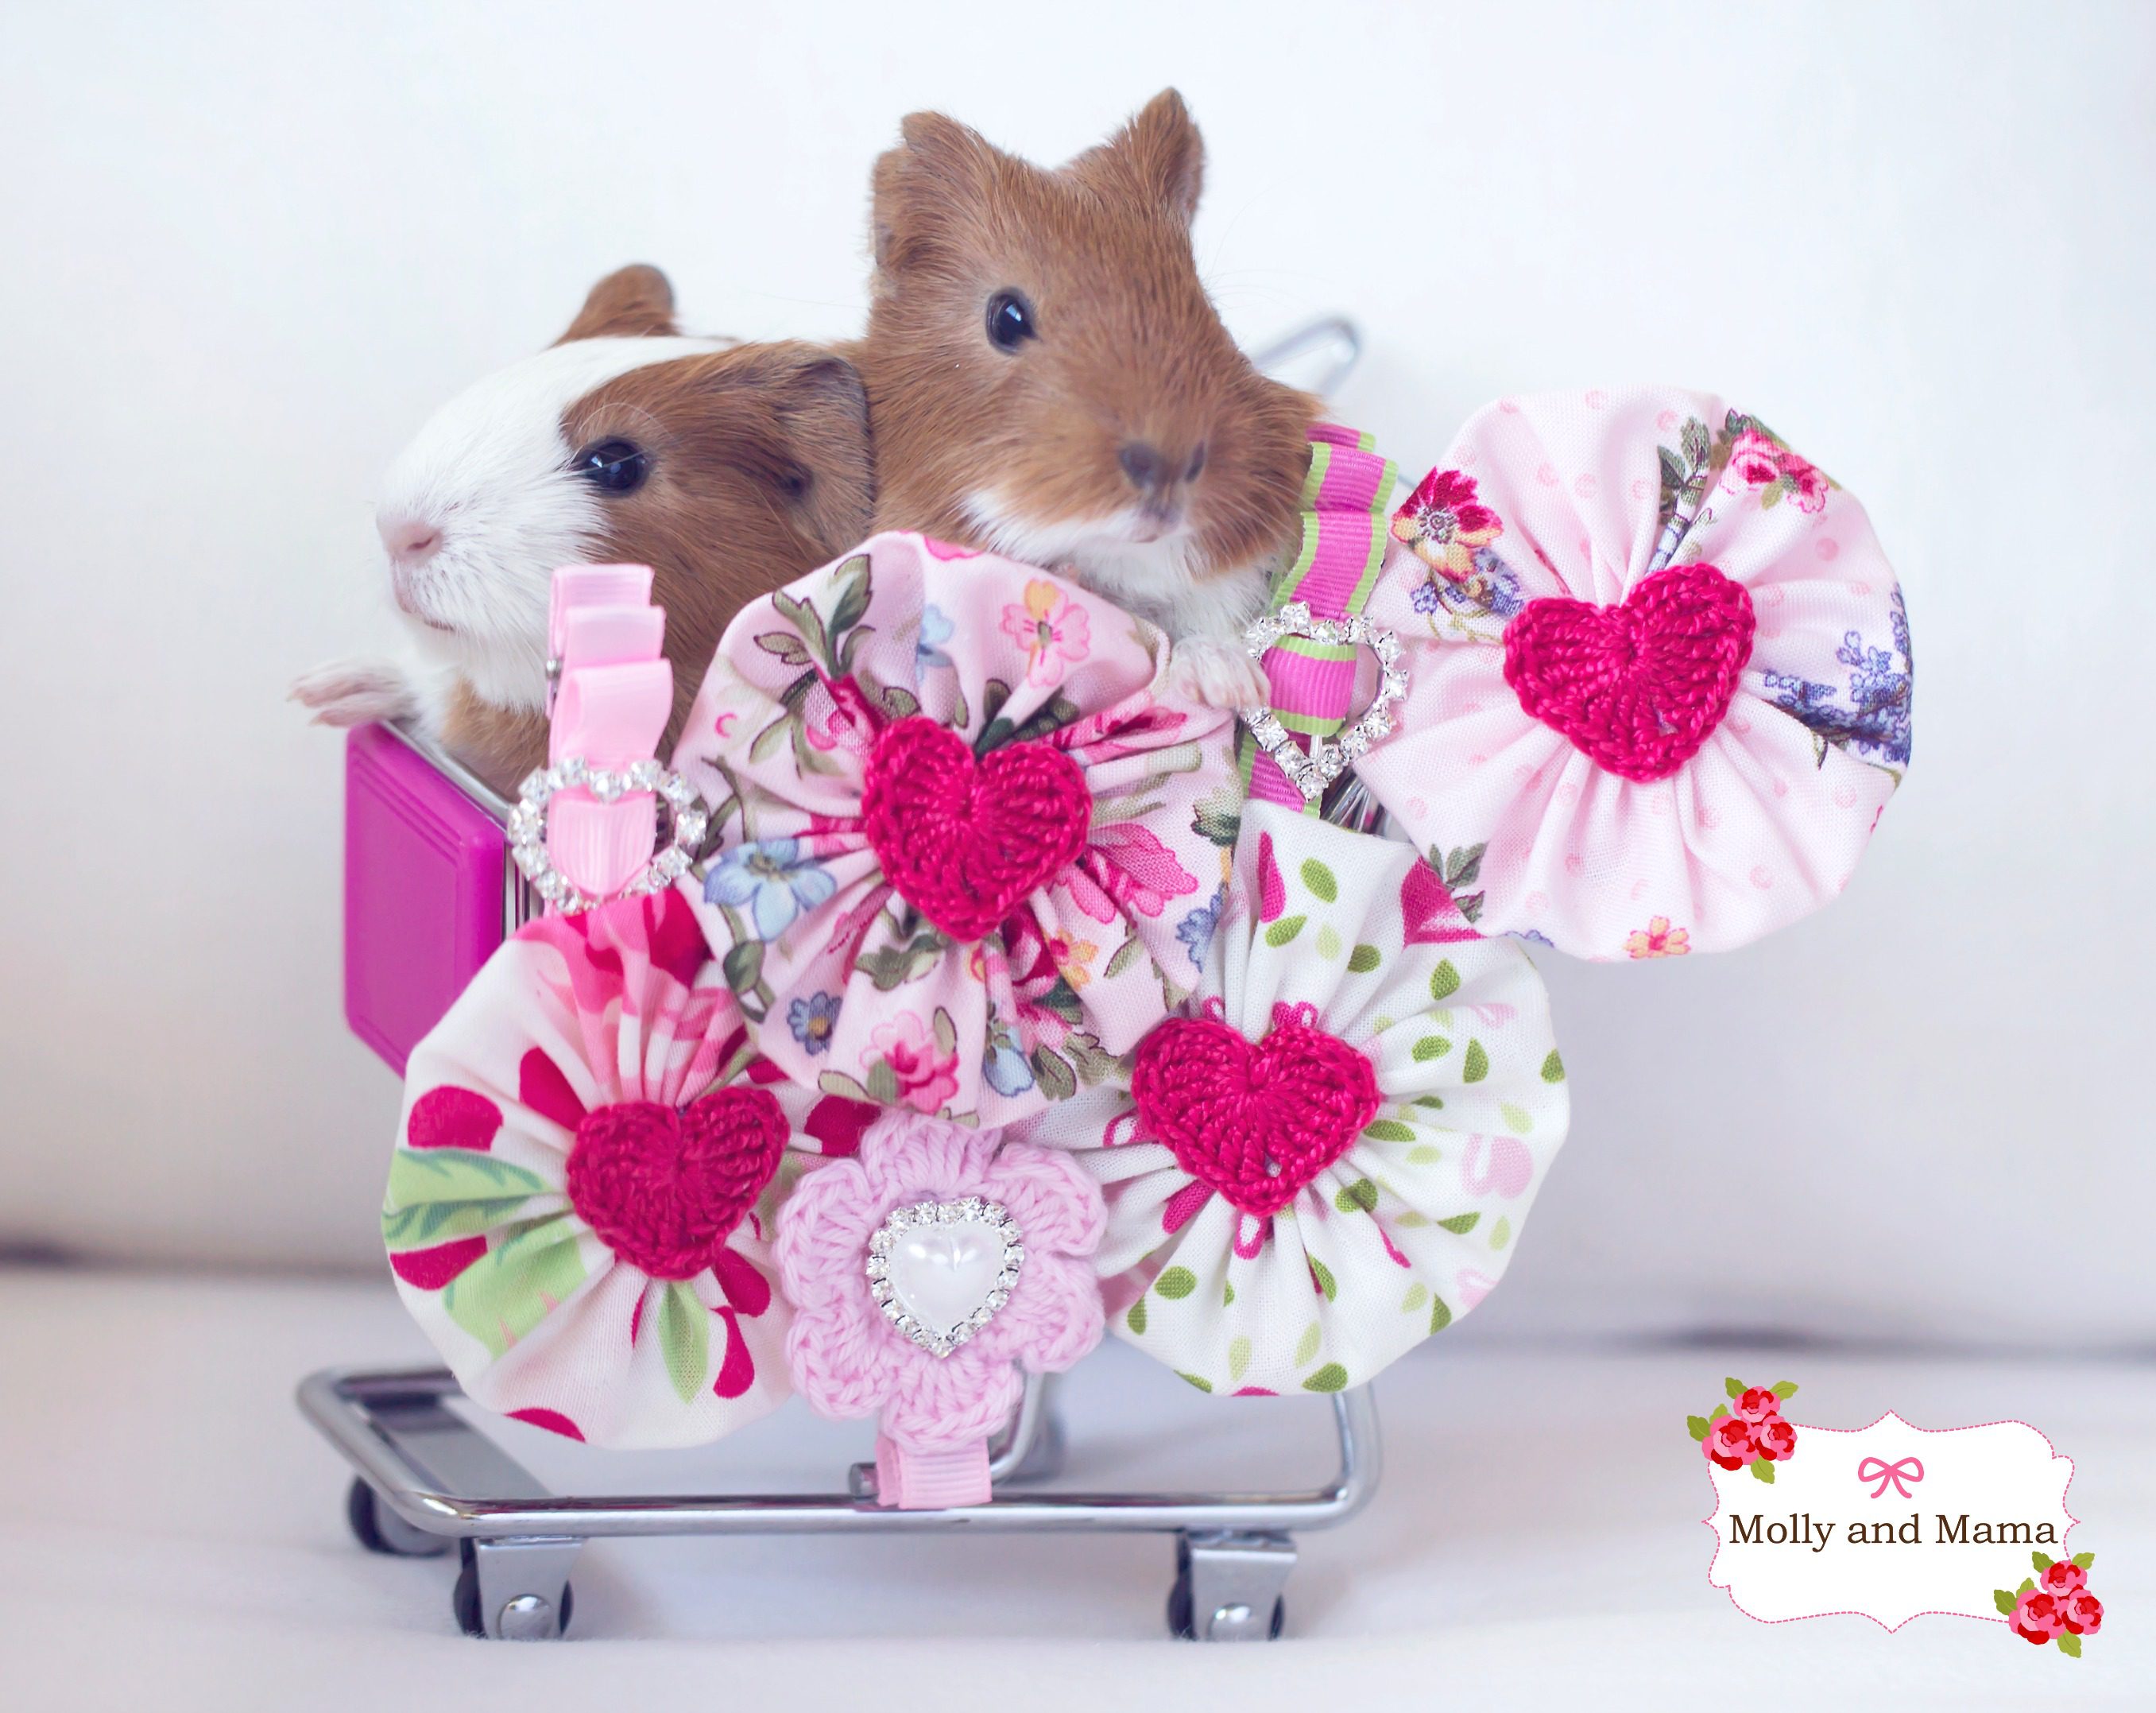
I’m so in love with making these pretties. I even had my lovely friend Mel from MiaMia Photography take some gorgeous photos for me. Here’s one of Monty and Pipsqueek (the guinea pigs). Aren’t they wonderful models?
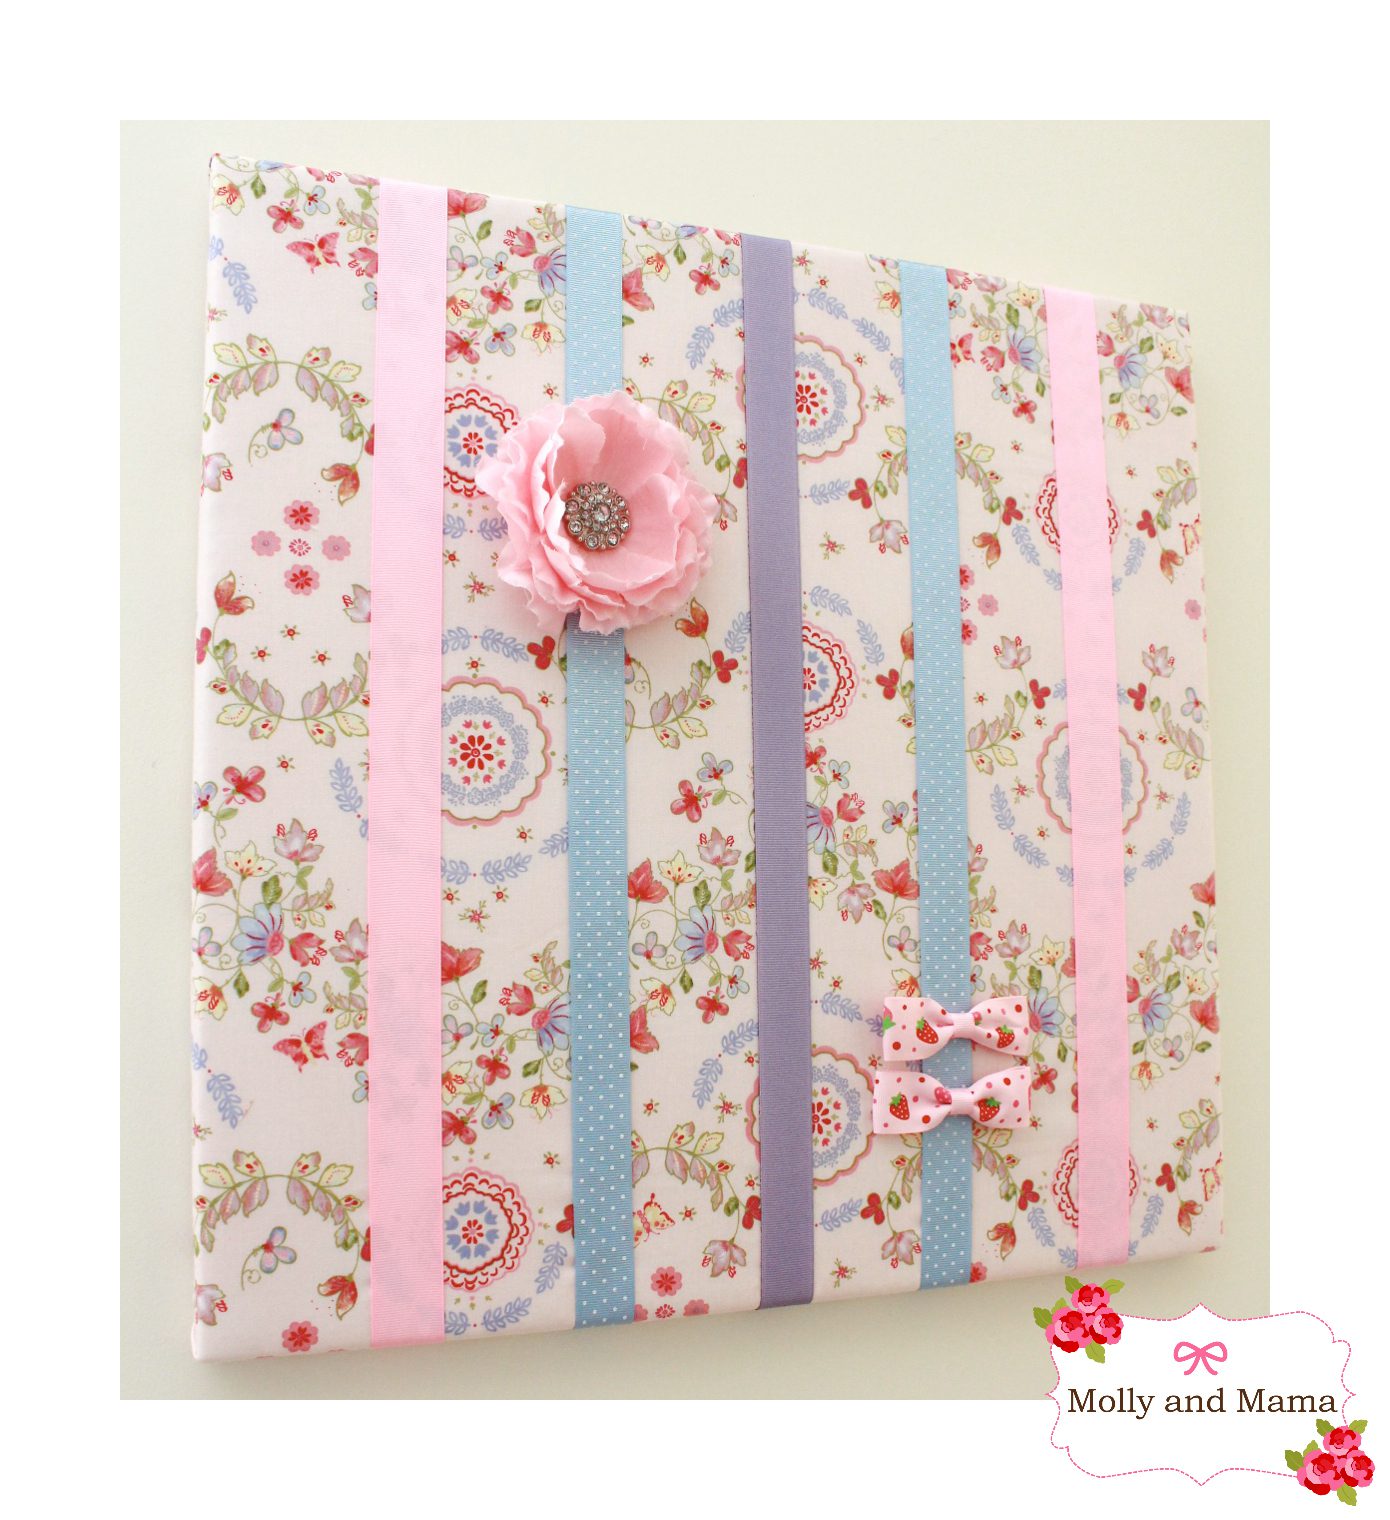
And once you’ve made a whole collection of clips and bows, you’re going to need somewhere to store them. Luckily I have just the thing. You can use a simple artist’s canvas to make a beautiful and practical hair clip holder. And I have written a tutorial over on the SewMcCool blog showing you how!
Have you made similar hair accessories? Do you have a hair clip project you’d love to share? I’d love to hear from you!
Check out more inspiration on my Pinterest board for Hair Accessories. Thanks for stopping by for another Molly and Mama tutorial!
Happy stitching, Lauren x
This post was written by Lauren Wright and appeared first on http://www.MollyandMama.com.au

Such a nice tutorial and the Piggie pics are adorable!
Thank you Sandra! I agree about the piggie pics. They were perfectly behaved models too!
Thank you Sandra! I agree about the piggie pics. They were perfectly behaved models too!