Molly and Mama

Studio for Pretty Stitches - Inspiring ideas for Felt, Stitchery and Patchwork

  • Home
  • Start Here!
  • PATTERNS
    • PDF Pattern Shop
    • Paper Pattern Stockists
    • Pattern Corrections
  • TUTORIALS
  • Classes
  • BOOK
  • Contact

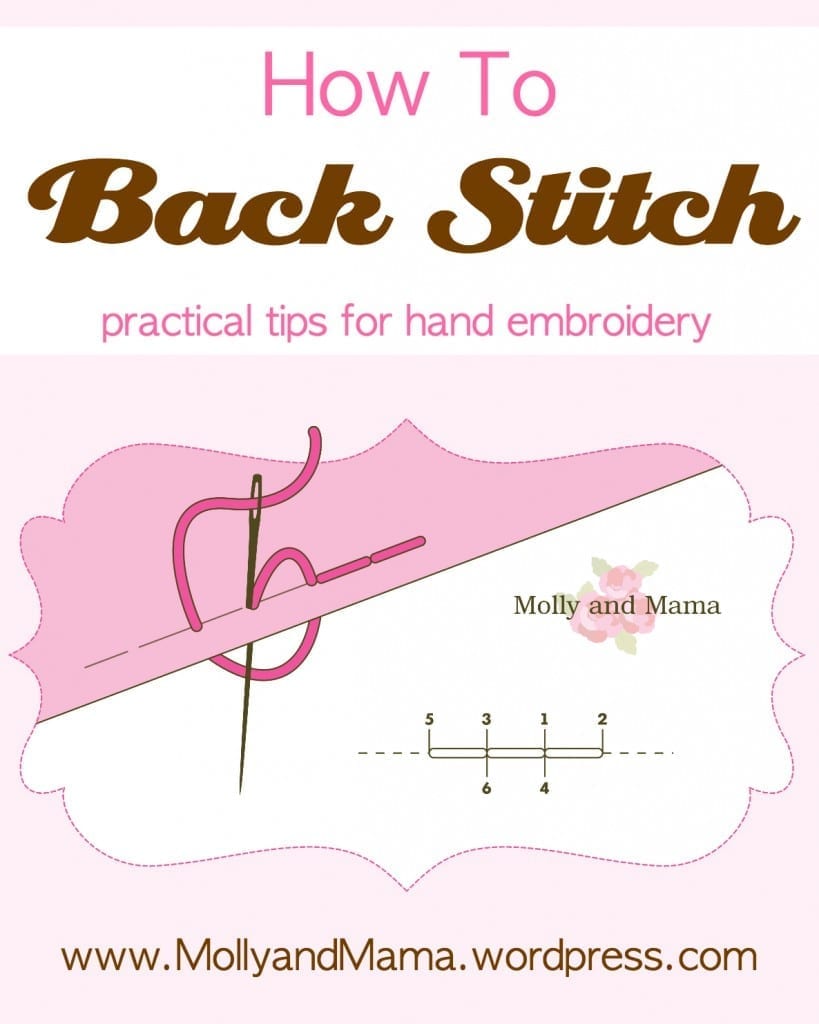
How to Back Stitch – practical tips for Hand Embroidery

January 18, 2015 By Lauren at Molly and Mama 7 Comments

How to Back Stitch by Molly and Mama

A lot of my sewing projects include hand embroidery. And the most common stitch I use is back stitch. It’s such a simple stitch to do, and it’s a great one to start with. Especially if you’re just beginning your hand stitching journey.

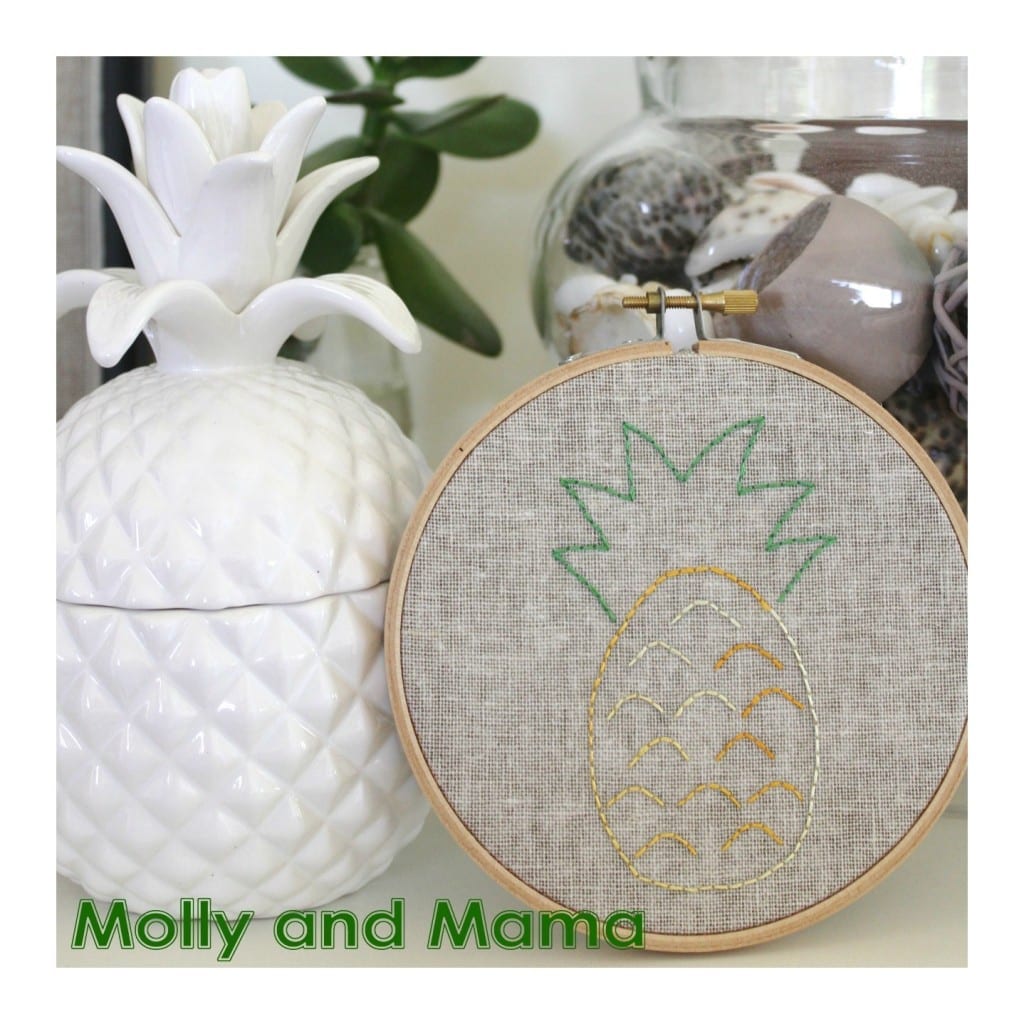
I recently stitched this lovely tropical inspired wall art. It’s created using nothing more than back stitch.

Pineapple Embroidery hoop art project by Molly and Mama

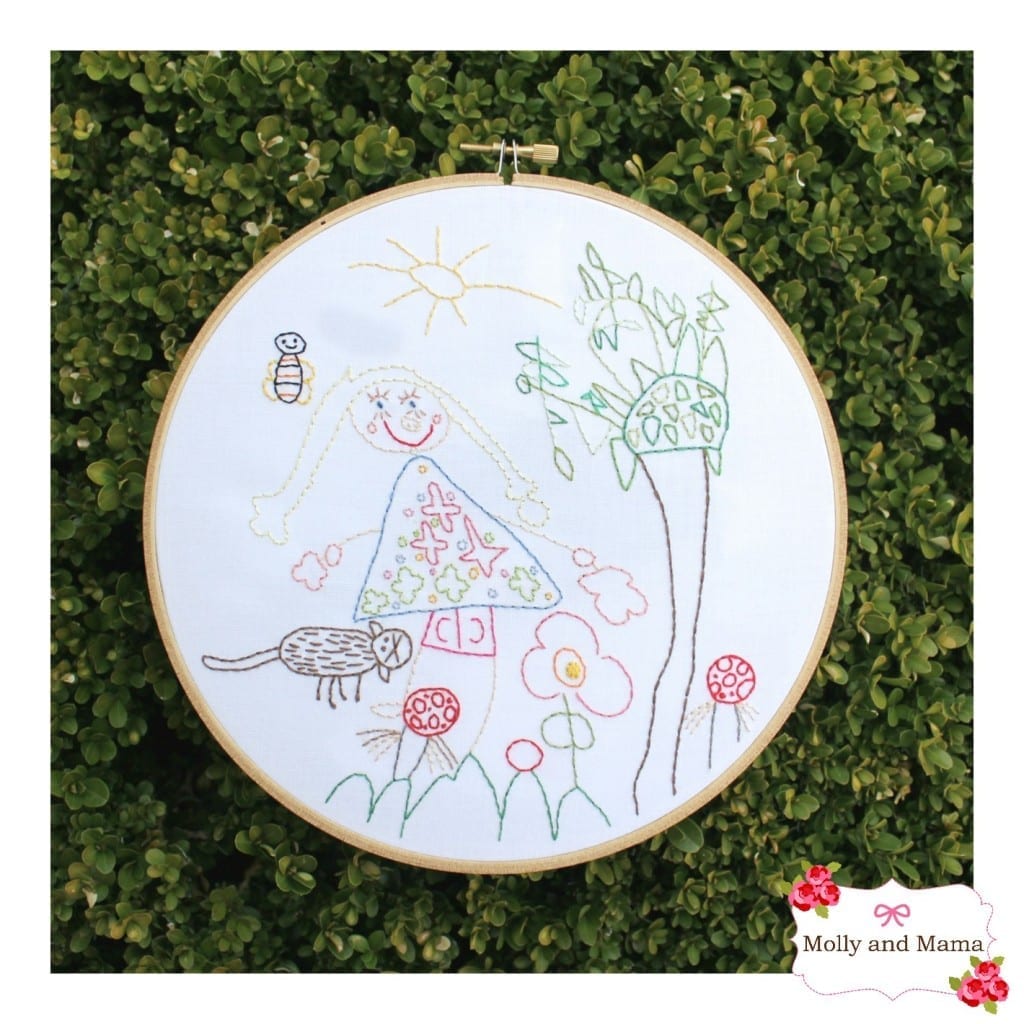
I also transformed one of my five year old daughter’s sketches into a beautiful embroidery using back stitch too! I love it!

Embroidered Children's Art by Molly and Mama

Back stitch is so easy and you can achieve such a neat and straight finish. It’s also a great alternative to machine sewing (if you ever need another option). Read on to find out how to back stitch;

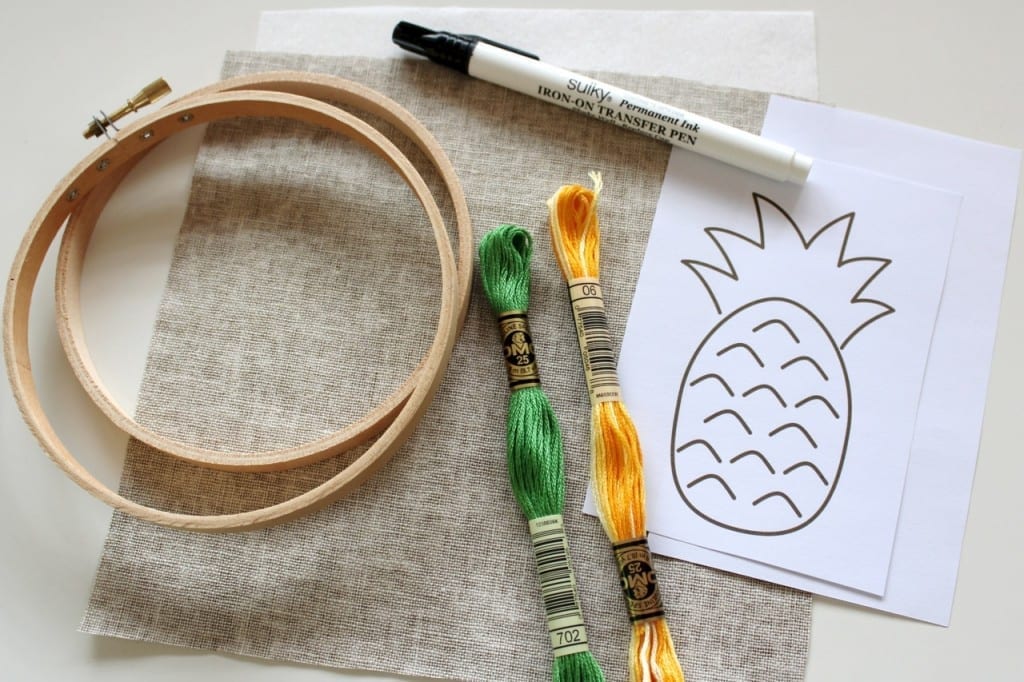
YOU WILL NEED

  • fabric to embroider
  • embroidery floss like DMC thread
  • an embroidery needle with a sharp point
  • a design to stitch and a method to transfer it to your fabric
  • an optional hoop
  • an optional fabric stiffener like iron-on interfacing

I use six stranded skeins of embroidery floss (like DMC) for hand embroidery like back stitch. Depending on your project and how thick you would like your stitching to be, you can use all six threads or you can split them up. It’s not uncommon to stitch with three strands or two strands of floss also. In this project, I split my floss skein in half so I used three threads together.

Some people like to pre-prepare their floss but I usually just cut a length of embroidery floss and then divide it as I need it.

Don’t forget to store your embroidery floss well too. It’s best to wind your floss onto individual cards that you can label with the floss type and the colour number. That way, you always know what colour you’re using and how much you have left. (But if I’m perfectly honest, I must confess to also having a little container bursting at the seams with tiny offcuts and remnants of floss. It’s just a big old jumble of thread! But it’s great when you just need a tiny bit of pink for a smile, or a scrap of brown for an eye.)

WILL YOU USE A HOOP?

Before starting your stitching, consider using an embroidery hoop. They’re inexpensive and they help keep your project flat. This means you’ll have a similar thread tension throughout your project. You’ll avoid puckering and have a neater finish. I like the adjustable wooden hoops like the one shown below. You don’t need a hoop large enough to fit your whole project. You can just keep moving them around and readjusting their position on your fabric.

Back stitching with a hoop, by Molly and Mama

PREPARE YOUR FABRIC

Prepare your fabric by ensuring it is clean, ironed flat and has the edges prepared. As the fabric edges can fray during the hand stitching process, prepare the edges by overlocking (or serging) them, taping them with masking tape or cutting them with pinking shears (my preferred method). The method you choose will also depend on what you’re using your embroidered design for.

If you’re creating a hoop art project, consider adding some weight to your fabric by adding some iron-on interfacing to the back. I did this for my pineapple embroidery project. It makes the fabric stiffer and easier to work with.

TRANSFER YOUR DESIGN

To prepare a project for stitching, transfer your design onto your fabric. Your design may be a pattern, or a print out. You may also have a pre-made iron-on transfer. You can use a light box to help you trace your design with a lead pacer pen or erasable ink pen. You can also hold it up against a window to trace. You can draw the design on thin paper, and stitch through it. You can also draw your design on paper with a fabric transfer pen and then iron your design onto your fabric. Remember if you iron your design on, it will be a mirror image of the original though.

PREPARE YOUR FLOSS

So to start, cut a length of floss and split it in half. Your length should be long enough to easily work with. If it’s too short, you’ll be rethreading your needle constantly. If it’s too long, your project will be more susceptible to knotting and tangles. 15 to 20 inches is a good starting length (38 – 50cm).

Thread the three strands onto your embroidery needle. Be sure to create a simple knot at the end and trim the excess thread past the knot (to 1/4 inch or less than 1cm).

BEFORE STITCHING

Consider where you’ll start your stitching and where you’ll finish. Try and work it so that your stitching will travel from line to line without too much overlapping and without travelling too great a distance on the back of the fabric. Will you stitch section by section or colour by colour? Take some time to consider this before you begin.

START BACK STITCHING

You’re ready to start. When backstitching, you’re just making a series of normal straight stitches. But you stitch them in a backward motion.

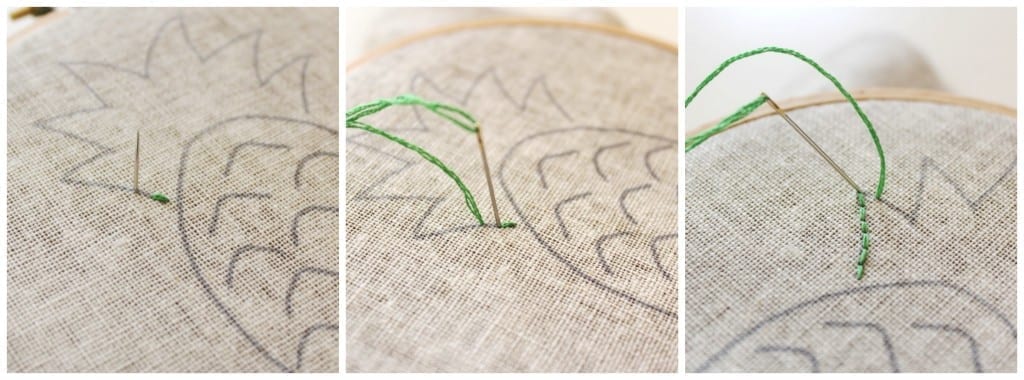
Bring the needle and thread up through the back (the wrong side) of your fabric so that the needle pops up a stitch ahead of your starting point or the beginning of your template. Stitch back to the starting point of your template. Make your stitch a 1/4 – 1/8 inch long (or a few millimetres long). This will be your first stitch.

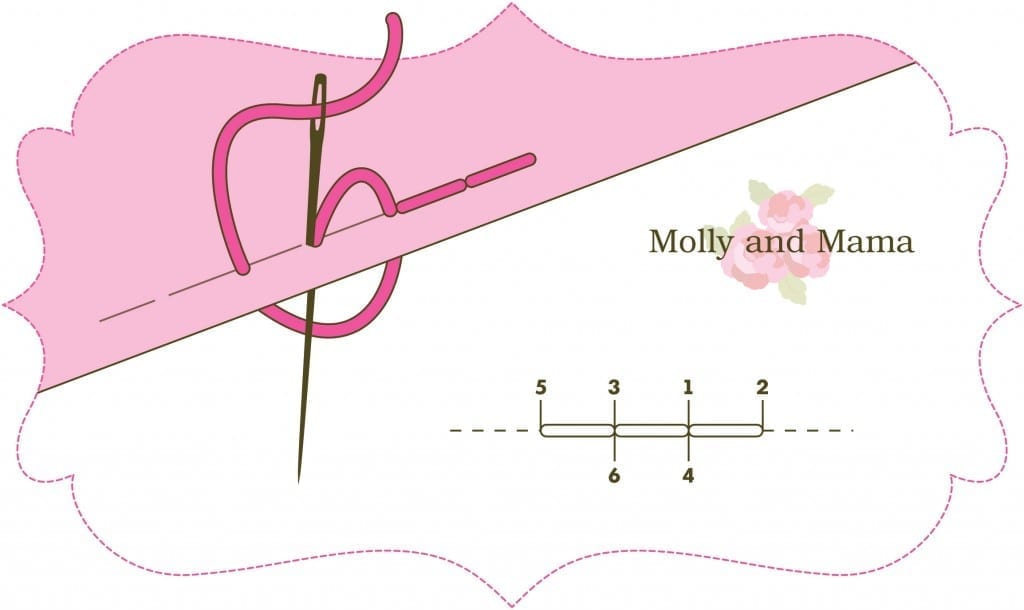
Then bring your needle and thread up a ‘stitch space’ ahead of your last stitch. Lastly, bring the needle down through the same hole as the end of the last stitch you made. This diagram may make things a little more clear.

How to do back stitch by Molly and Mama

As you back stitch, be careful to cover the lines of your transfer as you go. Try and keep your stitches the same length. However, make adjustments as you stitch so that you don’t end up with one unusually short or long stitch at the beginning or end of a section or line.

Starting backstitch

Consider the direction of stitching before you begin each new section, so you know exactly where you’re heading and where you’re ending.

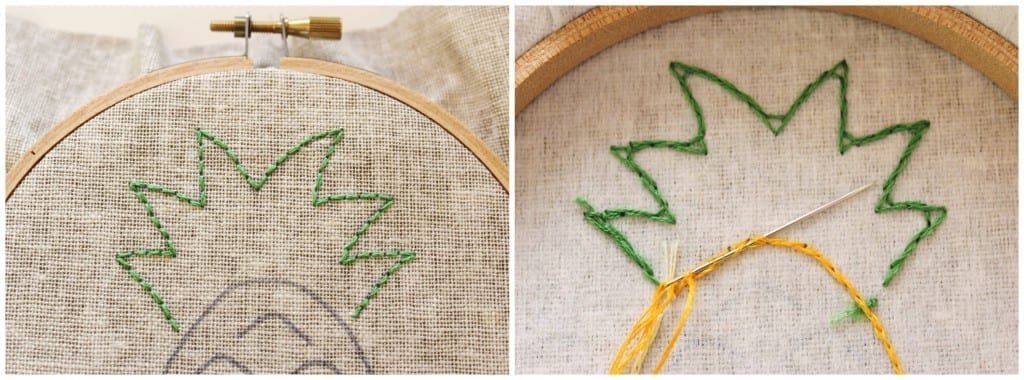
When complete, your stitching will look something like this from the front and the back;

The front and back of Back Stitch

As you finish your thread, feed the needle down into the back and be careful to catch a number of your stitches to help secure the thread (you can see this in the image above, where the yellow thread is being drawn through a number of the stitches on the back to secure the thread). Trim the excess thread away.

To start a new length of thread or to change colour, follow the previous instructions and continue stitching.

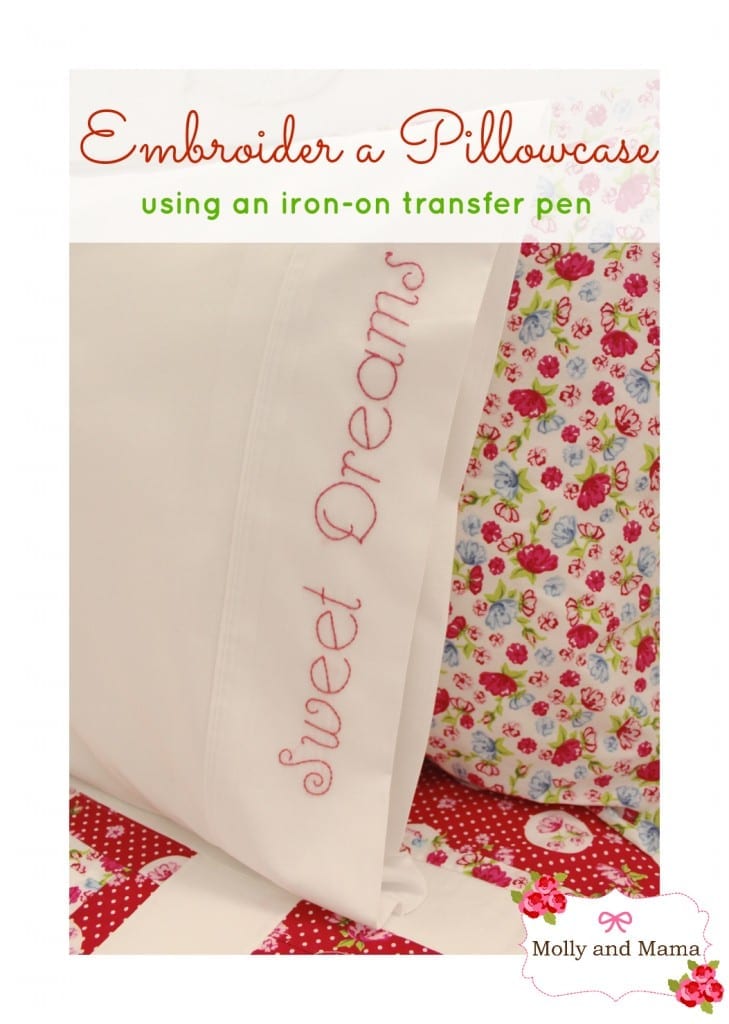
This FREE tutorial features back stitch and explains how to transfer text onto a pillowcase using an iron-on transfer pen. It also goes though the process of back stitching.

Embroider a Pillowcase with Molly and Mama


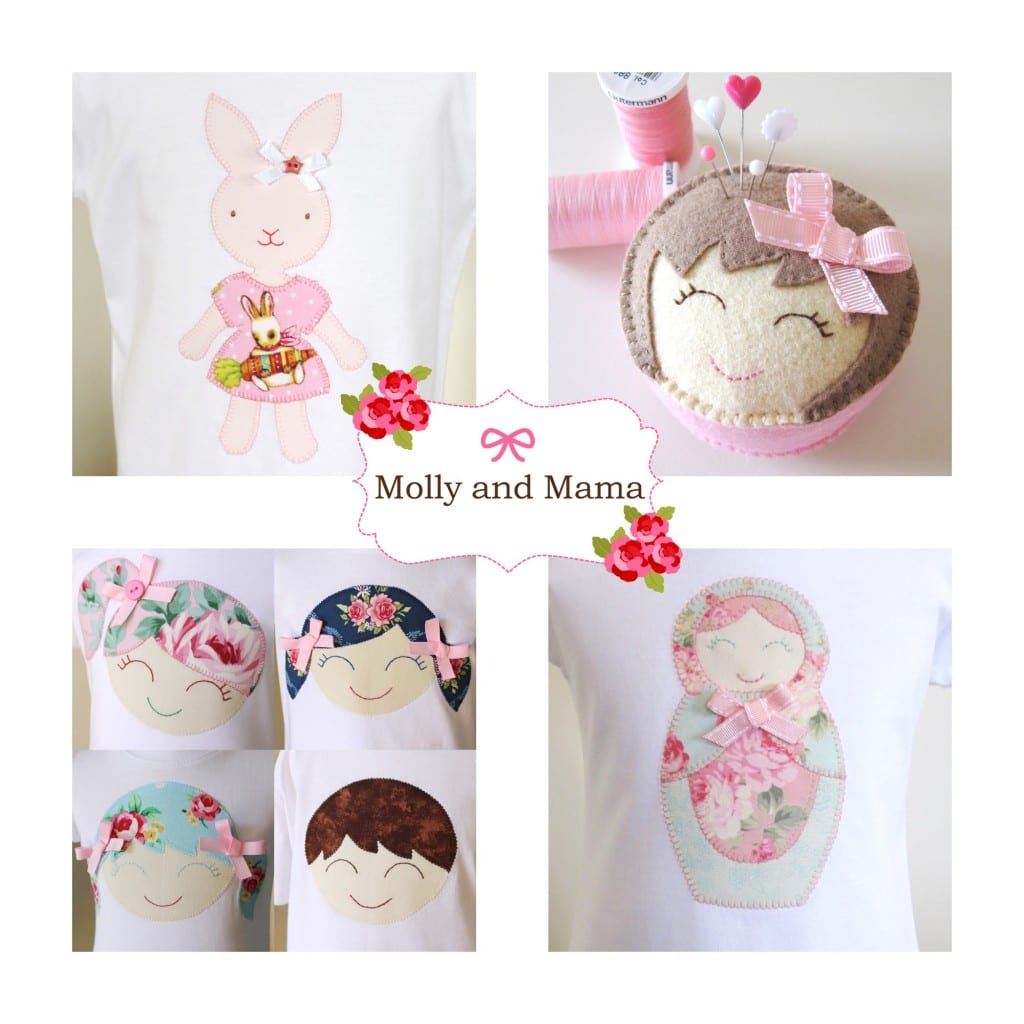
Back stitch is featured in most of my Applique Patterns too. You can browse the instant download range HERE. You can see how I’ve used it to stitch all the facial features below.

Molly and Mama Patterns .jpg

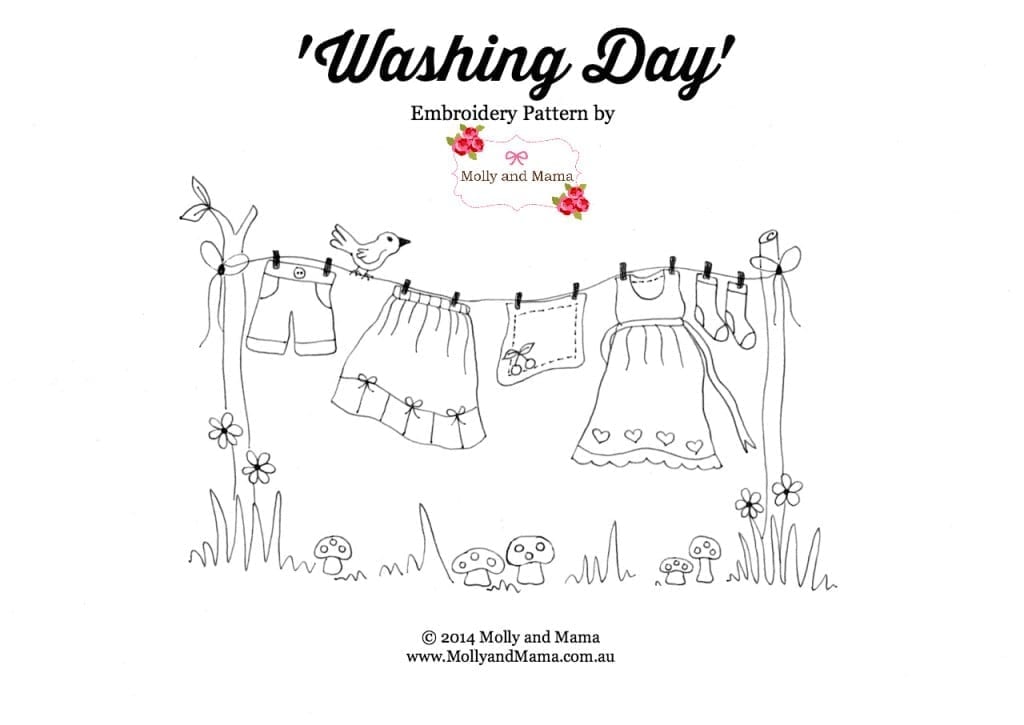
If you’re keen to create a backstitch project, you might like to use this FREE pattern I created for my Laundry Day post. You can download it HERE or Pin It for later.

'Washing Day' - a free embroidery pattern from Molly and Mama

Thanks for being here for another Molly and Mama tutorial. You may have some terrific tips and ideas so please leave a comment. Or feel free to share your thoughts, and projects over on Facebook.

Happy stitching, Lauren x

This post was written by Lauren Wright and appeared first on Molly and Mama http://www.MollyandMama.com.au

Filed Under: Projects Tagged With: back stitch, backstitch, hand embroidery, sewing, stitching

Trackbacks

  1. Swoodson Says – Making Time to Sew & Craft with Young Kids at Home says:
    April 29, 2015 at 10:33 pm

    […] my son sat in a pack and play, eating apple slices and ripping paper/fabric scraps while laughing. Check out how Lauren of Molly and Mama embroidered one of her daughter’s sketches! I also love this shot of Bethany’s daughter […]

    Reply
  2. Make a Koala Hair Clip - Molly and Mama says:
    June 5, 2015 at 2:12 pm

    […] the facial features using back stitch. For more tips on Back Stitch head over to this tutorial HERE. This image is a great refresher […]

    Reply
  3. Make a Headband Holder - Molly and Mama says:
    June 5, 2015 at 6:21 pm

    […]  This post was written by Lauren Wright of Molly and Mama http://www.MollyandMama.com.au  […]
    Reply
  4. Hand Embroider a Simple Hoop Art Project - Molly and Mama says:
    June 5, 2015 at 10:41 pm

    […] If you’re unsure how to back stitch, I have written a detailed tutorial with extra tips HERE. However, this image is a great […]

    Reply
  5. Stitch a Felt Angel Christmas Ornament - Molly and Mama says:
    November 19, 2015 at 12:45 pm

    […] Back stitch is used for the eyes and mouth. You can read more about it HERE.  […]

    Reply
  6. Sew a Felt Koala Bookmark - Molly and Mama says:
    January 23, 2016 at 12:23 pm

    […] the facial features using back stitch. For more tips on Back Stitch head over to this tutorial HERE. This image is also a great […]

    Reply
  7. Tips for working with Wool Felt - Molly and Mama says:
    May 10, 2016 at 9:46 pm

    […] You’ll need to master a few embroidery stitches if you want to give your work some personality too. But these can also be very simple. Straight stitch, back stitch and French knots are some wonderful stitch types to start with. They’re quick to master and very effective. Here’s a link to my Back Stitch tutorial. […]

    Reply

Leave a Reply to Swoodson Says – Making Time to Sew & Craft with Young Kids at Home Cancel reply

Your email address will not be published. Required fields are marked *

Categories

  • Christmas (37)
  • Christmas Stocking Sew Along (6)
  • Easter (10)
  • Embroidery For Beginners (6)
  • English Paper Piecing (9)
  • Felt Fun (12)
  • Forest Family Quilt Along (10)
  • Holidays (11)
  • Molly and Mama Patterns (54)
  • Pattern and Book Reviews (38)
  • Projects (40)
  • Quilting Help (3)
  • This and That (49)
  • Tutorials (49)

Cart

mollyandmama

Studio For Pretty Stitches
🐝🌸 You’ve seen my pretty floral Serious Se 🐝🌸 You’ve seen my pretty floral Serious Sewist’s Set, but here’s a sweet Liberty Wiltshire version. I love @libertyfabrics tana lawn, especially when it’s paired with linen.

Find out more about this new pattern in the listing details. Tap the photo or head to the shop link in my profile. 

#mollyandmama #serioussewistsset #libertyfabric #libertytanalawn #iloveliberty #libertywiltshire #felt #woolfelt  #feltapplique #appliquebee #feltbee #scissorkeeper #scissorcharm #hexies #hexagons #englishpaperpiecing #epp #handstitched #slowsewing #aurifil #aurifloss #aurifilfloss #embroideryfloss #aurifilartisan
I’m loving @mabletandesigns new collection ‘B I’m loving @mabletandesigns  new collection ‘Birds & Blooms’ for @pbsfabrics. And hand quilting with @aurifilthread embroidery floss is a dream! Can you guess which of my patterns this will become? 

#mollyandmama #mabletandesigns #birdsandbloomsfabric #pbsfabrics #australianflorafabric #australianafabric #cockatoo #parakeet #parrot #stellacushions #fatquarterbundle #fabriccollection #fabricpull #aurifulthread #aurifloss #aurifilartisan #embroideryfloss #aurifilfloss
🐝🤍 It’s here! Thank you so much to those w 🐝🤍 It’s here! Thank you so much to those who have already purchased the Serious Sewist’s pin cushion and scissor charm pattern set. Tap the photo for a direct link, or head to my profile. 

#mollyandmama #serioussewistsset #felt #woolfelt  #feltapplique #appliquebee #feltbee #scissorkeeper #scissorcharm #hexies #hexagons #englishpaperpiecing #epp #handstitched #slowsewing #missrosesisterviolet #rileyblakedesigns #iloverileyblake #rileyblake #roseandvioletsgardenfabrics #aurifil #aurifloss #aurifilfloss #embroideryfloss #aurifilartisan #fatquarterbundle #roseandvioletsgardenfabric
🦜🌼 On the cutting table this week is this su 🦜🌼 On the cutting table this week is this summery fun Australiana collection called Birds & Blooms from @mabletandesigns for @pbsfabrics. It’s described as combining classical botanical illustration styles with a modern, trend-worthy colour palette. And it’s so true! Check with @pbsfabrics for stockists near you. 

I love all of Mable’s designs, this one especially! What should I make? 

#mollyandmama #mabletandesigns #birdsandbloomsfabric #pbsfabrics #australianflorafabric #australianafabric #cockatoo #parakeet #parrot #gumblossom #fatquarterbundle #fabriccollection #fabricpull #aurifulthread #aurifloss #aurifilartisan #embroideryfloss #aurifilfloss
How sweet does Miss Maisie Pin Cushion look sittin How sweet does Miss Maisie Pin Cushion look sitting here on this cute ‘I Spy’ style doll’s quilt?  It’s based on the Rising Sun mini quilt pattern from @blossomheartquilts’ book ‘Mini Masterpieces’. You can see more photos and find links to the book on my latest blog post (there’s a link in my profile). 

Miss Maisie is part of the Miss Molly And Friends Pin Cushion Pattern in my store. Tap the photo for a link. She’s quick to stitch, lots of fun to make and comes with two other friends; Miss Molly and Miss Kitty. 

#mollyandmama #missmollypincushion #missmollyandfriends #missmaisiepincushion #felt #woolfelt #feltpincushion #applique #appliqué #appliquequilt #ispyquilt #minimasterpiecesbook #blossomheartquilts #aurifilartisan #aurifilthread #aurifilfloss #aurifloss #blanketstitch #rawedgeapplique #quiltersofinstagram #makersgonnamake
🪡✂️💗 Thank you so much for your wonderfu 🪡✂️💗 Thank you so much for your wonderfully positive response to my Serious Sewist’s Set. The pattern is now live! Visit the link in my profile to head to the store 🐝💕.

#mollyandmama #serioussewistsset #serioussewistspincushion  #felt #woolfelt  #feltapplique #appliquebee #feltbee #scissorkeeper #scissorcharm #hexies hexagons #englishpaperpiecing #epp #handstitched #slowsewing #missrosesisterviolet #rileyblakedesigns #iloverileyblake #rileyblake #roseandvioletsgardenfabrics #aurifil #aurifloss #aurifilfloss #embroideryfloss #aurifilartisan #fatquarterbundle #roseandvioletsgardenfabric
💗 Have you started the year with some English p 💗 Have you started the year with some English paper piecing? The weekly #sipteaandepp party is continuing with the lovely Larisa from @stitchingnotes and this year I’m making way for the very talented Irina from @nordiccrafter to become the new co-host. Please go and visit the profiles of these clever creatives to learn all about what 2021 holds for #sipteaandepp. The girls have some exciting plans in place and I know you’re going to love it!

This week’s theme is all about Introductions, where you’re encouraged to share a few random facts about yourself. So here’s a little about me. 

🤍 Before starting this wonderful journey into sewing, I was a primary school teacher

🤍My first degree was a bachelor of Behavioural Science / Psychology

🤍 I’ve been crafty for as long as I remember but I also love art, illustration, gardening and baking

🤍 I’m not a traditional tea drinker (which was a little strange as the co-host of #sipteaandepp 😂 

🤍 I’m inspired mostly by colour and nature. I’m drawn to anything muted, delicate, pastel, pretty, dainty and floral. Yet nothing in my home or wardrobe would give you that impression! 

With so many new followers joining me in the new year, I’d love to know more about you. And if you have any questions for me, feel free to ask! Lauren 💗
🌸💚 I’ve had lots of requests for informati 🌸💚 I’ve had lots of requests for information about pattern releases and more. The best way to stay in the loop is to sign up for the fortnightly newsletter. That way you’ll also get the new release discount code. And you’ll even get this embroidery design as a FREE PATTERN! 

It’s just a friendly space where I share previews of my current projects, a tutorial or pattern, and some of your makes for added inspiration. I’d be thrilled to have you join me. I’m also working on the next free pattern, which gives you a taste for what my projects are all about - beginner techniques with beautiful finishes, so everyone can experience sewing success! 

Head to my profile for the sign up link. There’s a new felt freebie coming soon 💗

#mollyandmama #embroidery #freeembroiderypattern #freeembroiderydesign #handembroidery #handstitched #freepattern #freeproject #floralwreath #floralwreathembroidery #flowerwreath #flowerwreathembroidery #aurifil #aurifilthread #aurifilartisan #aurifilfloss #embroideryfloss #spoolofthread #embroiderersofinstagram #embroideryhoop #embroideryhoopart #stitchersofinstagram #makersgonnamake #makersgonnashare #craftersgonnacraft #happystitching #slowstitching
Honey bees are so amazing! I really wish I wasn’ Honey bees are so amazing! I really wish I wasn’t allergic. So while we gave my father in law a hive, we keep native Australian stingless bee hives instead. And they are the friendliest little creatures. I love finding sewing inspiration from our garden 🐝💐

This scissor fob is part of the Serious Sewist’s Pin Cushion Set. Find it in the store or tap the photo for a direct link 🥰

#mollyandmama #felt #woolfelt #feltapplique #appliquebee #feltbee #scissorkeeper #scissorfob #scissorcharm #hexies hexagons #englishpaperpiecing #epp #handstitched #slowsewing #missrosesisterviolet #rileyblakedesigns #iloverileyblake #rileyblake #roseandvioletsgardenfabrics #aurifil #aurifloss #aurifilfloss #embroideryfloss #aurifilartisan #fatquarterbundle #serioussewistsset #roseandvioletsgardenfabric
Follow on Instagram
This error message is only visible to WordPress admins
© Copyright 2020 - Molly and Mama