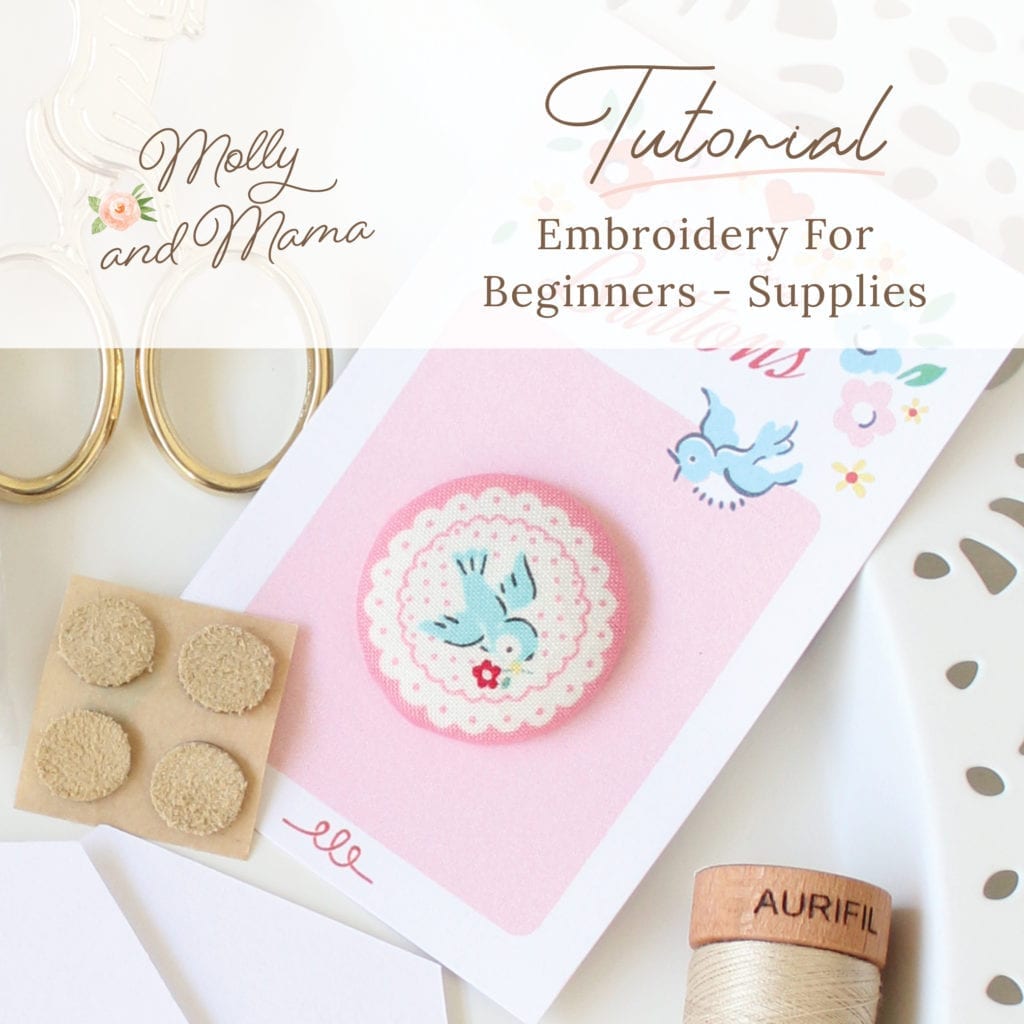
Embroidery For Beginners – What Supplies Will You Need?
Have you always wanted to try embroidery, but you weren’t sure where to start? Welcome to the first of five posts in my Embroidery for Beginners series. I’m here to share all of the basics with you, so you know what resources you need and then how to get started.
We’ll then look at How to Transfer an Embroidery Design to Fabric, How to Get Started, How to Sew the Basic Embroidery Stitches, and finally How to Finish an Embroidery Hoop for Wall Hanging.
Let’s Get Started
The most important thing to remember is that you don’t need to have the best of everything to get stitching. It’s true that there are many tools, notions and supplies that you can purchase that will make your sewing easier and will also improve the finish. But when you are just starting out, it’s wonderful to be able to use the resources that you have on hand and buy the extra supplies as you become more proficient.
Also remember that there are many ways to sew, stitch and achieve similar results. What works for me, might not suit someone else. So be sure to use the materials and supplies that you like, and that work best for you.
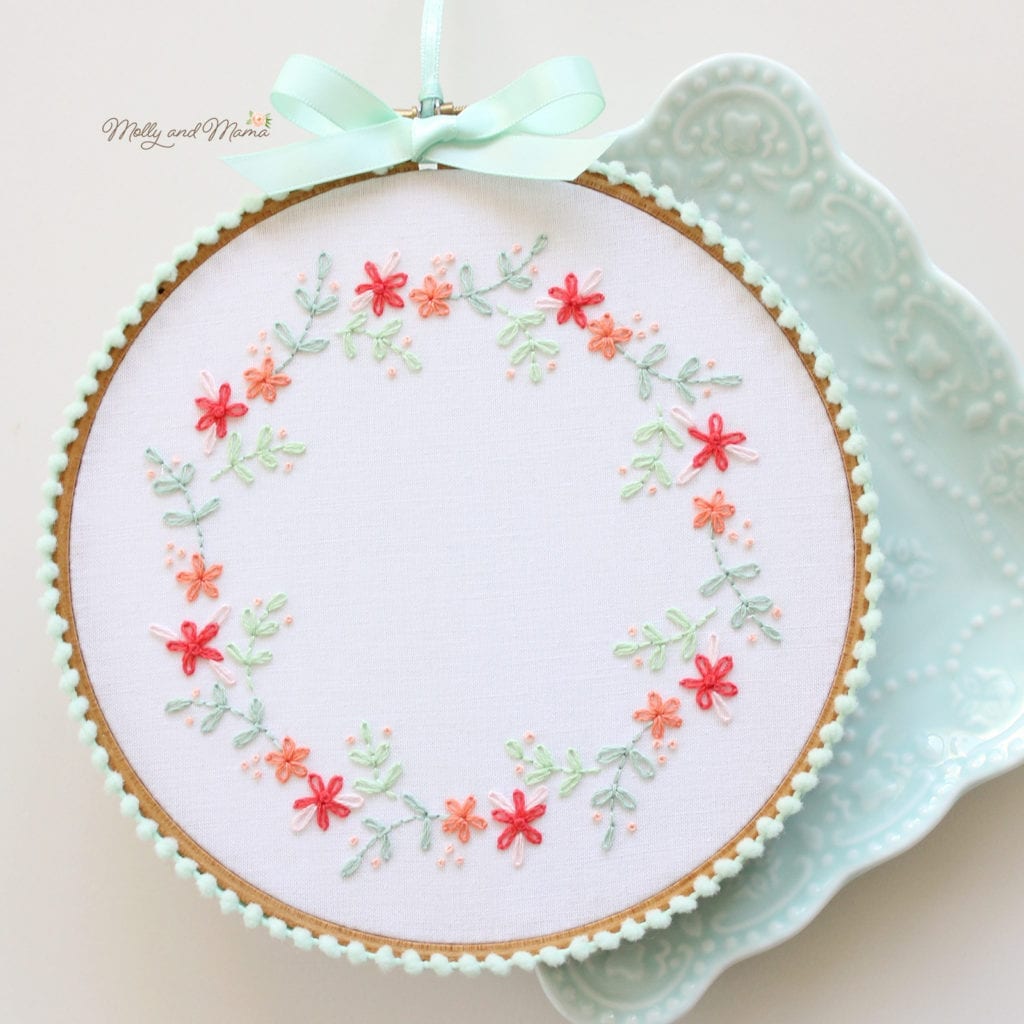
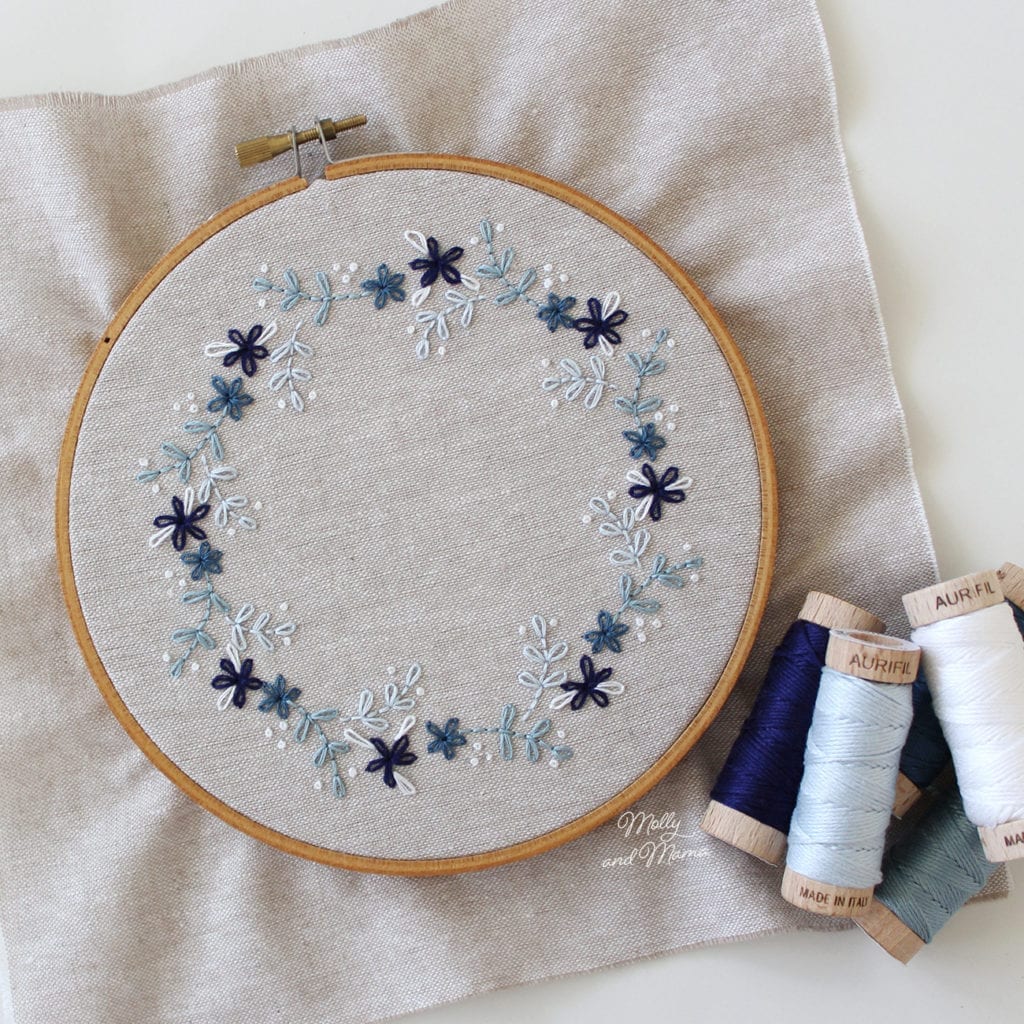
If you’re looking for a project to get started on, this is a free embroidery design and pattern I have written as a thank you for my subscribers. Just sign up to my newsletter to receive this PDF project for free.
The Basics
First of all, let’s talk about the basics. You’ll need a needle, floss, scissors, fabric, a design to stitch, and a way to transfer that design to your fabric.
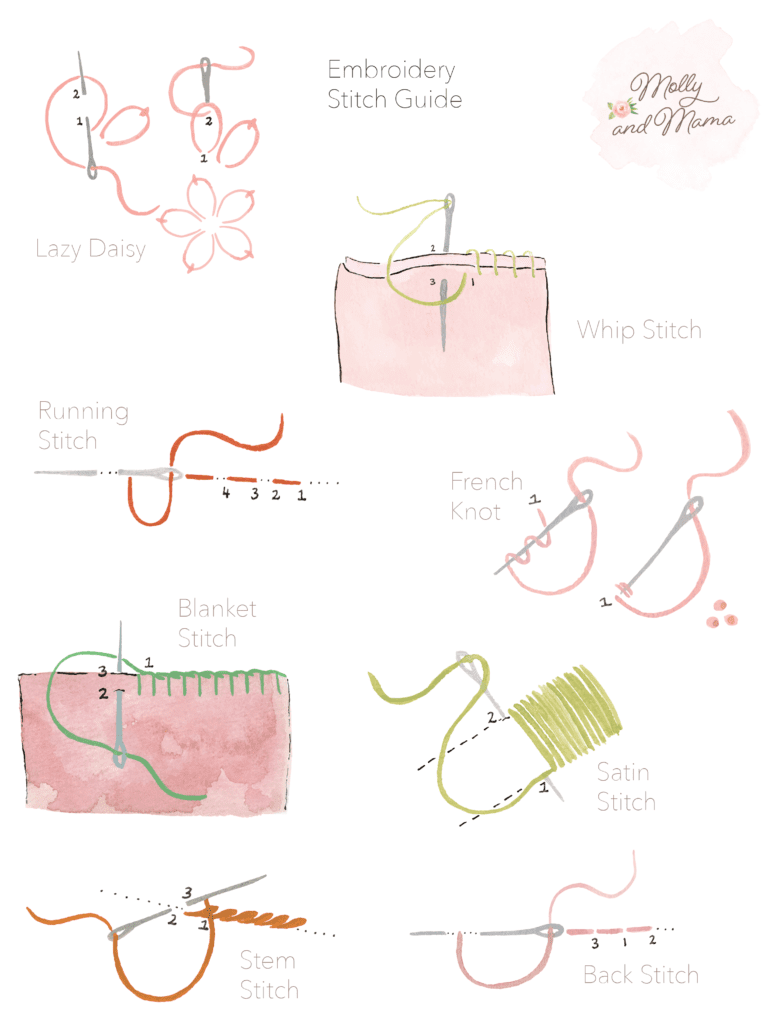
In my next posts, I’ll share some different methods for transferring your embroidery design to fabric, how to get started stitching, how to sew the different stitches and how to finish your embroidery design in a hoop.
Fabric And Stabiliser
You could probably embroider on just about anything, but most embroidery designs are stitched on woven cotton fabric, like quilting weight cottons or linens. Knits or fabrics that contain stretch can be harder to work with as it’s difficult to maintain an even tension while you stitch.
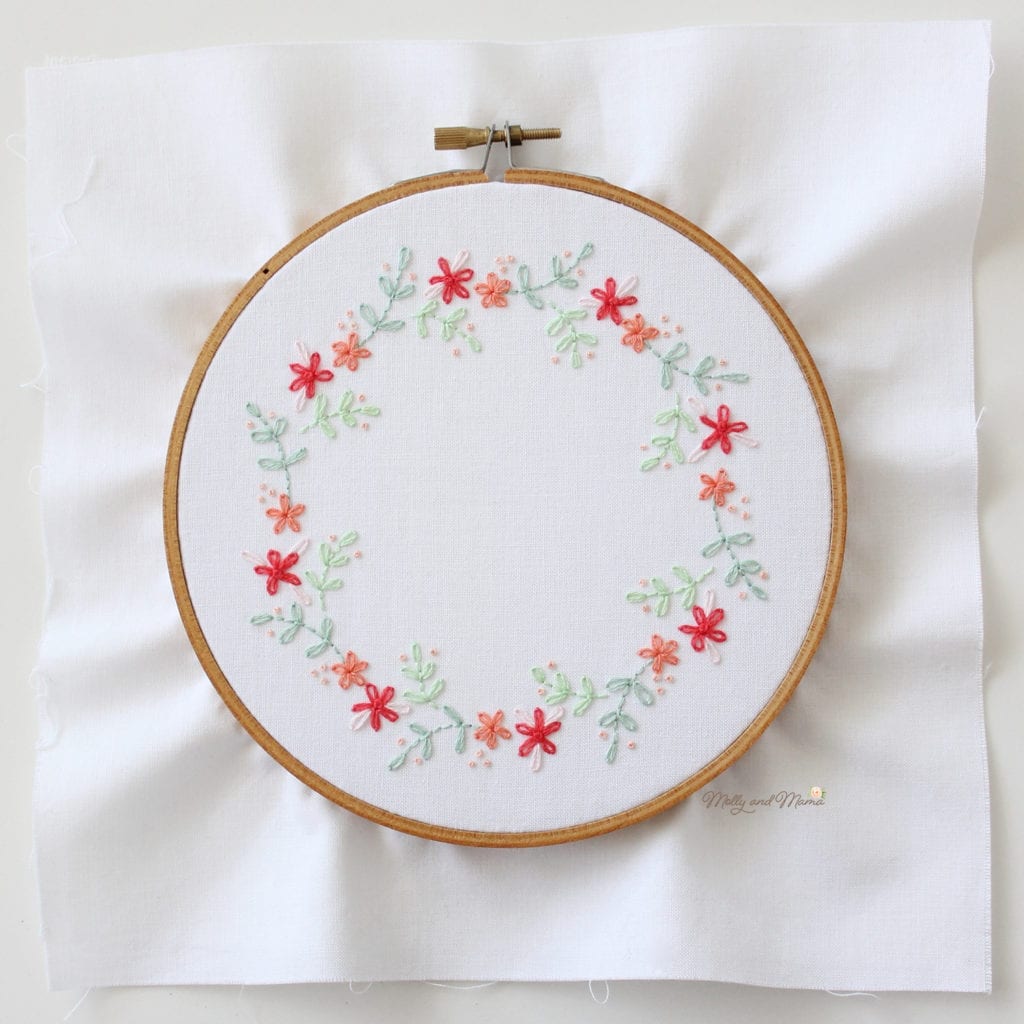
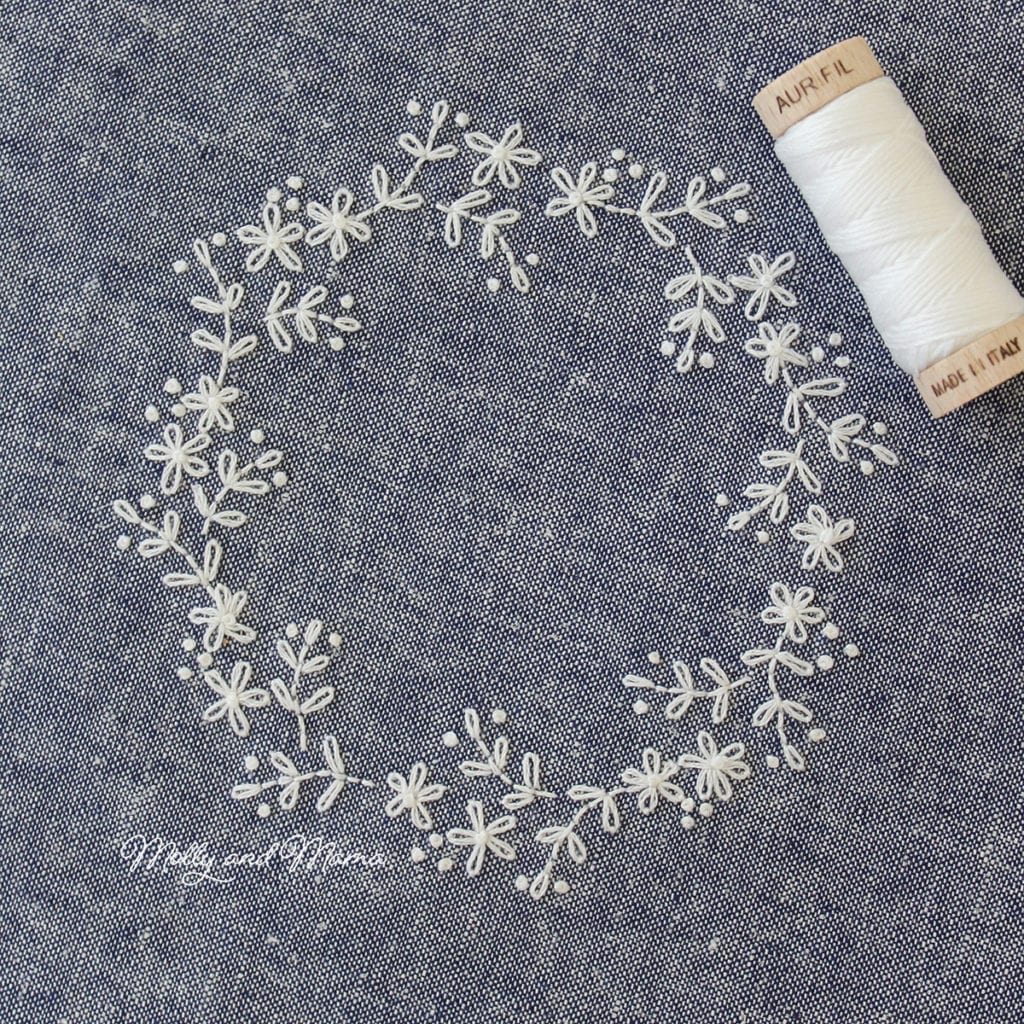
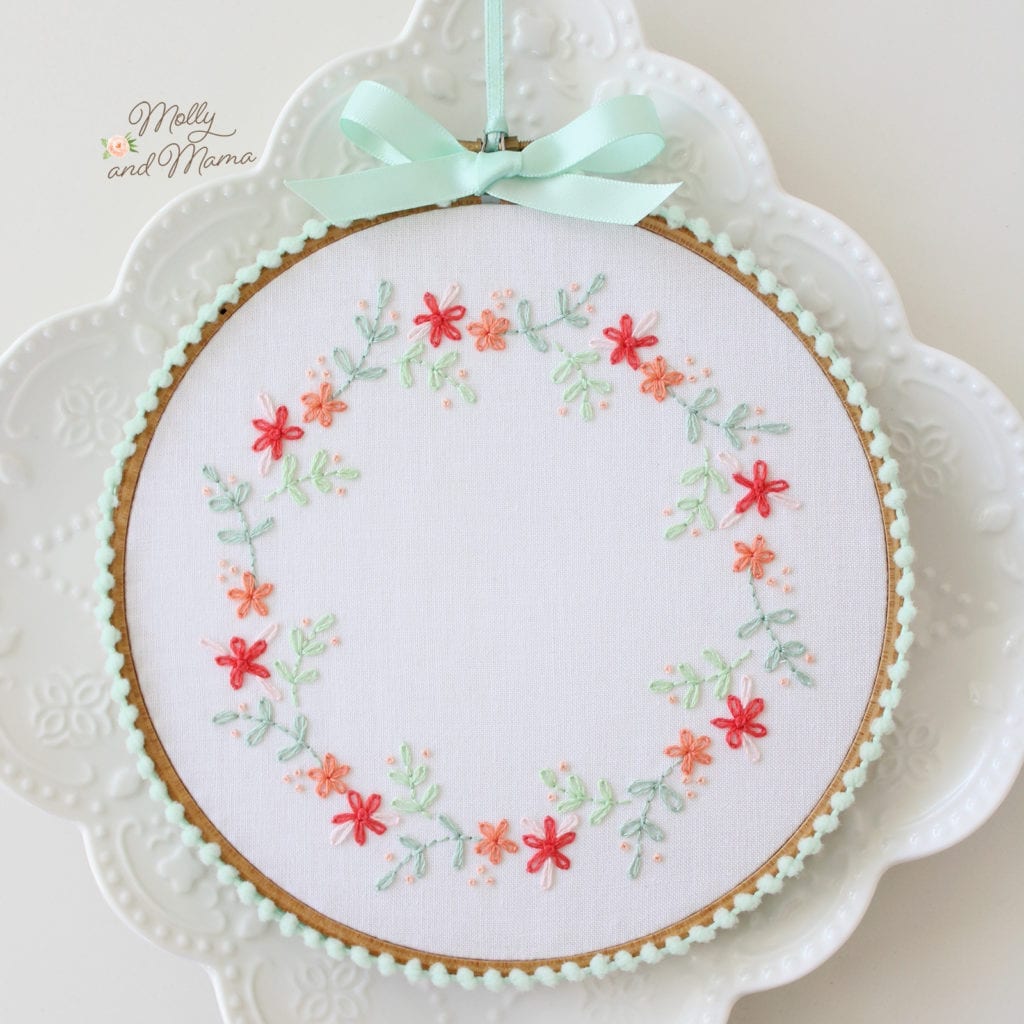
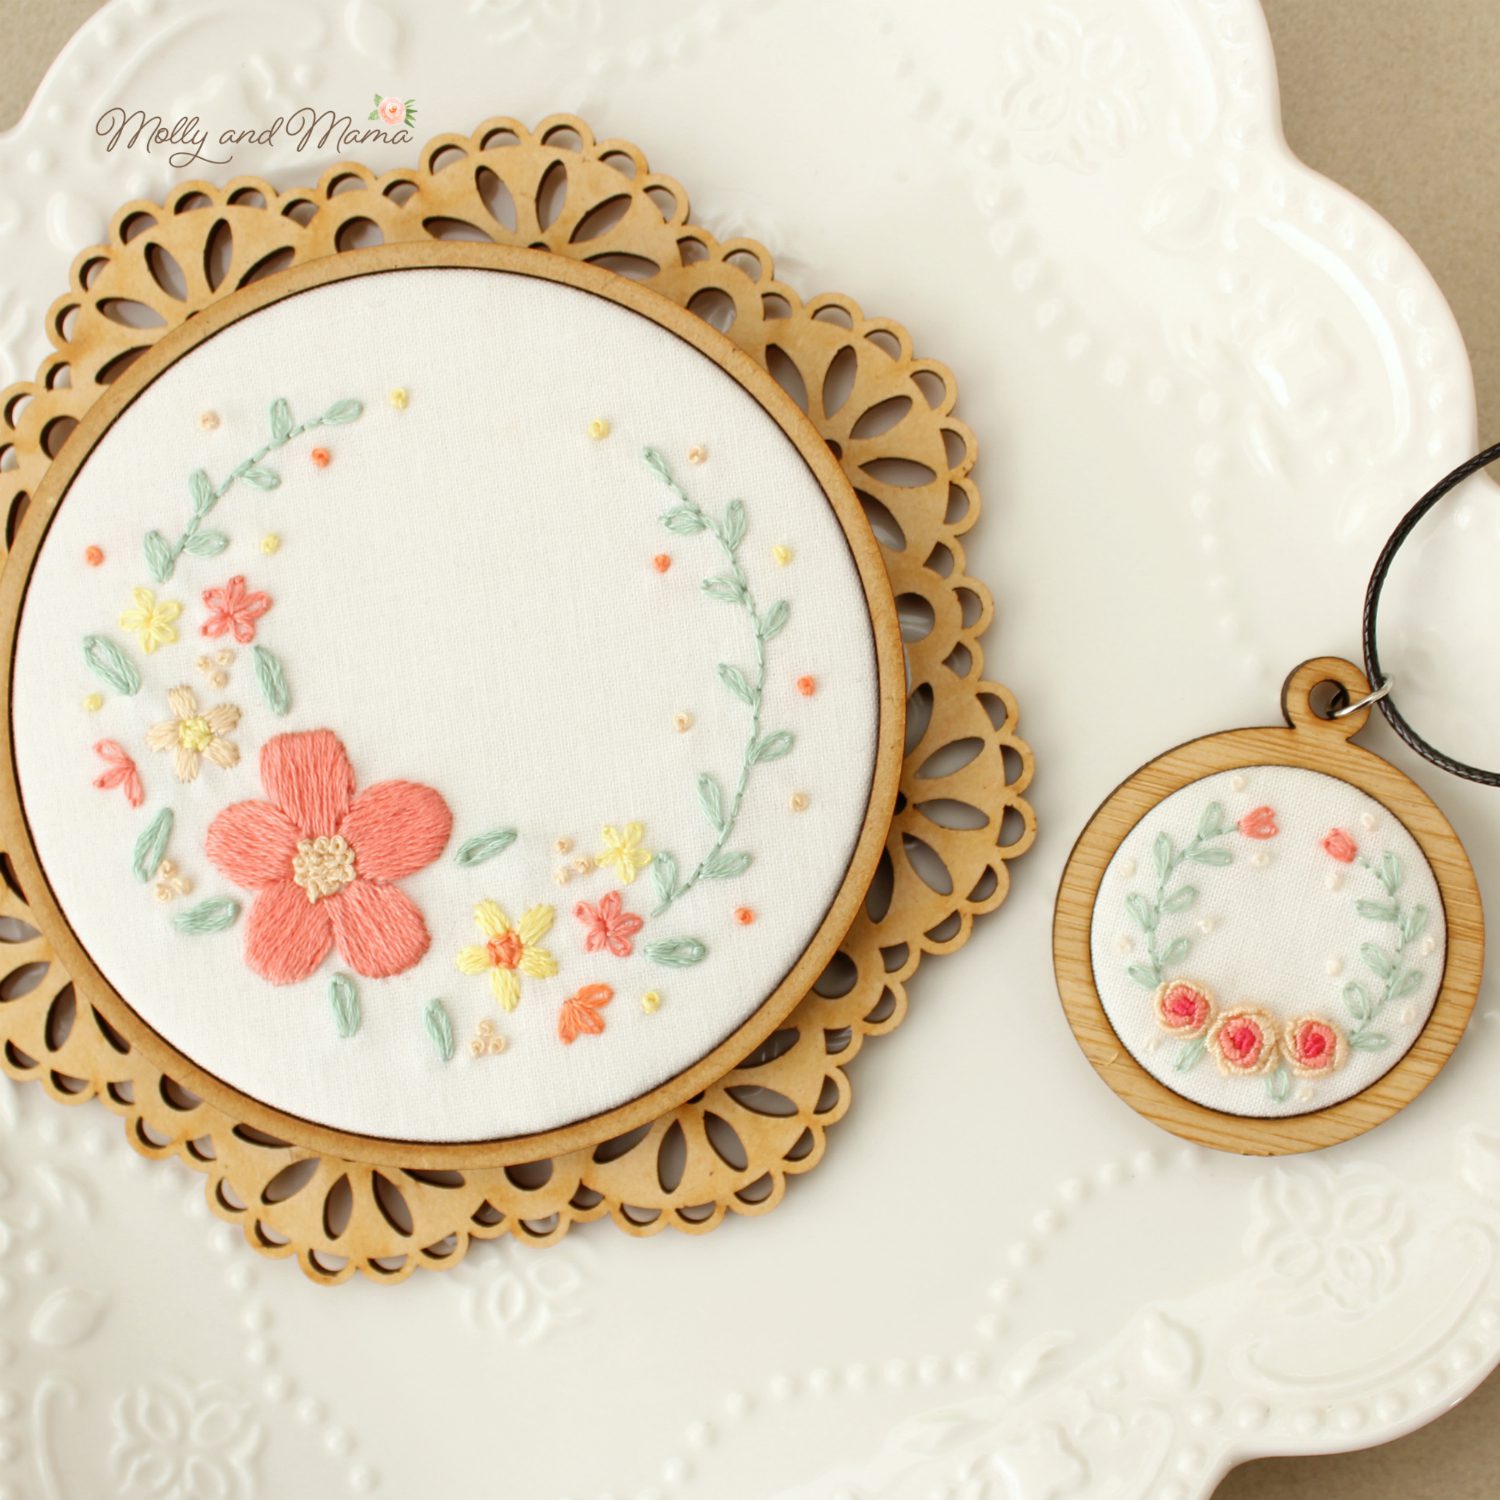
It’s always best to go for a plain or a neutral fabric. The fabric colour can really make a difference to the finished look of the design so consider the effect you’re going for. Keep in mind that it can be difficult to transfer designs to darker fabrics though. The embroidered wreaths above are stitched on white quilting weight cotton (left), blue heavier weight cotton (middle), and linen (right).
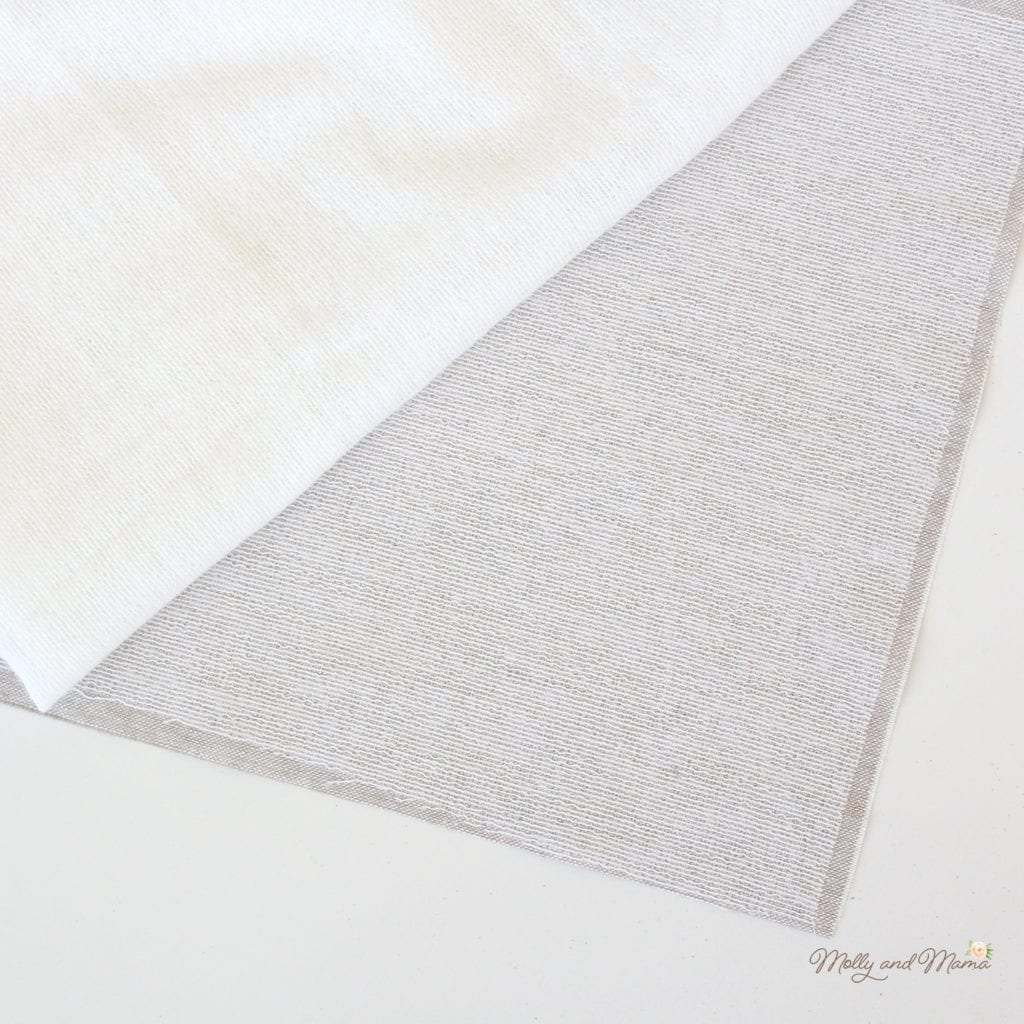
Fabrics can be prone to puckering and tension problems (especially if they are not stitched in a hoop). Light coloured fabrics can also have the problem of shadowing, where the coloured threads show through the fabric from the wrong side. An easy way to help eliminate these problems is to use a fabric stabiliser. It’s best to choose a woven, light weight, fusible interfacing that is designed for embroidery. Not any-old interfacing will work. Whilst it’s an added expense and extra step in the preparation, I would always recommend using a stabiliser to give you the best possible finish. The only time I don’t use it, is when I am embroidering fabric to be used with English paper piecing or possibly in a garment. This piece of linen below has Whisper Weft stabiliser fused to the wrong side of the fabric.
Whichever fabrics you choose, ensure that they are well pressed before use, especially if you have chosen to pre-wash them. You may even wish to use a spray starch specially designed for embroidery.
Floss
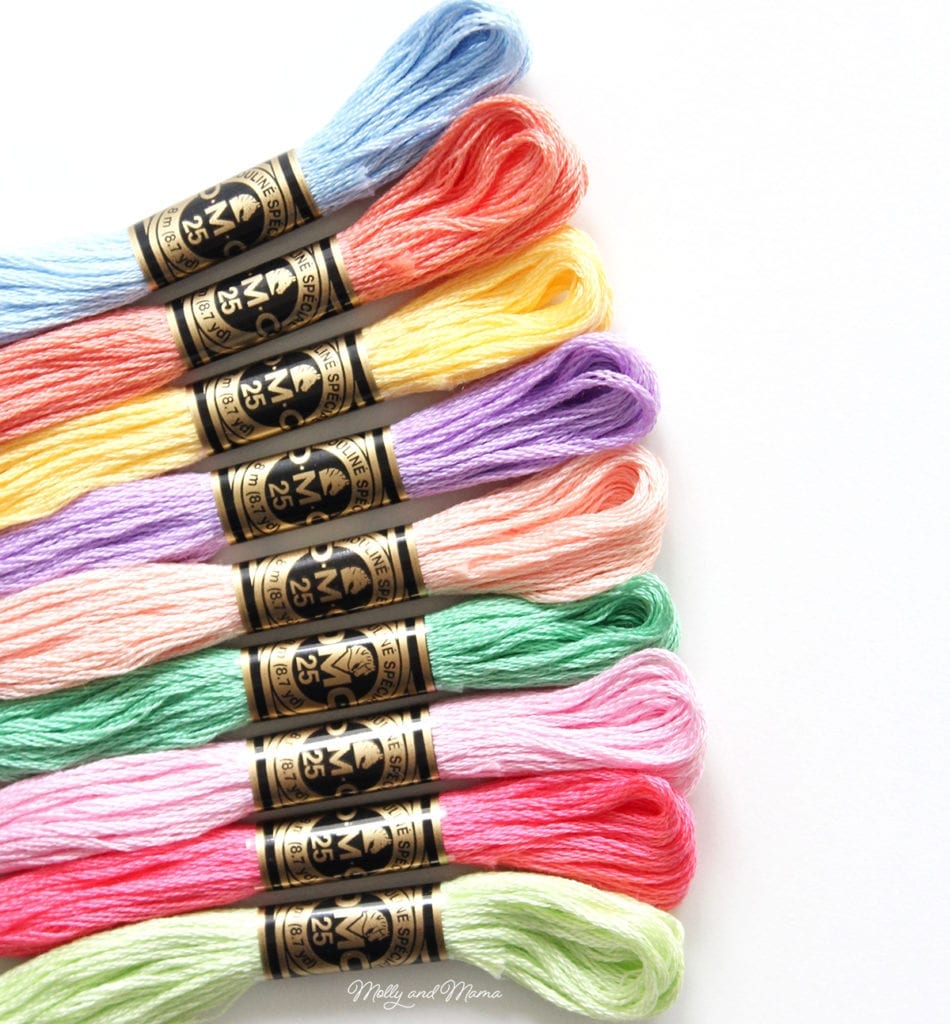
So you’ve chosen a design and the fabric to stitch it on. Now it’s time to choose your sewing floss or thread. Most hand embroidery is stitched with 6 stranded cotton floss; a thicker thread that is made up of six individual strands. Brands like DMC which come in a huge range of colours, are sold as skeins.
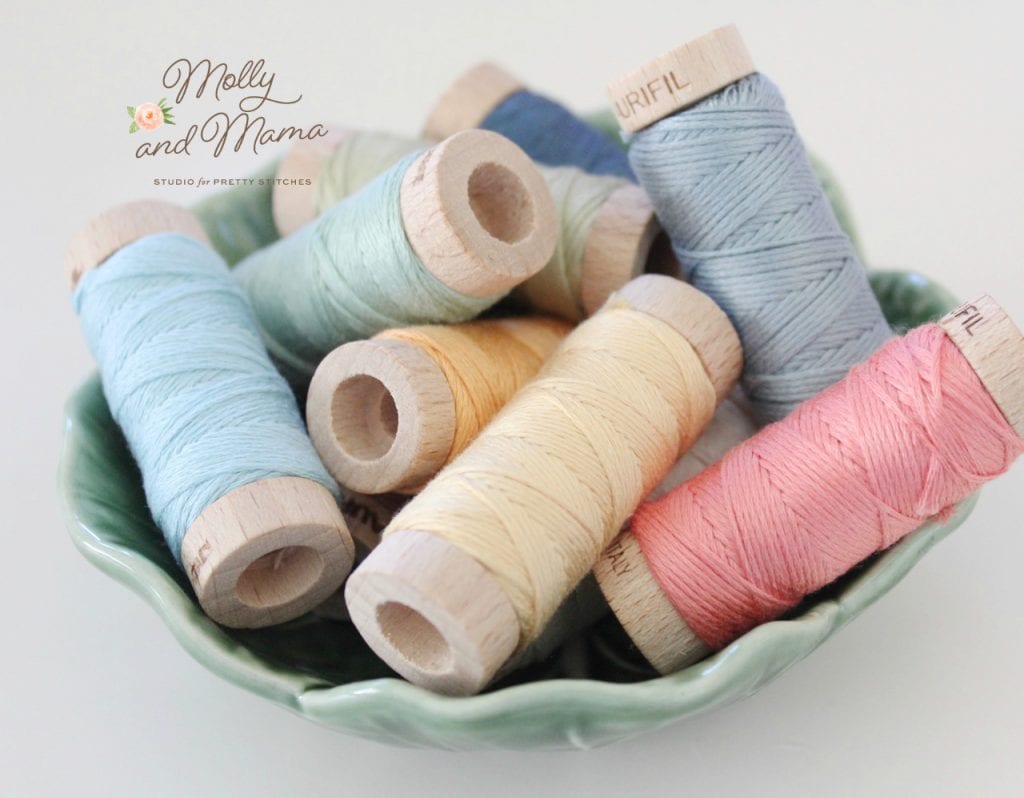
I love to use Aurifil floss which comes on a wooden spool (shown below).
To stitch, cut a length about 18 inches long. You may choose to sew with all six strands. This will give you a thicker stitch. However, most embroidery is traditionally sewn with two or three strands. So you would peel away the number of strands you would need to sew with, and set the remainder aside until needed.
Another common thread option for embroidery is perle thread which is a thicker twisted cotton. You cannot divide the strands but it does help you achieve a more dimensional look to your stitching. You could also try tapestry wool, broder, crewel yarn, silk, rayon, shashiko thread or even ribbon. It really depends on the finished look you are wanting to achieve.
The next thing to consider is thread colour. Will you stitch your design in just one shade, use a collection of a few colours, or will you mix together a huge selection of colours? I usually try and select a palette that complements the fabrics I will be using or that suits the intended use of the project.
Needles
Like everything sewing related, the needles you choose to sew with often come down to personal preference. When choosing needles for embroidery, you’ll need to consider what kind of floss or thread you are stitching with and sometimes even the types of stitches you will be sewing.
The important things to consider are if the needle is new and sharp, if the eye is wide enough to easily thread the floss you are using, and if the shank is strong and long enough to accomodate the types of stitches you are sewing.
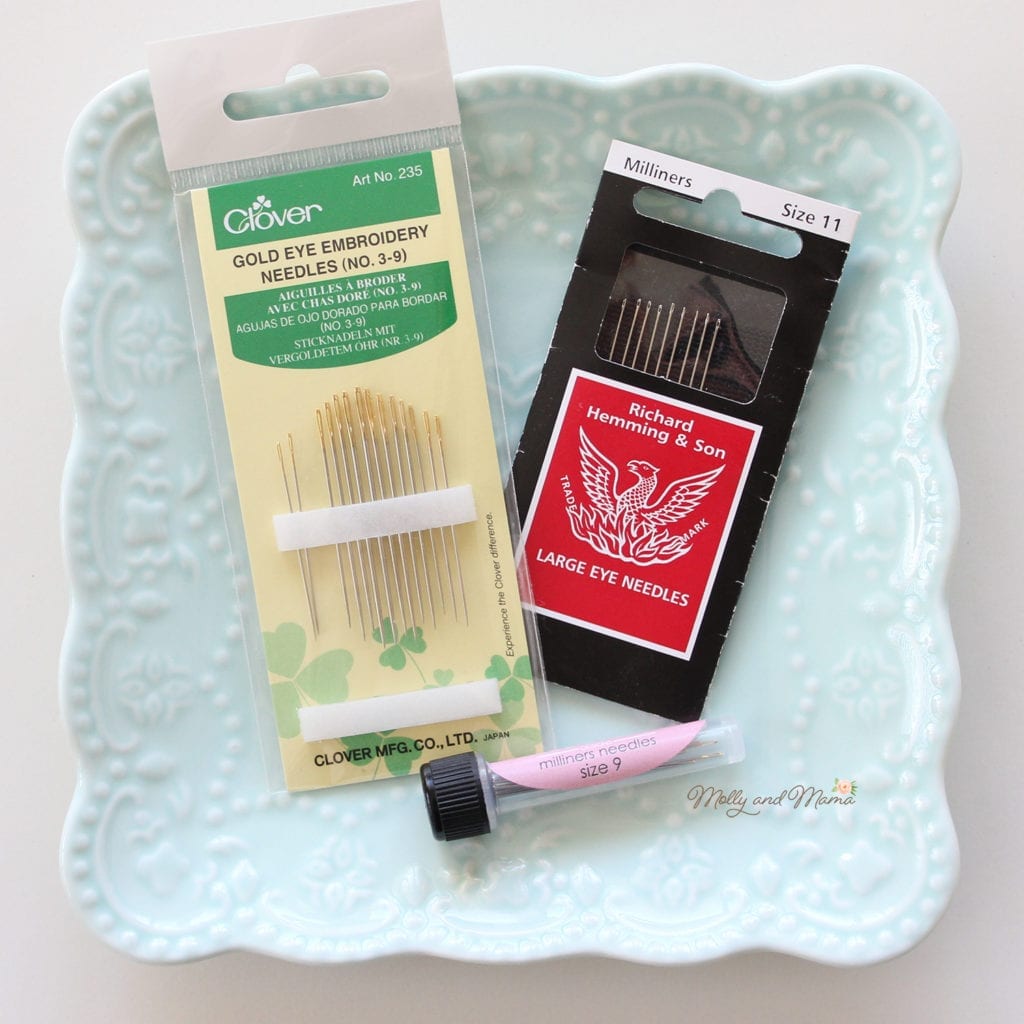
I like to stitch with a needle that has a longer narrow shank, and a longer eye. I use the larger Clover gold embroidery needles (above) when I am stitching with three or more strands of floss, as the eye is large enough to fit the threads through. If I’m only using one or two strands of floss, I prefer the Sue Daley milliner’s needles in the pink tube. They’re finer and don’t leave holes in my fabric that are larger than the stitches I am making. I find that the Richard Hemming milliner’s (pictured above) are great for fine detailed work, or for English paper piecing. Buying a general set of embroidery needles in a mix of sizes is a great starting point, as you can try a range to decide which size works best for you.
Scissors
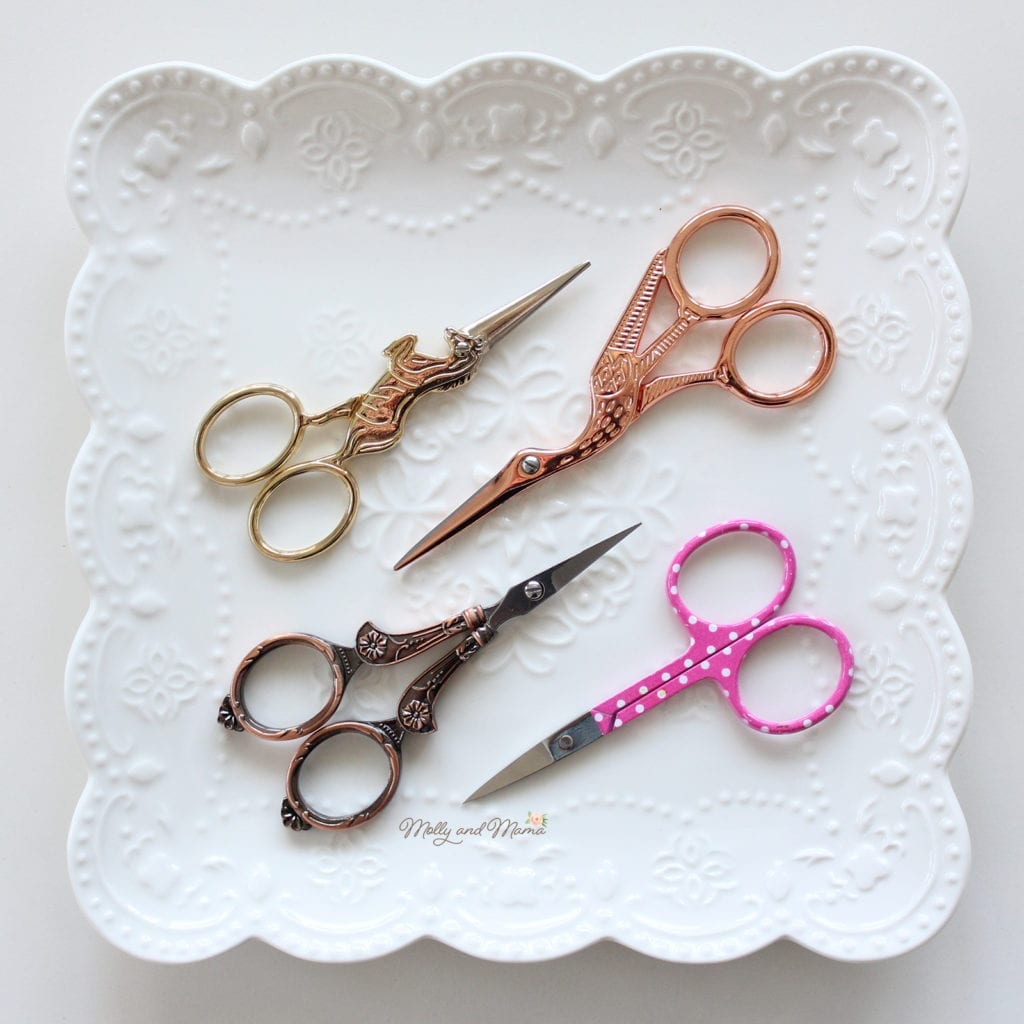
A good pair of embroidery scissors or snips is essential. Because you’re only using them to snip embroidery thread, they need to be sharp but can also be small. The scissors shown above are all ideal because they can easily be stored in a sewing case or kit.
To Hoop Or Not To Hoop
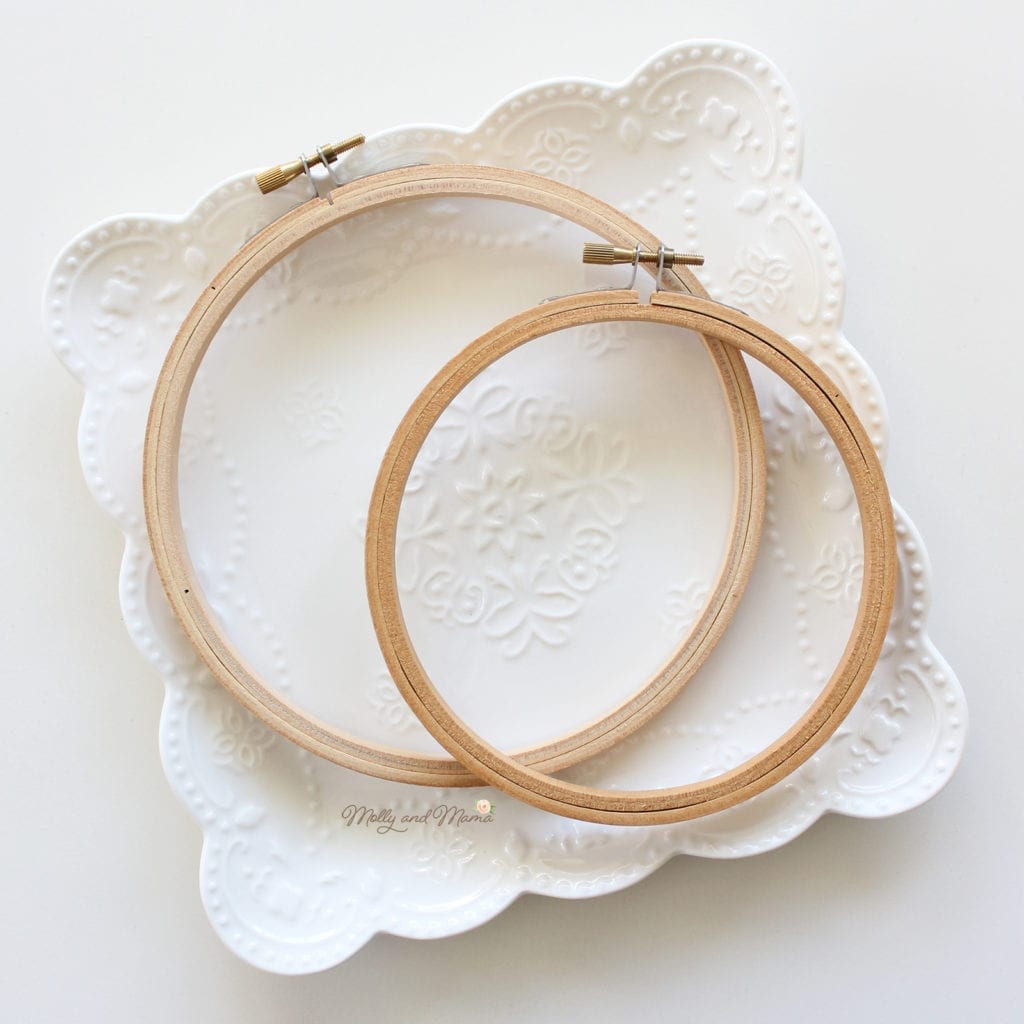
Placing your fabric in an embroidery hoop can really help you maintain an even tension while you stitch. This helps you avoid fabric puckering and keeps your stitches even. Depending on the size of your project, you may fit the entire design inside the hoop. However, you may also find you need to move the hoop around as you stitch larger sections of a more complex design.
I love to use a 6″ or 8″ hoop. There are many different sized hoops available, but keep in mind that the much smaller hoops can be designed only for project display and the much larger hoops are usually for hand quilting larger quilts. Find a size that feels comfortable in your hands.
You may also choose to remove the hoop when sewing certain stitches (like French knots and lazy daisy stitch). It all depends on skill level and personal preference.
Other Notions And Supplies
Here’s some extra notions that can be really helpful when you’re stitching.
A needleminder is a magnet that sits on your fabric and helps keep your needle safe while you’re not stitching. Here’s a decorative fabric covered one below.
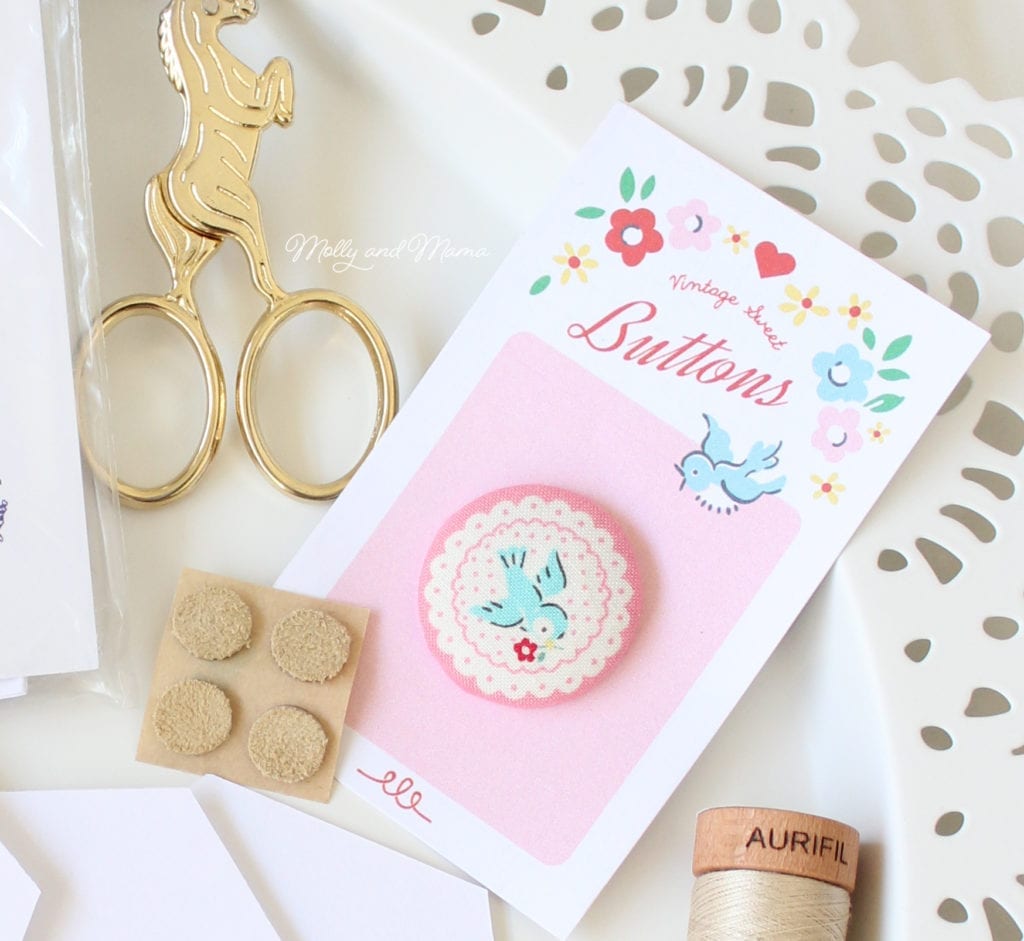
A leather thimble pad or traditional thimble can protect your fingers as you sew. I love to use an adhesive leather pad (like the four pictured above) on my middle finger when I stitch.
Specialty pens that are designed for transferring embroidery designs can be really useful. I talk about the different methods for transferring a design to fabric over HERE.
A pressing cloth or piece of cotton fabric is essential for covering your completed embroidery design before ironing it to remove any creases or lines from the embroidery hoop. It protects the stitches from being moved and flattened (especially if you iron the embroidery design on the reverse side). You can also use a fabric steamer or even a hairdryer to remove creases and avoid touching the fabric at all.
Getting Started
Once you’ve gathered all of your supplies, it’s time to transfer your design to your fabric, pop the fabric in the hoop and get ready for stitching. Check out my blog posts that cover these next steps in the embroidery process, including the different stitch types most commonly used by beginners.
Finishing the project
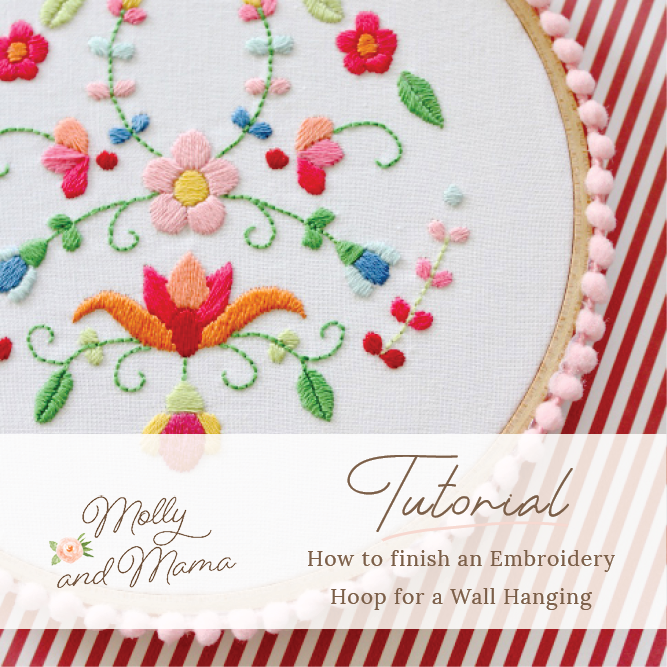
Once you have finished your embroidery, you’ll want to show it off right away! If you aren’t using it in a garment or quilty project, you might consider displaying it in the very hoop you stitched the design in! I have written a very handy tutorial that shows you how you finish an embroidery hoop for wall hanging.
Your finished embroidery design can look amazing featured on the wall with other embroideries. I’m planning a whole hoop wall!
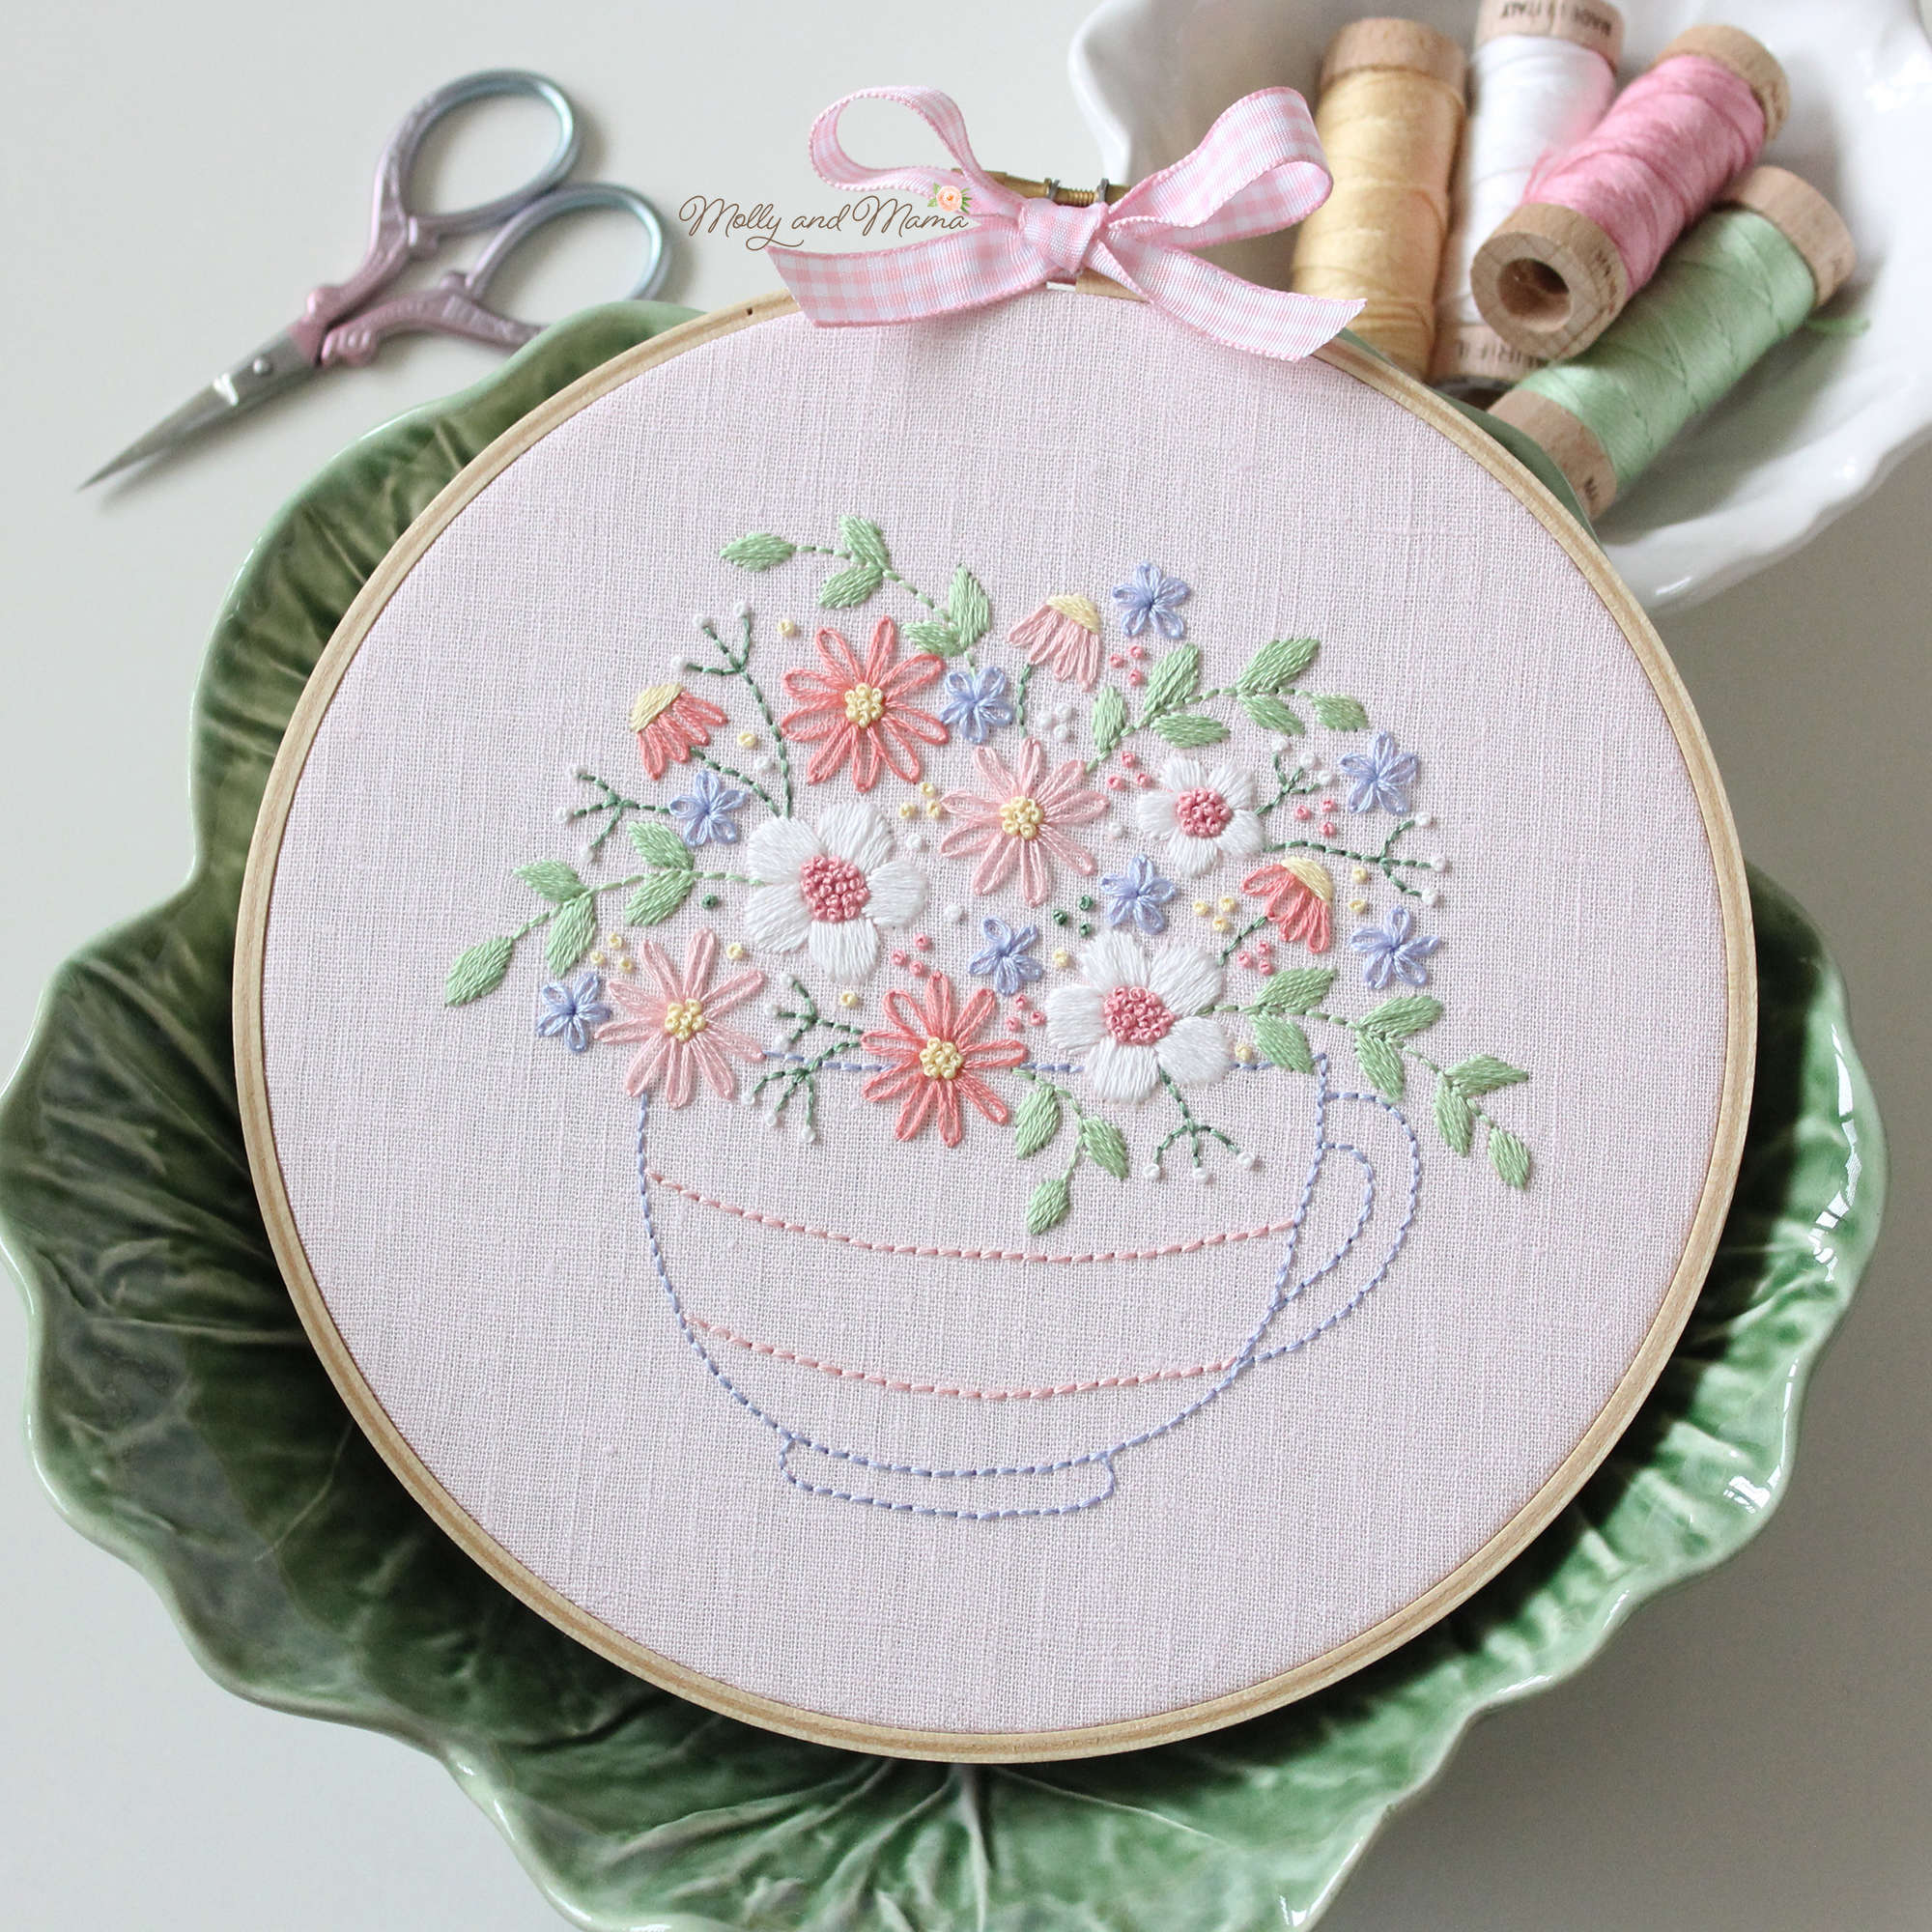
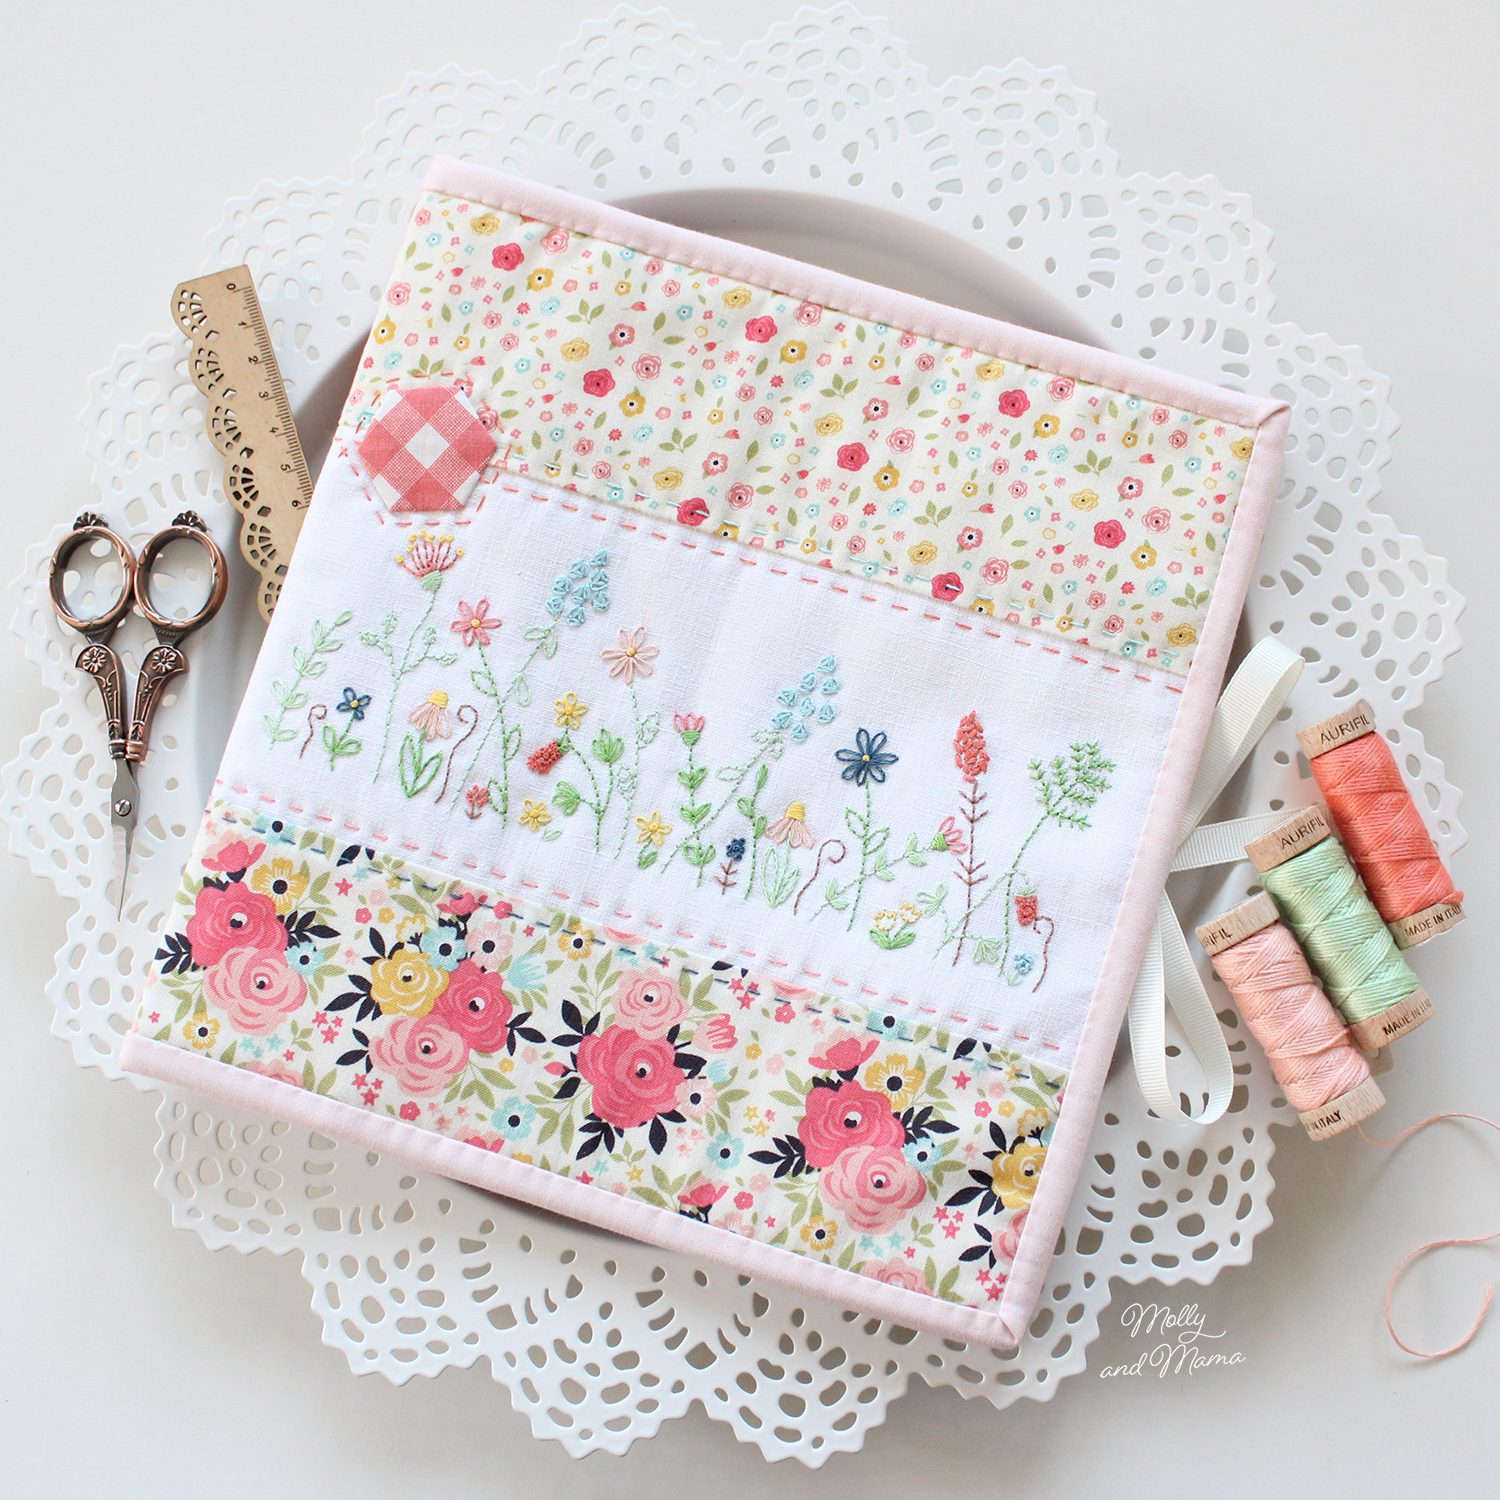
You might like this Tea Time Posy Stitchery. It’s perfect for beginners.
And don’t forget that this wreath design is free, when you sign up for the newsletter.
I really hope you’ve found this beginners tutorial useful. Please get in touch if you have any questions, or if you’d like to share some suggestions or your favourite techniques, notions and supplies. I’d love to share them with my readers.
Happy stitching, Lauren x
This post was written by Lauren Wright and appeared first on Molly and Mama https://www.MollyandMama.com.au
For more inspiration, pop by the store for beginner friendly, easy to follow, instant download sewing patterns!

First, I LOVE your website and your projects. It’s all gorgeous! I’m hoping to do one of your embroidery projects soon, but I am struggling to figure out what type of stabilizer to use. When I look online, I see things like tearaway or water soluble. I’m struggling to find something fusible and for basic hand embroidery, not machine. Do you have a particular brand to recommend? Any help you can offer is appreciated. Thank you.
Dear Cindy, thanks for reaching out. I like to use a product called Whisperweft as it is a very light weight fusible stabilizer. But your local quilting shop will also be able to advise and help you. What you choose will also depend on your preferences when stitching. Best wishes, Lauren.
Thank you!